Strategic Approaches to Reduce False Rejection Rates in Biomedical Quality Control
This article provides researchers, scientists, and drug development professionals with a comprehensive framework for optimizing quality control procedures to minimize false rejection rates while maintaining high error detection capability.
Strategic Approaches to Reduce False Rejection Rates in Biomedical Quality Control
Abstract
This article provides researchers, scientists, and drug development professionals with a comprehensive framework for optimizing quality control procedures to minimize false rejection rates while maintaining high error detection capability. Covering foundational principles through advanced applications, we explore key metrics like Probability for False Rejection (Pfr) and Probability for Error Detection (Ped), systematic methodologies including Quality Control Circles and Six Sigma, practical troubleshooting strategies using root cause analysis, and validation through cost-benefit assessment. The content synthesizes current best practices with emerging innovations, offering actionable strategies to enhance reliability, reduce costs, and improve operational efficiency in biomedical research and pharmaceutical development.
Understanding False Rejection: Fundamentals and Impact on Laboratory Efficiency
Defining False Rejection Rates (Pfr) and Error Detection (Ped) in QC Systems
Frequently Asked Questions (FAQs)
What is the difference between the Probability for False Rejection (Pfr) and the Probability for Error Detection (Ped)?
Probability for False Rejection (Pfr): This is the probability that a quality control (QC) procedure will incorrectly reject an analytical run when the method is actually performing stably and no significant error is present. It represents the rate of "false alarms" [1]. In an ideal system, the Pfr would be 0.00, meaning no false rejections occur [1]. A high Pfr can lead to wasted resources, unnecessary troubleshooting, and reduced productivity [2] [1].
Probability for Error Detection (Ped): This is the probability that a QC procedure will correctly identify and reject an analytical run that has an actual error. It measures the system's ability to detect real problems, such as shifts or increases in random error [1]. Ideally, the Ped should be 1.00, or 100% [1]. A high Ped is crucial for ensuring the reliability of test results and patient safety [3].
In summary, Pfr measures the system's tendency to "cry wolf," while Ped measures its ability to spot a real "fire" [1].
How do Pfr and Ped affect the security and usability of my QC system?
There is a fundamental trade-off between Pfr and Ped. Making your QC system more sensitive to detect real errors (increasing Ped) often also increases the rate of false rejections (Pfr). Conversely, making the system more lenient to reduce false alarms (lowering Pfr) can decrease its ability to catch real errors (lowering Ped) [2] [1].
This relationship is often managed by adjusting the system's threshold value [2]. A more lenient threshold may decrease Pfr but increase the False Accept Rate (FAR), compromising security. A stricter threshold may decrease FAR but increase Pfr, hurting usability [4]. The goal is to find a balance that provides sufficient error detection for your quality requirements while keeping false rejections at an acceptable level to maintain workflow efficiency [2] [3].
Why does using a 1:2s control rule lead to a high false rejection rate?
The 1:2s rule (a single control measurement outside ±2 standard deviations) is often used as a warning rule. However, when used as a rejection rule, it has a high probability of false rejection, which gets worse as more control measurements are used per run [1] [5].
The table below shows how the false rejection rate increases with the number of control measurements (N) when using a 1:2s rule:
| Number of Control Measurements (N) | Approximate False Rejection Rate (Pfr) for 1:2s Rule |
|---|---|
| 1 | ~5% |
| 2 | ~9% |
| 3 | ~14% |
| 4 | ~18% |
Data adapted from Westgard QC lessons [1] [5].
This means that with two control measurements per run—a common practice—you can expect nearly 1 in 10 runs to be falsely rejected, leading to significant waste and inefficiency [1] [5]. It is therefore considered poor practice to use the 1:2s rule as the sole criterion for run rejection [5].
What are some best practices for troubleshooting a failed QC run?
When a QC failure occurs, follow a systematic approach [6]:
- Put the problem in perspective: First, estimate the magnitude of the error. Use established QC multi-rules to determine if the error is a true failure or a single warning. Do not release patient results until the problem is resolved [6].
- Review Levey-Jennings charts: Identify the pattern of the error to understand its type [6]:
- Systematic Error (Shift/Trend): Indicated by multiple consecutive controls on one side of the mean (e.g., violating 2:2s, 4:1s, or 7T rules). This suggests a change in the method's accuracy, potentially from calibration issues, new reagent lots, or instrument maintenance [1] [6].
- Random Error: Indicated by a single control outside ±3s or a large spread between control values (e.g., violating R4s rule). This suggests an increase in imprecision, potentially from bubbles in samples, improperly mixed reagents, or power fluctuations [1] [6].
- Relate the error to possible causes: Based on the error type, investigate the most common root causes [6].
- Implement corrective actions and document: Perform corrective actions (e.g., calibration, maintenance, preparing fresh reagents) one at a time and monitor the effect. Document the entire process for future reference [6].
Troubleshooting Guides
Guide 1: Addressing High False Rejection Rates (Pfr)
A high Pfr disrupts workflow and wastes resources. Below are common causes and solutions.
| Problem Cause | Description | Recommended Solution |
|---|---|---|
| Use of over-sensitive QC rules (e.g., 1:2s) | Using control rules with high inherent false rejection rates, especially with multiple control measurements [1] [5]. | Implement multirule QC procedures (e.g., 1:3s/2:2s/R4s/4:1s). These combinations provide better error detection (Ped) while maintaining a low Pfr (typically ≤5% for N=4) [1] [5]. |
| Improperly configured thresholds | The decision threshold for accepting/rejecting a run is set too strictly, making the system overly sensitive to minor, insignificant fluctuations [2] [4]. | Re-calibrate the system's threshold based on the Equal Error Rate (EER) or to meet the specific security and usability needs of your laboratory [2] [4]. |
| Inadequate number of control measurements | Using too few or too many control measurements without adjusting the control rules can disrupt the balance between Pfr and Ped [1] [3]. | Follow a risk-based approach. Use QC design tools like the Sigma-metric Run Size Nomogram to determine the optimal number of control measurements and rules based on your assay's performance (sigma metric) and required run size [3]. |
Guide 2: Addressing Low Error Detection (Ped)
Low Ped means real errors go undetected, risking the release of unreliable results.
| Problem Cause | Description | Recommended Solution |
|---|---|---|
| Insufficiently sensitive QC rules | The control rules in use are not powerful enough to detect medically important errors [1]. | Adopt more sensitive rules or combinations. For systematic error, use rules like 2:2s, 4:1s, or 8x. For random error, the R4s and 1:3s rules are effective [1]. |
| Poor analytical method performance | The measurement procedure itself has high imprecision (CV) or bias, making it difficult to distinguish error from normal variation [7]. | Improve the method's performance. Calculate the sigma metric for your assay: σ = (TEa - |Bias|) / CV [3] [7]. Methods with a sigma ≥6 are world-class, while those with σ<4 may need improvement or more intensive QC monitoring [3] [7]. |
| Inadequate run size strategy | Testing too many patient samples between QC events increases the chance that an error will go undetected for a long time [3]. | Implement a multistage bracketed QC strategy. Use a more demanding "startup" QC design after maintenance or calibration, and a "monitor" design with a defined run size during continuous operation to maintain quality [3]. Use the Max E(Nuf) model to set a run size that keeps the expected number of unreliable results below one [3]. |
Experimental Protocols & Methodologies
Protocol 1: Calculating Sigma Metrics for QC Design
Purpose: To objectively evaluate the performance of an analytical method and design a statistically appropriate QC strategy.
Materials:
- Internal Quality Control (IQC) data (20+ data points recommended) [7]
- Proficiency Testing (PT) or External Quality Assessment (EQAS) data for bias estimation [7]
- Allowable Total Error (TEa) source (e.g., from CLIA, Ricos biological variation database) [3] [7]
Methodology:
- Calculate Imprecision: From your IQC data, calculate the mean (x̄) and standard deviation (SD) for each level of control. The coefficient of variation (%CV) is calculated as: %CV = (SD / x̄) * 100 [3] [7].
- Calculate Bias: Using PT/EQAS data, calculate the percentage bias relative to the target value: %Bias = [(Lab Result - Target Value) / Target Value] * 100 [3] [7].
- Determine Sigma Metric: Use the TEa, bias, and CV in the following formula: Sigma (σ) = (TEa - \%Bias) / \%CV [3] [7].
Interpretation and QC Design:
- σ ≥ 6: Excellent performance. Simple QC rules with fewer control measurements may be sufficient [3].
- σ = 5 - 6: Good performance. Standard multirule QC with N=2 is typically appropriate [3].
- σ = 4 - 5: Marginal performance. Requires more robust QC procedures, potentially with increased control measurements [3].
- σ < 4: Unacceptable performance for most clinical purposes. Method improvement is required before implementation [3].
Protocol 2: Implementing a Multistage QC Procedure
Purpose: To optimize QC efficiency by applying different stringency levels at different phases of operation, ensuring quality while managing false rejections [3].
Materials:
- Defined sigma metric for the assay [3]
- Defined workload and desired run size (maximum number of patient samples between QC events) [3]
- Sigma-metric Statistical QC Run Size Nomogram [3]
Methodology:
- Categorize Run Size: Based on daily workload, assign the test to a run size category (e.g., 12, 25, 50, 75, or 100 samples) [3].
- Design "Startup" QC: This is applied after major maintenance, calibration, or reagent lot changes. Using the nomogram, select a QC rule and number of control measurements (N) that provide a high Ped (>90%) for the assay's sigma value and run size [3].
- Design "Monitor" QC: This is applied during routine operation after the "startup" QC has been passed. Select a rule and N from the nomogram that maintains a low Pfr (<5%) while still providing adequate error detection for the defined run size [3].
Workflow and Relationship Diagrams
QC Error Decision Pathway
Relationship Between Pfr, Ped, and QC Threshold
The Scientist's Toolkit: Essential QC Reagents and Materials
| Item Name | Function in QC and Experimentation |
|---|---|
| IQC Materials | Stable, assayed materials used to monitor the precision and accuracy of the analytical method on a daily basis. Examples include Multichem S Plus, PreciControl [3]. |
| Calibrators | Solutions with known analyte concentrations used to establish a calibration curve for the instrument, ensuring that measurements are accurate and traceable to a standard [3]. |
| Proficiency Testing (PT) Samples | Samples provided by an external program to assess a laboratory's analytical performance compared to peers and reference methods, used for bias estimation [7]. |
| Sigma-metric Run Size Nomogram | A graphical tool used to select appropriate QC rules and the number of control measurements based on the assay's sigma metric and the desired patient sample run size [3]. |
| Levey-Jennings Charts | A visual tool for plotting QC results over time, allowing for the easy identification of trends, shifts, and increased random error [6]. |
| Multirule QC Procedures | A set of statistical rules (e.g., 1:3s, 2:2s, R4s) used in combination to improve error detection while minimizing the probability of false rejection [1] [5] [8]. |
The Clinical and Operational Impact of False Rejections on Laboratory Workflows
In clinical and research laboratories, a "false rejection" occurs when a valid specimen or test result is incorrectly classified as unacceptable or erroneous. This disrupts workflows, increases costs, and delays critical outcomes. This technical support center provides troubleshooting guides and FAQs to help researchers and scientists identify, address, and prevent the root causes of false rejections in their experimental and quality control procedures.
Understanding the scale and common causes of specimen rejection is the first step in optimizing workflows. The following data summarizes findings from broad analyses.
Table 1: Global Pooled Prevalence and Primary Causes of Blood Specimen Rejection [9]
| Metric | Value |
|---|---|
| Pooled Prevalence of Rejection | 1.99% (95% CI: 1.73, 2.25) |
| Highest Prevalence by Region | Asia: 2.82% (95% CI: 2.21, 3.43) |
| Lowest Prevalence by Region | America: 0.55% (95% CI: 0.27, 0.82) |
| Leading Cause of Rejection | Clotted Specimen: 32.23% (95% CI: 21.02, 43.43) |
| Second Leading Cause | Hemolysis: 22.87% (95% CI: 16.72, 29.02) |
| Third Leading Cause | Insufficient Volume: 22.81% (95% CI: 16.75, 28.87) |
Table 2: Detailed Causes from a Single-Institution Study [10]
| Rejection Cause | Frequency (n) | Percentage of Rejections |
|---|---|---|
| Contamination (e.g., by IV fluid) | 764 | 35.1% |
| Inappropriate Collection Container/Tube | 330 | 15.2% |
| Quantity Not Sufficient (QNS) | 329 | 15.1% |
| Labeling Errors | 321 | 14.7% |
| Hemolyzed Specimen | 205 | 9.4% |
| Clotted Specimen | 203 | 9.3% |
Experimental Protocols for Monitoring and Reducing Rejections
Protocol 1: Systematic Review and Meta-Analysis of Rejection Rates
This methodology is used to establish global baselines and identify major error sources. [9]
- Literature Search: Conduct a comprehensive online search of databases (e.g., MEDLINE, PubMed, EMBASE, Google Scholar) using terms like "specimen rejection," "blood specimen rejection," and "pre-analytical error."
- Study Selection: Apply strict eligibility criteria using guidelines like PRISMA. Include prospective/retrospective cohort and cross-sectional studies reporting blood specimen rejection rates. Exclude reviews, case reports, and non-blood specimens.
- Data Extraction: Independently extract data from selected studies onto a standardized spreadsheet. Key data points include: author, publication year, sample size, rejection rate, and causes of rejection.
- Quality Assessment: Appraise study quality using a critical appraisal checklist (e.g., Joanna Briggs Institute JBI tool). Include studies meeting a predefined quality score threshold.
- Statistical Synthesis: Perform meta-analysis using statistical software (e.g., STATA). Estimate pooled prevalence of rejection with a random-effects model, calculate 95% confidence intervals, and assess heterogeneity using I² statistics.
Protocol 2: Quality Improvement Initiative to Reduce Rejections
A practical framework for implementing and measuring interventions within a department or institution. [11]
- Baseline Measurement: Audit the laboratory information system to determine the current specimen rejection rate over a defined period (e.g., 1 year).
- Goal Setting: Define a specific, measurable goal. For example, "Reduce the percentage of rejected blood samples from 1.43% by 50% in the emergency department and coronary ICU within 20 months."
- Form a Multidisciplinary Team: Include phlebotomists, laboratory technologists, nurses, and physicians.
- Implement Interventions:
- Education & Training: Provide targeted phlebotomy education and competency validation through direct observation.
- Process Improvement: Ensure the use of appropriate consumables (e.g., collection tubes, needles).
- Stakeholder Engagement: Educate physicians on proper test ordering to reduce errors.
- Monitor with Rapid Cycle Improvements: Use weekly data reviews to assess the impact of changes and adapt strategies quickly.
Troubleshooting Guides & FAQs
Frequently Asked Questions
Q1: What is the typical clinical impact of a specimen rejection? Specimen rejections lead to prolonged turnaround times for test results, which can delay diagnosis and treatment. One study found recollections increased turnaround time by an average of 108 minutes [10]. This also necessitates re-drawing blood, which is uncomfortable for patients and carries risks like hematoma or iatrogenic anemia [9].
Q2: Our lab's rejection rate is high due to clotted samples. What are the primary causes? Clotted specimens, the leading cause of rejection globally, often result from improper mixing of blood with anticoagulant in the collection tube [9]. This can be due to insufficient inversion of the tube after collection or a slow draw that allows clotting to begin before mixing.
Q3: How can technology help reduce false rejections and improve workflow efficiency? Laboratory Information Management Systems (LIMS) and other centralized data platforms can dramatically optimize workflows [12]. For example, Merck leveraged advanced analytics on AWS to reduce false rejection rates by over 80% and accelerate investigation times from weeks to seconds [13]. Automated systems for task management and standardized procedures also reduce manual entry errors [12].
Q4: In analytical chemistry, what is the relationship between false positives and false negatives? There is often a trade-off. For instance, concentrating a sample might decrease the chance of a false negative but increase the risk of a false positive, and vice-versa for dilution [14]. The most effective way to reduce both is to use a high-quality, optimized method and to employ multiple analytical techniques to confirm results [14].
Q5: How does experimental design affect false acceptance and rejection in precision verification? The design of a precision verification experiment directly impacts its error rates. Using more samples increases the False Rejection Rate (FRR). Increasing the number of days, runs, or replicates in the experiment design reduces the FRR and also lowers the False Acceptance Rate (FAR) for between-day imprecision and repeatability [15].
Troubleshooting Common Pre-Analytical Errors
| Problem | Potential Causes | Corrective & Preventive Actions |
|---|---|---|
| Clotted Specimen | - Improper tube mixing- Slow draw time- Incorrect needle gauge | - Train on proper inversion technique (e.g., 5-10 times for EDTA tubes)- Ensure swift, smooth venipuncture [9] |
| Hemolyzed Specimen | - Difficult draw- Using a small-gauge needle- Vigorous shaking of tubes | - Use correct needle size- Train on gentle handling and mixing- Use specialized tubes or devices for difficult draws [11] |
| Insufficient Volume | - Tube pulled early- Vein collapsed during draw- Misunderstanding of test requirements | - Train to fill tubes to the correct volume- Verify test volume requirements in SOPs [9] [10] |
| Labeling Errors | - Rush to process patients- Unclear labeling policies | - Implement a policy of labeling at the patient's bedside- Use barcode systems integrated with the Hospital Information System (HIS) [16] [10] |
| Sample Contamination | - Drawing from an IV line- Improper site cleansing | - Always draw below an IV infusion site- Follow proper venipuncture site cleansing protocols [10] |
Workflow Visualization: From Problem to Optimization
The following diagram illustrates a structured approach to diagnosing and addressing high specimen rejection rates, moving from problem identification to sustainable solution implementation.
Table 3: Key Research Reagent Solutions for Quality Control [14] [17] [18]
| Item | Function |
|---|---|
| Adherence Markers (e.g., Riboflavin) | Inert biomarkers added to investigational drugs to objectively verify medication adherence in clinical trial participants via urine testing. [17] |
| Electronic Pill Monitoring Systems | Smart pill bottles or caps that record the date and time of opening, providing real-time, objective data on medication adherence. [17] |
| Laboratory Information Management System (LIMS) | A centralized software platform for tracking samples, test results, and associated data, standardizing procedures and reducing manual errors. [12] [18] |
| Sample Preparation Kits | Optimized kits for specific sample types (e.g., DNA/RNA extraction, protein purification) to minimize variability and contamination, reducing pre-analytical errors. [18] |
| Quality Control Materials | Commercial quality control samples with known analyte concentrations used to verify the precision and accuracy of analytical methods before testing patient or research samples. [15] |
| Automated Structure Verification (ASV) Software | Software that uses NMR and LC-MS data to automatically identify compounds, reducing human error in structure verification. [14] |
FAQs on QC Metrics and False Rejection Rates
This section addresses common questions from researchers about optimizing quality control procedures.
1. What is the difference between a 'false reject' and a 'false pass' in automated systems?
A false reject (or false positive) occurs when a conforming, good-quality item is incorrectly identified as defective and rejected by the QC system [19]. Conversely, a false pass (false negative) happens when a genuinely defective item is incorrectly passed by the system. The goal of optimization is to minimize both, with a specific research focus on reducing false rejection rates to decrease unnecessary waste and costs [20] [19].
2. Which metrics most directly indicate the effectiveness of our QC procedures?
The most direct metrics form a linked chain from process efficiency to real-world outcomes [21]:
- Process Health: Test Reliability (or Flake Rate) measures whether your tests fail randomly rather than due to actual defects. A high rate means results can't be trusted to make pass/fail decisions [21].
- Analytical Power: Defect Removal Efficiency (DRE) shows the percentage of defects caught before a product is released. A low DRE indicates defects are escaping to later, more costly stages [21].
- Real-World Outcome: Escaped Defects and Defect Leakage measure the failures that your process did not catch, providing the ultimate measure of QC effectiveness [21] [22].
3. How can a risk-based approach to QC reduce false rejects?
A risk-based approach focuses efforts where they matter most. It involves:
- Categorizing Defects: Prioritize based on severity and impact on patient safety or product function [23].
- Tailoring QC Rules: Use more stringent QC rules for high-risk parameters and simpler, more efficient rules for stable, well-performing processes. This prevents over-testing and unnecessary rejection of good items [23].
- Leveraging Sigma Metrics: Using the sigma scale (see Table 1) to objectively classify the performance of each analytical method allows for precisely tailored QC strategies [23].
4. Our automated visual inspection system has a high false reject rate. What are the primary troubleshooting steps?
High false rejects in Automated Visual Inspection (AVI) systems are often caused by the interaction between the system's sensitivity and the product itself [20] [19].
- Verify Lighting and Optics: Ensure consistent, optimized lighting to minimize reflections and shadows on shiny or complex parts that can be misinterpreted as defects [19].
- Calibrate and Validate Thresholds: Review the acceptance thresholds in your inspection recipe. Overly strict settings will reject good units [20].
- Implement a Re-inspection Process: A dedicated, secondary inspection station for rejects can automatically verify them, rescuing good products and providing data to fine-tune the primary AVI system [20].
- Explore AI/ML Algorithms: Traditional rule-based vision systems can struggle with subtle variations. AI-powered vision systems can learn to distinguish between acceptable variation and true defects more accurately [19].
Key QC Metrics and Terminology Framework
The tables below define core metrics and terminology essential for establishing a common language and measuring QC performance.
Table 1: Foundational QC Process Metrics
| Metric | Definition | Formula / Calculation | Interpretation & Target |
|---|---|---|---|
| Defect Removal Efficiency (DRE) [21] | Percentage of defects found before release. | (Defects found pre-release / Total defects found) x 100 | Higher is better. Measures in-process control effectiveness. Target > 90-95% [21]. |
| False Rejection Rate [19] | Percentage of conforming items incorrectly flagged as defective. | (Number of false rejects / Total number of good items) x 100 | Lower is better. Directly impacts waste and cost. Target < 0.2% in mature systems [19]. |
| Test Reliability / Flake Rate [21] | Measure of test result consistency, not failure due to actual defects. | (Number of flaky test runs / Total test runs) x 100 | Lower is better. A high rate undermines trust in QC gates. Target < 1% [21]. |
| Sigma Metric [23] | Measure of process capability and performance. | (Allowable Total Error - Bias) / Coefficient of Variation (CV) | Higher is better. A sigma ≥ 6 is world-class; σ < 4 requires more stringent (and potentially slower) QC [23]. |
| Max E(Nuf) [23] | Maximum Expected number of Unreliable final results. Estimates erroneous results released before error detection. | Calculated via model considering sigma, QC frequency, and rule design [23] | A value < 1.0 indicates the QC strategy is effective at minimizing risk to the patient or end-user [23]. |
Table 2: Key Outcome and Business Impact Metrics
| Metric | Definition | Formula / Calculation | Interpretation & Target |
|---|---|---|---|
| Defect Density [24] [22] | Concentration of defects in a specific product module or component. | (Number of defects / Size of module) | Lower is better. Pinpoints unstable areas for improvement. Used to gate releases [22]. |
| Defect Leakage [22] | Percentage of defects missed by QC and found post-release. | (Defects found in production / Total defects) x 100 | Lower is better. Directly reflects customer impact. Track trends and set severity-based tolerances [22]. |
| Mean Time to Detect (MTTD) [24] | Average time from defect introduction to its detection. | Total time to detect defects / Number of defects | Lower is better. Indicates efficiency of monitoring and feedback loops. |
| Mean Time to Resolve (MTTR) [24] | Average time from defect detection to its resolution and verification. | Total time to resolve defects / Number of defects | Lower is better. Reflects team responsiveness and rework cost. |
| Cost of Quality [21] | Total cost of quality activities plus cost of failures. | Cost of Prevention + Cost of Appraisal + Cost of Internal/External Failures | A business-level metric. Optimization aims to reduce total cost by balancing prevention and failure costs [21]. |
Experimental Protocols for QC Optimization
The following section provides a detailed methodology for implementing and validating an optimized, risk-based QC strategy, as demonstrated in a clinical laboratory setting [23].
Protocol: Implementing a Multi-Stage, Risk-Based QC Strategy
1. Objective To design and implement a statistical quality control plan that integrates multi-stage designs and risk management criteria to minimize the risk of reporting erroneous results while maintaining operational efficiency [23].
2. Experimental Workflow The process for designing the QC strategy follows a logical, sequential path, as visualized below.
3. Materials and Equipment
- Quality Control Materials: Commercial IQC materials (e.g., Multichem S Plus, PreciControl) [23].
- Analyzers: The automated analytical systems used for routine testing (e.g., clinical chemistry analyzers like Alinity c, Cobas Pro) [23].
- Data Analysis Software: Software capable of statistical analysis and sigma metric calculation (e.g., R, Python, specialized QC software).
- Reference Materials: For establishing target values for calculating bias.
4. Step-by-Step Methodology
Step 1: Evaluate Analytical Performance
- For each parameter on each analyzer, calculate the imprecision (as Coefficient of Variation, CV%) and bias (as percent deviation from target) over a significant period (e.g., 6 months) [23].
- Obtain the Allowable Total Error (TEa) from appropriate sources (e.g., biological variation, regulatory guidelines) [23].
- Calculate the Sigma Metric for each parameter and analyzer using the formula: Sigma = (TEa - Bias) / CV [23].
Step 2: Categorize Parameters by Workload
- Group parameters based on their daily testing volume. This determines the "sample run size" (number of patient samples between two QC events).
- Example categories from the study [23]:
- Category A (High): Run size of 100 samples.
- Category C (Medium): Run size of 50 samples.
- Category E (Low): Run size of 12 samples.
Step 3: Design a Multi-Stage QC Plan
- Use a tool like the Sigma Metric Run Size Nomogram [23] to select appropriate statistical QC rules for two distinct phases:
- 'Startup' Stage: Applied at the beginning of an analytical run. Use a QC rule with a high Probability of Error Detection (Ped ≥ 0.90) to ensure the system is in control before reporting patient results. Example: Use a
13.5s / 2 of 3² / R4smulti-rule for a parameter with Sigma = 5 and a run size of 50 [23]. - 'Monitor' Stage: Applied during continuous operation. Use a QC rule with a low Probability of False Rejection (Pfr ≤ 0.05) to maintain efficiency while monitoring quality. Example: Use a
13srule for the same parameter to monitor quality during the run [23].
- 'Startup' Stage: Applied at the beginning of an analytical run. Use a QC rule with a high Probability of Error Detection (Ped ≥ 0.90) to ensure the system is in control before reporting patient results. Example: Use a
- Use a tool like the Sigma Metric Run Size Nomogram [23] to select appropriate statistical QC rules for two distinct phases:
Step 4: Implement and Validate the Plan
- Implement the selected QC rules in the laboratory information system or manual QC review process.
- Harmonize plans across multiple analyzers for the same parameter to simplify operations [23].
- Continuously monitor the Max E(Nuf) value to ensure it remains below 1, confirming the strategy effectively minimizes risk [23].
The Scientist's Toolkit: Essential Research Reagent Solutions
Table 3: Key Materials for Automated Inspection and QC Research
| Item | Function in Research Context |
|---|---|
| AI-Powered Vision System [19] | Used to develop and train machine learning models for distinguishing true defects from acceptable variations, directly tackling the problem of high false rejection rates. |
| Internal Quality Control (IQC) Materials [23] | Stable, characterized samples used to run the experiments that determine a method's imprecision and bias, which are the foundational data for calculating Sigma metrics. |
| 3D Laser Scanner / Metrology System [19] | Provides high-accuracy, volumetric measurement data as a "gold standard" to validate the measurements and defect calls made by faster, inline automated visual inspection systems. |
| Digital Twin Software [19] | A digital replica of the physical process. Researchers use it to model different QC scenarios, predict how changes will affect false rejection rates, and optimize strategies before live implementation. |
| Sigma Metric Run Size Nomogram [23] | A practical tool (often a chart or software) that translates a parameter's Sigma value and sample run size into a recommended statistical QC rule, guiding the experimental design of optimized QC plans. |
FAQs: Troubleshooting Quality Control in the Laboratory
What is the practical impact of sensitivity and specificity in my QC procedures?
In quality control, sensitivity is the probability that your QC procedure will correctly identify an out-of-control error (also known as Probability of Error Detection, Ped). Specificity is the probability that your procedure will correctly identify an in-control process, with a high specificity meaning a low chance of false rejection (Pfr) [25].
A common issue laboratories face is the false rejection of good runs, which wastes significant time and resources [26]. For example, using a simple 12s rule with N=2 can lead to falsely rejecting about 9% of good runs [26]. Conversely, a procedure with low sensitivity will fail to detect medically important errors, potentially leading to incorrect patient results and increased costs from further, unnecessary confirmatory testing [25].
My lab is experiencing high false rejection rates. How can I reduce them without compromising error detection?
High false rejection rates are often caused by using QC procedures that are too sensitive for the stable performance of your assay [26]. To address this, consider implementing multirule QC procedures.
Multirule QC uses a combination of control rules (e.g., 13s, 22s, R4s) to judge an analytical run [26]. The advantage is that these rules are structured to maintain high error detection (sensitivity) while keeping false rejections (low specificity) low. For instance, using a 12s rule as a "warning" to trigger the application of other, more specific rejection rules can significantly reduce false alarms without missing true errors [26].
How can I objectively determine the best QC rules and frequency for my specific tests?
The optimal QC procedure depends on the sigma metric of your analytical process [25]. The sigma metric is a measure of process performance, calculated as (TEa% - Bias%) / CV% [25].
The table below summarizes how sigma performance can guide your QC strategy:
| Sigma Metric | Process Quality | Recommended QC Strategy |
|---|---|---|
| > 6 | World-Class | Minimal QC; simple rules with fewer controls may be sufficient [25]. |
| 4 - 6 | Good | Flexible QC procedures; use of multirules is often appropriate [25]. |
| < 4 | Low | Stricter control guidelines and more frequent QC are needed [25]. |
You can use software tools to validate and select candidate QC rules based on your test's sigma value, aiming for a high Probability of Error Detection (Ped ≥ 90%) and a low Probability of False Rejection (Pfr ≤ 5%) [25].
A run was rejected by a QC rule. What is a systematic troubleshooting approach?
When a run is rejected, follow this logical workflow to identify the cause:
This systematic approach helps to correct problems that may occur with instruments, reagents, or quality control material, thereby avoiding the reporting of erroneous patient results and contributing to patient safety [27].
Experimental Protocols for QC Optimization
Protocol: Calculating Sigma Metrics for QC Validation
Purpose: To objectively evaluate the performance of laboratory tests and select evidence-based QC procedures [25].
Materials:
- Internal Quality Control (IQC) data collected over a significant period (e.g., 30 days minimum).
- External Quality Assessment (EQA) or peer group data for bias calculation.
- Acceptable Total Allowable Error (TEa) from sources like CLIA or biological variation databases.
Method:
- Calculate Imprecision (CV%): Using your IQC data, calculate the laboratory mean and standard deviation for each test and control level. CV% = (Standard Deviation / Laboratory Mean) × 100 [25].
- Calculate Inaccuracy (Bias%): Using EQA or peer group data, determine the difference between your lab's result and the target value. Bias% = [(Observed Value - Target Value) / Target Value] × 100 [25].
- Determine Sigma Metric: Use the formula: Sigma (σ) = (TEa% - Bias%) / CV% [25].
- Average Sigma Values: If multiple control levels are used, average the sigma values for each level to get a single sigma metric for the test [25].
Protocol: Implementing and Validating a New Multirule QC Procedure
Purpose: To transition from a single-rule QC procedure to a multirule procedure to reduce false rejections and improve error detection [25] [26].
Materials:
- Established test mean and standard deviation for control materials.
- QC validation software (e.g., Biorad Unity) or manual Levey-Jennings charts with limits at ±1s, ±2s, and ±3s.
Method:
- Define the Rule Set: Select a combination of rules appropriate for your N (total number of control measurements per run). A common starting point is the Westgard multirule: 1
3s/22s/R4s[26]. - Establish a Warning System: In manual applications, use the 1
2srule as a warning. When a control point exceeds a 2s limit, it triggers a review using the other rejection rules [26]. - Apply Rejection Rules:
- 1
3s: Reject the run if a single control measurement exceeds the ±3s limit. - 2
2s: Reject the run if two consecutive controls exceed the same ±2s limit. - R
4s: Reject the run if one control in a group exceeds +2s and another exceeds -2s within the same run [26].
- 1
- Monitor Performance: Track the false rejection rate and error detection rate before and after implementation to quantify improvements [25].
Financial and Operational Savings from QC Optimization
A one-year study on 23 biochemistry parameters demonstrated significant cost savings after implementing sigma-based QC rules [25]. The results are summarized below:
| Cost Category | Savings After Optimization (INR) | Percentage Reduction |
|---|---|---|
| Internal Failure Costs (e.g., reagent waste, repeat labor) | 501,808.08 | 50% |
| External Failure Costs (e.g., further patient testing) | 187,102.80 | 47% |
| Total Combined Savings | 750,105.27 | -- |
Performance of Common QC Rules
Understanding the properties of different control rules helps in designing a balanced QC strategy [26].
| QC Rule | False Rejection (Specificity Impact) | Typical Use |
|---|---|---|
12s |
High (~9% with N=2) | Warning rule to trigger further checks [26]. |
13s |
Very Low (~1% with N=2) | Good for high-sigma processes; low error detection for smaller shifts [26]. |
Multirule (e.g., 13s/22s/R4s) |
Low | Balances high error detection with low false rejection [26]. |
Visualizing the Sensitivity-Specificity Relationship in QC
The relationship between a test's performance (sigma metric) and the optimal QC strategy can be visualized as a continuum. The following diagram illustrates how the focus of your QC procedure should shift as sigma metric changes.
The Scientist's Toolkit: Research Reagent Solutions
| Reagent / Material | Function in QC Optimization |
|---|---|
| Third-Party Assayed Controls | Used to independently verify analyzer performance and calculate bias without manufacturer influence [25]. |
| Lyphocheck Clinical Chemistry Control | An example of a stable control material used for daily Internal Quality Control (IQC) to determine assay imprecision (CV%) [25]. |
| Biorad Unity 2.0 Software | A software tool that aids in QC validation, sigma metric calculation, and the selection of candidate QC rules based on performance data [25]. |
| External Quality Assessment (EQA) Scheme | Provides target values for peer comparison, which are essential for calculating the inaccuracy (Bias%) of your method [25]. |
| CLIA / Biological Variation Database | Authoritative sources for obtaining the Total Allowable Error (TEa) required for sigma metric calculations [25]. |
Systematic Methodologies for Implementing Effective QC Optimization
In laboratory medicine and pharmaceutical development, false rejection of analytical runs poses a significant challenge to operational efficiency and resource utilization. A false rejection occurs when quality control (QC) procedures incorrectly flag an analytical run as unacceptable despite the method performing within its stable imprecision limits [1]. This not only wastes reagents and personnel time but can also delay critical test results and drug development timelines. The probability for false rejection (Pfr) describes the likelihood of these false alarms, while the probability for error detection (Ped) indicates how well the QC system identifies genuine problems [1]. This article explores how the integrated application of Quality Control Circles (QCC) and the Plan-Do-Check-Act (PDCA) cycle creates a structured framework for optimizing QC procedures, effectively reducing false rejection rates while maintaining high error detection capability.
Understanding Quality Control Circles and the PDCA Framework
Fundamentals of Quality Control Circles (QCC)
Quality Control Circles (QCC) are collaborative, team-based initiatives where small groups of employees (typically 3-12 members) from the same or cross-functional departments voluntarily meet regularly to identify, analyze, and solve work-related problems [28]. Originating in 1960s Japan through Kaoru Ishikawa and the Japanese Union of Scientists and Engineers (JUSE), QCCs emphasize employee engagement, systematic problem-solving, and continuous improvement [28]. In research and laboratory settings, QCCs provide a structured mechanism for tackling persistent quality issues, including suboptimal QC procedures that lead to high false rejection rates.
The PDCA Cycle as an Engine for Systematic Improvement
The Plan-Do-Check-Act (PDCA) cycle is a four-stage iterative methodology for continuous improvement that serves as the operational engine for QCC activities [29]. Also known as the Deming Cycle, it provides a structured framework for testing and implementing changes:
- Plan: Identify an opportunity, define the problem, and plan the change
- Do: Implement the change on a small scale
- Check: Measure the results and analyze whether the change worked
- Act: If successful, implement the change on a wider scale and standardize the process [29]
The power of PDCA lies in its iterative nature – each cycle builds on previous learning, creating continuous refinement of processes and systems [29].
Integrated QCC-PDCA Methodology for Error Reduction
Phase 1: QCC Formation and Planning (P of PDCA)
QCC Team Composition: Establish a cross-functional team comprising 5-8 members representing relevant specialties – laboratory technicians, quality assurance officers, data analysts, and research scientists [30] [28]. Including diverse perspectives ensures comprehensive understanding of the QC rejection issues.
Problem Definition and Baseline Measurement:
- Clearly define "false rejection rate" as a key performance indicator
- Collect historical QC data to establish baseline false rejection percentages
- Document current QC procedures, including control rules, number of control measurements (N), and acceptance criteria [1]
Analytical Tools Application:
- Flowchart Analysis: Map the entire QC process from sample preparation to result reporting [30]
- Pareto Analysis: Identify the most significant factors contributing to false rejections using the 80/20 principle [30]
- Cause-and-Effect Analysis: Utilize fishbone diagrams to systematically identify root causes of unnecessary rejections [30]
Phase 2: Implementation and Data Collection (D of PDCA)
Targeted Interventions: Based on root cause analysis, implement specific improvements to QC procedures:
- QC Rule Optimization: Replace high false rejection rules (e.g., 1₂s with N≥2 showing 9-18% Pfr) with more appropriate multirule procedures (e.g., 1₃s/2₂s/R₄s with ≤5% Pfr) [1]
- Control Measurement Strategy: Adjust the number of control measurements (N) based on quality goals and error detection requirements
- Procedure Standardization: Develop and implement standardized operating procedures (SOPs) for QC evaluation and troubleshooting [30]
Staff Training and Engagement:
- Conduct specialized training on proper QC techniques and interpretation
- Establish specimen collection liaisons for timely communication [30]
- Implement quality control teams to oversee specimen quality before testing [30]
Phase 3: Performance Monitoring and Analysis (C of PDCA)
Data Collection and Statistical Analysis:
- Monitor false rejection rates (Pfr) daily using statistical process control charts
- Track error detection capabilities (Ped) to ensure maintained sensitivity to genuine problems
- Utilize statistical software (e.g., SPSS) for trend analysis and significance testing [30]
Performance Metrics Evaluation: Compare key performance indicators against baseline measurements and established targets:
Table 1: Key Performance Indicators for QC Optimization
| Metric | Definition | Target | Measurement Method |
|---|---|---|---|
| Probability for False Rejection (Pfr) | Probability of rejecting an analytical run when no error exists | ≤5% [1] | Statistical analysis of stable process data |
| Probability for Error Detection (Ped) | Probability of detecting genuine analytical errors | ≥90% [1] | Challenge testing with introduced errors |
| Specimen Rejection Rate | Percentage of specimens rejected due to pre-analytical errors | Laboratory-specific benchmark | Laboratory information system tracking |
| Process Sigma Level | Overall process capability | Industry benchmark | Statistical calculation of process capability |
Phase 4: Standardization and Continuous Improvement (A of PDCA)
Standardization of Successful Interventions:
- Document and implement refined QC procedures as standard operating protocols
- Establish ongoing monitoring systems with defined review cycles
- Integrate successful changes into the quality management system [28]
Continuous Improvement Cycle:
- Address unresolved issues in subsequent PDCA cycles
- Share best practices across departments and facilities
- Regularly review and update QC procedures based on performance data and emerging technologies
Troubleshooting Guide: Common QC Challenges and Solutions
Table 2: Troubleshooting Common QC Implementation Challenges
| Problem | Potential Causes | Corrective Actions | Preventive Measures |
|---|---|---|---|
| High False Rejection Rates | Overly sensitive control rules (e.g., 1₂s with N>1) [1] | Implement multirule procedures with lower Pfr | Conduct QC validation studies before implementation |
| Inconsistent Error Detection | Insufficient control measurements (N) [1] | Increase N based on quality requirements | Perform power function analysis to determine optimal N |
| Poor Staff Compliance with QC Procedures | Inadequate training, unclear instructions [30] | Provide hands-on training, appoint QC liaisons | Establish clear SOPs with visual aids |
| Variable Pre-analytical Quality | Lack of standardized collection procedures [30] | Implement standardized collection protocols | Establish specimen collection liaisons |
Experimental Protocols for QC Procedure Validation
Protocol 1: Establishing Baseline False Rejection Rates
Purpose: To determine the current probability for false rejection (Pfr) of existing QC procedures.
Materials and Equipment:
- Historical QC data (minimum 30 days)
- Statistical analysis software (e.g., SPSS, R)
- QC validation worksheets
Procedure:
- Collect at least 30 consecutive days of stable QC data
- Apply current control rules to this data set
- Count the number of rejection signals generated
- Calculate Pfr as: (Number of false rejections / Total number of runs) × 100
- Compare calculated Pfr with theoretical expectations [1]
Interpretation: Pfr > 5% indicates need for procedure optimization [1]
Protocol 2: Evaluating Error Detection Capability
Purpose: To verify the probability for error detection (Ped) of proposed QC procedures.
Materials and Equipment:
- Computer simulation software or stable process data
- Quality requirements (allowable total error)
- Statistical power function curves
Procedure:
- Define medically important systematic and random errors
- Introduce simulated errors of increasing magnitude into stable baseline data
- Apply proposed QC rules to challenged data
- Calculate Ped as: (Number of errors detected / Total errors introduced) × 100
- Verify Ped ≥ 90% for critical errors [1]
Interpretation: Ped < 90% for critical errors requires procedure modification.
Essential Research Reagent Solutions for QC Studies
Table 3: Essential Materials for QC Optimization Research
| Item | Specifications | Application in QC Research |
|---|---|---|
| Stable Control Materials | Long-term stability, commutable with patient samples | Baseline establishment, false rejection studies |
| Computer Simulation Software | Capable of incorporating biological variation, error simulation | Error detection evaluation, power function analysis |
| Statistical Analysis Package | SPSS, R, or equivalent with quality control modules | Data analysis, trend identification, significance testing |
| Quality Control Documentation System | Electronic with audit trail capability | SOP management, change control, data integrity |
| Process Mapping Tools | Visual workflow software | Process analysis, bottleneck identification |
Case Study: Successful Implementation in Laboratory Medicine
A recent study demonstrated the effective application of QCC-PDCA methodology to reduce specimen rejection rates in a hospital clinical laboratory [30]. The initiative followed structured PDCA phases:
Planning Phase: The QCC team analyzed rejection causes using Pareto analysis, identifying that lack of sample collection information (48.7%) and blood clotting (29.1%) accounted for nearly 80% of rejections [30].
Implementation Phase: Targeted interventions included appointing specimen collection liaisons, establishing quality control teams, and providing specialized training on blood collection procedures [30].
Results: The monthly specimen rejection rate decreased significantly from 1.13% to 0.27% (p<0.001), demonstrating the methodology's effectiveness in improving quality while reducing unnecessary rejections [30].
The integrated QCC-PDCA methodology provides a robust framework for systematically reducing false rejection rates while maintaining high error detection capability in laboratory and pharmaceutical settings. Through structured team-based problem solving, data-driven decision making, and continuous improvement cycles, organizations can optimize their quality control procedures to enhance efficiency, reduce costs, and maintain high-quality standards. The case examples and protocols provided offer practical guidance for implementation across various research and development environments.
Leveraging Six Sigma Metrics for QC Procedure Validation and Performance Assessment
Technical Support Center
Troubleshooting Guides
Guide 1: Addressing High False Rejection Rates (Pfr)
Problem: Quality control procedures are yielding unacceptably high false rejection rates, leading to increased reagent costs and labor for unnecessary reruns.
Symptoms:
- Frequent out-of-control flags even when no analytical error is present
- Increased costs from repeated control measurements and patient sample reruns
- Decreased laboratory efficiency and prolonged turnaround times
Investigation and Resolution:
| Step | Action | Expected Outcome |
|---|---|---|
| 1. Calculate Sigma Performance | Determine sigma metrics for problematic analytes using formula: σ = (TEa - Bias%) / CV% [25] [23] [31]. | Identify which parameters have sigma values < 4, indicating inherently unstable processes requiring different QC rules. |
| 2. Evaluate Current QC Rules | Assess if uniform QC rules (e.g., 1(_{2s})) are applied to all tests regardless of performance [23]. | Recognition that high-performing tests (σ ≥ 6) are being subjected to overly sensitive control rules. |
| 3. Implement Risk-Based QC | Apply multistage QC strategy: Use "startup" design with high Ped (>90%) initially, then "monitor" design with low Pfr (≤5%) for continuous operation [23]. | Reduced false rejections during routine monitoring while maintaining error detection capability. |
| 4. Validate New QC Strategy | Use power function graphs to verify new QC rules meet predefined Ped and Pfr thresholds [23]. | Confirmation that optimized strategy maintains quality while reducing false rejections. |
Verification: Monitor false rejection rates weekly after implementation. Target reduction of Pfr to ≤5% [23].
Guide 2: Managing Analytical Tests with Low Sigma Performance
Problem: Certain tests consistently show poor performance (sigma < 4) despite acceptable imprecision and bias.
Symptoms:
- Frequent legitimate QC failures
- Difficulty in maintaining stable performance
- Increased risk of reporting unreliable patient results
Investigation and Resolution:
| Step | Action | Expected Outcome |
|---|---|---|
| 1. Perform Root Cause Analysis | Use Quality Goal Index (QGI) to determine whether poor performance is driven primarily by imprecision (CV%) or inaccuracy (Bias%) [31]. | Clear identification of the main source of performance problem. |
| 2. Address Identified Issues | If QGI < 0.8: Focus on improving imprecision through maintenance, calibration, or reagent optimization [31]. If QGI > 1.2: Address inaccuracy through calibration verification or method comparison [31]. | Systematic improvement of the underlying performance issue. |
| 3. Implement Stricter QC | For low sigma tests (σ < 4), apply more stringent multirule QC procedures (e.g., 1({3s})/2({2s})/R(_{4s}) with N=4) [25]. | Better error detection capability for medically significant errors. |
| 4. Monitor Max E(Nuf) | Ensure maximum expected number of unreliable final patient results between QC events remains below 1 [23]. | Reduced risk of reporting erroneous patient results. |
Verification: Recalculate sigma metrics after improvements; monitor error detection rates for medically significant errors.
Frequently Asked Questions (FAQs)
Q1: What are the key differences between Six Sigma and traditional Westgard rules for quality control?
A1: While traditional Westgard rules apply a uniform set of control rules across all tests, Six Sigma enables tailored QC strategies based on the specific performance of each test [31]. Six Sigma quantifies performance on a universal scale (typically 0-6σ), allowing laboratories to match QC rules to the actual robustness of each method. High sigma methods (σ ≥ 6) can use simpler QC rules, while low sigma methods (σ < 4) require more sophisticated multirule procedures [25] [31].
Q2: How can we effectively reduce costs associated with quality control without compromising quality?
A2: Implementing sigma metric-based QC optimization can significantly reduce costs while maintaining quality. One study demonstrated absolute savings of INR 750,105.27 annually by optimizing QC procedures [25]. This was achieved by reducing internal failure costs (reagents, controls, reruns) by 50% and external failure costs (incorrect diagnoses, additional confirmatory tests) by 47% through proper QC rule selection based on each test's sigma performance [25].
Q3: What is the relationship between risk management and Six Sigma in quality control planning?
A3: Six Sigma provides the quantitative framework for assessing analytical performance, while risk management principles guide the implementation of appropriate control measures based on that performance. The CLSI C24-Ed4 guidelines and ISO 15189:2022 standard require considering both analytical performance and the risk of reporting erroneous results when designing QC plans [23]. Concepts like Max E(Nuf) - the maximum expected number of unreliable final patient results - help laboratories balance quality assurance with operational efficiency [23].
Q4: How should we handle multiple comparison problems when statistically evaluating numerous tests simultaneously?
A4: When conducting multiple hypothesis tests (e.g., evaluating many analytes), false discovery rate (FDR) methods are generally preferred over familywise error rate (FWER) methods for exploratory analysis. The Benjamini-Hochberg (BH) FDR procedure provides a less conservative approach while still controlling the expected proportion of false positives among significant findings [32]. For confirmatory analyses requiring strict control of false positives, Bonferroni correction or Tukey's HSD remain appropriate [32].
Experimental Protocols and Data Presentation
Protocol 1: Sigma Metric Calculation for QC Validation
Purpose: To quantitatively assess analytical performance of laboratory tests using Six Sigma methodology [25] [31].
Materials:
- Internal Quality Control (IQC) data (minimum 20 measurements) [33]
- External Quality Assessment (EQA) data for bias calculation [31]
- Total Allowable Error (TEa) sources (CLIA, biological variation, or state-of-the-art specifications) [23]
Procedure:
- Calculate Imprecision: Compute coefficient of variation (CV%) from IQC data: CV% = (Standard Deviation / Mean) × 100 [25] [31]
- Determine Bias: Calculate percentage bias from EQA or method comparison studies: Bias% = [(Laboratory Mean - Target Value) / Target Value] × 100 [25] [31]
- Select TEa: Choose appropriate total allowable error based on intended use of test [23]
- Compute Sigma Metric: Apply formula: σ = (TEa - Bias%) / CV% [25] [31]
- Categorize Performance:
Protocol 2: Implementation of Risk-Based Multistage QC Strategy
Purpose: To establish a QC strategy that minimizes false rejections while maintaining error detection capability [23].
Materials:
- Sigma metric data for all tests
- Daily workload statistics
- QC validation software or power function graphs
Procedure:
- Categorize Tests by Sigma Performance:
Determine Sample Run Size:
Design Startup QC Rules:
Design Monitor QC Rules:
Validate Using Power Function Graphs:
- Verify that selected rules meet Ped and Pfr thresholds [23]
- Adjust as necessary based on actual performance
Table 1: Sigma-Based QC Rule Selection Guidelines
| Sigma Value | Performance Category | Recommended QC Rules | Expected Pfr | Expected Ped |
|---|---|---|---|---|
| ≥ 6 | World-class [31] | 1(_{3.5s}) N=2 [23] | < 0.01 | > 0.90 |
| 5-6 | Good [31] | 1({3s})/2({2s}) N=4 [23] | 0.02-0.05 | 0.80-0.90 |
| 4-5 | Marginal [31] | 1({3s})/2({2s})/R(_{4s}) N=4 [25] [23] | 0.03-0.06 | 0.70-0.85 |
| < 4 | Unacceptable [31] | Multirule with increased frequency [25] | > 0.05 | < 0.70 |
Table 2: Cost-Benefit Analysis of Sigma-Based QC Optimization
| Cost Category | Before Optimization | After Optimization | Reduction (%) |
|---|---|---|---|
| Internal Failure Costs (INR) [25] | 1,003,616.16 | 501,808.08 | 50% |
| External Failure Costs (INR) [25] | 374,205.60 | 187,102.80 | 47% |
| Total Annual Savings (INR) [25] | - | 750,105.27 | - |
| False Rejection Rate [23] | > 5% | ≤ 5% | > 50% |
Visualizations
Six Sigma QC Implementation Workflow
Multistage QC Strategy Diagram
The Scientist's Toolkit: Research Reagent Solutions
Table 3: Essential Materials for Six Sigma QC Implementation
| Item | Function | Application Notes |
|---|---|---|
| Third-Party QC Materials [25] [31] | Independent assessment of analytical performance without manufacturer bias | Use same lot for extended period to minimize variation; Biorad Unity recommended [25] |
| Multichem S Plus & U Controls [23] | Multianalyte quality control for clinical chemistry analyzers | Provides multiple concentration levels for precision and accuracy evaluation |
| PreciControl CARD, PCT, TN [23] | Specialized controls for specific testing platforms | Platform-specific controls ensure optimal performance verification |
| EQA/PT Samples [31] | External verification of accuracy and bias estimation | Use samples with concentrations comparable to IQC materials [31] |
| Calibrators [31] | Establishment of accurate measurement scales | Use manufacturer-matched calibrators for optimal performance |
| Six Sigma Calculation Software [25] | Automated sigma metric computation and QC rule selection | Biorad Unity 2.0 software enables efficient QC validation [25] |
In the context of optimizing quality control procedures to reduce false rejection rates in research, Root Cause Analysis (RCA) provides a systematic framework for identifying the fundamental sources of errors. False rejections, where acceptable samples or results are incorrectly flagged as erroneous, can significantly impede research progress, consume valuable resources, and compromise data integrity. For researchers, scientists, and drug development professionals, implementing structured RCA tools is paramount for enhancing the reliability and efficiency of experimental workflows. This guide focuses on two powerful RCA tools—the Fishbone Diagram and Pareto Analysis—providing detailed methodologies for their application in a research setting to pinpoint and eliminate the root causes of false rejections and other experimental errors.
Understanding the Core Tools
The Fishbone Diagram
Also known as an Ishikawa or cause-and-effect diagram, a Fishbone Diagram is a visual tool that helps teams systematically identify and categorize all potential causes of a problem (the effect) [34]. Its structure resembles a fish skeleton, with the problem statement at the "head" and potential causes branching off from the central "spine" into major categories [34]. This tool is exceptionally valuable for structuring brainstorming sessions and ensuring no potential source of error is overlooked, making it ideal for investigating complex issues like false rejection rates where multiple factors may be involved.
Pareto Analysis
A Pareto Chart is a bar graph that ranks factors related to a problem in decreasing order of frequency or impact [35]. It is based on the Pareto Principle, often called the 80/20 rule, which suggests that roughly 80% of problems are due to 20% of the causes [36]. By visually highlighting the most significant factors, it allows research teams to prioritize their efforts on the few causes that will have the greatest impact on reducing false rejections, thereby optimizing resource allocation and improvement time.
Detailed Methodologies and Experimental Protocols
Protocol for Creating and Using a Fishbone Diagram
The following procedure, adapted from quality management best practices, can be used to investigate the root causes of false rejection rates in your research processes [34].
Step 1: Define the Problem Statement Convene a team with firsthand knowledge of the process. Collaboratively agree on a clear and specific problem statement. For example: "15% false rejection rate in HPLC analysis of compound X during Q3 quality checks." Write this problem statement in a box on the right side of a whiteboard or digital canvas; this is the "fish's head."
Step 2: Identify Major Cause Categories Draw a horizontal arrow (the "spine") pointing to the problem statement. Then, decide on the main categories of causes. While Ishikawa's original "6 Ms" (Materials, Machinery, Methods, Measurement, Manpower, Mother Nature) are a common starting point, adapt them to your research context [34]. For a laboratory setting, relevant categories might be:
- Methods: Standard Operating Procedures (SOPs), protocols, techniques.
- Materials: Reagents, solvents, samples, consumables.
- Equipment: Instruments (e.g., HPLC, mass spectrometer), calibration, maintenance.
- Measurement: Data analysis algorithms, acceptance criteria, threshold settings.
- Personnel: Training, technique, experience.
- Environment: Laboratory temperature, humidity, lighting, contamination.
Draw these categories as branches emanating from the main spine.
Step 3: Brainstorm Potential Causes For each category, brainstorm all possible causes that could contribute to the false rejection rate. Ask "Why does this happen?" for each category. Be succinct in your descriptions.
- Example for "Methods": "Sample preparation time exceeds SOP specification."
- Example for "Measurement": "Calibration curve generated with degraded standard."
Write each cause as a smaller branch off the relevant main category branch.
Step 4: Drill Down to Root Causes For each cause identified, ask "Why?" again to delve deeper. This helps move from symptoms to root causes.
- Example:
- Cause: "Sample preparation time exceeds SOP specification."
- Why? "Centrifuge is frequently overloaded with samples."
- Why? "Only one centrifuge is available for high-throughput experiments." This final point is a more fundamental, addressable root cause. Add these sub-causes as smaller branches, creating layers of detail.
Step 5: Analyze and Prioritize Once all ideas are exhausted, analyze the diagram. Identify causes that appear repeatedly or those that the team agrees are most likely to be significant. These become the candidates for further investigation and data collection. The final output provides a comprehensive map of all suspected causes.
Protocol for Creating and Using a Pareto Chart
This protocol guides you through creating a Pareto Chart to prioritize the causes identified from a tool like the Fishbone Diagram [35].
Step 1: Define the Data Categories and Measurement Decide on the categories you will measure (e.g., types of errors leading to false rejections: "Peak Integration Error," "Calibration Drift," "Contaminated Blank," etc.). Choose an appropriate measurement, such as frequency (count of occurrences) or cost (lost time or materials). Define the data collection period (e.g., one week, one month, or 100 experimental runs).
Step 2: Collect and Tally Data Create a check sheet to collect data over the predetermined period. Tally the number of occurrences or the cost associated with each error category.
Step 3: Construct the Bar Chart List the categories in descending order of frequency/cost on the horizontal (x) axis. The vertical (y) axis on the left represents the count or cost. Construct a bar for each category, with the height corresponding to its measured value.
Step 4: Add the Cumulative Line (Optional but Recommended) Calculate the percentage each category contributes to the total. Then, calculate the cumulative percentage from left to right.
- Example: If "Peak Integration Error" represents 50 out of 100 total errors, it is 50%. The first bar is 50%.
- If "Calibration Drift" is 25, its percentage is 25%, and its cumulative percentage is 50% + 25% = 75%. Add a dot above the second bar at the 75% mark. Continue this for all categories. Connect the dots with a line graph. Add a second vertical axis on the right representing the cumulative percentage (0% to 100%).
Step 5: Analyze the Chart The Pareto Chart will visually identify the "vital few" categories that account for the majority of the problem. Focus your improvement efforts on these top categories for the greatest return on investment.
Troubleshooting Guides and FAQs
FAQ 1: When should I use a Fishbone Diagram versus a Pareto Chart?
These tools are often used together, not as alternatives [37]. Use a Fishbone Diagram during the initial brainstorming phase when you need to explore all possible causes of a complex problem with multiple potential sources [34]. Use a Pareto Chart after you have identified potential causes and collected data, to help you prioritize which of those causes to address first [35]. A common workflow is to use the Fishbone Diagram to generate a list of hypotheses, then collect data on the frequency of those issues, and finally use a Pareto Chart to visualize which hypotheses are the most significant.
FAQ 2: What are the most common pitfalls when using the Fishbone Diagram and how can I avoid them?
- Pitfall 1: Vague Problem Statement. A statement like "bad results" is too broad.
- Solution: Be specific and quantitative. For example: "False rejection rate exceeds 5% threshold due to unexplained variance in absorbance readings."
- Pitfall 2: Blaming People. The "Personnel" category can easily devolve into blaming individuals.
- Solution: Focus on process-oriented root causes behind human error, such as "inadequate training on new software," "ambiguous SOP," or "high workload leading to fatigue," rather than "technician is careless."
- Pitfall 3: Stopping at Symptoms. The team may list symptoms (e.g., "instrument gives noisy baseline") rather than root causes.
- Solution: Persistently use the "5 Whys" technique [38]. Ask "why" repeatedly until you reach a fundamental process or system failure. For example: Noisy baseline -> Why? Unstable power supply -> Why? Lack of a dedicated voltage regulator for sensitive equipment.
FAQ 3: The 80/20 rule didn't hold in my Pareto Analysis. Did I do something wrong?
Not necessarily. The 80/20 ratio is a guideline, not a rigid law [36]. The core purpose of the Pareto Chart is to separate the "significant few" from the "trivial many." Your analysis is still valid if it clearly shows that a small number of categories are responsible for a disproportionately large share of the problem, even if the ratio is 70/30 or 90/10. The chart's value is in its ability to direct your attention objectively.
FAQ 4: How can I ensure my RCA leads to sustainable solutions and not just a one-time fix?
Identifying the root cause is only half the battle. To create a sustainable solution:
- Verify the Root Cause: Before implementing a change, confirm the suspected root cause with data. For example, if you suspect a specific reagent lot is the problem, test with a new lot and compare results.
- Implement Corrective Actions: Design actions that eliminate the root cause, such as updating an SOP, modifying a calibration schedule, or implementing new training.
- Implement Preventive Actions: Modify management systems to prevent recurrence, such as adding a reagent quality check upon arrival or installing a voltage regulator.
- Monitor and Track: After implementation, continue to monitor the false rejection rate to ensure it remains low. Use control charts to track process performance over time.
Data Presentation and Comparison Tables
Table 1: Comparison of Fishbone Diagram and Pareto Analysis
| Feature | Fishbone (Ishikawa) Diagram | Pareto Chart |
|---|---|---|
| Primary Purpose | Identify and categorize all potential causes of a problem [34]. | Prioritize the most significant causes based on frequency or impact [35]. |
| Nature of Tool | Qualitative, visual brainstorming tool. | Quantitative, data-driven ranking tool. |
| Best Used When | Dealing with complex problems with unknown causes; during team brainstorming sessions [34]. | You have data on error frequencies and need to decide where to focus improvement efforts [35]. |
| Typical Output | A structured diagram showing a wide range of possible causes grouped into categories. | A bar chart showing a ranked list of causes, often revealing the "vital few." |
| Key Advantage | Promotes systematic thinking and prevents overlooking potential causes [34]. | Objectively directs resources to the areas that will have the greatest impact [37]. |
Table 2: Common RCA Tools and Their Applications
| Tool | Key Advantage | Best For |
|---|---|---|
| Fishbone Diagram | Visually organizes complex relationships between potential causes [34]. | Complex problems with multiple, interconnected potential causes. |
| Pareto Chart | Prioritizes key drivers based on empirical data [35] [37]. | Identifying which issues will deliver the highest ROI when solved. |
| 5 Whys | Simple, fast analysis to drill down to a root cause [38]. | Relatively straightforward problems with a likely linear cause-and-effect chain. |
| FMEA | Proactively identifies and prevents potential failure modes [38]. | High-risk processes where prevention is critical, such as new assay development. |
| Scatter Plot | Determines if a relationship exists between two variables [39]. | Investigating potential correlations, e.g., between room temperature and rejection rate. |
Visualization of Methodologies
Fishbone Diagram Creation Workflow
Pareto Analysis Procedure
The Scientist's Toolkit: Essential Research Reagent Solutions
The following table details key materials and reagents commonly used in quality control research, particularly in fields like drug development, where precise and reliable results are critical. Understanding their function is essential for troubleshooting root causes related to materials.
Table 3: Key Research Reagent Solutions for Quality Control
| Item | Function in Research & Quality Control |
|---|---|
| Certified Reference Materials (CRMs) | Provides a highly characterized standard with known properties and purity. Used to calibrate instruments, validate methods, and ensure the accuracy and traceability of measurements, directly impacting false acceptance/rejection rates. |
| High-Purity Solvents & Reagents | The foundation of sample preparation and analysis. Impurities can cause interference, baseline noise, or unexpected reactions, leading to inaccurate readings and false rejections. Using HPLC or MS-grade solvents minimizes this risk. |
| Stable Isotope-Labeled Internal Standards | Used in mass spectrometry to correct for sample loss during preparation and matrix effects. By adding a known quantity of a labeled analog of the analyte, researchers can achieve more precise and accurate quantification, reducing variability-based rejections. |
| Quality Control (QC) Samples | Prepared samples with known concentrations of the analyte(s) of interest. They are run alongside experimental samples to monitor the performance of the assay. Trends in QC data can signal instrument drift, reagent degradation, or other issues causing false results. |
| Enzymes & Biological Reagents | In biochemical assays, the specificity and activity of enzymes (e.g., proteases, kinases) are critical. Using reagents from qualified suppliers with documented performance data ensures consistent assay behavior and reduces run-to-run variability. |
Total Quality Control (TQC) is a comprehensive management approach that focuses on improving quality at every organizational level and process stage, emphasizing defect prevention over detection and continuous improvement [40]. In research and drug development, a critical objective of TQC is to reduce false rejection rates—instances where acceptable data or products are incorrectly flagged as failures. High false rejection rates lead to wasted resources, unnecessary troubleshooting, and delayed project timelines [41]. Optimizing TQC requires a balanced integration of statistical components (quantitative process control) and non-statistical components (human factors and systematic processes) to ensure reliability and efficiency [40] [41].
Troubleshooting Guides
Troubleshooting High False Rejection Rates in QC Results
Problem: The quality control (QC) system indicates an out-of-control situation, suggesting a high rate of false rejections.
Investigation & Resolution Protocol:
Step 1: Verify the Signal: Determine if the out-of-control signal is valid or a false rejection. Consult the table below to understand the false rejection characteristics of different statistical rules [41].
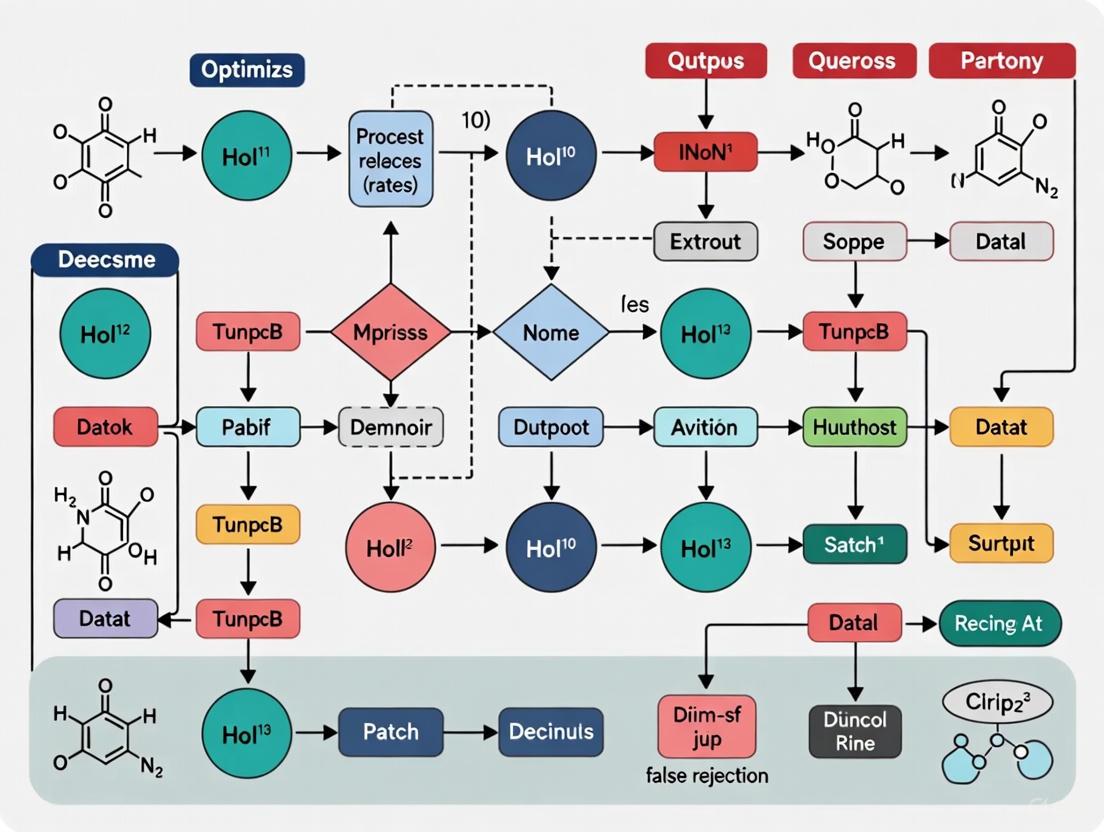
Step 2: Systematic Root Cause Analysis: Do not automatically repeat the control test or open a new control vial without investigation, as these are common bad habits that mask underlying problems [41]. Instead, use a structured approach. The diagram below outlines the logical workflow for troubleshooting.
Figure 1: Troubleshooting high false rejection rates workflow.
Step 3: Investigate Common Causes:
- Process Calibration: Investigate if frequent recalibration is masking an instrument malfunction or sub-optimal reagent quality [41].
- Control Material: Confirm proper reconstitution, storage conditions, and expiration dates if a control issue is suspected [41].
- Operator Technique: Review adherence to standardized protocols and manufacturer's maintenance schedules [41].
Step 4: Implement and Monitor: Apply the corrective action and closely monitor key performance indicators to confirm the false rejection rate has been reduced [40].
Troubleshooting Resistance to TQC Implementation
Problem: Employee and management resistance hinders the adoption of integrated TQC strategies, undermining their effectiveness.
Investigation & Resolution Protocol:
- Step 1: Diagnose the Root Cause: Common causes include lack of understanding, fear of change, or previous negative experiences with quality initiatives [40] [42].
- Step 2: Implement Corrective Actions:
- Strong Leadership Commitment: Secure visible, unwavering commitment from senior management to drive the quality culture [40] [42].
- Effective Communication: Clearly communicate the vision, benefits, and expectations of the TQC program to all employees [43] [42].
- Comprehensive Training: Provide continuous training on TQC principles, tools, and the specific roles employees play in quality improvement [40] [44].
- Employee Empowerment: Involve employees in quality efforts and decision-making to foster ownership and accountability [43] [44].
Frequently Asked Questions (FAQs)
Q1: What is the difference between a false rejection and a true quality failure? A false rejection occurs when an acceptable product or result is incorrectly flagged as being out of control by the QC system, often due to an overly sensitive statistical rule. A true quality failure indicates that the product or process has genuinely deviated from its specified quality standards and requires corrective action [41].
Q2: How do different Statistical Process Control (SPC) rules affect false rejection rates? The choice of SPC rule significantly impacts the false rejection rate. The table below summarizes the false rejection rates for different rules [41]:
| SPC Rule | Description | False Rejection Rate (for N=1 control material) |
|---|---|---|
| 12s Rule | A single control measurement exceeds ±2 standard deviations | 5% |
| 12.5s Rule | A single control measurement exceeds ±2.5 standard deviations | ~1-2% (Estimated) |
| 13s Rule | A single control measurement exceeds ±3 standard deviations | 0.3% |
Q3: What are the most critical non-statistical factors for successful TQC integration? The most critical factors are strong leadership commitment, a culture of continuous improvement, and organization-wide employee engagement [40] [43] [42]. Without these, even the most sophisticated statistical tools will be ineffective.
Q4: How can we sustain a TQC culture long-term? Sustain a TQC culture by embedding quality principles into performance management and recognition systems, providing ongoing training, and maintaining consistent communication about quality goals and successes [44] [42].
Experimental Protocols for Key TQC Experiments
Protocol: Evaluating SPC Rules for False Rejection Rate Reduction
Objective: To quantitatively assess and compare the false rejection rates of different SPC rules in a controlled laboratory setting.
The Scientist's Toolkit: Key Research Reagent Solutions
| Item | Function in Experiment |
|---|---|
| Stable Control Material | Provides a consistent signal with known performance characteristics to test SPC rules without introducing process variation. |
| Calibrated Analyzer | The primary instrument for generating measurement data; must be properly maintained and calibrated. |
| Data Logging Software | Essential for accurately and automatically recording all measurement results for subsequent statistical analysis. |
| Statistical Analysis Package | Software capable of performing statistical calculations and applying different SPC rules to the dataset. |
Methodology:
- Setup: Use a stable control material and a properly calibrated analyzer.
- Data Collection: Over a defined period, run the control material repeatedly (e.g., 100 times) under consistent conditions to generate a baseline dataset.
- Rule Application: Apply different SPC rules (e.g., 12s, 13s) to the collected data.
- Analysis: For each rule, count the number of times an "out-of-control" signal is generated. Since the process is stable, these signals represent false rejections.
- Calculation: Calculate the false rejection rate for each rule as (Number of False Rejections / Total Number of Runs) * 100.
- Validation: Compare the empirically calculated rates against theoretical values to validate your QC protocol.
Protocol: Assessing the Impact of Non-Statistical TQC Components
Objective: To measure the effect of structured training and clear communication on the reduction of human-error-related false rejections.
Methodology:
- Baseline Phase: Monitor and record the frequency of QC failures and investigation logs over a one-month period without intervention.
- Intervention Phase: Implement a targeted training program for staff on TQC principles, proper instrument use, and troubleshooting techniques. Establish clear, formal communication channels for reporting issues [42] [45].
- Post-Intervention Phase: Continue monitoring QC failure rates and investigation outcomes for another month.
- Data Analysis: Compare the rate of false rejections attributed to human error between the baseline and post-intervention phases using statistical methods (e.g., chi-square test). Employee feedback on clarity and empowerment should also be gathered qualitatively.
Integrated TQC System Workflow
A successful TQC strategy seamlessly blends statistical and non-stathematical elements. The following diagram depicts this integrated system, showing how all components work together to reduce false rejection rates and achieve quality objectives.
Figure 2: Integrated TQC system with statistical and non-statistical components.
Practical Strategies for Troubleshooting and Continuous QC Improvement
Troubleshooting Guides
Guide 1: Resolving High False Rejection Rates in QC Procedures
Problem: The quality control (QC) procedure is rejecting an unacceptably high number of valid runs, leading to increased reagent use, labor costs, and delayed turnaround times.
Symptoms:
- A high frequency of QC results triggering rejection rules despite no identifiable analytical error.
- Increased costs for control materials, reagents, and labor due to unnecessary reruns [25].
- Delays in reporting patient results and extended turnaround times (TAT).
Investigation & Resolution:
- Step 1: Calculate Sigma Metrics for Each Assay
- Methodology: For each test parameter, calculate the sigma metric using the formula: σ = (TEa% – Bias%) / CV% [25].
- Interpretation: A sigma value >6 indicates world-class performance, <3 indicates inadequate performance requiring method improvement, and values in between need carefully selected QC rules [25].
- Step 2: Select QC Rules Based on Sigma Performance
- Protocol: Use a tool like the Westgard Sigma Rules with Biorad Unity 2.0 software or a rules selection grid [25].
- Action:
- For high sigma (σ ≥ 6) assays: Use simple rules like 1
3swith 2 control measurements (N=2). - For lower sigma (e.g., 3-6) assays: Implement multi-rules (e.g., 1
3s/22s/R4s) to improve error detection.
- For high sigma (σ ≥ 6) assays: Use simple rules like 1
- Step 3: Validate and Monitor the New Rule
Guide 2: Addressing a High Volume of Out-of-Control Signals
Problem: The control chart is generating more out-of-control (OOC) signals than can be reasonably investigated, leading to "alert fatigue" and wasted resources.
Symptoms:
- Multiple OOC signals per day with no assignable cause found [46].
- Resources are depleted chasing "statistical phantoms" [46].
Investigation & Resolution:
- Step 1: Diagnose the Cause of Multiplicity
- Case 1: Multiplicity by Correlation: A single process fault affects multiple correlated product properties, creating multiple signals from one root cause [46].
- Case 2: Test/Data Multiplicity: A high frequency of data collection (e.g., a measurement every 4 minutes) increases the probability of false alarms by chance alone [46].
- Case 3: Parameter Multiplicity: Control charting a large number of parameters (e.g., 40) simultaneously increases the overall risk of a false OOC signal [46].
- Step 2: Implement Solutions for Multiplicity
- For Cases 2 & 3: Adjust the control limits. Increase the sigma multiplier (e.g., to 3.5 or 4) to widen the control limits, reducing false alarms while still capturing significant process failures [46].
- For Case 1: Use dimensionality reduction algorithms to create a single, multi-parameter control chart. A hybrid approach maintains individual charts with wider limits alongside the multi-parameter chart [46].
Guide 3: Managing Unacceptable Specimen Rejection Rates in the Pre-Analytical Phase
Problem: A high percentage of specimens are rejected upon receipt in the laboratory due to pre-analytical errors.
Symptoms:
- The monthly specimen rejection rate is higher than the national benchmark (e.g., 1.13% vs. 0.27%) [30].
- Patient discomfort from repeated blood draws and delays in diagnosis and treatment [30].
Investigation & Resolution:
- Step 1: Analyze Current State with Quality Control Circle (QCC)
- Methodology: Form a cross-functional team (lab, nursing, administration). Use a PDCA (Plan-Do-Check-Act) cycle and create a cause checklist (5W1H: Who, What, When, Where, Why, How) [30].
- Protocol: Perform Pareto analysis on rejection data to identify the "vital few" causes (e.g., lack of sample collection information, blood clotting) [30].
- Step 2: Conduct Root Cause Analysis
- Use a Fishbone (Cause-and-Effect) diagram to categorize contributing factors (People, Equipment, Policy, Materials) for the main errors [30].
- Step 3: Implement Targeted Interventions
Frequently Asked Questions (FAQs)
Q1: My process is stable, but I keep getting out-of-control signals based on the Western Electric rules. What's happening? This is likely due to multiplicity [46]. If you are monitoring a large number of parameters or collecting data at a very high frequency, the statistical risk of a false alarm increases. To address this, consider widening your control limits by using a larger sigma multiplier (e.g., 3.5σ) or implementing a hybrid approach with multi-parameter charts [46].
Q2: What are the concrete financial benefits of optimizing my statistical control rules? Optimizing QC rules based on sigma metrics directly reduces two types of costs [25]:
- Internal Failure Costs: Costs associated with rerunning controls and patient samples. One study reported a 50% reduction (saving INR 501,808) in these costs [25].
- External Failure Costs: Costs arising from undetected errors leading to incorrect diagnoses and further unnecessary tests. The same study reported a 47% reduction (saving INR 187,103) in these costs [25].
Q3: Beyond the classic 12s/13s rules, what other patterns indicate an out-of-control process?
Control charts can signal a loss of statistical control through several patterns, including [47]:
- Seven or more consecutive points steadily increasing or decreasing (a trend).
- Eight consecutive points on one side of the centerline (a shift).
- Fourteen consecutive points alternating up and down (a systematic oscillation).
- Two out of three consecutive points in Zone A (the region between 2σ and 3σ) or beyond.
- Four out of five consecutive points in Zone B (the region between 1σ and 2σ) or beyond.
Q4: How can I systematically reduce errors that occur before the analysis (pre-analytical errors)? Implementing a Quality Control Circle (QCC) initiative is an effective method [30]. This involves a structured, cross-departmental team that uses quality tools like flowcharts, Pareto analysis, and Fishbone diagrams to identify root causes and implement targeted interventions, such as standardized training and improved communication channels, which have been shown to reduce rejection rates from 1.13% to 0.27% [30].
Experimental Protocols & Data
Protocol 1: Implementing a Sigma-Metric QC Optimization Study
Objective: To reduce false rejection rates and associated costs by implementing sigma metric-based QC rules.
Materials: See "Research Reagent Solutions" table.
Methodology:
- Data Collection: Over a one-year period, collect daily Internal Quality Control (IQC) data for all analytes. Participate in an External Quality Assessment Scheme (EQAS) [25].
- Calculate Performance Metrics:
- Sigma Calculation: For each analyte, compute Sigma = (TEa - Bias%) / CV% [25].
- QC Rule Selection: Use software (e.g., Biorad Unity 2.0) or a Westgard Sigma Rules grid to select appropriate QC rules and frequency (N) based on each analyte's sigma value [25].
- Validation: Run a validation study comparing the false rejection rate (Pfr) and error detection (Ped) of the new rules against the old protocol [25].
- Cost-Benefit Analysis: Track costs related to reagents, controls, and labor for reruns before and after implementation to compute absolute and relative savings [25].
Quantitative Data from a Clinical Biochemistry Lab Optimization Study
Table 1: Annualized Cost Savings after Implementing Sigma-Based QC Rules [25]
| Cost Category | Description of Costs | Savings after Implementation (INR) | Relative Reduction |
|---|---|---|---|
| Internal Failure Costs | Reruns of controls & patient samples, reagent waste, labor | 501,808.08 | 50% |
| External Failure Costs | Incorrect diagnostics, additional confirmatory tests | 187,102.80 | 47% |
| Total Combined Savings | 750,105.27 |
Table 2: Sigma Metrics and Implied QC Strategy for Example Analytes [25]
| Analyte | Sigma Performance (σ) | Implied QC Strategy & Rule Selection |
|---|---|---|
| Cholesterol, Glucose | > 6 (World-Class) | Minimal QC effort required. Use simple rules with N=2. |
| Many Routine Chemistries | 3 - 6 (Adequate to Good) | Use multi-rules for better error detection (e.g., 13s/22s/R4s). |
| Alkaline Phosphatase | < 3 (Inadequate) | Stricter control rules are needed, but method improvement is the priority. |
Visual Workflows
Sigma-Based QC Optimization Workflow
Multi-Agent Framework for Complex Query Generation
The Scientist's Toolkit: Research Reagent Solutions
Table 3: Key Materials and Tools for QC Optimization Experiments
| Item | Function / Application in Research | Example from Literature |
|---|---|---|
| Third-Party Assayed Controls | Used to monitor analytical performance and calculate CV% and Bias% independently of reagent manufacturers. | Biorad Lyphocheck Clinical Chemistry Control [25] |
| QC Validation Software | Software tools used to model and identify optimal statistical QC rules and procedures based on assay performance. | Biorad Unity 2.0 Software [25] |
| External Quality Assessment (EQA) Scheme | Provides an external target for calculating Bias%, essential for determining the accuracy of an assay. | CLIA criteria, RCPA, Biological Variation database [25] |
| Graph-Informed Adversarial Framework | A computational framework for generating diverse and complex test queries to challenge and calibrate systems. | Used in FalseReject dataset generation for LLM safety evaluation [48] |
| Quality Control Circle (QCC) Tools | Structured problem-solving tools used to analyze processes, identify root causes, and implement solutions. | Flowcharts, Pareto Analysis, Fishbone (Cause-and-Effect) Diagrams [30] |
Frequently Asked Questions (FAQs)
Q1: What is threshold tuning and why is it critical in quality control and machine learning? Threshold tuning is the process of adjusting the decision boundary used by a classification model or a quality control (QC) rule to distinguish between different classes, such as "in-control" and "out-of-control" processes, or "positive" and "negative" results. It is critical because a fixed, universal threshold (e.g., 0.5) often fails to account for variations in data characteristics across different subgroups or analytical contexts [49]. Optimizing this threshold is essential for balancing key performance metrics; it can enhance predictive accuracy, boost recall, refine decision boundaries, and directly reduce false rejection rates (Pfr), which is a core objective in quality control procedure optimization [50] [25].
Q2: How can threshold optimization specifically help reduce costs in a clinical laboratory? Implementing optimized, context-specific QC rules based on sigma metrics can lead to substantial financial savings by reducing both internal and external failure costs. A 2025 study demonstrated that applying tailored Westgard sigma rules to 23 biochemistry parameters resulted in an absolute annual saving of INR 750,105.27. This was achieved by cutting internal failure costs by 50% (e.g., costs of reruns, reagents, and labor for repeats) and reducing external failure costs by 47% (e.g., costs associated with incorrect diagnoses and further patient care triggered by erroneous results) [25].
Q3: What are the common challenges when using a single, fixed universal threshold? A primary challenge is performance discrepancy across subgroups. For instance, an AI-text detector using a fixed threshold makes more false positive errors on shorter human-written texts than on longer ones. Similarly, writing styles characterized by openness are more likely to be misclassified as AI-generated than neurotic styles [49]. In clinical QC, a one-size-fits-all rule can lead to a high false rejection rate, causing unnecessary repeats, increased reagent use, longer turnaround times, and higher operational costs without improving error detection [51] [25].
Q4: What are some advanced algorithms used for optimization in complex modeling scenarios? The choice of optimization algorithm often depends on model and data complexity. For general-purpose optimization of biogas prediction routines, Bayesian Search is highly recommended [52]. For simpler scenarios, a 50-step optimization process may be sufficient. However, for complex scenarios involving models like Recurrent Neural Networks (RNNs) on dynamic datasets, more powerful optimizers are needed. Studies show that a meta-tuned Genetic Algorithm (GA) can outperform others, and Differential Evolution and Particle Swarm Optimization (PSO) with time-varying acceleration also deliver strong performance, particularly with steady-state data [52].
Troubleshooting Guides
Guide 1: Troubleshooting High False Rejection Rates in Laboratory QC
A high false rejection rate (Pfr) wastes resources and reduces laboratory efficiency. This guide helps diagnose and resolve common causes.
- Problem: The QC procedure is triggering out-of-control (OOC) events too frequently, leading to excessive repeats of control and patient samples, but no systematic error is found.
- Symptoms: High consumption of control materials and reagents; prolonged turnaround times; frustrated laboratory staff.
- Investigation and Resolution Steps:
| Step | Action | Investigation Question | Potential Resolution |
|---|---|---|---|
| 1 | Check Current QC Rules | Are you using a 2SD rule for rejection? | Stop using 2SD for rejection. A 2025 global survey found 52% of labs use 2SD for all testing, which drastically increases Pfr [51]. Use it only as a warning rule. |
| 2 | Evaluate Sigma Performance | What are the sigma metrics for the underperforming analyte? | Implement sigma-based QC rules. Use software (e.g., Bio-Rad Unity) to select rules that provide high Ped (≥90%) and low Pfr (≤5%). For a sigma >4, a multi-rule procedure like 13s/22s/R4s is often effective [25]. |
| 3 | Review QC Material & Setup | Are you using the manufacturer's mean and SD? | Switch to lab-calculated mean and SD. Using actual, lab-calculated values for controls (a practice adopted by nearly 70% of labs as of 2025) improves the accuracy of control limits and reduces false OOCs [51]. |
Guide 2: Troubleshooting Poor Performance in AI Classification Models
When a machine learning model for classification (e.g., predicting adverse drug events) shows poor recall or high false positives, suboptimal thresholding is often a culprit.
- Problem: A trained model has good overall accuracy but fails to identify critical positive cases (low recall) or has too many false positives, making it untrustworthy for clinical decision support.
- Symptoms: The model misses true positive cases (e.g., fails to flag patients at risk of Drug-Induced Immune Thrombocytopenia (DITP)); high false alarm rate leads to alert fatigue.
- Investigation and Resolution Steps:
| Step | Action | Investigation Question | Potential Resolution |
|---|---|---|---|
| 1 | Analyze Performance by Subgroup | Does model performance vary significantly by data segment? | Implement group-adaptive thresholds. Use methods like FairOPT to learn different thresholds for subgroups based on attributes like text length, patient age, or clinical history. This decreases balanced error rate (BER) discrepancy [49]. |
| 2 | Tune the Global Threshold | Is the default 0.5 threshold appropriate for your imbalanced dataset? | Optimize for a business metric. For a DITP prediction model, lowering the classification threshold to 0.09 significantly improved the F1-score to 0.341 during external validation, enhancing its clinical utility [53]. |
| 3 | Validate Optimization Algorithm | Is your hyperparameter and threshold optimization process effective for your model's complexity? | Select an appropriate optimizer. For simpler models, Bayesian Search is efficient. For complex models (e.g., RNNs), consider a meta-tuned Genetic Algorithm or Differential Evolution for better results [52]. |
Experimental Protocols & Data
Protocol 1: Implementing a Sigma-Metric Based QC Optimization
This methodology details how to transition from a generic QC rule to a cost-effective, sigma-based rule for a laboratory analyte [25].
Key Reagent Solutions:
| Item | Function in Experiment |
|---|---|
| Third-Party Assayed Controls (e.g., Biorad Lyphocheck) | Provides independent target values for calculating bias and imprecision. |
| Autoanalyzer (e.g., Beckman Coulter AU680) | Platform for running patient and control samples to generate primary data. |
| QC Validation Software (e.g., Biorad Unity 2.0) | Automates the calculation of sigma metrics and recommends optimal multi-rules. |
| Six Sigma Cost Worksheet | A tool for calculating internal and external failure costs before and after implementation. |
Step-by-Step Methodology:
- Data Collection: For each analyte, collect internal QC data (for CV%) over a significant period (e.g., one year).
- Calculate Sigma Metrics: Compute the sigma metric for each analyte using the formula: σ = (TEa% – Bias%) / CV%, where TEa can be sourced from CLIA guidelines.
- QC Validation Software Analysis: Input the sigma metrics into the QC validation software. The software will propose candidate QC rules (e.g., 13s with n=2) that meet the criteria of high probability of error detection (Ped ≥ 90%) and low probability of false rejection (Pfr ≤ 5%).
- Cost-Benefit Analysis: Use the Six Sigma Cost Worksheet to compute the internal failure costs (false rejection control cost, false rejection test cost, rework labor cost) and external failure costs for both the current and candidate QC rules.
- Implementation and Monitoring: Implement the candidate rule and monitor its performance, tracking OOC events and cost savings.
Protocol 2: Developing a Fairness-Aware ML Model with Threshold Optimization
This protocol outlines the process for developing a machine learning model with group-adaptive threshold optimization, as applied in predicting conditions like DITP [53] or in AI-text detection [49].
Step-by-Step Methodology:
- Cohort Definition and Feature Extraction: Define development and external validation cohorts. Extract relevant features from electronic medical records (e.g., demographics, lab values, drug exposures).
- Model Training: Train a probabilistic classifier (e.g., Light Gradient Boosting Machine - LightGBM). Evaluate initial performance using Area Under the Curve (AUC).
- Subgroup Partitioning: Partition the validation data into subgroups (G1...Gi) based on critical attributes (e.g., for DITP, this could be baseline platelet count or renal function; for text, it's length and style).
- Apply FairOPT Algorithm: Instead of a single threshold, iteratively learn and adjust group-specific thresholds {θ(G1),…,θ(Gi)}. The optimization objective is to balance overall performance (e.g., F1-score) and fairness metrics (e.g., balanced error rate discrepancy across subgroups).
- External Validation & Decision Curve Analysis: Validate the model with the optimized group-specific thresholds on a completely independent cohort. Use decision curve analysis (DCA) to assess the clinical net benefit of the model.
Table 1: Financial Impact of QC Optimization in a Clinical Laboratory
Summary of annual savings after implementing sigma-based QC rules for 23 biochemistry parameters [25].
| Cost Category | Savings after Optimization (INR) | Percent Reduction |
|---|---|---|
| Internal Failure Costs | 501,808.08 | 50% |
| External Failure Costs | 187,102.80 | 47% |
| Total Absolute Savings | 750,105.27 | -- |
Table 2: Performance of Optimization Algorithms for ML Models
Comparison of optimization algorithm performance in tuning machine learning models for biogas prediction [52].
| Optimization Algorithm | Use Case Context | Model Accuracy / Performance |
|---|---|---|
| Bayesian Search | General biogas prediction routine | Recommended for general use |
| Meta-tuned Genetic Algorithm (GA) | Complex scenarios (e.g., RNN on dynamic data) | 99.2% (vs. 94.4% for non-meta-tuned) |
| Differential Evolution & PSO | Steady-state datasets | Good performance |
Workflow Diagrams
Threshold Optimization Workflow
QC Rule Optimization Pathway
In clinical laboratories, the pre-analytical phase is particularly error-prone, contributing to approximately 70% of laboratory errors [30]. High specimen rejection rates directly impact patient care by delaying diagnosis and treatment, causing patient discomfort, and increasing healthcare costs [30]. Effective cross-functional collaboration among nursing, laboratory, and administrative teams represents a powerful strategy to address these challenges, directly supporting the optimization of quality control procedures and the reduction of false rejection rates.
Research demonstrates that ineffective care coordination and underlying suboptimal teamwork processes constitute a significant public health issue [54]. In healthcare delivery systems, which exemplify complex organizations operating under high stakes, the coordination and delivery of safe, high-quality care demands reliable teamwork and collaboration across organizational, disciplinary, technical, and cultural boundaries [54]. This article explores how structured collaboration frameworks can significantly improve laboratory quality metrics.
Building an Effective Cross-Functional Team
Team Composition and Structure
A successful Quality Control Circle (QCC) initiative requires careful attention to team composition and structure. One effective approach involves forming a team of eight members with representation from all key stakeholder groups [30]:
- 5 personnel from the Clinical Laboratory
- 2 personnel from the Nursing Department
- 1 personnel from the Administration Department
This balanced representation ensures that all perspectives from the specimen journey are considered, from collection to processing and analysis.
Establishing Clear Goals and Shared Purpose
The primary objective for such a team should be focused and measurable: "Reducing the specimen rejection rate" due to its significant impact on sample analysis and subsequent delays in patient diagnosis and treatment [30]. Specimen rejection not only leads to longer turnaround times (TAT) but also hinders the timely provision of patient care, making it a critical concern for all departments involved.
Table 1: Impact of Specimen Rejection
| Consequence | Effect on Patients | Effect on Healthcare System |
|---|---|---|
| Diagnostic Delays | Postponed treatment decisions | Reduced capacity for timely care |
| Repeated Procedures | Patient discomfort, hematoma, iatrogenic anemia | Increased resource utilization |
| Reporting Delays | Extended anxiety and uncertainty | Compromised care coordination |
Troubleshooting Guides and FAQs: Addressing Common Collaboration Challenges
Pre-Analytical Phase Troubleshooting
Q: What are the most significant factors contributing to specimen rejection, and how can we address them?
A: Pareto analysis reveals that approximately 80% of specimen rejections typically stem from two primary factors: (1) lack of sample collection information and (2) blood clotting [30]. To address these issues:
- For information deficits: Implement a specimen collection liaison in each ward responsible for timely communication between departments [30]
- For blood clots: Provide standardized training to nursing staff on blood collection procedures, specifically specifying the number of inversions for blood collection tubes [30]
Q: How can we improve communication during transitions of care when specimen errors often occur?
A: Transitions of care represent high-risk interactions associated with approximately 28% of surgical adverse events [54]. Implement structured communication protocols including:
- Standardized documentation checklists
- Read-back procedures to verify understanding
- Escalation pathways for unresolved concerns
Cross-Functional Communication Troubleshooting
Q: How can we overcome communication barriers between different professional roles and hierarchies?
A: Hierarchy between professional roles can inhibit the assertive communication necessary for effective error recovery [54]. Strategies to mitigate this include:
- Establishing a culture of psychological safety where all team members feel empowered to speak up
- Using structured communication tools like SBAR (Situation-Background-Assessment-Recommendation)
- Implementing cross-training sessions to foster mutual understanding of role-specific challenges
Q: What approaches help when troubleshooting complex issues that span multiple departments?
A: Effective troubleshooting of complex issues requires both technical and human-centered approaches [55] [56]:
- Active listening: Don't interrupt; let the customer (or colleague) explain fully before responding [56]
- Effective questioning: Ask targeted, open-ended questions to uncover details not initially shared [56]
- Critical thinking: Break down problems into smaller parts and eliminate potential causes systematically [56]
Diagram 1: Cross-Functional Troubleshooting Workflow
Experimental Protocols and Quality Improvement Methodologies
The PDCA Cycle for Quality Improvement
The Plan-Do-Check-Act (PDCA) cycle provides a structured framework for implementing cross-functional quality improvements [30]:
- PLAN: Analyze current state using flowchart analysis and develop intervention strategies
- DO: Implement targeted interventions such as specimen collection liaisons and standardized training
- CHECK: Monitor specimen rejection rates and compare against baseline measurements
- ACT: Standardize successful practices and adjust approaches based on results
Analytical Tools for Process Improvement
Several analytical tools prove valuable for diagnosing root causes of quality issues:
Pareto Analysis: Apply the 80/20 principle to identify the vital few factors contributing to most specimen rejections [30]. In one implementation, this analysis revealed that lack of sample collection information and blood clots accounted for the majority of rejected specimens.
Fishbone (Cause-and-Effect) Diagram: Categorize contributing factors into key areas such as people, equipment, policy, and materials when analyzing why specific errors occur [30]. This visual tool helps cross-functional teams systematically explore all potential causes.
Diagram 2: Fishbone Diagram Structure for Specimen Rejection Analysis
Quantitative Results and Performance Metrics
Specimen Rejection Rate Improvement
Implementation of a Quality Control Circle initiative following the PDCA cycle can yield significant improvements in specimen rejection rates [30]:
Table 2: Specimen Rejection Rates Before and After QCC Implementation
| Time Period | Average Monthly Specimen Rejection Rate | Total Specimens | Statistical Significance |
|---|---|---|---|
| Before QCC (Jan 2021 - Jun 2021) | 1.13% | Not specified | p<0.001 |
| After QCC Implementation | 0.27% | Not specified | p<0.001 |
| National Benchmark | 0.27% | Not applicable | Reference standard |
The chi-square test for trend demonstrated a statistically significant linear decrease in rejection rates over time (Pearson correlation coefficient -0.43, p<0.001) following implementation of cross-functional collaboration strategies [30].
Impact of Specific Interventions
Targeted interventions produce measurable effects on different rejection causes:
Table 3: Effectiveness of Targeted Interventions
| Intervention Strategy | Primary Rejection Cause Addressed | Impact Measurement |
|---|---|---|
| Specimen Collection Liaisons | Lack of sample collection information | Improved communication effectiveness |
| Nursing Quality Control Team | Blood clotting and sample quality | Pre-testing quality oversight |
| Standardized Blood Collection Training | Blood clotting and improper collection | Reduced technique-related errors |
Successful cross-functional collaboration requires specific tools and resources to facilitate communication, problem-solving, and standardization:
Table 4: Research Reagent Solutions for Cross-Functional Collaboration
| Tool/Resource | Function | Application Context |
|---|---|---|
| Standard Operating Procedures (SOPs) | Documents specimen collection process and provides education | Standardizes procedures across departments [30] |
| 5W1H Checklist (Who, What, When, Where, Why, How) | Systematically categorizes and summarizes reasons for unacceptable samples | Root cause analysis of specimen rejection [30] |
| Pareto Analysis Chart | Identifies the most significant factors contributing to specimen rejection following the 80/20 principle | Data-driven prioritization of improvement efforts [30] |
| Fishbone Diagram | Visualizes cause-and-effect relationships for identified problems | Structured root cause analysis in team settings [30] |
| PDCA Cycle Gantt Chart | Outlines timeline and ensures structured approach to quality improvement | Project management of collaboration initiatives [30] |
| Communication Platform | Enables timely communication between laboratory and nursing staff | Issue resolution and process alignment [30] |
Effective cross-functional collaboration between nursing, laboratory, and administrative teams represents more than just a quality improvement tactic—it constitutes a fundamental component of a robust quality control system aimed at reducing false rejection rates. By implementing structured approaches such as Quality Control Circles, employing analytical tools for root cause analysis, and establishing clear communication channels, healthcare organizations can significantly improve specimen quality metrics.
The success of these initiatives demonstrates that quality in laboratory medicine is not merely a technical challenge but a collaborative endeavor requiring engagement across traditional departmental boundaries. As the healthcare landscape continues to evolve with increasing complexity, the ability to foster effective teamwork and collaboration will remain essential for delivering high-quality patient care and optimizing laboratory performance.
Technical Support Center
Troubleshooting Guides & FAQs
This section addresses common challenges researchers face when implementing automated quality control systems, helping to reduce false rejections and maintain data integrity.
Frequently Asked Questions
Q1: Our automated quality control system has a high false rejection rate. What are the primary causes?
A high false rejection rate often stems from overly sensitive quality rules or static thresholds that don't account for normal process variation [57]. To address this:
- Review and Adjust Rules: Analyze which rules trigger the most false rejects. Recalibrate them to focus on critical anomalies that truly impact data fitness for purpose [57] [58].
- Implement Adaptive Monitoring: Use solutions with AI-driven, adaptive monitoring rules that learn from data patterns and can distinguish between acceptable variance and actual defects, significantly reducing false positives [59].
Q2: How can we quickly identify the root cause of a data quality failure in a complex pipeline?
Leverage automated lineage tracking and impact analysis capabilities [57] [60].
- Use Bidirectional Lineage: Tools with detailed, bidirectional lineage allow you to trace an error backward to its source (root cause analysis) and forward to all affected dashboards or models (impact analysis) [57] [60].
- Centralized Logging: Implement a unified observability platform that centralizes logs from all data quality checks, making it easier to correlate events and pinpoint failure origins [60].
Q3: What is the best way to define data quality thresholds for our specific research context?
Avoid using only traditional, static metrics. Instead, adopt a "fitness-for-purpose" framework [57].
- Engage Stakeholders: Collaborate with researchers to define what "good data" means for each specific use case, model need, and risk threshold [57] [58].
- Business-Defined Rules: Create metadata-driven quality rules that align with business logic, not just technical schema. For example, define how fresh a data stream needs to be for a real-time fraud detection model versus a weekly report [57].
Q4: How can we ensure our quality control processes adapt to new data patterns without constant manual reprogramming?
Integrate AI and machine learning into your quality control framework [59].
- Streaming Active Learning: Deploy systems that use online active learning, which can cut labeling effort by 70% while boosting accuracy. These systems automatically generate tests and detect errors traditional methods miss [59].
- Self-Healing Capabilities: Utilize agentic AI platforms that understand intent and context. These systems can self-heal when tests break or UI changes occur, adapting dynamically without human intervention [59].
Experimental Protocols for QC Optimization
Protocol 1: Implementing a Proactive Data Quality Management Framework
This methodology provides a structured approach to shift from reactive data cleaning to proactive quality assurance [58].
Phase 1: Finding Focus
- Step 1: Impact Analysis: Identify Critical Data Elements (CDEs) that directly impact research outcomes and decisions. Quantify the cost of poor data quality on these elements [58].
- Step 2: Rule Creation: Develop targeted business rules for CDEs. Document what "fit-for-purpose" data looks like for each critical element [58].
- Step 3: Data Profiling & Assessment: Execute an initial assessment by profiling data against the new rules. Measure quality across different transformation layers (e.g., bronze, silver, gold in a medallion architecture) to find where issues are introduced or resolved [58].
Phase 2: Continuous Improvement
- Step 4: Remediation: Prioritize and fix high-impact, easy-to-resolve issues first. Use data lineage tools for root cause analysis [58].
- Step 5: Automated Monitoring & Validation: Set up automated checks and alerts for data quality thresholds. Use no-code/low-code tools to scale these checks efficiently [58].
- Step 6: Certification & Metrics: Define benchmarks and certify datasets that meet minimum quality thresholds. Integrate these certifications into a data catalog so users can instantly gauge data trustworthiness [58].
Protocol 2: Integrated Prioritization Strategy for Non-Target Screening (NTS) Data
This protocol, adapted from environmental analytics, is excellent for managing complex, high-dimensionality data common in research, helping to focus QC resources on the most relevant features [61].
- Step 1: Target and Suspect Screening (P1): Narrow candidates by matching features (e.g., m/z, retention time) against predefined databases of known or suspected compounds [61].
- Step 2: Data Quality Filtering (P2): Apply reliability-driven filters to remove artifacts, blanks, and unreliable signals based on replicate consistency and peak shape [61].
- Step 3: Process-Driven Prioritization (P4): Compare data from different process stages (e.g., control vs. experimental, upstream vs. downstream) to highlight features linked to the experimental intervention [61].
- Step 4: Effect-Directed Prioritization (P5): Integrate statistical models (e.g., partial least squares discriminant analysis) to link chemical features to biological or experimental endpoints, directly targeting bioactive or relevant components [61].
- Step 5: Prediction-Based Prioritization (P6): Use in silico models to predict concentrations and toxicities (or other relevant properties), calculating risk quotients to focus on features of highest concern, even without full structural elucidation [61].
The Scientist's Toolkit: Research Reagent Solutions
The following tools and platforms are essential for building a modern, automated, and proactive quality control ecosystem.
| Tool/Platform Name | Type | Primary Function in Proactive QC |
|---|---|---|
| Great Expectations [60] | Open-source Python Library | Enables data teams to define, document, and validate "expectations" for data as code, integrating directly into CI/CD pipelines. |
| Soda Core & Soda Cloud [60] | Open-source CLI & SaaS Platform | Provides a simple, collaborative framework for defining data quality checks and offers a cloud interface for monitoring and alerting. |
| Monte Carlo [60] | Data Observability Platform | Uses AI to automatically detect anomalies across data freshness, volume, and schema, providing end-to-end lineage. |
| Atlan [57] | Active Metadata Platform | Unifies data quality, discovery, lineage, and governance, using metadata to power automated policy enforcement and quality workflows. |
| OvalEdge [60] | Unified Governance Platform | Combines data cataloging, lineage visualization, and quality monitoring into a single platform with active metadata management. |
| Jidoka Kompass [59] | Industrial QC Platform | Provides deep learning-based visual inspection on edge devices for microscopic defect detection with minimal defect escape rates. |
| Celonis [62] | Process Mining Tool | Uses AI to analyze how business and data processes actually run, identifying bottlenecks and automation opportunities for optimization. |
| UiPath Autopilot [62] | Agentic AI Platform | Adds generative AI and agent-like capabilities to enterprise workflows, allowing systems to interpret context and make decisions. |
Quantitative Data for Proactive QC
Table 1: Impact of Advanced QC Technologies on Operational Metrics
| Metric | Traditional QC | With AI & Automation | Source |
|---|---|---|---|
| Defect Detection Rate | Baseline | Up to 90% improvement | [59] |
| Data Processing & Cleanup Time | >30% of analytics team time | Significantly reduced via automation | [60] |
| False Positives in Inspection | High | Reduced via continuous learning algorithms | [59] |
| Defect Escape Rate | Industry standard | ≤0.5% with deep learning on edge | [59] |
| Manual Intervention in Workflows | High | Reduced by up to 80% with agentic AI | [62] |
Workflow Visualization
Proactive QC Management Workflow
NTS Data Prioritization Flow
Measuring Success: Validation Frameworks and Comparative Analysis of QC Strategies
Troubleshooting Guide: Common Issues in QC Optimization
High False Rejection Rate (Type I Error)
- Problem: The inspection or quality control system is rejecting an excessive number of acceptable parts or samples. This is often characterized by a high false reject rate, leading to significant material waste and lost productivity [63].
- Causes:
- Overly Sensitive Thresholds: Defect classification parameters are set too tightly, beyond what is required by specifications [63].
- Environmental Variability: Inconsistent lighting, vibrations, or temperature fluctuations during measurement can cause acceptable products to appear defective [63].
- Poor System Calibration: The inspection system is not properly calibrated to distinguish between natural product variation and actual defects [63].
- Inadequate Data Separation: The measurement data distributions for "good" and "bad" parts overlap significantly, making accurate classification difficult [63].
- Solutions:
- Statistical Threshold Setting: Use historical data and statistical process control (SPC) methods to set tolerance thresholds that account for natural process variation. Conduct Gage R&R (Repeatability & Reproducibility) studies to validate the measurement system itself is not a major source of variation [63].
- Environmental Control: Implement enclosures, stable LED lighting systems, and vibration-dampening mounts to create consistent inspection conditions [63].
- Advanced Classification: For automated systems, employ machine learning classifiers that can learn from a database of known good and bad parts, improving contextual decision-making over static rules [63].
High False Acceptance Rate (Type II Error)
- Problem: The QC system is failing to detect actual defects, allowing non-conforming products to move to the next stage or to the customer.
- Causes:
- Insufficient Sensitivity: The system's detection capabilities are not fine enough to identify subtle or critical defects [63].
- Inadequate Sampling Frequency: The rate of inspection is too low to catch defects that occur intermittently.
- Uncalibrated or Worn Equipment: Sensors or measurement devices have drifted from their standard or are degraded.
- Poorly Defined Defect Criteria: The standards for what constitutes a "defect" are ambiguous or not comprehensive.
- Solutions:
- Technology Upgrade: Evaluate and implement higher-resolution sensors (e.g., moving from 2D to 3D vision) or more sensitive assay methods that can detect the specific defect of concern [64] [63].
- Process Optimization: Increase the frequency of quality checks or implement 100% automated inspection for critical-to-quality attributes [64].
- Preventive Maintenance: Establish and adhere to a strict schedule for equipment calibration and maintenance based on manufacturer recommendations and usage data.
Inconsistent QC Results Across Shifts or Operators
- Problem: Quality control decisions and results vary significantly depending on the personnel performing the task or the time of day.
- Causes:
- Subjective Interpretation: Reliance on manual inspection where criteria are open to individual interpretation [64].
- Fatigue and Attention Lapse: Human inspectors experience eye strain and reduced concentration after 2-3 hours of repetitive tasks [64].
- Lack of Standardized Procedures: Work instructions are not detailed, visual, or consistently enforced across the team [65].
- Solutions:
- Digitize and Automate: Implement automated inspection systems (e.g., computer vision, automated assay readers) that apply the same objective criteria 24/7 without performance degradation [64].
- Standardize Processes: Create clear, visual, and digitized Standard Operating Procedures (SOPs) that are easily accessible to all operators. This ensures consistency and makes training new team members more efficient [65].
- Structured Work/Rest Schedules: For manual inspection tasks, institute mandatory short breaks and job rotation to maintain peak inspector performance.
Frequently Asked Questions (FAQs)
Q1: What is a typical financial return we can expect from optimizing our quality control processes? A1: The return can be substantial but varies by scale. One yearlong study in a clinical biochemistry lab implementing Six Sigma methodology reported absolute savings of INR 750,105 (approx. $9,000 USD). These savings came from a 50% reduction in internal failure costs (e.g., repeats, reruns) and a 47% reduction in external failure costs [66]. In high-volume manufacturing, automated computer vision systems have reported annual savings of $200,000-$500,000 per production line and ROI within 12-18 months [64].
Q2: How can we balance sensitivity to catch defects without increasing false rejections? A2: Balancing sensitivity and accuracy is a core challenge. Instead of simply tightening defect thresholds, you should [63]:
- Validate with Data: Use statistical models to analyze the data distributions of both good and bad parts to find the optimal separation point.
- Leverage Advanced Algorithms: Implement machine learning-based inspection systems that can consider multiple factors (like context and historical data) rather than relying on single, rigid thresholds.
- Perform Gage R&R: Ensure your measurement system's variation is minimal compared to the product's tolerance range.
Q3: Our team is resistant to new QC procedures. How can we ensure adoption? A3: Successful optimization is as much about people as it is about process.
- Engage Team Members: Involve your team in the optimization process. Their firsthand experience with daily tasks provides invaluable insights into current inefficiencies and potential solutions [65].
- Communicate Clearly: Explain the "why" behind the changes, focusing on benefits like reduced repetitive work and fewer errors [65].
- Provide Comprehensive Training: Ensure everyone is confident using new systems and understands the new standardized processes [65].
Q4: What is the role of a Cost-Benefit Analysis (CBA) in QC optimization? A4: A CBA is a systematic process used to estimate the costs and benefits of a project to determine its financial viability. For QC optimization, it helps decision-makers [67] [68]:
- Compare projected costs (e.g., new equipment, software, training) against expected benefits (e.g., cost savings from reduced waste, higher throughput, lower labor costs).
- Calculate key financial metrics like the Benefit-Cost Ratio, Net Present Value (NPV), and Return on Investment (ROI) to objectively justify the investment.
- Identify and plan for both tangible and intangible costs and benefits.
Q5: Are there structured methodologies to guide our QC optimization efforts? A5: Yes, several proven methodologies exist. The choice depends on your industry and specific problems.
- Six Sigma: A data-driven methodology for eliminating defects and reducing variation. A clinical lab used this to define new sigma rules for QC validation, leading to significant savings [66].
- Quality by Design (QbD): A systematic approach that begins with predefined objectives, emphasizing product and process understanding. It is widely used in pharmaceutical development to build quality in from the start [69].
- Lean Manufacturing: A set of tools and principles focused on eliminating waste. Tools like SMED (Single-Minute Exchange of Dies) can drastically reduce changeover-related downtime and errors [70].
Quantitative Data on QC Optimization Returns
The table below summarizes financial and operational returns from documented case studies across industries.
Table 1: Documented Returns from Quality Control Optimization Initiatives
| Industry / Case Study | Optimization Method | Key Quantitative Outcomes |
|---|---|---|
| Clinical Biochemistry Lab [66] | Application of Six Sigma methodology and new Westgard sigma rules for Quality Control. | - Absolute Savings: INR 750,105.27- Internal Failure Costs: Reduced by 50%- External Failure Costs: Reduced by 47% |
| Automotive Tooling SME [70] | Integrated ERP-Lean model, including SMED (Lean) for die changeover. | - Die Changeover Time: Reduced by 95.2%- Downtime: Reduced by 88.9%- Rejection Rate (PPM): Reduced by 72.4% |
| Manufacturing (General) [64] | Implementation of AI-powered computer vision systems for automated visual inspection. | - Manual QA Effort: Reduced by up to 50%- Defect Detection Accuracy: Improved to 98-99%- Annual Savings/Line: $200,000-$500,000- ROI Period: 12-18 months |
| Electronics Manufacturing (Foxconn) [64] | Automated smartphone assembly QA using PyTorch/TensorFlow. | - Defect Rates: Slashed by 55%- Achieved real-time defect flagging across 50 production lines |
Experimental Protocol: Implementing a Six Sigma QC Optimization Study
This protocol is based on a yearlong study in a clinical biochemistry lab that achieved significant cost savings [66]. It can be adapted for other laboratory or production environments.
1. Define the Scope and Metrics
- Objective: To reduce costs associated with quality control failures (repeats, reruns) by optimizing QC validation procedures without compromising quality.
- Key Metrics to Track:
- False Rejection Rate
- Probability of Error Detection
- Cost of all reruns and repeats (Internal Failure Cost)
- Cost associated with errors that reach the customer (External Failure Cost)
2. Calculate Baseline Sigma Metrics
- Duration: Conduct this analysis over a sufficient period to establish a reliable baseline (e.g., 3-6 months).
- Method: For each parameter (e.g., 23 routine chemistry tests), calculate the Sigma value.
- Collect data on the coefficient of variation (CV%) and bias percentage (Bias%).
- Formula: Sigma = (Allowable Total Error % - |Bias%|) / CV% [66].
- Tools: Utilize specialized software (e.g., Biorad Unity) to automate these calculations if available.
3. Apply New QC Validation Rules
- Action: Based on the calculated Sigma metrics for each parameter, apply the appropriate Westgard sigma rules.
- High Sigma-level tests (>6) can use simpler QC rules with fewer controls.
- Low Sigma-level tests require stricter multi-rule QC procedures.
- Goal: To tailor the QC effort to the actual performance of each test, eliminating unnecessary QC and reducing false rejections [66].
4. Monitor and Compare Performance
- Duration: Monitor performance under the new rules for a comparable period (e.g., 3-6 months or a full year).
- Data Collection: Track the same key metrics from Step 1.
- Cost-Benefit Analysis: Compare the pre- and post-implementation data.
- Calculate the absolute and relative savings in internal and external failure costs.
- Compute the net financial benefit.
Workflow Diagram for QC Optimization
The diagram below illustrates the logical workflow for planning and executing a QC optimization project.
The Scientist's Toolkit: Key Reagents and Solutions for a QC Lab
Table 2: Essential Research Reagent Solutions for Quality Control Laboratories
| Item | Function / Explanation |
|---|---|
| Reference Materials (Standards) | Certified materials with known purity/characteristics used to calibrate equipment and validate the accuracy of analytical methods. Essential for establishing a reliable baseline [69]. |
| Control Samples | Stable materials with known values run alongside patient or product samples. They monitor the precision and stability of the QC process over time, helping to detect drift or errors [66]. |
| Calibrators | Solutions used to adjust the output of an analytical instrument to a known standard. They create the standard curve against which unknown samples are measured. |
| Buffers and pH Solutions | Used to maintain a stable and consistent pH environment during testing, which is critical for the reliability of many biochemical reactions and assays [69]. |
| Enzymes and Substrates | Key reagents for enzymatic assays common in clinical biochemistry and pharmaceutical testing. Their quality and stability directly impact the accuracy of results for parameters like assay and content uniformity [66] [69]. |
In clinical and pharmaceutical research, quality control (QC) is a diagnostic test for assay reliability. Traditional QC plans often use rules of thumb, such as 2 or 3 standard deviation (SD) limits, which may not be optimal for all contexts. A key challenge is the high rate of false rejections, which consumes time and resources without improving data quality. This analysis explores a framework for optimizing QC procedures to enhance accuracy and reduce false rejections, directly supporting robust and efficient research outcomes. The core principle is to treat QC as a diagnostic test, classifying errors as "important" or "unimportant" based on a predefined critical shift size (Sc) that would affect clinical practice [71].
Troubleshooting Guides and FAQs
Frequently Asked Questions
Q1: My assay has no window at all. What is the most common cause? A1: The most common reason is an incorrect instrument setup. Please refer to instrument setup guides specific to your model. For TR-FRET assays, an incorrect choice of emission filters is a single most common point of failure; the specified emission filters must be used exactly as recommended [72].
Q2: Why might there be differences in EC50/IC50 values between laboratories using the same assay? A2: Differences in stock solution preparation are a primary reason. Other factors include the compound's inability to cross the cell membrane or it being pumped out, or the compound targeting an inactive form of the kinase in cell-based assays [72].
Q3: What is the best practice for data analysis in TR-FRET assays? A3: Ratiometric data analysis represents the best practice. Calculate an emission ratio by dividing the acceptor signal by the donor signal (e.g., 520 nm/495 nm for Terbium). This ratio accounts for pipetting variances and lot-to-lot reagent variability [72].
Q4: Is a large assay window alone a good measure of assay performance? A4: No. A large window with significant noise can be less robust than a small window with low noise. The Z'-factor, which incorporates both the assay window and the data variability (standard deviation), is a key metric. Assays with a Z'-factor > 0.5 are considered suitable for screening [72].
Q5: How can I quickly assess my assay window? A5: Divide the emission ratio at the top of the titration curve by the emission ratio at the bottom. For a more standardized view, you can normalize all data points to the bottom ratio, creating a response ratio where the assay window always starts at 1.0 [72].
Troubleshooting Common Experimental Issues
Issue: Complete Lack of Assay Window in Z'-LYTE Assays
- Step 1 - Determine the source: Perform a development reaction control test.
- For the 100% phosphopeptide control, do not expose it to any development reagent. This should yield the lowest ratio.
- For the substrate (0% phosphopeptide), expose it to a 10-fold higher concentration of development reagent than recommended to ensure full cleavage. This should yield the highest ratio [72].
- Step 2 - Interpret results: A properly developed reaction typically shows a 10-fold difference between the ratios of the 100% phosphorylated control and the substrate. If this difference is not observed, the development reagent dilution needs to be checked. If no difference is observed, the issue is likely with the instrument setup [72].
Issue: Poor Z'-Factor Despite a Large Assay Window
- Investigate noise sources: A poor Z'-factor indicates high variability (standard deviation) in your data points.
- Action items:
- Check reagent homogeneity: Ensure all reagents are thoroughly mixed and at the correct temperature before dispensing.
- Verify pipette calibration: Inaccurate pipetting is a major source of variability.
- Review instrument settings: Ensure the instrument gain and other settings are optimized and consistent across reads. High background noise can contribute to a poor Z'-factor [72].
Methodologies and Data Presentation
Optimized QC Procedures for Serum Sodium
The following table summarizes recommended optimized PBRTQC procedures for detecting different error types in serum sodium testing, based on a large-scale computational study [73].
Table 1: Optimized Patient-Based Real-Time QC (PBRTQC) Procedures for Serum Sodium
| Error Type to Monitor | Recommended Optimized Procedure | Key Parameters |
|---|---|---|
| System Error (SE) | Moving Proportion of Normal Results (P3SD) | Algorithm: P3SD (CLs based on mean and SD of proportion)Block Size (N): 50Truncation: None (T0) |
| Random Error (RE) | Moving Standard Deviation (S) | Algorithm: Moving SD (S)Block Size (N): 25Control Limits (CLs): Set for 0.1% false alarm rateTruncation (TLs): Set 1% outliers exclusion (T1%) |
A Framework for Optimizing Traditional QC Limits
Research demonstrates that moving beyond traditional 2SD or 3SD limits can optimize accuracy. A dichotomous model classifies assay errors as "important" or "unimportant" based on a critical shift size (Sc). The optimal QC limit (k*) that maximizes accuracy can be described by the following relationships, depending on the frequency of process upsets (p) [71]:
- For p < 1:
k* = 1.78 - 0.39Sc + 0.14N + 0.12Sc² + 0.16ScN - For p = 1:
k* = -0.98 + 1.20Sc + 0.47N
Where N is the number of QC measurements and Sc is the critical shift size. This method allows laboratories to tailor QC limits to their specific operational context, thereby improving the accuracy of fault detection and reducing false rejections [71].
Visualizing Workflows and Relationships
QC Optimization and Error Detection Logic
QC Optimization and Error Detection Logic
TR-FRET Ratiometric Data Analysis Workflow
TR-FRET Ratiometric Data Analysis Workflow
The Scientist's Toolkit: Key Research Reagent Solutions
Table 2: Essential Research Reagents and Materials
| Item | Function / Explanation |
|---|---|
| LanthaScreen TR-FRET Reagents | These reagents, using Terbium (Tb) or Europium (Eu) as donors, are key for binding assays and kinase activity profiling. They leverage time-resolved fluorescence to reduce background noise [72]. |
| Z'-LYTE Assay Kits | These kits utilize a fluorescence resonance energy transfer (FRET) based method to measure kinase activity by monitoring the cleavage of a phosphorylated peptide substrate [72]. |
| Critical Shift Size (Sc) | This is not a physical reagent but a crucial conceptual tool. It defines the minimum error size that would affect clinical practice, forming the basis for optimizing QC limits and reducing false rejections [71]. |
| Patient-Based Real-Time QC (PBRTQC) | A statistical "tool" that uses patient data itself as a continuous QC monitor. It is low-cost and effective for monitoring analytic performance, especially for analytes with small biological variation like serum sodium [73]. |
| TR-FRET Emission Filters | Specific optical filters that are critical for successfully reading TR-FRET assays. Using the incorrect filters is a primary reason for assay failure, as the signal is highly dependent on exact wavelength selection [72]. |
| Development Reagent (for Z'-LYTE) | An enzyme solution used to cleave non-phosphorylated peptide, creating the assay's signal window. Its concentration must be carefully titrated and controlled for robust assay performance [72]. |
In clinical laboratories and drug development, quality control (QC) is vital for producing reliable, accurate data. Traditional QC procedures often rely on generic, one-size-fits-all rules that can lead to high false rejection rates—where acceptable runs are incorrectly flagged as errors. This disrupts workflows, increases costs, and lengthens turnaround times. Optimized QC procedures use a data-driven approach to maximize error detection while minimizing false rejections, enhancing both efficiency and reliability [25] [74]. This guide explores their comparative performance and provides practical troubleshooting advice.
Quantitative Performance Comparison
The table below summarizes key performance metrics for traditional versus optimized QC procedures, compiled from recent studies.
Table 1: Performance Metrics of Traditional vs. Optimized QC Procedures
| Metric | Traditional QC | Optimized QC | Context & Impact |
|---|---|---|---|
| False Rejection Rate (Pfr) | ~5-9% (with 12s rule, N=2) [41] |
< 0.3% (with 13s rule) [41] |
High Pfr increases unnecessary repeats, reagent costs, and labor [25]. |
| Error Detection (Ped) | Varies, often suboptimal for low-sigma analytes [25] | >90% (designed for high Ped) [25] | Low Ped fails to catch medically significant errors, risking patient misdiagnosis [25]. |
| Cost Impact | Higher internal & external failure costs [25] | Absolute savings of INR 750,105.27 reported in one study [25] | Savings from reduced reruns, repeats, and lower patient care costs due to errors [25]. |
| Detection Sensitivity | Delayed critical error detection [73] | Faster detection; e.g., PBRTQC identified errors in 1.46% of patient samples [75] | Early error detection prevents reporting of invalid results and supports patient-based real-time monitoring [73] [75]. |
Experimental Protocols for Optimization
Protocol 1: Implementing a Sigma-Metric QC Selection Process
This methodology optimizes QC rules based on the analytical performance of each test.
- Calculate Sigma Metrics: For each analyte, calculate the sigma metric using one year of internal QC and external quality assessment data.
- Formula: Sigma (σ) = (TEa% – Bias%) / CV% [25]
- TEa% (Total Allowable Error): Obtain from guidelines like CLIA.
- Bias% (Inaccuracy): Calculate from EQA/proficiency testing data.
- CV% (Imprecision): Derive from internal QC data.
- Select Appropriate QC Rules: Use software (e.g., Bio-Rad Unity 2.0) or decision charts to select QC rules and the number of controls (N) based on the sigma metric [25].
- Sigma ≥ 6: Use simple rules like 1
3swith N=2. - Sigma 4-5: Use multi-rules like 1
3s/22s/R4swith N=4. - Sigma < 4: Use more complex multi-rules with a higher N.
- Sigma ≥ 6: Use simple rules like 1
- Validate and Implement: Characterize the candidate QC procedure by verifying it provides a low probability of false rejection (Pfr ≤ 5%) and a high probability of error detection (Ped ≥ 90%) before full implementation [25].
Protocol 2: Optimizing Patient-Based Real-Time QC (PBRTQC) for Serum Sodium
This protocol uses patient data for continuous, real-time quality control.
- Data Collection and Simulation:
- Evaluate PBRTQC Algorithms:
- Test various algorithms (e.g., Moving Average, Moving Median, Moving SD, Moving Proportion of Normal Results) with different block sizes (N) and control limits [73].
- Assess performance using the Median Number of patient samples to Error Detection (MNPed) and the Median Number of patient samples between False Rejections (MNPfr) [73].
- Select the Optimal Procedure:
The Scientist's Toolkit: Essential Research Reagent Solutions
Table 2: Key Materials for QC Optimization Experiments
| Item | Function in QC Optimization |
|---|---|
| Third-Party Assayed Controls | Used to independently assess analyzer precision (CV%) and bias without manufacturer influence [25]. |
| Electronic Quality Control (eQC) | Simulates instrument performance; part of intelligent systems like GEM Premier 5000's iQM 2 for continuous monitoring [75]. |
| QC Validation Software | Software such as Bio-Rad Unity 2.0 automates sigma metric calculation and recommends statistically valid QC rules [25]. |
| Patient Data Repository | Large, curated sets of historical patient results are essential for developing and validating PBRTQC algorithms [73]. |
Troubleshooting Guides & FAQs
Troubleshooting Guide: Responding to QC Failures
Diagram: A logical workflow for troubleshooting failed QC runs, emphasizing systematic problem-solving over bad habits like automatic repetition.
Frequently Asked Questions (FAQs)
Q1: Our QC occasionally fails with one control outside 2SD, but repeats are within range. Is it acceptable to accept the initial run?
No, this is a common but risky practice. Using a 12s rule has a high false rejection rate (5-9% for N=2) [41]. A single repeat might show an in-control result, but an underlying problem could persist. If your QC procedure is properly designed (e.g., using a 13s rule with a 0.3% false rejection rate), any violation should be taken seriously and investigated systematically, not just repeated [41] [74].
Q2: Can I use peer group means and standard deviations to set my laboratory's control limits?
This is not recommended. While peer group data is excellent for comparing your lab's bias to others, it should not be used directly to set your internal control limits. Your lab's mean and standard deviation reflect your specific instrument, reagent lot, and environmental conditions. Using peer group statistics, especially with arbitrary adjustments (like using 2/3 of the group SD), means your QC is not sensitive to the unique performance of your own system [74].
Q3: How can we reduce costs associated with quality control?
The key is to implement optimized, method-specific QC rules rather than using the same blanket rules for all tests. A 2025 study demonstrated that applying Six Sigma principles to select optimal QC rules led to a 50% reduction in internal failure costs (repeats, reruns) and a 47% reduction in external failure costs (costs from incorrect results affecting patient care), resulting in total annual savings of over INR 750,000 [25].
Q4: What is the most common error in setting up control limits?
A frequent error is calculating control limits based on total allowable error (TEa) goals rather than actual performance. For example, using TEa/4 to derive a standard deviation is incorrect. The standard deviation must be your observed measure of imprecision from repeated control measurements. Similarly, the mean should be your laboratory's established mean for the control lot, not just the target value from the assay sheet [74].
Technical Support Center
Troubleshooting Guides
Guide 1: Resolving High False Positive Rates in AI Visual Inspection
Problem: The AI-powered visual inspection system is flagging an excessive number of false positives, leading to unnecessary product rejection and investigation efforts.
Investigation Steps:
- Verify Data Quality: Confirm the training dataset for the AI model is balanced and contains sufficient examples of both acceptable product variations and genuine defects. A common cause of false positives is a dataset skewed toward defect examples [76].
- Check for Data Drift: Analyze recent production images for changes in lighting, background, or product appearance that differ from the model's original training conditions. Retrain the model with new data reflecting these changes if drift is detected [76] [59].
- Calibrate Detection Thresholds: Review and adjust the model's sensitivity and confidence thresholds. A threshold set too conservatively will flag minor, acceptable variations as defects [59].
- Validate Sensor and Camera Calibration: Ensure all cameras and sensors involved in image capture are correctly calibrated and focused. Blurry or inconsistently lit images can confuse the AI model [76].
Solution: Retrain the deep learning model using a balanced, high-quality dataset that includes recent production samples. Implement a continuous feedback loop where operator-confirmed false positives are added to the training set to improve model accuracy over time [76] [59].
Guide 2: Addressing Inaccurate Predictive Maintenance Alerts
Problem: The predictive analytics system generates false alarms for equipment failure, causing unnecessary maintenance downtime.
Investigation Steps:
- Audit Sensor Data: Check the integrity and placement of IIoT sensors (e.g., vibration, temperature) on the equipment. Faulty or misaligned sensors provide corrupted input data [59] [77].
- Review Model Training Data: Ensure the machine learning model was trained on data that represents a full range of normal operating conditions, including start-up, shutdown, and typical load variations.
- Analyze Alert Triggers: Examine the specific data patterns that triggered the false alert. Correlate these with equipment logs and operator notes to identify any non-failure-related events that cause similar data signatures [78].
Solution: Refine the predictive model by incorporating a wider set of operational data and contextual information. Establish a clear protocol for maintenance teams to log and provide feedback on all alerts, which is then used to continuously retrain and improve the model's accuracy [78] [77].
Guide 3: Overcoming Data Silos for Effective Predictive Analytics
Problem: Predictive quality models are underperforming because they cannot access integrated, high-quality data from across manufacturing, lab, and supply chain systems.
Investigation Steps:
- Map Data Sources: Identify all critical data sources, including Manufacturing Execution Systems (MES), Laboratory Information Management Systems (LIMS), and Enterprise Resource Planning (ERP) systems [79] [80].
- Assess Data Governance: Evaluate the existing data governance framework. Check for inconsistencies in data formats, naming conventions, and metadata across different systems [80].
- Audit Data Pipelines: Verify the functionality and performance of data pipelines that transfer information between systems. Look for bottlenecks or failures that result in incomplete datasets [77].
Solution: Implement a unified data analytics platform or integration layer that can connect to disparate systems. Prioritize projects that establish a single source of truth for critical quality attributes and process parameters, ensuring data is clean, standardized, and accessible for AI models [79] [77].
Frequently Asked Questions (FAQs)
Q1: What are the core technologies powering AI-driven quality control in pharma? AI-driven QC is primarily powered by a combination of computer vision, machine learning, and the Industrial Internet of Things (IIoT) [76] [59]. Computer vision uses deep learning models to analyze images from high-resolution cameras for defect detection. Machine learning algorithms learn from production data to identify patterns and predict quality issues. IIoT sensors collect real-time data on parameters like temperature and vibration, enabling continuous monitoring and predictive maintenance [76] [59] [81].
Q2: How can AI reduce false rejection rates in our quality control process? AI reduces false rejections by moving beyond simple rule-based checks. Deep learning models can be trained to understand the difference between acceptable product variations and genuine defects, significantly lowering false positives [59]. Furthermore, predictive quality models identify process drifts that could lead to defects, allowing for adjustments before non-conforming products are even made, thus reducing the total number of items that enter the rejection queue [76] [82].
Q3: What is a 'digital twin' and how is it used in pharmaceutical manufacturing? A digital twin is a virtual replica of a physical asset, such as a manufacturing process or piece of equipment [59]. In pharma, it is used to simulate and optimize processes before real-world implementation. For example, it can predict potential quality issues by analyzing historical and real-time IIoT data, allowing engineers to perform virtual validation and prevent costly defects [59] [83].
Q4: We have legacy equipment. Can we still implement AI-driven quality control? Yes. Legacy equipment can be integrated with AI systems through the use of retrofitted sensors and edge analytics devices [59]. These devices can collect data from older machines and perform local processing, enabling real-time monitoring and analysis without requiring a full equipment replacement. Unified platforms are designed to connect legacy systems with modern AI tools [59].
Q5: What are the common pitfalls when implementing an AI-based QC system? Common pitfalls include inadequate or low-quality training data, underestimating the need for continuous model retraining, and a lack of "translator" talent—professionals who understand both the pharmaceutical manufacturing process and data science [76] [82]. A phased implementation approach, starting with a pilot project, is recommended to mitigate these risks [76] [81].
Experimental Protocols & Data
Quantitative Impact of AI in Pharmaceutical Manufacturing
Table 1: Documented Performance Metrics of AI in Pharma Operations
| Application Area | Key Metric | Impact/Performance | Source |
|---|---|---|---|
| AI-Driven Visual Inspection | Defect Detection Accuracy | 95-99% accuracy at production speed [76] | Industry Analysis |
| Defect Detection Rate | Up to 90% improvement vs. manual inspection [59] [82] | Industry Analysis | |
| Process Optimization | Waste Reduction | 40% reduction in waste [76] | Industry Case Studies |
| Inspection Cycle Time | 25% faster cycles [76] | Industry Case Studies | |
| Clinical Trials | Cost Reduction | Up to 70% reduction in trial costs [78] [77] | Industry Analysis |
| Timeline Reduction | 50-80% shorter recruitment timelines [77] | Industry Analysis | |
| Predictive Maintenance | Equipment Downtime | 30-50% reduction [78] [77] | Industry Analysis |
Detailed Methodology: Implementing a Computer Vision System for Defect Detection
Objective: To deploy an AI-powered visual inspection system for detecting surface defects on pharmaceutical tablets, aiming to reduce false rejection rates.
Materials & Equipment:
- High-Resolution Industrial Cameras: For capturing detailed images of each tablet on the production line [76].
- Lighting System: Consistent, calibrated lighting to ensure uniform image capture and minimize variations [76].
- Edge Computing Device: A local processing unit to run the AI model in real-time with millisecond-level response, reducing reliance on cloud connectivity [59].
- Data Storage Server: For storing labeled image datasets used for training and validation [76].
Protocol:
- Data Collection:
- Capture a minimum of 10,000 high-resolution images of tablets from the production line. The dataset must include examples of "good" units and units with all known defect types (e.g., cracks, chips, discoloration) [76].
- Ensure data variety by collecting images under different, but controlled, lighting conditions and from multiple production batches.
- Data Preparation & Labeling:
- A team of qualified quality control technicians will label each image in the dataset, identifying and categorizing any defects. This labeled dataset is the "ground truth" for training [76].
- Split the dataset into three parts: Training (70%), Validation (20%), and Test (10%).
- Model Training:
- Select a pre-trained Convolutional Neural Network (CNN) model, such as a ResNet variant, suited for image classification [76].
- Train the model on the Training set, using the Validation set to tune hyperparameters and avoid overfitting. The goal is for the model to learn the patterns that distinguish defective from non-defective tablets.
- Model Validation & Threshold Calibration:
- Use the Test set to evaluate the model's final performance. Key metrics are Accuracy, Precision (to minimize false positives), and Recall (to minimize false negatives) [76].
- Calibrate the detection confidence threshold to optimize the trade-off between false positives and false negatives, specifically targeting a reduction in false rejections.
- Deployment & Integration:
- Deploy the validated model to the edge computing device on the production line.
- Integrate the system with the production line's control system to automatically reject confirmed defective tablets.
- Continuous Monitoring & Improvement:
Visualizations
Diagram 1: AI Quality Control Workflow
(Diagram Title: AI QC Workflow)
Diagram 2: Predictive Analytics Data Flow
(Diagram Title: Predictive Data Flow)
The Scientist's Toolkit: Research Reagent Solutions
Table 2: Essential Tools for AI-Driven QC Research in Pharma
| Tool / Solution Category | Specific Examples | Function in AI-QC Research |
|---|---|---|
| Process Analytical Technology (PAT) | In-line Spectrometers, pH Sensors | Provides real-time data on Critical Process Parameters (CPPs) and Critical Quality Attributes (CQAs) for model training and monitoring [80]. |
| Laboratory Information Management System (LIMS) | SampleTrack, LabWare | Manages and standardizes lab-generated quality data, making it accessible for integration with AI models [79]. |
| Manufacturing Execution System (MES) | SAP MES, Honeywell MES | Provides crucial context on the manufacturing process steps and parameters that correlate with final product quality [79] [59]. |
| AI/ML Modeling Platforms | Python (Scikit-learn, TensorFlow, PyTorch), Jidoka Kompass | Platforms and libraries used to build, train, and deploy custom machine learning models for defect detection and prediction [59] [77]. |
| Cloud & Data Analytics Platforms | AWS/Azure ML Services, Databricks | Provide the scalable computing power and data infrastructure needed to process large datasets and run complex AI algorithms [77]. |
Conclusion
Optimizing quality control procedures to reduce false rejection rates requires a multifaceted approach that balances statistical rigor with practical implementation. The strategies discussed—from foundational understanding of Pfr and Ped metrics to systematic methodologies like QCC and Six Sigma—demonstrate that significant improvements are achievable through targeted interventions. Successful implementations have shown reduction in specimen rejection rates from 1.13% to 0.27% and cost savings exceeding 40% through proper QC planning. Future directions point toward increased integration of AI and machine learning for predictive quality control, expanded application of risk assessment frameworks like FMEA and FMECA in pharmaceutical development, and the development of more adaptive, real-time QC systems that can dynamically adjust to process variations. As the field evolves, the focus must remain on developing context-specific QC strategies that maintain the delicate balance between error detection capability and false rejection minimization, ultimately enhancing both scientific validity and operational efficiency in biomedical research and drug development.
References
- 1. QC - The Chances of Rejection [https://www.westgard.com/lessons/basic-qc-practices-l/lesson15full.html]
- 2. False Reject Rate (FRR) - Definition, FAQs, [https://www.innovatrics.com/glossary/false-reject-rate-frr/]
- 3. Refining quality control strategies in highly automated ... [https://pmc.ncbi.nlm.nih.gov/articles/PMC12523598/]
- 4. What is a False Rejection Rate? [https://www.portnox.com/cybersecurity-102/false-rejection-rate/]
- 5. Re-emerging Issues in QC Today [https://www.westgard.com/essays/basic-qc-practices/re-emerging-qc-issues.html]
- 6. Problems: Your Troubleshooting has failed, what do you do... QC QC [https://www.slideshare.net/slideshow/troubleshooting-qc-problems-your-qc-has-failed-what-do-you-do-next/51582328]
- 7. Total Analytic Error [https://myadlm.org/cln/articles/2013/september/total-analytic-error]
- 8. probabilities for false rejection and error detection [https://pubmed.ncbi.nlm.nih.gov/902411/]
- 9. Blood specimen rejection rate in clinical laboratory [https://pmc.ncbi.nlm.nih.gov/articles/PMC9792348/]
- 10. Causes and impact of specimen rejection in a clinical ... [https://www.sciencedirect.com/science/article/abs/pii/S0009898116302078]
- 11. A Quality Improvement Initiative to Reduce Rejected ... [https://www.sciencedirect.com/science/article/pii/S1553725021000982]
- 12. Rethinking Lab Workflow Optimization [https://www.labkey.com/lab-workflow-optimization/]
- 13. Merck boosts research with AWS, cuts false rejections by 80% [https://www.linkedin.com/posts/chandra-balani_accelerating-biopharmaceutical-innovation-activity-7348531058620973057-IZ8s]
- 14. How to Avoid False Positives and False Negatives in ... [https://www.acdlabs.com/blog/how-to-avoid-false-positives-and-false-negatives-in-analytical-chemistry/]
- 15. Precision Verification: Effect of Experiment Design on False ... [https://pubmed.ncbi.nlm.nih.gov/34111241/]
- 16. Errors within the total laboratory testing process, from test ... [https://pmc.ncbi.nlm.nih.gov/articles/PMC7271754/]
- 17. Methods to Reduce the Incidence of False Negative Trial ... [https://pmc.ncbi.nlm.nih.gov/articles/PMC6661207/]
- 18. Optimizing Laboratory Workflows: A Practical Guide [https://cellculturecompany.com/optimizing-laboratory-workflows-a-practical-guide/]
- 19. Inline Quality Control and AI in Injection Molding [https://tedesolutions.pl/en/blog/inline-ai-vision-systems-quality-control-injection-molding]
- 20. Reducing False Rejects: Reinspection of Ejects [https://www.wilco.com/news-events/news/reducing-false-rejects-reinspection-of-ejects-in-inline-production/]
- 21. Software Testing Metrics That Matter for Enterprises in 2025 [https://www.qodo.ai/blog/software-testing-metrics/]
- 22. Top 12 QA Metrics to Measure Software Quality Effectively ... [https://www.botgauge.com/blog/top-qa-metrics-to-measure-software-quality]
- 23. Refining quality control strategies in highly automated ... [https://www.biochemia-medica.com/en/journal/35/3/10.11613/BM.2025.030704/fullArticle]
- 24. Top 10 QA Metrics Stakeholders Must Track in 2025 [https://www.accelq.com/blog/qa-metrics/]
- 25. Maximizing Returns: Optimizing Biochemistry Lab ... [https://pmc.ncbi.nlm.nih.gov/articles/PMC12205154/]
- 26. "Westgard Rules" and Multirules [https://www.westgard.com/westgard-rules.html]
- 27. Troubleshooting with Quality Control Data in Medical ... [https://www.labroots.com/webinar/troubleshooting-quality-control-data-medical-laboratories-beginners?srsltid=AfmBOoq73mmO0jvPMZkacrG2XNSujDq9dyntduUr0P7jQRMLvkMF3fnN]
- 28. Effective Practices for Implementing Quality Control Circles ... [https://www.mdpi.com/2305-6703/5/1/6]
- 29. Why the PDCA Cycle Still Matters in 2025 [https://www.linkedin.com/pulse/secret-behind-world-class-quality-why-pdca-cycle-still-habarakada-xsxlc]
- 30. Quality Control Circle Practices to Reduce Specimen ... [https://pmc.ncbi.nlm.nih.gov/articles/PMC11523946/]
- 31. The Application of Six Sigma to Assess the Analytical ... [https://pmc.ncbi.nlm.nih.gov/articles/PMC12378367/]
- 32. Comparison of false discovery rate and familywise error ... [https://link.springer.com/article/10.1007/s42452-025-07426-y]
- 33. Validation Protocol: First Step of a Lean-Total Quality ... [https://pmc.ncbi.nlm.nih.gov/articles/PMC3162948/]
- 34. What is a Fishbone Diagram? Ishikawa ... - ASQ [https://asq.org/quality-resources/fishbone?srsltid=AfmBOopSV7nWUVuC3Luy0qbxsqcZ2k4TSzoGnz42-A82VwLkowDRB9hk]
- 35. What is a Pareto Chart? Analysis & Diagram [https://asq.org/quality-resources/pareto?srsltid=AfmBOopx4D4CkWuNEdGe7OOvBstwxlWRthJkpB0VMVWQZBP5Ue5s4hMC]
- 36. Applications of Pareto Analysis [https://www.geeksforgeeks.org/software-engineering/applications-of-pareto-analysis/]
- 37. 7 Powerful Root Cause Analysis Tools and Techniques [https://reliability.com/resources/articles/7-root-cause-analysis-tools/]
- 38. What are some Root Cause Analysis Tools? | RCA Methods [https://www.6sigma.us/etc/what-are-common-root-cause-analysis-rca-tools/]
- 39. Root Cause Analysis (RCA) Tools & Learning Resources [https://asq.org/quality-resources/root-cause-analysis/tools?srsltid=AfmBOoq1PT9y0iLQzM9giP6j7coyOourAXGOGB7_1P6nDVa-4Vzy8ES4]
- 40. Total Quality Control (TQC): Benefits, Challenges, and ... [https://amrepinspect.com/blog/total-quality-control]
- 41. Troubleshoot QC Results [https://unityweb.qcnet.com/Documentation/Help/UnityWeb/1535.htm]
- 42. 8 Key Principles of Total Quality Management Explained [https://www.edstellar.com/blog/total-quality-management-principles]
- 43. Total Quality Management (TQM): What is TQM? [https://asq.org/quality-resources/total-quality-management?srsltid=AfmBOoqs8Xt1Pqoyv9TxP5HdEIW2vKnudZhvOi9qe90yLxd7sil_dOtA]
- 44. Total Quality Management: Complete Guide to TQM in 2025 [https://quality.eleapsoftware.com/total-quality-management-complete-guide-to-tqm-in-2025/]
- 45. Quality Management Team Roles & Responsibilities [https://www.invensislearning.com/blog/roles-responsibilities-of-quality-management-team/]
- 46. Statistical Process Control Charts and Managing Multiplicity [https://www.astm.org/news/statistical-process-control-charts]
- 47. Out of Control Processes (SPC) Control Charts Detection ... [https://www.sixsigma-institute.org/Six_Sigma_DMAIC_Process_Control_Phase_SPC_Out_Of_Control.php]
- 48. FalseReject: A Resource for Improving Contextual Safety ... [https://arxiv.org/html/2505.08054v1]
- 49. Group-Adaptive Threshold Optimization for Robust AI ... [https://arxiv.org/html/2502.04528v3]
- 50. RSSN at SemEval-2025 Task 11: Optimizing Multi-Label ... [https://aclanthology.org/2025.semeval-1.105/]
- 51. 2025 Great Global QC Survey Results: The whole world [https://www.westgard.com/qc-applications/basic-qc-practices/2025-global-qc-survey.html]
- 52. Meta-tuning and fast optimization of machine learning ... [https://www.sciencedirect.com/science/article/pii/S0960852425006200]
- 53. Development and external validation of a machine learning ... [https://bmcmedinformdecismak.biomedcentral.com/articles/10.1186/s12911-025-03107-3]
- 54. Teamwork in Healthcare: Key Discoveries Enabling Safer ... [https://pmc.ncbi.nlm.nih.gov/articles/PMC6361117/]
- 55. The Art of Troubleshooting for Customer Support ... [https://www.helpscout.com/helpu/art-of-troubleshooting-support/]
- 56. The complete guide to customer service troubleshooting [https://devrev.ai/blog/customer-service-troubleshooting]
- 57. Data Quality Solutions: Trends & Must-Have Capabilities in ... [https://atlan.com/know/data-quality-solutions/]
- 58. Data Quality Management for AI Success: Your 2025 Guide [https://www.alation.com/blog/data-quality-management-ai-success-2025/]
- 59. Top AI Trends in Quality Control Automation for 2025 [https://www.jidoka-tech.ai/blogs/quality-control-automation-trends]
- 60. Data Quality Tools 2025: The Complete Buyer's Guide to ... [https://www.ovaledge.com/blog/data-quality-tools/]
- 61. HPLC 2025 Preview: Prioritization Strategies in Non-Target ... [https://www.chromatographyonline.com/view/hplc-2025-preview-prioritization-strategies-in-non-target-screening-of-environmental-samples-by-chromatography-with-high-resolution-mass-spectrometry]
- 62. Business Process Automation Trends in 2025 [https://codewave.com/insights/future-business-process-automation-trends/]
- 63. Preventing false : Balancing... | KEYENCE America Rejections [https://www.keyence.com/products/measure/resources/measurement-sensors-resources/preventing-false-rejections-balancing-sensitivity-and-accuracy-in-inspection-systems.jsp]
- 64. AI Computer Vision Quality Control - Cut Manual QA 50% [https://smartdev.com/fr/ai-computer-vision-manufacturing-quality-control/]
- 65. Workflow Optimization: Benefits and Best Practices ... [https://camphouse.io/blog/workflow-optimization]
- 66. Optimizing Biochemistry Lab Performance through Six ... [https://pubmed.ncbi.nlm.nih.gov/40584979/]
- 67. Cost-Benefit Analysis: A Quick Guide with Examples and ... [https://www.projectmanager.com/blog/cost-benefit-analysis-for-projects-a-step-by-step-guide]
- 68. What is a cost-benefit analysis (CBA)? [https://www.atlassian.com/work-management/strategic-planning/cost-benefit-analysis]
- 69. An industrial case study: QbD to accelerate time-to-market of a ... [https://aapsopen.springeropen.com/articles/10.1186/s41120-021-00047-w]
- 70. Integrated ERP lean model for quality enhancement and ... [https://www.nature.com/articles/s41598-025-18619-1]
- 71. A method to optimize the accuracy of laboratory quality ... [https://www.sciencedirect.com/science/article/abs/pii/S0009898119317954]
- 72. Drug Discovery Assays Support—Troubleshooting [https://www.thermofisher.com/us/en/home/technical-resources/technical-reference-library/drug-discovery-development-support-center/drug-discovery-assays-support/drug-discovery-assays-support-troubleshooting.html]
- 73. Comparison and optimization of various moving patient ... [https://pmc.ncbi.nlm.nih.gov/articles/PMC8529142/]
- 74. Ten Ways to do the Wrong QC Wrong [https://www.westgard.com/questions/quest16.html]
- 75. Analytical performance evaluation of intelligent quality ... [https://www.sciencedirect.com/science/article/pii/S2352551725000332]
- 76. AI-Driven Quality Control: How to Reduce Defects in 2025 [https://ai-innovate.com/ai-driven-quality-control/]
- 77. Data Analytics in Pharmaceutical Industry: 7 Use Cases + ROI [https://sranalytics.io/blog/data-analytics-pharmaceutical-industry/]
- 78. AI in Pharmaceutical Industry: 2025 Guide & Use Cases [https://sranalytics.io/blog/ai-in-pharmaceutical-industry/]
- 79. Testing in the Real World: 5 Uses... Pharmaceutical Quality Control [https://www.linkedin.com/pulse/pharmaceutical-quality-control-testing-real-world-tnuoc]
- 80. : Pharmaceutical Playbook Quality Control 2025 [https://www.pharmanow.live/pharma-manufacturing/quality-control-in-pharmaceutical-manufacturing]
- 81. AI-Powered Quality Assurance: Reducing Defects Through ... [https://www.o3ozone.ai/articles/ai-powered-quality-assurance-reducing-defects-through-automation]
- 82. From Detection to Prevention: Manufacturing's Quality ... [https://zero100.com/from-detection-to-prevention-manufacturings-quality-revolution/]
- 83. How AI will reshape pharma in 2025 [https://www.drugtargetreview.com/article/154981/how-ai-will-reshape-pharma-by-2025/]