Optimizing Primer Concentration: A Scientific Guide to Minimizing Dimerization in PCR and qPCR
This article provides a comprehensive guide for researchers and drug development professionals on leveraging primer concentration optimization to minimize primer dimer formation in PCR assays.
Optimizing Primer Concentration: A Scientific Guide to Minimizing Dimerization in PCR and qPCR
Abstract
This article provides a comprehensive guide for researchers and drug development professionals on leveraging primer concentration optimization to minimize primer dimer formation in PCR assays. It covers the foundational science behind primer dimers, detailing how excessive primer concentration fuels nonspecific amplification and consumes critical reaction resources. The content delivers step-by-step methodological protocols for establishing optimal primer-to-template ratios, advanced troubleshooting strategies to overcome persistent dimerization, and rigorous validation techniques to confirm assay specificity and sensitivity. By integrating primer concentration adjustment with complementary strategies like hot-start polymerases and sophisticated primer design, this guide serves as an essential resource for improving the reliability of molecular diagnostics, genotyping, and other critical biopharmaceutical applications.
The Science of Primer Dimers: Mechanisms and Impact on Assay Efficiency
What are the fundamental types of primer dimers?
Primer dimers are short, unintended DNA artifacts that can form during a Polymerase Chain Reaction (PCR). They are primarily classified into two types based on how the primers interact with each other.
The table below outlines the core characteristics of these two dimer types.
| Feature | Self-Dimerization | Cross-Dimerization |
|---|---|---|
| Definition | A single primer molecule anneals to another copy of itself. [1] [2] | The forward primer anneals to the reverse primer (or vice versa). [1] [2] |
| Also Known As | Self-dimer, Intra-primer homology. [2] [3] | Cross-dimer, Hetero-dimer, Inter-primer homology. [2] [3] |
| Formation Mechanism | Regions within a single primer sequence are complementary to each other, leading to intermolecular binding. [1] [4] | Complementary sequences exist between the forward and reverse primer sequences, causing them to bind together. [1] [4] |
| Primary Consequence | Reduced availability of that specific primer for target amplification; can be extended by DNA polymerase. [1] [5] | Consumes both forward and reverse primers, often forming a structure that can be efficiently extended into a short amplicon. [1] [5] |
The following diagram illustrates the logical workflow for diagnosing and troubleshooting primer dimer formation in an experiment.
How do I experimentally confirm and identify the type of primer dimer in my reaction?
Gel Electrophoresis and No-Template Control (NTC)
The telltale sign of a primer dimer is a fuzzy, smeary band on a gel, typically below 100 base pairs (bp). Running the gel for a longer duration can help separate these small fragments from your desired PCR product. [1]
The most critical experiment for confirmation is a No-Template Control (NTC). Since primer dimers form independently of the target DNA, they will be the only amplification product visible in the NTC lane on a gel. If you see a band or smear in the NTC around 100 bp, you have confirmed primer dimer formation. [1] [4]
Using In Silico Tools for Prediction
Before even entering the lab, you can use thermodynamic analysis tools to screen your primer designs. Software like OligoAnalyzer can calculate the Gibbs Free Energy (ΔG) for potential dimer structures. [6] [3]
- Principle: A more negative ΔG value indicates a more stable and spontaneously forming dimer, which is undesirable. [3]
- Guideline: Generally, dimer structures with a ΔG of less than -9 kcal/mol (i.e., more negative) are considered problematic and should be avoided. [6] Hairpins, particularly those at the 3' end with a ΔG of less than -2 kcal/mol, are also likely to interfere with the reaction. [3]
What are the proven strategies to minimize or eliminate primer dimers?
The strategies below are aimed at reducing the opportunities for primers to interact nonspecifically.
Optimize Primer Design and Concentration
This is the most effective long-term solution.
- Check 3' Complementarity: Avoid primers with complementary sequences at their 3' ends, as this is where DNA polymerase begins extension. Complementarity of just two or three bases at the 3' ends can be enough to cause dimerization. [1] [7]
- Use Design Software: Leverage primer design tools (e.g., Primer-BLAST, commercial software) to check for and minimize "self-complementarity" and "self 3'-complementarity" scores during the design phase. [1] [2] [6]
- Reduce Primer Concentration: Titrate your primer concentrations down to the lowest level that still allows robust amplification of the target. This directly reduces the chance of primer-primer interactions. [1] [5] [7] This is a core strategy within the thesis context of reducing primer concentration to minimize dimerization.
Adjust Thermal Cycler Conditions
- Increase Annealing Temperature: A higher annealing temperature promotes more specific binding and helps prevent the weak hydrogen bonding that holds primer dimers together. [1] [5] Perform a temperature gradient PCR to find the optimal balance. [3]
- Use Hot-Start DNA Polymerase: A significant amount of primer dimer formation occurs when reagents are mixed at room temperature. Hot-start polymerases remain inactive until a high-temperature activation step (e.g., 95°C), preventing this pre-PCR mis-extension. [1] [4]
Explore Advanced Techniques
For persistent problems, especially in multiplex PCR or SNP detection, consider advanced solutions.
- SAMRS Nucleotides: Self-Avoiding Molecular Recognition Systems (SAMRS) incorporate modified bases that pair strongly with natural DNA but weakly with other SAMRS bases. This allows primers to bind the template while avoiding primer-primer interactions. [8]
- Modified Oligos: Using locked nucleic acids (LNAs) or peptide nucleic acids (PNAs) in primers can enhance specificity and reduce self-complementarity. [5]
What key reagents and protocols are essential for troubleshooting?
Research Reagent Solutions
The table below lists essential materials for experimenting with and mitigating primer dimers.
| Reagent/Material | Function in Troubleshooting Primer Dimers |
|---|---|
| Hot-Start DNA Polymerase | Prevents enzymatic activity during reaction setup, drastically reducing pre-PCR primer dimer formation. [1] [4] |
| Optimized Primer Pairs | Primers designed with low self-complementarity and minimal 3'-end complementarity are the foundation of a dimer-free reaction. [1] [2] |
| dNTPs | Consumed during both target and primer dimer amplification. Excessive dimer formation depletes dNTPs, reducing target yield. [5] [4] |
| SYTO Green Dye / SYBR Green | A fluorescent intercalating dye that allows real-time monitoring of total DNA synthesis, including primer dimer artifacts, in qPCR. [9] [4] |
| No-Template Control (NTC) | A critical control reaction containing all PCR components except the DNA template. Used to confirm the presence of primer-derived artifacts. [1] [4] |
Detailed Experimental Protocol: Primer Concentration Optimization
This protocol directly tests the core thesis of reducing primer concentration to minimize dimerization.
- Prepare Master Mix: Create a standard PCR master mix containing buffer, dNTPs, hot-start polymerase, and a fixed, known amount of DNA template.
- Set Up Primer Dilution Series: Prepare a series of reactions where the concentration of the forward and reverse primer pair is varied. A typical series might be: 1.0 µM, 0.5 µM, 0.2 µM, and 0.1 µM (final concentration in the reaction). [1] [7]
- Include Controls: For each primer concentration, include a No-Template Control (NTC).
- Run PCR: Perform amplification using your standard thermocycling program.
- Analyze Results:
- Run the products (including NTCs) on an agarose gel.
- Identify the lowest primer concentration that still produces a strong, specific band of your target amplicon.
- The corresponding NTC for this optimal concentration should show little to no primer dimer smear.
- For qPCR, the optimal concentration will give the lowest Ct value for the template reaction and the highest Ct value (or no signal) in the NTC. [4]
By systematically applying these definitions, diagnostics, and troubleshooting strategies, researchers can effectively manage primer dimer formation, leading to more efficient and reliable PCR results.
Core Biochemical Mechanism of Primer Dimer Formation
Primer-dimer (PD) is a potential by-product in the polymerase chain reaction (PCR) that consists of two primer molecules that have hybridized to each other instead of to the intended DNA template. This occurs due to the presence of short strings of complementary bases, particularly at the primers' 3' ends [10]. The formation and amplification of a primer dimer is a sequential process that occurs in three key steps [10]:
- Step I: Primer-Primer Annealing. Two primers anneal to each other at their 3' ends. The stability of this initial hybrid is largely determined by the GC-content and the length of the complementary overlap. Even a small region of 3' complementarity can be sufficient for this interaction to occur [10] [1].
- Step II: Initial Extension by DNA Polymerase. If the primer-primer construct is stable, DNA polymerase binds and extends the primers. The enzyme adds nucleotides complementary to the sequence of the bound primer, effectively synthesizing a short, double-stranded DNA fragment [10].
- Step III: Template-Driven Amplification. In subsequent PCR cycles, the single-stranded product from Step II acts as a template for fresh primers. These primers anneal to the newly synthesized strands, and the polymerase extends them, leading to the exponential amplification of the primer-dimer product itself [10].
This unintended process competes with the target amplification for essential PCR reagents like primers, nucleotides, and polymerase, thereby potentially inhibiting the amplification of the desired DNA sequence [10].
The following diagram illustrates this three-step mechanism:
Troubleshooting Guide & FAQs
FAQ: Under what conditions are primer dimers most likely to form? Primer dimers are favored by low annealing temperatures, which allow primers to bind to each other via short regions of complementarity despite mismatches [11]. Excessively high primer concentrations create a high local concentration that increases the chance of primer-primer interactions [1] [11]. Furthermore, the presence of complementary bases, especially at the 3' ends of primers, provides a foothold for this process to initiate [10] [1]. Finally, nonspecific polymerase activity during reaction setup at room temperature can extend these primer hybrids before PCR begins [10] [11].
FAQ: How can I confirm that a band on my gel is a primer dimer? In gel electrophoresis, primer dimers are typically visualized as a smear or band of moderate to high intensity between 30-50 base pairs, which is distinguishable from the longer target amplicon [10] [1]. Running the gel for a longer duration can help separate these small fragments from your desired product. The most definitive diagnostic test is to run a no-template control (NTC). Since primer dimers do not require a DNA template to form, they will be the sole amplification product visible in the NTC lane [1].
FAQ: What is the most critical parameter to adjust for minimizing primer dimer formation? While multiple factors are involved, primer concentration is a critical and often adjustable parameter. Empirical data shows that varying primer concentrations can significantly impact Cq values and primer dimer formation, and many assays perform best with asymmetric primer concentrations rather than the standard default [12]. This approach is central to the thesis of reducing primer concentration to minimize dimerization.
FAQ: Are primer dimers a sign of a failed experiment? Not necessarily. Primer dimer formation is a common challenge in molecular biology. While they can reduce amplification efficiency and complicate quantification in qPCR, their presence does not automatically invalidate an experiment, provided the target product is also amplified and proper controls are used for interpretation [1].
Experimental Protocol: Primer Optimization Matrix
This protocol provides a detailed methodology for optimizing primer concentrations to suppress dimerization and improve assay performance, based on validated research [12].
Principle: Systematically testing a range of forward and reverse primer concentrations to identify the combination that yields the lowest quantification cycle (Cq), the highest fluorescence intensity (signal-to-noise ratio), and minimal primer-dimer formation, as verified by gel electrophoresis.
Materials:
- Optimized PCR master mix (including buffer, Mg²⁺, dNTPs, hot-start DNA polymerase, and template DNA)
- Forward and reverse primers (stock solutions, e.g., 100 µM)
- Nuclease-free water
- Real-time PCR instrument
- Agarose gel electrophoresis system
Procedure:
- Prepare Primer Dilutions: Dilute the forward and reverse primer stocks to a working concentration (e.g., 10 µM).
- Set Up the Matrix: In a 96-well plate, prepare PCR reactions according to the table below. Each combination should be tested in at least duplicate.
- Perform qPCR: Run the reaction using standardized thermal cycling conditions.
- Analyze Results: Calculate the mean Cq and fluorescence intensity for each combination.
- Verify Specificity: Analyze the amplification products from the optimal combinations by agarose gel electrophoresis to confirm the presence of a single, specific band of the expected size and the absence of primer-dimer smears.
Data Interpretation: The optimal primer combination is the one that fulfills the following criteria: the lowest Cq value, the highest endpoint fluorescence (indicating robust yield), a low standard deviation between replicates, and no visible primer-dimer bands on the gel [12].
Table: Example Primer Optimization Matrix Setup
| Well | Forward Primer Concentration (nM) | Reverse Primer Concentration (nM) | Mean Cq | Endpoint Fluorescence | Gel Result (Primer-Dimer) |
|---|---|---|---|---|---|
| A1 | 100 | 100 | To be measured | To be measured | To be assessed |
| A2 | 100 | 200 | To be measured | To be measured | To be assessed |
| A3 | 100 | 300 | To be measured | To be measured | To be assessed |
| B1 | 200 | 100 | To be measured | To be measured | To be assessed |
| B2 | 200 | 200 | To be measured | To be measured | To be assessed |
| B3 | 200 | 300 | To be measured | To be measured | To be assessed |
| C1 | 300 | 100 | To be measured | To be measured | To be assessed |
| C2 | 300 | 200 | To be measured | To be measured | To be assessed |
| C3 | 300 | 300 | To be measured | To be measured | To be assessed |
The workflow for this optimization experiment is summarized below:
The following tables consolidate key quantitative data from the literature to guide evidence-based experimental design.
Table 1: Recommended Primer Concentrations for Common DNA Polymerases
| DNA Polymerase | Recommended Final Concentration (each primer) | Typical Working Range (each primer) | Rationale |
|---|---|---|---|
| Q5 / Phusion (Proofreading) | 500 nM | 200 - 1000 nM | Higher concentration counteracts potential 3'→5' exonuclease digestion of primers [13]. |
| Taq / OneTaq | 200 nM | 50 - 1000 nM | Standard concentration that balances specificity and efficiency [13]. |
| Hemo KlenTaq | 300 nM | 50 - 1000 nM | Optimized for sensitivity in challenging samples [13]. |
Table 2: Impact of Primer Optimization on RT-qPCR Assay Performance [12]
| Optimization Parameter | Experimental Finding | Implication |
|---|---|---|
| Cq Value Difference | 0.5 to 6.7 cycles (depending on primer conc.) | Primer concentration can dramatically impact amplification efficiency and sensitivity. |
| Optimal Primer Symmetry | 65% of assays performed better with asymmetric primer concentrations. | The default symmetric concentration is often suboptimal; optimization is required. |
| Optimal Probe Concentration | 78% of assays optimal at 100 nM; 22% at 200 nM. | Primer optimization should precede or be paired with probe concentration checks. |
| Performance with Default (200 nM) | Only 12% of assays performed best at 200/200 nM. | Systematically testing concentrations is critical for robust assay design. |
Research Reagent Solutions
This table lists essential materials and their functions for studying and preventing primer dimer formation.
Table 3: Key Reagents for Primer-Dimer Troubleshooting
| Reagent / Tool | Function / Purpose | Specific Example |
|---|---|---|
| Hot-Start DNA Polymerase | Inhibits polymerase activity at low temperatures, preventing pre-PCR mis-priming and primer-dimer formation during reaction setup [10] [11]. | Antibody-inhibited, aptamer-blocked, or chemically modified enzymes [10]. |
| Primer Design Software | Algorithms check for self-complementarity, inter-primer homology, and secondary structures to minimize dimerization potential during the design phase [10] [14]. | NCBI Primer-BLAST [14] [15]. |
| SYBR Green I Dye | A nonspecific intercalating dye for qPCR that allows detection of primer dimers via post-amplification melting curve analysis [10]. | Distinguishes target amplicon from primer dimers based on melting temperature (Tm) [10]. |
| Sequence-Specific Probes | Generates fluorescence only upon hybridization to the target amplicon, preventing signal acquisition from primer dimers in qPCR [10]. | TaqMan probes, Molecular Beacons [10]. |
In the polymerase chain reaction (PCR), achieving specific and efficient amplification of a target DNA sequence is a cornerstone of molecular biology. However, this process is susceptible to a common and persistent problem: primer-dimer formation. This issue occurs when PCR primers anneal to each other instead of to the template DNA, leading to the amplification of short, unintended artifacts [1]. Within the broader context of optimizing PCR fidelity, a key strategy involves the careful management of primer concentration. Excessive primer concentration is a primary driver of primer-dimer formation, which in turn depletes essential reaction resources, reduces the yield of the desired product, and can generate false results [16] [17] [1]. This guide details the consequences of this phenomenon and provides targeted troubleshooting FAQs to help researchers mitigate these challenges.
Mechanisms and Consequences of Primer-Dimer Formation
Primer-dimers are short, unintended DNA fragments that form when primers anneal to one another via complementary base pairing, creating a substrate that DNA polymerase can extend. This can occur through self-dimerization (a single primer binding to itself) or, more commonly, cross-dimerization (the forward and reverse primers binding to each other) [1]. The following diagram illustrates the logical workflow for troubleshooting this issue, connecting the causes directly to their consequences and potential solutions.
The formation of primer-dimers triggers a cascade of negative outcomes in the PCR:
- Resource Depletion: The DNA polymerase and dNTPs are finite resources in the reaction. When consumed by extending primer-dimers, fewer are available for amplifying the desired target, directly leading to reduced yield or even amplification failure [1].
- Reduced Yield: As resources are diverted to the amplification of primer-dimer artifacts, the efficiency of target amplification drops significantly. This is especially critical when amplifying low-abundance targets or when working with precious samples [16].
- False Results: In gel electrophoresis, primer-dimers appear as a fuzzy smear or band typically below 100 base pairs [1]. This can be mistaken for a specific product, leading to false positives. Furthermore, in quantitative PCR (qPCR), primer-dimers can generate false fluorescence signals, severely compromising data accuracy.
Quantitative Data and Optimization Strategies
Recommended Primer Concentrations by Polymerase Type
The optimal primer concentration is not universal and can depend on the specific DNA polymerase used, largely due to differences in enzymatic properties like exonuclease activity. The following table summarizes recommended concentrations.
Table 1: Final Primer Concentration Guidelines for Common DNA Polymerases
| Polymerase Type / Name | Recommended Final Concentration (each primer) | Typical Optimization Range | Rationale |
|---|---|---|---|
| Archaeal (High-Fidelity)(e.g., Q5, Phusion) | 500 nM [18] | 200 - 1000 nM [18] | Higher concentration counteracts potential digestion by the enzyme's strong 3'→5' exonuclease (proofreading) activity [18]. |
| Taq-Based(e.g., Standard Taq, OneTaq) | 200 nM [18] | 50 - 1000 nM [18] | Standard concentration for robust amplification without excessive nonspecific binding. |
Comprehensive PCR Optimization Strategies
Beyond adjusting primer concentration, a multi-faceted approach is often required to fully suppress primer-dimer formation and enhance amplification specificity.
Table 2: Key Parameters for PCR Optimization to Prevent Primer-Dimer
| Parameter | Optimization Strategy | Effect on Primer-Dimer & Specificity |
|---|---|---|
| Primer Design | Ensure primers are 20-30 nt; Tm 55-70°C (within 5°C); GC content 40-60%. Avoid 3' end complementarity and GC-rich 3' ends [16] [19]. | Minimizes the fundamental possibility of primers annealing to themselves or each other [16] [1]. |
| Annealing Temperature | Set annealing temperature 3-5°C below the lowest primer Tm. Use a gradient thermocycler for empirical optimization. Increase temperature to improve specificity [17] [20]. | Higher temperatures destabilize the weak bonds in primer-dimers, favoring specific primer-template binding [1]. |
| Hot-Start Polymerase | Use a hot-start enzyme. These polymerases require heat activation, preventing activity during reaction setup at lower temperatures [11] [1]. | Prevents enzymatic extension of primerdimers that form before the PCR cycle begins [1]. |
| Template Quality & Amount | Use high-quality template. For genomic DNA, use 1 ng–1 µg; for plasmid, 1 pg–10 ng per 50 µL reaction [20]. Avoid excessive template [11]. | Provides an optimal primer-to-template ratio, guiding primers to the correct target instead of each other [17]. |
| dNTP Concentration | Use balanced dNTP concentrations (typically 0.2 mM each). Avoid excess [16] [17]. | Prevents resource oversupply that can fuel nonspecific amplification and reduces misincorporation errors [16]. |
The Scientist's Toolkit: Essential Research Reagents
Successful troubleshooting and optimization rely on the use of specific, high-quality reagents. The following table details key solutions used to combat PCR issues like primer-dimer.
Table 3: Research Reagent Solutions for PCR Troubleshooting
| Reagent / Material | Function & Application in Troubleshooting |
|---|---|
| Hot-Start DNA Polymerase | Essential for suppressing primer-dimer. It remains inactive until the initial denaturation step, preventing spurious extension during reaction setup [11] [1]. |
| Universal Annealing Buffer | Specialized buffers (e.g., with isostabilizing components) allow for a universal annealing temperature (e.g., 60°C), simplifying multi-assay PCR and reducing optimization time without sacrificing yield or specificity [21]. |
| dNTP Mix (Balanced) | Provides the equimolar building blocks (dATP, dCTP, dGTP, dTTP) for DNA synthesis. Using a pre-mixed, balanced solution is crucial to prevent incorporation errors and maintain fidelity [16] [20]. |
| Magnesium Salt Solution (MgCl₂/MgSO₄) | Serves as a essential cofactor for DNA polymerase activity. Its concentration requires precise optimization, as excess Mg²⁺ can decrease specificity and increase error rates [11] [20]. |
| PCR Additives (e.g., GC Enhancer) | Additives like DMSO or commercial GC enhancers help denature complex templates (e.g., GC-rich sequences), improving primer binding and overall amplification efficiency of difficult targets [11] [20]. |
| Nuclease-Free Water | The solvent for all reactions. Must be certified nuclease-free to prevent degradation of primers, templates, and reaction components, which can lead to complete amplification failure [22] [20]. |
Frequently Asked Questions (FAQs)
Q1: How can I be sure the smeared band at ~100 bp on my gel is a primer-dimer and not my target product? Primer-dimers have two key characteristics on a gel: they are short (typically under 100 bp) and have a fuzzy, smeary appearance rather than a sharp, defined band [1]. The most definitive test is to run a No-Template Control (NTC). If the same smeary band appears in the NTC well, it confirms the amplification is occurring without your template and is almost certainly a primer-dimer [1].
Q2: I am getting false positives in my negative controls. Could primer-dimer be the cause, and how do I resolve it? Yes, primer-dimer formation is a common cause of false positives, especially in qPCR where it can produce a fluorescence signal. To resolve this:
- Decontaminate: Thoroughly clean your PCR work area and equipment with 10% bleach and/or UV irradiation. Use separate work areas for pre- and post-PCR steps [22].
- Use Filter Tips: Always use sterile, filter tips to prevent aerosol contamination [22].
- Fresh Reagents: Aliquot primers and reagents to minimize freeze-thaw cycles and replace all stocks if contamination is suspected [22].
- Re-optimize: Follow the optimization strategies above, particularly lowering primer concentration and increasing the annealing temperature [1].
Q3: What is the most effective first step if I suspect primer-dimer is affecting my PCR? The most straightforward and effective first step is to lower the primer concentration within the recommended range for your polymerase (e.g., from 1 µM to 0.2-0.5 µM) [16] [18] [17]. This directly reduces the probability of primers encountering and binding to each other. Simultaneously, increasing the annealing temperature by a few degrees can further disrupt the unstable primer-dimer duplexes [20] [1].
Q4: My primers have high complementarity at the 3' ends. Should I immediately order new primers? While redesigning and ordering new primers is the most robust long-term solution, you can first attempt a Touchdown PCR protocol. This method starts with a high, stringent annealing temperature that prevents primer-dimer formation and favors only perfect matches. The temperature is then gradually lowered in subsequent cycles to the calculated Tm. This can often "rescue" an experiment by allowing specific amplification to outcompete nonspecific products [17] [19].
FAQ: How does high primer concentration lead to primer dimer formation?
In a PCR reaction, primers are designed to find and bind to a specific template DNA sequence. When the primer concentration is too high, it creates a situation where there are many more primer molecules than available template binding sites [1]. These excess primers are more likely to randomly encounter and anneal to each other through short regions of complementary sequences, rather than to the intended template [23] [4]. Once two primers bind to each other, even partially, the DNA polymerase can recognize the 3' end as a starting point and extend the primer, creating a short, unintended DNA fragment known as a primer dimer [10]. This process consumes reagents and can outcompete the amplification of the desired target [4].
Experimental Protocol: Optimizing Primer Concentration
Objective: To determine the optimal primer concentration that maximizes target amplification yield while minimizing or eliminating primer dimer formation.
Materials:
- Prepared PCR master mix (containing buffer, dNTPs, DNA polymerase, MgCl₂, and template DNA)
- Forward and reverse primer stock solutions (e.g., 100 µM)
- Nuclease-free water
- PCR tubes
- Thermal cycler
- Gel electrophoresis equipment
Methodology:
- Prepare Dilution Series: Create a series of PCR reactions where the final concentration of each primer is varied. A typical range is from 0.1 µM to 1.0 µM [11].
- Run PCR: Amplify the samples using your standard PCR protocol.
- Analyze Results: Resolve the PCR products using gel electrophoresis. Primer dimers will typically appear as a fuzzy smear or band below 100 bp [1]. Compare the intensity of the desired product band against the primer dimer band for each primer concentration.
Expected Outcome: You will observe that at high primer concentrations, primer dimers are prominent and the specific product yield may be low. As you decrease the concentration, primer dimers should diminish, and the specific product band should become stronger. The optimal concentration is the one that gives the strongest desired band with the faintest or no primer dimer band.
The following table summarizes the direct and indirect consequences of using excessively high primer concentrations in PCR.
| Aspect | High Primer Concentration (>0.5 µM) | Recommended/Optimized Concentration (0.1 - 0.5 µM) |
|---|---|---|
| Primer Dimer Formation | Significantly promoted; high risk [23] [4] | Minimized [1] [5] |
| Reaction Efficiency | Resources (dNTPs, polymerase) consumed by dimers [4] | Resources dedicated to target amplification |
| Amplification Specificity | Reduced; increased non-specific background [11] | Enhanced; cleaner target amplification |
| qPCR Ct Value | Can cause increased Ct or false negatives in target detection [4] | More accurate and efficient quantification |
| Primer-to-Template Ratio | High ratio favors primer-primer interactions [1] | Balanced ratio favors primer-template binding |
Research Reagent Solutions
The following key reagents are essential for troubleshooting primer dimer issues related to primer concentration.
| Reagent/Solution | Function in Minimizing Primer Dimers |
|---|---|
| Hot-Start DNA Polymerase | Remains inactive at room temperature, preventing polymerase activity during reaction setup and early stages when primer dimers are most likely to form [1] [10] [11]. |
| HPLC-Purified Primers | Provides high-quality primers free of truncated synthesis products that can contribute to non-specific amplification and dimer formation [24] [23]. |
| MgCl₂ Solution | Cofactor for DNA polymerase; its concentration can be optimized (lowered if necessary) to increase stringency and reduce non-specific priming and dimer extension [11]. |
| PCR Additives (e.g., DMSO) | Can help denature templates with complex secondary structures, but should be used at optimized concentrations as excess can promote dimerization [23] [11]. |
Troubleshooting Guide: Addressing Primer Dimers Beyond Concentration
While primer concentration is a critical factor, a comprehensive troubleshooting approach involves optimizing multiple parameters. The following diagram outlines the logical relationship between different strategies to mitigate primer dimers.
Primer Dimer Troubleshooting Strategy
Primer Design and Quality
- Eliminate 3' Complementarity: Ensure the 3' ends (especially the last 5 nucleotides) of your forward and reverse primers are not complementary, as this is a major trigger for dimer extension by DNA polymerase [2] [23].
- Analyze Secondary Structures: Use primer design software to check for self-complementarity (hairpins) and cross-dimerization potential between the primer pair. Select primers where these values are low [24] [2].
- Follow Design Rules: Adhere to standard guidelines for primer length (18-30 nucleotides) and ensure both primers have similar melting temperatures (Tm within 5°C of each other) [24] [2].
- Use Pure Primers: Order HPLC-purified primers to avoid truncated oligonucleotides that can contribute to non-specific amplification [23] [11].
Reaction Condition Optimization
- Increase Annealing Temperature: A higher annealing temperature increases stringency, preventing primers from binding to non-target sequences or to each other. Use a temperature gradient to find the optimal temperature [1] [11].
- Optimize Mg²⁺ Concentration: Excessive Mg²⁺ can reduce reaction specificity and promote primer dimer formation. Titrate Mg²⁺ concentration to find the lowest level that supports robust amplification of your target [11].
- Employ Touchdown PCR: This technique starts with an annealing temperature above the primers' estimated Tm and gradually lowers it. This favors the amplification of the specific target in the early cycles, which then outcompetes any non-specific products in later cycles [24].
Advanced Enzyme and Primer Systems
- Use Hot-Start Polymerases: These enzymes are inactive until a high-temperature activation step, critically preventing enzymatic activity during reaction setup at lower temperatures where primer dimers readily form [1] [10].
- Explore Specialized Primer Systems: For challenging applications like highly multiplexed PCR, consider advanced solutions such as chimeric primers or cooperative primers (Co-Primers), which are structurally modified to prevent primer-primer interactions [10] [25].
Core Concepts and Troubleshooting FAQs
What is the fundamental relationship between primer-to-template ratio and primer dimer formation?
The primer-to-template ratio directly influences the likelihood of primer-dimer formation. When the concentration of primers is high relative to the target template, primers are more likely to encounter and anneal to each other instead of binding to the template DNA. This occurs because primers are short, single-stranded DNA fragments with a high diffusion rate; an excessive number of primers in the reaction increases the probability of complementary regions between primers base-pairing. This non-productive interaction creates free 3' ends that DNA polymerase can extend, synthesizing short, unintended DNA fragments that consume reaction resources and can compete with the amplification of the desired product [8] [1].
How can I optimize primer concentration to improve PCR specificity?
Optimization involves lowering the primer concentration to a level that is sufficient for specific amplification but minimizes non-specific interactions. The recommended concentration range for primers in a standard PCR is typically 0.1–1 µM [11] [26]. If primer dimers are observed, the first step is to lower the primer concentration within this range or, alternatively, increase the template concentration to achieve a more favorable primer-to-template ratio [1]. Using a hot-start DNA polymerase is also highly recommended, as it remains inactive at room temperature, preventing polymerase activity during reaction setup when primer-dimer formation is most likely to initiate [11] [1].
What other factors contribute to primer dimer formation besides ratio?
While concentration is critical, other factors are intrinsically linked to dimer formation:
- Primer Design: Primers with complementary sequences, especially at their 3' ends, are a major risk. Avoid designs where primers can form stable cross-dimers or self-dimers [11] [2].
- Annealing Temperature: An annealing temperature that is too low allows primers to bind to sequences with partial complementarity, including to other primers. Increasing the annealing temperature enhances stringency and primer specificity [11] [26].
- Reagent Quality: The presence of truncated oligonucleotides in poorly purified primer stocks can exacerbate dimer formation, as these shorter fragments can anneal more promiscuously [27].
Quantitative Data and Optimization Strategies
The following table summarizes key parameters and their recommended values for optimizing primer-to-template ratios and minimizing amplification artifacts.
| Parameter | Sub-Optimal Condition | Optimized Condition | Primary Effect of Optimization |
|---|---|---|---|
| Primer Concentration | High (>1 µM) | Low (0.1–1 µM), optimized [11] [1] | Reduces primer-primer interactions, favoring primer-template binding. |
| Template Quantity | Too low | Follow guidelines: 1 pg–10 ng (low complexity); 1 ng–1 µg (high complexity) per 50 µL reaction [26] | Improves primer-to-template ratio, reducing chance of primer-dimer formation. |
| Annealing Temperature | Too low | Increase temperature; optimize using a gradient (often 3–5°C below primer Tm) [11] [26] | Increases amplification stringency, preventing non-specific primer binding. |
| DNA Polymerase Type | Standard polymerase | Hot-start polymerase [11] [1] | Prevents enzymatic activity during setup, curtailing early-stage primer-dimer extension. |
| Mg²⁺ Concentration | Excess | Optimize in 0.2–1 mM increments [11] [26] | Reduces non-specific amplification and mispriming, as Mg²⁺ is a cofactor for polymerase. |
Advanced Research and Reagent Solutions
For persistent issues or highly demanding applications, advanced chemical and computational solutions are available.
SAMRS (Self-Avoiding Molecular Recognition Systems) Nucleotides
SAMRS are artificially engineered nucleobases that pair with natural nucleotides but not with other SAMRS nucleotides. When incorporated into primers, SAMRS components strategically disrupt complementarity between primers, thereby avoiding primer-dimer formation. This technology is particularly valuable for highly multiplexed PCR and sensitive SNP detection assays, as it allows for the use of higher primer concentrations without the associated artifact formation [8].
Machine Learning for PCR Prediction
Emerging research uses Recurrent Neural Networks (RNNs) and Convolutional Neural Networks (CNNs) to predict PCR success from sequence data alone. These models are trained on large datasets of primer-template combinations and their amplification outcomes. They can predict the success of PCR amplification with high accuracy, providing a powerful in silico tool for primer design and optimization before any wet-lab experiment is conducted [28] [29].
The Scientist's Toolkit: Essential Research Reagents
| Reagent or Tool | Function in Optimizing Amplification |
|---|---|
| Hot-Start DNA Polymerase | Essential for specificity; remains inactive until a high-temperature activation step, preventing primer-dimer formation during reaction setup [11] [1]. |
| SAMRS-Modified Primers | Advanced primers that resist primer-primer interactions due to their engineered base-pairing properties, ideal for complex multiplex assays [8]. |
| HPLC-Purified Oligonucleotides | High-purity primer preparation removes failure sequences and truncated oligonucleotides, ensuring a homogeneous primer population and reducing mispriming [27]. |
| Gradient Thermocycler | Instrumental for empirical optimization of the annealing temperature, a critical parameter that works in concert with primer concentration to ensure specificity [11] [26]. |
| In Silico Prediction Tools (RNN/CNN) | Computational models that predict PCR efficiency and potential for primer-dimer formation from sequence data, guiding optimal primer design [28] [29]. |
Experimental Protocols for Troubleshooting and Validation
Protocol: Systematic Optimization of Primer Concentration
- Prepare a Master Mix: Create a master mix containing all PCR components except primers.
- Dilution Series: Prepare a serial dilution of your primer pair to final concentrations across the range of 0.05 µM, 0.1 µM, 0.3 µM, 0.5 µM, and 1 µM.
- Run PCR: Aliquot the master mix into separate tubes and add the different primer concentrations. Perform amplification using a standardized thermal cycling protocol.
- Analyze Results: Resolve the PCR products on an agarose gel. Identify the concentration that yields the strongest specific band with the faintest or no primer-dimer smear (typically seen at ~50-100 bp) [1] [26].
Protocol: Using a No-Template Control (NTC) to Diagnose Primer-Dimer
- Set Up Reaction: Prepare a standard PCR reaction that is identical in all respects to your test reactions, but omit the template DNA. Replace it with nuclease-free water.
- Run Alongside Tests: Place the NTC in the same thermocycler run as your experimental samples.
- Interpretation: After gel electrophoresis, any amplification product in the NTC lane is the result of primer-dimer formation or contamination. If your test sample shows a band at the same size as the NTC, that band is a primer-dimer artifact and not a true amplicon [1].
Primer Optimization and Amplification Specificity Workflow
The following diagram illustrates the logical decision-making process for troubleshooting and optimizing PCR specificity through primer concentration and related parameters.
A Step-by-Step Protocol for Determining Optimal Primer Concentration
Why is primer concentration important?
In polymerase chain reaction (PCR) experiments, primer concentration is a critical factor for success. Using primers within the standard range of 0.1 to 1 μM provides a baseline for efficient and specific amplification of the target DNA sequence [11] [30]. Deviating from this range, particularly using excessive primer concentrations, is a common cause of primer-dimer formation and other non-specific amplification artifacts, which can severely compromise experimental results and the reliability of downstream applications [11] [30].
Standard Primer Concentration Guidelines
The table below summarizes the standard concentration ranges and their applications [11] [30].
| Primer Concentration (μM) | Typical Use Cases | Notes & Considerations |
|---|---|---|
| 0.1 - 0.5 | Standard PCR amplification | A common starting point for many applications. |
| 0.5 - 1.0 | Long-range PCR, PCR with degenerate primers | Provides a higher primer concentration to support more challenging amplification [11]. |
| > 1.0 | Generally not recommended | High risk of primer-dimer formation and non-specific amplification, reducing yield and specificity [11] [30]. |
Frequently Asked Questions (FAQs)
What is primer-dimer and how does high primer concentration cause it?
Primer-dimer is a non-specific byproduct of PCR where two primer molecules anneal to each other and are extended by the DNA polymerase, instead of binding to the target DNA template [30]. When primer concentration is too high, it increases the likelihood that primers will encounter and bind to each other, especially during the reaction setup and initial cycling steps before the optimal annealing temperature is reached [11]. Experimental research has shown that stable primer-dimer formation can occur with as few as 15 consecutive complementary base pairs between primers [31].
My PCR yield is low. Should I increase my primer concentration?
Not necessarily. Low yield can have many causes. Before increasing primer concentration, which could create new problems, you should first investigate other common issues [11] [32]:
- Template Integrity & Quantity: Ensure your DNA template is intact and you are using the recommended amount.
- Primer Quality: Verify that your primers are of high chemical purity and have been stored correctly.
- Annealing Temperature: An annealing temperature that is too high can reduce primer binding efficiency. Optimize this temperature in 1-2°C increments.
- Cycle Number: Ensure an adequate number of PCR cycles (typically 25-40) are being used [11].
I see multiple bands or smears on my gel. Is primer concentration the issue?
Yes, excessive primer concentration is a common cause of non-specific products and high background [11] [30]. When primers are too abundant, they are more likely to bind to non-target, partially complementary sequences on the DNA template. To resolve this:
- Reduce primer concentration within the 0.1-1 μM range.
- Use a hot-start DNA polymerase to prevent activity during reaction setup [11] [32].
- Increase the annealing temperature to improve stringency and prevent mis-priming [11].
- Optimize Mg²⁺ concentration, as excess Mg²⁺ can also decrease specificity [11] [30].
Experimental Protocol: Optimizing Primer Concentration to Minimize Dimerization
This protocol provides a method to empirically determine the optimal primer concentration for your specific reaction, minimizing primer-dimer while maintaining strong target amplification.
Materials Required
- DNA template
- Forward and reverse primers (resuspended to a stock concentration, e.g., 100 μM)
- PCR master mix (containing buffer, dNTPs, Mg²⁺, and DNA polymerase)
- Nuclease-free water
- Thermal cycler
- Gel electrophoresis equipment
Procedure
- Prepare Primer Dilutions: Dilute your primer stock to a working concentration of 10 μM.
- Set Up Reactions: Prepare a series of PCR reactions as outlined in the table below. Keep all components constant except for the primer concentration.
| Tube | Final Primer Concentration (μM) | 10 μM Primer (μL) | Master Mix + Template + Water (μL) | Total Volume (μL) |
|---|---|---|---|---|
| 1 | 0.1 | 0.5 | 49.5 | 50 |
| 2 | 0.25 | 1.25 | 48.75 | 50 |
| 3 | 0.5 | 2.5 | 47.5 | 50 |
| 4 | 0.75 | 3.75 | 46.25 | 50 |
| 5 | 1.0 | 5.0 | 45.0 | 50 |
- Run PCR: Place the tubes in a thermal cycler and run the standard PCR program for your target.
- Analyze Results: Analyze the PCR products using gel electrophoresis. The optimal condition is the one that produces a single, sharp band of the expected size with the lowest intensity of primer-dimer (visible as a fast-migrating smear or band near the bottom of the gel).
This systematic approach allows you to identify the precise concentration that offers the best specificity for your experiment.
The Scientist's Toolkit: Research Reagent Solutions
The following table details key reagents and their functions in PCR, specifically in the context of optimizing reactions and minimizing artifacts like primer-dimer.
| Reagent / Material | Function | Considerations for Reducing Dimerization |
|---|---|---|
| Hot-Start DNA Polymerase | A modified enzyme inactive at room temperature, preventing enzymatic activity during reaction setup. | Crucial for specificity. Reduces primer-dimer and non-specific amplification by only activating at high temperatures [11] [32]. |
| High-Fidelity DNA Polymerase | Enzymes with proofreading (3'→5' exonuclease) activity for high-accuracy DNA synthesis. | Often used in cloning and sequencing. While not directly preventing dimerization, they produce higher fidelity products [11] [32]. |
| dNTPs | The building blocks (nucleotides) for DNA synthesis. | Use high-quality, pure dNTPs. Unbalanced concentrations can increase error rates [11] [30]. |
| Magnesium Ions (Mg²⁺) | A essential cofactor for DNA polymerase activity; stabilizes primer-template binding. | Concentration is critical. Excess Mg²⁺ promotes non-specific binding and primer-dimer [11] [30]. Optimize for each primer set. |
| PCR Additives (e.g., DMSO, Betaine) | Co-solvents that help denature complex DNA secondary structures, especially in GC-rich templates. | Can weaken primer binding, potentially affecting dimerization. May require re-optimization of annealing temperature [11]. |
Primer-Dimer Troubleshooting Workflow
The following diagram illustrates a logical pathway for diagnosing and resolving primer-dimer issues, starting with the foundational step of verifying primer concentration.
Advanced Strategy: Cooperative Primers
For applications requiring extreme multiplexing or where traditional optimization fails, cooperative primers represent an advanced technological solution. This novel class of primers is designed to greatly reduce the propagation of primer-dimers once they are formed. Research has demonstrated a dramatic 2.5 million–fold improvement in the reduction of nonspecific amplification compared to standard primers, allowing for specific target detection even in a massive background of potential primer-dimers [33]. This approach is particularly valuable for next-generation sequencing library preparation and complex diagnostic assays.
Designing a Primer Concentration Gradient Experiment
FAQ: Primer Concentration and Dimerization
What is a primer dimer and why is it a problem for my PCR?
A primer dimer is a small, unintended DNA fragment that forms when PCR primers anneal to each other instead of to the intended target DNA template. This occurs via two main mechanisms: self-dimerization (a single primer with self-complementary regions) or cross-dimerization (two primers with complementary regions binding to each other) [1]. The problem is that primer dimers consume valuable PCR resources—including primers, polymerase, and dNTPs—which can drastically reduce the yield and efficiency of your target amplification. In quantitative applications, this can lead to inaccurate quantification and false results [8] [5].
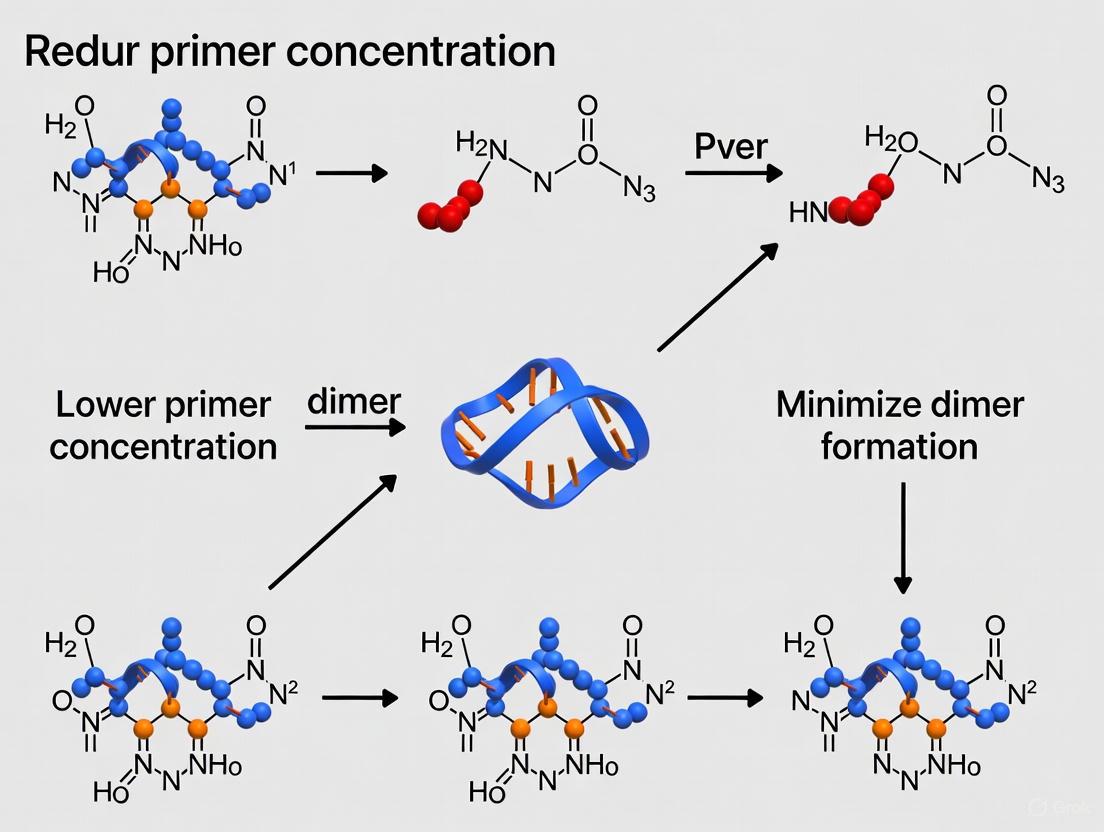
How does reducing primer concentration help minimize primer dimer formation?
High primer concentrations increase the likelihood that primers will encounter and bind to each other rather than to the template DNA. Lowering the primer concentration reduces this probability, giving primers fewer opportunities to form dimers and favoring their binding to the more abundant template [1]. The optimal primer-to-template ratio is critical; excessive primers promote secondary priming and spurious products [34] [11].
What is a typical starting point for primer concentration, and how far should I test?
A common and effective starting concentration for each primer in a standard PCR is 0.1-0.5 µM [34]. Many protocols suggest a typical optimal concentration of around 0.1-0.3 µM [35]. For your gradient experiment, it is advisable to test a range both above and below this. A range of 0.05 µM to 1 µM is a good starting point, as concentrations above this often increase the risk of nonspecific amplification and primer dimer formation [34] [11].
Besides primer concentration, what other factors can I optimize to reduce dimerization?
Primer concentration is one of several key parameters. A comprehensive approach to troubleshooting primer dimers should also consider [1] [11]:
- Primer Design: Design primers with minimal self-complementarity, especially at their 3' ends.
- Annealing Temperature: Increase the annealing temperature to discourage primers from binding to mismatched sequences or each other.
- Hot-Start Polymerase: Use a hot-start enzyme to prevent polymerase activity during reaction setup at lower temperatures, where primer dimer formation is most likely to initiate.
- Magnesium Concentration: Optimize Mg²⁺ concentration, as excess Mg²⁺ can stabilize nonspecific primer binding.
Experimental Protocol: Primer Concentration Gradient Setup
This protocol provides a step-by-step guide for systematically determining the optimal primer concentration to minimize dimerization while maximizing specific product yield.
Preliminary Primer Quality Control
Before beginning wet-lab experiments, analyze your primer sequences in silico.
- Objective: To identify regions of self-complementarity and cross-complementarity that could lead to dimer formation [36].
- Method: Use online oligonucleotide analysis tools (e.g., Oligo Analyzer) to check for hairpins, self-dimers, and cross-dimers. A strong predicted dimer structure, especially at the 3' ends, may require redesigning the primers [37].
Reagent Preparation
Gather and prepare the following reagents. Using a pre-mixed master mix for everything except the primers and template is highly recommended to minimize pipetting error and ensure reaction uniformity.
Table 1: Research Reagent Solutions for Concentration Gradient Setup
| Reagent | Function in the Experiment | Recommended Concentration or Amount |
|---|---|---|
| Hot-Start DNA Polymerase | Enzyme that amplifies DNA; hot-start version prevents activity until high-temperature activation, reducing pre-PCR dimers [1]. | 0.5–2.0 units/50 µL reaction [34]. |
| PCR Buffer (with MgCl₂) | Provides optimal chemical environment (pH, salts) for polymerase activity. The included Mg²⁺ is a essential cofactor [35]. | 1X final concentration. |
| dNTP Mix | Building blocks for new DNA synthesis [34]. | 200 µM of each dNTP. |
| DNA Template | The target DNA to be amplified. Quality and quantity are critical [11]. | 1 pg–10 ng (plasmid) or 1 ng–1 µg (genomic) per reaction [34]. |
| Nuclease-Free Water | Solvent to bring the reaction to its final volume. | Variable to volume. |
| Primer Stock Solutions | Forward and reverse primers to be tested. Resuspend to a high concentration (e.g., 100 µM) for accurate serial dilution. | Variable; see gradient design below. |
Designing the Primer Concentration Gradient
The core of the experiment is to create a series of reactions where the primer concentration is the only variable.
Table 2: Example Primer Concentration Gradient Setup for a 50 µL Reaction
| Reaction Tube | Final Primer Concentration (µM) | Volume of 10 µM Primer Stock (µL) | Volume of Master Mix + Water (µL) |
|---|---|---|---|
| 1 | 0.05 | 0.25 | 49.75 |
| 2 | 0.1 | 0.5 | 49.5 |
| 3 | 0.2 | 1.0 | 49.0 |
| 4 | 0.3 | 1.5 | 48.5 |
| 5 | 0.5 | 2.5 | 47.5 |
| 6 | 0.75 | 3.75 | 46.25 |
| 7 | 1.0 | 5.0 | 45.0 |
Notes:
- The "Master Mix + Water" volume assumes a master mix containing buffer, dNTPs, polymerase, template, and enough water to make the final volume 50 µL after the primer is added.
- It is critical to include a No-Template Control (NTC) for each primer concentration you test. The NTC will contain all reaction components except the DNA template, which is replaced with water. Amplification in the NTC is a clear indicator of primer dimer or contamination [1].
Thermal Cycling Conditions
Use the following standard cycling conditions as a starting point. The annealing temperature (Ta) may need optimization in a separate experiment, ideally using a temperature gradient cycler [38].
Analysis and Interpretation of Results
After thermal cycling, analyze the results using gel electrophoresis.
- Procedure: Run the entire volume of each PCR reaction, including all NTCs, on an agarose gel. Include an appropriate DNA ladder.
- Interpreting the Gel:
- Specific Product: Look for a clear, sharp band at the expected size for your target amplicon.
- Primer Dimer: Appears as a fuzzy, smeary band or a low-molecular-weight band (typically below 100 bp) near the dye front [1]. The NTC lanes are crucial for confirming that bands in this region are primer dimers and not non-specific products from the template.
- Determining the Optimal Concentration: The optimal primer concentration is the lowest concentration that produces a strong, specific amplicon with little to no visible primer dimer in the sample or NTC lane. In the example below, 0.2 µM would be selected.
Systematically optimizing primer concentration is a fundamental and highly effective strategy for mitigating primer dimerization. The experimental workflow involves preparing a dilution series of your primers, running parallel PCRs with a no-template control for each concentration, and analyzing the results by gel electrophoresis to identify the concentration that provides the best specificity. This straightforward approach directly addresses the primer-to-template ratio, a key factor in minimizing unproductive interactions that compromise assay efficiency and accuracy in diagnostic and drug development research.
Correlating Annealing Temperature with Primer Concentration for Enhanced Specificity
Frequently Asked Questions (FAQs)
Q1: How do annealing temperature and primer concentration functionally interact to influence PCR specificity? The annealing temperature (Ta) and primer concentration are interdependent parameters that collectively control the stringency of primer binding. A higher Ta promotes specific primer-template hybridization but can reduce yield if too stringent. Conversely, high primer concentrations increase reaction efficiency but lower stringency, elevating the risk of primers binding to off-target sequences or to each other, forming primer-dimers. Optimizing both simultaneously creates a balance that favors specific amplification over nonspecific byproducts [11] [39] [40].
Q2: Within the context of dimerization research, what is the primary benefit of reducing primer concentration? Reducing primer concentration directly decreases the likelihood of primer-dimer formation by lowering the probability that primer molecules will encounter and anneal to each other instead of to the template DNA. This is a key strategy to minimize the amplification of these nonspecific products, which are short, unintended DNA fragments that can compete with the target amplicon for reaction resources [1] [40].
Q3: What are the definitive indicators of primer-dimer formation in gel electrophoresis? Primer-dimers are typically identified by two main characteristics on a gel:
- Short Length: They appear as a band or smear below 100 base pairs.
- Smeary Appearance: They often look fuzzy and poorly defined compared to a specific amplicon band. Running a no-template control (NTC) is a crucial validation step; if the same smeary band appears in the NTC, it confirms the product is derived from the primers themselves and not the template DNA [1].
Q4: Are there computational tools that aid in designing primers to minimize dimerization risk? Yes, several high-throughput primer design tools are available that evaluate the potential for dimer formation. These tools, such as PrimerScore2 and NGS-PrimerPlex, automatically check for self-complementarity and cross-dimers between all primers in a reaction. They use algorithms to score or filter primers based on features that contribute to secondary structures, helping researchers select primers with a low propensity for dimerization before the experiment even begins [41] [42].
Troubleshooting Guides
Problem: No PCR Product or Low Yield
This issue occurs when the amplification of the desired target is inefficient or absent.
| Possible Cause | Recommended Solution |
|---|---|
| Overly Stringent Annealing Temperature | Recalculate primer Tm and test a gradient, starting ~5°C below the lowest primer Tm. Increase temperature incrementally if specificity is the goal [11] [39]. |
| Insufficient Primer Concentration | Optimize primer concentration, typically within the range of 0.1–1 µM. Avoid excessive reduction, which can cause low yield [11] [39] [40]. |
| Suboptimal Mg²⁺ Concentration | Optimize Mg²⁺ concentration in 0.2–1 mM increments. Chelators or high dNTPs may require higher Mg²⁺ [11] [39]. |
| Poor Template Quality or Quantity | Assess DNA integrity and purity. Increase template amount if insufficient, or re-purify to remove inhibitors [11] [39]. |
Problem: Multiple Bands or Non-Specific Products
This problem is characterized by the presence of extra, unintended bands in addition to the target amplicon.
| Possible Cause | Recommended Solution |
|---|---|
| Non-Stringent Annealing Temperature | Increase the annealing temperature in 1–2°C increments to enhance specificity. Use a gradient thermal cycler if available [11] [39]. |
| Excessive Primer Concentration | Lower primer concentration (e.g., from 1 µM to 0.2 µM) to reduce mis-priming and primer-dimer formation [39] [40]. |
| Primer Design Issues | Verify primer specificity using tools like Primer-Blast. Avoid primers with complementary regions, especially at the 3' ends [11] [2]. |
| High Mg²⁺ Concentration | Lower Mg²⁺ concentration, as excess Mg²⁺ can reduce fidelity and promote non-specific amplification [11] [39]. |
Problem: Primer-Dimer Formation
Primer-dimers are short, smeary products below 100 bp that outcompete target amplification.
| Possible Cause | Recommended Solution |
|---|---|
| High Primer Concentration | Decrease primer concentration to lower the primer-to-template ratio, reducing opportunities for primers to anneal to each other [1] [40]. |
| Low Annealing Temperature | Increase the annealing temperature to discourage the weak hydrogen bonding that stabilizes primer-dimer complexes [1] [39]. |
| Primers with 3' Complementarity | Redesign primers using design tools to minimize self-complementarity and cross-complementarity, particularly at the 3' ends [1] [2]. |
| Polymerase Activity at Low Temperatures | Use a hot-start DNA polymerase. These enzymes remain inactive until a high-temperature activation step, preventing enzymatic extension during reaction setup [11] [1]. |
The following tables consolidate key experimental parameters and findings from the literature to guide your optimization strategy.
Table 1: Standard Optimization Ranges for Key PCR Components
This table provides baseline parameters for reagent optimization.
| Parameter | Standard or Recommended Range | Key Considerations |
|---|---|---|
| Primer Concentration | 0.1 – 1.0 µM [11] [39] [40] | Lower end (0.1-0.3 µM) favors specificity; higher end may be needed for multiplex or long PCR [11]. |
| Annealing Temperature (Ta) | 3 – 5°C below the lowest primer Tm [11] [39] | Must be optimized empirically. Start low and increase for specificity. |
| Mg²⁺ Concentration | 0.2 – 1.0 mM (in increments) [39] | Varies by polymerase buffer. Excessive Mg²⁺ reduces specificity [11]. |
| Primer Length | 18 – 24 nucleotides [2] | Shorter primers hybridize faster but may lack specificity; longer primers are more specific but less efficient [2]. |
| Primer GC Content | 40% – 60% [2] | Stronger binding with higher GC content. Avoid >3 consecutive G/C at the 3' end (GC clamp) [2]. |
Table 2: Experimental Findings on Primer-Dimer Formation
This table summarizes specific experimental data related to dimerization.
| Experimental Factor | Finding or Threshold | Experimental Context |
|---|---|---|
| Stable Dimer Formation | Requires >15 consecutive base pairs [31]. | Capillary electrophoresis study of 30-mer primers. Non-consecutive base pairing did not form stable dimers [31]. |
| Dimerization & Temperature | Inversely correlated for dimers with <30 bonded base pairs [31]. | Higher temperatures disrupted dimers that were not fully complementary [31]. |
| Primer Design Success | 94.7% of high-scoring primer pairs performed well [41]. | NGS validation of a 57-plex library designed with PrimerScore2, which scores primers to avoid dimerization [41]. |
The Scientist's Toolkit: Research Reagent Solutions
| Item | Function in Experiment |
|---|---|
| Hot-Start DNA Polymerase | A modified enzyme inactive at room temperature, preventing nonspecific amplification and primer-dimer formation during reaction setup. Essential for high-specificity assays [11] [1]. |
| Gradient Thermal Cycler | Instrument that allows testing a range of annealing temperatures across different wells in a single run, drastically speeding up the optimization of Ta for specificity [11] [39]. |
| dNTP Mix | The building blocks for DNA synthesis. Use a balanced, equimolar mix to prevent incorporation errors that can increase the PCR error rate [39]. |
| MgCl₂ or MgSO₄ Solution | A critical co-factor for DNA polymerase activity. Its concentration must be optimized as it significantly impacts primer annealing, specificity, and fidelity [11] [39]. |
| PCR Additives (e.g., DMSO, GC Enhancer) | Reagents that help amplify difficult templates like GC-rich sequences by lowering the melting temperature and disrupting secondary structures, thereby improving specificity and yield [11] [39]. |
Experimental Protocols
Protocol 1: Systematic Optimization of Annealing Temperature and Primer Concentration
Objective: To empirically determine the ideal combination of annealing temperature (Ta) and primer concentration that maximizes specific product yield while minimizing primer-dimer formation.
- Primer Design: Design or obtain primers with optimal characteristics: length of 18-24 nt, Tm of 54°C or higher, and GC content between 40-60% [2]. Use tools to check for self-complementarity.
- Reaction Setup: Prepare a master mix containing buffer, dNTPs, MgCl₂, template DNA, and a hot-start DNA polymerase.
- Variable Setup:
- Prepare a series of tubes with a gradient of primer concentrations (e.g., 0.1 µM, 0.3 µM, 0.5 µM, 1.0 µM).
- Use a gradient thermal cycler to run these reactions across a span of annealing temperatures (e.g., from 5°C below the calculated Tm to 2°C above it).
- Include Controls: Always run a No-Template Control (NTC) for each primer concentration to identify primer-derived artifacts.
- Analysis: Analyze PCR products using gel electrophoresis. Identify the condition that produces a single, bright band of the expected size with a clear NTC.
Protocol 2: Capillary Electrophoresis for Quantifying Primer-Dimer Formation
Objective: To precisely quantify the extent of primer-dimer formation under different experimental conditions [31].
- Sample Preparation: Anneal primer pairs under study in the presence of a neutral "drag-tag" conjugated to one primer. This tag alters electrophoretic mobility, allowing separation of ssDNA and ds primer-dimers in free solution [31].
- Electrophoresis: Load and run samples using Free-Solution Conjugate Electrophoresis (FSCE) at a range of temperatures (e.g., 18°C, 25°C, 40°C, 55°C).
- Detection & Quantification: Use laser-induced fluorescence (LIF) detection. The ratio of the peak areas for the dimer and monomer (single primer) provides a quantitative measure of dimerization risk at each temperature [31].
- Data Application: This precise data can be used to parameterize computational models predicting dimerization, helping to inform primer design and cycling conditions for complex multiplex assays [31].
Workflow and Relationship Diagrams
PCR Optimization Workflow
Primer-Dimer Causation Diagram
Utilizing No-Template Controls (NTCs) to Identify Primer-Derived Artifacts
Why is there amplification in my No-Template Control (NTC)?
Amplification in an NTC indicates that your reaction reagents are contaminated or that your primers are forming artifacts. Since an NTC contains all PCR components except the template DNA, any amplification signal points to an issue that must be resolved before experimental data can be trusted [43].
There are two primary causes for this, which can be distinguished by their amplification patterns:
- Contamination: This occurs when your master mix, water, or primers are contaminated with template DNA, genomic DNA, or PCR products from previous experiments [44] [45]. In this case, the amplification curve in the NTC will typically be consistent and have a well-defined shape, similar to a positive sample, because the contaminant is amplifiable.
- Primer-Dimer Formation: This is a nonspecific artifact that occurs when primers anneal to each other instead of the target DNA. The DNA polymerase can then extend these primers, creating short, unintended products [44] [1]. Amplification from primer dimer is often characterized by a later, less robust amplification curve (Ct > 30-35) and can appear inconsistent between NTC replicates [44].
How can I determine if my NTC amplification is from contamination or primer dimer?
You can diagnose the cause by analyzing the melt curve and the amplification profile.
| Feature | Contamination | Primer Dimer |
|---|---|---|
| Melt Curve Peak | A single, sharp peak matching the intended target's melting temperature (Tm) [45]. | A distinct peak at a lower Tm than the target product, often appearing as a small, broad peak [44] [1]. |
| Amplification Ct | Can occur at any Ct, but often earlier if contamination is significant. | Typically appears at a late Ct (e.g., >30-35 cycles) [44]. |
| Gel Electrophoresis | A discrete band at the expected size of your target amplicon. | A fuzzy, smeary band at a low molecular weight (usually below 100 bp) [1]. |
The following workflow can help you systematically troubleshoot a positive NTC:
Troubleshooting Guide
If you detected CONTAMINATION:
- Use Clean Techniques: Always wear gloves, use sterile, DNase-free labware and filter tips, and prepare reactions in a clean, dedicated pre-PCR area [44] [46].
- Decontaminate Reagents and Workspace: Replace all suspect reagents (water, master mix, primers). Clean your work surface, pipettes, and equipment with a 10% bleach solution or UV irradiation [45] [46].
- Use an Enzymatic Control: Incorporate Uracil-N-Glycosylase (UNG) or UDG into your PCR protocol. This enzyme degrades PCR products from previous reactions (if dUTP was used), preventing their re-amplification [44] [45].
If you detected PRIMER DIMER:
The following strategies focus on optimizing your reaction conditions to reduce primer dimer formation, with an emphasis on primer concentration as a key variable.
Optimize Primer Concentration: Using excessively high primer concentrations increases the chance of primers interacting with each other. Perform a primer concentration gradient test to find the lowest concentration that still provides robust, specific amplification of your target [44] [7]. A sample test matrix is shown below.
Improve Primer Design: Utilize software to design primers with minimal self-complementarity (especially at the 3' ends) and minimal complementarity between the forward and reverse primers [7] [1].
Increase Annealing Temperature: A higher annealing temperature promotes stricter primer binding to the specific target and reduces nonspecific annealing between primers [1].
Use a Hot-Start DNA Polymerase: Hot-start polymerases remain inactive until a high-temperature activation step, preventing enzymatic activity during reaction setup at lower room temperatures when primer dimer formation is most likely to occur [1] [5].
Experimental Protocol: Optimizing Primer Concentration to Minimize Dimerization
This protocol provides a detailed method to empirically determine the optimal primer concentration, a central technique for minimizing primer dimer artifacts.
Objective: To identify the combination of forward and reverse primer concentrations that yield maximum specific amplification with minimal or no primer dimer formation in the NTC.
Materials:
- Template DNA (diluted to appropriate concentration)
- Forward and Reverse Primers (stock solutions, e.g., 100 µM)
- 2x PCR Master Mix (including buffer, dNTPs, hot-start polymerase, MgCl₂)
- Nuclease-free Water
- Real-time PCR instrument or equipment for gel electrophoresis
Procedure:
Prepare Primer Dilutions: Dilute your forward and reverse primer stocks to create intermediate working solutions (e.g., 10 µM) for easy pipetting.
Set Up Reaction Matrix: Create a series of PCR reactions that test different combinations of forward and reverse primer concentrations. A standard test matrix is shown below. Always include an NTC for each unique primer combination.
Primer Concentration Optimization Matrix [44]
Reaction Forward Primer (nM) Reverse Primer (nM) 1 100 100 2 100 200 3 100 400 4 200 100 5 200 200 6 200 400 7 400 100 8 400 200 9 400 400 Run the PCR: Use your standard thermocycling protocol. If possible, include a melt curve analysis at the end.
Analyze Results:
- Amplification Curves: Identify the reactions with the lowest Ct value for the target and the cleanest baseline (no amplification in the NTC).
- Melt Curves: Check that all reactions with a positive signal have a single, sharp peak at the expected Tm. The NTCs should have no peak or a much smaller, distinct peak at a lower Tm if primer dimer is still present.
- Gel Electrophoresis: If using conventional PCR, run the products on a gel. The optimal condition will show a single, bright band of the correct size, with little to no smeary band at ~100 bp in the sample or NTC [1].
Select Optimal Conditions: Choose the primer concentration combination that provides the best efficiency and specificity, even if it is not the one that gives the very earliest Ct. The complete absence of primer dimer in the NTC is a key success indicator.
The Scientist's Toolkit: Research Reagent Solutions
The following reagents are essential for effectively implementing NTCs and troubleshooting primer-derived artifacts.
| Reagent / Tool | Function in Troubleshooting |
|---|---|
| Hot-Start DNA Polymerase | Reduces nonspecific amplification and primer dimer formation by remaining inactive until a high-temperature activation step [1] [5]. |
| SYBR Green Master Mix | Allows for melt curve analysis post-amplification, which is critical for distinguishing specific product from primer dimer [44]. |
| Uracil-N-Glycosylase (UNG/UDG) | An enzymatic control added to the master mix to degrade carryover contamination from previous PCRs, helping to ensure a clean NTC [44] [45]. |
| Nuclease-Free Water | A guaranteed DNA/RNA-free reagent essential for preparing reaction mixes and dilutions to prevent false positives in NTCs [46]. |
| Primer Design Software | Algorithms help design primers with minimal self- and cross-complementarity, reducing the inherent potential for dimer formation [1] [5]. |
Advanced Technique: Self-Avoiding Molecular Recognition Systems (SAMRS)
For exceptionally challenging applications like highly multiplexed PCR or sensitive SNP detection, advanced chemical solutions can be explored. Self-Avoiding Molecular Recognition Systems (SAMRS) involve using modified nucleobases in the primers [8].
These SAMRS nucleobases (e.g., a, t, g, c) pair normally with their natural complementary bases (A with T, G with C) but do not pair with other SAMRS bases. This means a SAMRS-containing primer will still bind perfectly to its DNA target but is much less likely to bind to another SAMRS-containing primer, thereby strategically avoiding primer-dimer formation [8].
| Aspect | Challenge | Solution | Outcome |
|---|---|---|---|
| Primer Dimers | Nonspecific amplification from primer self-annealing, competing with target[sitation:1] [47]. | Optimized primer design and lowered primer concentration[sitation:1] [11]. | Sharp, clear target band; minimal smearing below 100 bp[sitation:1]. |
| Low-Copy Target | Insufficient template (∼10 copies) led to weak or no amplification[sitation:4]. | Increased PCR cycles and used a high-sensitivity, hot-start polymerase[sitation:3] [48]. | Strong, specific amplification of the target amplicon. |
| Overall Efficiency | Low yield and specificity compromised downstream applications. | Integrated, systematic optimization of multiple reaction components. | Successful amplification suitable for sequencing or cloning. |
This case study details a systematic approach to overcome the common yet challenging problem of amplifying a low-copy number DNA target while suppressing the formation of primer dimers. Primer dimers are short, unintended DNA fragments that form when primers anneal to each other instead of the target DNA, often appearing as a fuzzy smear or band below 100 bp on an agarose gel[sitation:1] [47]. Their formation competes with the desired amplification, consuming reagents and reducing yield, which is particularly detrimental when the target is already scarce[sitation:1] [48]. The successful strategy combined stringent in-silico primer design with precise wet-lab optimization of reaction conditions and cycling parameters.
In polymerase chain reaction (PCR) experiments, the goal is to specifically and efficiently amplify a target DNA sequence. However, researchers often encounter a trade-off between sensitivity and specificity. This is especially true when the target is present in low copy numbers (e.g., less than 100 copies), requiring reaction conditions that maximize sensitivity, which can inadvertently promote nonspecific artifacts like primer dimers[sitation:4] [47].
Primer dimers form primarily through two mechanisms:
- Self-dimerization: A single primer contains regions complementary to itself.
- Cross-dimerization: The forward and reverse primers have complementary regions, causing them to bind to each other[sitation:1].
These structures provide free 3' ends that DNA polymerase can extend, generating nonspecific products that are amplified in subsequent cycles. Within the context of thesis research focused on reducing primer concentration to minimize dimerization, this case study provides a real-world validation of this principle, demonstrating that a lower primer-to-template ratio is a critical factor in successful amplification of difficult targets[sitation:1].
Experimental Investigation and Optimization
Initial Failed Conditions and Observations
The initial attempt to amplify the low-copy target used standard PCR conditions: 0.5 µM of each primer, 1X standard PCR buffer, 1.5 mM MgCl₂, 200 µM dNTPs, 0.5 units of a standard DNA polymerase, and an estimated 10-50 copies of template DNA in a 50 µL reaction. Cycling parameters included an initial denaturation at 95°C for 2 minutes, followed by 35 cycles of 95°C for 30 seconds, 55°C for 30 seconds, 72°C for 1 minute, and a final extension at 72°C for 5 minutes [11] [49] [50].
Result: Agarose gel analysis revealed a prominent, smeary band approximately 50-100 bp in size, characteristic of primer dimers. The desired 250 bp target band was either absent or extremely faint[sitation:1] [47].
Systematic Troubleshooting and Optimization
A multi-pronged optimization strategy was implemented to resolve the issue.
Primer Redesign and In-Silico Analysis
The primers were first redesigned using NCBI Primer-BLAST to ensure specificity and optimal properties [6]. The new designs adhered to the following parameters:
| Parameter | Recommended Range | Our Design | Rationale |
|---|---|---|---|
| Length | 18-30 nucleotides[sitation:2] [51] [49] | 22 nt | Balances specificity and binding efficiency. |
| GC Content | 40-60%[sitation:2] [51] [52] | 50% | Prevents overly stable (high GC) or unstable (low GC) duplexes. |
| Melting Temp (Tm) | 50-65°C; pairs within 2°C[sitation:2] [51] [49] | 60°C & 61°C | Ensures both primers anneal simultaneously at the same temperature. |
| 3' End Complementarity | Avoid >3 G/C; no complementarity between primers[sitation:1] [6] [49] | No G/C clamp; no 3' complementarity | Crucially reduces potential for primer-dimer formation. |
| Specificity Check | BLAST analysis for unique binding[sitation:2] [51] | Passed | Confirms amplification of the intended target only. |
The candidate primers were further analyzed using tools like OligoAnalyzer to check for secondary structures (hairpins) and self-/cross-dimer formation, selecting primers with ΔG values for dimers weaker (more positive) than -9 kcal/mol[sitation:2] [51].
Reaction Component Optimization
With the new primers, the reaction mixture was systematically optimized. Key changes are summarized below.
| Component | Standard Condition | Optimized Condition | Function and Optimization Rationale |
|---|---|---|---|
| Primer Concentration | 0.5 µM [49] | 0.1-0.3 µM[sitation:1] [11] | Critical Change. Lowering concentration reduces primer-primer interactions and dimer formation. |
| DNA Polymerase | Standard Taq | Hot-Start Taq[sitation:1] [11] | Prevents enzymatic activity during reaction setup, minimizing nonspecific extension at low temperatures. |
| MgCl2 Concentration | 1.5 mM [49] | 2.0 mM (optimized) [11] [50] | Essential cofactor for polymerase. Concentration was titrated (0.5-5.0 mM) for maximum yield and specificity. |
| Template Quantity | ~10 copies | Up to 1000 ng (complex DNA) [11] [48] | Increased template improves primer-to-template ratio, favoring specific binding. |
| Additives | None | DMSO (2.5-5%) [48] [50] | Disrupts secondary structures, especially beneficial for GC-rich regions. |
Thermal Cycler Protocol Adjustments
The thermal cycling profile was refined to enhance specificity.
| Step | Initial Protocol | Optimized Protocol | Rationale |
|---|---|---|---|
| Initial Denaturation | 95°C, 2 min | 98°C, 2 min [50] | More complete denaturation of complex genomic DNA template. |
| Denaturation | 95°C, 30 s | 98°C, 10 s [50] | Shorter, high-temperature denaturation preserves enzyme activity. |
| Annealing | 55°C, 30 s | 62°C, 15 s (gradient used) [11] [50] | Critical Change. Higher temperature (3-5°C below primer Tm) greatly enhances specificity. Shorter time reduces mispriming. |
| Extension | 72°C, 1 min | 72°C, 1 min (unchanged) | Sufficient for the 250 bp product. |
| Cycle Number | 35 | 40 [11] [48] | Increased to enhance signal from the low-copy number target. |
Final Optimized Protocol
Materials:
- Template: Genomic DNA (up to 1000 ng).
- Primers: Sequence-verified, HPLC-purified, resuspended to 10 µM stock.
- Polymerase: Hot-start, high-sensitivity DNA polymerase (e.g., PrimeSTAR GXL).
- Buffer: Manufacturer-provided 2X PCR mix, or 1X buffer with optimized Mg2+.
- Additives: Molecular biology grade DMSO.
Workflow:
- Prepare Master Mix on ice: 10 µL 2X PCR buffer, 0.4 µL each primer (10 µM), 0.5 µL DMSO, 0.4 µL dNTPs (10 mM), 0.5 U polymerase, and Nuclease-free water to 19 µL.
- Add Template: Add 1 µL of template DNA to the reaction tube for a 20 µL final volume.
- Run PCR: Place tubes in thermal cycler and run the following program:
- Initial Denaturation: 98°C for 2 min.
- 40 Cycles:
- Denaturation: 98°C for 10 s.
- Annealing: 62°C for 15 s.
- Extension: 72°C for 30 s.
- Final Extension: 72°C for 5 min.
- Hold: 4°C.
- Analyze Results: Run 5 µL of the PCR product on a 2% agarose gel. A clear, bright band at the expected size (250 bp) with no smearing below 100 bp indicates success.
PCR Optimization Workflow for Low-Copy Targets
Key Results and Data Interpretation
The success of the optimization was evident from the agarose gel electrophoresis results.
- Elimination of Primer Dimers: The prominent smeary band below 100 bp was eliminated, leaving only a clean, well-defined band at the expected 250 bp position[sitation:1].
- Strong Target Amplification: The intensity of the target band increased significantly, confirming efficient amplification of the low-copy number template.
- No-Template Control (NTC) Validation: A NTC reaction, which contained all reagents except the DNA template, was run alongside the optimized reaction. The absence of any amplification band in the NTC confirmed that the product was specific to the template and not due to contamination or primer-dimer artifacts[sitation:1].
Research Reagent Solutions
The following table details the key reagents that were pivotal for the success of this experiment.
| Reagent / Kit | Function / Role | Specific Example(s) |
|---|---|---|
| Hot-Start DNA Polymerase | Suppresses enzyme activity until high temperatures, drastically reducing primer-dimer formation and nonspecific amplification during reaction setup[sitation:1] [11]. | Terra PCR Direct Polymerase Mix, PrimeSTAR GXL DNA Polymerase [50]. |
| High-Fidelity Polymerase Blends | Provides superior accuracy for downstream applications like cloning and sequencing due to 3'→5' exonuclease (proofreading) activity [48]. | PrimeSTAR Max DNA Polymerase, Pfu polymerase [48]. |
| PCR Additives | Aid in denaturing complex templates (GC-rich) by disrupting secondary structures, thereby improving specificity and yield[sitation:4] [50]. | DMSO, Formamide, Betaine. |
| PCR Optimization Kits | Provide pre-titrated mixes of magnesium and other enhancers, or specialized polymerases for challenging templates [11] [50]. | GC Buffer, Mg2+ Optimization Kits, LA Taq with GC Buffer. |
Frequently Asked Questions (FAQs)
Q1: My target band is still weak after optimization. What can I do?
- Increase template amount: If the template is complex genomic DNA, you can carefully increase the input up to 1 µg [50].
- Re-check primer specificity: Use BLAST to ensure primers are unique to your target[sitation:2] [51].
- Try a touchdown PCR protocol: Start with an annealing temperature 5-10°C above the calculated Tm and decrease it incrementally over the first few cycles. This enriches for the specific target early in the reaction [50].
Q2: Are primer dimers always a problem? Not necessarily. If your target band is strong and the dimers are faint, they may not interfere, especially if you are performing a post-PCR clean-up step before sequencing or cloning[sitation:1] [47]. However, for low-copy targets or quantitative applications, they must be minimized as they compete for reaction resources.
Q3: How critical is the hot-start polymerase? It is one of the most effective single changes you can make to reduce primer dimers. It prevents the polymerase from extending primers that anneal nonspecifically while the reaction tube is being prepared and heated to the initial denaturation temperature[sitation:1] [11].
Q4: Can I simply raise the annealing temperature to fix dimers? Raising the annealing temperature is a highly effective strategy and should be one of the first steps in troubleshooting. However, if the primers themselves are poorly designed (e.g., with strong 3' complementarity), a higher temperature may not be sufficient on its own and must be combined with primer redesign[sitation:1] [11].
Advanced Troubleshooting: Solving Persistent Primer Dimerization
Frequently Asked Questions
FAQ 1: What is the primary cause of primer-dimer formation, and how do these two strategies address it? Primer dimers form when primers anneal to each other via complementary sequences, especially at their 3' ends, instead of to the intended target DNA. This occurs most readily during reaction setup at lower, non-stringent temperatures. [5] [1] The synergistic strategy combats this by:
- Lowered Primer Concentration: Reducing the number of primer molecules in the reaction directly decreases the probability that they will encounter and bind to each other. [1] [11]
- Hot-Start Polymerases: These enzymes are inactive during reaction setup. They only become active after a high-temperature activation step, preventing them from extending any primer dimers that may have temporarily formed at low temperatures. [53] [54]
FAQ 2: Can I simply use a hot-start polymerase without optimizing primer concentration? While using a hot-start polymerase alone provides a significant improvement in specificity, it may not be sufficient for all assays, particularly those with challenging primer sets or highly sensitive applications like qPCR. [55] [53] Combining it with optimized, lower primer concentrations provides a dual-layer of protection, further minimizing the risk of primer-dimer formation and maximizing the yield of your specific product. [11]
FAQ 3: What is a typical starting point for primer concentration optimization? A standard starting concentration for each primer is 0.5 µM. [56] For optimization, it is recommended to test a range of 0.1 µM to 1.0 µM. [57] [11] Begin with 0.5 µM and titrate down in 0.1 µM increments to find the lowest concentration that still provides robust amplification of your target. [57]
FAQ 4: Are all hot-start polymerases the same? No, hot-start polymerases use different inhibition mechanisms. The table below summarizes the most common types. Antibody-based and chemical modification methods are among the most widely used. [53] [56]
Table 1: Comparison of Common Hot-Start Methods
| Hot-Start Technology | Mechanism of Action | Key Characteristics | Considerations |
|---|---|---|---|
| Antibody-Based [53] [54] | An antibody binds the polymerase's active site, blocking activity. | Rapid activation during initial denaturation; full enzyme activity restored. [53] | Antibody may be of animal origin; exogenous protein in reaction. [53] |
| Chemical Modification [53] [56] | Polymerase is covalently modified with a chemical group. | Stringent inhibition; animal-origin free. [53] | Requires longer initial activation time; may not fully activate. [53] |
| Aptamer-Based [53] [54] | An oligonucleotide aptamer binds to the polymerase. | Short activation time; animal-origin free. [53] | May be less stringent; reaction stability at room temperature can be poor. [53] |
| Primer-Based (OXP) [55] | Primers contain a thermolabile group that blocks extension. | Activity is blocked at the primer level; highly specific. | Requires custom synthesized primers. |
FAQ 5: How do I visualize the success of this synergistic approach? The most common method is agarose gel electrophoresis. A successful reaction will show a single, clear band at the expected size of your target amplicon. Primer dimers typically appear as a fuzzy smear or a low molecular weight band below 100 bp. [1] Always include a no-template control (NTC) to confirm that any amplification products are derived from your template and not from primer artifacts. [1]
Troubleshooting Guide
Problem: Despite using a hot-start polymerase, I still observe primer dimers in my reaction.
| Possible Cause | Recommended Solution |
|---|---|
| Primer concentration is too high. | Titrate the primer concentration downward from 0.5 µM to 0.2 or 0.1 µM. [11] |
| Suboptimal primer design. | Redesign primers to avoid 3'-end complementarity. Use primer design software to check for self-dimers and cross-dimers. [57] [2] |
| Annealing temperature is too low. | Increase the annealing temperature stepwise by 1-2°C increments. The optimal temperature is typically 3-5°C below the primer Tm. [11] |
| Insufficient hot-start activation. | Ensure the initial denaturation/activation step is performed at the correct temperature and for the recommended duration for your specific polymerase. [53] |
Problem: Target signal is weak or absent after reducing primer concentration.
| Possible Cause | Recommended Solution |
|---|---|
| Primer concentration is too low. | Increase the primer concentration slightly within the 0.1-1.0 µM range. Avoid excessive concentrations that promote dimerization. [57] |
| Poor primer efficiency or degradation. | Check primer quality and sequence specificity. Ensure primers are stored properly in aliquots to prevent degradation. [57] [11] |
| Insufficient template DNA. | Increase the amount of template DNA, or increase the number of PCR cycles if the template is low copy number. [11] |
Problem: Non-specific amplification bands persist.
| Possible Cause | Recommended Solution |
|---|---|
| Annealing stringency is too low. | Further increase the annealing temperature. [11] Implement a touchdown PCR protocol, where the annealing temperature starts high and gradually decreases in later cycles. [57] |
| Magnesium concentration is too high. | Optimize Mg2+ concentration, as excess Mg2+ can reduce specificity and favor non-specific amplification. [11] |
| Insufficient enzyme specificity. | Consider switching to a more stringent hot-start polymerase, such as a chemically modified version. [53] |
Research Reagent Solutions
Table 2: Essential Materials for Experimental Implementation
| Item | Function/Description | Optimization Tip |
|---|---|---|
| Hot-Start DNA Polymerase | Engineered to be inactive at room temperature to prevent premature amplification. [53] | Select based on required stringency, activation time, and absence of animal-derived components. [53] |
| SYBR Green I Dye | A fluorescent dye used in qPCR to intercalate into all double-stranded DNA, allowing for product quantification and dimer detection. [55] | Use with a no-template control (NTC) to distinguish specific product fluorescence from primer-dimer fluorescence. |
| dNTP Mix | A solution containing equimolar concentrations of dATP, dCTP, dGTP, and dTTP; the building blocks for DNA synthesis. [49] | Use balanced concentrations to maintain polymerase fidelity and prevent misincorporation. [11] |
| PCR Buffer with MgCl₂ | Provides the optimal ionic environment and pH for polymerase activity. Mg2+ is an essential cofactor for the enzyme. [49] | Mg2+ concentration often requires optimization; start with the manufacturer's recommended concentration. [11] |
| Thermal Cycler with Gradient | An instrument that automates PCR temperature cycles. The gradient function allows testing of multiple annealing temperatures simultaneously. [11] | Essential for efficiently optimizing the annealing temperature for any new primer set. |
Experimental Workflow & Protocol
The following diagram illustrates the logical workflow for implementing and optimizing this synergistic strategy.
Detailed Methodology for Optimization
Primer Design and Preparation:
- Design primers to be 18-30 nucleotides in length with a GC content between 40-60%. [57] [49]
- Ensure both primers have similar melting temperatures (Tm), differing by no more than 5°C. [49]
- Critically, use design software to avoid self-complementarity and 3'-end complementarity between primers to minimize dimerization potential. [57] [2]
- Resuspend primers in sterile TE buffer or nuclease-free water and store in aliquots to prevent degradation. [57]
Initial Reaction Setup:
- Prepare a master mix on ice to minimize non-specific activity.
- Use a hot-start DNA polymerase according to the manufacturer's instructions. [53]
- Set up a 50 µL reaction with a final concentration of 0.5 µM for each primer as a starting point. [56]
- Include a no-template control (NTC) containing all reagents except the DNA template to detect contamination or primer-dimer formation. [1]
Thermal Cycling Conditions:
- Initial Denaturation/Activation: 95°C for 2-10 minutes (duration depends on the hot-start polymerase used). [53] [56]
- Amplification (25-35 cycles):
- Denaturation: 95°C for 15-30 seconds.
- Annealing: 50-65°C for 15-30 seconds (set based on the Tm of your primers). [56]
- Extension: 72°C for 30 seconds/kb of product length.
- Final Extension: 72°C for 5-10 minutes. [56]
Analysis and Iterative Optimization:
- Analyze PCR products by agarose gel electrophoresis. [1] [56]
- If primer dimers are present: Titrate primer concentration down to 0.2 µM or 0.1 µM in subsequent reactions. [11] Simultaneously, consider increasing the annealing temperature in 1-2°C increments. [11]
- If the target band is weak: Slightly increase the primer concentration (e.g., to 0.8 µM) or the amount of template DNA. Re-evaluate primer design if the problem persists. [11]
The Core Problem: What is Inherent 3' Complementarity?
What does "Inherent 3' Complementarity" mean in primer design? Inherent 3' complementarity refers to a specific design flaw where the 3'-ends of your PCR primers (either the two primers in a pair, or two copies of the same primer) contain sequences that are complementary to each other [1] [2]. This allows them to anneal to one another instead of to your target DNA template. Once annealed, DNA polymerase can extend these primers, leading to the synthesis of short, unintended "primer dimer" artifacts [5] [58].
Why is this a significant problem for my research, especially in a diagnostic context? Primer dimers compete with your target amplicon for essential PCR reagents, including primers, nucleotides, and polymerase [8]. This consumption drastically reduces the efficiency and sensitivity of your assay [5] [8]. In sensitive applications like diagnostic PCR or qPCR, primer dimers can cause false positives or inaccurate quantification, compromising the reliability of your results [1] [8]. Minimizing this through optimal design and reagent concentration is a key research goal.
Diagnostic Guide: Should You Re-Design Your Primers?
Follow the flowchart below to systematically diagnose your primer pair and decide on the correct course of action. The process evaluates both in-silico predictions and experimental results.
Decision Logic for Primer Re-Design
- Immediate Re-Design is Necessary: If in-silico tools predict significant 3'-end complementarity or your No-Template Control (NTC) shows a clear primer dimer band appearing in the early cycles of PCR (typically before cycle 35), the primers have an inherent design flaw [58]. Proceeding with experimental optimization alone will be ineffective and waste resources.
- Proceed to Experimental Optimization: If the NTC is clean in early cycles but a faint dimer appears only after many cycles (e.g., >35 in qPCR), the primers are likely well-designed [58]. The issue can probably be resolved by optimizing reaction conditions without the need for a full re-design.
Experimental Protocol: Confirming Primer Dimer Formation
This protocol allows you to experimentally verify if your current primers produce dimer artifacts.
Objective: To detect the formation of primer dimers using gel electrophoresis of a No-Template Control (NTC) reaction [1].
Materials:
- Your prepared PCR primer pair
- Standard PCR master mix (polymerase, dNTPs, buffer)
- Nuclease-free water
- Thermocycler
- Gel electrophoresis system and DNA stain
Method:
- Prepare a standard PCR reaction mix but omit the DNA template, replacing it with nuclease-free water. This is your NTC [1].
- Run the NTC and your test sample through your standard PCR protocol.
- Analyze all reactions alongside a suitable DNA ladder using gel electrophoresis. For best resolution of small fragments, run the gel a little longer than usual [1].
- Visualize the gel. Primer dimers will appear as a fuzzy smear or broad band typically below 100 base pairs, well separated from your specific amplicon [1].
Interpretation: The presence of a band in the NTC lane confirms that the amplification is due to primer-prime interaction and not your target DNA. Refer to the diagnostic guide in Section 2 to decide on the next steps.
Primer Design Specifications Table
When re-designing primers, adhere to the following quantitative specifications to minimize the risk of 3' complementarity and other common issues.
Table 1: Optimal Design Parameters for PCR Primers
| Parameter | Optimal Range | Rationale & Technical Notes |
|---|---|---|
| Primer Length | 18 - 24 nucleotides [2] [59] | Shorter primers hybridize faster but very short primers (<18 bp) reduce specificity. Longer primers (>30 bp) can slow hybridization and reduce efficiency [2]. |
| Melting Temperature (Tm) | 54°C - 65°C [2] [59] | The Tms of the forward and reverse primers should be within 5°C of each other [59]. |
| GC Content | 40% - 60% [2] [59] | GC content outside this range can promote non-specific binding and primer-dimer formation [2]. |
| 3'-End Complementarity | Minimize (especially ≥ 3 complementary bases) [1] [58] | Strong complementarity at the 3'-ends is a primary cause of dimerization. Some sources suggest ending primers with AA or TT to reduce stability [58]. |
| GC Clamp | Avoid >3 G/C in the last 5 bases [2] | A strong GC clamp can promote non-specific binding at the 3' end, leading to spurious amplification [2]. |
Advanced Research & Reagent Solutions
For persistent problems in highly sensitive or multiplexed assays, consider these advanced strategies and reagents.
Table 2: Research Reagent Solutions for Demanding Applications
| Reagent / Technology | Function & Mechanism |
|---|---|
| Hot-Start DNA Polymerase | Remains inactive until a high-temperature activation step, preventing enzymatic activity during reaction setup and reducing pre-amplification primer dimer formation [5] [1]. |
| Self-Avoiding Molecular Recognition Systems (SAMRS) | Advanced nucleobase analogs that pair with natural bases but not with other SAMRS. Incorporating SAMRS into primers drastically reduces primer-primer interactions, effectively preventing dimer formation [8]. |
| Bioinformatics Tools (e.g., Primer-BLAST) | An official NIH tool that designs primers and checks their specificity against a selected database to ensure they do not generate unwanted PCR products on unintended sequences [14]. |
FAQ: Addressing Common Researcher Concerns
Q: My primer design software didn't flag any issues, but I still see primer dimers in my NTC. Why? A: Software predictions are not perfect [8]. An alternative mechanism for dimer formation involves short regions of genomic DNA acting as a "scaffold" that brings two primers into close proximity, even without strong 3' complementarity [58]. This is harder for standard software to predict and reinforces the need for empirical testing with an NTC.
Q: Can't I just lower the primer concentration to fix this without re-designing? A: While lowering primer concentration is a valid optimization step to reduce dimer formation [1], it is often insufficient if the primers have a fundamental design flaw like strong 3' complementarity. This approach may also reduce the efficiency of your target amplification. Re-designing the primers is the more robust and sustainable solution [5].
Q: Are primer dimers always a sign of a failed experiment? A: Not necessarily. The presence of a faint primer dimer band at a high cycle number (e.g., >35 in qPCR) in an otherwise successful reaction with a strong target band may not critically impact results [1] [58]. However, dimers that appear early in the reaction cycle are a serious concern as they will consume reagents and out-compete the target amplicon [8].
FAQs: Troubleshooting PCR Specificity
Q1: How do Mg2+ concentrations influence PCR specificity and the formation of nonspecific products like primer dimers?
Magnesium ions (Mg2+) are an essential cofactor for DNA polymerase activity, but their concentration is a critical determinant of reaction specificity [16] [60]. A concentration that is too high can stabilize nonspecific primer-template interactions, including those that lead to primer-dimer formation, resulting in a ladder or smear of unwanted products on a gel [11] [60]. Conversely, a concentration that is too low can reduce the enzyme's activity and the overall yield of the desired product [11]. The optimal concentration must be determined empirically but typically falls within a range of 1.0 to 4.0 mM [61]. Furthermore, Mg2+ binds to dNTPs; therefore, any optimization must consider the dNTP concentration in the reaction [16].
Q2: What is the relationship between dNTP concentration and PCR specificity, and how does it interact with Mg2+?
Deoxynucleoside triphosphates (dNTPs) are the building blocks for new DNA strands. Using excessively high concentrations of dNTPs can inhibit PCR and promote misincorporation of bases, reducing fidelity [11] [61]. For standard PCR, a final concentration of 50–200 µM for each dNTP is recommended [62] [61]. Crucially, dNTPs chelate Mg2+ ions from the solution [16] [62]. A high dNTP concentration can therefore effectively reduce the amount of free Mg2+ available for the DNA polymerase, linking the optimization of these two components. Lowering dNTP concentrations (e.g., to 20–50 µM) can, in some cases, improve specificity and fidelity, but this must be accompanied by a proportional reduction in Mg2+ concentration [16] [62].
Q3: Within our research on reducing primer concentration to minimize dimerization, how do Mg2+ and dNTPs factor into the optimization strategy?
Reducing primer concentration (e.g., to 0.1–0.5 µM) is a primary strategy to minimize primer-dimer formation [63] [11]. However, this adjustment can be ineffective or even counterproductive if the concentrations of Mg2+ and dNTPs are not balanced. High Mg2+ levels can stabilize the weak interactions between low-concentration primers, still allowing dimer formation [60]. Similarly, high dNTP concentrations provide ample resources for the polymerase to extend these dimers once they form. Therefore, a holistic optimization strategy is required: after lowering primer concentration, titrate Mg2+ to the lowest level that supports robust amplification of your specific target and ensure dNTP concentrations are equimolar and not in excess [16] [11].
Q4: What are the recommended concentrations for critical PCR components to maximize specificity?
The table below summarizes the standard and optimal concentration ranges for key PCR components to aid in troubleshooting specificity issues.
Table 1: Optimal Concentration Ranges for Key PCR Components
| Component | Standard Range | Considerations for Specificity |
|---|---|---|
| Primers [16] [63] | 0.1 – 1.0 µM | Lower within this range (e.g., 0.1-0.5 µM) to reduce primer-dimer potential. |
| Mg2+ [11] [61] | 1.0 – 4.0 mM | Must be optimized for each primer-template system; high concentrations cause nonspecific binding. |
| dNTPs (each) [16] [62] [61] | 50 – 200 µM | Use the lowest sufficient concentration; high levels can inhibit PCR and chelate Mg2+. |
| DNA Polymerase [16] [11] | 1 – 2.5 Units/50 µL | Excess enzyme can increase nonspecific background and smearing. |
Experimental Protocols for Component Optimization
Protocol 1: Mg2+ Titration
Purpose: To empirically determine the optimal Mg2+ concentration for a specific primer set and template, maximizing target yield while minimizing nonspecific amplification and primer dimers.
Materials:
- Template DNA (e.g., 10-50 ng genomic DNA)
- Forward and Reverse Primers (e.g., 10 µM stock each)
- 10X PCR Buffer (without MgCl2)
- MgCl2 solution (e.g., 25 mM stock)
- dNTP Mix (e.g., 10 mM total)
- DNA Polymerase (e.g., Taq DNA Polymerase)
- Nuclease-free Water
Methodology:
- Prepare a Master Mix for all common components for ( n+1 ) reactions, where ( n ) is the number of Mg2+ conditions. per reaction:
- Nuclease-free Water: Q.S. to 50 µL final volume
- 10X PCR Buffer (without Mg2+): 5 µL
- dNTP Mix (10 mM): 1 µL
- Forward Primer (10 µM): 1 µL
- Reverse Primer (10 µM): 1 µL
- Template DNA: X µL
- DNA Polymerase: 0.5 - 1.0 µL
- Aliquot the Master Mix into ( n ) PCR tubes.
- Add MgCl2 to each tube to create a concentration gradient. A typical range is 0.5 mM to 5.0 mM in 0.5 mM increments.
- Example: For a 50 µL reaction with a 1.5 mM Mg2+ condition, add 3 µL of 25 mM MgCl2 stock.
- Run the PCR using your standard cycling parameters.
- Analyze the results by agarose gel electrophoresis. The optimal condition is the one with the strongest target band and the cleanest background.
Protocol 2: dNTP and Mg2+ Co-Optimization
Purpose: To systematically balance dNTP and Mg2+ concentrations, which is crucial when fine-tuning reactions with low primer concentrations for dimer suppression.
Materials: (As in Protocol 1)
Methodology:
- Prepare a Master Mix as in Protocol 1, but omit both MgCl2 and dNTPs.
- Set up a two-dimensional matrix of reactions. For example, test three dNTP concentrations (50 µM, 100 µM, 200 µM) against four Mg2+ concentrations (1.0 mM, 2.0 mM, 3.0 mM, 4.0 mM).
- Add the corresponding volumes of dNTP stock and MgCl2 stock to each tube.
- Run the PCR and analyze by gel electrophoresis. Identify the combination that produces the best specificity. Note that as dNTP concentration increases, the optimal Mg2+ concentration may also increase to compensate for chelation [16].
Visualization of Reaction Component Interplay
The Scientist's Toolkit: Research Reagent Solutions
Table 2: Essential Reagents for Optimizing PCR Specificity
| Reagent / Solution | Function / Rationale | Key Considerations |
|---|---|---|
| Hot-Start DNA Polymerase [11] [5] | Enzyme engineered to be inactive at room temperature. Prevents primer-dimer formation and nonspecific extension during reaction setup. | Critical for high-specificity applications. Choose based on fidelity, processivity, and tolerance to inhibitors. |
| Magnesium Salt Solutions (MgCl2/MgSO4) [16] [11] | Essential cofactor for DNA polymerase. Concentration directly impacts enzyme activity and primer-binding stringency. | Must be vortexed thoroughly after thawing [61]. MgSO4 is often preferred for proofreading enzymes. |
| dNTP Mix (Neutralized) [16] [62] | Provides the four nucleotide bases (dATP, dCTP, dGTP, dTTP) for DNA synthesis. | Use small, single-use aliquots to avoid degradation from freeze-thaw cycles [61]. Solution should be neutral pH (7.0-7.5). |
| PCR Additives (DMSO, BSA, Betaine) [49] [60] | Assist in denaturing complex templates (e.g., GC-rich sequences), stabilize enzymes, and improve hybridization stringency. | Require optimization. DMSO is common but can inhibit polymerase if concentration is too high (>10%). |
| Nuclease-Free Water [49] [11] | The solvent for the reaction. Ensures no external nucleases or contaminants degrade reagents or template. | A critical, often overlooked, component for reliable and reproducible results. |
Leveraging Touchdown PCR to Favor Specific Product Amplification
Frequently Asked Questions (FAQs)
Q1: How does Touchdown PCR fundamentally improve amplification specificity?
Touchdown PCR enhances specificity by starting with an annealing temperature higher than the primer's calculated melting temperature (Tm) and gradually decreasing it in subsequent cycles until the optimal Tm is reached [64]. This initial high temperature creates a highly stringent environment that favors the most specific primer-template interactions. Amplification products generated from these specific early cycles then serve as templates later, effectively outcompeting non-specific products and primer-dimers as the temperature lowers to the optimal range [65].
Q2: My PCR results show multiple non-specific bands. Can Touchdown PCR help, and how should I implement it?
Yes, Touchdown PCR is a primary troubleshooting method for non-specific amplification [66]. To implement it, begin with an annealing temperature approximately 10°C above the calculated Tm of your primers [65]. Then, decrease the temperature by 1°C per cycle for the next 10-15 cycles. Once the temperature reaches the calculated Tm, continue with another 20-25 cycles at that temperature [65]. This protocol systematically enriches for the desired specific product.
Q3: How does reducing primer concentration help minimize primer-dimer formation, and what is a good starting point?
High primer concentrations increase the chance of primers interacting with each other instead of the template DNA, promoting primer-dimer formation [11]. Reducing primer concentration minimizes these off-target interactions. A final concentration between 0.1–1.0 µM for each primer is typically recommended [67]. For Touchdown PCR and situations where dimerization is a persistent issue, start optimization at the lower end of this range (e.g., 0.1–0.3 µM) [11] [67].
Q4: I am still getting primer-dimers even with Touchdown PCR. What are my next steps?
If primer-dimers persist, consider a combined approach:
- Re-design Primers: Check your primer sequences for complementarity, especially at the 3' ends, and re-design them if necessary [66] [49].
- Use Hot-Start DNA Polymerase: Employ a hot-start enzyme to prevent any polymerase activity during reaction setup at low temperatures, which is a common source of primer-dimer formation [64] [11].
- Optimize Reaction Setup: Keep all reagents on ice until thermal cycling begins and use a pre-denaturation or "hot-start" activation step in the cycler [65].
Troubleshooting Guide
Common Problems and Solutions
| Problem | Possible Cause | Recommended Solution |
|---|---|---|
| No Amplification | Excessive initial annealing stringency [65] | Verify primer Tm calculations; ensure the initial "touchdown" temperature is not excessively high [67]. |
| Too few cycles during touchdown phase [65] | Increase number of cycles in the touchdown phase (e.g., from 10 to 15) before locking at the final annealing temperature. | |
| Non-specific Bands/Smearing | Final annealing temperature is too low [66] | Increase the final annealing temperature in 1-2°C increments [11]. |
| Too many total cycles [66] | Reduce total number of PCR cycles to under 35 [65]. | |
| Excessive template or enzyme amount [66] | Reduce template DNA by 2–5 fold; ensure DNA polymerase is not in excess [11]. | |
| Primer-Dimer Formation | High primer concentration [11] | Reduce final primer concentration to 0.1–0.3 µM [67]. |
| Primers with complementary 3' ends [49] | Re-design primers to avoid 3' complementarity [66]. | |
| Lack of hot-start enzyme [64] | Use a hot-start DNA polymerase [11]. |
Quantitative Data for Experimental Planning
| Parameter | Standard PCR | Touchdown PCR Protocol | References |
|---|---|---|---|
| Primer Concentration | 0.1–1.0 µM | 0.1–0.5 µM (Lower end to minimize dimerization) | [67] [11] |
| Annealing Temperature | Constant, ~3–5°C below Tm | Starts 10°C above Tm, decreases by 1°C/cycle to target Tm | [65] |
| Number of Cycles | 25–40 | Stage 1 (Touchdown): 10–15 cyclesStage 2: 20–25 cycles | [65] |
| Typical Primer Length | 20–30 nucleotides | 20–30 nucleotides | [49] |
| Optimal GC Content | 40–60% | 40–60% | [67] |
Experimental Protocols
Core Touchdown PCR Protocol
This protocol is adapted from established methodologies [65] and is designed for a 50 µl reaction volume.
1. Reagent Setup and Master Mix Prepare reagents on ice and consider a Master Mix for multiple reactions. A sample table for a single 50 µl reaction is below.
| Component | Final Concentration | Volume (µl) |
|---|---|---|
| Sterile Water | - | Q.S. to 50 µl |
| 10X PCR Buffer | 1X | 5 |
| dNTP Mix (10 mM) | 200 µM | 1 |
| MgCl₂ (25 mM)* | 1.5–4.0 mM | Variable |
| Forward Primer (20 µM) | 0.2 µM | 0.5 |
| Reverse Primer (20 µM) | 0.2 µM | 0.5 |
| Template DNA | 1–1000 ng | Variable |
| Hot-Start DNA Polymerase | 0.5–2.5 U | 0.5–1 |
| Total Volume | 50 |
*Add if not present in the buffer; concentration requires optimization [49].
2. Thermal Cycling Conditions Use the following program, assuming a primer Tm of 57°C. Adjust temperatures based on your specific primer Tm [65].
| Step | Temperature | Time | Cycles |
|---|---|---|---|
| Initial Denaturation | 95°C | 3–5 min | 1 |
| Denaturation | 95°C | 30 sec | 10 |
| Anneal | 67°C (-1°C/cycle) | 45 sec | 10 |
| Extension | 72°C | 1 min/kb | 10 |
| Denaturation | 95°C | 30 sec | 20–25 |
| Anneal | 57°C (final Tm) | 45 sec | 20–25 |
| Extension | 72°C | 1 min/kb | 20–25 |
| Final Extension | 72°C | 5–15 min | 1 |
| Hold | 4°C | ∞ | 1 |
Workflow: Touchdown PCR for Specific Amplification
The Scientist's Toolkit: Essential Research Reagents
| Item | Function in Touchdown PCR | Rationale for Dimerization Reduction |
|---|---|---|
| Hot-Start DNA Polymerase | Enzyme is inactive until initial high-temperature step, preventing activity during setup [64]. | Crucially prevents primer-dimer formation during reaction setup at permissive temperatures [11]. |
| Optimized Primer Pairs | Primers of 20-30 nt, 40-60% GC, with Tms within 5°C of each other [67]. | Good design minimizes 3' end complementarity, directly reducing chance of primer-dimer initiation [49]. |
| PCR Additives (e.g., DMSO, BSA) | Can help denature complex templates and improve specificity [49]. | By improving primer-template binding efficiency, reduces mispriming and off-target interactions [11]. |
| Magnesium Chloride (MgCl₂) | Cofactor for DNA polymerase; concentration critical for enzyme fidelity and yield [66]. | Excess Mg2+ can promote non-specific binding and primer-dimer formation; requires optimization [11]. |
Utilizing Additives like DMSO for Problematic Templates
Frequently Asked Questions
What makes GC-rich templates problematic in PCR? GC-rich templates (typically >60% GC content) form stable secondary structures, such as hairpins, due to the three hydrogen bonds between G and C bases. These structures do not melt completely during standard PCR denaturation steps, preventing primers from binding and causing the DNA polymerase to stall. This results in inefficient amplification or a complete failure of the reaction. [68] [69]
How does DMSO help in amplifying such difficult templates? DMSO acts as a PCR enhancer through two primary mechanisms. First, it interferes with the hydrogen bonding in DNA, which lowers the overall melting temperature (Tm) of the template and makes it easier to denature secondary structures. Second, it binds to DNA and prevents the reannealing of single-stranded templates, thereby giving primers better access to their complementary binding sites. This increases both the specificity and yield of the PCR. [69]
Can DMSO completely prevent primer-dimer formation? While DMSO can improve reaction specificity, it is not a guaranteed solution for preventing primer dimers. The primary strategy for minimizing primer dimers remains careful primer design to avoid self-complementarity, optimizing primer concentration, and using higher annealing temperatures or hot-start polymerases. [69] [1]
What are the consequences of using too much DMSO? Excessive concentrations of DMSO (typically beyond 10%) can be detrimental. It can over-stabilize single-stranded DNA, excessively reduce the annealing temperature, and lead to non-specific amplification. In very high concentrations, it can even reduce the fidelity of the DNA polymerase, introducing errors (mutations) into the amplified sequence, which is a critical concern for downstream applications like sequencing. [69]
Troubleshooting Guide
| Problem | Possible Cause | Suggested Solution |
|---|---|---|
| No Amplification | Overly stable secondary structures in template [68] [69] | - Use 3-10% DMSO [69]- Use a combination of additives (e.g., Betaine, DMSO) [68] |
| Non-specific Bands/Smearing | Excess DMSO lowering Tm excessively [69] | - Titrate DMSO concentration (test 4%, 5%, 6%) [69]- Increase annealing temperature [5] [1] |
| Primer-Dimer Formation | Primers with 3' complementarity; low annealing temperature [5] [1] [7] | - Redesign primers [5] [2]- Use hot-start polymerase [5] [1]- Lower primer concentration [1] [7] |
| Low Yield | Inefficient amplification despite correct conditions | - Combine DMSO with other enhancers like Betaine [68]- Use touchdown PCR [68] |
The following table summarizes common additives used for challenging PCR templates, based on the gathered data.
| Additive | Typical Working Concentration | Primary Mechanism of Action | Key Considerations |
|---|---|---|---|
| DMSO | 3% - 10% [69] | Reduces DNA melting temperature; disrupts secondary structures [69] [70] | Titrate carefully; high concentrations can be inhibitory and reduce polymerase fidelity [69] |
| Betaine | Used in combination with DMSO [68] | Equalizes the stability of AT and GC base pairs; disrupts secondary structures [68] | Often used in multi-additive cocktails for GC-rich templates [68] |
| BSA | Used in combination with DMSO [68] | Binds to impurities and stabilizes the polymerase [68] | Part of a proven multi-additive mixture [68] |
| DTT | Used in combination with DMSO [68] | A reducing agent that helps maintain enzyme activity [68] | Part of a proven multi-additive mixture [68] |
Experimental Protocol: Using a Multi-Additive Approach for GC-Rich Templates
This protocol is adapted from a published method that uses a cocktail of four additives for amplifying GC-rich templates with Taq DNA polymerase. [68]
1. Prepare the PCR Master Mix: Combine the following components in a sterile tube on ice:
- PCR Buffer (as supplied with the polymerase, typically 1X final concentration)
- dNTPs (e.g., 200 µM of each)
- Forward and Reverse Primers (Optimized concentration; consider lower amounts to minimize dimerization as per your thesis context)
- Taq DNA Polymerase (e.g., 1.25 units per 50 µL reaction)
- Template DNA
- Additive Cocktail:
- Betaine (e.g., 1 M final concentration)
- DMSO (e.g., 5% final concentration)
- DTT (e.g., 1 mM final concentration)
- BSA (e.g., 100 µg/mL final concentration)
- Nuclease-free water to the final volume.
2. PCR Cycling Conditions:
Use the following steps, optimizing the annealing temperature (Ta) as needed:
- Initial Denaturation: 95°C for 5 minutes.
- Amplification Cycles (30-35 cycles):
- Denature: 95°C for 30 seconds.
- Anneal:
Ta(Start 2-5°C above the calculated Tm of the primers) for 30 seconds. - Extend: 72°C for 1 minute per kb.
- Final Extension: 72°C for 7 minutes.
- Hold: 4°C.
3. Analysis and Optimization:
- Analyze the PCR products using agarose gel electrophoresis.
- If amplification is inefficient or non-specific, consider using a touchdown PCR protocol. [68]
- Systematically vary the concentration of DMSO (e.g., 4%, 5%, 6%) to find the optimal condition for your specific template. [69]
The Scientist's Toolkit: Research Reagent Solutions
| Reagent / Material | Function in Protocol |
|---|---|
| DMSO (Molecular Grade) | Primary enhancer to denature GC-rich secondary structures. [69] |
| Betaine | Additive that equalizes base-pair stability in combination with DMSO. [68] |
| Hot-Start DNA Polymerase | Reduces non-specific amplification and primer-dimer formation by being inactive until the initial denaturation step. [5] [1] |
| SAMRS-Modified Primers | Advanced primer technology; SAMRS components avoid primer-primer interactions, drastically reducing dimer formation. [8] |
| Nuclease-Free Water | Ensures the reaction is not degraded by nucleases. |
Mechanism of DMSO Action on GC-Rich DNA
The diagram below illustrates how DMSO facilitates the amplification of GC-rich DNA templates.
Experimental Workflow for PCR Optimization
This workflow outlines a systematic approach to optimizing a PCR for a problematic template, integrating the use of additives like DMSO.
Validation and Comparative Analysis: Ensuring Assay Robustness
Frequently Asked Questions (FAQs)
FAQ 1: What are primer dimers and why are they a problem in PCR? Primer dimers are short, unintended DNA fragments that form when PCR primers anneal to each other instead of to the intended target DNA template. This occurs due to complementary regions between primers, leading to self-dimerization or cross-dimerization. Primer dimers compete with the target amplification for reagents, thereby reducing PCR efficiency and yield. They can lead to inaccurate quantification in qPCR, complicate data interpretation, and generate false positives, ultimately compromising experimental results [5] [1].
FAQ 2: How can gel electrophoresis and melt curve analysis distinguish primer dimers from specific products? These techniques identify primer dimers based on distinct physical and thermodynamic properties:
- Gel Electrophoresis: Primer dimers typically appear as a fuzzy smear or a broad band at a low molecular weight, usually below 100 base pairs, which is faster migrating than the specific target amplicon. Running the gel for a longer duration can help separate these small fragments from the desired product [1].
- Melt Curve Analysis: In qPCR, primer dimers usually produce a broad melt peak at a lower melting temperature (Tm), often below 80°C. In contrast, a specific target amplicon typically generates a sharp, single peak at a higher, predictable Tm [71].
FAQ 3: What is the most critical factor in preventing primer dimer formation? While several factors are involved, primer design is the most critical first step in prevention. Primers should be designed with minimal self-complementarity or 3'-end complementarity to each other to avoid dimerization. Furthermore, wet-lab optimization, particularly reducing primer concentration and increasing annealing temperature, are highly effective strategies confirmed to minimize dimerization [5] [72] [1].
FAQ 4: How does reducing primer concentration help minimize dimerization? High primer concentrations increase the chance of primers encountering and binding to each other instead of the template DNA. Using a lower primer concentration, typically within the recommended range of 0.05-1.0 µM, and optimizing it to the lowest effective concentration, reduces these non-productive interactions. This improves the primer-to-template ratio, favoring specific binding and amplification [72] [1].
Troubleshooting Guides
Troubleshooting Primer Dimer Detection in Gel Electrophoresis
Table 1: Identifying and resolving primer dimer issues in gel electrophoresis.
| Problem | Possible Cause | Solutions |
|---|---|---|
| Faint or absent target band with a primer dimer smear | Low amplification efficiency; high dimer formation. | Optimize annealing temperature; lower primer concentration; use hot-start polymerase; increase template concentration if too low [5] [1]. |
| Smeared bands in all lanes, including No-Template Control (NTC) | Excessive primer dimer formation. | Redesign primers to minimize complementarity; include an NTC to confirm amplification is from primers, not template; ensure proper gel running conditions (voltage, time) [73] [1]. |
| Poorly resolved bands | Gel percentage is inappropriate for fragment size. | Use a higher percentage agarose gel (e.g., 2-3%) to better resolve small primer dimers from your specific product [73] [74]. |
Troubleshooting Primer Dimer Detection in Melt Curve Analysis
Table 2: Interpreting and correcting abnormal melt curves indicative of primer dimers [71].
| Melt Curve Profile | Interpretation | Recommended Solutions |
|---|---|---|
| Single peak, but Tm < 80°C | The product is likely only primer dimer, with no true specific amplicon. | Redesign primers. If the product is genuinely <100 bp, a low Tm is expected, but primer dimers should still be suspected [71]. |
| Double peaks, with a minor peak < 80°C | Specific amplification is present, but accompanied by primer dimers. | Lower primer concentration; Redesign primers; Increase the annealing temperature (but generally not exceeding 63°C as a starting point) [71]. |
| Double peaks, with a minor peak > 80°C | Non-specific amplification, such as mis-priming on genomic DNA or off-target sites. | Raise annealing temperature; Check and remove genomic DNA contamination from the template [71]. |
Experimental Protocols
Protocol: Using Gel Electrophoresis to Validate Primer Dimers
Principle: This protocol uses agarose gel electrophoresis to separate DNA fragments by size, allowing visual identification of primer dimers as low molecular weight smears.
Materials:
- Agarose
- Appropriate buffer (e.g., TAE or TBE)
- DNA loading dye
- DNA ladder (covering low molecular weight range, e.g., 50-500 bp)
- Electrophoresis tank and power supply
- Gel documentation system
Procedure:
- Prepare Agarose Gel: Create a 2-3% agarose gel by dissolving agarose in buffer, melting it, and pouring it into a tray with a well-forming comb. Allow it to solidify completely [73] [74].
- Prepare Samples: Mix your PCR reaction products with DNA loading dye.
- Load Gel: Carefully load the samples and an appropriate DNA ladder into the wells. Crucially, include a No-Template Control (NTC) reaction to identify bands originating from primer interactions alone [1].
- Run Electrophoresis: Run the gel at 5-8 V/cm until the dye front has migrated sufficiently. Running the gel longer helps separate small primer dimers from the main product [1].
- Visualize and Analyze: Stain the gel (e.g., with ethidium bromide or SYBR Safe) and visualize under UV light. Primer dimers will appear as a fuzzy band or smear below 100 bp in the sample lanes and the NTC lane [1].
Protocol: Using Melt Curve Analysis to Validate Primer Dimers in qPCR
Principle: Following qPCR amplification, a melt curve analysis gradually increases temperature while monitoring fluorescence. A sharp drop in fluorescence indicates DNA denaturation, and the resulting peak's position and shape help identify specific products versus primer dimers.
Materials:
- qPCR instrument with melt curve acquisition software
- Optimized qPCR master mix (e.g., SYBR Green)
- Primers and template
Procedure:
- qPCR Setup: Perform the qPCR run with your chosen cycling conditions.
- Melt Curve Setup: Program the melt curve step as follows:
- Denaturation: 95°C for 15 seconds.
- Annealing/Hold: 60°C for 15-60 seconds (start of data acquisition).
- Melt/Ramp: Continuously raise the temperature to 95°C (e.g., 0.5°C increments per 5 seconds) with continuous fluorescence acquisition. Ensure the final temperature is high enough (e.g., 90-95°C) to fully denature all products, including high-Tm amplicons [71].
- Analyze the Curve: Use the instrument's software to plot the negative derivative of fluorescence (-dF/dT) versus temperature.
- A single, sharp peak at a high, consistent Tm (>80°C) indicates a specific product.
- A broader peak at a lower Tm (<80°C) is characteristic of primer dimers [71].
Research Reagent Solutions
Table 3: Key reagents and their roles in dimer prevention and detection.
| Reagent / Tool | Function in Dimer Minimization & Detection |
|---|---|
| Hot-Start DNA Polymerase | Remains inactive at room temperature, preventing polymerase activity during reaction setup and non-specific primer extension that leads to dimer formation [5] [1]. |
| SYBR Green qPCR Master Mix | Fluorescent dye that binds double-stranded DNA, enabling real-time amplification quantification and subsequent melt curve analysis for product identification [71]. |
| Primer Design Software | In-silico tools help assess and minimize primer self-complementarity, hairpin formation, and inter-primer homology during the design phase, reducing dimer potential [5] [72]. |
| Optimized Buffer Systems | qPCR master mixes contain proprietary buffers with components that can influence DNA melting behavior and enhance reaction specificity, helping to suppress non-specific amplification [71]. |
Workflow Diagram
The following diagram illustrates the systematic approach to detecting and troubleshooting primer dimers using gel electrophoresis and melt curve analysis.
Systematic Workflow for Dimer Detection and Troubleshooting
Polymerase Chain Reaction (PCR) efficiency is a fundamental parameter in quantitative PCR (qPCR) that describes the rate at which a target DNA sequence is amplified during each cycle of the reaction. It is defined as the fold increase in amplicons per cycle, with a value of 2 representing a 100% efficient reaction where the DNA quantity doubles every cycle [75]. Accurate assessment of efficiency is crucial for reliable quantification, as low efficiency requires more cycles to detect a signal and can lead to significant inaccuracies in estimating initial DNA concentration [75]. Furthermore, non-homogeneous amplification efficiency between different DNA templates in a single reaction is a major source of skewed abundance data, compromising the accuracy and sensitivity of results in applications from quantitative molecular biology to DNA data storage [29].
Specificity, the ability of the reaction to amplify only the intended target, is intrinsically linked to efficiency. Factors that reduce specificity, such as primer-dimer formation or mispriming, often consume reaction resources and thereby reduce the efficiency of the target amplification [11] [76]. A core strategy for maximizing both specificity and efficiency is the optimization of primer concentration, as excessive primer levels are a primary cause of dimerization and non-specific amplification [77]. This guide provides a framework for using standard curves to troubleshoot and optimize these critical parameters.
FAQs on Standard Curves, Efficiency, and Specificity
What is a standard curve and how is it used to calculate PCR efficiency?
A standard curve is generated by performing qPCR on a series of known template concentrations, typically serial dilutions. The quantification cycle (Cq), the fractional cycle number at which the amplification curve crosses a fluorescence threshold, is plotted against the logarithm of the initial template concentration [75].
The slope of the resulting line is used to calculate the amplification efficiency (E) using the formula: E = 10^(-1/slope) [75].
An ideal reaction with 100% efficiency (doubling every cycle) will have a slope of -3.32 and an efficiency of 2.0. In practice, an efficiency between 1.9 and 2.0 (90-100%) is typically considered acceptable [75].
How can reducing primer concentration improve my qPCR results?
Reducing primer concentration is a primary troubleshooting step to address two common issues:
- Primer-Dimer Formation: High primer concentrations promote the annealing of primers to themselves rather than to the template DNA, creating short, non-specific products called primer-dimers. This consumes reagents and can generate false fluorescence signals, thereby reducing the efficiency and specificity of the target amplification [76] [77].
- Non-Specific Amplification: Excess primers increase the likelihood of binding to partially complementary, off-target sites, leading to the amplification of unwanted products and high background [11] [77].
The optimal primer concentration is typically in the range of 0.1–1 µM [11] [48]. If you observe multiple bands or a smear on a gel, or if your standard curve shows poor efficiency, reducing the primer concentration within this range is a recommended first step [76] [77].
My standard curve has poor efficiency. What should I do?
A standard curve with low efficiency (e.g., < 1.8) indicates a problem with the reaction. The following table outlines systematic troubleshooting steps.
| Observation | Possible Cause | Recommended Solution |
|---|---|---|
| Low Efficiency | Suboptimal primer concentration or design | Optimize primer concentration (0.1–1 µM); verify design (length 15-30 nt, 40-60% GC, avoid complementary 3' ends) [11] [48] [77]. |
| PCR inhibitors in sample | Further purify template DNA; dilute template to dilute potential inhibitors; use inhibitor-tolerant polymerases [11] [76]. | |
| Suboptimal Mg²⁺ concentration | Optimize Mg²⁺ concentration in 0.2–1 mM increments, as it is a critical cofactor for DNA polymerase [76] [48]. | |
| Non-Linear Standard Curve / High Variability | Pipetting errors during serial dilution | Ensure accurate pipetting technique; create larger-volume stock dilutions to minimize error [75]. |
| Fluorescence baseline set incorrectly | Manually review and adjust the baseline cycles in the qPCR software to ensure it is set in the ground phase, before exponential amplification begins [75]. | |
| Multiple Bands or Smear (Low Specificity) | Annealing temperature too low | Increase annealing temperature in 1–2°C increments; use a gradient thermal cycler [11] [76]. |
| Excess primers or template | Reduce primer concentration; reduce the amount of input template DNA [76] [77]. | |
| Primer sequences are non-specific | Use BLAST to check primer specificity; redesign primers if necessary [78] [77]. |
What are the best practices for setting up a standard curve experiment?
- Dilution Series: Use at least 3, but preferably 5 or more, log dilutions of the template to create a robust standard curve [75].
- Template Integrity: Use a high-quality, purified template of known concentration for the standards. Assess template integrity by gel electrophoresis if necessary [11] [76].
- Replication: Run each dilution point in duplicate or triplicate to account for technical variability.
- Threshold Setting: Set the fluorescence quantification threshold within the exponential phase of all amplification curves. Plotting fluorescence on a logarithmic axis can help identify the true exponential phase [75].
Experimental Protocol: Using a Standard Curve to Investigate Primer Concentration
This protocol provides a detailed method for using a standard curve to systematically evaluate how primer concentration affects PCR efficiency and specificity.
Sample and Reaction Preparation
- Template DNA: Prepare a serial dilution (e.g., 1:10 dilutions) of a known, high-quality DNA template containing your target sequence. A suitable starting concentration is often 1 ng/µL to 1 pg/µL for genomic DNA [76].
- Primer Stocks: Prepare a concentrated stock solution of your forward and reverse primers. Then, dilute this stock to create working solutions that will yield final reaction concentrations of 0.1 µM, 0.5 µM, and 1.0 µM.
- Master Mix: Prepare a qPCR master mix on ice containing all common components: buffer, dNTPs, DNA polymerase, fluorescent dye (e.g., SYBR Green), and water [48]. Aliquot the master mix into separate tubes for each primer concentration to be tested.
Reaction Setup and Thermal Cycling
- For each primer concentration (0.1, 0.5, 1.0 µM), add the corresponding primer working solution and the different template dilutions to the aliquoted master mix.
- Include a no-template control (NTC) for each primer concentration to check for contamination or primer-dimer formation.
- Load the reactions into a real-time PCR instrument and run using the following typical cycling conditions [48]:
- Initial Denaturation: 94–98°C for 1 minute (1 cycle)
- Amplification: 94–98°C for 10–60 seconds, 52–58°C for 30 seconds, 70–80°C for extension (25-40 cycles)
- Final Extension: 70–80°C for 5 minutes (1 cycle)
- Hold: 4°C
Data Analysis and Interpretation
- In the qPCR software, ensure the baseline fluorescence is correctly subtracted. The baseline should be set from the early cycles before exponential growth begins [75].
- Set a consistent quantification threshold in the exponential phase of all reactions.
- Generate a standard curve for each primer concentration by plotting the Cq values against the log of the initial template quantity.
- For each curve, record the slope, R² value (goodness of fit), and calculated efficiency (E).
- Examine the amplification plots and melt curves for the NTCs. A late Cq signal in the NTC indicates primer-dimer formation.
Expected Outcomes
- The optimal primer concentration will yield a standard curve with a slope close to -3.32, an R² > 0.99, and an efficiency between 90-105%. The NTC should show no or very late amplification.
- A concentration that is too high may show good efficiency but will likely have strong primer-dimer signals in the NTC, indicating a risk of false positives and resource competition.
- A concentration that is too low will result in poor efficiency and low sensitivity, as there are insufficient primers to sustain robust exponential amplification.
Workflow for primer concentration optimization.
The Scientist's Toolkit: Key Reagents for Reliable qPCR
The following table details essential reagents and their critical functions in ensuring accurate standard curves and high-efficiency qPCR.
| Reagent | Function & Importance in Efficiency/Specificity |
|---|---|
| High-Fidelity DNA Polymerase | Enzymes with 3'→5' exonuclease (proofreading) activity correct base mismatches, increasing fidelity and yield for downstream applications like cloning [76] [48]. |
| Hot-Start DNA Polymerase | Engineered to be inactive at room temperature, preventing non-specific priming and primer-dimer formation during reaction setup, thereby enhancing specificity [76] [48]. |
| dNTPs | The building blocks for new DNA strands. Unbalanced concentrations (e.g., from old or contaminated stocks) increase misincorporation rates and reduce efficiency [76] [75]. |
| Magnesium Salts (MgCl₂/MgSO₄) | An essential cofactor for DNA polymerase. Its concentration must be optimized, as it directly affects enzyme activity, primer annealing, and strand dissociation [76] [48]. |
| PCR Additives (DMSO, BSA) | Additives like DMSO help denature GC-rich templates and secondary structures, improving efficiency and specificity. BSA can neutralize PCR inhibitors in complex samples [11] [48]. |
Advanced Concepts: Moving Beyond Cq Values
Traditional qPCR analysis that relies solely on Cq values without considering efficiency can introduce significant bias [75]. The fundamental kinetic equation of PCR is NC = N0 × EC, where NC is the amplicon number at cycle C, N0 is the initial target quantity, and E is the efficiency [75]. When efficiency is less than 2, the calculated N0 is underestimated.
Advanced analysis methods focus on efficiency-corrected quantification, which uses the fluorescence data from the entire amplification curve rather than just the Cq value. This approach is less sensitive to how the baseline or threshold is set and provides a more accurate and reliable measure of the initial target quantity [75].
Relationship between key qPCR parameters.
Frequently Asked Questions (FAQs)
Q1: What is the fundamental relationship between primer concentration and dimer formation? High primer concentration is a primary cause of primer dimer formation [5]. When primers are overly abundant, they are more likely to anneal to each other instead of to the intended target DNA template, leading to nonspecific amplification that consumes reaction resources and reduces the yield of your desired product [5].
Q2: Beyond reducing concentration, what is the most critical factor in primer design to prevent dimers? The most critical factor is ensuring primers lack self-complementarity and cross-complementarity, particularly at their 3' ends [49] [2]. You must verify that the 3' end of a single primer is not complementary to other sequences within itself (avoiding hairpin loops), and that the 3' ends of your forward and reverse primer pair are not complementary to each other (avoiding primer dimers) [49].
Q3: My PCR has multiple bands and a primer dimer smear. What are my first three troubleshooting steps? Your first three steps should be:
- Increase the annealing temperature: Test a temperature gradient starting 5°C below the calculated Tm of your primers [79].
- Switch to a hot-start polymerase: This enzyme remains inactive until the initial denaturation step, preventing enzymatic activity during reaction setup at lower temperatures and thus minimizing primer dimer formation during the early cycles [5] [79].
- Re-analyze your primer design: Use software tools to check for and avoid self-complementarity and complementarity between primers [79].
Q4: For highly multiplexed PCR (dozens to hundreds of targets), is manual primer design sufficient? No, manual design is not feasible for highly multiplexed assays. The number of potential primer dimer interactions grows quadratically with the number of primers [80]. For a 96-plex PCR (192 primers), systematic computational design using algorithms like SADDLE (Simulated Annealing Design using Dimer Likelihood Estimation) is necessary to minimize dimer formation on a massive scale [80].
Q5: What are the key advantages of advanced technologies like modified bases over traditional optimization? Technologies like Locked Nucleic Acids (LNAs) enhance primer specificity and reduce self-complementarity by forming more stable duplexes with complementary DNA [5]. This provides a biochemical solution to the problem of dimerization that is inherent to the primer sequence itself, potentially offering a more robust and direct solution than simply adjusting reaction conditions like concentration [5].
Troubleshooting Guide: Primer Dimerization
| Observation | Possible Cause | Recommended Solution |
|---|---|---|
| Smear of low molecular weight products on agarose gel | Excessive primer concentration [5] | - Titrate primer concentration within the range of 0.05–1 µM [79].- Use the lowest concentration that still provides robust amplification of the specific product. |
| Multiple or non-specific bands | Primer annealing temperature is too low [79] | - Increase the annealing temperature in increments of 1-2°C.- Calculate the Tm and set the Ta to be no more than 5°C below the primer Tm [51]. |
| Low or no yield of desired product | Formation of primer-dimers consuming reagents [5] | - Use hot-start polymerase to prevent activity during reaction setup [5] [79].- Ensure primers do not have complementary 3' ends [49]. |
| Persistent primer dimers despite optimization | Poor primer design with high self-complementarity [79] [2] | - Redesign primers using tools like NCBI Primer-BLAST [14] or Primer3 [49].- Screen for and minimize self-dimers and hairpins (ΔG > -9.0 kcal/mol) [51]. |
| Severe primer dimer formation in highly multiplexed PCR | Combinatorial explosion of potential dimer interactions between primers [80] | - Employ advanced computational design algorithms (e.g., SADDLE) to select primer sets that globally minimize dimer likelihood [80]. |
Table 1: Standard PCR Component Concentrations for Optimization [79] [49]
| Reaction Component | Typical Final Concentration Range | Optimization Notes |
|---|---|---|
| Primers (forward & reverse) | 0.05 – 1 µM | Titrate to find the minimum concentration for specific product yield. Start at 0.2-0.5 µM. |
| Mg2+ | 1.5 – 5.0 mM | A critical cofactor. Optimize in 0.2–1 mM increments if dimers persist. [79] [49] |
| dNTPs | 50 – 200 µM (each) | Unbalanced concentrations can promote errors; use a fresh, balanced mix. [79] |
| DNA Template | 1 pg – 1 µg (per 50 µL reaction) | Varies by template type (e.g., plasmid vs. genomic DNA). Too much can increase nonspecific binding. [79] |
Table 2: Comparison of Technologies for Managing Primer Dimerization
| Technology / Method | Principle | Key Experimental Consideration | Relative Scalability |
|---|---|---|---|
| Primer Concentration Optimization | Reduces probability of primer-primer interactions by limiting reactant availability [5]. | Requires empirical titration for each primer set; can trade off with assay sensitivity. | Low to Moderate |
| Hot-Start Polymerase | Polymerase is inactive until a high-temperature activation step, preventing nonspecific extension at low temperatures [5] [79]. | A standard best practice for most PCR applications. Does not fix inherently bad primer design. | High |
| Computational Design (SADDLE) | Algorithmically selects optimal primer combinations from thousands of candidates to minimize a "dimer likelihood" score across the entire set [80]. | Essential for highly multiplexed panels (>50 plex). Requires specialized software and computational resources. | Very High |
| Modified Bases (e.g., LNA) | Incorporates structurally modified nucleotides to increase binding affinity (Tm) and specificity, reducing off-target annealing [5]. | Can be costly. Requires careful redesign of primers and re-optimization of thermal cycling conditions. | Moderate |
Experimental Protocols
Protocol 1: Optimizing Primer Concentration to Minimize Dimerization
Objective: To empirically determine the minimum primer concentration required for specific amplification of your target while minimizing or eliminating primer dimer formation.
Materials:
- Template DNA
- Forward and Reverse Primers (stock solution, e.g., 100 µM)
- PCR Master Mix (containing buffer, dNTPs, MgCl₂, and hot-start DNA polymerase)
- Nuclease-free water
- PCR tubes and thermal cycler
Methodology:
- Prepare Primer Dilutions: Create a working stock of your primer pair at 10 µM. From this, prepare a serial dilution to create stocks at 5 µM, 2.5 µM, 1 µM, and 0.5 µM.
- Set Up Reactions: In a series of PCR tubes, prepare a master mix containing all common components. Aliquot the master mix into individual tubes, then add a different primer dilution to each tube so that the final reaction concentrations are 1.0 µM, 0.5 µM, 0.25 µM, 0.1 µM, and 0.05 µM. Include a negative control (no template) for each concentration.
- Run PCR: Perform amplification using your standard thermal cycling protocol. It is recommended to use a thermal gradient for the annealing temperature for a more comprehensive optimization.
- Analyze Results: Separate the PCR products by agarose gel electrophoresis. Identify the lane where the specific product band is brightest and the primer dimer smear is faintest or absent. This represents your optimal primer concentration.
Protocol 2: Utilizing Computational Tools for Primer Design (NCBI Primer-BLAST)
Objective: To design target-specific primers that are inherently less likely to form dimers or amplify non-specific products.
Materials:
- Template DNA sequence (in FASTA format or as an NCBI Accession number)
- Computer with internet access
Methodology:
- Access the Tool: Navigate to the NCBI Primer-BLAST website [14].
- Enter Template Sequence: Paste your template sequence or its accession number into the "PCR Template" field.
- Set Parameters: Under the "Primer Parameters" section, adjust the following key settings based on best practices [81] [2] [51]:
- Primer Size: Min: 18, Opt: 20, Max: 24
- Tm: Min: 52°C, Opt: 60°C, Max: 58°C (Ensure Tm difference between primer pairs is ≤ 5°C)
- GC%: Min: 40, Opt: 50, Max: 60
- Enforce Specificity: In the "Primer Pair Specificity Checking Parameters" section, select the appropriate organism database (e.g., "RefSeq mRNA") to ensure the primers are unique to your intended target [14].
- Run and Select: Click "Get Primers." Primer-BLAST will return a list of candidate primer pairs ranked by efficiency. Select a pair that shows no significant self-complementarity or hairpin structures.
Workflow Visualization
Diagram 1: A systematic workflow for troubleshooting and resolving primer dimerization issues in PCR experiments, progressing from fundamental checks to advanced technological solutions.
The Scientist's Toolkit: Research Reagent Solutions
Table 3: Essential Reagents and Tools for PCR Optimization and Advanced Primer Design
| Item | Function / Application | Example / Note |
|---|---|---|
| Hot-Start DNA Polymerase | Reduces non-specific amplification and primer dimer formation by remaining inactive until the initial denaturation step. | A fundamental best-practice enzyme for any diagnostic or sensitive PCR [5] [79]. |
| Primer Design Software | Automates the selection of primers with optimal length, Tm, GC%, and minimal self-complementarity. | NCBI Primer-BLAST (free) combines primer design with specificity checking [14]. Primer3 is another common free tool [49]. |
| Multiplex PCR Design Algorithm (SADDLE) | For designing highly multiplexed primer sets (e.g., 96-plex to 384-plex) by computationally minimizing a global "dimer likelihood" function. | Essential for large NGS panels; reduces primer dimer fraction from >90% to <5% in complex mixes [80]. |
| PCR Additives/Enhancers | Helps amplify difficult templates (e.g., GC-rich) and can improve specificity, indirectly reducing dimer competition. | DMSO (1-10%), Betaine (0.5-2.5 M), or BSA (10-100 μg/ml) can be tested during optimization [49]. |
| Locked Nucleic Acids (LNA) | Modified nucleotides that, when incorporated into primers, increase binding affinity (Tm) and specificity, reducing off-target priming [5]. | Useful for difficult targets but requires custom synthesis and protocol adjustment. |
Multiplex PCR is a powerful technique that allows for the simultaneous amplification of multiple target DNA sequences in a single reaction. The success of higher-plex assays—those that detect many targets at once—heavily depends on the careful optimization of primer concentrations. This guide explores the critical role of optimized concentration in enabling these complex assays, directly supporting research focused on reducing primer dimerization.
The Science of Concentration Optimization
The Primer Concentration Challenge
In multiplex PCR, the primary challenge is managing the interactions between a large number of primers within a single reaction. As the number of targets increases, the potential for primer-dimer formation grows quadratically. For an N-plex PCR primer set comprising 2N primers, there are (\left(\begin{array}{l}2N\ 2\end{array}\right)) possible primer dimer interactions [80]. For a 96-plex assay (192 primers), this translates to over 18,000 potential dimer interactions that must be managed [80].
Optimized primer concentration is crucial for minimizing these non-specific interactions while maintaining efficient amplification of all targets. Research demonstrates that lowering primer concentration is an effective strategy to reduce dimerization, but must be balanced against maintaining sufficient amplification efficiency [82].
Experimental Evidence from a 9-Plex Assay
A recent study developing a 9-plex one-step RT-ddPCR assay for viral detection provides a concrete example of strategic concentration optimization. Researchers successfully quantified nine targets in a single reaction by implementing a dual-concentration strategy [83]:
Table 1: Primer/Probe Concentration Strategy in 9-Plex Viral Assay
| Target Group | Targets Included | Primer/Probe Concentration | Rationale |
|---|---|---|---|
| High Targets | SARS-CoV-2 N1, Influenza A, Influenza B, Hepatitis A | 900 nM / 300 nM | Higher fluorescence signal requirements |
| Low Targets | RSV, Hepatitis E, External Control | 400 nM / 100 nM | Lower fluorescence signal requirements |
| Medium Targets | SARS-CoV-2 N2, Endogenous Control (B2M) | 450 nM / 150 nM | Moderate signal requirements |
This strategic concentration management allowed for clearly separated clusters in the 2D scatter plot analysis, enabling accurate quantification of all nine targets simultaneously. The assay demonstrated excellent analytical performance with detection limits ranging from 1.4 to 2.9 copies/μL depending on the viral target [83].
Troubleshooting Guides
Common Issues and Solutions in Concentration Optimization
Table 2: Troubleshooting Concentration-Related Issues in Multiplex PCR
| Problem | Possible Causes | Solutions |
|---|---|---|
| Primer-dimer formation | Excessive primer concentration; complementary 3' ends | Reduce concentration to 0.015 μM per primer; use computational tools to screen interactions [82] |
| Uneven amplification | Variable primer efficiency; concentration imbalance | Harmonize melting temperatures (65-68°C); use 2-step PCR protocol [82] |
| Poor sensitivity | Excessively reduced concentration; inhibitor presence | Optimize cDNA input (30% found optimal in 6-plex cdPCR) [84] |
| High background noise | Non-specific amplification; suboptimal cycling conditions | Extend annealing times to 5 minutes for complete primer binding [82] |
Experimental Protocol: Concentration Optimization for High-Plex Assays
Based on successful implementations in recent studies, here is a detailed protocol for optimizing primer concentrations in high-plex assays:
Materials Needed:
- Quality-controlled primers with harmonized Tm (65-68°C)
- One-step RT-ddPCR Advanced kit for Probes (or equivalent)
- Thermal cycler with precise temperature control
- Droplet reader (e.g., QX600 Droplet Digital PCR System)
Step-by-Step Procedure:
Initial Primer Preparation:
Reaction Setup:
- Assemble 20μL reactions containing:
- 5.0 μL of Supermix
- 2.0 μL of Reverse Transcriptase
- 1.0 μL of 300 mM DTT
- Primers and probes at optimized concentrations
- 5 μL of RNA template
- Nuclease-free H2O to volume [83]
- Assemble 20μL reactions containing:
Thermal Cycling:
- Reverse transcription: 50°C for 1 hour
- Enzyme activation: 95°C for 10 minutes
- 40 cycles of:
- Denaturation: 94°C for 30 seconds
- Annealing/Extension: 61°C for 1 minute
- Final extension: 98°C for 10 minutes
- Set temperature ramp rate at 2°C/s [83]
Analysis:
- Read plate in droplet reader
- Analyze using appropriate software (e.g., QuantaSoft)
- Exclude wells with <10,000 droplets from analysis
- Calculate absolute copy number using Poisson distribution [83]
Frequently Asked Questions (FAQs)
How does reduced primer concentration specifically minimize dimerization?
Reduced primer concentration directly limits the opportunity for primers to interact with each other instead of with the template DNA. At lower concentrations, the probability of two primers colliding and forming stable dimers decreases significantly. Advanced computational tools like SADDLE (Simulated Annealing Design using Dimer Likelihood Estimation) can reduce dimer fractions from 90.7% in naive designs to 4.9% in optimized sets, even with 192 primers in a single reaction [80].
What is the typical optimal primer concentration range for high-plex assays?
For high-plex applications, optimal primer concentrations typically employ 0.015 μM per primer, with final concentrations adjusted based on the total number of primers within each pool [82]. However, this should be optimized for specific assays, as demonstrated in the 9-plex viral assay where concentrations ranged from 400nM/100nM to 900nM/300nM (primer/probe) depending on the target [83].
How can I computationally predict and minimize primer interactions before wet lab testing?
Computational tools like SADDLE algorithm evaluate potential primer dimer interactions by calculating a Loss function that sums the "Badness" (predicted dimer formation) for every possible primer pair combination [80]. Similarly, PrimerPooler performs comprehensive inter- and intra-primer hybridization analysis to strategically allocate primer pairs into optimized subpools that minimize cross-hybridization [82].
What role does melting temperature (Tm) harmonization play in concentration optimization?
Melting temperature harmonization is crucial for ensuring that all primers in a multiplex reaction function efficiently at the same annealing temperature. Advanced multiplex protocols employ primers designed with high annealing temperatures within narrow ranges (65-68°C), enabling PCR to be performed as a 2-step protocol. This eliminates the need for nested primer strategies while maintaining exceptional specificity in complex samples [82].
How does cDNA input amount affect multiplex efficiency when optimizing concentrations?
In 6-plex Crystal Digital PCR optimization, different cDNA input ratios (20%-70%) were evaluated, with 30% cDNA input demonstrating optimal performance for simultaneous detection of both enteric and respiratory viruses [84]. The appropriate cDNA input must be balanced with primer concentrations to ensure efficient amplification without introducing inhibitors or exceeding reaction capacity.
The Scientist's Toolkit: Essential Research Reagents
Table 3: Key Reagents for High-Plex Concentration Optimization
| Reagent/Category | Specific Examples | Function in Concentration Optimization |
|---|---|---|
| Digital PCR System | QX600 Droplet Digital PCR System [83] | Enables absolute quantification without standard curves; critical for evaluating amplification efficiency |
| Nucleic Acid Extraction Kit | AllPrep PowerViral DNA/RNA Kit [84] | Provides high-quality template for accurate concentration assessment |
| One-Step RT-PCR Kit | One-step RT-ddPCR Advanced kit for Probes [83] | Maintains reaction integrity with multiple primers at varying concentrations |
| Computational Design Tools | SADDLE, PrimerPooler, Primal Scheme [80] [82] | Predicts and minimizes primer-dimer interactions before wet lab testing |
| Fluorophore Systems | FAM, HEX, ROX, Cy5, ATTO590 [83] | Allows signal differentiation in multiplexed reactions with concentration-based clustering |
Visualizing Workflows
The following diagrams illustrate key experimental and computational workflows for concentration optimization in high-plex PCR assays.
Concentration Optimization Workflow
Primer-Dimer Challenge and Solution
Troubleshooting Guides
Common Issues and Solutions in SNP Detection Experiments
| Problem Category | Specific Symptom | Potential Cause | Recommended Solution |
|---|---|---|---|
| Assay Failure | No amplification in validation or run [85] | Incorrect input sequence (e.g., cDNA instead of gDNA), degraded DNA, or reaction inhibitors [85] | Verify sequence origin is gDNA; check DNA quality and quantity; ensure reaction setup is correct [85] |
| Poor Specificity | Inability to cleanly discriminate SNP alleles; high background signal [8] | Primer-dimer formation and off-target primer interactions consuming PCR resources [8] | Implement "Self-Avoiding Molecular Recognition Systems" (SAMRS) in primer design [8] |
| Signal Artifacts | Multiple or trailing clusters in genotyping plots [85] | Hidden SNP under primer/probe binding site; variable gDNA quality/concentration; copy number variation [85] | Check dbSNP for nearby variants; redesign assay to mask SNP as "N"; requantify gDNA; run copy number assay [85] |
| Low Sensitivity | Failure to meet clinical detection thresholds | PAM sequence constraints limiting targetable sites; insufficient signal amplification [86] | Employ novel Cas systems with relaxed PAM requirements; utilize signal amplification strategies [86] |
| Enzymatic Assay | Weak fluorescence signal in flap-based assays | suboptimal cell density; impure genomic DNA template; poorly designed flap-probe oligo [87] | Use 2x10^4 to 2x10^5 cells per well; ensure 3' end of flap-probe has /3C6/ modification [87] |
Frequently Asked Questions (FAQs)
General Workflow
What advanced technologies are revolutionizing SNP detection for clinical diagnostics? CRISPR/Cas systems are transformative, offering unparalleled single-nucleotide specificity, isothermal operation, and signal amplification. Foundational platforms like SHERLOCK, HOLMES, and DETECTR leverage the trans-cleavage activity of Cas nucleases. Recent innovations focus on achieving ultra-high specificity, overcoming PAM sequence constraints, and optimizing sensitivity to meet clinical thresholds [86].
How can primer-dimer formation be effectively minimized? Self-Avoiding Molecular Recognition Systems (SAMRS) provide a chemical solution. SAMRS nucleobases (a, t, g, c) pair normally with natural DNA but do not pair with each other. Incorporating SAMRS into primers strategically reduces primer-primer interactions, preventing dimer formation and improving SNP discrimination without requiring physical separation or complex reaction setups [8].
Protocol & Design
What are the critical design rules for SAMRS-modified primers? The number and placement of SAMRS components are crucial [8]:
- How many: The number of SAMRS modifications must be limited to maintain efficient annealing and extension.
- Where: Strategic placement is required for optimal benefit. The 3'-end is critical for specificity. Using primers with SAMRS at the 3'-terminus can achieve superior SNP discrimination compared to conventional allele-specific PCR [8].
Can SNP screening kits distinguish homozygous from heterozygous edited clones? The current single-color chemistry of some kits, like the Guide-it SNP Screening Kit, provides a qualitative output and cannot quantitatively distinguish homozygotes from heterozygotes in a single assay. Zygosity assessment requires performing multiple independent assays. Future versions with dual-color detection are in development for this purpose [87].
Do I need column-purified genomic DNA for high-throughput SNP screening? For standard SNP detection in clonal populations, many protocols do not require column purification. Cells can be lysed with a reagent, and the supernatant can be used directly as a PCR template. However, for specific applications like detecting homologous recombination in mixed populations, column-based purification is recommended for optimal results [87].
Reagents & Kits
What essential reagents are needed for a flap nuclease-based SNP screening assay? A typical kit, like the Guide-it SNP Screening Kit, includes all necessary reagents for DNA extraction, target amplification, and detection [87]:
- MightyPrep Reagent for DNA: For rapid cell lysis and DNA preparation.
- Terra PCR Direct Polymerase Mix and Buffer: For robust PCR amplification directly from lysates.
- Guide-it Flapase: The core structure-specific nuclease that cleaves only upon correct probe binding.
- Annealing Buffer & Flapase Buffer: For optimal enzymatic reaction conditions.
- Guide-it Flap Detector: A fluorescent reporter for signal detection.
Experimental Protocols
Protocol 1: SNP Detection Using SAMRS-Modified Primers to Suppress Primer Dimers
1. Principle: This protocol uses primers incorporating Self-Avoiding Molecular Recognition Systems (SAMRS) nucleotides. SAMRS bases pair with complementary natural nucleotides but not with other SAMRS bases, thereby minimizing primer-primer interactions and dimer formation. This leads to cleaner signals, improved sensitivity, and superior SNP discrimination [8].
2. Reagents and Equipment:
- Oligonucleotides: Forward and reverse primers with strategic SAMRS modifications.
- SAMRS Phosphoramidites: For in-house synthesis (available from Glen Research or ChemGenes).
- DNA Polymerase: A hot-start polymerase compatible with SAMRS primers.
- Thermal Cycler
- Ion-Exchange HPLC System: For purification of synthesized SAMRS-containing oligonucleotides.
3. Step-by-Step Procedure:
- Step 1: Design and Synthesize SAMRS Primers.
- Step 2: Purify Oligonucleotides.
- Deprotect in aqueous ammonium hydroxide at 55°C for 10-12 hours.
- Purify via ion-exchange HPLC to a high purity standard (>85-90%) [8].
- Step 3: Set Up PCR.
- Use a standard PCR protocol optimized for your chosen hot-start polymerase.
- The annealing temperature may require optimization based on the slightly weakened binding of SAMRS:standard pairs [8].
- Step 4: Analyze Results.
- Analyze PCR products by gel electrophoresis. A successful reaction will show a clear, specific band with a significant reduction or absence of low-molecular-weight primer-dimer artifacts compared to standard primers.
Protocol 2: High-Throughput SNP Screening Using a Flap Nuclease Assay
1. Principle: This method uses a structure-specific nuclease (Flapase) that cleaves a fluorescent reporter only when a "flap-probe" oligo perfectly hybridizes to the target PCR product at the interrogated nucleotide. A single-base mismatch prevents cleavage, enabling high-specificity SNP detection [87].
2. Reagents and Equipment:
- Guide-it SNP Screening Kit (or equivalent), which includes [87]:
- MightyPrep Reagent for DNA
- Terra PCR Direct Polymerase Mix & Buffer
- Guide-it Flapase
- Annealing Buffer
- Flapase Buffer
- Guide-it Flap Detector (40X)
- Control Oligos
- User-Provided Oligos: Forward/reverse PCR primers, displacement oligo, and a flap-probe oligo with a 3' hexanediol (/3C6/) modification.
- Thermal Cycler
- Fluorescence Plate Reader (Ex/Em: 485/535 nm) or qPCR machine.
3. Step-by-Step Procedure:
- Step 1: Cell Lysis and DNA Preparation.
- Lyse cells directly in a 96-well plate using MightyPrep Reagent. Use the supernatant as PCR template without further purification [87].
- Step 2: PCR Amplification of Target Locus.
- Amplify the genomic region containing the SNP using the provided Terra PCR Direct reagents and your specific primers.
- Step 3: Flapase Enzymatic Assay.
- Mix the PCR product with the displacement oligo, flap-probe oligo, and other reaction components.
- Incubate the mixture to allow Flapase to cleave the fluorophore from the quencher only if the base is a perfect match.
- Step 4: Fluorescence Detection.
- Measure the fluorescence signal in a plate reader. A significant increase in fluorescence over the negative control indicates the presence of the target allele [87].
The Scientist's Toolkit: Research Reagent Solutions
Essential Materials for Advanced SNP Detection
| Item | Function & Application | Key Features |
|---|---|---|
| SAMRS Phosphoramidites | Chemical synthesis of primers that avoid primer-dimer formation [8]. | Enables standard phosphoramidite chemistry; requires HPLC purification for optimal performance [8]. |
| CRISPR/Cas Systems (e.g., for SHERLOCK/DETECTR) | Ultrasensitive, specific SNP detection with isothermal amplification [86]. | Offers single-nucleotide specificity via trans-cleavage activity; ideal for point-of-care diagnostics [86]. |
| Guide-it SNP Screening Kit | High-throughput enzymatic detection of single-nucleotide substitutions in clonal populations [87]. | Includes Flapase nuclease and DNA prep reagent; works with suspension and adherent cells; no column purification needed [87]. |
| TaqMan Genotyper Software | Advanced analysis of SNP genotyping data, especially with challenging cluster patterns [85]. | Improved clustering algorithm over standard instrument software; can call samples the latter misses [85]. |
| Hot-Start DNA Polymerase | Suppresses non-specific amplification and primer-dimer formation during PCR setup [8]. | Withholds essential activity until high temperatures are reached; compatible with SAMRS primers [8]. |
Conclusion
Optimizing primer concentration is a fundamental, cost-effective, and powerful strategy for minimizing primer dimerization, directly leading to more efficient, specific, and reliable PCR assays. This guide has synthesized a complete workflow—from understanding the foundational science and implementing precise methodological protocols to advanced troubleshooting and rigorous validation. For researchers in drug development and clinical diagnostics, mastering this technique is not merely about improving gel images; it is critical for enhancing the accuracy of SNP detection, the robustness of multiplexed assays, and the fidelity of diagnostic results. Future directions will likely involve deeper integration of bioinformatic primer design with empirical optimization, and the adoption of novel chemistries like SAMRS to push the limits of multiplexing and sensitivity in biomedical research.
References
- 1. Troubleshooting primer dimer in PCR [https://www.minipcr.com/primer-dimer-pcr/]
- 2. Primer design guide - 5 tips for best PCR results [https://the-dna-universe.com/2022/09/05/primer-design-guide-the-top-5-factors-to-consider-for-optimum-performance/]
- 3. Guide to Primer Design for PCR [https://www.benchling.com/primer-design-for-pcr]
- 4. The Pain of Primer Dimer [https://kilobaser.com/post/the-pain-of-primer-dimer]
- 5. PCR Optimization: Strategies To Minimize Primer Dimer [https://genemod.net/blog/pcr-optimization]
- 6. How to Design Primers for DNA Sequencing | Practical Lab ... [https://www.cd-genomics.com/resource-how-to-design-primers-for-dna-sequencing.html]
- 7. How can I avoid primer-dimer formation during PCR ... [https://www.qiagen.com/us/resources/faq/544]
- 8. Eliminating primer dimers and improving SNP detection ... [https://pmc.ncbi.nlm.nih.gov/articles/PMC7200914/]
- 9. Impact of Primer Dimers and Self-Amplifying Hairpins on ... [https://pmc.ncbi.nlm.nih.gov/articles/PMC5922443/]
- 10. Primer dimer [https://en.wikipedia.org/wiki/Primer_dimer]
- 11. PCR Troubleshooting Guide | Thermo Fisher Scientific - US [https://www.thermofisher.com/us/en/home/life-science/cloning/cloning-learning-center/invitrogen-school-of-molecular-biology/pcr-education/pcr-reagents-enzymes/pcr-troubleshooting.html]
- 12. Validation of a primer optimisation matrix to improve the ... [https://pmc.ncbi.nlm.nih.gov/articles/PMC2706253/]
- 13. What should the final primer concentration be in my PCR? [https://www.neb.com/en-us/faqs/2023/08/02/what-should-the-final-primer-concentration-be-in-my-pcr?srsltid=AfmBOoou4mxzb0vXv5CwZMFK9E55PaECwsp4E-n3Gw5AcLpECE8ZsELY]
- 14. Primer designing tool - NCBI - NIH [https://www.ncbi.nlm.nih.gov/tools/primer-blast/]
- 15. Using Primer-BLAST to find PCR primers-tips from IDT [https://www.idtdna.com/page/support-and-education/decoded-plus/tips-for-using-blast-to-locate-pcr-primers/]
- 16. PCR Setup—Six Critical Components to Consider [https://www.thermofisher.com/us/en/home/life-science/cloning/cloning-learning-center/invitrogen-school-of-molecular-biology/pcr-education/pcr-reagents-enzymes/pcr-component-considerations.html]
- 17. Faster PCR Optimization [https://bitesizebio.com/31937/optimizing-your-pcr-faster/]
- 18. What should the final primer concentration be in my PCR? [https://www.neb.com/en-us/faqs/2023/08/02/what-should-the-final-primer-concentration-be-in-my-pcr?srsltid=AfmBOooMN8xRyKWtEetW7qW_oGi4X5I8gnr5w4GSdxeJAR_y1v6wV99t]
- 19. Proven tips for PCR primer design [https://www.neb.com/en-us/nebinspired-blog/proven-tips-for-pcr-primer-design?srsltid=AfmBOooIi8cO4xAwZNR7SsfqVk7axzCgESM185IRbDlLmVBagJHPYxjd]
- 20. PCR Troubleshooting Guide [https://www.neb.com/en-us/tools-and-resources/troubleshooting-guides/pcr-troubleshooting-guide?srsltid=AfmBOor4jHDGIw1BxUglS6XKXoKbpRbynQ0ty4W91AiNpUCOHjN6r7Mc]
- 21. How to Simplify PCR Optimization Steps for Primer Annealing [https://www.thermofisher.com/us/en/home/brands/thermo-scientific/molecular-biology/molecular-biology-learning-center/molecular-biology-resource-library/spotlight-articles/pcr-annealing-optimization-universal-annealing.html]
- 22. Avoiding false positives with PCR | IDT [https://www.idtdna.com/page/support-and-education/decoded-plus/how-to-avoid-false-positives-in-pcr-and-what-to-do-if-you-get-them/]
- 23. PCR Troubleshooting 103: How to Address Primer-Dimers [https://geneticeducation.co.in/pcr-troubleshooting-103-how-to-address-primer-dimers/]
- 24. Proven tips for PCR primer design [https://www.neb.com/en-us/nebinspired-blog/proven-tips-for-pcr-primer-design?srsltid=AfmBOooF46F7x9AnkvjuoSGRuISSD-qzu2s6dF8JuNEUq6J4yWtXcITL]
- 25. Overcoming the challenge of primer-dimers in multiplexed ... [https://blog.biosearchtech.com/overcoming-the-challenge-of-primer-dimers-in-multiplexed-pcr-assays]
- 26. PCR Troubleshooting Guide [https://www.neb.com/en-us/tools-and-resources/troubleshooting-guides/pcr-troubleshooting-guide?srsltid=AfmBOoqN6X7XoLOmolGbJdclV9zBdZqhzS0w4pWsUPJrSUKA0NouZ7Jy]
- 27. Oligonucleotide Purification Methods for Your Research [https://www.thermofisher.com/us/en/home/brands/thermo-scientific/molecular-biology/molecular-biology-learning-center/molecular-biology-resource-library/spotlight-articles/oligonucleotide-purification-methods.html]
- 28. Prediction of PCR amplification from primer and template ... [https://www.nature.com/articles/s41598-021-86357-1]
- 29. Predicting sequence-specific amplification efficiency in ... [https://www.nature.com/articles/s41467-025-64221-4]
- 30. Endpoint PCR Troubleshooting - Technical Support [https://www.biotechrabbit.com/support/technical-support/endpoint-pcr-troubleshooting.html]
- 31. Quantitative Experimental Determination of Primer-Dimer ... [https://pmc.ncbi.nlm.nih.gov/articles/PMC3416024/]
- 32. PCR Troubleshooting Guide [https://www.neb.com/en-us/tools-and-resources/troubleshooting-guides/pcr-troubleshooting-guide?srsltid=AfmBOoqYNSJZgpJaX2PdjfXiXhdEy3FS7y1P9iN1sWC_TU1yFYFRN24N]
- 33. Cooperative Primers: 2.5 Million–Fold Improvement in the ... [https://www.sciencedirect.com/science/article/pii/S1525157813002493]
- 34. Guidelines for PCR Optimization with Taq DNA Polymerase [https://www.neb.com/en-us/tools-and-resources/usage-guidelines/guidelines-for-pcr-optimization-with-taq-dna-polymerase?srsltid=AfmBOooiQA4GyiKPDkghx8hAsvHoST9h9d12QK2rPAaXxBF1vFypyS7o]
- 35. General Guidelines for PCR Optimization [https://primerdigital.com/pcr.html]
- 36. qPCR primer design revisited - PMC - PubMed Central - NIH [https://pmc.ncbi.nlm.nih.gov/articles/PMC5702850/]
- 37. Primer Dimer [https://mugenomicscore.missouri.edu/primerdimer.html]
- 38. 5 Essential Tips for Successful Gradient PCR [https://www.4esci.com/5-essential-tips-for-successful-gradient-pcr.html?srsltid=AfmBOopFEbxVx_wTiI2teBjdwgSazmu8lrm2bSmmCArhU3yTowO3a4mD]
- 39. PCR Troubleshooting Guide [https://www.neb.com/en-us/tools-and-resources/troubleshooting-guides/pcr-troubleshooting-guide?srsltid=AfmBOooZ-zKSn5jpuUKcBP9vKsKpPKzHRFlFqoMfQqPdmcXZDsi98jel]
- 40. PCR Troubleshooting Guide [https://www.genscript.com/pcr-troubleshooting-guide.html]
- 41. High-throughput primer design by scoring in piecewise ... [https://www.nature.com/articles/s41598-022-25561-z]
- 42. NGS-PrimerPlex: High-throughput primer design for ... [https://pmc.ncbi.nlm.nih.gov/articles/PMC7802936/]
- 43. PCR controls [https://www.qiagen.com/us/knowledge-and-support/knowledge-hub/bench-guide/pcr/reference-genes-and-controls/pcr-controls]
- 44. Amplification of the No Template Control (NTC) [https://www.thermofisher.com/us/en/home/life-science/pcr/real-time-pcr/real-time-pcr-learning-center/real-time-pcr-basics/real-time-pcr-troubleshooting-tool/gene-expression-quantitation-troubleshooting/amplification-no-template-control.html]
- 45. FAQ: Why do I see amplification curves in my NTC samples? [https://www.neb.com/en/faqs/2016/11/15/why-do-i-see-amplification-curves-in-my-ntc-samples?srsltid=AfmBOopsmzv1FEHUOG4a4HZV-T-uJT89-YZyy-inonfMyjPyVsT1SVIu]
- 46. Why is my no template control (NTC) real-time Ct value < ... [https://www.qiagen.com/us/resources/faq/2686]
- 47. Troubleshooting Non-Specific Amplification [https://bento.bio/resources/bento-lab-advice/troubleshooting-non-specific-amplification-with-bento-lab/]
- 48. Optimizing PCR: Proven Tips and Troubleshooting Tricks [https://www.the-scientist.com/optimizing-pcr-proven-tips-and-troubleshooting-tricks-71660]
- 49. Polymerase Chain Reaction: Basic Protocol Plus ... [https://pmc.ncbi.nlm.nih.gov/articles/PMC4846334/]
- 50. Optimizing your PCR [https://www.takarabio.com/learning-centers/pcr/faq/optimization?srsltid=AfmBOopr0lGQFd80kX5cj0cZQ4O22KfVITe9phZFftbXZ8z3ctgY7Oxa]
- 51. Rules and Tips for PCR & qPCR Primer Design | IDT [https://www.idtdna.com/page/support-and-education/decoded-plus/how-to-design-primers-and-probes-for-pcr-and-qpcr/]
- 52. How to Design PCR Primers in Geneious Prime [https://www.geneious.com/tutorials/primer-design]
- 53. How is Hot-Start Technology Beneficial For Your PCR [https://www.thermofisher.com/us/en/home/brands/thermo-scientific/molecular-biology/molecular-biology-learning-center/molecular-biology-resource-library/spotlight-articles/hot-start-technology-benefits-PCR.html]
- 54. Hot start PCR [https://en.wikipedia.org/wiki/Hot_start_PCR]
- 55. Hot Start PCR with heat-activatable primers [https://pmc.ncbi.nlm.nih.gov/articles/PMC2582603/]
- 56. Hot Start PCR: Definition, Protocol and Application [https://www.bocsci.com/resources/hot-start-pcr-definition-protocol-and-application.html?srsltid=AfmBOopkAK45vK3IKVC_QSTRmY5Z5RJXnPxtlAFqyUaC5j4d3VNJoIN3]
- 57. Proven tips for PCR primer design [https://www.neb.com/en-us/nebinspired-blog/proven-tips-for-pcr-primer-design?srsltid=AfmBOoo2jEzeJqQ_SORxfotpnsEDgNDmGK8ApO6ctyg9fPeco4LceKD-]
- 58. Dimer Artifacts Are Due to Primer myth - DNA Software Dimerization [https://www.dnasoftware.com/resources/news/primer-dimer-artifacts-are-due-to-dimerization-myth/]
- 59. Proven tips for PCR primer design [https://www.neb.com/en-us/nebinspired-blog/proven-tips-for-pcr-primer-design?srsltid=AfmBOorxITe4ccHJUCDgdv1S3j5V5f7JU6MMxEvGQVNV-j6KTtFI11XP]
- 60. PCR conditions | Primer annealing specificity | PCR buffers [https://www.qiagen.com/us/knowledge-and-support/knowledge-hub/bench-guide/pcr/introduction/pcr-conditions]
- 61. Ten Things That Can Kill Your PCR [https://www.biosyn.com/tew/ten-things-that-can-kills-your-pcr.aspx]
- 62. Five Essential Elements of PCR [https://www.bocsci.com/resources/five-essential-elements-of-pcr.html?srsltid=AfmBOoop6ZojwxiAqO6g_P0E5ib3FKwoN3P3-uBsYvS8Lx4aPQ0gbeA_]
- 63. DNA Amplification | Primers - National Institute of Justice [https://nij.ojp.gov/nij-hosted-online-training-courses/dna-amplification/overview/thermal-cyclers/primers]
- 64. PCR Methods - Top Ten Strategies [https://www.thermofisher.com/us/en/home/life-science/cloning/cloning-learning-center/invitrogen-school-of-molecular-biology/pcr-education/pcr-reagents-enzymes/pcr-methods.html]
- 65. Touchdown PCR: Easy Intro Plus 5 Expert Tips [https://bitesizebio.com/2203/touchdown-pcr-a-primer-and-some-tips/]
- 66. Troubleshooting your PCR [https://www.takarabio.com/learning-centers/pcr/faq/troubleshooting?srsltid=AfmBOootaaUv1NPPNArPrvkoAb2eX_d32FXFMK5Jq2KPQwi1HqfuHYaE]
- 67. Proven tips for PCR primer design [https://www.neb.com/en-us/nebinspired-blog/proven-tips-for-pcr-primer-design?srsltid=AfmBOoqQ4YAQWNupjkQ16kGXphOEdango5iQ2ByLXHfVADw6etDTfq6n]
- 68. Polymerase Chain Reaction (PCR) Amplification of GC- ... [https://pubmed.ncbi.nlm.nih.gov/30710022/]
- 69. Role of DMSO in PCR [https://geneticeducation.co.in/role-of-dmso-in-pcr/]
- 70. The effects of DMSO on DNA conformations and mechanics [https://www.sciencedirect.com/science/article/pii/S0006349525004187]
- 71. Why Does Your Melt Curve Look So Strange? - Yeasen [https://www.yeasenbio.com/blogs/molecular-biology/why-does-your-melt-curve-look-so-strange]
- 72. Proven tips for PCR primer design [https://www.neb.com/en-us/nebinspired-blog/proven-tips-for-pcr-primer-design?srsltid=AfmBOorRJaAi_nflvLf4q1of4C8ayQmuV1gKkZwA8ZUgaXlhRPqeeyS5]
- 73. Nucleic Acid Gel Electrophoresis Troubleshooting [https://www.thermofisher.com/us/en/home/life-science/cloning/cloning-learning-center/invitrogen-school-of-molecular-biology/na-electrophoresis-education/na-electrophoresis-troubleshooting.html]
- 74. Common errors in electrophoresis [https://kalstein.eu/common-errors-in-electrophoresis/?lang=en]
- 75. Analysis of qPCR Data: From PCR Efficiency to Absolute ... [https://www.preprints.org/manuscript/202510.2485]
- 76. PCR Troubleshooting Guide [https://www.neb.com/en-us/tools-and-resources/troubleshooting-guides/pcr-troubleshooting-guide?srsltid=AfmBOoqOeBA9qbPg8dG2voa72S8ZT2my-DG8NND05A6XwDME0X9lIrJO]
- 77. Troubleshooting your PCR [https://www.takarabio.com/learning-centers/pcr/faq/troubleshooting?srsltid=AfmBOopAO_lFumeSahvJSv2qwGI8dkZmcXqmoUz1Cu4ay47eLO0K61Ad]
- 78. A PCR primer design method for identifying spider mite ... [https://journals.plos.org/plosone/article?id=10.1371/journal.pone.0321199]
- 79. PCR Troubleshooting Guide [https://www.neb.com/en-us/tools-and-resources/troubleshooting-guides/pcr-troubleshooting-guide?srsltid=AfmBOopOkhiPc1VwmYAzwDH-GxBqa1ygypYnnNzy1tSC2AjSrEwbFfAs]
- 80. Designing highly multiplex PCR primer sets with Simulated ... [https://www.nature.com/articles/s41467-022-29500-4]
- 81. Protocol - How to Design Primers [https://www.addgene.org/protocols/primer-design/]
- 82. Primer Pool Design Strategies for Multiplex PCR Success [https://www.dynegene.com/en/detail-416.html]
- 83. One Assay, Nine Targets: Advancing Viral Surveillance ... [https://pmc.ncbi.nlm.nih.gov/articles/PMC12529474/]
- 84. Optimization of a 6-plex Crystal Digital PCR® assay and its ... [https://www.sciencedirect.com/science/article/pii/S0048969725005741]
- 85. SNP Genotyping Support—Troubleshooting [https://www.thermofisher.com/us/en/home/technical-resources/technical-reference-library/real-time-digital-PCR-applications-support-center/snp-genotyping-support/snp-genotyping-support-troubleshooting.html]
- 86. CRISPR-based SNP detection technologies advance from ... [https://pubs.rsc.org/en/content/articlelanding/2025/cc/d5cc03655k]
- 87. Guide-it SNP Screening Kit FAQs [https://www.takarabio.com/learning-centers/gene-function/gene-editing/creating-and-screening-for-snps/guide-it-snp-screening-kit-faqs?srsltid=AfmBOooMPCID7l4NE-deU0exBqtYhkEWwr_bn3ezKBffK_tVArsLa7y7]