Mastering SDS-PAGE Sample Preparation: A Comprehensive Guide to Loading Buffer and Boiling Protocols
This article provides researchers, scientists, and drug development professionals with a complete guide to SDS-PAGE sample preparation, a critical step for accurate protein analysis.
Mastering SDS-PAGE Sample Preparation: A Comprehensive Guide to Loading Buffer and Boiling Protocols
Abstract
This article provides researchers, scientists, and drug development professionals with a complete guide to SDS-PAGE sample preparation, a critical step for accurate protein analysis. Covering foundational principles to advanced applications, it details the formulation and function of loading buffers, optimized boiling and denaturation protocols for various protein types, systematic troubleshooting for common issues like smearing and aggregation, and validation through method comparison. The content synthesizes current best practices to ensure reliable protein separation, accurate molecular weight determination, and reproducible results in western blotting and quality control.
The Science Behind SDS-PAGE Sample Preparation: Principles and Components
The Role of SDS and Reducing Agents in Protein Denaturation
Within the realm of protein biochemistry, controlled denaturation is a critical step for analyzing complex protein mixtures. Sodium dodecyl sulfate (SDS) and reducing agents work in concert to dismantle the native structures of proteins, facilitating separation by molecular weight via SDS-Polyacrylamide Gel Electrophoresis (SDS-PAGE). This process is foundational to proteomic research, drug development, and diagnostic assays [1] [2]. The sample preparation protocol, involving specific loading buffers and a heating step, is designed to ensure complete and uniform denaturation, which is paramount for obtaining reliable and interpretable results [3]. This application note details the mechanistic roles of SDS and reducing agents in protein denaturation, provides quantitative data on their action, and outlines standardized protocols for effective sample preparation within the context of SDS-PAGE-based research.
The Molecular Mechanism of Protein Denaturation
The Action of Sodium Dodecyl Sulfate (SDS)
SDS is an anionic surfactant that plays a dual role in protein denaturation and subsequent electrophoresis. Its mechanism unfolds in stages:
- Initial Binding and Unfolding: Below the critical micellar concentration (cmc), SDS monomers bind electrostatically to positively charged residues on the protein surface and hydrophobically to surface-exposed hydrophobic patches [4] [5]. This binding initiates the disruption of the protein's tertiary structure.
- Cooperative Unfolding and Micellar Interaction: As the SDS concentration increases, cooperative binding occurs. Recent structural, kinetic, and computational studies have decisively ruled out the traditional "beads-on-a-string" model. Instead, the evidence supports a core-shell model, also known as protein-decorated micelles [6]. In this model, the SDS micelles act as a nucleus for denaturation. The protein unfolds asymmetrically and wraps around the micelle, with the polypeptide chain covering the micelle surface rather than being surrounded by multiple small micelles [6].
- Charge Equilibration and Sieving: In the final SDS-protein complex, SDS binds to the polypeptide backbone at a nearly constant weight ratio of 1.4 g SDS per 1 g of protein [2]. This extensive binding confers a uniform negative charge density on all proteins, effectively masking their intrinsic charge. The resulting SDS-polypeptide complexes migrate through the polyacrylamide gel based primarily on molecular size, enabling mass estimation [2].
The following diagram illustrates this multi-stage denaturation process.
The Role of Reducing Agents
While SDS disrupts non-covalent interactions, many proteins are further stabilized by covalent disulfide (S-S) bonds between cysteine residues. Reducing agents are essential for cleaving these bonds.
- Breaking Disulfide Bridges: Agents like β-mercaptoethanol or dithiothreitol (DTT) reduce disulfide bonds, converting them into free sulfhydryl (-SH) groups [3] [2].
- Complete Subunit Separation: This reduction is crucial for separating individual polypeptide subunits that constitute a multi-chain protein. Without this step, the protein would not fully denature and could migrate anomalously, leading to incorrect molecular weight estimates [7].
The combination of a reducing agent and SDS, facilitated by heating to 95–100°C for 5–10 minutes, ensures complete unfolding of the protein into its linear polypeptide form, which is the prerequisite for accurate SDS-PAGE analysis [8] [3] [1].
Quantitative Data on Denaturation
SDS and Reducing Agent Concentrations in Standard Buffers
Standard SDS-PAGE loading buffers are formulated with precise concentrations of denaturants and reagents to ensure complete and reproducible protein denaturation. The table below summarizes the typical composition of a commercial loading buffer.
Table 1: Composition of a commercial 5X SDS-PAGE loading buffer.
| Component | Final 1X Concentration (Approx.) | Function |
|---|---|---|
| SDS | 2% | Denatures proteins; confers negative charge [3]. |
| DTT | 100 mM | Reduces disulfide bonds [3]. |
| Glycerol | 10% | Adds density for sample loading into wells. |
| Bromophenol Blue | 0.1% | Tracking dye for electrophoresis progress. |
| Tris-HCl (pH 6.8) | 50-62.5 mM | Buffers the sample at stacking gel pH [3] [1]. |
Minimal SDS Concentrations for Protein Denaturation
The susceptibility to SDS denaturation varies among proteins. The minimal SDS concentration required to induce denaturation has been experimentally determined for several model proteins, as shown below.
Table 2: Experimentally determined minimal SDS concentrations required for protein denaturation. Data obtained using Taylor Dispersion Analysis (TDA) in Phosphate-Buffered Saline (PBS) [5].
| Protein | Molecular Weight (kDa) | Minimal [SDS] for Denaturation (M) |
|---|---|---|
| Insulin | ~5.8 | 2.3 × 10⁻⁴ |
| β-Lactoglobulin | ~18.3 | 4.3 × 10⁻⁴ |
| Transferrin | ~77 | 4.3 × 10⁻⁴ |
Standard Protocols for Protein Denaturation
Workflow for Sample Preparation
The following diagram and protocol describe the standard procedure for preparing protein samples for SDS-PAGE analysis.
Detailed Denaturation Protocol
Methodology: Denaturation of Protein Samples for SDS-PAGE [8] [3] [1].
Materials:
- Protein sample (e.g., cell lysate, purified protein)
- 5X SDS-PAGE Loading Buffer (with reducing agent, e.g., DTT)
- Microcentrifuge tubes
- Heating block or water bath
- Microcentrifuge
Procedure:
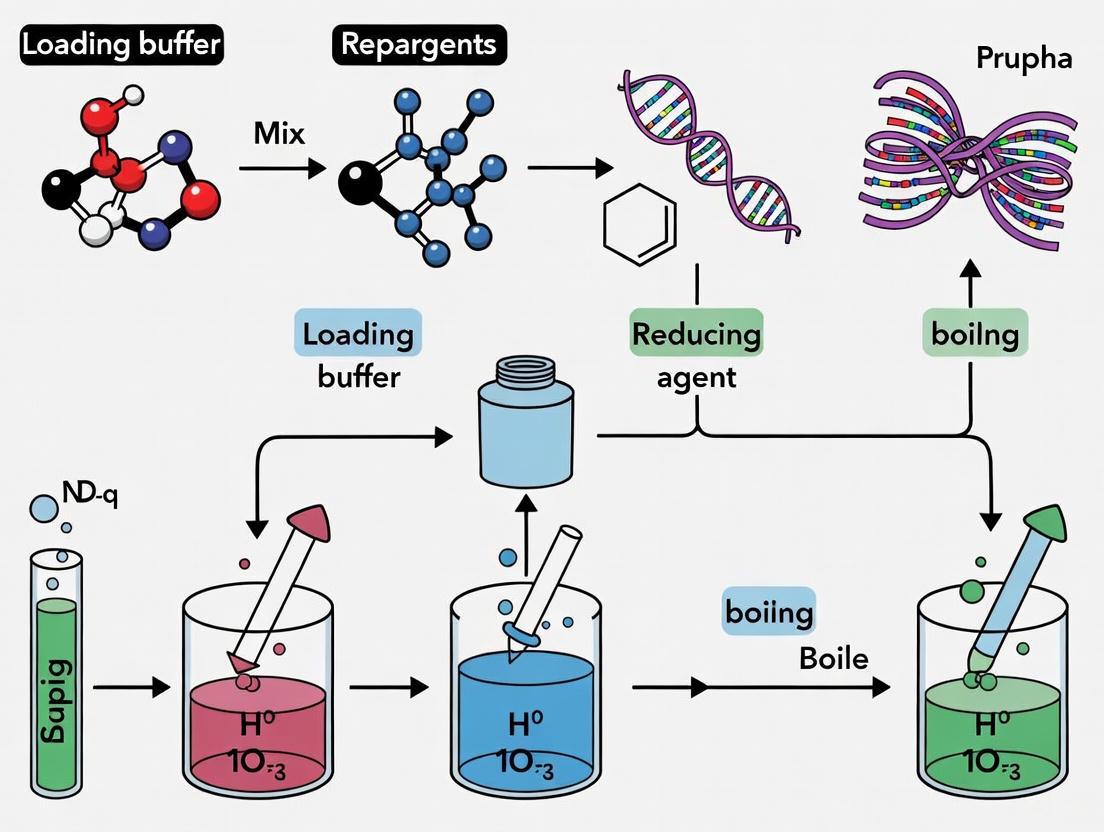
- Dilution: Mix one volume of 5X SDS-PAGE Loading Buffer with four volumes of the protein sample (e.g., 20 μL sample + 5 μL buffer) in a microcentrifuge tube [3].
- Denaturation and Reduction: Cap the tube tightly and heat the mixture in a heating block or boiling water bath at 95–100°C for 5–10 minutes [8] [1].
- Pressure Release: Briefly open the tube lid after heating to release any built-up pressure [1].
- Brief Centrifugation: Centrifuge the sample briefly (10–30 seconds) to collect all condensation and sample at the bottom of the tube.
- Loading: The sample is now ready to be loaded into the well of an SDS-polyacrylamide gel. Proceed with electrophoresis.
Troubleshooting Notes:
- If a viscous or semi-transparent substance remains after boiling, extend the boiling time for another 5–10 minutes or add more diluted 1X loading buffer and re-boil [3].
- Smeared bands on the gel can result from insufficient denaturation or reduction. Ensure the loading buffer is fresh and the heating step is performed correctly [7].
- Overloading the well can cause streaking or smearing. A typical load is 10–50 μg of total protein per well [8].
The Scientist's Toolkit: Essential Reagents for SDS Denaturation
Table 3: Key research reagents and materials for protein denaturation studies.
| Reagent/Material | Function in Denaturation | Example & Notes |
|---|---|---|
| Anionic Surfactant | Disrupts hydrophobic interactions; confers charge. | Sodium Dodecyl Sulfate (SDS): The gold standard. Tetra-alkylammonium dodecyl sulfates can be used to manipulate denaturation kinetics [4]. |
| Reducing Agents | Cleaves disulfide bonds for complete unfolding. | Dithiothreitol (DTT): Common in commercial buffers [3]. β-Mercaptoethanol: Alternative, with a shorter half-life. |
| Loading Buffer | Ready-made mixture of denaturants, buffer, and dyes. | SDS-PAGE Sample Loading Buffer: Contains SDS, reducing agent, glycerol, tracking dye, and Tris buffer at pH 6.8 [9] [3]. |
| Chaotropic Salts | Optional for difficult samples; disrupts hydrogen bonding. | Urea or Guanidine HCl: Can be added to the buffer to aid in solubilizing aggregated proteins [7]. |
| Protease Inhibitors | Prevents protein degradation during sample handling. | PMSF, EDTA-free cocktails: Essential for preserving sample integrity in cell lysates and tissue homogenates [10]. |
Advanced Considerations and Variations
Native SDS-PAGE (NSDS-PAGE)
A modified version of the protocol, known as Native SDS-PAGE (NSDS-PAGE), omits the reducing agent and the heating step and uses a lower SDS concentration in the running buffer [10]. This approach allows for high-resolution separation while preserving certain native features, such as metal cofactors and enzymatic activity in some proteins. For instance, one study showed Zn²⁺ retention increased from 26% in standard SDS-PAGE to 98% in NSDS-PAGE, and most model enzymes tested retained activity [10]. This technique is valuable for studying metalloproteins and functional protein complexes.
The Influence of Cations
While sodium is the most common cation paired with dodecyl sulfate, research shows that the choice of cation (e.g., tetramethylammonium (NMe₄⁺) vs. tetra-butylammonium (NBu₄⁺)) can significantly impact the kinetics of protein denaturation above the cmc. The denaturation rate decreases with larger, more hydrophobic cations (Na⁺ ~ NMe₄⁺ > NEt₄⁺ > NPr₄⁺ > NBu₄⁺), an effect correlated with a lowering of the cmc [4]. This provides a tool for manipulating surfactant-protein interactions for specific analytical or separation needs.
Sample preparation is a critical foundation for successful Sodium Dodecyl Sulfate-Polyacrylamide Gel Electrophoresis (SDS-PAGE), a cornerstone technique in biochemical research and drug development. The loading buffer, often called Laemmli buffer, transforms complex protein samples into a form suitable for high-resolution electrophoretic separation [11] [12]. This application note deconstructs the four key components of a standard SDS-PAGE loading buffer—Tris-HCl, glycerol, SDS, and tracking dye—within the context of a broader thesis on optimizing sample preparation protocols. A thorough understanding of each component's biochemical function enables researchers to troubleshoot experimental artifacts, validate findings, and generate reproducible data essential for pre-clinical development. We provide detailed protocols, quantitative data summaries, and visual workflows to standardize procedures across laboratories and improve the reliability of protein analysis in research and diagnostic applications.
Component Deconstruction and Functions
The loading buffer performs multiple synchronized functions: it denatures proteins, imparts a uniform charge, facilitates loading, and visualizes migration. The table below summarizes the role and mechanism of each core component.
Table 1: Core Components of SDS-PAGE Loading Buffer and Their Functions
| Component | Primary Function | Mechanism of Action | Typical Working Concentration |
|---|---|---|---|
| SDS (Sodium Dodecyl Sulfate) | Denatures proteins and confers uniform negative charge [11] [12] | Binds to protein backbone via hydrophobic interactions; disrupts hydrogen bonds and unfolds secondary structures [11]. Coats proteins with negative charge, masking their intrinsic charge [13]. | 1-2% (w/v) [12] |
| Tris-HCl | Provides buffering capacity and defines pH environment [14] | Maintains stable pH (typically ~6.8) in the stacking gel, which is critical for the discontinuous buffer system to function [11] [14]. | 62.5 mM [10] |
| Glycerol | Increases sample density [15] [16] | Makes the aqueous sample denser than the running buffer, causing it to sink to the bottom of the well and preventing diffusion into the buffer [15]. | 5-10% (v/v) [10] |
| Tracking Dye (Bromophenol Blue) | Visualizes sample migration during electrophoresis [11] | Provides a visible dye front (blue line) that allows the user to monitor the progress of the electrophoresis run and stop it before proteins run off the gel [11]. | 0.001-0.0025% (w/v) [10] |
| Reducing Agent (e.g., DTT, BME)* | Breaks disulfide bonds [13] [16] | Reduces cysteine residues, ensuring complete protein denaturation and disruption of quaternary structure [13]. This prevents protein aggregation and ensures separation is based on polypeptide chain size [16]. | 1-5% (v/v) for BME [16] |
Note: While not listed in the title, reducing agents are a critical addition to most loading buffers for complete denaturation.
The following diagram illustrates the logical relationship and synergistic action of these components in preparing a protein sample for SDS-PAGE.
Quantitative Data and Buffer Formulations
Standard SDS-PAGE loading buffer is typically prepared as a concentrated stock solution (e.g., 2X, 4X, or 6X) for convenience and mixed with the protein sample prior to heat denaturation. The following table provides a standard formulation for a 2X stock solution.
Table 2: Standard 2X Laemmli Loading Buffer Formulation
| Component | Final Concentration in 2X Buffer | Purpose & Notes |
|---|---|---|
| Tris-HCl (pH 6.8) | 125 mM | The acidic pH in the buffer is key for the stacking process. Tris-HCl is used instead of Tris base to achieve this specific pH [14]. |
| SDS | 4% (w/v) | Ensures a vast excess of SDS is available to fully denature and coat the proteins in the sample [11]. |
| Glycerol | 20% (v/v) | Provides sufficient density to ensure the sample sinks properly into the well [15] [10]. |
| Bromophenol Blue | 0.02% (w/v) | Provides a highly visible dye front to track migration [11]. |
| β-Mercaptoethanol (BME) | 10% (v/v) | A common reducing agent to break disulfide bonds. Can be substituted with DTT [13] [16]. |
Protocol: Preparation and Use of 2X Laemmli Loading Buffer
Materials:
- Tris-HCl (pH 6.8)
- SDS (Ultrapure)
- Glycerol (Molecular Biology Grade)
- Bromophenol Blue
- β-Mercaptoethanol (BME) or Dithiothreitol (DTT)
- Ultrapure Water
Method:
- Prepare Base Solution: In a final volume of 100 mL, combine:
- 25 mL of 0.5 M Tris-HCl, pH 6.8
- 20 mL of Glycerol
- 4 g of SDS
- A small spatula tip of Bromophenol Blue (approx. 20 mg)
- Add ultrapure water to 100 mL and mix thoroughly until all components are dissolved [11].
- Storage: Aliquot the base solution (without reducing agent) and store at room temperature. The absence of reducing agent prevents its degradation during storage.
- Add Reducing Agent Fresh: Before use, add β-Mercaptoethanol to a final concentration of 5-10% (v/v) to the required volume of base solution. For example, add 50-100 µL of BME to 1 mL of base solution [16]. Alternatively, DTT can be used at a final concentration of 100-500 mM.
- Sample Preparation: Mix your protein sample with an equal volume of the complete 2X loading buffer (e.g., 20 µL sample + 20 µL buffer) [12].
- Denaturation: Heat the mixture at 95-100°C for 5-10 minutes to ensure complete protein denaturation [12].
- Brief Centrifugation: Briefly centrifuge the heated samples to collect all condensation and liquid at the bottom of the tube.
- Loading: Load the required volume (typically 10-30 µL) into the well of the polyacrylamide gel.
The Scientist's Toolkit: Essential Research Reagent Solutions
Successful and reproducible SDS-PAGE relies on a suite of essential reagents beyond the loading buffer. The following table details these key materials and their functions within the experimental workflow.
Table 3: Essential Reagents for SDS-PAGE Experimentation
| Reagent / Material | Function in SDS-PAGE Workflow |
|---|---|
| Polyacrylamide Gel (Stacking & Resolving) | A mesh-like matrix that sieves proteins by size. The stacking gel (low %T, pH ~6.8) concentrates proteins into a sharp band; the resolving gel (higher %T, pH ~8.8) separates them by molecular weight [11] [13]. |
| Tris-Glycine-SDS Running Buffer | Conducts current and maintains pH during electrophoresis. Glycine's changing charge state (zwitterion in stacking gel, anion in resolving gel) is crucial for the discontinuous buffer system [11]. |
| Protein Molecular Weight Marker | A mixture of pre-stained or unstained proteins of known molecular weights. Run alongside samples to estimate the molecular mass of unknown proteins and monitor run progress [17]. |
| Acrylamide/Bis-Acrylamide | Monomers used to cast polyacrylamide gels. The ratio and total concentration (%T) determine the gel's pore size and resolving range [11]. |
| Ammonium Persulfate (APS) & TEMED | Catalysts for the polymerization reaction of acrylamide. APS provides free radicals, and TEMED accelerates the reaction, solidifying the gel solution [11] [13]. |
| Coomassie Blue / Silver Stain | Staining solutions for visualizing separated proteins post-electrophoresis. Coomassie is less sensitive but simpler; silver stain offers high sensitivity for low-abundance proteins [12] [17]. |
The complete experimental workflow, from sample preparation to analysis, is outlined below.
Troubleshooting and Advanced Applications
Common Artifacts and Solutions Related to Loading Buffer
- Smeared Bands: Can result from insufficient glycerol, causing sample to leak from wells [16], incomplete denaturation due to old or improperly prepared reducing agents, or protein aggregation [16] [12].
- Sample Leaking from Wells: Directly linked to insufficient density of the loaded sample. Solution: Increase the concentration of glycerol in the loading buffer or ensure the sample is mixed thoroughly with the buffer before loading [15] [16].
- Bands Clumping in Wells: Often caused by protein aggregation or precipitation. Solution: Ensure fresh reducing agent is used, consider sonicating samples, or add urea to the lysis buffer for hydrophobic proteins [16].
- Atypical Band Migration (Incorrect Apparent MW): Can be caused by unusual protein characteristics (e.g., heavy glycosylation, phosphorylation) that affect SDS binding [11], or by incomplete denaturation from omitting reducing agents, which leaves disulfide bonds intact [13].
Advanced Application: Native SDS-PAGE as a Comparative Tool
While standard SDS-PAGE is denaturing, a modified protocol called Native SDS-PAGE (NSDS-PAGE) can be employed to study functional protein properties. In this technique, the SDS concentration is drastically reduced (e.g., to 0.0375% in the running buffer) and the heating step and reducing agents are omitted from the sample preparation [10]. This allows proteins to retain aspects of their native conformation, enzymatic activity, and non-covalently bound cofactors (such as metal ions) while still achieving separation with good resolution [10]. This method is particularly valuable in metalloprotein research and for analyzing protein complexes where functional data is required post-electrophoresis.
How Boiling Linearizes Proteins for Accurate Molecular Weight Separation
Sample preparation is a critical foundation in protein research, determining the success of subsequent analytical techniques such as SDS-Polyacrylamide Gel Electrophoresis (SDS-PAGE). The process of boiling samples in a loading buffer containing Sodium Dodecyl Sulfate (SDS) and reducing agents represents a crucial step for achieving accurate molecular weight separation [13] [18]. This denaturation process systematically dismantles protein higher-order structures to create linear polypeptide chains with uniform charge densities, thereby enabling separation based primarily on molecular weight rather than inherent charge or structural characteristics [19] [18].
Within the context of a broader thesis on sample preparation methodologies, this application note examines the mechanistic role of boiling in protein linearization, presents optimized protocols for researcher implementation, and discusses advanced considerations for challenging protein systems. The fundamental principle underpinning this preparation method lies in its ability to negate structural and charge variations among different proteins, thereby ensuring that their electrophoretic mobility correlates directly with polypeptide chain length [13] [19]. When properly executed, this sample treatment allows researchers to reliably estimate protein molecular weights, assess sample purity, and prepare samples for downstream applications including western blotting and mass spectrometry [13] [18].
Mechanistic Role of Boiling in Protein Linearization
The Denaturation Process: A Stepwise Mechanism
The transformation of native proteins into linear SDS-polypeptide complexes occurs through a coordinated mechanism involving chemical and thermal interventions, with each component of the loading buffer playing a distinct role in the denaturation process as detailed in the table below.
Table 1: Components of SDS-PAGE Loading Buffer and Their Functions
| Component | Primary Function | Mechanistic Action |
|---|---|---|
| SDS (Sodium Dodecyl Sulfate) | Denaturation & Charge Uniformity [13] [18] | Binds polypeptide backbone (~1.4g SDS/g protein) [19]; masks intrinsic charge; confers net negative charge [13] |
| Reducing Agents (DTT, β-mercaptoethanol) | Disulfide Bond Reduction [13] [18] | Breaks covalent disulfide linkages; disrupts tertiary/quaternary structure [13] |
| Heat (Boiling at 95-100°C) | Thermal Denaturation [13] [20] | Disrupts hydrogen bonds & hydrophobic interactions; eliminates secondary structure [18] |
| Tris-HCl Buffer (pH 6.8) | pH Control [21] | Maintains optimal pH for stacking in Laemmli system [21] |
| Glycerol | Density Agent [20] | Adds density to sample; prevents diffusion from wells during loading [20] |
| Bromophenol Blue | Tracking Dye [20] | Visualizes sample migration during electrophoresis [20] |
The denaturation process begins when proteins are mixed with the loading buffer containing SDS and a reducing agent. SDS, an anionic detergent, plays a dual role: it binds extensively to the hydrophobic regions of the protein backbone while its sulfate groups impart a strong negative charge [13] [19]. Concurrently, reducing agents such as dithiothreitol (DTT) or β-mercaptoethanol cleave disulfide bonds that stabilize tertiary and quaternary structures [13] [18]. The subsequent application of heat at 95-100°C for 3-5 minutes provides the thermal energy necessary to disrupt hydrogen bonds and hydrophobic interactions that maintain secondary structures [13] [20] [18]. This combinatorial approach results in fully denatured polypeptides that adopt an extended, rod-like conformation surrounded by SDS molecules [13].
Charge-to-Mass Ratio Standardization
The SDS coating mechanism fundamentally standardizes the charge-to-mass ratio across different polypeptides [13] [19]. Research indicates that SDS binds to proteins at an approximately constant ratio of 1.4 grams of SDS per gram of protein [19], which means the number of negative charges contributed by SDS is directly proportional to the polypeptide chain length. This uniform charge distribution eliminates the influence of a protein's intrinsic amino acid composition on its electrophoretic mobility [13] [18]. Consequently, when an electric field is applied, these SDS-polypeptide complexes migrate through the polyacrylamide gel matrix with velocities determined primarily by molecular size rather than native charge or structural characteristics [13] [19].
Diagram 1: Protein Linearization Workflow. This diagram illustrates the sequential process from native protein structure to complete linearization for SDS-PAGE.
Quantitative Aspects of Protein Denaturation
SDS Binding and Migration Characteristics
The denaturation process follows predictable quantitative relationships that enable accurate molecular weight determination. The consistent binding of SDS to polypeptides creates a near-uniform charge density, establishing the foundation for molecular weight estimation through comparison with standardized protein ladders [13] [19]. The relationship between protein size and migration distance can be visualized through a semi-logarithmic plot, where the logarithm of molecular weight exhibits an inverse linear relationship with electrophoretic mobility through the gel matrix [19].
Table 2: Optimal Denaturation Conditions for Various Sample Types
| Sample Type | Boiling Temperature | Incubation Time | Special Considerations |
|---|---|---|---|
| Standard Cell Lysates | 95-100°C [13] [20] | 5 minutes [13] [20] | Ensures complete denaturation of most cellular proteins |
| Challenging Proteins (e.g., CARM1) | 70-85°C [22] [23] | 8-10 minutes [23] | Prevents aggregation of heat-sensitive proteins [23] |
| Membrane Proteins | 95-100°C [13] | 5-10 minutes [13] | May require additional SDS for complete solubilization |
| Non-Reducing Conditions | Omit heating or use 37°C [22] [18] | 30 minutes [22] | Preserves disulfide bonds and native complexes [18] |
Gel Composition and Separation Range
The polyacrylamide gel matrix serves as a molecular sieve whose pore size determines the effective separation range for denatured polypeptides [13] [18]. The gel percentage must be optimized based on the molecular weight of the target proteins, with higher acrylamide concentrations providing better resolution for lower molecular weight species [13].
Table 3: Gel Composition Guidelines for Optimal Protein Separation
| Gel Type | Total Acrylamide Concentration | Effective Separation Range | Applications |
|---|---|---|---|
| Stacking Gel | 4-5% [19] [18] | N/A (Non-separating) [13] | Focuses samples into sharp bands before separation gel [13] |
| Resolving Gel (Low %) | 8-10% [13] [19] | 30-200 kDa [22] | Ideal for high molecular weight proteins |
| Resolving Gel (Mid %) | 12% [13] [19] | 15-100 kDa [13] | Standard separation for most research applications |
| Resolving Gel (High %) | 15% [24] [19] | 5-60 kDa [24] | Optimal for low molecular weight proteins and peptides |
| Gradient Gel | 4-20% [24] [18] | 10-300 kDa [24] | Broad range separation for complex mixtures |
Experimental Protocols for Protein Linearization
Standard Sample Preparation Protocol
The following protocol describes the optimized procedure for preparing protein samples for SDS-PAGE analysis, with particular emphasis on the crucial boiling/denaturation step [13] [20] [19].
Materials Required:
- Protein sample (cell lysate, tissue homogenate, or purified protein)
- 2X or 4X Laemmli sample buffer [25] [21]
- Reducing agent (DTT or β-mercaptoethanol) [13] [21]
- Heating block or water bath (capable of maintaining 95-100°C)
- Microcentrifuge tubes
- Pipettes and appropriate tips
Procedure:
- Sample Dilution: Mix protein sample with an equal volume of 2X Laemmli buffer (or appropriate volume for 4X/6X buffers) to achieve final 1X concentration [25] [21]. For a standard 20μL reaction, combine 10μL protein sample with 10μL 2X loading buffer.
Reducing Agent Addition: Add fresh reducing agent if not already present in the loading buffer. For DTT, use a final concentration of 50-100mM; for β-mercaptoethanol, use 2.5-5% (v/v) [22] [21].
Heat Denaturation: Cap tubes securely and heat samples at 95-100°C for 5 minutes in a heating block or boiling water bath [13] [20]. This thermal treatment ensures complete protein denaturation and linearization.
Cooling and Centrifugation: Briefly cool samples at room temperature for 2-3 minutes, then centrifuge at 12,000-16,000 × g for 2 minutes to pellet any insoluble debris [25] [18].
Gel Loading: Load 10-50μL of supernatant into the wells of a polyacrylamide gel, depending on protein concentration and detection method [19]. Include appropriate molecular weight markers in at least one well.
Electrophoresis: Run gel at constant voltage (120-200V) until the bromophenol blue tracking dye reaches the bottom of the gel [20] [19].
Diagram 2: Sample Preparation Protocol. Sequential steps for preparing protein samples for SDS-PAGE analysis.
Alternative Protocol for Heat-Sensitive Proteins
Recent research has identified that certain proteins, such as CARM1 (PRMT4) and PRMT1, exhibit atypical behavior under standard denaturing conditions, forming SDS-resistant aggregates when boiled in the presence of DTT [23]. For such challenging proteins, the following modified protocol is recommended:
Modified Materials:
- High-SDS sample buffer (4-6% w/v SDS instead of standard 2-4%) [23]
- Alternative reducing agents or exclusion for specific applications
- Temperature gradient block (capable of 70-85°C)
Modified Procedure:
- High-SDS Buffer Preparation: Prepare sample buffer with increased SDS concentration (4-6% w/v instead of standard 2%) to improve solubilization and prevent aggregation [23].
Reducing Agent Optimization: For aggregation-prone proteins, consider eliminating DTT or replacing it with alternative reducing agents. In some cases, non-reducing conditions may be necessary to prevent aggregate formation [23].
Modified Heat Treatment: Incubate samples at 70-85°C for 8-10 minutes instead of 95-100°C. This moderate heating sufficiently denatures most proteins while minimizing aggregation tendencies in susceptible proteins [23].
Validation: Always include controls to verify that modified conditions maintain protein solubility while achieving sufficient denaturation for accurate molecular weight assessment.
The Scientist's Toolkit: Essential Reagents and Materials
Table 4: Essential Research Reagents for Protein Denaturation and SDS-PAGE
| Category | Specific Reagents | Function & Application Notes |
|---|---|---|
| Detergents | SDS (Sodium Dodecyl Sulfate) [13] [18] | Primary denaturant; binds protein backbone at ~1.4g/g protein ratio [19] |
| Reducing Agents | DTT (Dithiothreitol), β-Mercaptoethanol [13] [21] | Breaks disulfide bonds; DTT preferred for stability and lower odor [21] |
| Buffer Systems | Tris-HCl (pH 6.8, 8.8), Tris-Glycine [22] [18] | Maintains pH for stacking and separation; discontinuous system improves resolution [13] [18] |
| Gel Components | Acrylamide/Bis-acrylamide, APS, TEMED [13] [19] | Forms polyacrylamide matrix; APS/TEMED catalyze polymerization [13] |
| Tracking Dyes | Bromophenol Blue [20] [21] | Visual migration marker; migrates at ~5kDa front [20] |
| Molecular Standards | Prestained Protein Ladders [13] [20] | Molecular weight reference for estimating protein size [13] |
| Staining Reagents | Coomassie Brilliant Blue, Silver Stain [13] [19] | Protein visualization; Coomassie detects ~50ng, Silver detects ~1ng [13] |
Troubleshooting and Technical Considerations
Common Issues and Resolution Strategies
Despite the standardized nature of protein denaturation protocols, researchers may encounter several technical challenges that affect SDS-PAGE results:
Protein Smearing or Streaking: Often results from incomplete denaturation [19]. Solution: Extend boiling time to 8-10 minutes, ensure fresh reducing agents are used, and include protease inhibitors in lysis buffers to prevent degradation [19].
Aberrant Migration: Can indicate improper SDS binding or protein modifications. Solution: Verify sample buffer composition, use fresh DTT, and consider post-translational modifications that affect mobility [19].
Protein Aggregation at High Temperatures: Particularly problematic for certain proteins like CARM1 [23]. Solution: Implement modified protocols with increased SDS concentration (4-6%) and reduced heating temperatures (70-85°C) [23].
Vertical Streaks in Gel: Often caused by air bubbles trapped during gel pouring or particulate matter in samples. Solution: Degas gel solutions before polymerization and centrifuge samples after boiling to remove insoluble material [19].
Method Selection Guidelines
The choice between standard and modified denaturation protocols depends on protein characteristics and research objectives:
Standard Conditions (95-100°C with reducing agents): Appropriate for most soluble proteins, particularly when determining subunit molecular weight or analyzing complex mixtures [13] [18].
Non-Reducing Conditions (without DTT/β-mercaptoethanol): Essential when studying disulfide-linked complexes, antibody structure, or conformational epitopes [18] [21].
Modified Thermal Protocols (70-85°C): Recommended for aggregation-prone proteins identified in recent literature, including certain methyltransferases like CARM1 and PRMT1 [23].
Native Conditions (no SDS, no heat): Preserves protein structure and activity for functional assays or analysis of protein complexes [18].
The boiling step in sample preparation for SDS-PAGE remains a cornerstone technique in molecular biology and proteomics, providing reproducible protein linearization when appropriately optimized. As research continues to identify protein-specific idiosyncrasies in denaturation behavior, such as the recently characterized aggregation propensity of CARM1 [23], protocol refinement and customization will remain essential for accurate protein analysis. Through systematic application of the principles and protocols outlined in this document, researchers can ensure optimal sample preparation for reliable protein separation and characterization.
The Critical Link Between Sample Preparation and Electrophoretic Resolution
In the realm of protein biochemistry, SDS-PAGE (sodium dodecyl sulfate–polyacrylamide gel electrophoresis) is a foundational technique for separating proteins by molecular weight. While the electrophoresis process itself is critical, the quality of the final separation is profoundly dependent on the steps taken before the sample is even loaded into the gel. Proper sample preparation is the single most crucial factor in achieving high-resolution, reproducible results. This application note details the essential protocols and principles for preparing protein samples for SDS-PAGE, framing them within the broader context of a thesis on optimizing electrophoretic resolution for research and drug development.
The Science of Denaturation and the Role of SDS
Principles of SDS-PAGE
SDS-PAGE is a denaturing gel electrophoresis technique. The anionic detergent Sodium Dodecyl Sulfate (SDS) plays a dual role: it disrupts nearly all non-covalent interactions within and between protein molecules, unfolding them into linear chains, and it binds to the polypeptide backbone in a constant weight ratio [26] [12]. This binding confers a uniform negative charge to all proteins, effectively masking their intrinsic electrical charges [2] [27]. Consequently, when an electric field is applied, all proteins migrate towards the anode, and their separation becomes almost entirely dependent on molecular size as they sieve through the polyacrylamide matrix, with smaller proteins migrating faster [12] [2].
The Crucial Heating Step
The boiling step (typically 95–100°C for 5 minutes) during sample preparation is not arbitrary; it is critical for achieving complete denaturation. Heat provides the energy required to disrupt hydrogen bonds and other stabilizing interactions that SDS alone may not overcome, ensuring proteins are fully unfolded [28]. This step also serves to inactivate proteases that can otherwise digest proteins during the preparation process, leading to artifactual bands or smearing [29]. However, one must exercise caution, as heating for too long at high temperatures can cleave sensitive Asp-Pro bonds within a protein's primary structure [29]. For most applications, 5 minutes at 95°C is sufficient, but if a protein is known to be heat-sensitive, heating at 75°C can be a suitable alternative to avoid this specific cleavage while still inactivating proteases [29].
Comprehensive Protocols for Sample Preparation
Sample and Loading Buffer Formulation
The sample loading buffer, often called Laemmli buffer, is a critical component that ensures proper denaturation, loading, and visualization. A standard recipe is provided below, with common variants being 2X or 5X concentrated solutions [30].
Table 1: Composition of SDS-PAGE Sample Loading Buffer
| Component | Final Concentration (in 1X Buffer) | Function |
|---|---|---|
| SDS | 2-5% (w/v) | Denatures proteins and confers uniform negative charge [27] [30]. |
| Tris-HCl (pH 6.8) | 50-62.5 mM | Provides buffering capacity at the stacking gel pH [30]. |
| Glycerol | 5-10% (v/v) | Adds density to the sample, allowing it to sink to the bottom of the well [27] [31]. |
| Bromophenol Blue | 0.001-0.025% (w/v) | Tracking dye to monitor migration progress during electrophoresis [32] [27]. |
| β-Mercaptoethanol (BME) or Dithiothreitol (DTT) | 1-5% (v/v) BME or 100-500 mM DTT | Reducing agents that break disulfide bonds, ensuring complete protein unfolding [26] [30]. |
| EDTA (optional) | 1 mM | Chelating agent that can bind metal ions and inhibit metalloproteases [30]. |
A standard 5X sample buffer recipe can be formulated as follows:
- 10% SDS
- 50% Glycerol
- 250 mM Tris-HCl, pH 6.8
- 5 mM EDTA
- 200 mM DTT (or 5% β-mercaptoethanol)
- 0.25% Bromophenol Blue [30]
Sample Preparation Workflow
The following workflow outlines the key steps for preparing a standard protein sample for SDS-PAGE.
Detailed Step-by-Step Protocol:
Combine Sample and Buffer: Mix the protein sample with an appropriate volume of sample loading buffer. The ratio must maintain a final 1X concentration of the buffer components. For a 2X buffer, use an equal volume of sample and buffer. For a 5X buffer, use 4 parts sample to 1 part buffer [30]. Incorrect ratios can lead to poor resolution and distorted bands.
Heat the Mixture: Place the sample-buffer mixture in a heating block or boiling water bath at 95–100°C for 5 minutes [26] [29]. This critical step ensures complete denaturation and protease inactivation.
Centrifuge: After heating, briefly centrifuge the samples for 2–3 minutes (e.g., 17,000 x g) to pellet any insoluble debris or aggregated material [29] [32]. Loading this pellet will cause streaking in the gel.
Load the Supernatant: Carefully load the clear supernatant into the wells of the prepared SDS-PAGE gel. Avoid overloading wells; do not fill beyond 3/4 of the well's capacity to prevent cross-contamination between lanes [31].
Determining Optimal Protein Load
The ideal amount of protein to load depends on the complexity of the sample and the detection method. Overloading leads to poor resolution and distorted bands, while underloading results in bands that are too faint to detect.
Table 2: Guidelines for Protein Load in SDS-PAGE
| Sample Type | Recommended Load (for Coomassie Staining) | Recommended Load (for Silver Staining) | Notes |
|---|---|---|---|
| Purified Protein | 0.5 - 4.0 µg [29] | N/A | As little as 50 ng can be sufficient for a highly purified protein, depending on detection [30]. |
| Crude Cell Lysate | 20 - 60 µg [29] | < 1 µg | Required amount varies with sample complexity and abundance of target protein. |
| General Guideline | 1 µg (purified) to 10 µg (lysate) is often sufficient for visualization [26]. | ~100x more sensitive than Coomassie [29]. |
Troubleshooting Common Sample Preparation Artifacts
Even with a sound protocol, artifacts can arise. The table below links common issues to their likely causes in sample preparation.
Table 3: Troubleshooting Common SDS-PAGE Artifacts
| Observed Problem | Potential Causes Related to Sample Prep | Solutions |
|---|---|---|
| Smiling or Frowning Bands | Improper buffer composition/ionic strength; uneven current distribution [12]. | Ensure correct sample buffer concentration; load equal volumes. |
| Smeared Bands | Protein degradation by proteases [29]; incomplete denaturation; overloading [12] [31]. | Heat samples immediately after adding buffer; ensure sufficient SDS/DTT; centrifuge before loading; reduce load. |
| Unexpected Bands (~55-65 kDa) | Keratin contamination from skin or dust [29]. | Wear gloves; use clean equipment; aliquot and store buffer properly. |
| Horizontal Streaking | Failure to remove insoluble material after heating [29]. | Always centrifuge sample after heating and load only the supernatant. |
| Sample Leaking from Well | Insufficient glycerol in loading buffer; air bubbles in well; overfilling well [31]. | Check buffer recipe; rinse wells with running buffer before loading; do not overfill wells. |
| Bands Clumping in Well | Protein aggregation; loading too much protein; high salt concentration [31]. | Ensure use of reducing agent; sonicate viscous samples; desalt sample if necessary. |
Advanced Considerations and Alternative Techniques
Special Sample Types
Some protein classes require modifications to the standard protocol:
- Membrane & Hydrophobic Proteins: May not solubilize effectively in standard SDS buffer. Adding urea (6-8 M) or a non-ionic detergent like Triton X-100 to the lysis buffer can improve solubility and prevent aggregation [29] [31].
- Viscous Samples (crude extracts): Viscosity is often caused by high molecular weight nucleic acids. Treatment with Benzonase Nuclease (which degrades DNA and RNA) or brief sonication before adding sample buffer can reduce viscosity and improve entry into the gel [29].
Native SDS-PAGE (NSDS-PAGE): An Alternative for Functional Analysis
A significant limitation of standard SDS-PAGE is the irreversible destruction of protein function. Native SDS-PAGE (NSDS-PAGE) is a modified technique that aims to balance good protein resolution with the retention of native functional properties, such as enzymatic activity or bound metal ions [10]. This is achieved by:
- Omitting EDTA from the sample and running buffers.
- Removing the heating step from sample preparation.
- Drastically reducing the SDS concentration in the running buffer (e.g., to 0.0375%) [10]. This approach allows for high-resolution separation while preserving the native state for many proteins, making it invaluable for metalloprotein analysis and activity assays [10].
The Scientist's Toolkit: Essential Research Reagent Solutions
Table 4: Essential Reagents for SDS-PAGE Sample Preparation
| Reagent / Material | Function & Importance |
|---|---|
| SDS (Sodium Dodecyl Sulfate) | Anionic detergent responsible for protein denaturation and imparting uniform charge. Purity is critical for consistent results. |
| DTT (Dithiothreitol) or BME (β-Mercaptoethanol) | Reducing agents that break disulfide bonds, essential for complete unfolding of proteins. DTT is often preferred due to its lower odor. |
| TEMED & Ammonium Persulfate (APS) | Catalysts for the polymerization of acrylamide to form the polyacrylamide gel matrix. |
| Tris-Based Buffers | Provides the required pH environment for both sample preparation (pH 6.8) and gel electrophoresis (pH ~8.3-8.8). |
| Molecular Weight Markers (Protein Ladder) | A mixture of proteins of known sizes run alongside samples to estimate the molecular weight of unknown proteins. |
| Protease Inhibitor Cocktails | Added to lysis buffers during cell/tissue preparation to prevent proteolytic degradation of the target protein before denaturation. |
Optimized Protocols: Step-by-Step Guide to Sample Preparation and Boiling
Within the broader context of sample preparation for SDS-PAGE, the formulation and application of SDS loading buffer constitutes a critical foundation for successful protein analysis. This protocol outlines the standardized procedure for preparing and utilizing 4X SDS loading buffer, a key reagent that ensures proteins are properly denatured, reduced, and prepared for electrophoretic separation [33]. The consistent use of a rigorously prepared loading buffer is paramount to generating reliable, reproducible data in downstream applications including Western blotting and proteomic profiling, which are essential techniques in biomedical research and drug development [34].
The principle of this buffer is to fully denature protein complexes into individual polypeptide chains, render them uniformly negatively charged, and provide density for easy gel loading, thereby facilitating accurate molecular weight determination [35]. This document provides detailed methodologies for buffer preparation, sample denaturation, and integration into the SDS-PAGE workflow, supported by structured data presentation and visual guides to ensure protocol fidelity.
Principles and Composition
The 4X SDS Loading Buffer is designed to disrupt native protein structures, reduce disulfide bonds, and prepare the sample for electrophoresis. Each component plays a specific role in this process, working in concert to ensure that proteins migrate through the polyacrylamide gel based primarily on their molecular weight [33] [35].
- Denaturation: SDS (sodium dodecyl sulfate) is a strong anionic detergent that binds to hydrophobic regions of proteins, unfolding them and conferring a uniform negative charge that masks the protein's intrinsic charge [33] [35].
- Reduction: Reducing agents, such as beta-mercaptoethanol (β-ME) or dithiothreitol (DTT), cleave disulfide bonds between cysteine residues, breaking down tertiary and quaternary protein structures [33] [35].
- Buffering and pH Control: Tris buffer, typically at pH 6.8, provides a stable chemical environment. This specific pH is crucial as it is low enough to minimize peptide bond hydrolysis yet high enough to allow effective action of the reducing agent [33].
- Density and Visualization: Glycerol increases the density of the sample, ensuring it sinks to the bottom of the gel well during loading. A tracking dye like bromophenol blue or Orange G allows visual monitoring of the electrophoresis progress [33] [36].
Table 1: Standard Composition of 4X SDS Loading Buffer
| Component | Final Concentration in 4X Buffer | Molecular Weight | Function |
|---|---|---|---|
| Tris-HCl | 125–250 mM [33] [36] | 121.14 g/mol [33] | Buffering agent, maintains pH 6.8 [33] |
| SDS | 4–8% (w/v) [33] [36] | 288.37 g/mol [33] | Denatures proteins and confers negative charge [35] |
| Glycerol | 20–50% (v/v) [33] [36] | 92.09 g/mol [33] | Adds density for easy gel loading [33] |
| Bromophenol Blue | ~0.02% (w/v) [33] | 691.94 g/mol [33] | Tracking dye to monitor electrophoresis [33] |
| Beta-Mercaptoethanol (β-ME) / DTT | 10–20% (v/v) β-ME [33] or 160-400 mM DTT [37] [35] | 78.13 g/mol (β-ME) [33] | Reducing agent; breaks disulfide bonds [35] |
The Scientist's Toolkit: Research Reagent Solutions
The following table catalogues the essential materials and reagents required for the successful preparation of samples using 4X SDS Loading Buffer.
Table 2: Essential Materials and Reagents for Sample Preparation
| Item | Specification/Function |
|---|---|
| Tris-HCl | Buffering agent, prepare as 1.5 M stock, pH 6.8 for buffer or pH 8.8 for gels [38]. |
| Sodium Dodecyl Sulfate (SDS) | Anionic detergent for protein denaturation and charge masking [35]. |
| Glycerol | Increases sample density for loading into wells [33]. |
| Beta-Mercaptoethanol (β-ME) or DTT | Reducing agents to break disulfide bonds. Caution: β-ME is toxic and has a strong odor; use in a fume hood [33] [35]. |
| Bromophenol Blue | Anionic tracking dye to visualize sample migration [33]. |
| Acrylamide/Bis-acrylamide Solution | Typically 30% (w/v) with a 37.5:1 ratio for casting SDS-PAGE gels [1] [38]. |
| Ammonium Persulfate (APS) | Catalyst for acrylamide polymerization [1]. |
| TEMED | Co-catalyst to initiate acrylamide polymerization [1]. |
| Protein Molecular Weight Standards | Pre-stained or unstained markers for estimating protein size [34]. |
| Microcentrifuge Tubes | Heat-resistant tubes for sample denaturation. |
Formulation Protocol
Materials and Reagents
- Tris base (FW: 121.14 g/mol)
- Hydrochloric acid (HCl), concentrated
- SDS (FW: 288.37 g/mol)
- Glycerol (100%)
- Bromophenol Blue
- Beta-Mercaptoethanol (β-ME) or Dithiothreitol (DTT)
- Deionized water
- pH meter
- Magnetic stirrer and stir bar
- Measuring cylinder (100 mL)
- Beaker (100 mL)
- Fume hood
- Personal protective equipment (lab coat, gloves, safety glasses)
Step-by-Step Preparation (50 mL Volume)
- Dissolve Tris Base: In a 100 mL beaker, dissolve the calculated amount of Tris base (e.g., 1.514 g for 0.25 M) in approximately 20 mL of deionized water using a magnetic stirrer [33].
- Adjust pH: While stirring, carefully adjust the pH of the Tris solution to 6.8 using concentrated HCl. Perform this step in a fume hood to avoid inhalation of HCl fumes. Take care not to overshoot the target pH [33].
- Add Glycerol: Add the required volume of glycerol (e.g., 20 mL for 40% v/v) to the Tris solution and mix thoroughly [33].
- Add SDS and Bromophenol Blue: Add the measured amounts of SDS (e.g., 4 g for 8% w/v) and bromophenol blue (e.g., 200 mg). Stir until all components are completely dissolved. This may take several minutes [33].
- Add Reducing Agent (Option 1 - Pre-aliquoted): For convenience in daily use, add the reducing agent (e.g., 10 mL β-ME for 20% v/v) directly to the solution. Bring the total volume to 50 mL with deionized water. Mix thoroughly and aliquot into smaller tubes. Store at -20 °C [33].
- Add Reducing Agent (Option 2 - For Extended Stability): For enhanced long-term stability of the reducing agent, bring the volume of the solution from step 4 to just under 50 mL (e.g., ~45 mL) without adding the reducing agent. Aliquot and store. Just before use, add the appropriate amount of β-ME or DTT to each aliquot [33].
Storage and Stability
- The 4X SDS Loading Buffer containing a reducing agent (β-ME or DTT) should be stored at -20 °C [33] [36].
- The buffer without a reducing agent can be stored at room temperature or 4 °C for up to one year [33] [36].
- If SDS precipitates upon storage at low temperatures, warm the buffer slightly (to ~28-37°C) and vortex to redissolve before use [36].
Experimental Workflow for Sample Preparation
The process of preparing a protein sample for SDS-PAGE using the 4X loading buffer is a critical sequence of steps to ensure complete denaturation and reduction. The following diagram illustrates the logical workflow from sample acquisition to loaded gel.
Diagram 1: Logical workflow for preparing protein samples using 4X SDS loading buffer.
Sample Preparation Protocol
- Mix Sample with Buffer: Combine the protein sample with 4X SDS Loading Buffer at a 3:1 volume ratio (e.g., 30 µL sample + 10 µL buffer) in a microcentrifuge tube [1]. For a final 1X concentration, this ensures the sample has adequate SDS and reducing agent.
- Vortex: Vortex the mixture briefly to ensure it is homogeneous [1].
- Denature by Heating: Heat the samples at 95°C for 5 minutes in a heat block or boiling water bath [1] [29]. Caution: Pressure can build up during heating. Briefly open the tube lids or pierce the lid with a needle to prevent tubes from popping open [1].
- Centrifuge: Briefly centrifuge the heated samples (e.g., 15-30 seconds at maximum speed in a microcentrifuge) to collect any condensation and bring the entire sample to the bottom of the tube [1] [29].
- Load Gel: Load the required volume of the supernatant onto the SDS-PAGE gel. Avoid loading any insoluble pellet if present [29].
Critical Parameters and Optimization
- Protein-to-Buffer Ratio: Maintaining an excess of SDS is critical. A general recommendation is a 3:1 mass ratio of SDS to protein [29]. For concentrated samples, ensure the final concentration of SDS in the 1X mix is sufficient (typically 1-2%).
- Heating Conditions: While 95°C for 5 minutes is standard, some sensitive proteins may be degraded. For proteins containing acid-labile aspartic acid-proline (Asp-Pro) bonds, heating at 75°C for 5-10 minutes can prevent cleavage while still effectively denaturing the sample and inactivating proteases [29].
- Reducing Agent Selection: DTT is often preferred over β-ME as it has a less pungent odor and is a more effective reducing agent at lower concentrations [35]. DTT is also less volatile, making the buffer more stable.
Troubleshooting and Artifact Prevention
Despite a straightforward protocol, several artifacts can arise from improper sample preparation.
Table 3: Common Artifacts and Preventive Measures
| Problem | Potential Cause | Solution |
|---|---|---|
| Protein Degradation (smearing) | Protease activity in sample before heating [29]. | Add sample to loading buffer and heat immediately. Keep samples on ice before buffer addition. Include protease inhibitors in initial lysis buffer. |
| Unexpected Cleavage | Cleavage of Asp-Pro bonds due to excessive heat [29]. | Reduce heating temperature to 75°C for 5-10 minutes instead of 95°C [29]. |
| Keratin Contamination (bands at ~55-65 kDa) | Contamination from skin, hair, or dust [29]. | Wear gloves, use clean equipment, and aliquot buffer to avoid repeated contact. Run a "buffer-only" control lane to identify contamination source [29]. |
| Protein Aggregation | Over-boiling or improper SDS-to-protein ratio [35] [29]. | Ensure correct SDS-to-protein ratio (aim for 3:1) [29]. Avoid heating for extended periods. For membrane proteins, consider adding urea to the buffer [29]. |
| Streaky or Distorted Bands | Insoluble material in sample [29]. | Centrifuge sample after heating and loading buffer addition. Load only the supernatant [29]. |
Within the broader research on sample preparation for SDS-PAGE, the boiling step serves as a foundational procedure that significantly influences experimental outcomes. Proper thermal denaturation ensures that proteins are completely unfolded and linearized, facilitating accurate separation by molecular weight during electrophoresis [39]. The standard condition of 95–100°C for 5 minutes represents a carefully optimized starting point that effectively balances complete denaturation with the preservation of protein integrity for most common applications [39]. This protocol is typically performed after mixing protein samples with Laemmli sample buffer, which contains critical components including SDS for denaturation and charge impartation, reducing agents such as DTT or β-mercaptoethanol for disulfide bond cleavage, and glycerol for sample density [39]. Understanding the scientific rationale behind these conditions and knowing when to modify them is crucial for researchers aiming to generate reliable and reproducible data in protein analysis and drug development workflows.
Optimal Boiling Conditions for Different Protein Types
Standard Protocol and Scientific Rationale
The universally accepted standard boiling condition of 95–100°C for 5 minutes provides sufficient thermal energy to achieve three critical objectives in sample preparation for SDS-PAGE. First, it promotes thorough protein denaturation, effectively dismantling the tertiary and secondary structures to convert proteins into linear polypeptides [39]. Second, this thermal treatment facilitates the reduction of disulfide bonds when performed in the presence of reducing agents, thereby separating polypeptide chains into their constituent subunits [39]. Third, the combination of heat and SDS ensures optimal detergent binding, creating a uniform negative charge distribution across all proteins, which is essential for migration based solely on molecular weight during electrophoresis [39] [2]. The 5-minute duration represents a balance that typically provides complete denaturation without causing significant protein degradation for standard proteins [39].
Specialized Conditions for Challenging Proteins
While the standard boiling conditions work effectively for most routine applications, specific protein categories require modified approaches to prevent aggregation, degradation, or loss of antigenicity. The table below summarizes the optimized conditions for various protein types:
Table 1: Optimal Boiling Conditions for Different Protein Types
| Protein Type | Temperature | Duration | Special Notes |
|---|---|---|---|
| Standard Proteins | 95–100°C | 5 minutes | Works for most small to medium-sized proteins [39] |
| Heat-Sensitive Proteins | 70°C | 5–10 minutes | Reduces risk of aggregation or loss of antigenicity [39] |
| Large Proteins (>150 kDa) | 70°C | 5–10 minutes | Prevents aggregation that affects electrophoresis [39] |
| Phosphorylated Proteins | Avoid boiling | Room temperature for 15–30 minutes | Preserves phosphorylation-sensitive epitopes [39] |
For membrane proteins and other challenging samples, thorough heating is particularly critical as it ensures the dissociation of strong hydrophobic interactions, including those involving lipids [40]. Incomplete denaturation of these protein categories can result in abnormal migration patterns and unreliable data interpretation.
Troubleshooting Common Boiling-Related Issues
Even with established protocols, researchers may encounter several boiling-related challenges that compromise Western blot results. The table below outlines common issues, their causes, and practical solutions:
Table 2: Troubleshooting Boiling-Related Issues in Protein Preparation
| Issue | Primary Cause | Recommended Solution |
|---|---|---|
| Protein Degradation | Overheating or prolonged boiling | Reduce boiling time or lower temperature to 70°C [39] |
| Loss of Antigenicity | Denaturation of heat-sensitive epitopes | Use reduced temperature or skip boiling for sensitive proteins [39] |
| Protein Aggregation | High temperatures causing large proteins to clump | Heat at 70°C instead of 95–100°C [39] |
| Incomplete Denaturation | Inadequate heat or missing reducing agents | Ensure proper boiling temperature and add β-mercaptoethanol or DTT [39] |
Protein aggregation represents a particularly common challenge with high molecular weight proteins (>150 kDa), where excessive heat can promote intermolecular interactions that prevent proper gel entry and migration [39]. Additionally, researchers should consider that some proteins, especially those with labile post-translational modifications like phosphorylation, may require complete avoidance of boiling, with room temperature incubation in Laemmli buffer for 15-30 minutes providing sufficient denaturation while preserving epitope integrity [39].
Experimental Protocols for Boiling Protein Samples
Standard Sample Preparation and Boiling Protocol
This fundamental protocol describes the standard procedure for preparing protein samples for SDS-PAGE through boiling denaturation:
Sample Mixing: Combine protein lysate with 4X Laemmli sample buffer to achieve a final 1X concentration [39]. Ensure proper vortexing to achieve a homogeneous mixture.
Heat Denaturation: Transfer samples to a heat block or water bath preheated to 95–100°C. Boil for exactly 5 minutes [39]. For large protein numbers, consider using a floating rack to ensure consistent heat transfer across all samples.
Brief Centrifugation: Centrifuge boiled samples at maximum speed for 2-3 minutes to pellet any insoluble material or aggregates that could interfere with electrophoresis [40].
Loading: Carefully load the supernatant into the wells of an SDS-PAGE gel, avoiding the pellet if present [39].
Storage Option: If immediate electrophoresis is not possible, samples can be frozen at -80°C after boiling. However, repeated freeze-thaw cycles should be minimized to maintain protein integrity [41].
Alternative Protocol for Native SDS-PAGE
For experiments requiring preservation of protein function or metal cofactors, a modified approach called Native SDS-PAGE (NSDS-PAGE) can be implemented:
Sample Buffer Preparation: Modify standard sample buffer by removing SDS and EDTA [10].
Sample Mixing: Combine protein samples with the modified buffer without subsequent heating [10].
Electrophoresis Conditions: Utilize running buffer with reduced SDS concentration (0.0375% instead of standard 0.1%) [10].
Application: This method retains Zn²⁺ binding in proteomic samples (increasing from 26% to 98% compared to standard SDS-PAGE) and preserves enzymatic activity for most proteins while maintaining good resolution [10].
The Scientist's Toolkit: Essential Research Reagents
Successful protein sample preparation requires specific reagents, each fulfilling a distinct function in the denaturation and preparation process:
Table 3: Essential Research Reagents for Protein Denaturation
| Reagent | Function | Application Notes |
|---|---|---|
| Laemmli Sample Buffer | Provides denaturing environment | Contains SDS, reducing agents, tracking dye, and glycerol [39] |
| SDS (Sodium Dodecyl Sulfate) | Denatures proteins and imparts negative charge | Ensures uniform charge-to-mass ratio [39] [2] |
| DTT (Dithiothreitol) | Reduces disulfide bonds | Less odor than β-mercaptoethanol but less stable [40] |
| β-mercaptoethanol | Reduces disulfide bonds | Strong odor but stable over freeze-thaw cycles [40] |
| Glycerol | Adds density to samples | Enables samples to sink properly into gel wells [39] |
| Bromophenol Blue | Tracking dye | Visualizes sample migration during electrophoresis [39] |
Workflow Diagram: Sample Preparation Process
The following diagram illustrates the complete decision pathway for optimizing protein sample preparation through thermal denaturation:
The optimization of protein boiling conditions represents a critical component in the broader context of sample preparation research for SDS-PAGE. While the standard protocol of 95-100°C for 5 minutes serves as an effective starting point for most proteins, researchers must remain vigilant to the specific characteristics of their target proteins. The adoption of customized thermal denaturation strategies for challenging proteins, including large complexes, heat-sensitive antigens, and phosphorylated species, can significantly enhance experimental outcomes in both basic research and drug development applications. Through systematic implementation of these optimized protocols and thorough troubleshooting of common issues, scientists can ensure the generation of reliable, reproducible, and interpretable data in their protein analysis workflows.
Within the broader context of thesis research on sample preparation for SDS-PAGE, this application note addresses critical modifications required for challenging protein classes. Standard sample preparation involving Laemmli buffer and boiling at 95°C effectively denatures most proteins for molecular weight-based separation [42] [35]. However, this conventional approach frequently fails for sensitive protein categories, including large proteins exceeding 150 kDa and phosphorylated signaling molecules, leading to incomplete denaturation, aggregation, or loss of post-translational modifications [42] [10]. This document provides detailed, optimized protocols to overcome these limitations, enabling accurate analysis of sensitive targets in basic research and drug development.
The following workflow outlines the decision process for selecting the appropriate denaturation protocol based on protein characteristics and research goals:
The Challenge of Large Proteins and Phosphorylated Targets
Large Proteins (>150 kDa)
The analysis of high-molecular-weight proteins presents unique challenges in SDS-PAGE. Their substantial size makes them particularly susceptible to aggregation and incomplete unfolding when subjected to standard boiling protocols [35]. The hydrophobic cores of these large polypeptides, when rapidly exposed to high temperatures, can undergo irreversible aggregation through non-covalent interactions, potentially leading to protein precipitation or smeared electrophoretic patterns [43]. Furthermore, the extended polypeptide chains of large proteins contain more potential sites for non-specific chemical modifications during sample preparation, which can alter their migration and detection.
Phosphorylated Proteins
Phosphorylated proteins represent another challenging category due to the labile nature of phosphate groups and their typically low stoichiometry in biological samples [42] [44]. The phosphorylation status of proteins is dynamically regulated by kinase and phosphatase activities, and even trace amounts of endogenous phosphatases remaining in samples can rapidly remove phosphate groups during preparation, obliterating the analytical signal [42]. Additionally, phosphorylated epitopes can be structurally subtle, requiring highly specific antibodies for detection while being prone to obscuration by non-specific binding when inappropriate blocking agents are used [42]. The conventional use of milk-based blocking buffers is particularly problematic due to the presence of phosphoproteins like casein, which can cross-react with detection antibodies and generate high background noise [42].
Modified Denaturation Protocols for Large Proteins (>150 kDa)
Gradual Denaturation Protocol
This protocol employs controlled, lower-temperature heating to facilitate gradual protein unfolding while minimizing aggregation.
- Step 1: Sample Preparation - Mix cell lysate or protein sample with standard 2× Laemmli buffer (final concentration: 1× SDS, 50 mM Tris-Cl pH 6.8, 10% glycerol, 2.5% β-mercaptoethanol or 50 mM DTT) [35]. Note: DTT is preferred over 2-mercaptoethanol for more effective reduction with less odor [35].
- Step 2: Controlled Heating - Incubate samples at 70°C for 10-15 minutes instead of boiling at 95°C [42]. For extremely sensitive large proteins, a stepped temperature approach may be beneficial: start at 60°C for 5 minutes, then increase to 70°C for 10 minutes.
- Step 3: Brief Centrifugation - Centrifuge samples at 14,000 × g for 5 minutes to pellet any insoluble aggregates that may have formed [35].
- Step 4: Gel Loading - Carefully load the supernatant onto the gel, avoiding the pellet. Use low-percentage gels (e.g., 6-8%) or gradient gels (e.g., 4-12%) to improve the resolution and transfer of large proteins [2].
Native SDS-PAGE (NSDS-PAGE) Protocol
This method modifies standard SDS-PAGE conditions to preserve functional properties while maintaining high resolution [10].
- Step 1: Modified Sample Buffer Preparation - Prepare NSDS sample buffer (final concentration: 100 mM Tris HCl, 150 mM Tris base, 10% glycerol, 0.0185% Coomassie G-250, 0.00625% Phenol Red, pH 8.5) [10]. Omit SDS and EDTA from the sample buffer, and do not heat the samples before loading [10].
- Step 2: Modified Running Buffer - Prepare NSDS running buffer (50 mM MOPS, 50 mM Tris Base, 0.0375% SDS, pH 7.7) [10]. This represents a significant reduction in SDS concentration compared to standard running buffers (which typically contain 0.1% SDS).
- Step 3: Electrophoresis - Load unheated samples onto precast Bis-Tris gels and run at constant voltage (200V) for approximately 45 minutes [10].
Table 1: Buffer Compositions for Standard SDS-PAGE vs. NSDS-PAGE
| Component | Standard SDS-PAGE | Native SDS-PAGE (NSDS-PAGE) |
|---|---|---|
| Sample Buffer | 2% SDS, 20% glycerol, 20 mM Tris-Cl, pH 6.8, 2 mM EDTA, 160 mM DTT [35] | 100 mM Tris HCl, 150 mM Tris base, 10% glycerol, 0.0185% Coomassie G-250, 0.00625% Phenol Red, pH 8.5 [10] |
| Running Buffer | 50 mM MOPS, 50 mM Tris Base, 1 mM EDTA, 0.1% SDS, pH 7.7 [10] | 50 mM MOPS, 50 mM Tris Base, 0.0375% SDS, pH 7.7 [10] |
| Sample Heating | 70-100°C for 5-10 minutes [2] | No heating [10] |
| Primary Application | Molecular weight determination | Retention of native activity/metal cofactors [10] |
Modified Protocols for Phosphorylated Targets
Phosphorylation-Preserving Sample Preparation
This protocol emphasizes the preservation of phosphorylation states throughout sample preparation.
- Step 1: Lysis with Phosphatase Inhibitors - Prepare lysis buffer with comprehensive phosphatase inhibition: 50 mM Tris-HCl (pH 7.5), 150 mM NaCl, 1% NP-40, 0.5% sodium deoxycholate, supplemented with phosphatase inhibitors (1 mM sodium orthovanadate, 10 mM sodium fluoride, 10 mM β-glycerophosphate, and commercial phosphatase inhibitor cocktails) [42]. Keep samples on ice throughout lysis.
- Step 2: Denaturation with Preservation - Mix lysate with 2× SDS sample buffer and heat at 95°C for 5 minutes [42]. The immediate denaturation inactivates phosphatases, preserving phosphorylation.
- Step 3: BSA-Based Blocking - Following transfer, block membranes with 5% (w/v) BSA in TBST for 1 hour at 4°C with agitation [42]. Avoid milk-based blockers which contain phosphoproteins that cause high background.
- Step 4: Phospho-Specific Antibody Incubation - Incubate with primary phospho-specific antibody diluted in TBST overnight at 4°C with agitation [42]. Use antibodies validated for phospho-specificity.
Phos-tag SDS-PAGE Protocol
Phos-tag technology provides an innovative approach to separate phosphorylated protein species based on their phosphorylation status rather than molecular weight alone [44].
- Step 1: Gel Preparation - Incorporate Phos-tag Acrylamide (typically 25-50 µM) and MnCl₂ (typically 50-100 µM) into the separating gel solution during polymerization [44]. Alternatively, use commercially available SuperSep Phos-tag precast gels.
- Step 2: Sample Preparation - Prepare samples using standard SDS-PAGE sample buffer and denature at 95°C for 5 minutes [44]. The protocol is otherwise identical to conventional SDS-PAGE sample preparation.
- Step 3: Electrophoresis - Run gels at constant voltage following manufacturer's recommendations. Note that phosphorylated proteins will migrate slower than their non-phosphorylated counterparts due to reversible interaction with the Phos-tag molecule [44].
- Step 4: Post-Run Processing - Wash gels in transfer buffer containing 1 mM EDTA to chelate Mn²⁺ before western transfer, which helps prevent metal carry-over to the membrane [44].
Table 2: Comparison of Phosphoprotein Analysis Methods
| Method | Principle | Advantages | Limitations |
|---|---|---|---|
| Standard Western with Phospho-Specific Antibodies | Antibody recognition of specific phosphorylated epitopes [42] | High specificity; widely accessible; semi-quantitative [42] | Requires specific antibodies; potential cross-reactivity; limited to known sites [42] |
| Phos-tag SDS-PAGE | Phosphate-affinity electrophoresis; phosphorylated proteins bind Phos-tag and migrate slower [44] | Detects unknown phosphorylation sites; separates multiple phospho-forms; works for unstable His/Asp-phosphorylated proteins [44] | May require optimization; additional gel components; not compatible with all detection methods [44] |
| Phos-tag Biotin/Blotting | Phos-tag Biotin binds phosphorylated proteins on membranes [44] | Comprehensive detection without phospho-specific antibodies; compatible with antibody microarrays [44] | Less specific than antibodies; may detect all phosphorylated proteins nonspecifically [44] |
| Mass Spectrometry | Direct detection of phosphate groups and modified residues [42] | Identifies exact modification sites; high sensitivity; comprehensive profiling [42] | Requires specialized equipment; advanced expertise; may miss low-abundance species [42] |
Integrated Workflow for Complex Samples
For samples containing both large proteins and phosphorylated targets, a sequential denaturation approach may be beneficial. The SDPP (Sequential Denaturation and Protein Precipitation) method, though originally developed for ligand target identification, offers a useful paradigm for handling complex protein mixtures [45]. This approach applies different denaturation conditions sequentially to the same sample, progressively precipitating proteins based on their stability characteristics while preserving sensitive epitopes and preventing aggregation [45].
The following diagram illustrates the key signaling pathways regulating protein phosphorylation and the points of intervention for experimental control:
The Scientist's Toolkit: Essential Research Reagents
Table 3: Key Research Reagent Solutions for Sensitive Protein Analysis
| Reagent/Category | Function/Application | Specific Examples |
|---|---|---|
| Phosphatase Inhibitors | Prevent dephosphorylation during sample preparation [42] | Sodium orthovanadate, sodium fluoride, β-glycerophosphate, commercial phosphatase inhibitor cocktails [42] |
| Alternative Blocking Agents | Reduce background in phosphoprotein detection [42] | BSA (5% w/v in TBST) instead of milk-based blockers [42] |
| Specialized Electrophoresis Reagents | Separate phosphorylated protein variants [44] | Phos-tag Acrylamide, SuperSep Phos-tag precast gels, Phos-tag Biotin for blotting [44] |
| Reducing Agents | Break disulfide bonds without strong odor [35] | DTT (dithiothreitol) at 50-100 mM instead of 2-mercaptoethanol [35] |
| Metal Chelators | Control metal-dependent processes [10] | EDTA in sample buffers to inhibit metalloproteases [35] |
| Sequential Denaturation Reagents | Progressive protein precipitation for target identification [45] | Thermal denaturation followed by organic solvent treatment (TEMP-SL) [45] |
Troubleshooting and Optimization Guide
Common Issues with Large Proteins
- Problem: Protein aggregation/smearing in large proteins (>150 kDa)
Solution: Implement gradual denaturation at 70°C instead of boiling; use lower-percentage gels (6-8%) for better separation; consider native SDS-PAGE for extremely sensitive targets [10] [35]
Problem: Poor transfer efficiency for large proteins
- Solution: Extend transfer time; use pre-chilled methanol for PVDF membrane activation; verify transfer efficiency with Ponceau staining [42]
Common Issues with Phosphorylated Targets
- Problem: Weak or inconsistent phosphorylation signals
Solution: Ensure fresh phosphatase inhibitors are used in all buffers; minimize sample processing time; verify antibody specificity with appropriate controls [42]
Problem: High background in western blots for phosphorylated proteins
Solution: Replace milk-based blockers with BSA (5% in TBST); optimize antibody concentrations; include additional washes with TBST [42]
Problem: Incomplete separation of phospho-forms
- Solution: Implement Phos-tag SDS-PAGE with optimized Mn²⁺ concentrations; validate with known phospho-standard proteins [44]
The analysis of sensitive protein classes requires deliberate modification of standard SDS-PAGE protocols to preserve structural integrity and post-translational modifications. For large proteins exceeding 150 kDa, reduced heating temperatures and Native SDS-PAGE approaches prevent aggregation while maintaining resolution [10]. For phosphorylated targets, comprehensive phosphatase inhibition combined with specialized detection methods like Phos-tag technology enables accurate profiling of phosphorylation states [42] [44]. These optimized protocols provide researchers with robust methods for investigating challenging but biologically critical protein targets in signaling pathway analysis and drug development contexts.
Proper sample preparation is a critical first step in sodium dodecyl sulfate-polyacrylamide gel electrophoresis (SDS-PAGE) that fundamentally impacts the quality, reproducibility, and interpretability of results. This foundational process transforms complex protein mixtures from biological samples into a form compatible with electrophoretic separation, enabling researchers to analyze protein composition, estimate molecular weights, and compare expression levels. The core of this transformation occurs through the application of Laemmli buffer, a denaturing solution that linearizes proteins and confers uniform charge characteristics, followed by a controlled heating step that ensures complete denaturation [33] [46]. Within the broader context of thesis research on sample preparation methodologies, this application note provides detailed protocols and experimental frameworks for optimizing the journey from crude lysate to loaded gel, with particular emphasis on quantitative formulation and functional principles.
Principles of Laemmli Buffer and Protein Denaturation
The Laemmli buffer, named after its inventor Prof. Ulrich K. Laemmli, serves as the chemical foundation for SDS-PAGE sample preparation by executing several simultaneous functions that are essential for successful electrophoretic separation [33]. Each component in the buffer formulation performs a specific role in transforming native proteins into a state where their electrophoretic mobility correlates primarily with molecular weight.
Table 1: Composition and Function of Laemmli Buffer Components
| Component | Molecular Weight | Final Concentration (1X) | Primary Function |
|---|---|---|---|
| Tris base | 121.14 g/mol | 0.0625 M | Maintains pH at 6.8 to preserve peptide bonds and ensure proper buffering capacity |
| SDS | 288.37 g/mol | 2% (0.07 M) | Denatures proteins and confers uniform negative charge proportional to polypeptide length |
| Glycerol | 92.09 g/mol | 10% | Increases sample density for facile loading into gel wells |
| Bromophenol Blue | 691.94 g/mol | ~0.001%-0.01% | Serves as tracking dye to monitor electrophoresis progress |
| β-mercaptoethanol or DTT | 78.13 g/mol (BME) | 5% or 100-200 mM | Reduces disulfide bonds to ensure complete protein unfolding |
The mechanism of protein denaturation begins with SDS binding, wherein this anionic surfactant disrupts hydrophobic interactions and hydrogen bonds that maintain secondary and tertiary structures [46]. With a binding capacity of approximately 1.4 g SDS per 1.0 g of protein, SDS creates a negatively charged micelle-like environment around the polypeptide backbone, effectively masking any inherent charge differences between proteins [46]. Concurrently, reducing agents such as β-mercaptoethanol or dithiothreitol (DTT) cleave covalent disulfide linkages between cysteine residues, thereby dissociating protein complexes into individual subunits and ensuring complete unfolding [33] [47]. The Tris buffer system maintains the solution at pH 6.8, which represents a critical compromise that minimizes acid-catalyzed peptide bond hydrolysis while preserving the efficacy of thiol-based reducing agents [33].
The following diagram illustrates the sequential process of protein denaturation from their native state to fully linearized forms suitable for electrophoretic separation:
Research Reagent Solutions
Table 2: Essential Materials for SDS-PAGE Sample Preparation
| Category | Specific Reagents/Equipment | Function/Application |
|---|---|---|
| Buffering Agents | Tris-HCl, Tris base | Maintains pH throughout sample preparation and electrophoresis (stacking gel: pH 6.8, resolving gel: pH 8.8) [33] [1] |
| Denaturing Agents | Sodium dodecyl sulfate (SDS) | Disrupts non-covalent bonds, linearizes proteins, imparts uniform negative charge [46] |
| Reducing Agents | β-mercaptoethanol, DTT | Cleaves disulfide bonds between cysteine residues [33] [47] |
| Density Agents | Glycerol | Increases sample density for loading into wells; typically used at 10-20% concentration [33] |
| Tracking Dyes | Bromophenol blue | Visual indicator of electrophoresis progress [33] |
| Protease Inhibition | PMSF, commercial protease inhibitor cocktails | Prevents protein degradation during sample preparation [10] |
| Sample Preparation | Laemmli buffer (2X or 4X concentration), heating block/water bath | Standardized sample denaturation; 95°C for 5 minutes ensures complete unfolding [47] |
Detailed Experimental Protocols
Standard Laemmli Buffer Preparation
The preparation of high-quality Laemmli buffer requires precise formulation and appropriate handling of potentially hazardous chemicals. The following protocol yields 50 mL of 2X buffer solution [33]:
- Tris Solution Preparation: Dissolve 0.747 g of Tris base in approximately 10 mL of deionized water using a magnetic stirrer.
- pH Adjustment: Carefully adjust the pH to 6.8 using concentrated HCl, taking care not to overshoot the target pH. Perform this step in a fume hood to avoid inhalation of HCl fumes.
- Glycerol Addition: Add 10 mL of glycerol to the Tris solution and mix thoroughly.
- SDS and Dye Addition: Add 2 g of SDS and 100 mg of bromophenol blue to the solution. Stir continuously until complete dissolution is achieved.
- Reducing Agent Incorporation: Implement one of two strategies based on intended storage:
- Option 1 (Immediate Use): Add 5 mL of β-mercaptoethanol and adjust the final volume to 50 mL with deionized water. Aliquot and store at -20°C.
- Option 2 (Long-term Storage): Adjust the volume to approximately 45 mL, aliquot, and store at -20°C. Add β-mercaptoethanol to each aliquot immediately before use.
Critical Safety Considerations: β-mercaptoethanol is seriously irritating and toxic if swallowed or inhaled, so it must be handled in an active fume hood. Similarly, concentrated HCl fumes are dangerous and require fume hood usage. Tris base and bromophenol blue can cause skin and eye irritation, necessitating appropriate personal protective equipment including lab coats and gloves [33].
Sample Preparation and Denaturation Protocol
Proper execution of sample preparation ensures optimal resolution and minimizes experimental artifacts:
- Sample-Buffer Mixing: Combine protein sample with an equal volume of 2X Laemmli buffer (or appropriate volume for other concentrations) in a heat-resistant microcentrifuge tube [47]. For example, mix 20 μL of protein lysate with 20 μL of 2X buffer.
- Denaturation: Heat the mixture at 95°C for 5 minutes in a heating block or water bath [1]. During heating, briefly open tube lids or pierce them with a needle to prevent pressure buildup.
- Cooling and Clarification: Briefly centrifuge heated samples to collect condensation and ensure all material is at the bottom of the tube.
- Gel Loading: Load 10-30 μL of the prepared sample into gel wells, using adjacent wells for molecular weight standards.
Troubleshooting Notes: If samples appear viscous or incompletely denatured after initial heating, extend the heating duration to 10 minutes or add additional 1X SDS-PAGE loading buffer before repeating the heating step [47]. For samples with high salt content or dilute protein concentration, implement a trichloroacetic acid (TCA) precipitation step prior to denaturation: add 100 μL of 10% TCA to 100 μL sample, incubate on ice for 20 minutes, centrifuge at maximum speed for 15 minutes, wash pellet with ice-cold ethanol, dry, and resuspend in 1X SDS-PAGE sample buffer [1].
NSDS-PAGE: A Native State Alternative
For applications requiring retention of protein function or associated metal ions, a modified approach called Native SDS-PAGE (NSDS-PAGE) provides an effective alternative to conventional denaturing methods. This technique eliminates the heating step and modifies buffer composition to preserve enzymatic activity and metal cofactors in many proteins while maintaining high resolution separation [10].
Key Modifications for NSDS-PAGE:
- Sample Buffer: 100 mM Tris HCl, 150 mM Tris base, 10% glycerol, 0.01875% Coomassie G-250, 0.00625% phenol red, pH 8.5
- Running Buffer: 50 mM MOPS, 50 mM Tris Base, 0.0375% SDS, pH 7.7
- Procedure: Omit both EDTA from buffers and the heating step from sample preparation
- Performance: Retains 98% of bound Zn²⁺ compared to 26% with standard SDS-PAGE, with seven of nine model enzymes maintaining activity post-electrophoresis [10]
Visualization and Analysis
Following electrophoretic separation, protein bands require visualization for analysis. The two most common methods offer different sensitivity levels and applications:
Coomassie Staining:
- Sensitivity: 30-100 ng protein per band
- Procedure: Incubate gel in Coomassie staining solution (0.05% Coomassie Brilliant Blue R-250, 40% ethanol, 10% acetic acid) for 30 minutes to 2 hours with gentle shaking. Destain with multiple changes of destaining solution (40% ethanol, 10% acetic acid) until background is clear [1].
- Applications: Quantitative protein assessment, downstream processing including western blotting or mass spectrometry
Silver Staining:
- Sensitivity: 2-5 ng protein per band
- Procedure: Follow commercial kit protocols for fixation, sensitization, silver impregnation, development, and stopping
- Applications: High-sensitivity detection when protein amounts are limited; not recommended for subsequent protein sequencing or mass spectrometry due to protein oxidation [1]
For mass spectrometry-based proteomic applications, the whole gel (WG) procedure streamlines processing by performing washing, reduction, and alkylation steps on the intact gel before slicing, significantly reducing manual processing time while maintaining identification and quantification reproducibility compared to conventional in-gel digestion [48].
The sample preparation workflow from lysate to loaded gel establishes the fundamental quality of SDS-PAGE analysis, with careful attention to buffer composition, denaturation conditions, and sample handling protocols directly influencing experimental outcomes. The standardized Laemmli method, with its specific combination of denaturing, reducing, and buffering agents, remains the cornerstone of protein separation by molecular weight. The alternative NSDS-PAGE approach extends application possibilities to functional studies where native protein characteristics must be preserved. Through systematic implementation of these protocols and consideration of methodological variations based on experimental requirements, researchers can ensure reliable, reproducible protein analysis that forms the foundation for robust scientific conclusions in drug development and basic research.
Calculating Protein Amounts and Loading Volumes for Optimal Detection
Within the broader context of sample preparation for SDS-PAGE research, accurate calculation of protein amounts and loading volumes represents a fundamental prerequisite for generating reproducible and quantitatively reliable data. The integrity of any western blot experiment is established at this initial stage, where improper protein quantification or volume calculation can compromise detection sensitivity and linear dynamic range, irrespective of subsequent analytical sophistication [49]. This protocol addresses the critical need for standardized methodologies in preparing samples for SDS-PAGE with loading buffer and boiling, providing researchers with precise frameworks for optimizing protein detection across diverse experimental conditions.
The challenges of protein quantification and loading extend beyond simple arithmetic, encompassing considerations of protein abundance, cellular compartmentalization, and detection methodology. Recent investigations demonstrate that evolving from traditional qualitative techniques to rigorously quantitative approaches requires careful attention to total protein load, sample quality, and normalization strategies [49]. This application note establishes comprehensive guidelines for calculating protein amounts and loading volumes, with particular emphasis on achieving optimal signal within the linear dynamic range of detection systems.
Critical Parameters for Protein Quantification and Loading
Fundamental Calculations for Protein Amounts and Volumes
The relationship between protein concentration, loading volume, and final protein amount per lane follows fundamental principles that must be precisely controlled:
Core Calculation Formula:
- Protein per Lane (µg) = Protein Concentration (µg/µL) × Loading Volume (µL)
Practical Implementation Considerations:
- Typical Loading Range: For standard mini-gels, loading volumes typically range from 5-30 µL, with protein amounts varying based on application and target abundance [49].
- Dilution Factors: Account for any dilution introduced by adding Laemmli sample buffer (typically 1:1 to 1:4 ratios) when calculating final concentrations [50].
- Adjustment Protocol: If the calculated protein amount falls outside the optimal range for your target:
- Concentrate samples using precipitation methods for low-concentration lysates
- Dilute over-concentrated samples with appropriate lysis buffer
- Re-measure concentration after adjustment to confirm accuracy
Verification Step: Always confirm the final calculated amount does not exceed the well capacity of your specific gel system (typically 50-100 µg maximum for standard mini-gels).
Establishing Linear Dynamic Range for Quantitative Analysis
A critical step often overlooked in routine western blotting is the empirical determination of the linear dynamic range for each target protein, which directly informs optimal loading amounts:
Table 1: Comparative Linear Dynamic Ranges of Detection Methods
| Detection Method | Linear Dynamic Range | Optimal Protein Loading | Key Advantages |
|---|---|---|---|
| Chemiluminescence | ~3-4 orders of magnitude [49] | Varies by target abundance; must be determined empirically | High sensitivity for many targets |
| Fluorescence | ~3-4 orders of magnitude [49] | Varies by target abundance; must be determined empirically | Multiplexing capability without stripping |
| Film-Based Detection | ~1 order of magnitude [49] | Limited by narrow linear range | Widely accessible |
Procedure for Determining Linear Range:
- Prepare a dilution series of pooled sample lysates (e.g., 1:2, 1:4, 1:8, 1:16)
- Load equal volumes across lanes with varying protein amounts
- Plot signal intensity against protein load for each target
- Identify the linear portion of the curve where signal increases proportionally with protein amount
- Select loading amounts that fall within this linear range for experimental samples
This approach ensures that quantitative comparisons between samples reflect actual protein abundance differences rather than detection system saturation [49].
Sample Preparation Methods for SDS-PAGE
Direct Lysis with Laemmli Sample Buffer
For routine western blot analysis of total cellular proteins, direct lysis with Laemmli sample buffer provides a robust and straightforward method:
Table 2: Laemmli Sample Buffer Composition
| Component | Final Concentration | Function |
|---|---|---|
| Tris (pH 6.8) | 62.5 mM | Maintains pH environment |
| SDS | 2% | Denatures proteins and confers negative charge |
| Glycerol | 10% | Increases density for gel loading |
| DTT | 100 mM | Reduces disulfide bonds |
| Bromophenol Blue | 0.008% | Visualizes migration during electrophoresis |
Protocol:
- Wash Cells: Wash cell plate with ice-cold PBS. Repeat 3 times [50].
- Add Lysis Buffer: Place plate on ice and add cold Laemmli Sample Buffer at a ratio of 5 × 10⁶ cells/mL [50].
- Harvest Lysate: Scrape dish with cell scraper and transfer lysate to microtube.
- Denature Proteins: Boil sample at 100°C for 5 minutes [50].
- Shear DNA: Sonicate boiled sample for 5 seconds to reduce viscosity [50].
- Clarify Lysate: Centrifuge at 14,000 rpm for 5 minutes at 4°C [50].
- Store Samples: Transfer supernatant to clean tube and store at -80°C until use.
Calculation Consideration: When using this method, protein concentration is typically determined from a parallel plate where cells are counted after trypsinization [50].
Mild Detergent Lysis for Specialized Applications
For downstream applications like immunoprecipitation or for preserving protein complexes, mild detergent lysis offers an alternative approach:
Lysis Buffer D Composition:
- 50 mM Tris (pH 7.6)
- 1% Triton X-100
- 5 mM EDTA (pH 8)
- 150 mM NaCl
- Complete EDTA-free protease inhibitor cocktail [50]
Protocol:
- Wash Cells: Wash cell plate with ice-cold PBS three times.
- Add Lysis Buffer: Add ice-cold Lysis Buffer D at ratio of 5 × 10⁶ cells/mL.
- Harvest Lysate: Scrape cells and transfer to microtube.
- Extract Proteins: Rock sample for 30 minutes at 4°C.
- Clarify Lysate: Centrifuge at 14,000 rpm for 10 minutes at 4°C.
- Prepare for Storage: Transfer supernatant to clean tube; store at -20°C or mix with Laemmli buffer [50].
Protein Quantification: For this method, protein concentration must be determined using assays like Bradford or BCA before adding loading buffer [51].
Figure 1: Sample Preparation Workflow for SDS-PAGE. This diagram outlines the critical decision points and processes for preparing protein samples, from cell culture to gel loading.
Specialized Applications and Considerations
Membrane and Nuclear Protein Preparation
Proteins localized to specific cellular compartments often require specialized preparation techniques to ensure optimal extraction and detection:
Fractionation Strategy:
- Whole-cell lysates: Suitable for highly expressed proteins [51]
- Nuclear/Membrane enrichment: Recommended for low-abundance targets to avoid weak signals [51]
Protocol for Nuclear and Membrane Proteins:
- Harvest and Homogenize: Resuspend cells in cold extraction buffer (10 mM Tris-HCl pH 7.4, 10 mM KCl, 1.5 mM MgCl₂) and homogenize 20-30 times [51].
- Separate Fractions:
- Centrifuge at 2,000 × g for 5 min at 4°C to pellet nuclear material
- Transfer supernatant and centrifuge at 17,000 × g for 20 min at 4°C to pellet membrane fraction [51]
- Solubilize Proteins: Add RIPA buffer to each fraction as in standard lysate preparation [51].
- Sonicate: Use ultrasonic cell disruptor (3 sec pulses, 10 sec intervals, 5-15 cycles) to break cell clusters until lysate clears [51].
- Determine Concentration: Measure protein concentration using Bradford or BCA assay [51].
Critical Note: For multi-pass transmembrane proteins, avoid boiling samples as this can cause aggregation. Instead, incubate at room temperature for 15-20 minutes, on ice for 30 minutes, or at 70°C for 10-20 minutes [51].
Optimization of Denaturation and Reduction Conditions
Proper denaturation and reduction are essential for accurate protein migration and detection:
Reducing Agent Options:
- Dithiothreitol (DTT): 50 mM final concentration [52]
- β-mercaptoethanol: 2.5% final concentration [52]
- Tris(2-carboxyethyl)phosphine (TCEP): 50 mM final concentration [52]
Heating Conditions:
- Standard proteins: Heat at 85°C for 2-5 minutes for optimal results [52]
- Heat-sensitive proteins: For multi-pass transmembrane proteins, use alternative denaturation methods [51]
- Native electrophoresis: Do not heat samples [52]
Temporal Considerations:
- Add reducing agent to samples no more than one hour before loading gels [52]
- Avoid storing reduced samples for extended periods, even frozen, due to reoxidation [52]
Research Reagent Solutions
Table 3: Essential Reagents for Protein Sample Preparation
| Reagent Category | Specific Examples | Function and Application |
|---|---|---|
| Lysis Buffers | Laemmli Sample Buffer, RIPA Buffer, Triton X-100-based Lysis Buffer | Solubilize and extract proteins from cells or tissues [50] [51] |
| Protease Inhibitors | Complete EDTA-free protease inhibitor cocktail | Prevent protein degradation during extraction [50] [51] |
| Phosphatase Inhibitors | Sodium fluoride, β-glycerophosphate, sodium orthovanadate | Preserve phosphorylation states during lysis [51] |
| Reducing Agents | DTT (50 mM), β-mercaptoethanol (2.5%), TCEP (50 mM) | Break disulfide bonds for complete denaturation [52] |
| Detergents | SDS (2%), Triton X-100 (1%), NP-40 | Solubilize membrane proteins and facilitate denaturation [50] [52] |
| Protein Assays | Bradford assay, BCA assay | Quantify protein concentration for accurate loading [51] |
Troubleshooting Common Issues
Addressing Sample Preparation Challenges
High DNA Content Causing Viscosity:
- Problem: Genomic DNA in cell lysates increases viscosity, affecting protein migration [52]
- Solution: Shear DNA by sonication for 5 seconds after boiling [50]
Insoluble Material in Lysates:
- Problem: Cellular lysates contain insoluble fractions that alter protein migration [52]
- Solution: Centrifuge samples after lysis and load soluble and insoluble fractions separately [52]
High Salt Concentrations:
- Problem: Increased conductivity affects protein migration and causes gel artifacts [52]
- Solution: Perform dialysis or precipitate and resuspend samples in lower-salt buffer [52]
Inadequate Signal Detection:
- Problem: Weak western blot signals for low-abundance targets
- Solution: Fractionate samples to enrich nuclear or membrane components rather than using whole-cell lysates [51]
Quantitative Analysis and Normalization
For accurate quantitative western blotting, several normalization strategies should be considered:
Total Protein Normalization:
- Measure total protein on transferred membrane prior to blotting
- Confirm consistent band pattern and decreasing intensity reflective of dilution series [49]
Housekeeping Protein Normalization:
- Use internal controls like β-catenin or α-tubulin [49]
- Verify loading amounts fall within linear dynamic range for both target and reference proteins
Critical Consideration: When working with chemiluminescence detection, be aware that the linear range may be truncated compared to fluorescence detection, particularly for phospho-proteins [49].
Figure 2: Optimization Pathway for Quantitative Western Blotting. This diagram illustrates the interconnected processes and optimization strategies required for generating reproducible quantitative data from western blot experiments.
Troubleshooting SDS-PAGE Sample Preparation: Solving Smears, Aggregation, and Leaks
Smeared bands in SDS-PAGE are a common frustration that can compromise data integrity. Within the critical context of sample preparation research, these smears are predominantly caused by three key issues: excessive voltage, improper buffer conditions, and incomplete protein denaturation. This guide provides detailed protocols to diagnose and resolve these problems, ensuring sharp, publication-quality results.
In SDS-PAGE, the goal is to separate proteins based strictly on their molecular weight, resulting in sharp, well-defined bands. A smeared appearance indicates a failure in this process, where proteins of a single species migrate at inconsistent rates, creating a blurred or streaked track rather than a discrete band. For research focused on sample preparation methodologies, understanding and rectifying the root causes of smearing is fundamental to generating reliable and reproducible data. The primary culprits often lie in the interplay between electrophoretic conditions (voltage) and sample preparation chemistry (buffer and denaturation) [53] [54].
Root Cause Analysis
The table below summarizes the three primary causes of smeared bands and their underlying mechanisms.
Table 1: Primary Causes of Smeared Bands in SDS-PAGE
| Root Cause | Underlying Mechanism | Visual Clue |
|---|---|---|
| Excessive Voltage [53] [54] | High voltage generates excessive Joule heat. This heat can denature the acrylamide gel matrix unevenly and cause proteins to diffuse laterally during migration. | Smearing is often accompanied by "smiling" or "frowning" bands due to uneven gel temperature [53] [55]. |
| Improper Buffer Conditions [53] [54] [56] | A diluted or incorrect running buffer has improper ion concentration, disrupting current flow and pH stability. High salt in the sample increases local conductivity, distorting the electric field. | General poor resolution and smearing across all samples; vertical streaking from wells [54] [56]. |
| Incomplete Protein Denaturation [57] [54] | Proteins retain secondary/tertiary structure or form aggregates. These complexes do not migrate uniformly through the gel pores. The result is a continuum of migration speeds for a single protein. | Smearing may originate from the well, and bands may appear fuzzy or non-discrete [57]. |
Diagnostic and Resolution Protocol
The following workflow provides a systematic approach to diagnosing and fixing smeared bands. It is designed to be followed sequentially.
Detailed Experimental Methodologies
1. Optimizing Voltage and Buffer Conditions
- Principle: Excessive voltage causes overheating, which disrupts the gel matrix and leads to protein diffusion and band distortion [53]. Proper buffer ionic strength is crucial for maintaining a stable pH and consistent current flow [53] [54].
- Protocol:
- Voltage Adjustment: For standard mini-gels, run at a constant voltage of 100-150V [53] [54]. If smearing occurs, lower the voltage by 25-50% and increase the run time accordingly [56].
- Buffer Preparation: Prepare Tris-Glycine running buffer at the correct concentration (typically 25 mM Tris, 192 mM Glycine, 0.1% SDS, pH 8.3) [58] [54]. Always use freshly prepared buffer and avoid recycling buffer from previous runs to prevent pH drift and loss of buffering capacity [54].
- Salt Reduction: If the sample has high salt concentration (>500 mM), desalt it using dialysis, desalting columns, or precipitation (e.g., TCA) before loading [54] [56].
2. Protocol for Complete Protein Denaturation and Solubilization
- Principle: SDS must fully denature the protein, and reducing agents must break disulfide bonds to ensure a uniform linear structure and negative charge [12] [59].
- Protocol:
- Sample Buffer Formulation: Use Laemmli buffer containing 1-2% SDS and a fresh reducing agent such as β-mercaptoethanol (BME) or DTT [7] [58].
- Denaturation Step: Heat the sample-protein mixture at 95-100°C for 5 minutes in a heat block or boiling water bath [7] [54]. Allow to cool briefly before loading.
- Preventing Aggregation: For hydrophobic or difficult proteins, add 4-8 M urea to the lysis buffer or sample buffer to improve solubility and prevent aggregation in the wells [57] [56].
- Load Optimization: Avoid overloading. A good starting point is 10-20 µg of total protein per well [57]. Centrifuge the denatured sample at >12,000 × g for 5 minutes to pellet any insoluble debris before loading the supernatant [56].
The Scientist's Toolkit
The following reagents are essential for successful SDS-PAGE sample preparation and troubleshooting.
Table 2: Essential Reagents for Troubleshooting Smeared Bands
| Reagent | Function & Rationale | Troubleshooting Tip |
|---|---|---|
| SDS (Sodium Dodecyl Sulfate) | Anionic detergent that denatures proteins and confers a uniform negative charge. The cornerstone of SDS-PAGE [12] [58]. | Ensure final concentration is 1-2% in sample buffer. Do not exceed 200 µg SDS per 30 µl sample to avoid micelle formation [56]. |
| DTT or β-Mercaptoethanol | Reducing agents that break disulfide bonds, ensuring complete protein unfolding [59] [58]. | Always use fresh aliquots. Old or oxidized agents lead to incomplete reduction and smearing [7] [56]. |
| Urea (4-8 M) | Chaotropic agent that disrupts hydrogen bonds, improving solubility of hydrophobic or aggregation-prone proteins [57] [56]. | Add directly to the lysis or sample buffer. Helps prevent precipitation in the well. |
| Glycerol | Increases sample density, allowing it to sink to the bottom of the well during loading [57] [58]. | Standard loading buffers contain 10-20% glycerol. Check concentration if samples leak out of wells [57]. |
| Protease Inhibitor Cocktail | Prevents proteolytic degradation of samples during preparation, which can cause smearing and artifact bands [7] [54]. | Add to lysis buffer immediately upon cell/tissue disruption. |
Discussion and Best Practices
Successful resolution of smeared bands requires a methodical approach. Begin troubleshooting with the simplest and most common factors: voltage and sample denaturation. Running a gel at a moderately lower voltage is a safe and easy first step. Simultaneously, rigorously ensure your denaturation protocol is followed, paying close attention to the freshness of reducing agents and the heating time.
For persistent issues, investigate sample-specific problems like high salt content or inherent hydrophobicity. The use of urea and rigorous desalting can be decisive. Finally, adhere to general best practices: do not reuse running buffer, avoid overloading wells, and always include a properly prepared molecular weight marker to calibrate and assess the run. By systematically addressing voltage, buffer, and denaturation, smeared bands can be effectively eliminated, leading to robust and interpretable data.
Preventing Protein Aggregation and Poor Well Entry for Large Hydrophobic Proteins
Sample preparation is a critical step in sodium dodecyl sulfate-polyacrylamide gel electrophoresis (SDS-PAGE), particularly for large hydrophobic proteins such as membrane proteins. These proteins inherently tend to aggregate and precipitate due to exposed hydrophobic regions, which can lead to poor well entry, smearing, and unreliable results. Within the broader context of thesis research on sample preparation for SDS-PAGE, this application note provides detailed protocols and data-driven strategies to prevent aggregation, ensuring accurate separation and analysis of these challenging proteins.
The Challenge of Hydrophobic Proteins in SDS-PAGE
Large hydrophobic proteins, especially integral membrane proteins, present unique challenges during SDS-PAGE sample preparation. Their native hydrophobic environment within cellular membranes makes them prone to aggregation and precipitation when solubilized in aqueous buffers. When these proteins are heated at high temperatures (e.g., 95°C) in loading buffer, they can form large aggregates that are too massive to enter the gel matrix [60]. This results in material being retained in the loading wells, significant smearing within the gel lanes, and poor resolution of bands. Consequently, standard sample preparation protocols must be modified to maintain these proteins in a soluble, denatured state compatible with electrophoretic separation.
Mechanism of Aggregation and Strategic Solutions
The aggregation of hydrophobic proteins is primarily driven by strong hydrophobic interactions. Under standard denaturing conditions that include high heat, the detergent SDS unfolds the protein but may not sufficiently mask hydrophobic domains. This leads to interactions between exposed hydrophobic regions, forming dimers, multimers, and larger insoluble aggregates [60] [61].
Key strategic approaches to prevent this aggregation include:
- Optimized Thermal Denaturation: Replacing boiling with controlled, lower-temperature incubation.
- Enhanced Solubilization: Using specialized detergents and reducing agents.
- Buffer and Additive Optimization: Tailering the chemical environment to improve protein stability and solubility.
Experimental Protocols
Protocol 1: Optimized Sample Preparation for Hydrophobic Proteins
This primary protocol is designed to effectively denature hydrophobic proteins while minimizing aggregation.
Materials:
- 2X SDS-PAGE Sample Loading Buffer (containing 4% SDS, 100 mM Tris-HCl pH 6.8, 20% glycerol, 0.02% Bromophenol Blue)
- 1.5 M Tris-HCl, pH 8.8
- 1.0 M Dithiothreitol (DTT) stock solution
- Alternative reducing agents: Tris(2-carboxyethyl)phosphine (TCEP)
- Protein sample
Method:
- Combine Samples: Mix protein sample with an equal volume of 2X SDS-PAGE Sample Loading Buffer.
- Add Reducing Agent: Add DTT to a final concentration of 50-100 mM from the 1.0 M stock. Alternatively, use TCEP at a final concentration of 10-20 mM.
- Incubate: Instead of boiling at 95°C, incubate the sample at a optimized temperature. Begin with 30-37°C for 30 minutes [60]. For more resistant proteins, a temperature gradient test (see Protocol 2) is recommended.
- Cool and Load: After incubation, briefly centrifuge the sample to collect condensation and load directly into the gel well without cooling.
Protocol 2: Temperature Gradient Optimization for Novel Targets
For proteins of unknown stability, this protocol systematically identifies the optimal denaturation temperature.
Materials:
- Prepared protein samples in loading buffer with reducing agent
- Thermal cycler or precise water baths
Method:
- Aliquot Samples: Dispense identical protein samples into multiple tubes.
- Temperature Incubation: Incubate each aliquot at a different temperature for 30 minutes. A suggested range is:
- Room temperature (22-25°C)
- 30°C
- 37°C
- 45°C
- 55°C
- 70°C [60]
- 95°C (standard condition for comparison)
- Analyze Results: Run all samples on the same SDS-PAGE gel. Identify the highest temperature that provides clean band entry and separation without aggregation in the well.
Protocol 3: Assessing and Troubleshooting Aggregation
This protocol helps confirm if poor well entry is due to protein aggregation.
Method:
- Visual Inspection: After electrophoresis, check for protein retention in the well or smearing at the top of the separating gel.
- Filter Test: Centrifuge a portion of the prepared sample through a 0.22 μm spin filter at 14,000 x g for 10 minutes. If a significant amount of protein is retained on the filter, aggregation has occurred.
- Alternative Gel System: For very large hydrophobic proteins (>150 kDa), consider using agarose-acrylamide composite gels to improve entry and separation.
Data Presentation and Analysis
Table 1: Optimization of Denaturation Conditions for Representative Hydrophobic Proteins
| Protein Target | Protein Type | Standard Boiling (95°C) | Optimized Temperature | Resulting Band Clarity (1-5 scale) | Key Additive |
|---|---|---|---|---|---|
| Na+/K+ ATPase | Membrane Transport Protein | Poor well entry | 70°C | 4 | 100 mM DTT |
| Plant PM H+-ATPase | Membrane Protein | Not detected | 30°C | 5 | 50 mM DTT |
| GPCR (Example) | Receptor | Smearing | 37°C, 30 min | 4 | 10 mM TCEP |
| Mitochondrial Porin | Outer Membrane Channel | Aggregation | 45°C | 4 | 2% SDS |
Table 2: Troubleshooting Guide for Poor Well Entry and Aggregation
| Problem | Possible Cause | Solution |
|---|---|---|
| Protein retained in well | Aggregation due to high heat | Reduce denaturation temperature per Protocol 2 |
| Smearing throughout gel | Incomplete denaturation or overloading | Increase incubation time; reduce protein load |
| No signal/band | Protein precipitated before loading | Ensure fresh reducing agents; test solubility additives |
| Horizontal streaks | Insufficient reducing agent | Increase DTT concentration to 100 mM or use TCEP |
The Scientist's Toolkit: Research Reagent Solutions
Essential Materials and Their Functions:
- Dithiothreitol (DTT): Reducing agent that breaks disulfide bonds within and between proteins, preventing covalent aggregation. Typical working concentration: 50-100 mM [62] [63].
- Tris(2-carboxyethyl)phosphine (TCEP): Alternative reducing agent to DTT; more stable and effective at lower pH and in the presence of metal ions. Typical working concentration: 10-20 mM.
- Sodium Dodecyl Sulfate (SDS): Ionic detergent that binds to and unfolds proteins, conferring a uniform negative charge and masking hydrophobic regions. Critical for linearizing proteins [64] [62].
- Glycerol: Increases sample density for easier well loading; typically used at 5-10% in the final sample.
- Bromophenol Blue: Tracking dye that allows visual monitoring of electrophoresis progress.
- Tris-HCl Buffer: Maintains stable pH during denaturation and electrophoresis, typically at pH 6.8 for stacking gel compatibility.
Workflow Visualization
Below is a decision workflow for optimizing sample preparation for large hydrophobic proteins:
Successful SDS-PAGE analysis of large hydrophobic proteins requires a fundamental departure from standard boiling protocols. The controlled, lower-temperature denaturation strategies outlined in this application note directly address the aggregation propensity of these challenging proteins by minimizing the strong hydrophobic interactions that occur at elevated temperatures. Through systematic temperature optimization and the use of appropriate reducing agents, researchers can reliably prevent poor well entry and smearing, thereby obtaining reproducible and interpretable results. Integrating these tailored sample preparation methods into thesis research on SDS-PAGE protocols ensures robust and reliable analysis of the full spectrum of protein types, including the most challenging hydrophobic targets.
Sample leakage during SDS-PAGE loading presents a significant methodological challenge that compromises experimental reproducibility and data integrity in proteomic research. This application note systematically addresses the root causes of this issue, with particular focus on optimizing glycerol concentration in loading buffers and implementing proper well-loading techniques. We provide evidence-based protocols and quantitative guidelines to ensure sample retention within wells, enabling researchers to achieve superior band resolution and reliable protein separation. Within the broader context of sample preparation for SDS-PAGE, mastering these fundamental techniques establishes a critical foundation for successful electrophoresis and subsequent analysis in drug development pipelines.
Sodium dodecyl sulfate-polyacrylamide gel electrophoresis (SDS-PAGE) remains a cornerstone technique in molecular biology for separating proteins based on molecular weight. The reliability of this technique hinges on proper sample preparation, with sample leakage from wells representing a frequent yet preventable issue that can compromise entire experiments. This problem manifests as distorted bands, smeared patterns, and complete sample loss, ultimately leading to inaccurate protein analysis and misinterpretation of results.
Sample leakage primarily occurs when the density of the loaded sample is insufficient to overcome the buoyant forces within the electrophoresis buffer, causing the sample to diffuse out of wells during or after loading [65]. This technical failure is particularly problematic in high-throughput screening environments and drug development workflows where sample quantities are often limited and reproducibility is paramount. This application note systematically addresses the scientific principles behind sample leakage and provides optimized, detailed protocols to overcome this challenge, with specific focus on glycerol optimization and loading techniques within the comprehensive framework of SDS-PAGE sample preparation.
Understanding the Mechanism: Why Samples Leak
The phenomenon of sample leakage stems from fundamental physical principles governing density and buoyancy. In SDS-PAGE systems, the loading buffer containing the protein sample must be denser than the surrounding running buffer to settle and remain in the well. Glycerol, a dense, viscous liquid, serves this critical function by increasing the density of the sample mixture, acting as a weight that causes the sample to sink to the bottom of the well during loading [66].
When glycerol concentration is suboptimal, samples cannot overcome buoyant forces, leading to immediate floating or gradual diffusion out of the well. This results in several observable issues: cross-contamination between adjacent lanes, uneven protein migration, smeared band patterns, and complete sample loss [65]. Additional technical factors exacerbating leakage include air bubbles trapped in wells that displace sample during loading, and overfilling of wells beyond their functional capacity [65]. Understanding these mechanisms is essential for implementing effective preventive strategies.
Troubleshooting Guide: Causes and Solutions for Sample Leakage
The following table summarizes the primary causes of sample leakage and their corresponding evidence-based solutions:
| Problem Cause | Underlying Mechanism | Recommended Solution |
|---|---|---|
| Insufficient Glycerol Concentration | Inadequate density prevents samples from sinking and remaining in wells [65] [66]. | Increase glycerol concentration to 10-20% (final concentration in 1X buffer) or use high-density formulations (up to 50% glycerol in loading buffer) [67] [36]. |
| Air Bubbles in Wells | Bubbles displace sample volume and create uneven surfaces, forcing sample out [65]. | Rinse wells with running buffer immediately before loading to displace air pockets. |
| Overfilled Wells | Exceeding well capacity causes immediate spillage into adjacent lanes [65]. | Load wells to a maximum of 3/4 capacity and maintain consistent volumes across all samples. |
| Improper Buffer Composition | Missing or degraded components fail to maintain sample integrity. | Verify fresh preparation of loading buffer with all required components: SDS, reducing agents, tracking dye, and glycerol. |
| High Salt Contamination | Certain salts can affect density and SDS compatibility [68]. | Dilute samples or desalt to reduce ionic strength; maintain KCl concentrations below 200 mM. |
Quantitative Guidelines: Glycerol Concentration in Loading Buffers
Glycerol concentration critically determines sample density and retention capability. The following table provides specific formulation guidelines for loading buffers with optimal glycerol content:
| Buffer Type | Glycerol Concentration | Final Concentration (1X) | Application Context |
|---|---|---|---|
| Standard Laemmli Buffer | 20% in 2X buffer | 10% | Routine applications with most protein types [65]. |
| High-Density Formulation | 50% in 4X buffer | 12.5% | Problematic samples prone to floating; challenging conditions [36]. |
| Emergency Adjustment | 100% glycerol additive | Varies | Add equal volume to existing samples with leakage issues [67]. |
| Commercial Formulation | 50% in 4X buffer | 12.5% | Pre-made solutions for consistency and reliability [36]. |
Empirical evidence strongly supports increasing glycerol concentrations for resolving leakage problems. In one documented case, a researcher troubleshooting Wnt3a protein analysis found that switching from a standard loading buffer (20% glycerol in 5X stock) to a high-density formulation (50% glycerol in 5X stock) completely resolved the sample floating issue that had previously rendered experiments unsuccessful [67].
Experimental Protocols
Protocol 1: High-Density Loading Buffer Formulation
This protocol creates a reliable 4X protein loading buffer with optimal glycerol concentration for preventing sample leakage:
Materials:
- 125 mM Tris-HCl, pH 6.8
- Glycerol (molecular biology grade)
- SDS (ultrapure)
- Orange G or bromophenol blue tracking dye
- β-mercaptoethanol (add fresh) or DTT
Procedure:
- Combine the following components in a sterile bottle:
Mix thoroughly by gentle inversion until all components are completely dissolved.
Store at room temperature in a tightly sealed container. For reducing conditions, add β-mercaptoethanol to a final concentration of 5% immediately before use.
For sample preparation, mix 3 μL of protein lysate with 1 μL of 4X loading buffer to achieve 1X working concentration [36].
Protocol 2: Proper Well-Loading Technique for Leakage Prevention
This protocol details the optimal mechanical technique for loading samples to prevent leakage:
Materials:
- Prepared protein samples in loading buffer
- Vertical electrophoresis unit with cast gel
- Running buffer (Tris-glycine-SDS)
- Micropipette with appropriate thin-walled tips
Procedure:
- Prepare the Gel Assembly:
- Ensure the electrophoresis chamber is properly assembled with the gel cassette securely positioned.
- Fill the inner and outer chambers with running buffer until wells are completely submerged.
Clear Wells of Air Bubbles:
- Using a micropipette with a fine tip, gently draw up approximately 10-20 μL of running buffer.
- Insert the tip to the bottom of the first well and slowly expel the buffer to displace any air bubbles [65].
- Repeat for all wells to be loaded. This critical step ensures no air pockets remain to displace samples.
Load Samples with Precision:
- Draw up the prepared protein sample into a clean pipette tip.
- Position the tip just inside the desired well, resting against the rear glass plate at approximately 45° angle.
- Slowly dispense the sample, allowing it to settle at the well bottom. The high glycerol content will ensure the sample remains in place.
- Do not exceed 3/4 of the well's total capacity to prevent overflow [65].
Complete the Loading Process:
- Load molecular weight markers in designated lanes using the same technique.
- Record the loading pattern for accurate post-electrophoresis analysis.
- Carefully place the electrode assembly onto the tank, ensuring proper orientation.
Protocol 3: Troubleshooting Existing Leakage Problems
For situations where sample leakage is actively occurring during loading:
Immediate Intervention:
- Add an equal volume of 100% glycerol directly to the leaking sample, mix thoroughly by pipetting, and reload immediately [67].
- For persistent issues, precipitate the protein using methanol/chloroform, then resuspend directly in high-density loading buffer containing 50% glycerol.
Long-term Solution:
- Reformulate loading buffer to include higher glycerol concentrations (up to 50% in stock solutions).
- Implement routine well-rinsing practices before each loading procedure.
- Verify protein concentrations to prevent overloading, which can exacerbate leakage.
The Scientist's Toolkit: Essential Research Reagent Solutions
| Reagent | Function in SDS-PAGE | Specification Guidelines |
|---|---|---|
| Glycerol | Increases sample density for well retention [66] | Use molecular biology grade; 10-20% final concentration in sample |
| Tris-HCl Buffer | Maintains optimal pH during denaturation | pH 6.8 for sample buffer; prepare fresh monthly |
| SDS (Sodium Dodecyl Sulfate) | Denatures proteins and confers negative charge [68] | Ultra-pure grade; critical for consistent charge-to-mass ratio |
| DTT or β-mercaptoethanol | Reduces disulfide bonds [68] | Add fresh before use; prevents protein aggregation |
| Tracking Dye | Visualizes loading and migration progress | Bromophenol blue or Orange G; quality varies by supplier |
| Protease Inhibitors | Prevents protein degradation during preparation | Use cocktails for broad-spectrum protection in cell lysates |
| 4X Protein Loading Buffer | Commercial ready-made solution [36] | Verify glycerol content (up to 50%); contains optimized component ratios |
Integrated Workflow: Comprehensive Sample Preparation to Prevent Leakage
The relationship between proper sample preparation, loading techniques, and successful electrophoresis outcomes follows a logical pathway where each step builds upon the previous one:
This integrated approach emphasizes that preventing sample leakage requires attention to both buffer composition and mechanical technique throughout the entire process from sample preparation through analysis.
Sample leakage during SDS-PAGE represents a preventable technical challenge that can significantly compromise experimental outcomes in proteomic research and drug development. Through systematic optimization of glycerol concentration in loading buffers and implementation of proper well-loading techniques, researchers can eliminate this common problem. The protocols and guidelines presented herein provide a comprehensive framework for ensuring sample retention, leading to improved band resolution, reduced cross-contamination, and enhanced experimental reproducibility. As part of a robust SDS-PAGE sample preparation workflow, these methods establish a critical foundation for successful protein separation and analysis.
Within the critical workflow of life science research and drug development, SDS-PAGE serves as a fundamental analytical technique for assessing protein samples. The failure to visualize bands, or the appearance of faint staining, upon completion of this process represents a significant and common obstacle that can compromise experimental timelines and data integrity. These issues predominantly originate from two key facets of sample preparation: the degradation of the target protein before analysis, or the loading of an insufficient quantity of protein into the gel [69] [7]. This application note, framed within a broader thesis on sample preparation, provides a detailed diagnostic framework and validated protocols to systematically address these challenges, ensuring reliable and reproducible protein analysis.
Systematic Troubleshooting Workflow
A methodical approach is essential for efficiently identifying the root cause of staining problems. The following diagnostic pathway guides researchers from initial observation to targeted solution.
Addressing Key Issues: Protocols and Procedures
Protocol 1: Optimized Sample Preparation to Prevent Degradation
Protein degradation, often caused by endogenous protease activity, is a primary culprit for the complete absence of bands or a smeared appearance [7]. The following protocol ensures protein integrity during preparation.
Objective: To extract and denature protein samples while preserving the target protein and ensuring complete linearization.
Materials:
- Lysis Buffer (e.g., RIPA Buffer)
- Protease Inhibitor Cocktail (PIC)
- 5X SDS-PAGE Sample Loading Buffer (containing SDS and DTT)
- Heating block or water bath
- Microcentrifuge tubes
- Ice
Procedure:
- Cell Lysis: Place your cell or tissue sample on ice. Add an appropriate volume of chilled lysis buffer supplemented with a 1X final concentration of protease inhibitor cocktail (PIC) immediately before use [7].
- Extraction: Incubate the sample on ice for 15-30 minutes with occasional vortexing to facilitate complete lysis.
- Clarification: Centrifuge the lysate at >12,000 × g for 15 minutes at 4°C to pellet insoluble debris. Carefully transfer the supernatant (containing the soluble protein) to a new microcentrifuge tube.
- Sample Denaturation: Mix the protein supernatant with 5X SDS-PAGE sample loading buffer to achieve a 1X final concentration [1]. Ensure the loading buffer contains a reducing agent like DTT or β-mercaptoethanol to break disulfide bonds [70].
- Heat Denaturation: Cap the tubes securely and heat at 95–100°C for 5–7 minutes [63] [1]. Briefly centrifuge the tubes after heating to collect condensation.
- Cooling: Immediately place the samples on ice after the heating step to prevent gradual cooling and protein renaturation [63]. Load samples onto the gel promptly.
Determining Optimal Protein Loading Quantity
Insufficient protein loaded into the gel well is a direct cause of faint or undetectable bands [69]. The total protein concentration of samples must be quantified prior to loading. Bradford, Lowry, or BCA assays are standard methods for this purpose [7]. The optimal loading amount depends on the detection method and the abundance of the target protein.
Table 1: Guidelines for Protein Loading Quantities in SDS-PAGE
| Detection Method | Total Protein per Well (µg) | Typical Load Volume (µL) | Key Considerations |
|---|---|---|---|
| Coomassie Staining | 10 – 50 µg [71] | 10 – 30 µL | Varies with gel thickness and protein complexity. |
| Silver Staining | 1 – 100 ng (per band) [1] [69] | 5 – 15 µL | Highly sensitive; requires optimization to avoid saturation. |
| Western Blot (Standard Abundance) | 10 – 50 µg [7] | 10 – 25 µL | Load a known positive control to confirm detection. |
| Western Blot (Low Abundance) | 50 – 100 µg | 20 – 40 µL | May require specialized detection methods. |
The Scientist's Toolkit: Essential Reagents and Materials
Successful SDS-PAGE analysis relies on the quality and proper use of specific reagents. The following table details key solutions and their critical functions in preventing degradation and ensuring clear visualization.
Table 2: Essential Research Reagent Solutions for Sample Preparation
| Reagent/Material | Function | Key Considerations for Use |
|---|---|---|
| Protease Inhibitor Cocktail (PIC) | Prevents proteolytic degradation of sample proteins by inhibiting serine, cysteine, metallo-, and other proteases [7]. | Add fresh to lysis buffer immediately before use. Avoid multiple freeze-thaw cycles of the stock solution. |
| SDS-PAGE Sample Buffer (with Reducing Agent) | Denatures proteins (SDS), breaks disulfide bonds (DTT/β-ME), adds density (glycerol), and allows visual tracking (dye) [70]. | Ensure it is at a 1X final concentration in the sample. The presence of a reducing agent is critical for full denaturation. |
| SDS (Sodium Dodecyl Sulfate) | An ionic detergent that binds to and unfolds proteins, imparting a uniform negative charge for separation by size [72] [70]. | Standard sample buffers contain 1-2% SDS. Incompatible with Native PAGE techniques. |
| Fresh Electrophoresis Buffer | Provides the ions necessary to carry current and maintains the pH required for proper protein migration [63] [73]. | Overused or improperly formulated buffer can lead to poor band separation and resolution. Make fresh frequently. |
| Protein Molecular Weight Marker ("Ladder") | A set of pre-stained or unstained proteins of known sizes that allows estimation of the molecular weight of unknown proteins [7] [70]. | Essential for troubleshooting. Always run a ladder to distinguish sample issues from system-wide failures. |
| Coomassie Stain / Silver Stain | Stains proteins in the gel for visualization. Coomassie is less sensitive but quantitative; silver is highly sensitive but can be less quantitative [1]. | For Coomassie, ensure SDS is thoroughly washed from the gel to prevent high background [69]. |
Sample preparation is a critical step in sodium dodecyl sulfate-polyacrylamide gel electrophoresis (SDS-PAGE) that directly impacts the quality and reproducibility of protein separation. While standard protocols involving Laemmli buffer and boiling suffice for many routine samples, complex biological matrices, membrane proteins, and aggregation-prone specimens present significant challenges. These difficult samples often precipitate during standard denaturation, leading to poor resolution, smearing, and incomplete migration. This application note synthesizes current methodologies to address these challenges, providing researchers with optimized protocols for urea supplementation, sonication parameters, and alternative denaturation strategies to enhance protein solubility and recovery for downstream analysis.
The Challenge of Difficult Samples in SDS-PAGE
The fundamental goal of SDS-PAGE sample preparation is to completely denature proteins into linear monomers with uniform negative charge proportional to their molecular weight. However, certain sample types resist this process due to intrinsic structural stability, extensive hydrophobic domains, or high nucleic acid content. Protein precipitation during heating or loading manifests as aggregated material in wells, smeared bands, and vertical streaking. These artifacts compromise molecular weight determination, quantification accuracy, and detection sensitivity. Addressing these issues requires understanding the physicochemical basis of protein aggregation and implementing targeted strategies to maintain solubility throughout the preparation workflow.
Methodological Approaches and Protocols
Urea-Based Denaturation Strategies
Urea acts as a powerful denaturant by disrupting hydrogen bonds and hydrophobic interactions, thereby solubilizing recalcitrant protein structures.
Protocol: Urea-Enhanced Sample Preparation
- Reagents Required: Ultrapure urea, standard Laemmli buffer (2-5X concentration), reducing agent (DTT, β-mercaptoethanol, or TCEP).
- Procedure:
- Prepare a saturated urea solution (8 M) in Laemmli buffer. Gently warm the buffer to 37°C to dissolve urea completely, then cool to room temperature.
- Mix protein sample with an equal volume of the 8 M urea-Laemmli buffer.
- Incubate at room temperature for 15-30 minutes instead of boiling. For highly resistant samples, incubation at 37°C may be used.
- Load samples directly onto the polyacrylamide gel without heating [74].
Mechanistic Insight: Urea penetrates protein cores, disrupting internal cohesion while SDS coats the unfolded polypeptide chains. This synergistic action prevents re-aggregation during electrophoresis.
Sonication-Assisted Solubilization
Sonication applies mechanical shear forces via cavitation, effectively disrupting aggregates and enhancing protein solubility, with effects being highly pH-dependent.
Protocol: Controlled Sonication of Protein Samples
- Equipment: Ultrasonic processor with microtip (e.g., 20-30 kHz), ice bath.
- Procedure:
- Suspend the protein pellet or viscous lysate in desired buffer. Adjust pH away from the protein's isoelectric point (pI) to enhance solubility—typically pH 3, 7, or 9 are effective [75].
- Place the sample tube in an ice bath to dissipate heat.
- Sonicate using a microtip probe with the following parameters:
- Power: 30 W
- Duration: Multiple short bursts (e.g., 5-10 seconds pulse-on, 10-15 seconds pulse-off)
- Total Time: Up to 15 minutes, monitoring for reduced viscosity and clarification.
- Centrifuge briefly (10,000 × g, 5 minutes) to pellet any insoluble debris. Transfer the supernatant to a fresh tube.
- Proceed with standard Laemmli buffer addition and heating (70°C for 10 minutes recommended) [75] [74].
Applications: Particularly effective for tissue homogenates, bacterial lysates, and fibrous protein samples that resist chemical denaturation alone.
Alternative Denaturation and Heating Methods
Modifying standard thermal denaturation protocols can prevent aggregation of heat-sensitive proteins.
Protocol: Moderate-Temperature Denaturation
- Reagents Required: Standard Laemmli buffer, reducing agent.
- Procedure:
- Mix protein sample with Laemmli buffer.
- Heat at 70°C for 10 minutes instead of the traditional 95-100°C for 5 minutes [74].
- Cool samples to room temperature before loading.
- Centrifuge at 15,000 × g for 5 minutes to remove any precipitated material.
Rationale: Reduced heating minimizes hydrophobic interactions that drive aggregation while maintaining sufficient denaturation for SDS binding.
Detergent-Assisted Extraction with SDS Removal
For extremely challenging samples like membrane proteins, initial extraction with high SDS concentrations ensures complete solubilization, followed by detergent removal.
Protocol: SDS-Assisted Preparation with KDS Precipitation
- Reagents Required: SDS extraction buffer (1% SDS in 50 mM NH₄HCO₃, pH 8.0), DTT, iodoacetamide, trypsin, KCl solution (0.25-4 M).
- Procedure:
- Extract proteins in SDS buffer (1% SDS) with heating at 95°C for 5 minutes.
- Reduce with 10 mM DTT (95°C, 5 minutes) and alkylate with 40 mM iodoacetamide (37°C, 30 minutes in dark).
- Dilute SDS concentration to ≤0.07% with 50 mM NH₄HCO₃ buffer.
- Digest with trypsin (1:50 enzyme:protein, 37°C, 3 hours).
- Add equal volume of 0.25-4 M KCl to precipitate potassium dodecyl sulfate (KDS).
- Centrifuge at 14,000 × g for 5-10 minutes to pellet KDS.
- Collect peptide-containing supernatant for analysis [76].
Advantages: This approach achieves >99.9% SDS removal with >95% peptide recovery, making it compatible with downstream mass spectrometry analysis [76].
Research Reagent Solutions
Table 1: Essential reagents for optimizing SDS-PAGE sample preparation
| Reagent | Function | Application Notes |
|---|---|---|
| Urea (8 M) | Disrupts hydrogen bonds & hydrophobic interactions | Use ultrapure grade; prepare fresh to avoid cyanate formation [74] |
| TCEP | Reduces disulfide bonds | More stable than DTT; effective at neutral pH [74] |
| Potassium Chloride (KCl) | Precipitates SDS as KDS salt | Critical for detergent removal post-digestion [76] |
| Alternative Detergents | Aids initial solubilization | SDS alternatives for specific applications [77] |
| Nucleases | Degrades genomic DNA | Reduces viscosity & prevents smearing [74] |
Quantitative Comparison of Method Efficacy
Table 2: Performance metrics of optimization strategies for difficult samples
| Method | Solubilization Efficiency | Optimal Sample Type | Recovery Yield | Downstream Compatibility |
|---|---|---|---|---|
| Urea Supplementation | High for aggregated proteins | Insoluble fractions, inclusion bodies | >90% | SDS-PAGE, Western blot |
| Sonication | pH-dependent; up to 57.4% solubility increase | Tissue homogenates, bacterial pellets | Variable | SDS-PAGE, protein assays |
| Moderate-Temperature Denaturation | Moderate for heat-sensitive proteins | Enzymes, membrane complexes | >85% | SDS-PAGE, native assays |
| SDS/KDS Precipitation | Very high for membrane proteins | Membrane proteomes, amyloid fibrils | >95% | LC-MS/MS, proteomics |
Experimental Workflows
Optimizing SDS-PAGE sample preparation for difficult specimens requires a mechanistic understanding of protein aggregation and a toolkit of complementary strategies. Urea supplementation effectively solubilizes aggregated proteins, sonication mechanically disrupts resistant structures, modified heating prevents thermal aggregation, and SDS-assisted extraction with KDS precipitation provides a comprehensive solution for membrane proteomes. By implementing these evidence-based protocols, researchers can significantly improve protein recovery, electrophoretic resolution, and analytical reproducibility for the most challenging sample types, thereby advancing discovery in proteomics and drug development.
Validation and Method Comparison: Ensuring Accurate Molecular Weight Analysis
The Critical Role of Molecular Weight Markers in Accurate Protein Sizing
Molecular weight markers, also known as protein ladders or standards, are indispensable tools in SDS-PAGE (sodium dodecyl sulfate polyacrylamide gel electrophoresis) and western blotting. These calibrated mixtures of proteins of known molecular weights serve as critical reference points for estimating the size of unknown proteins, monitoring electrophoretic separation, and verifying transfer efficiency during western blotting. Within the broader context of sample preparation for SDS-PAGE research—which encompasses critical steps like loading buffer formulation and boiling protocols—the appropriate selection and application of molecular weight markers directly impacts the accuracy, reproducibility, and interpretation of experimental data. This application note provides detailed methodologies and current data to guide researchers in leveraging these essential tools for precise protein analysis in drug development and basic research.
Types of Molecular Weight Markers and Their Applications
Molecular weight markers are engineered for specific applications and detection methods. The choice of marker depends on the experimental goals, from routine separation monitoring to precise molecular weight determination.
Table 1: Categories of Protein Molecular Weight Markers
| Marker Type | Primary Applications | Key Features | Visualization Methods |
|---|---|---|---|
| Prestained | - Monitoring gel electrophoresis progress- Verifying western transfer efficiency- Approximate protein sizing [78] | - Proteins covalently linked to dyes- Colored bands visible during and after electrophoresis | - Direct colorimetric visualization [79] |
| Unstained | - Precise molecular weight determination [79]- Protein quantitation after staining | - No dye modification, so no mobility shift- Accurate mass representation | - Coomassie, silver stain, or other protein stains [79] |
| Western Blotting | - Protein size estimation directly on blot [79]- Positive control for antibody detection | - Recombinant proteins with IgG-binding sites [79]- Bind detection antibodies | - Chemiluminescence, fluorescence, or colorimetric detection [79] |
| Specialized | - His-tagged, phosphorylated, or glycosylated protein detection [79]- IEF and Native PAGE | - Engineered with specific protein modifications or tags [79] | - Specific stains or antibodies [79] |
It is crucial to understand that molecular weight markers provide an estimation, not an absolute measurement, of protein size. Apparent molecular weight can be influenced by amino acid composition, which affects SDS binding, as well as by gel composition, buffer system, and running conditions [78]. For example, a highly hydrophilic protein might migrate differently than a hydrophobic protein of similar mass [78]. Therefore, researchers should calibrate the marker's migration curve specifically for their experimental conditions and protein of interest.
Selection Guide and Quantitative Data
Selecting the appropriate marker requires matching its separation range to the protein of interest and ensuring compatibility with the gel and detection system. The market offers a wide array of standards with different ranges, band numbers, and formulations.
Table 2: Comparison of Commercial Protein Molecular Weight Markers
| Product Name | Type | Molecular Weight Range (kDa) | Number of Bands | Key Properties & Recommended Use |
|---|---|---|---|---|
| ExcelBand Enhanced 3-color [78] | Prestained | 9 - 245 (Tris-Glycine) | 12 | Enhanced 25 kDa (green) and 75 kDa (red) reference bands; ready-to-use. |
| PageRuler Plus [79] | Prestained | 10 - 250 | 9 | Multicolor; compatible with colorimetric and NIR fluorescence detection. |
| Spectra Multicolor Broad Range [79] | Prestained | 10 - 260 | 10 | 4 colors for improved visualization during separation and transfer. |
| HiMark Prestained [79] | Prestained | 31 - 460 | 9 | Optimized for high molecular weight proteins; use with Tris-Acetate gels. |
| iBright Prestained [79] | Prestained / Western | 11 - 250 | 12 | Versatile; 2 bands have IgG-binding sites for western blot detection. |
| MagicMark XP [79] | Western | 20 - 220 | 9 | All bands contain IgG-binding sites for direct visualization on blots. |
| PageRuler Unstained [79] | Unstained | 10 - 200 | 14 | Superior accuracy; proteins contain Strep-tag II for immunodetection. |
| HiMark Unstained [79] | Unstained | 40 - 500 | 9 | For analysis of high molecular weight proteins. |
For high molecular weight proteins (e.g., above 200 kDa), it is recommended to use markers and gels specifically designed for this purpose, such as the HiMark standards combined with NuPAGE Tris-Acetate protein gels, and to prolong the electrophoresis running time to improve band separation [78] [79].
Detailed Experimental Protocols
Protocol 1: SDS-PAGE with Prestained Markers for Protein Separation and Transfer Monitoring
This protocol outlines the use of prestained markers to monitor protein separation during SDS-PAGE and verify efficiency of transfer to a membrane for western blotting [78].
Required Reagents and Materials:
- Prestained protein molecular weight marker (e.g., ExcelBand, PageRuler Plus) [78] [79]
- SDS-PAGE gel (appropriate percentage for target protein range) [7]
- SDS-PAGE running buffer (e.g., Tris-Glycine-SDS) [19]
- Protein samples prepared in Laemmli buffer with reducing agent [19]
- Western transfer apparatus and transfer buffer [80]
Methodology:
- Gel Electrophoresis:
- Thaw the prestained marker completely and mix gently before use. Avoid repeated freeze-thaw cycles to prevent protein degradation [78].
- Load 1-10 µL of the ready-to-use marker (volume depends on gel thickness and manufacturer's recommendation) into a well of the SDS-PAGE gel alongside protein samples [79].
- Run the gel at a constant voltage (e.g., 80V through stacking gel, 120V through resolving gel) until the dye front approaches the bottom of the gel [19].
- Observe the separation of the colored bands during the run to monitor progress.
- Western Blot Transfer:
- Following electrophoresis, proceed to transfer proteins to a nitrocellulose or PVDF membrane using standard wet or semi-dry transfer methods.
- After transfer, visually inspect the membrane. The colored bands from the prestained marker should be clearly present on the membrane, confirming successful transfer.
- Note: The apparent molecular weight of prestained proteins on the membrane may differ slightly from their actual mass due to the bound dye molecules.
Protocol 2: Western Blotting with IgG-Binding Protein Standards
This protocol uses specialized western blot markers that contain IgG-binding domains, allowing them to be detected directly by the secondary antibody system, serving as an internal positive control on the blot itself [79].
Required Reagents and Materials:
- IgG-binding protein standard (e.g., MagicMark XP, iBright Prestained Ladder) [79]
- Blocking buffer (e.g., Intercept (TBS) Blocking Buffer or equivalent) [80]
- Primary and secondary antibodies specific to your target protein
- Wash buffers (e.g., TBS-T or PBS-T) [80]
Methodology:
- Electrophoresis and Transfer:
- Load 5-10 µL of the IgG-binding standard onto the SDS-PAGE gel and run as described in Protocol 3.1 [79].
- Transfer proteins to membrane. While some markers are prestained, their key feature is post-detection visualization.
- Immunodetection:
- After transfer, block the membrane in an appropriate blocking buffer for 1 hour at room temperature [80].
- Incubate with the primary antibody diluted in antibody diluent (e.g., blocking buffer with 0.2% Tween 20), followed by the enzyme- or fluorophore-conjugated secondary antibody [80].
- During the detection step (e.g., chemiluminescence, fluorescence), the IgG-binding proteins in the marker will be recognized by the secondary antibody and become visible.
- The resulting blot will show the marker bands alongside the target protein bands, providing direct molecular weight calibration and confirming that the detection protocol worked effectively.
The following workflow diagram illustrates the key steps for using molecular weight markers in SDS-PAGE and Western blotting:
Troubleshooting Common Issues
Even with optimized protocols, researchers may encounter issues. The table below outlines common problems, their causes, and solutions.
Table 3: Troubleshooting Guide for Molecular Weight Marker Use
| Issue | Potential Cause | Recommended Solution |
|---|---|---|
| Faint or absent marker bands | - Protein degradation from excessive freeze-thaw cycles.- Insufficient volume loaded.- Marker washed out during blotting (high Tween-20 concentration). | - Aliquot marker; avoid more than 5 freeze-thaw cycles [78].- Load recommended volume per gel thickness [79].- Use transfer buffer with 20% methanol and wash with <0.1% Tween-20 [78]. |
| Inaccurate size estimation | - Mismatch between marker range and protein of interest.- Different buffer systems or gel types.- Amino acid composition affecting mobility. | - Select a marker with a range bracketing your protein [79].- Note that migration varies between Tris-Glycine, Bis-Tris (MOPS), and Bis-Tris (MES) buffers [78].- Use an unstained marker for precise determination [79]. |
| Smeared or distorted bands | - Overloading the gel well.- Improper gel polymerization.- Ionic strength of sample too high. | - Do not exceed well capacity; use colored loading buffer for visualization [7].- Ensure fresh APS and TEMED are used for gel casting [19].- Keep salt concentrations in samples below 500 mM [7]. |
| Missing bands after stripping | - Harsh stripping conditions affecting marker proteins. | - For prestained markers, wash PVDF membrane with methanol before stripping to mitigate Tween-20 effects [78]. |
Application in Research Context: Detecting Low-Abundance Proteins
The critical importance of molecular weight markers is exemplified in challenging applications such as the detection of low-abundance proteins. For instance, a 2025 study aimed at optimizing a western blot protocol for detecting Tissue Factor (TF) in low-expressing cells highlighted that sensitivity is affected by multiple factors, including the detection method and antibodies [81]. In such sensitive assays, the use of appropriate molecular weight markers (e.g., prestained markers for transfer control and unstained or IgG-binding markers for accurate sizing on the blot) is vital for validating that the detected band at ~50 kDa corresponds to the glycosylated form of TF, and not a non-specific signal [81]. This prevents misinterpretation of data, especially when using techniques like knockout cell lines to confirm antibody specificity [81].
Furthermore, the use of fluorescent western blotting with compatible markers (e.g., iBright Prestained Protein Ladder) and near-infrared (NIR) imaging systems, such as the Odyssey imager, can enhance quantitative accuracy and dynamic range for detecting low-abundance targets [80] [79]. Consistency in the buffer system (TBS-based is often preferred for phospho-proteins) throughout the blocking, washing, and antibody dilution steps is also crucial for maintaining low background and high signal-to-noise ratio [80].
The Scientist's Toolkit: Essential Research Reagent Solutions
Table 4: Key Reagents for Protein Electrophoresis and Blotting
| Reagent / Material | Function / Purpose | Example Products / Notes |
|---|---|---|
| SDS (Sodium Dodecyl Sulfate) | Denatures proteins and confers a uniform negative charge, allowing separation by mass [19]. | Component of Laemmli sample buffer. |
| Polyacrylamide Gels | Forms a porous matrix that separates proteins based on size during electrophoresis [7]. | Discontinuous (stacking/resolving) or gradient gels from various suppliers. |
| Reducing Agents (DTT, β-ME) | Breaks disulfide bonds to fully denature proteins into polypeptide chains [19]. | Add fresh to sample buffer before boiling. |
| Blocking Buffers | Prevents non-specific binding of antibodies to the membrane in western blotting [80]. | Intercept Blocking Buffer, BSA, or non-fat milk; choice depends on antigen and detection method. |
| IRDye Secondary Antibodies | Fluorophore-conjugated antibodies for highly sensitive detection on imaging systems like the Odyssey [80] [81]. | Used at high dilutions (e.g., 1:20,000) for low background. |
| Western Blot Incubation Boxes | Dedicated containers for consistent processing of membranes during blocking and antibody incubation [80]. | Clean thoroughly with methanol before use to prevent contamination. |
Molecular weight markers are far more than simple reference tools; they are integral quality controls that validate every stage of the protein analysis workflow, from gel electrophoresis through to final detection. The careful selection of the appropriate marker type—prestained, unstained, or IgG-binding—for a given application, coupled with adherence to optimized protocols for sample preparation (including proper boiling in loading buffer) and electrophoresis, is fundamental to obtaining accurate and reliable protein sizing data. As research progresses towards analyzing proteins of lower abundance and greater complexity, the role of these markers in ensuring methodological rigor and data integrity becomes ever more critical.
Protein purity analysis is a critical requirement in the successful development of biopharmaceuticals, particularly for monoclonal antibodies (MAbs). Their manufacture involves processes of protein purification, formulation, and stability evaluation, all of which require highly accurate and reproducible analytical results to support decisions made by product developers and manufacturers [82]. For decades, sodium dodecyl sulfate-polyacrylamide gel electrophoresis (SDS-PAGE) has been the established technique for size-based protein separation. However, capillary electrophoresis SDS (CE-SDS) has emerged as a powerful alternative with distinct advantages for regulated environments. This application note provides a detailed comparative analysis of these two technologies, framed within the context of sample preparation for SDS-PAGE with loading buffer and boiling research, to guide researchers, scientists, and drug development professionals in selecting the appropriate analytical method for their specific biopharmaceutical applications.
Theoretical Principles and Technological Evolution
Fundamental Separation Mechanisms
Both techniques utilize sodium dodecyl sulfate (SDS) to denature proteins and impart a uniform negative charge-to-mass ratio. When a polypeptide chain binds SDS proportionally to its relative molecular mass (approximately 1.4 g SDS per 1 g of protein), intrinsic polypeptide charge becomes negligible, allowing separation based primarily on molecular size [82].
SDS-PAGE employs a polyacrylamide gel matrix as a molecular sieve through which SDS-protein complexes migrate under an electric field. The discontinuous gel system with stacking and resolving regions enables concentration of samples into sharp bands before separation [83].
CE-SDS utilizes a replaceable, viscous polymer-based sieving matrix within a fused-silica capillary. Proteins are injected into the capillary inlet using high voltage and separated as they migrate toward the detection window near the distal end, where quantitative detection occurs typically via UV absorbance [82] [84].
Historical Development
SDS-PAGE was pioneered in the 1960s and 1970s by Ulrick K. Laemmli, building upon earlier works of Ornstein, Davis, and Maizel. The initial methodology involved casting polyacrylamide gels in tubes, which needed to be cracked open with a hammer for analysis—a stark contrast to modern precast gels [83]. The development of slab gels represented a significant improvement, enabling simultaneous analysis of multiple samples [83].
Around the same period, Stellan Hjertén began developing capillary electrophoresis (CE), with later contributions from James W. Jorgenson and Krynn D. Lukacs, who demonstrated separations inside capillary tubes with internal diameters ranging from 3 mm to 75 µM [83]. This foundational work led to commercial CE instruments by the end of the 1980s, with the specific technique for SDS-based separation becoming known as CE-SDS [83].
The evolution continues with recent advancements including chip-based systems and high-throughput instruments like the BioPhase 8800, offering 8-fold higher throughput compared to previous systems [85] [86].
Figure 1: Timeline of key developments in SDS-based protein separation technologies, highlighting the parallel evolution of gel-based and capillary-based methods.
Experimental Protocols
Sample Preparation: The Common Foundation
Both SDS-PAGE and CE-SDS share a common initial sample preparation workflow centered on proper use of loading buffer and boiling, which is crucial for generating reliable, comparable data.
Critical Reagents and Materials:
- SDS-PAGE Sample Loading Buffer (2X, 5X, or 6X concentrations) containing Tris-HCl, glycerol, SDS, and bromophenol blue (BPB) tracking dye [87] [88]
- Reducing agents (if required): Dithiothreitol (DTT) or β-mercaptoethanol for reducing conditions [88]
- Protein samples diluted to appropriate concentration (typically 0.2-1.0 mg/mL) [82]
- Heating block or water bath (95-100°C)
Standardized Sample Preparation Protocol:
Dilution: Dilute protein sample to desired concentration using purified water. For SDS-PAGE, typically 0.2 mg/mL; for CE-SDS, typically 1.0 mg/mL [82].
Buffer Mixing: Combine diluted protein sample with appropriate volume of SDS-PAGE loading buffer. For 5X buffer, mix one volume buffer with four volumes protein sample [88].
Denaturation and Reduction:
- For reducing conditions: Ensure loading buffer contains DTT (e.g., 500 mM) or β-mercaptoethanol [88]
- Heat mixture at 70-100°C for 3-5 minutes using a heating block or water bath [82] [88]
- If semitransparent viscous substance remains after initial heating, extend boiling for additional 5-10 minutes or add additional diluted loading buffer and reheat [88]
Cooling: Allow samples to cool to room temperature before loading [88].
Note: The composition of loading buffers is critical. A typical 5X reducing buffer contains 10% SDS, 500 mM DTT, 50% glycerol, 250 mM Tris-HCl, and 0.5% bromophenol blue dye at pH 6.8 [88].
SDS-PAGE Methodology
Materials and Equipment:
- Invitrogen NuPAGE Mini-Gel electrophoresis system or equivalent [82]
- Precast gels (e.g., 4-12% Bis-Tris gel) [82]
- GelCode Blue stain or equivalent [82]
- Electrophoresis chamber and power supply
- Molecular weight markers
Protocol:
- Gel Preparation: Remove precast gel from packaging, remove tape from bottom, and place into electrophoresis chamber [82].
- Buffer System: Fill inner and outer chambers with appropriate running buffer [82].
- Sample Loading: Load prepared samples (10-30 µL) into wells, including molecular weight markers in designated lanes [82].
- Electrophoresis: Run at recommended constant voltage (typically 150-200 V) until bromophenol blue tracking dye reaches the bottom of the gel [82] [88].
- Staining and Destaining:
- Remove gel from cassette and place in staining solution (e.g., GelCode Blue)
- Incubate with gentle agitation for 1 hour to overnight
- Destain with purified water until background is clear and protein bands are visible [82]
- Imaging and Quantification: Image gel using appropriate system and quantify band intensities using software such as Alpha View integration software [82].
CE-SDS Methodology
Materials and Equipment:
- CE-SDS instrument (e.g., PA 800 plus system, Maurice, or BioPhase 8800) [82] [83]
- Bare, fused-silica capillaries or pre-assembled cartridges [82] [89]
- SDS sample buffer and polymer solution [82]
Protocol:
- Instrument Setup: Install capillary or cartridge according to manufacturer instructions [82] [89].
- Sample Preparation: Prepare samples as described in Section 3.1, diluting to 1.0 mg/mL with SDS sample buffer [82].
- Injection: Inject samples into capillary inlets using high voltage (e.g., 5 kV for 20 seconds) [82].
- Separation: Separate proteins in an electric field of 500 V/cm for 25-35 minutes [82].
- Detection: Quantitatively detect proteins using UV absorbance at 220 nm as they pass through the detection window [82].
- Data Analysis: Analyze electropherograms using instrument software (e.g., Beckman Coulter 32 Karat, Compass for iCE) to determine sample quantitations and migration times [82] [83].
Figure 2: Comparative workflows for SDS-PAGE and CE-SDS analysis, highlighting the shared sample preparation stage followed by divergent separation and detection processes.
Comparative Data Analysis
Performance Comparison
A direct comparison study evaluating both normal and heat-stressed IgG samples (14 days at 45°C) by both methods revealed significant differences in performance characteristics [82].
Table 1: Direct comparison of SDS-PAGE and CE-SDS performance for antibody analysis
| Parameter | SDS-PAGE | CE-SDS |
|---|---|---|
| Detection of nonglycosylated IgG | Not resolved [82] | Easily detected [82] |
| Signal-to-noise ratio for impurities | Lower, difficult autointegration [82] | Higher, enabling easy quantitation [82] |
| Resolution of degradation species | Limited resolution of minor bands [82] | High-resolution separation of fragments [82] |
| Reproducibility | Variable due to manual processes [82] [89] | Excellent (demonstrated in 4 consecutive runs) [82] |
| Quantitation capability | Semi-quantitative at best [84] | Fully quantitative [82] [84] |
| Analysis time (hands-on) | Several hours including staining/destaining [82] [84] | Minimal after sample preparation [89] |
Technical Specifications Comparison
Table 2: Comprehensive technical comparison between SDS-PAGE and CE-SDS methodologies
| Aspect | SDS-PAGE | CE-SDS |
|---|---|---|
| Automation Level | Manual process [89] | Highly automated [89] |
| Separation Medium | Polyacrylamide gel [89] | Polymer-based sieving matrix [89] [84] |
| Reproducibility | Variable due to gel-to-gel differences and manual steps [89] [84] | High consistency with pre-assembled cartridges [89] |
| Sample Loading | Manual pipetting [89] | Automated/electrokinetic injection [89] |
| Run Time | Several hours (including staining/destaining) [84] | Minutes to an hour [89] |
| Throughput | Lower (limited by gel wells and staining time) [89] | Higher (rapid sequential analysis) [89] |
| Detection Method | Staining with Coomassie, silver, or fluorescent dyes [82] [84] | Direct UV absorbance at 220 nm or LIF [82] [84] |
| Data Output | Band patterns on gel [82] | Electropherograms with peak integration [82] |
| Quantification | Semi-quantitative based on band intensity [89] [84] | Quantitative with accurate peak integration [89] |
| Regulatory Compliance | Limited quantitative acceptance [89] | Recognized in USP <129> for therapeutic antibodies [89] |
In the referenced comparative study, normal IgG samples analyzed by SDS-PAGE showed a single major band at 150 kDa and a minor band at 130 kDa, while heat-stressed IgG samples revealed a major band at 150 kDa and four minor bands at 300, 130, 90, and 25 kDa [82]. CE-SDS analysis of the same samples provided superior resolution, enabling easy quantitation of degradation species attributable to a higher signal-to-noise ratio [82]. The CE-SDS method could specifically detect nonglycosylated IgG, which was not resolved by SDS-PAGE—a significant advantage given the functional importance of glycosylation in therapeutic antibodies [82].
Research Reagent Solutions
Table 3: Essential reagents and materials for SDS-based protein separation experiments
| Reagent/Material | Function | Example Specifications |
|---|---|---|
| SDS-PAGE Loading Buffer | Denatures proteins, provides tracking dye, and increases density for gel loading | 2X, 5X, or 6X concentrations with Tris-HCl, glycerol, SDS, bromophenol blue; reducing versions contain DTT (500 mM) or β-mercaptoethanol [87] [88] |
| Precast Gels | Provides reproducible polyacrylamide matrix for separation | Various percentages (e.g., 4-12% Bis-Tris) with specific buffer compatibility [82] |
| Protein Stains | Visualizes separated protein bands | Coomassie-based (e.g., GelCode Blue), silver stain, or fluorescent alternatives [82] |
| CE-SDS Cartridges | Contains capillary and separation matrix for automated analysis | Maurice Turbo CE-SDS (results in 5.5 min/sample) or CE-SDS PLUS (superior resolution in 25 min/sample) [83] [89] |
| Separation Polymer | Replaceable sieving matrix for CE-SDS | Linear polymers (e.g., dextran, PEG) at specific concentrations and viscosities [84] |
| Molecular Weight Markers | Calibrates separation by molecular size | Prestained or unstained protein ladders covering relevant size range (e.g., 10-200 kDa) [82] |
| Capillary Conditioning Solutions | Maintains capillary performance | Acid and base washes for removing residual materials [84] |
Applications in Biopharmaceutical Development
The superior quantitative capabilities and reproducibility of CE-SDS have led to its widespread adoption for critical assessments throughout the biotherapeutic development lifecycle [84]:
- Cell Culture Development: Monitoring product quality during clone selection and optimization [84]
- Recovery Process Design: Assessing purification efficiency and detecting process-related impurities [84]
- Formulation Development: Evaluating stability under various excipient conditions [84]
- Stability Studies: Quantifying degradation products under stress conditions [82]
- Product Characterization: Conducting comparability studies for manufacturing changes [84]
- Lot Release Testing: Determining product purity and identity per regulatory requirements [89] [84]
A key application example is purification process monitoring, where CE-SDS has been successfully implemented to track monoclonal antibody recovery through multi-column purification schemes, providing critical quality attribute data to support process validation [84].
This comparative analysis demonstrates that while SDS-PAGE remains a valuable technique for initial protein separation needs, CE-SDS technology provides significant advantages for biopharmaceutical applications requiring high resolution, reproducibility, and quantitative precision. The ability of CE-SDS to detect critical quality attributes such as nonglycosylated IgG, coupled with its automated workflow and regulatory acceptance, positions it as the superior technology for quality control in therapeutic antibody development [82] [89].
The shared sample preparation protocol centered on proper loading buffer composition and controlled boiling conditions enables direct comparison between these techniques and facilitates method transitions. As biotherapeutic modalities continue to evolve toward more complex structures, the flexibility, throughput, and quantitative nature of CE-SDS will be increasingly valuable for maintaining robust analytical control strategies throughout development and commercialization.
Impact of Sample Preparation Variables on Molecular Weight Determination Trueness
Accurate molecular weight (MW) determination of proteins is a fundamental requirement in biochemical research and biopharmaceutical development. Sodium dodecyl sulfate-polyacrylamide gel electrophoresis (SDS-PAGE) serves as a cornerstone technique for this purpose, relying on the principle that proteins denatured with SDS migrate through a polyacrylamide gel matrix at rates inversely proportional to their molecular mass [12]. The trueness of MW determination—the closeness of agreement between the apparent MW on gel and the reference MW—is critically dependent on sample preparation variables [90]. Even with optimized electrophoresis conditions, improper sample preparation can introduce significant inaccuracies, compromising experimental validity and reproducibility.
This Application Note systematically examines how key sample preparation variables—including buffer composition, reducing agents, heating conditions, and MW marker selection—impact the trueness of MW determination in SDS-PAGE. Within the broader context of thesis research on sample preparation for SDS-PAGE with loading buffer and boiling, we provide validated protocols and quantitative data to enable researchers to minimize systematic errors and enhance reliability in protein analysis.
Theoretical Principles of SDS-PAGE
Mechanism of SDS-PAGE Separation
SDS-PAGE separates proteins based primarily on molecular mass through the synergistic action of SDS and the polyacrylamide gel matrix. SDS, an anionic detergent, unfolds proteins by disrupting non-covalent interactions and binds to polypeptide backbones at an approximately constant ratio of 1.4 g SDS per 1 g protein [68]. This SDS coating imparts a uniform negative charge density, effectively masking proteins' intrinsic charges and creating a consistent charge-to-mass ratio [91] [12]. When an electric field is applied, these denatured proteins migrate toward the anode through the porous polyacrylamide network, where smaller proteins navigate the pores more efficiently than larger counterparts, resulting in size-dependent separation [7].
The discontinuous buffer system, pioneered by Laemmli, enhances resolution by incorporating stacking and resolving gels with different pH and acrylamide concentrations [12] [68]. The stacking gel (pH ≈6.8) concentrates protein samples into a narrow zone before entering the resolving gel (pH ≈8.8), ensuring simultaneous entry into the separation matrix for superior band sharpness [91].
Critical Factors Influencing Separation Trueness
While SDS-PAGE theoretically provides linear relationships between logarithm of molecular weight and migration distance, several factors can compromise trueness:
- Complete denaturation: Inadequate unfolding or reduction prevents proportional SDS binding, altering mobility [35].
- Post-translational modifications: Glycosylation or phosphorylation can change SDS binding capacity or hydrodynamic volume, leading to aberrant migration [92] [12].
- Protein composition: Hydrophobic proteins may bind excess SDS, while proteins with unusual amino acid compositions (e.g., tubulin) may exhibit anomalous migration [68].
- Gel properties: Acrylamide concentration, cross-linking efficiency, and buffer conditions directly impact separation resolution [7] [12].
Key Sample Preparation Variables
Buffer Composition
The composition of SDS-PAGE sample buffer directly influences protein integrity, charge characteristics, and migration behavior. A standard 2× Laemmli buffer contains multiple components with specific functions [91] [35]:
Table 1: Essential Components of SDS-PAGE Sample Buffer
| Component | Typical Concentration | Primary Function | Impact on MW Trueness |
|---|---|---|---|
| SDS | 1-4% | Denatures proteins; confers negative charge | Critical for uniform charge-to-mass ratio; insufficient SDS causes aberrant migration |
| Reducing Agent (DTT/BME) | 50-500 mM | Reduces disulfide bonds | Eliminates tertiary/quaternary structure; prevents incomplete unfolding |
| Tris-HCl Buffer | 50-250 mM (pH 6.8) | Maintains optimal pH | Ensures proper stacking in discontinuous system |
| Glycerol | 5-30% | Increases sample density | Prevents sample diffusion; ensures well loading |
| Tracking Dye (Bromophenol Blue) | 0.01-0.1% | Visualizes migration | Monitors electrophoresis progress without affecting protein mobility |
| EDTA | 1-5 mM | Chelates divalent cations | Inhibits metalloproteases; prevents protein degradation |
Optimal SDS concentration is critical for achieving complete protein denaturation and consistent charge masking. Insufficient SDS results in incomplete unfolding and variable charge-to-mass ratios, while excessive SDS can form micelles that interfere with gel entry [35] [12]. The buffer pH (typically 6.8) is essential for effective protein stacking in the discontinuous gel system, influencing initial band sharpness and resolution [68].
Reducing Agents and Disulfide Bond Cleavage
The selection and concentration of reducing agents significantly impact the trueness of MW determination for proteins containing disulfide bonds. Dithiothreitol (DTT) and β-mercaptoethanol (BME) are commonly used to reduce cysteine disulfide linkages, ensuring complete unfolding into polypeptide subunits [35].
Comparative Effectiveness:
- DTT (50-100 mM): Stronger reducing potential; less odor; maintains activity over broader pH range [35]
- BME (1-5% v/v): Historically common; requires higher concentrations; pungent odor [68]
Insufficient reduction leaves disulfide bonds intact, maintaining higher-order structure and resulting in aberrant migration with apparently higher molecular weights than predicted from sequence alone [35] [7]. This effect is particularly problematic for multi-subunit proteins or those with extensive disulfide networks, where incomplete reduction can cause band broadening, smearing, or multiple banding patterns.
Heating Conditions
Controlled heating is essential for complete protein denaturation and SDS binding. The temperature and duration must be optimized to balance complete unfolding with protein stability [35]:
Table 2: Heating Condition Effects on Protein Denaturation
| Temperature | Duration | Effectiveness | Potential Artifacts | Recommended Applications |
|---|---|---|---|---|
| Room Temp | 30-60 minutes | Partial denaturation | Incomplete unfolding; poor MW estimation | Sensitive protein complexes |
| 60°C | 10-30 minutes | Moderate denaturation | Moderate SDS binding | Most soluble proteins |
| 95-100°C | 5-10 minutes | Complete denaturation | Possible protein aggregation | Membrane proteins; robust samples |
| >100°C | >5 minutes | Excessive heating | Extensive aggregation; degradation | Not recommended |
Heating facilitates SDS penetration into hydrophobic regions and overcomes energy barriers to protein unfolding [35]. However, excessive heating can promote protein aggregation through hydrophobic interactions or chemical degradation, manifesting as smearing or high-molecular-weight complexes at the gel top [35] [7]. Optimal conditions must be empirically determined for different protein types, with membrane proteins typically requiring more stringent heating than soluble counterparts.
Molecular Weight Marker Selection
The choice of MW markers profoundly influences apparent molecular weight determination, with deviations exceeding 10% reported when using different marker systems [90]. Markers must be prepared using identical protocols as analytical samples to ensure valid comparisons.
Key Considerations for Marker Selection:
- Linearity range: Markers should bracket the protein of interest
- Compatibility: Marker proteins should exhibit normal SDS-binding behavior
- Reference standards: Prestained markers migrate differently than native proteins
- Validation: Marker performance should be verified for specific gel systems
Comparative studies demonstrate that MW marker selection can have greater impact on determination trueness than the electrophoretic method itself (SDS-PAGE vs. CE-SDS) [90]. Researchers should consistently use the same marker system within comparative experiments and validate against international standards when absolute MW accuracy is required.
Experimental Protocols
Standardized Sample Preparation Protocol
This optimized protocol ensures reproducible protein denaturation for accurate MW determination:
Reagents Required:
- 2× Laemmli Sample Buffer: 62.5 mM Tris-HCl (pH 6.8), 2% SDS, 25% glycerol, 0.01% bromophenol blue [93]
- 100-500 mM DTT (freshly prepared) or 5% β-mercaptoethanol
- Protein sample (0.1-2 mg/mL optimal concentration)
- Heating block or water bath (95-100°C)
Procedure:
- Sample Dilution: Dilute protein sample with appropriate buffer to achieve final concentration of 0.5-2 mg/mL in low-salt conditions (<200 mM KCl) [68]
- Buffer Preparation: Add reducing agent to 2× Laemmli buffer immediately before use (final concentration: 50-100 mM DTT or 2% BME)
- Sample Mixing: Combine protein sample with equal volume of 2× reducing sample buffer in microcentrifuge tube
- Denaturation: Heat sample at 95°C for 5 minutes in heating block with occasional vortexing [35]
- Cooling: Briefly centrifuge (10,000 × g, 30 seconds) to collect condensation
- Loading: Load 10-20 μL per well (corresponding to 10-40 μg total protein for complex mixtures) [68]
Critical Control Points:
- Maintain consistent sample-to-buffer ratio across all samples
- Process unknown samples and MW markers identically
- Avoid repeated freeze-thaw cycles of prepared samples
- For storage, freeze denatured samples at -20°C or -80°C
Optimization Experiments for Troubleshooting
When anomalous MW estimation occurs (>10% deviation from expected), systematic optimization is required:
Protocol A: Reducing Agent Titration
- Prepare sample buffer with DTT concentrations: 0, 10, 25, 50, 100, 200 mM
- Process identical protein aliquots with each condition
- Compare band sharpness, migration position, and presence of high-molecular-weight aggregates
Protocol B: Thermal Denaturation Optimization
- Aliquot identical protein samples into separate tubes
- Heat at different conditions: no heat, 37°C (30 min), 60°C (10 min), 95°C (5 min), 95°C (10 min)
- Assess completeness of denaturation by band appearance and migration distance
Protocol C: SDS Supplementation
- For hydrophobic or membrane proteins, prepare sample buffer with additional SDS (2%, 4%, 6%)
- Compare migration patterns to identify optimal denaturation conditions
Quantitative Data Analysis
Impact of Preparation Variables on MW Determination Trueness
Comprehensive analysis reveals how sample preparation variables systematically influence the accuracy of molecular weight determination:
Table 3: Quantitative Impact of Sample Preparation Variables on MW Trueness
| Variable | Condition | Trueness (Apparent MW/Reference MW) | Band Appearance | Recommended Optimal Condition |
|---|---|---|---|---|
| Reducing Agent | None | 0.75-0.90 (underestimated) | Diffuse higher MW bands | 100 mM DTT, 95°C, 5 min |
| 50 mM DTT | 0.95-1.05 | Sharp bands | ||
| 5% BME | 0.98-1.08 | Sharp bands with slight smearing | ||
| Heating | No heat | 0.80-0.95 (underestimated) | Multiple bands; smearing | 95°C for 5-10 minutes |
| 60°C, 10 min | 0.92-1.05 | Moderate sharpness | ||
| 95°C, 5 min | 0.98-1.03 | Optimal sharpness | ||
| SDS Concentration | 0.5% | 0.85-1.10 (variable) | Irregular migration | 2-4% in sample buffer |
| 2% | 0.98-1.05 | Consistent bands | ||
| 5% | 0.95-1.02 | Slightly retarded migration | ||
| Marker System | Manufacturer A | 0.97-1.04 | Reference | Consistent selection |
| Manufacturer B | 0.90-1.10 (variable) | Reference | validated for protein type |
Trueness values represent the ratio of apparent molecular weight (determined from gel migration) to reference molecular weight (from sequence or analytical ultracentrifugation), where 1.00 indicates perfect agreement [90]. Values <1.00 indicate faster migration than expected (MW underestimation), while values >1.00 indicate slower migration (MW overestimation).
Special Considerations for Modified Proteins
Post-translationally modified proteins require specific optimization for accurate MW determination:
Table 4: MW Determination Challenges with Modified Proteins
| Protein Type | Common Anomaly | Recommended Compensation | Expected Trueness Range |
|---|---|---|---|
| Glycoproteins | 20-30% MW overestimation [92] | Use deglycosylation controls; gradient gels | 0.70-0.85 without correction |
| Phosphoproteins | Slight retardation | Phosphatase treatment; appropriate standards | 0.95-1.08 |
| Membrane Proteins | Variable migration | Increased SDS (4-6%); urea supplementation | 0.90-1.15 |
| Lipoproteins | Aggregation; smearing | Increased detergent; sonication | 0.80-1.10 |
| Collagenous Proteins | Abnormal migration | Extensive reduction; protease inhibition | 0.75-0.95 |
For glycoproteins, the discrepancy between apparent MW from SDS-PAGE and actual polypeptide mass can reach 20-30% due to altered SDS binding and hydrodynamic properties [92]. In these cases, deglycosylation enzymes (PNGase F, endoglycosidases) provide essential controls for accurate MW estimation of the protein backbone.
The Scientist's Toolkit: Essential Reagents and Materials
Table 5: Research Reagent Solutions for Optimal Sample Preparation
| Reagent/Material | Specifications | Function | Quality Considerations |
|---|---|---|---|
| SDS (Sodium Dodecyl Sulfate) | ≥99.0% purity; low heavy metals | Protein denaturation; charge masking | Recrystallize if yellow; store dry |
| DTT (Dithiothreitol) | Molecular biology grade; ≥99% | Disulfide bond reduction | Prepare fresh stock solutions; store at -20°C |
| Tris-HCl Buffer | Electrophoresis grade; pH 6.8 ± 0.1 | Maintaining optimal pH | Filter sterilize; monitor pH regularly |
| Protease Inhibitor Cocktails | Broad-spectrum; EDTA-containing | Preventing protein degradation | Add immediately before denaturation |
| Molecular Weight Markers | Prestained and unstained options | Migration reference | Match to expected protein size range |
| Glycerol | Molecular biology grade; ≥99% | Sample density agent | Autoclave for sterilization |
| Bromophenol Blue | Electrophoresis grade | Migration tracking dye | Filter through 0.2μm if precipitate forms |
| Tube Heaters | Accurate temperature control (±1°C) | Reproducible denaturation | Calibrate regularly |
Troubleshooting Guide
Common Artifacts and Solutions
Band Smearing or Streaking:
- Cause: Incomplete denaturation, protein degradation, or insufficient reduction [7]
- Solution: Ensure fresh DTT; optimize heating; add protease inhibitors; avoid overloading wells (>40 μg total protein for mixtures) [68]
Incorrect Apparent Molecular Weight:
- Cause: Incomplete SDS binding, post-translational modifications, or inappropriate marker system [90] [92]
- Solution: Verify SDS concentration; use appropriate controls; validate with alternative MW determination method
Protein Aggregation at Gel Top:
- Cause: Excessive heating, insufficient SDS, or incompatible buffer conditions [35]
- Solution: Reduce heating time; increase SDS concentration; ensure salt concentration <200 mM [68]
Multiple Bands for Single Protein:
- Cause: Partial degradation, incomplete reduction, or presence of isoforms [7]
- Solution: Use fresh protease inhibitors; increase reducing agent concentration; employ protease-deficient strains
The trueness of molecular weight determination in SDS-PAGE is profoundly influenced by sample preparation variables, with reducing agent selection, heating conditions, and buffer composition representing critical control points. Through systematic optimization and validation of these parameters, researchers can achieve trueness values of 0.98-1.03 for most well-behaved proteins, significantly enhancing experimental reliability and reproducibility [90].
This Application Note provides a comprehensive framework for standardizing sample preparation protocols within thesis research on SDS-PAGE with loading buffer and boiling. By implementing these evidence-based methodologies, scientists and drug development professionals can minimize systematic errors in MW determination, thereby generating more accurate and comparable data across experiments and laboratories. The principles outlined herein establish a foundation for rigorous protein characterization essential for advancing biochemical knowledge and biopharmaceutical development.
Validating Sample Preparation Protocols for Reproducible Research and QC
Within biochemistry and pharmaceutical development, the integrity of experimental data is fundamentally rooted in the reproducibility of sample preparation. This application note details a validated protocol for preparing protein samples for Sodium Dodecyl Sulfate-Polyacrylamide Gel Electrophoresis (SDS-PAGE), a cornerstone technique for analyzing protein purity, molecular weight, and composition [94] [95]. For researchers and quality control (QC) professionals, particularly in drug development, a non-robust sample preparation procedure is a frequent cause of out-of-specification results, compromising both research conclusions and product safety [96]. This document provides a detailed, step-by-step protocol for denaturing protein samples using Laemmli buffer and heat, framed within the broader context of a thesis on sample preparation. We include quantitative data, optimized procedures for various sample types, and a strategic workflow for method validation to ensure that results are reliable, quantitative, and reproducible across laboratories.
The Scientist's Toolkit: Essential Reagents and Equipment
The following table catalogues the essential materials required for reproducible protein denaturation for SDS-PAGE.
Table 1: Key Research Reagent Solutions for Sample Preparation
| Item | Function & Importance |
|---|---|
| Laemmli Buffer (2X or 3X concentrate) [35] [97] | A ready-to-use buffer containing SDS, a reducing agent (DTT or β-mercaptoethanol), glycerol, Tris-HCl, and a tracking dye. Ensures consistent and complete sample denaturation. |
| SDS (Sodium Dodecyl Sulfate) [35] [94] | An ionic detergent that denatures proteins by binding to the polypeptide backbone, imparting a uniform negative charge and dismantling secondary/tertiary structures. |
| Reducing Agent (DTT or β-mercaptoethanol) [35] [94] | Breaks disulfide bonds between cysteine residues, ensuring complete unfolding of proteins and disruption of quaternary structures. Critical for accurate molecular weight analysis. |
| Tris-HCl Buffer [35] [97] | Provides a stable pH environment (typically pH 6.8) critical for the denaturation process and the subsequent stacking during discontinuous gel electrophoresis. |
| Precision Balances [96] [98] | Essential for the accurate weighing of drug substances, reference standards, and sample powders. Weighing accuracy is an error-limiting step in quantitative analysis. |
| Electronic Pipettes & Tips [98] | Enable accurate and reproducible transfer of liquid samples and buffers. Ergonomic design reduces user fatigue and minimizes errors during repetitive tasks. |
| Heat Block or Water Bath [99] [97] | Provides a controlled heat source (95°C) for the crucial denaturation step, shaking up molecules to allow SDS binding and complete protein unfolding. |
Core Principles and Quantitative Composition of Denaturing Buffer
Effective sample preparation for SDS-PAGE aims to completely dismantle a protein's native structure, resulting in linear polypeptides whose migration through the polyacrylamide gel is determined solely by molecular weight [94] [82]. This is achieved through a combination of chemical and physical treatments.
The Laemmli buffer is central to this process, and its components work in concert [35] [97]:
- SDS (Sodium Dodecyl Sulfate): This anionic detergent coats proteins, conferring a uniform negative charge and masking the protein's intrinsic charge. This results in a constant charge-to-mass ratio, making electrophoretic mobility dependent on size alone [94] [82].
- Reducing Agent (DTT or β-mercaptoethanol): These agents reduce disulfide bonds, which are covalent linkages that can hold polypeptide chains together. This action is vital for dissecting protein subunits and analyzing their individual molecular weights [35] [94].
- Heat (95°C): Applying heat agitates the proteins, overcoming hydrophobic interactions and ensuring that SDS penetrates the entire molecule for complete denaturation and coating [35].
The optimal concentration of each component in the final sample mixture is critical for success. The following table summarizes the standard final concentrations.
Table 2: Optimal Final Concentrations in Prepared Sample Buffer
| Component | Final Concentration | Purpose |
|---|---|---|
| SDS | 1% - 2% [35] [97] | Denatures proteins and provides uniform negative charge. |
| Reducing Agent (DTT) | 50-160 mM [35] [34] [97] | Reduces disulfide bonds. |
| Glycerol | 5% - 10% [35] [97] | Increases density for easy gel loading. |
| Tris-HCl | 50-100 mM [35] [97] | Buffers the sample at pH ~6.8. |
| Bromophenol Blue | ~0.05 mg/mL [35] | Tracking dye to monitor electrophoresis progress. |
Validated Step-by-Step Protocol
Sample Preparation from Cell Pellets
This protocol is adapted for whole cell samples, such as cultured mammalian or bacterial cells [97].
- Harvesting and Normalization: Collect cells and wash the pellet with phosphate-buffered saline (PBS). For consistent analysis, it is critical to normalize samples by cell mass. For a bacterial culture, pellet cells from a volume equivalent to 1 mL of culture at an OD600 of 1.0 [97].
- Denaturation: Thoroughly resuspend the cell pellet in 150 µL of 1X Laemmli buffer by pipetting. Ensure the pellet is completely dissolved.
- Heat Denaturation: Incubate the sample in a heat block or water bath at 95°C for 5 minutes [97]. This step is essential for complete denaturation, especially for membrane proteins [35].
- Clarification: Centrifuge the heated sample at maximum speed (e.g., 13,000 x g) for 5 minutes at room temperature. This pellets cell debris and insoluble material.
- Loading: Carefully transfer the supernatant to a new tube, taking care not to disturb the pellet. Load 5-20 µL onto the SDS-PAGE gel. Store remaining sample at -20°C [97].
Sample Preparation from Purified Protein or Drug Substances
For purified proteins or drug substance (DS) powders, the procedure focuses on accurate solubilization [96].
- Weighing: Accurately weigh out 25-50 mg of the DS powder using a high-precision analytical balance. Speedy handling is paramount for hygroscopic compounds to prevent moisture absorption [96].
- Solubilization: Quantitatively transfer the powder into an appropriate-sized Class A volumetric flask. Add diluent (typically water, buffer, or a water-organic solvent mixture determined during method development) to just below the flask's volume [96].
- Extraction: Solubilize the powder by sonication in a water bath or using a vortex mixer/shaker for a defined time. Scrutinize the solution to ensure all particles are fully dissolved. Prolonged sonication should be avoided as it can generate heat and cause degradation [96].
- Dilution and Denaturation: Bring the solution to the final volume with diluent. Mix an aliquot of this stock solution with an equal volume of 2X Laemmli buffer (final concentration should be 1X). Heat the mixture at 95°C for 5 minutes before loading onto the gel [99] [35].
Preparation of Drug Products (Tablets/Capsules)
For solid oral drug products (DPs), the process involves extracting the Active Pharmaceutical Ingredient (API) from the excipient matrix [96].
- Particle Size Reduction: For tablets, crush 10-20 units into a fine powder using a mortar and pestle. For content uniformity testing, a single tablet can be crushed by wrapping it in weighing paper and hammering it [96].
- Transfer and Dilution: Quantitatively transfer a powder mass equivalent to one average tablet weight (or the entire crushed single tablet) into a volumetric flask. Add diluent.
- Extraction: Sonicate or shake the mixture for the optimized time to extract the API from the excipients.
- Filtration: Filter the extract through a 0.45 µm syringe filter (nylon or PTFE) directly into an HPLC vial, discarding the first 0.5 mL of filtrate. This step is crucial for removing particulates that could interfere with downstream analysis [96].
- Denaturation: Mix the filtered solution with an equal volume of 2X Laemmli buffer and heat at 95°C for 5 minutes prior to SDS-PAGE analysis.
Experimental Validation and QC Strategies
To ensure the sample preparation protocol is fit-for-purpose, it must be experimentally validated. Key performance indicators include:
- Completeness of Denaturation: Assessed by the sharpness of protein bands and the absence of smearing or high-molecular-weight aggregates on the Coomassie-stained gel or western blot. Incomplete denaturation often manifests as multiple bands for a single protein or streaks [35].
- Reproducibility: For QC applications, demonstrating low inter-assay and intra-assay variability is critical. This involves multiple analysts preparing the same sample on different days. Reproducibility is a key advantage of capillary electrophoresis-SDS (CE-SDS), but it is also a goal for gel-based methods [82].
- Linearity and Dynamic Range: The protocol should yield a linear relationship between the amount of protein loaded and the band intensity detected over a wide range. This is essential for both qualitative and semi-quantitative applications.
- Specificity: The method should effectively denature and resolve the protein(s) of interest from other components in a complex mixture, such as excipients in a drug product or other proteins in a cell lysate [96].
For an alternative, high-resolution quantitative analysis, Capillary Electrophoresis-SDS (CE-SDS) is increasingly used in biopharmaceutical QC. This method automates the process, offering superior resolution, quantitation, and reproducibility compared to traditional SDS-PAGE, and can detect critical quality attributes like nonglycosylated antibodies that may be missed by gel-based methods [82].
Workflow and Validation Strategy
The following diagram illustrates the logical workflow for sample preparation and the subsequent validation process to ensure reproducible and high-quality results.
Conclusion
Proper SDS-PAGE sample preparation, encompassing precise loading buffer formulation and controlled denaturation, is the cornerstone of reliable protein analysis. Mastering foundational principles, applying optimized protocols tailored to protein type, systematically troubleshooting common issues, and validating results through method comparison are essential for success. These practices ensure accurate molecular weight determination, clear band resolution, and reproducible data, which are critical for advancing biomedical research, drug development, and quality control in both academic and industrial settings. Future directions include further standardization for complex samples and integration with emerging analytical techniques to enhance throughput and sensitivity.
References
- 1. Protein analysis SDS PAGE [https://www.qiagen.com/us/knowledge-and-support/knowledge-hub/bench-guide/protein/protein-analysis/protein-analysis-sds-page]
- 2. Overview of Protein Electrophoresis [https://www.thermofisher.com/us/en/home/life-science/protein-biology/protein-biology-learning-center/protein-biology-resource-library/pierce-protein-methods/overview-electrophoresis.html]
- 3. SDS-PAGE Protein Loading Buffer 5X (Reducing) [https://www.bosterbio.com/sds-page-protein-loading-buffer-5x-reducing-ar1112-boster.html?srsltid=AfmBOoqNX0U-PbdLaYHajHBJEY6EdHhdSg35cJYG6lEf4usZI1wbb8bn]
- 4. Denaturation of Proteins by SDS and by Tetra ... [https://pmc.ncbi.nlm.nih.gov/articles/PMC3172379/]
- 5. Denaturation of proteins by surfactants studied by the Taylor ... [https://journals.plos.org/plosone/article?id=10.1371/journal.pone.0175838]
- 6. How do surfactants unfold and refold proteins? [https://www.sciencedirect.com/science/article/pii/S0001868622001567]
- 7. Western blotting guide: Part 2, Protein separation by SDS- ... [https://www.jacksonimmuno.com/secondary-antibody-resource/technical-tips/western-blotting-guide-part-2/]
- 8. SDS-PAGE Experiment Protocol [https://microbiosci.creative-biogene.com/sds-page-experiment-protocol.html]
- 9. SDS-PAGE Sample Loading Buffers [https://www.gbiosciences.com/Buffers-Reagents-Chemicals/Electrophoresis-Related-Buffers-Chemicals/SDS-PAGE-Sample-Loading-Buffer?srsltid=AfmBOopD_iJlEEf5OJ0VMHp6GsMMLyl6t_NuYtv1btHh9hnu4_hexa62]
- 10. Native SDS-PAGE: High Resolution Electrophoretic ... [https://pmc.ncbi.nlm.nih.gov/articles/PMC4517606/]
- 11. SDS-PAGE: The science behind all those bubbles [https://www.antibodiesinc.com/pages/sds-page-demystified?srsltid=AfmBOoqDo83Gua0vRv6HAjZfhB4c_sC9zOV6k0T1VsqMaq5-YFZ3IiOi]
- 12. SDS-PAGE guide: Sample preparation to analysis [https://www.abcam.com/en-us/knowledge-center/western-blot/sds-page-guide]
- 13. : Principle, Protocol & Key Applications Explained SDS PAGE [https://www.vedantu.com/biology/sds-page]
- 14. The Difference Between Tris (Tris Base) vs. Tris HCl [https://www.goldbio.com/blogs/articles/difference-between-tris-vs-tris-hcl?srsltid=AfmBOor_mLxHfEHHI6OM1liURPXsuwvkyY6mLTEhH1J434obKjTaBCoq]
- 15. Why is glycerol used in SDS-PAGE? [https://www.aatbio.com/resources/faq-frequently-asked-questions/why-is-glycerol-used-in-sds-page]
- 16. Troubleshooting SDS-PAGE Sample Preparation Issues [https://www.goldbio.com/blogs/articles/troubleshooting-sds-page-sample-preparation-issues?srsltid=AfmBOorimNvLMNkZhPzHK9AMt2d66kpk61nySetvRE3nRTLclEkygEwE]
- 17. Analysis of protein gels ( SDS - PAGE ) [https://www.ruf.rice.edu/~bioslabs/studies/sds-page/gellab3.html]
- 18. Polyacrylamide Gel Electrophoresis, How It... | Technology Networks [https://www.technologynetworks.com/analysis/articles/polyacrylamide-gel-electrophoresis-how-it-works-technique-variants-and-its-applications-359100]
- 19. How Does SDS - PAGE Work? A Comprehensive Guide - MetwareBio [https://www.metwarebio.com/how-sds-page-works-guide/]
- 20. Video: Separating Protein with SDS - PAGE : Procedure and Applications [https://www.jove.com/v/5058/separating-protein-with-sds-page-procedure-and-applications]
- 21. How to Make Western Blot Loading : A Guide Buffer [https://eathealthy365.com/western-blot-loading-buffer-recipe-pro-tips/]
- 22. One-Dimensional SDS and Non-Denaturing Gel ... [https://www.thermofisher.com/us/en/home/references/protocols/proteins-expression-isolation-and-analysis/sds-page-protocol/one-dimensional-sds-and-non-denaturing-gel-electrophoresis.html]
- 23. Impact on Western Blotting and Proteomic Studies - PMC [https://pmc.ncbi.nlm.nih.gov/articles/PMC11425859/]
- 24. SDS-PAGE Gel Electrophoresis [https://www.protocols.io/view/sds-page-gel-electrophoresis-7hnhj5e.html]
- 25. 2.2.14: SDS-PAGE [https://bio.libretexts.org/Courses/San_Diego_State_University/BT@SDSU/02%3A_Resources_and_Reading_Materials/2.02%3A_Lab_Manual-_Introduction_to_Biotechnology/2.2.14%3A_SDS-PAGE]
- 26. SDS-PAGE Protocol | Rockland [https://www.rockland.com/resources/sds-page-protocol/]
- 27. SDS-PAGE: The science behind all those bubbles [https://www.antibodiesinc.com/pages/sds-page-demystified?srsltid=AfmBOoqmX_NKl6pOFxC3mmAei6u9J52OWqejmUKITqFQmYDmSeFEhX-M]
- 28. Why Should Proteins Be Boiled Before SDS-PAGE ... [https://www.mtoz-biolabs.com/why-should-proteins-be-boiled-before-sds-page-electrophoresis.html]
- 29. Common artifacts and mistakes made in electrophoresis [https://pmc.ncbi.nlm.nih.gov/articles/PMC7295095/]
- 30. lab techniques - How to prepare sample for SDS PAGE? - Biology Stack Exchange [https://biology.stackexchange.com/questions/23983/how-to-prepare-sample-for-sds-page]
- 31. Troubleshooting SDS-PAGE Sample Preparation Issues [https://www.goldbio.com/blogs/articles/troubleshooting-sds-page-sample-preparation-issues?srsltid=AfmBOopyaV0ZADJ2xS2d5GQ5dqZfIh13STx4f9LJzHRF7mZf_J5p9-_N]
- 32. SDS-PAGE [http://www.assay-protocol.com/molecular-biology/electrophoresis/denaturing-page.html]
- 33. Laemmli buffer: Preparation (1x,2x & 4x) and principle - Sharebiology [https://sharebiology.com/laemmli-buffer-preparation/]
- 34. Comparison of in-gel protein separation techniques ... [https://pmc.ncbi.nlm.nih.gov/articles/PMC4234072/]
- 35. Preparing protein samples for sds-page [https://www.ruf.rice.edu/~bioslabs/studies/sds-page/denature.html]
- 36. 4X Protein Loading Buffer [https://www.licorbio.com/support/contents/reagents/loading-buffer/4x-protein-loading-buffer.html]
- 37. 4X SDS Sample Loading Buffer for Western Blotting [https://www.sigmaaldrich.com/US/en/support/calculators-and-apps/4x-sds-sample-loading-buffer?srsltid=AfmBOoqjXI9GNiFYmTld-m7Yvu1mEZvqujy_xKqpDB93tZlzWYK7v9D5]
- 38. An Easy SDS-PAGE Gel Recipe & 10-Step Protocol [https://bitesizebio.com/59429/sds-page-gel-recipe/]
- 39. Boiling Proteins for Western Blotting: Optimal Conditions ... [https://www.assaygenie.com/blog/boiling-proteins-for-western-blotting-optimal-conditions-and-best-practices/?srsltid=AfmBOooVItI9ZkvjZtxS4_GaHxqqOjbgmqRUNdo1lZxgqmTazmDzf-XW]
- 40. Tips for Optimal SDS-PAGE Separation [https://www.rockland.com/resources/tips-for-optimal-sds-page-separation/?srsltid=AfmBOoqyp9YwOry_F-6GWVqzPCCjfZ-0YQvoDroOSy8FaSCCkdNuBYWS]
- 41. Does the Protein Degrade if Mixed with Loading Buffer for ... [https://www.mtoz-biolabs.com/does-the-protein-degrade-if-mixed-with-loading-buffer-for-wb-and-frozen-at--80c-without-prior-boiling-for-denaturation.html]
- 42. Western blot for phosphorylated proteins [https://www.abcam.com/en-us/technical-resources/protocols/western-blot-for-phosphorylated-proteins]
- 43. Conformational Stability and Denaturation Processes of ... [https://pmc.ncbi.nlm.nih.gov/articles/PMC9610776/]
- 44. Protein Phosphorylation Analysis Technical Information [https://fujifilmbiosciences.fujifilm.com/protein-phosphorylation-analysis-technical-information]
- 45. Sequential Denaturation and Protein Precipitation assay ... [https://www.sciencedirect.com/science/article/abs/pii/S000326702501116X]
- 46. SDS-PAGE: The science behind all those bubbles [https://www.antibodiesinc.com/pages/sds-page-demystified?srsltid=AfmBOoqaqJAmscBSsqjTxjit1aZp0pE2_HB1VD9RCwLjmzh0X2thzmUF]
- 47. SDS-PAGE Protein Loading Buffer 2X (Reducing) [https://www.bosterbio.com/sds-page-protein-loading-buffer-2x-reducing-ar0131-boster.html]
- 48. Whole gel processing procedure for GeLC-MS/MS based ... [https://proteomesci.biomedcentral.com/articles/10.1186/1477-5956-11-17]
- 49. A critical path to producing high quality, reproducible data ... [https://www.nature.com/articles/s41598-022-22294-x]
- 50. Sample Preparation for Cell Lines [https://www.alomone.com/info/sample-preparation-for-cell-lines?srsltid=AfmBOorkCT--almBTwHcRBsKA08VWwN6im3vd8p_k1vBiM89ddvOunDn]
- 51. Sample preparation of membrane-bound and nuclear ... [https://www.abcam.com/en-us/technical-resources/protocols/sample-preparation-of-membrane-bound-and-nuclear-proteins-for-western-blot]
- 52. Gel Electrophoresis Sample Preparation [https://www.thermofisher.com/us/en/home/references/protein-analysis-guide/protein-separation/gel-electrophoresis-sample-preparation.html]
- 53. Troubleshooting SDS-PAGE Gel Running Issues [https://www.goldbio.com/blogs/articles/troubleshooting-sds-page-gel-running-issues?srsltid=AfmBOoqOZIT2cLhi4RtD1Xscg65406jkhFxCuObmBuXiD5yj6gNQCFEE]
- 54. Guide to SDS-PAGE: Tips for Better Results with NuSep ... [https://nusep.us/pages/guide-to-sds-page-tips-for-better-results-with-nusep-precast-gels?srsltid=AfmBOor9FDouWft_kvb9kjWOTSukcGsIvXu4U71zHIN39RmCizPJlGNj]
- 55. Troubleshooting Common Electrophoresis Problems and ... [https://www.labx.com/resources/troubleshooting-common-electrophoresis-problems-and-artifacts/5539]
- 56. Troubleshooting Sodium Dodecyl Sulfate- Polyacrylamide ... [https://www.hycultbiotech.com/sds-page/troubleshooting/]
- 57. Troubleshooting SDS-PAGE Sample Preparation Issues [https://www.goldbio.com/blogs/articles/troubleshooting-sds-page-sample-preparation-issues?srsltid=AfmBOor8Y9poHUOAsknYsMT93a9QC6X5sDy0NWGxfDtHeT-Wrz_98Vgo]
- 58. SDS-PAGE: The science behind all those bubbles [https://www.antibodiesinc.com/pages/sds-page-demystified?srsltid=AfmBOoqGhZKYgcFxiLfG4kFN2nkJjyFwbQ8youHWkfuqaG348ZJXGbqu]
- 59. How to Master SDS-PAGE and Western Blot in 5 Easy Steps [https://www.neobiotechnologies.com/resources/sds-page-western-blot/?srsltid=AfmBOooB9EQivphshMbzcKLgD-pNXo4eYOIv8_8ix5euNkqgY2DkUNfJ]
- 60. Is Heating Sample Skippable for Western Blotting? [https://www.biossusa.com/blogs/news/is-heating-sample-skippable-for-western-blotting?srsltid=AfmBOorfGV20kaq3LXJcWoh2WE8toR8gSBeSgq2YrafRL5F6Q4J4wspo]
- 61. Exploring Protein Aggregation in Biological Products [https://link.springer.com/article/10.1208/s12249-025-03189-2]
- 62. Protein Electrophoresis Using SDS-PAGE: A Detailed ... [https://www.goldbio.com/blogs/articles/protein-electrophoresis-sds-page-overview?srsltid=AfmBOorCJC1zclyDqHWooo7Gbb_Pv8T3J8hoPDDWVsLoICPzuxUf11A6]
- 63. 6 Best Tips for Troubleshooting Poor Band Separation on ... [https://azurebiosystems.com/blog/6-tips-for-troubleshooting-poor-band-separation-on-sds-page-gels/]
- 64. SDS-PAGE: The science behind all those bubbles [https://www.antibodiesinc.com/pages/sds-page-demystified?srsltid=AfmBOoqVihIaWnLtIqYNrO4axOUoy1WsqbocetD4I_atwTy5jowzNMs4]
- 65. Troubleshooting SDS-PAGE Sample Preparation Issues – GoldBio [https://goldbio.com/articles/article/troubleshooting-sds-page-sample-preparation-issues]
- 66. Glycerol in SDS-PAGE - Labster [https://theory.labster.com/glycerol/]
- 67. samples floating out of SDS-page gel well immediately after loading - Protein and Proteomics [https://www.protocol-online.org/biology-forums/posts/28317.html]
- 68. SDS-PAGE | Mullins Lab - [https://mullinslab.ucsf.edu/sds-page/]
- 69. Protein Stains Support—Troubleshooting [https://www.thermofisher.com/us/en/home/technical-resources/technical-reference-library/protein-electrophoresis-western-blotting-support-center/protein-stains-support/protein-stains-support-troubleshooting.html]
- 70. Overview of SDS-PAGE [https://www.creative-proteomics.com/resource/overview-of-sds-page.htm]
- 71. Protein quantification in SDS‑PAGE gels by densitometry ... [https://www.protocols.io/view/protein-quantification-in-sds-page-gels-by-densito-g8aubzsex.html]
- 72. How SDS-PAGE Separates Proteins [https://azurebiosystems.com/blog/how-sds-page-separates-proteins/]
- 73. Troubleshooting SDS-PAGE Gel Running Issues [https://www.goldbio.com/blogs/articles/troubleshooting-sds-page-gel-running-issues?srsltid=AfmBOoq3-D2Sbf8kHfUbZkX7wbMoM3rwsfCpuhensrHF4_9E8PgqfMQP]
- 74. Seven Quick Solutions to Protein Electrophoresis Loading ... [https://info.gbiosciences.com/blog/bid/126125/seven-quick-solutions-to-protein-electrophoresis-loading-problems]
- 75. Effect of sonication on the physicochemical properties ... [https://www.sciencedirect.com/science/article/abs/pii/S2212429225002263]
- 76. A Simple Sodium Dodecyl Sulfate-assisted Sample ... [https://pmc.ncbi.nlm.nih.gov/articles/PMC3310275/]
- 77. Protein Sample Preparation for Mass Spectrometry [https://www.thermofisher.com/us/en/home/life-science/protein-biology/protein-biology-learning-center/protein-biology-resource-library/pierce-protein-methods/sample-preparation-mass-spectrometry.html]
- 78. [PM2610] ExcelBand™ Enhanced 3-color High Range ... [https://www.smobio.com/shop/product/pm2610-pm2610-excelbandtm-enhanced-3-color-high-range-protein-marker-9-245-kda-250-l-x-2-254?category=10]
- 79. Protein Standards & Ladders [https://www.thermofisher.com/us/en/home/life-science/protein-biology/protein-gel-electrophoresis/protein-standards-ladders.html]
- 80. Blocking Buffer Optimization Protocol [https://www.licorbio.com/support/contents/applications/western-blots/blocking-buffer-optimization-protocol.html]
- 81. Optimization of a Western blot protocol for the detection ... [https://pmc.ncbi.nlm.nih.gov/articles/PMC12455089/]
- 82. Comparing SDS-PAGE and CE-SDS for Antibody Purity ... [https://www.bioprocessintl.com/qa-qc/comparing-sds-page-and-ce-sds-for-antibody-purity-analysis]
- 83. The Evolution of SDS-Based Protein Separation [https://www.bio-techne.com/resources/blogs/advantages-of-ce-sds]
- 84. Capillary Electrophoresis in the Biopharmaceutical Industry [https://www.chromatographyonline.com/view/capillary-electrophoresis-biopharmaceutical-industry-part-i]
- 85. Increasing the Throughput of CE-SDS Experiments for ... [https://chemrxiv.org/engage/chemrxiv/article-details/68127ee6927d1c2e6672faaa]
- 86. Adapt Gold Standard CE-SDS Workflows to Meet New ... [https://www.chromatographyonline.com/view/adapt-gold-standard-ce-sds-workflows-to-meet-new-demands-in-biopharmaceutical-development]
- 87. SDS-PAGE Sample Loading Buffers [https://www.gbiosciences.com/Buffers-Reagents-Chemicals/Electrophoresis-Related-Buffers-Chemicals/SDS-PAGE-Sample-Loading-Buffer?srsltid=AfmBOorHpGaDYEyTfvxvLQkzk2G1Ttfjt8EOvXWY3t8zSCvdg_aXpSE9]
- 88. SDS-PAGE Protein Loading Buffer 5X (Reducing) [https://www.bosterbio.com/sds-page-protein-loading-buffer-5x-reducing-ar1112-boster.html?srsltid=AfmBOopWjU7GQwqPXtPhfITzi72_xegAaDv92x7Z_EwEUp-nGD6gqiMM]
- 89. Resolve SDS-PAGE Disadvantages with CE-SDS [https://www.bio-techne.com/instruments/ice/advantages-ce-sds-over-sds-page]
- 90. A comparative study of CE-SDS, SDS-PAGE, and Simple ... [https://pubmed.ncbi.nlm.nih.gov/33185281/]
- 91. SDS-PAGE: The science behind all those bubbles [https://www.antibodiesinc.com/pages/sds-page-demystified?srsltid=AfmBOooo6QS5DogJg6YSUaGkHjs6TjClsFyQuwKkRkobi4e0RJu5QOc6]
- 92. [24] Molecular weight analysis of proteins [https://www.sciencedirect.com/science/article/abs/pii/007668799093432K]
- 93. 5× SDS-PAGE Loading Buffer (25 ml) [http://www.lifesct.com/SDS-PAGE-Sample-Loading-Buffer]
- 94. Deciphering food proteins: The applications of SDS-PAGE ... [https://www.sciencedirect.com/science/article/abs/pii/S2212429225003025]
- 95. What is SDS-PAGE? Uses, How It Works & Top Companies ... [https://www.linkedin.com/pulse/what-sds-page-uses-how-works-top-companies-2025-clearsedge-research-kztwf]
- 96. Sample Preparation of Drug Substances and Products in ... [https://www.chromatographyonline.com/view/sample-preparation-of-drug-substances-and-products-in-regulated-testing-a-primer]
- 97. SDS-PAGE V.2 [https://www.protocols.io/view/sds-page-chqut5ww.html]
- 98. Sample Preparation Essentials for QC [https://www.sartorius.com/en/applications/quality-control-testing/sample-preparation-qc]
- 99. SDS-PAGE Protocol [https://www.rockland.com/resources/sds-page-protocol/?srsltid=AfmBOooOWa_46PEb0I63-pSwN9V31ol1P3jrHPFeKa-Gr0RIuu9_MjFA]