Mastering SDS-PAGE Gel Casting: A Complete Guide to Stacking and Resolving Layers for Precision Protein Separation
This comprehensive guide details the science and methodology behind casting reliable SDS-PAGE gels with stacking and resolving layers, a foundational technique for researchers, scientists, and drug development professionals.
Mastering SDS-PAGE Gel Casting: A Complete Guide to Stacking and Resolving Layers for Precision Protein Separation
Abstract
This comprehensive guide details the science and methodology behind casting reliable SDS-PAGE gels with stacking and resolving layers, a foundational technique for researchers, scientists, and drug development professionals. It explores the core principles of discontinuous gel systems, provides a step-by-step casting protocol, and delivers extensive troubleshooting for common issues like smeared bands and poor separation. The content also examines the technique's validation across diverse applications—from food science to biopharmaceuticals—and discusses emerging trends, including automation and capillary electrophoresis, equipping practitioners to achieve reproducible, high-resolution protein analysis.
The Science of Discontinuous Gels: Unraveling the Principles of SDS-PAGE
Sodium Dodecyl Sulfate-Polyacrylamide Gel Electrophoresis (SDS-PAGE) is a foundational technique in biochemistry and molecular biology for separating proteins based on their molecular weight [1]. The remarkable resolution of this method is largely attributable to its discontinuous buffer system, which employs two distinct polyacrylamide gel layers—a stacking gel and a resolving gel [2] [3]. This architectural design is crucial for concentrating protein samples into sharp, narrow bands before they begin to separate by size, thereby achieving a clarity that would be impossible in a single-layer gel system [3]. Within the context of advanced research, such as casting gels for thesis work, a deep understanding of this two-layer mechanism is essential for optimizing protein separation, whether for routine analysis or for challenging applications like detecting low-abundance proteins in drug development.
The Core Principle: A Discontinuous System for Superior Resolution
The power of SDS-PAGE lies in its use of multiple points of discontinuity—in gel pore size, pH, and buffer ion chemistry—all working in concert to concentrate and separate proteins [3].
- Charge Uniformity: The anionic detergent SDS binds extensively to proteins, masking their intrinsic charges and conferring a uniform negative charge. This ensures that protein migration depends solely on molecular size, not on native charge [1].
- Molecular Sieving: The polyacrylamide gel matrix, formed from acrylamide and the cross-linker bisacrylamide, creates a three-dimensional mesh. Proteins are forced to migrate through the pores of this mesh, with smaller proteins moving faster than larger ones [2] [1].
- The Discontinuous Buffer System: This is the cornerstone of the technique. The system uses:
The key to the stacking process is the behavior of the glycine ions in the running buffer. At the pH of the stacking gel (pH 6.8), glycine exists predominantly as a zwitterion with no net mobility [2]. In contrast, the chloride ions (Cl⁻) from the Tris-HCl in the gel and the protein-SDS complexes are highly mobile. This creates a steep voltage gradient between the fast-moving chloride ions (leading ions) and the slow-moving glycine zwitterions (trailing ions). The protein-SDS complexes, with mobilities intermediate to these two fronts, are compressed into an extremely narrow zone as they are "herded" through the stacking gel [2]. When this ion front reaches the resolving gel at pH 8.8, the glycine loses a proton, becomes a fully mobile glycinate anion, and rapidly overtakes the proteins. Freed from the voltage gradient, the proteins are deposited as a tight band at the top of the resolving gel, where they begin to separate based solely on their molecular weight [2] [4].
Table 1: Composition and Function of the Two Gel Layers in a Discontinuous SDS-PAGE System
| Gel Layer | Typical Acrylamide Concentration | pH | Primary Function | Key Chemical Environment |
|---|---|---|---|---|
| Stacking Gel | 5% [5] | 6.8 [2] [3] | Concentrate protein samples into a sharp, narrow band | Low pH causes glycine to be a slow-moving zwitterion [2] |
| Resolving Gel | 8-15% (varies by target protein size) [1] | 8.8 [2] [3] | Separate proteins based on molecular weight | High pH causes glycine to become a fast-moving anion [2] |
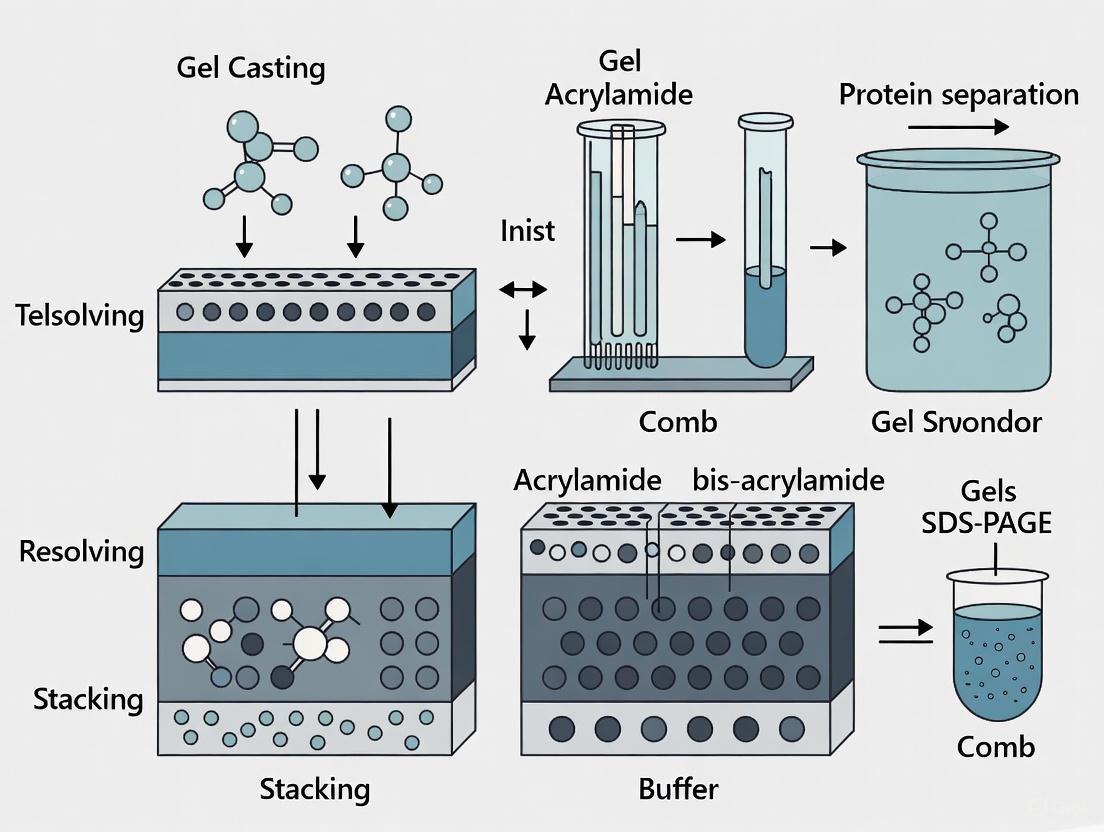
Diagram: The Two-Layer SDS-PAGE Mechanism for Protein Stacking and Separation.
The Scientist's Toolkit: Essential Reagents for SDS-PAGE
A successful SDS-PAGE experiment requires a precise set of reagents, each with a critical function in protein denaturation, gel polymerization, and electrophoretic separation.
Table 2: Key Research Reagent Solutions for SDS-PAGE Gel Casting and Electrophoresis
| Reagent | Function | Typical Working Concentration/Formula |
|---|---|---|
| Acrylamide/Bis-acrylamide | Forms the porous gel matrix for molecular sieving [1] | 30% stock solution; ratio of acrylamide to bisacrylamide determines pore size [3] [6] |
| SDS (Sodium Dodecyl Sulfate) | Denatures proteins and confers uniform negative charge [2] [1] | 10% stock; included in sample and running buffers [3] |
| Tris-HCl Buffer | Provides buffering capacity at specific pH for stacking (pH 6.8) and resolving (pH 8.8) gels [2] [3] | 1.0 M (stacking), 1.5 M (resolving) [3] |
| Ammonium Persulfate (APS) & TEMED | Catalyzes the free-radical polymerization of acrylamide [2] [1] | 10% APS (freshly prepared) and TEMED added immediately before casting [3] [5] |
| Tris-Glycine Running Buffer | Provides conducting ions for electrophoresis; glycine's charge state is key to stacking [2] | 25 mM Tris, 250 mM glycine, 0.1% SDS, pH 8.3 [3] |
| Laemmli Sample Buffer | Denatures proteins, adds charge and density for loading [2] | Contains Tris-HCl, SDS, glycerol, Bromophenol Blue, and β-mercaptoethanol [2] |
Detailed Protocol: Casting a Two-Layer SDS-PAGE Gel
The following protocol, adapted from standard laboratory methods, details the casting of a discontinuous SDS-PAGE gel [5].
Materials and Reagent Preparation
- Glass plates, spacers, and casting frame
- 30% Acrylamide/Bis-acrylamide stock solution (29:1 ratio) [3]
- Resolving Gel Buffer: 1.5 M Tris-HCl, pH 8.8 [3]
- Stacking Gel Buffer: 1.0 M Tris-HCl, pH 6.8 [3]
- 10% (w/v) Sodium Dodecyl Sulfate (SDS)
- 10% (w/v) Ammonium Persulfate (APS): Prepare fresh weekly [3]
- TEMED (N,N,N',N'-Tetramethylethylenediamine)
- Water-saturated isobutanol or absolute ethanol [5]
- Sample & Running Buffer: Tris-Glycine-SDS, pH 8.3 [3]
Step-by-Step Gel Casting Procedure
Assemble the Gel Cassette: Clean and dry the glass plates and spacers. Assemble them according to the manufacturer's instructions into a leak-proof cassette.
Prepare and Pour the Resolving Gel:
- For a 15% resolving gel, mix the components in Table 3 in a beaker. Add TEMED last, as it will initiate polymerization immediately [5].
- Use a Pasteur pipette to quickly transfer the solution into the gap between the glass plates, filling to about 3/4 inch below the top of the short plate.
- Gently overlay the gel solution with a layer of water-saturated isobutanol or absolute ethanol. This excludes oxygen and ensures a flat, uniform gel surface [5].
- Allow the gel to polymerize completely (typically 20-30 minutes). Polymerization is indicated by a sharp refractive line between the gel and the overlay.
Prepare and Pour the Stacking Gel:
- Once the resolving gel has set, pour off the overlay liquid. Rinse the top of the gel several times with deionized water to remove any unpolymerized acrylamide and residual overlay. Blot away excess liquid with filter paper.
- For a 5% stacking gel, mix the components in Table 3. Add TEMED last.
- Pipette the stacking gel solution directly onto the polymerized resolving gel. Immediately insert a clean well-forming comb, being careful to avoid air bubbles.
- Allow the stacking gel to polymerize for 15-20 minutes.
Table 3: Example Formulations for a 10 mL Resolving Gel and 3 mL Stacking Gel
| Component | 15% Resolving Gel (10 mL) | 5% Stacking Gel (3 mL) |
|---|---|---|
| Deionized Water | 2.3 mL | 2.1 mL |
| 30% Acrylamide/Bis | 5.0 mL | 0.5 mL |
| Resolving Gel Buffer (1.5 M Tris, pH 8.8) | 2.5 mL | - |
| Stacking Gel Buffer (1.0 M Tris, pH 6.8) | - | 0.38 mL |
| 10% SDS | 0.1 mL | 0.03 mL |
| 10% APS | 0.1 mL | 0.03 mL |
| TEMED | 0.004 mL | 0.003 mL |
Electrophoresis and Protein Detection
Sample Preparation: Mix protein samples with Laemmli sample buffer. Heat at 95-100°C for 5-10 minutes to fully denature proteins [5]. Centrifuge briefly to collect condensation.
Gel Running:
- Place the polymerized gel cassette into the electrophoresis tank.
- Fill the inner and outer chambers with Tris-glycine running buffer.
- Remove the comb carefully and flush the wells with running buffer to remove any unpolymerized acrylamide.
- Load equal volumes of prepared samples and molecular weight markers into the wells.
- Connect the apparatus to the power supply. Run the gel at a constant voltage of 80V until the dye front enters the resolving gel, then increase to 120V until the dye front reaches the bottom of the gel [5].
Protein Detection:
- After electrophoresis, proteins can be visualized by staining. Coomassie Brilliant Blue staining is common and detects ~0.2 μg of protein per band, while silver staining is more sensitive, detecting as little as 5 ng of protein [5].
Optimization and Advanced Considerations
For thesis research and drug development, optimizing the SDS-PAGE protocol is critical for challenging samples.
- Gel Concentration Selection: The optimal acrylamide percentage in the resolving gel depends on the molecular weight of the target proteins. Use lower percentages for high molecular weight proteins and higher percentages for low molecular weight proteins [6].
Table 4: Optimizing Resolving Gel Concentration for Target Protein Size
| Target Protein MW Range | Recommended Gel Concentration |
|---|---|
| 100 - 600 kDa | 4 - 7% |
| 50 - 300 kDa | 7 - 10% |
| 10 - 200 kDa | 12% |
| 3 - 100 kDa | 15% |
- Innovations in Gel Casting: Recent methodological developments include time-saving one-step casting procedures where the stacking and resolving gels are poured simultaneously. A recent innovation adds dye to the stacking gel component, creating a clear visual boundary that allows researchers to confirm successful gel preparation prior to electrophoresis [7]. This "Mako OT method" reportedly halves preparation time while maintaining performance comparable to the traditional Laemmli method for both SDS-PAGE and western blotting [7].
The two-layer system of SDS-PAGE is a masterpiece of biochemical engineering. Its discontinuous design, leveraging differences in pH, gel porosity, and ion mobility, is fundamental to its high resolution. The stacking gel's ability to concentrate a dilute protein sample into a razor-thin band before entry into the resolving gel is the pivotal step that enables clear, distinct separation. For researchers engaged in thesis work or drug development, a deep and practical understanding of this principle is not merely academic. It is the foundation for troubleshooting, optimizing separations for novel proteins, and generating reliable, publication-quality data that drives scientific discovery forward.
Within the framework of thesis research on casting SDS-PAGE gels with resolving and stacking layers, understanding the fundamental chemistry governing protein separation is paramount. Sodium dodecyl sulfate-polyacrylamide gel electrophoresis (SDS-PAGE) is a foundational technique in biochemistry, molecular biology, and drug development for separating complex protein mixtures based on molecular weight [8] [9]. The reliability of this method hinges on the precise interplay of three key chemical components: acrylamide, the monomer that forms the gel matrix; bisacrylamide, the cross-linking agent that creates the sieving network; and SDS, the ionic detergent that denatures proteins and confers uniform charge [9] [10]. This application note details the specific roles, optimal formulations, and practical protocols for employing these reagents to achieve high-resolution protein separation, providing a solid chemical foundation for advanced research.
The Chemical Roles in Separation
Sodium Dodecyl Sulfate (SDS): The Universal Denaturant
SDS is an amphipathic, anionic detergent with a hydrophobic 12-carbon tail and a hydrophilic sulfate head group [9]. Its primary role is to dismantle the native structure of proteins and impart a uniform negative charge.
- Mechanism of Denaturation: SDS binds to the hydrophobic regions of proteins via its lipid-like tail, disrupting hydrogen bonds and van der Waals forces that maintain secondary and tertiary structures [9] [10]. This transforms globular proteins into linear polypeptide chains.
- Charge Conferral: SDS binds to proteins at a nearly constant ratio of approximately 1.4 g SDS per 1 g of protein [9] [10]. This equates to about one SDS molecule for every two amino acids, masking the protein's intrinsic charge [9]. The resulting SDS-polypeptide complexes all have a similar charge-to-mass ratio [10].
- Implications for Separation: Once treated with SDS and a reducing agent (e.g., β-mercaptoethanol or DTT) to break disulfide bonds, proteins migrate through the gel based almost exclusively on polypeptide chain length, not on their native charge or shape [10] [11].
Acrylamide and Bisacrylamide: The Molecular Sieve
The polyacrylamide gel acts as a molecular sieve through which the SDS-coated proteins travel. Its pore size, and thus its sieving properties, is determined by the concentrations of acrylamide and bisacrylamide.
- Polymerization Chemistry: Acrylamide monomers polymerize into long linear chains in a reaction catalyzed by ammonium persulfate (APS) and accelerated by TEMED (N,N,N',N'-Tetramethylethylenediamine) [12] [10]. APS provides the free radicals to initiate polymerization, while TEMED acts as a catalyst to speed up the formation of these radicals [12].
- Cross-Linking Function: Bisacrylamide (N,N'-methylenebisacrylamide) is a cross-linker that connects individual polyacrylamide chains to form a three-dimensional mesh-like network [10]. The ratio of bisacrylamide to acrylamide, typically between 1:20 to 1:50, critically influences the rigidity and pore size of the final gel [12] [10].
- Pore Size Control: The effective pore size is inversely related to the total acrylamide percentage. Low-percentage gels (e.g., 5-8%) have larger pores and are used to resolve high molecular weight proteins, while high-percentage gels (e.g., 15-20%) have smaller pores for separating low molecular weight proteins [10] [13].
Table 1: Recommended Acrylamide Concentrations for Resolving Proteins of Different Sizes
| Protein Size (kDa) | Recommended Gel Percentage (%) |
|---|---|
| 4 - 40 | 20 |
| 12 - 45 | 15 |
| 10 - 70 | 12.5 |
| 15 - 100 | 10 |
| 25 - 200 | 8 |
| >200 | 5 |
Data compiled from [14] and [13].
Essential Reagent Solutions
The successful execution of SDS-PAGE relies on a set of precisely formulated reagent solutions. The table below catalogues the key materials required for casting and running discontinuous gels.
Table 2: Research Reagent Solutions for SDS-PAGE Gel Casting
| Reagent/Solution | Function & Composition |
|---|---|
| Acrylamide/Bisacrylamide Mix | Pre-mixed solution (e.g., 30% w/v) of acrylamide and bisacrylamide at a fixed cross-linker ratio (commonly 37.5:1 or 29.2:0.8). Forms the backbone of the polyacrylamide gel matrix [14] [13]. |
| Resolving Gel Buffer | High-pH buffer (e.g., 1.5 M Tris-HCl, pH 8.8) that establishes the alkaline environment necessary for the separating function of the resolving gel [12] [15]. |
| Stacking Gel Buffer | Lower-pH buffer (e.g., 0.5 M Tris-HCl, pH 6.8) that creates the conditions for protein stacking at the start of electrophoresis [12] [15]. |
| SDS Solution (10%) | Ionic detergent added to both gel solutions and running buffer to maintain protein denaturation and charge uniformity during electrophoresis [14] [12]. |
| Ammonium Persulfate (APS) | Radical initiator (typically 10% w/v solution) that, along with TEMED, catalyzes the polymerization of acrylamide and bisacrylamide [12] [10]. |
| TEMED | Free radical stabilizer that accelerates the polymerization reaction by promoting APS decomposition. It is added last to the gel solution [12] [10]. |
| Electrophoresis Running Buffer | Conductive buffer containing Tris, glycine, and SDS (e.g., Tris-Glycine-SDS buffer) that carries the current and establishes the ionic conditions for stacking and separation [9] [15]. |
| Sample Buffer (Laemmli Buffer) | Contains SDS, glycerol, a reducing agent, tracking dye, and Tris buffer. Denatures proteins, provides density for loading, and allows visual tracking of migration [14] [15]. |
Detailed Experimental Protocol for Gel Casting
This section provides a step-by-step methodology for preparing discontinuous SDS-PAGE gels, a critical skill for thesis research requiring customized separation conditions.
Gel Formulation and Calculation
The following table provides a standard recipe for preparing a 10% resolving gel and a 4% stacking gel, suitable for separating proteins in the 15-100 kDa range. These volumes are sufficient for casting one mini-gel (e.g., 8 x 8 cm) with a thickness of 0.75 mm [14] [13].
Table 3: Standard SDS-PAGE Gel Recipes for a 10% Resolving Gel
| Component | 10% Resolving Gel (10 mL) | 4% Stacking Gel (5 mL) |
|---|---|---|
| dH₂O | 4.0 mL | 3.05 mL |
| 1.5 M Tris-HCl (pH 8.8) | 2.5 mL | - |
| 0.5 M Tris-HCl (pH 6.8) | - | 1.25 mL |
| 30% Acrylamide/Bis Mix | 3.3 mL | 0.65 mL |
| 10% SDS | 100 µL | 50 µL |
| 10% APS | 50 µL | 25 µL |
| TEMED | 5 µL | 10 µL |
Formulations adapted from [13] and [12].
Step-by-Step Casting Procedure
- Assemble the Gel Cassette: Thoroughly clean the glass plates with ethanol or acetone and assemble the gel cassette using spacers to form a water-tight seal [13] [11].
- Prepare and Pour the Resolving Gel: In a beaker, mix the components for the resolving gel in the order listed in Table 3, adding APS and TEMED last. Mix gently and pour the solution immediately into the gel cassette, leaving space for the stacking gel (~2.5 cm from the top) [14].
- Overlay and Polymerize: Carefully overlay the resolving gel solution with a thin layer of water-saturated butanol or isopropanol to prevent oxygen exposure, which inhibits polymerization. Allow the gel to polymerize completely for 20-45 minutes [14] [12].
- Prepare and Pour the Stacking Gel: Pour off the overlay liquid and rinse the top of the polymerized gel with dH₂O. Wick away any residual liquid with filter paper. Mix the stacking gel components, add APS and TEMED last, and pour it directly onto the resolving gel [14] [11].
- Insert the Comb and Complete Polymerization: Immediately insert a clean sample comb into the stacking gel, avoiding air bubbles. Allow the stacking gel to polymerize for 20-30 minutes. Once set, the gel can be used immediately or wrapped in moist tissue and plastic film and stored at 4°C for several weeks [14].
Workflow and Chemical Pathway Visualizations
SDS-PAGE Chemical Separation Workflow
The following diagram illustrates the key chemical processes and workflow involved in SDS-PAGE, from sample preparation to final separation.
Polyacrylamide Gel Polymerization Chemistry
This diagram outlines the chemical reaction between acrylamide and bisacrylamide that forms the cross-linked polyacrylamide gel matrix.
Within the framework of research on casting SDS-PAGE gels with resolving and stacking layers, understanding the stacking gel mechanism is paramount for achieving high-resolution protein separation. The discontinuous buffer system, a cornerstone of the Laemmli method, utilizes precise manipulations of pH and the chemistry of glycine to focus protein samples into sharp bands before they enter the resolving gel [16]. This focusing effect is critical for the clarity and resolution of the final result, ensuring that proteins migrate as tight bands based primarily on their molecular weight [17]. This application note details the underlying principles and provides a standardized protocol for implementing this essential technique.
The Scientific Principle of the Stacking Gel
The core function of the stacking gel is to concentrate protein samples from a volume that can be up to a centimeter deep in the well into an extremely narrow disc before they begin separation in the resolving gel [17]. Without this step, proteins would enter the resolving gel at different times, resulting in smeared and poorly resolved bands [18].
The Key Players: A Discontinuous System
The mechanism relies on a discontinuous system involving three different pH environments and two different types of ions [3]:
- Stacking Gel: Buffered with Tris-HCl at pH 6.8 [16] [3].
- Resolving Gel: Buffered with Tris-HCl at pH 8.8 [16] [3].
- Electrode (Running) Buffer: Buffered with Tris-Glycine at pH 8.3 [16] [3].
The Central Role of Glycine and pH
Glycine, a component of the running buffer, is the key actor whose behavior is controlled by pH. It is a weak acid that can exist in different charge states depending on the pH of its environment [17]:
- At pH 8.3 (electrode buffer), glycine is predominantly in the glycinate anion form, carrying a negative charge [18].
- Upon entering the pH 6.8 environment of the stacking gel, the glycine molecules encounter a pH close to their isoelectric point (pI ~5.97) [3]. This causes a majority of them to enter a zwitterionic state with no net charge [18] [16].
This change in glycine's charge state is the fundamental trigger for the stacking phenomenon.
The Mechanism of Ion Fronts and Voltage Gradients
When the electric current is applied, the highly mobile chloride ions (Cl⁻) from the Tris-HCl in the gel move rapidly toward the anode [18] [16]. The now mostly neutral glycine zwitterions move much more slowly [17]. This creates a dissociation between the two ion fronts, setting up a narrow zone with a steep voltage gradient between the fast-moving Cl⁻ (leading ions) and the slow-moving glycine (trailing ions) [18] [16].
The negatively charged SDS-coated proteins possess an electrophoretic mobility that is intermediate between the Cl⁻ and glycine zwitterions. Consequently, they are swept into and concentrated within this narrow, high-voltage gradient zone, forming a tight stack [18] [17]. This procession continues through the stacking gel until it reaches the resolving gel.
The Transition into the Resolving Gel
When the stacked ion front hits the pH 8.8 environment of the resolving gel, the conditions change dramatically. The glycine molecules lose protons and become predominantly negatively charged glycinate anions once more [18]. Their mobility increases rapidly, and they speed past the stacked proteins, dissipating the steep voltage gradient [16].
Simultaneously, the proteins enter a gel with a higher % acrylamide, which creates a sieving effect. Freed from the focusing voltage gradient but now hindered by the gel matrix, the proteins begin to separate based solely on their molecular weight [17]. The entire process, from sample application to final separation, is visualized in the workflow below.
Experimental Workflow Diagram
The following diagram illustrates the complete experimental workflow for SDS-PAGE gel casting and the key ionic events during electrophoresis.
Quantitative Data for SDS-PAGE Optimization
Gel Percentage and Protein Separation Range
The percentage of acrylamide in the resolving gel determines the size range of proteins that can be effectively separated. The table below provides a standard guide for selecting the appropriate gel composition based on the molecular weight of your target protein.
Table 1: Recommended Acrylamide Percentage for Resolving Proteins of Different Sizes
| Protein Size (kDa) | Recommended Acrylamide Percentage (%) | Remarks |
|---|---|---|
| 4 - 40 | 20 | Ideal for resolving very small proteins and peptides. |
| 12 - 45 | 15 | Suitable for low molecular weight proteins. |
| 10 - 70 | 12.5 | A standard percentage for many common proteins. |
| 15 - 100 | 10 | A versatile percentage for a broad range. |
| 25 - 200 | 8 | Best for high molecular weight proteins. |
| >200 | 4 - 6 | Requires low percentage gels for large protein complexes. |
Standard SDS-PAGE Gel Recipes
The following tables provide standardized recipes for casting discontinuous Tris-Glycine SDS-PAGE gels. These volumes are suitable for preparing four 0.75-mm thick mini-gels. Adjust volumes proportionally for gels of different thicknesses [14].
Table 2: Recipe for Resolving Gel (Various Percentages)
| Component | 8% Gel | 10% Gel | 12% Gel | 15% Gel |
|---|---|---|---|---|
| 30% Acrylamide Mix | 4.0 mL | 5.0 mL | 6.0 mL | 7.5 mL |
| 1.5 M Tris-HCl (pH 8.8) | 3.75 mL | 3.75 mL | 3.75 mL | 3.75 mL |
| 10% SDS | 150 µL | 150 µL | 150 µL | 150 µL |
| H₂O | 7.0 mL | 6.0 mL | 5.0 mL | 3.5 mL |
| 10% APS | 75 µL | 75 µL | 75 µL | 75 µL |
| TEMED | 7.5 µL | 7.5 µL | 7.5 µL | 7.5 µL |
| Total Volume | 15 mL | 15 mL | 15 mL | 15 mL |
Table 3: Recipe for Stacking Gel (4%)
| Component | Volume for 4 Gels |
|---|---|
| 30% Acrylamide Mix | 1.98 mL |
| 1.0 M Tris-HCl (pH 6.8) | 3.78 mL |
| 10% SDS | 150 µL |
| H₂O | 9.0 mL |
| 10% APS | 75 µL |
| TEMED | 15 µL |
| Total Volume | 15 mL |
Recipes adapted from [14] [10].
Detailed Protocol for Casting and Running Discontinuous SDS-PAGE Gels
Gel Casting Protocol
- Assemble Casting Apparatus: Clean the glass plates and spacers thoroughly. Assemble the gel cassette according to the manufacturer's instructions, ensuring a tight seal to prevent leaks [14] [20].
- Prepare Resolving Gel: In a beaker or flask, mix the components for the resolving gel as detailed in Table 2. Add the 10% Ammonium Persulfate (APS) and TEMED last, as these catalysts initiate polymerization. Mix gently to avoid introducing air bubbles [14] [21].
- Pour Resolving Gel: Immediately pour the resolving gel mixture into the assembled cassette, leaving space for the stacking gel (approximately 2.5 cm from the top) [14] [21].
- Overlay with Solvent: Carefully overlay the resolving gel with a thin layer of water-saturated isopropanol or n-butanol, or simply deionized water. This excludes oxygen, which inhibits polymerization, and results in a flat, uniform gel surface [20] [16].
- Polymerize: Allow the gel to polymerize completely at room temperature for 20-45 minutes. A distinct schlieren line will appear between the gel and the overlay solution once polymerization is complete [20] [21].
- Prepare and Pour Stacking Gel: Pour off the overlay liquid and rinse the top of the gel with deionized water. Wick away any residual liquid with a lint-free wipe or filter paper [14]. In a separate container, mix the stacking gel components from Table 3, again adding APS and TEMED last. Pour the stacking gel solution directly onto the polymerized resolving gel and immediately insert a clean comb, avoiding air bubbles [14] [20].
- Polymerize Stacking Gel: Allow the stacking gel to polymerize for 20-30 minutes at room temperature [20]. Once set, carefully remove the comb and rinse the wells with running buffer or deionized water to remove any unpolymerized acrylamide.
Sample Preparation and Electrophoresis
- Prepare Protein Samples: Dilute your protein sample with an equal volume of 2X Laemmli sample buffer [19]. A standard 1X sample buffer contains Tris-HCl (pH 6.8), SDS, glycerol, bromophenol blue, and a reducing agent like beta-mercaptoethanol (BME) or DTT [18] [16].
- Denature Samples: Heat the samples at 95-100°C for 5-10 minutes to ensure complete denaturation and linearization of the proteins [20] [21]. Centrifuge briefly to collect condensation.
- Load and Run Gel: Assemble the gel cassette into the electrophoresis tank and fill the chambers with running buffer (25 mM Tris, 192 mM glycine, 0.1% SDS, pH 8.3) [19]. Load equal amounts of protein (10-50 µg for cell lysates) and a protein molecular weight marker into the wells [19]. Connect the power supply and run the gel at a constant voltage. A standard setting is 80-100V until the dye front enters the resolving gel, then 150-200V until the dye front reaches the bottom of the gel [21].
The Scientist's Toolkit: Essential Reagents and Materials
Table 4: Key Research Reagent Solutions for SDS-PAGE
| Reagent/Material | Function and Rationale |
|---|---|
| Acrylamide/Bis-acrylamide (30:1 or 37.5:1) | Forms the polyacrylamide gel matrix. The ratio and total concentration determine pore size, which sieves proteins during separation [14] [10]. |
| Tris-HCl Buffer (pH 8.8 & 6.8) | The resolving gel (pH 8.8) and stacking gel (pH 6.8) buffers create the discontinuous pH system essential for the stacking mechanism [16] [3]. |
| Sodium Dodecyl Sulfate (SDS) | An ionic detergent that denatures proteins, linearizes them, and confers a uniform negative charge, allowing separation primarily by size [18] [10]. |
| Glycine | A key component of the running buffer. Its pH-dependent charge state (zwitterion vs. anion) is the basis for the stacking effect in the discontinuous system [18] [17]. |
| Ammonium Persulfate (APS) & TEMED | Polymerization catalysts. APS provides free radicals, and TEMED accelerates the polymerization reaction of acrylamide and bis-acrylamide [10] [3]. |
| Laemmli Sample Buffer | Contains SDS for denaturation, glycerol for sample density, a reducing agent to break disulfide bonds, and a tracking dye to monitor migration [18] [16]. |
| Tris-Glycine Running Buffer | Conducts current and provides the glycine and pH environment (pH 8.3) necessary for the initial formation of ion fronts in the stacking gel [18] [19]. |
Within the framework of thesis research focused on casting SDS-PAGE gels with resolving and stacking layers, understanding the precise function of the resolving gel is paramount. This application note details the critical role of the resolving gel in achieving molecular weight-based separation of proteins through molecular sieving. In SDS-PAGE, the stacking gel concentrates samples into sharp bands, but it is the resolving gel that performs the actual size-based separation, a process fundamental to protein analysis in biochemical research and drug development [17] [22]. The resolving gel achieves this through its polyacrylamide matrix, which creates a three-dimensional network with tunable pore sizes that act as a molecular sieve [23] [24]. This document provides a comprehensive overview of the principles, optimization parameters, and detailed protocols for leveraging the resolving gel's function to obtain high-quality, reproducible data.
Principles of Molecular Sieving in the Resolving Gel
The Polyacrylamide Matrix as a Molecular Sieve
The resolving gel, also known as the separating gel, is formed through the polymerization of acrylamide and a cross-linker, most commonly N,N'-methylenebisacrylamide (Bis) [23] [1]. This reaction, catalyzed by ammonium persulfate (APS) and N,N,N',N'-tetramethylethylenediamine (TEMED), creates a porous gel matrix [23] [10]. The pore size within this network is determined by the concentration of acrylamide and the degree of cross-linking [24] [10]. When an electric field is applied, linearized and negatively charged protein-SDS complexes migrate through this meshwork. Smaller proteins navigate the pores more easily and migrate faster, while larger proteins are impeded, resulting in separation strictly by molecular size [24] [10] [1].
The Discontinuous Buffer System
SDS-PAGE employs a discontinuous buffer system that utilizes a stacking gel (pH ~6.8) layered atop the resolving gel (pH ~8.8) [17] [24]. The key to this system is the differential mobility of glycine ions in the running buffer at different pH levels. In the stacking gel, glycine exists predominantly as a zwitterion with low mobility, creating a sharp voltage gradient that concentrates all protein samples into a thin, unified band before they enter the resolving gel [17] [25]. Upon reaching the resolving gel at pH 8.8, glycine gains a strong negative charge, accelerates, and overtakes the proteins. This deposits the proteins as a tight band at the top of the resolving gel, ensuring they begin their size-based separation simultaneously from a unified starting point, which is critical for high-resolution separation [17] [25].
Optimizing Pore Size for Target Protein Separation
Acrylamide Concentration and Pore Size
The resolving power of the gel is directly controlled by its acrylamide concentration. Higher percentages of acrylamide create a denser matrix with smaller pores, ideal for resolving smaller proteins. Conversely, lower percentages create larger pores better suited for separating larger proteins [17] [10]. The optimal acrylamide concentration must be selected based on the molecular weights of the target proteins to achieve the best possible separation.
Table 1: Recommended Acrylamide Concentrations for Protein Separation
| Acrylamide Percentage (%) | Effective Separation Range (kDa) | Primary Application |
|---|---|---|
| 7-8% | 25 - 200 [17] | Separation of very high molecular weight proteins. |
| 10% | 20 - 300 [17] | Standard separation for a broad range of proteins. |
| 12% | 10 - 200 [17] | Standard separation for a broad range of proteins. |
| 12.5% | 10 - 70 [14] | Optimal for mid-range proteins. |
| 15% | 3 - 100 [17] [14] | Resolution of smaller polypeptides. |
Gradient Gels for Enhanced Resolution
For complex protein mixtures with a wide molecular weight distribution, a gradient resolving gel offers superior performance. Gradient gels are cast with a continuously varying acrylamide concentration, typically increasing from top to bottom (e.g., 5% to 20%) [10]. This creates a pore size gradient that allows high-resolution separation across an exceptionally broad mass range. As proteins migrate, they progressively encounter smaller pores, which sharpens the protein bands and improves resolution compared to a single-concentration gel [10].
Experimental Protocol: Casting and Running the Resolving Gel
Reagent Preparation
Table 2: Research Reagent Solutions for Resolving Gel Casting
| Reagent/Solution | Function | Key Considerations |
|---|---|---|
| Acrylamide/Bis Solution (30%) | Forms the backbone of the polyacrylamide matrix. The Bis-acrylamide ratio (typically 37.5:1) determines cross-linking [14]. | Neurotoxic. Handle with gloves in a fume hood [23]. |
| Tris-HCl Buffer (1.5 M, pH 8.8) | Buffers the resolving gel at the optimal pH for separation and provides chloride ions (Cl⁻) for the discontinuous buffer system [23] [25]. | pH accuracy is critical for proper glycine ion function and separation. |
| Sodium Dodecyl Sulfate (SDS), 10% | Anionic detergent that ensures proteins remain denatured and uniformly charged during electrophoresis [23] [24]. | |
| Ammonium Persulfate (APS), 10% | Initiator of the acrylamide polymerization reaction. | Prepare fresh weekly or aliquot and store at -20°C for longer activity [23]. |
| TEMED | Catalyst that accelerates the polymerization reaction by generating free radicals from APS [23] [10]. | |
| Isopropanol (or water-saturated butanol) | Layered on top of the poured resolving gel mixture to exclude oxygen, which inhibits polymerization, and to create a flat gel surface [23] [14]. |
Step-by-Step Casting Protocol for the Resolving Gel
- Gel Cassette Assembly: Clean and assemble the glass plates according to the manufacturer's instructions for the chosen mini-gel system (e.g., Bio-Rad Mini-PROTEAN) to form a leak-proof cassette [14].
- Resolving Gel Formulation: For a 10% resolving gel, combine the following reagents in a beaker in this order to avoid premature polymerization: 3.3 mL of 30% Acrylamide/Bis mix, 2.5 mL of 1.5 M Tris-HCl (pH 8.8), 100 µL of 10% SDS, and 3.9 mL deionized water [23]. Mix gently.
- Polymerization Initiation: Add 50 µL of fresh 10% APS and 5 µL TEMED to the mixture. Swirl gently to combine. Note: Polymerization will begin immediately.
- Gel Casting and Pouring: Using a pipette, immediately transfer the gel solution into the gap between the assembled glass plates until it reaches about 2/3 of the total height, leaving space for the stacking gel.
- Overlaying and Polymerization: Carefully overlay the gel solution with isopropanol or water-saturated butanol to create a flat, even interface. Allow the gel to polymerize completely for 20-30 minutes at room temperature. A distinct schlieren line will appear between the gel and the overlay once polymerization is complete [23].
- Preparing the Stacking Gel: After polymerization, pour off the overlay. Rinse the top of the resolving gel with deionized water to remove any residual isopropanol and thoroughly wick away the water with a lint-free tissue [14].
- Stacking Gel Casting: Prepare the stacking gel solution (e.g., 0.83 mL 30% Acrylamide/Bis, 0.63 mL 1.0 M Tris-HCl pH 6.8, 3.4 mL water, 50 µL 10% SDS). Add 25 µL of 10% APS and 5 µL TEMED, mix, and pour on top of the resolving gel. Immediately insert a clean comb without introducing bubbles. Polymerize for 15-20 minutes [23].
- Gel Storage: Once polymerized, gels can be used immediately or wrapped in moist tissue paper, sealed in plastic wrap, and stored at 4°C for up to one week [23] [14].
Electrophoresis and Visualization
- Sample Preparation: Mix protein samples with 2x Laemmli buffer (containing SDS and a reducing agent like DTT or β-mercaptoethanol). Heat denature at 95°C for 5 minutes to ensure complete linearization [23] [24].
- Electrophoresis Setup: Place the gel cassette into the electrophoresis chamber and fill the inner and outer chambers with Tris-Glycine-SDS running buffer (pH 8.3) [23].
- Sample Loading and Run: Load 20-50 µg of protein per well for Coomassie staining, or 1-10 µg for silver staining, alongside a molecular weight marker [23]. Run the gel at a constant voltage: 80 V through the stacking gel, then increase to 120 V once the dye front enters the resolving gel. Continue until the dye front reaches the bottom of the gel [23].
- Protein Visualization: After electrophoresis, proteins can be visualized using stains such as Coomassie Brilliant Blue or the more sensitive silver stain, following standard protocols of fixation, staining, and destaining [23] [24].
Workflow and Separation Mechanism
The following diagram illustrates the key stages of protein separation within the SDS-PAGE system, highlighting the distinct roles of the stacking and resolving gels.
Troubleshooting and Optimization
Achieving sharp, well-resolved bands requires careful optimization. The table below outlines common issues related to the resolving gel and their solutions.
Table 3: Troubleshooting Common Resolving Gel Issues
| Issue | Potential Cause | Solution |
|---|---|---|
| Smearing or Streaking Bands | Incomplete protein denaturation; protein degradation. | Extend boiling time in sample buffer; add fresh protease inhibitors to samples [23]. |
| Aberrant Migration (e.g., curved bands) | Uneven SDS binding; improper buffer pH. | Use fresh DTT and sample buffer; verify pH of resolving gel buffer (should be 8.8) [23]. |
| Poor Resolution | Incorrect acrylamide percentage; excessive voltage causing overheating. | Match gel percentage to target protein size; run gel at lower voltage or with cooling [23] [17]. |
| Failed Polymerization | Degraded APS or TEMED; oxygen inhibition. | Prepare fresh APS solution; ensure no leaks in gel cassette during pouring [23]. |
The resolving gel is the cornerstone of the SDS-PAGE technique, whose primary function of molecular sieving enables the reliable separation of proteins by molecular weight. A deep understanding of how polyacrylamide concentration dictates pore size and resolution is essential for researchers to optimize this powerful method for their specific applications, from routine protein analysis to critical quality control in biopharmaceutical development. By following the detailed protocols and optimization strategies outlined in this application note, scientists can consistently cast and utilize high-performance resolving gels, thereby generating robust and reproducible data for their research.
Within the methodology of casting SDS-PAGE gels for the separation of proteins by molecular weight, the polymerization process is a critical biochemical step that transforms liquid monomer solutions into a solid, porous gel matrix. This process is entirely dependent on a pair of key chemical initiators: Tetramethylethylenediamine (TEMED) and Ammonium Persulfate (APS) [10]. The function of this gel matrix is to serve as a molecular sieve, and its precise polymeric structure is fundamental to the resolution and reproducibility of the electrophoretic separation [24]. Within the context of developing robust protocols for creating discontinuous gel systems with both resolving and stacking layers, a thorough understanding of the polymerization mechanism is non-negotiable. This application note details the synergistic roles of TEMED and APS, provides validated protocols for gel casting, and summarizes best practices to ensure consistent, high-quality results for research and drug development applications.
The Polymerization Mechanism
The formation of a polyacrylamide gel involves the cross-linking of acrylamide monomers with bisacrylamide to create a three-dimensional network. This reaction is a free radical-induced polymerization, a process entirely initiated by the TEMED-APS system [26] [27].
- Ammonium Persulfate (APS) as the Free Radical Source: APS is the chemical initiator of the polymerization reaction. In an aqueous solution, it decomposes to form sulfate free radicals (
SO₄•⁻) [26] [28]. These highly reactive molecules are the primary engines that drive the polymerization forward. - TEMED as the Catalytic Stabilizer: TEMED functions as a catalyst that dramatically accelerates the rate of polymerization [28]. It does this by donating electrons to facilitate the decomposition of APS into free radicals [23]. Furthermore, TEMED acts as a free radical stabilizer, helping to maintain the reactive state of the radicals long enough to effectively initiate the chain reaction [27].
- Synergistic Reaction Cascade: The mechanism is a powerful synergy. TEMED induces the decomposition of APS to produce sulfate free radicals. A single free radical then attacks an acrylamide monomer, converting it into a radical that rapidly propagates the chain reaction by linking with thousands of other acrylamide and bisacrylamide monomers. This continues until the chain terminates, resulting in the solid polyacrylamide gel matrix [23] [10].
Table 1: Core Functions of TEMED and APS in Gel Polymerization
| Component | Chemical Role | Primary Function in Polymerization | Key Interaction |
|---|---|---|---|
| APS | Free radical initiator [26] | Generates sulfate free radicals (SO₄•⁻) to start the polymerization reaction [26]. |
Its decomposition is catalyzed by TEMED [23]. |
| TEMED | Catalyst / Free radical stabilizer [27] [28] | Accelerates free radical production from APS and stabilizes the radicals [23] [27]. | Enables the rapid and efficient initiation of polymerization by APS [28]. |
The following diagram illustrates this synergistic reaction mechanism:
Quantitative Data and Formulations
The consistent preparation of SDS-PAGE gels requires precise formulations. The tables below provide standardized recipes for both resolving and stacking gels, highlighting the critical concentrations of APS and TEMED.
Table 2: Standard Formulation for a 10% Resolving Gel (10 mL volume)
| Component | Function | Volume / Quantity |
|---|---|---|
| 30% Acrylamide/Bis Solution | Monomer for gel matrix; pore size determinant [23] | 3.3 mL [23] |
| 1.5 M Tris-HCl, pH 8.8 | Buffer for optimal separation pH [23] | 2.5 mL [23] |
| 10% SDS | Denaturing agent to maintain protein linearity [23] | 100 µL [23] |
| Deionized Water | Solvent | 3.9 mL [23] |
| 10% Ammonium Persulfate (APS) | Free radical initiator for polymerization [23] [29] | 50 µL [23] |
| TEMED | Catalyst to accelerate polymerization [23] [30] | 5 µL [23] |
Table 3: Standard Formulation for a 5% Stacking Gel (5 mL volume)
| Component | Function | Volume / Quantity |
|---|---|---|
| 30% Acrylamide/Bis Solution | Low-concentration monomer for large-pore gel [23] | 0.83 mL [23] |
| 1.0 M Tris-HCl, pH 6.8 | Buffer for stacking pH [23] | 0.63 mL [23] |
| 10% SDS | Denaturing agent [23] | 50 µL [23] |
| Deionized Water | Solvent | 3.4 mL [23] |
| 10% Ammonium Persulfate (APS) | Free radical initiator [23] [29] | 25 µL [23] |
| TEMED | Catalyst [23] [30] | 5 µL [23] |
Experimental Protocol for Hand-Casting Gels
Reagent Preparation
- Acrylamide/Bis Solution (30%): A pre-mixed solution of acrylamide and the cross-linker N,N'-methylenebisacrylamide, typically in a 29:1 or 37.5:1 ratio [28] [29]. Safety Note: Acrylamide is a potent neurotoxin. Wear gloves and work in a fume hood. [23] [29]
- APS Solution (10%): Prepare fresh daily by dissolving ammonium persulfate in deionized water. Older solutions lose reactivity due to the accumulation of water and decomposition [30].
- TEMED: Store tightly sealed at room temperature or as recommended by the manufacturer. It has a strong odor and should be handled in a fume hood [30].
Step-by-Step Gel Casting Procedure
The following workflow outlines the key stages of casting a discontinuous SDS-PAGE gel:
- Assemble the Gel Casting Module: Thoroughly clean and dry the glass plates and spacers. Assemble the cassette according to the manufacturer's instructions, ensuring a tight seal to prevent leaks [30].
- Prepare and Pour the Resolving Gel:
- In a Falcon tube, mix all components for the resolving gel except APS and TEMED (see Table 2). Vortex to ensure a homogeneous mixture [30].
- Critical Step: Immediately before pouring, add the specified volumes of 10% APS and TEMED. Mix quickly but thoroughly with a serological pipette [23] [30].
- Transfer the solution into the gap between the glass plates. Leave space for the stacking gel.
- Carefully overlay the gel solution with isopropanol or water-saturated butanol to create a flat, even interface and exclude oxygen, which inhibits polymerization [23] [29].
- Allow the gel to polymerize completely (typically 20-30 minutes). A distinct schlieren line will appear at the gel-isopropanol interface upon polymerization.
- Prepare and Pour the Stacking Gel:
- After polymerization, pour off the isopropanol overlay. Rinse the top of the resolving gel with deionized water and dry completely with filter paper [23].
- In a new tube, mix stacking gel components excluding APS and TEMED (see Table 3) [30].
- Add the specified volumes of 10% APS and TEMED, mix quickly, and pour the solution directly onto the polymerized resolving gel.
- Immediately insert a clean comb into the stacking gel solution, avoiding air bubbles.
- Allow the stacking gel to polymerize for 15-20 minutes [23].
The Scientist's Toolkit: Essential Research Reagents
Table 4: Essential Materials and Reagents for SDS-PAGE Gel Casting
| Reagent | Function | Critical Notes |
|---|---|---|
| Acrylamide/Bis-acrylamide | Forms the cross-linked polymer network that acts as the molecular sieve [27] [10]. | Neurotoxic. Handle with gloves. Pre-mixed 30-40% solutions reduce exposure risk [23] [29]. |
| Tris-HCl Buffer | Provides the appropriate pH for the stacking (pH 6.8) and resolving (pH 8.8) gel layers [23] [31]. | The discontinuous pH system is crucial for the stacking effect and proper protein separation [31]. |
| Sodium Dodecyl Sulfate (SDS) | Anionic detergent included in the gel to maintain protein denaturation and uniform charge [31] [24]. | Ensures separation is based primarily on molecular weight. |
| Ammonium Persulfate (APS) | Free radical initiator for the polymerization reaction [26] [28]. | Prepare a 10% solution fresh daily for consistent and reliable gel polymerization [30]. |
| TEMED | Catalyst that acts as a free radical stabilizer to accelerate polymerization [23] [27]. | Add last to the gel solution. The reaction begins immediately upon addition [30]. |
| Glycine | Key component of the Tris-glycine running buffer; its charge state changes with pH to enable protein stacking [31]. | In the stacking gel (pH 6.8), glycine exists as a zwitterion, creating a key ion front for stacking [31]. |
Troubleshooting and Best Practices
Successful polymerization is the foundation of a good SDS-PAGE experiment. Common issues and their solutions are outlined below.
- Slow or Failed Polymerization: The most common cause is degraded or improperly prepared APS. Always use a freshly prepared 10% APS solution [30]. Ensure that TEMED has not lost its potency due to age or improper storage. Inadequate mixing after adding APS and TEMED can also lead to uneven or failed polymerization [23].
- Optimizing Polymerization Speed: The concentration of APS and TEMED can be adjusted to control the rate of polymerization. Increasing their concentration will speed up the process, while decreasing it will slow it down, which can be useful for avoiding bubbles or for casting gradient gels. The standard concentrations provided in Tables 2 and 3 are a reliable starting point [23].
- Gel Storage: Hand-cast gels can be stored at 4°C for up to one week. Wrap the entire cassette in plastic wrap moistened with running buffer or deionized water to prevent the gel from drying out. We do not suggest long-term storage (more than one week) as the gel may deteriorate and affect experimental results [30].
Table 5: Troubleshooting Polymerization Problems
| Problem | Possible Cause | Solution |
|---|---|---|
| Gel does not polymerize | Degraded APS [23] | Prepare fresh 10% APS solution daily [30]. |
| Old or inactivated TEMED | Use fresh TEMED from a reliable source. | |
| Polymerization is too fast/slow | Incorrect APS/TEMED concentration | Adjust concentrations slightly; more for faster, less for slower polymerization [23]. |
| Bands are curved or smeared | Incomplete or uneven polymerization | Ensure APS and TEMED are mixed thoroughly and rapidly after addition [23]. |
Step-by-Step Protocol: Casting Perfect Stacking and Resolving Gels
Within the broader scope of research on casting SDS-PAGE gels with resolving and stacking layers, proper material preparation establishes the foundation for experimental success. This application note details the essential reagents, equipment, and safety protocols required for reliable reproduction of SDS-PAGE methodology. The discontinuous buffer system, utilizing a stacking gel and a resolving gel, is critical for achieving high-resolution separation of proteins based on their molecular weight [32]. The meticulous preparation of these components ensures consistent polymerization and optimal electrophoretic performance, enabling researchers and drug development professionals to generate robust, reproducible data for protein analysis.
Research Reagent Solutions
The following table catalogues the essential reagents required for casting and running SDS-PAGE gels, along with their specific functions in the procedure.
Table 1: Essential Reagents for SDS-PAGE Gel Casting and Electrophoresis
| Reagent Name | Function and Purpose |
|---|---|
| Acrylamide/Bis-acrylamide (30-40% w/v) | Forms the porous gel matrix for protein separation; the ratio of acrylamide to bis-acrylamide (typically 29:1 or 37.5:1) determines the cross-linking density [14] [33]. |
| Tris-HCl Buffer (pH 6.8 & 8.8) | Provides the appropriate pH environment; Tris pH 8.8 is for the resolving gel, while Tris pH 6.8 is for the stacking gel, enabling the discontinuous buffer system [32] [5]. |
| Sodium Dodecyl Sulfate (SDS) | An ionic detergent that denatures proteins and confers a uniform negative charge, allowing separation based primarily on molecular weight [32] [34]. |
| Ammonium Persulfate (APS) | A catalyst that, along with TEMED, initiates the free-radical polymerization of acrylamide and bis-acrylamide [35]. |
| TEMED (N,N,N',N'-Tetramethylethylenediamine) | A catalyst that stabilizes free radicals and accelerates the polymerization reaction initiated by APS [35]. |
| Electrophoresis Buffer (Tris-Glycine-SDS) | Conducts current and maintains the pH necessary for protein migration during electrophoresis [32]. |
| Protein Sample Buffer (Laemmli Buffer) | Contains SDS, glycerol, a reducing agent (e.g., β-mercaptoethanol or DTT), and a tracking dye to denature proteins and prepare them for loading [32]. |
Essential Equipment and Instrumentation
A successful SDS-PAGE setup requires specific instrumentation for gel casting, electrophoresis, and analysis.
Table 2: Key Equipment for SDS-PAGE Gel Casting and Running
| Equipment Category | Specific Items |
|---|---|
| Gel Casting System | Glass plates, spacers (varying thicknesses: 0.75 mm, 1.0 mm, 1.5 mm), casting frames, casting stand, and combs (varying well numbers: 5, 10, 15) [14] [35]. |
| Electrophoresis Apparatus | Inner and outer electrophoresis chambers, electrode assembly, clamping frame, and power supply capable of providing constant voltage [5] [21]. |
| Sample Preparation Tools | Microcentrifuge tubes, heating block or water bath, micropipettes and gel-loading tips, and a microcentrifuge [34] [21]. |
| Visualization & Analysis | Gel documentation camera system, white light transilluminator, staining and destaining containers, and an oscillating table [32] [21]. |
Safety Protocols and Material Handling
The preparation of SDS-PAGE gels involves several hazardous materials that require strict safety measures.
- Acrylamide/Bis-acrylamide Handling: Acrylamide monomer is a potent neurotoxin and suspected carcinogen. Always wear appropriate personal protective equipment (PPE), including gloves and safety goggles, when handling the liquid solution or powder [5] [35]. All work should be conducted in a designated area, and any spills should be cleaned immediately.
- TEMED Handling: TEMED is flammable, corrosive, and has a strong, unpleasant odor. It should be handled in a fume hood whenever possible, and containers should be tightly sealed after use [35].
- General Electrical Safety: Electrophoresis involves high voltages. Ensure all buffer chambers are properly assembled and free from leaks before connecting to the power supply. Do not touch the apparatus during operation [5].
- Waste Disposal: Follow institutional guidelines for the disposal of liquid and solid chemical waste, including unpolymerized acrylamide, stained gels, and contaminated gloves.
Experimental Protocol: Casting SDS-PAGE Gels
This detailed protocol is designed for casting two 1.0 mm thick gels using a standard mini-gel system.
A. Gel Formulation Tables
The percentage of the resolving gel should be selected based on the molecular weight of the target proteins, as indicated in the table below.
Table 3: Resolving Gel Percentage Guide for Target Protein Sizes [32] [14]
| Acrylamide Percentage (%) | Effective Separation Range (kDa) |
|---|---|
| 5 | 36 - 200 |
| 7.5 | 24 - 200 |
| 10 | 14 - 200 |
| 12 | 10 - 70 |
| 15 | 14 - 60 |
Table 4: Recipe for a 10% Resolving Gel (for two 1.0 mm gels, ~10 mL total) [14] [35]
| Component | Volume |
|---|---|
| Deionized Water | 4.1 mL |
| 30% Acrylamide/Bis Solution | 3.3 mL |
| 1.5 M Tris-HCl (pH 8.8) | 2.5 mL |
| 10% (w/v) SDS | 0.1 mL |
| 10% (w/v) Ammonium Persulfate (APS) | 0.1 mL |
| TEMED | 0.01 mL |
Table 5: Recipe for a 4% Stacking Gel (for two gels, ~5 mL total) [14] [33]
| Component | Volume |
|---|---|
| Deionized Water | 3.05 mL |
| 30% Acrylamide/Bis Solution | 0.65 mL |
| 1.0 M Tris-HCl (pH 6.8) | 1.25 mL |
| 10% (w/v) SDS | 0.05 mL |
| 10% (w/v) Ammonium Persulfate (APS) | 0.05 mL |
| TEMED | 0.01 mL |
B. Step-by-Step Casting Procedure
- Assemble the Gel Casting Apparatus: Clean the glass plates and spacers, then assemble them in the casting frame. Verify that the assembly is watertight by pipetting a small amount of deionized water between the plates. If it does not leak, pour out the water and dry the space with a filter paper or lint-free wipe [35].
- Prepare and Pour the Resolving Gel: In a small beaker or conical tube, mix all components for the resolving gel except APS and TEMED. Once mixed, add the APS and TEMED. Swirl gently to mix—avoid introducing bubbles. Immediately pipette the solution into the gap between the glass plates to a height about 2 cm below the top of the shorter plate [14] [35].
- Overlay the Resolving Gel: Gently pipette a layer of water-saturated butanol or deionized water on top of the resolving gel mixture. This layer excludes oxygen, which inhibits polymerization, and ensures a flat, uniform gel surface. Allow the gel to polymerize for 20-45 minutes at room temperature. Polymerization is complete when a distinct schlieren line appears between the gel and the overlay [5] [35].
- Prepare and Pour the Stacking Gel: After polymerization, pour off the overlay liquid. Rinse the top of the gel with deionized water and wick away any residual liquid with a lint-free wipe [14]. In a clean tube, mix the stacking gel components, again adding APS and TEMED last. Pour the stacking gel solution directly onto the polymerized resolving gel until it overflows the top of the plates.
- Insert the Comb: Immediately insert a clean, dry comb into the stacking gel, being careful to avoid trapping air bubbles under the teeth. If the comb is not centered, adjust it before the gel sets. Allow the stacking gel to polymerize for 20-30 minutes [14] [33].
- Post-Polymerization Storage: Once polymerized, the gels can be used immediately. For storage, carefully remove the comb and wrap the entire gel cassette in a paper towel moistened with deionized water. Seal it in a plastic bag or with cling film and store at 4°C for up to several weeks [14].
Diagram 1: SDS-PAGE Gel Casting Workflow
Principle of the Discontinuous Buffer System
The high resolution of SDS-PAGE is achieved through a discontinuous buffer system that physically "stacks" proteins into a sharp band before they enter the resolving gel. The stacking gel, with a lower pH (6.8) and acrylamide percentage, allows glycine from the running buffer to exist in a neutral charge state, creating a zone of low conductivity. Chloride ions from the gel buffer move faster, while the protein-SDS complexes have an intermediate mobility, getting compressed between the two ion fronts. Upon reaching the resolving gel with a higher pH (8.8), glycine becomes negatively charged and migrates faster, leaving the proteins to be separated based on size within the sieving matrix of the resolving gel [32].
Diagram 2: Discontinuous Buffer System Principle
Troubleshooting Common Casting and Running Issues
Even with careful preparation, issues can arise. The following table outlines common problems and their solutions.
Table 6: Troubleshooting Guide for SDS-PAGE Gel Issues [36] [37]
| Problem | Possible Cause | Suggested Solution |
|---|---|---|
| Gel does not polymerize | Old or degraded APS/TEMED; Oxygen inhibition; Incorrect temperature. | Use fresh APS and TEMED; Ensure reagents are at room temperature; Degas the acrylamide solution before adding catalysts [36]. |
| Poor band resolution | Incorrect acrylamide percentage; Run voltage too high; Gel run time too short. | Select appropriate gel percentage for target protein size; Reduce voltage by 25-50% to prevent overheating; Run gel until dye front reaches bottom [36] [37]. |
| Smeared bands | Voltage too high; Protein overload; High salt concentration in sample. | Run gel at a lower voltage (e.g., 10-15 V/cm); Reduce amount of protein loaded; Dialyze sample or desalt to reduce salt concentration [36] [37]. |
| "Smiling" bands (curved upwards) | Excessive heat generation during electrophoresis. | Run the gel at a lower voltage; Use a cooling apparatus or perform electrophoresis in a cold room [36] [37]. |
| Distorted bands in peripheral lanes | "Edge effect" from empty wells. | Load protein or sample buffer in empty wells to ensure even current flow across the entire gel [37]. |
| Protein samples diffuse out of wells | Delay between loading and starting electrophoresis. | Minimize the time between loading the first sample and applying the voltage to the gel [37]. |
Within the broader scope of thesis research on perfecting SDS-PAGE gel casting methodologies, the preparation of the resolving gel constitutes the foundational step that determines the ultimate success of the electrophoretic separation. The resolving gel, with its higher polyacrylamide concentration and pH, is responsible for the size-based separation of protein polypeptides [38] [1]. This Application Note provides a detailed, step-by-step protocol for mixing, pouring, and overlaying the resolving gel with isopropanol—a critical step to ensure a uniform polymerization environment and a perfectly flat interface with the subsequent stacking gel [39] [40]. A meticulously cast resolving gel is a prerequisite for achieving the parallel, well-defined bands that are essential for accurate analysis in both protein characterization and drug development workflows.
The Science of the Resolving Gel
The resolving gel, also known as the separating gel, is designed to separate proteins based on their molecular weight. Its effectiveness stems from its specific chemical composition and the creation of a sieving matrix with optimized pore sizes.
Composition and Function: The gel matrix is formed through the polymerization of acrylamide and a cross-linker, most commonly N,N'-methylenebisacrylamide (Bis) [1]. This process is catalyzed by ammonium persulfate (APS) and the catalyst N,N,N',N'-Tetramethylethylenediamine (TEMED) [30] [14]. The polymerizing mixture also contains Tris-HCl at pH 8.8, which establishes the alkaline environment necessary for the subsequent electrophoretic separation [38] [41]. The key operational feature of the resolving gel is its discontinuous buffer system with the stacking gel. When the glycinate ions from the running buffer enter the high pH environment of the resolving gel, they become negatively charged and overtake the proteins, leaving them to migrate through the sieving matrix based solely on their size [38] [41].
Polyacrylamide Concentration: The chosen percentage of acrylamide in the resolving gel determines the size of the pores in the polyacrylamide matrix, which in turn defines the range of protein molecular weights that can be effectively separated. The following table serves as a guide for selecting the appropriate gel percentage for your target proteins.
Table 1: Guide to Resolving Gel Percentage for Protein Separation
| Size of Protein (kDa) | % Acrylamide in Resolving Gel |
|---|---|
| 25 - 200 | 8% |
| 15 - 100 | 10% |
| 10 - 70 | 12.5% |
| 12 - 45 | 15% |
| 4 - 40 | 20% |
Detailed Protocol: Resolving Gel Casting
Reagent Preparation
The following table lists the necessary reagents and their functions for casting the resolving gel. Always wear appropriate personal protective equipment, and note that acrylamide is a potent neurotoxin before polymerization and should be handled with care.
Table 2: Research Reagent Solutions for Resolving Gel Casting
| Reagent | Function/Description |
|---|---|
| 40% Acrylamide/Bis Solution | Pre-mixed solution of acrylamide and bis-acrylamide, typically at a ratio of 37.5:1. Forms the sieving matrix of the gel. Handle with extreme care as it is a neurotoxin. [14] |
| 1.5 M Tris-HCl, pH 8.8 | Buffer for the resolving gel. The high pH is critical for the discontinuous buffer system and the separation of proteins. [30] [41] |
| 10% Sodium Dodecyl Sulfate | Anionic detergent that denatures proteins and confers a uniform negative charge, allowing separation by size rather than native charge. [38] [1] |
| 10% Ammonium Persulfate | Initiator for the polymerization reaction. Must be prepared fresh for optimal catalytic activity. [30] |
| TEMED | Catalyst that accelerates the polymerization reaction of acrylamide and bis-acrylamide. It is added last to the gel solution. [30] [1] |
| Isopropanol | A layer of isopropanol is poured on top of the unpolymerized resolving gel to exclude oxygen, which inhibits polymerization, and to ensure a flat, even interface. [39] [40] [30] |
| Deionized Water | Solvent for all solutions. |
Workflow and Procedure
The following diagram illustrates the key stages in the resolving gel casting process.
Diagram 1: Resolving gel casting workflow.
Step-by-Step Instructions:
Gel Casting Assembly: Assemble the gel cassette according to the manufacturer's instructions, ensuring the glass plates and spacers are correctly aligned. A critical step is to verify that the bottom of the two glass plates is perfectly parallel and that the cassette is securely sealed to prevent leakage [39]. Before assembly, thoroughly clean the glass plates with 70% ethanol or industrial methylated spirits to remove any gel debris or contaminants [30] [14].
Mixing the Resolving Gel Solution: In a suitably sized container (e.g., a 15 mL conical tube or a small beaker), combine the reagents for the resolving gel in the order listed in the recipe table below, with the exception of TEMED. Vortex or stir the solution to ensure it is well-mixed [30]. The table provides a standard recipe, with volumes easily scalable for casting multiple gels.
Table 3: Standard Resolving Gel Recipe (for one 0.75 mm mini-gel)
Component Volume for 8% Gel Volume for 10% Gel Volume for 12% Gel 40% Acrylamide/Bis 2.0 mL 2.5 mL 3.0 mL 1.5 M Tris-HCl, pH 8.8 2.5 mL 2.5 mL 2.5 mL 10% SDS 100 µL 100 µL 100 µL dI-H2O 5.35 mL 4.85 mL 4.35 mL 10% APS 50 µL 50 µL 50 µL TEMED 5 µL 5 µL 5 µL Initiating Polymerization and Pouring: Just before pouring, add the 10% APS and TEMED to the mixture. Mix gently but quickly, as polymerization will begin immediately [30] [14]. Using a serological pipette or a plastic Pasteur pipette, transfer the solution into the gap between the glass plates. Pour continuously until the level reaches the midpoint of the top green bar of the casting frame, or until you have left approximately 2.5 cm of space for the stacking gel and comb [14].
Overlaying with Isopropanol: Immediately after pouring the resolving gel, carefully overlay the solution with a layer of isopropanol [30]. Using a pipette, slowly add enough isopropanol (typically 500 µL or less for a mini-gel) to cover the entire surface of the gel mixture. This step is crucial as it excludes oxygen (an inhibitor of polymerization), prevents the gel from drying out, and ensures the formation of a perfectly flat meniscus at the top of the resolving gel [39] [40] [30]. If the casting process is delayed, the isopropanol layer may need to be refilled if it evaporates over time [30].
Polymerization: Allow the gel to polymerize undisturbed for 20-45 minutes at room temperature [11] [30] [14]. Polymerization is complete when a distinct schlieren line, or clear interface, becomes visible between the polymerized gel and the overlaid isopropanol.
Final Preparation for Stacking Gel: Once polymerized, pour off the isopropanol by inverting the gel cassette. Rinse the gel surface thoroughly with deionized water to remove any residual isopropanol, which could otherwise interfere with the polymerization of the stacking gel [30] [14]. Wick away the excess water completely using a lint-free wipe or filter paper [14]. The resolving gel is now ready for the pouring of the stacking gel.
Troubleshooting Common Issues
Slanted or Non-Parallel Bands: This is often a direct result of an uneven interface between the resolving and stacking gels. Ensuring a flat, horizontal surface during polymerization by using a level bench and a proper isopropanol overlay is critical to prevent this [40].
Gel Leakage: Leakage before or during polymerization is typically caused by an improperly assembled casting cassette. Before pouring the gel, perform a leakage check by filling the assembled cassette with a little water and observing if it holds without dripping [39].
Incomplete or Slow Polymerization: This can be caused by old or inactive APS, insufficient TEMED, or exposure to oxygen. Always prepare a fresh 10% APS solution daily and ensure TEMED is added just before pouring. A proper isopropanol seal effectively excludes oxygen [40] [30].
The meticulous execution of the resolving gel casting protocol, particularly the steps of mixing and isopropanol overlay, is a fundamental technique that underpins reliable and reproducible protein analysis via SDS-PAGE. A well-polymerized resolving gel with a perfectly flat surface is the first and most critical determinant for achieving sharp, parallel protein bands, which are indispensable for accurate molecular weight determination, purity assessment, and subsequent applications such as western blotting in both academic research and pharmaceutical development pipelines.
In the context of SDS-PAGE gel fabrication, the successful casting of the stacking gel is a critical step that directly influences the resolution and quality of protein separation. This protocol details the precise methodology for creating a uniform stacking gel-resolving gel interface and properly inserting combs to form wells, which is foundational to the discontinuous buffer system that enables high-resolution protein analysis [42] [43]. The stacking gel, with its distinct chemical composition and pH, functions to concentrate protein samples into sharp bands before they enter the resolving gel, ensuring that all proteins begin separation simultaneously from a narrow starting point [23] [1]. This process is essential for researchers and drug development professionals who require reproducible and reliable protein separation for applications ranging from purity assessment to western blotting.
Scientific Principle of Stacking
The stacking mechanism operates on principles of isotachophoresis, leveraging a discontinuous buffer system to concentrate protein samples [42] [43]. The key to this process lies in the differential mobility of ions within the unique pH environments of the stacking gel (pH ~6.8) and the running buffer (pH ~8.3) [42].
In the running buffer at pH 8.3, glycine molecules exist primarily as glycinate anions, carrying a negative charge [42]. However, when these anions enter the low-pH environment (pH 6.8) of the stacking gel, a significant proportion shifts to a zwitterionic state, possessing both positive and negative charges but with a net zero charge [42] [43]. This change dramatically reduces their electrophoretic mobility. Chloride ions (Cl⁻) from the Tris-HCl in the gel, meanwhile, remain highly mobile [42].
This disparity creates a steep voltage gradient between the fast-moving chloride ion front (leading ions) and the slow-moving glycine zwitterion front (trailing ions) [42]. Protein molecules, with mobilities intermediate to these two fronts, are compressed into a extremely narrow zone as they are "stacked" between the leading and trailing ion boundaries [43]. This concentration effect continues until the proteins reach the resolving gel.
Table: Ionic States and Mobility in the Discontinuous Buffer System
| Component | Stacking Gel (pH 6.8) | Resolving Gel (pH 8.8) | Electrophoretic Mobility |
|---|---|---|---|
| Glycine | Zwitterion (neutral) | Glycinate anion (negative) | Low in stack, high in resolve |
| Chloride (Cl⁻) | Anion (negative) | Anion (negative) | High (leading ion) |
| Proteins | SDS-coated (negative) | SDS-coated (negative) | Intermediate |
Materials and Reagents
Research Reagent Solutions
The following table catalogues the essential materials required for casting the stacking gel.
Table: Essential Reagents for Stacking Gel Casting
| Reagent/Material | Typical Composition/Specification | Primary Function |
|---|---|---|
| Acrylamide/Bis Solution | 30% Acrylamide: Bis-acrylamide (29:1 or 37.5:1) | Forms the gel matrix; lower concentration (4-5%) in stacking gel creates larger pores [23] [43]. |
| Stacking Gel Buffer | 0.5 M or 1.0 M Tris-HCl, pH 6.8 | Establishes the low-pH environment critical for glycine zwitterion formation and the stacking effect [44] [21]. |
| SDS (Sodium Dodecyl Sulfate) | 10% aqueous solution | Anionic detergent that maintains proteins in a denatured, linear state and confers negative charge [43] [45]. |
| Ammonium Persulfate (APS) | 10% solution in water | Initiator of the free radical polymerization reaction for gel formation; must be fresh [23] [43]. |
| TEMED (N,N,N',N'-Tetramethylethylenediamine) | Liquid, stored cool | Catalyst that accelerates the polymerization reaction by generating free radicals from APS [23] [43]. |
| Isobutanol or Water | Saturated or pure | Layered on top of resolving gel before polymerization to create a flat, uniform interface by excluding oxygen and preventing meniscus formation [46] [23]. |
| Comb | 1, 2, 5, 10, 12, 15, or 26-well formats | Creates wells in the polymerized stacking gel for sample loading [44]. |
| Gel Cassette | Assembled glass plates with spacers (e.g., 1.0 mm or 1.5 mm thick) | Mold for holding the gel solution during polymerization and subsequent electrophoresis [44] [47]. |
Step-by-Step Protocol
Preparation of Stacking Gel Solution
This protocol assumes the resolving gel has been successfully cast and polymerized. The volumes provided are sufficient for one mini-gel (8 x 8 cm). Scale volumes proportionally for multiple gels or midi gels [44].
- Prepare Workspace: Ensure the gel cassette containing the polymerized resolving gel is ready. Remove any isopropanol or water overlay from the top of the resolving gel by gently inverting the cassette and draining the liquid. Rinse the top of the resolving gel with deionized water and use absorbent paper to wick away any remaining liquid without touching the gel surface [21].
- Mix Primary Components: In a small beaker or tube, combine the following reagents in the order listed to prepare a 4% stacking gel solution [23]:
- Deionized Water: 3.4 mL
- 1.0 M Tris-HCl, pH 6.8: 0.63 mL
- 10% SDS: 50 µL
- 30% Acrylamide/Bis Solution: 0.83 mL . Gently swirl the mixture to ensure homogeneity, avoiding vigorous stirring which can introduce air bubbles.
- Add Polymerization Initiators: Immediately before pouring, add the polymerization agents:
- 10% Ammonium Persulfate (APS): 25 µL
- TEMED: 5 µL [23] . Mix thoroughly by gentle swirling. The addition of TEMED will initiate the polymerization process, typically allowing 5-10 minutes of working time before the solution becomes too viscous to pour.
Pouring the Stacking Gel and Inserting the Comb
- Transfer Solution: Using a pipette, immediately draw up the stacking gel solution and carefully dispense it into the space on top of the solidified resolving gel. Fill until the solution reaches the top of the shorter (front) glass plate.
- Insert Comb: Tilt the entire cassette at a slight angle (approximately 45 degrees) to minimize air bubble formation. Slowly and steadily insert the clean, dry comb between the glass plates, guiding it at an angle to allow air to escape. Once the bottom of the comb teeth are nearly touching the resolving gel interface, gently straighten the comb to a vertical position. Apply slight pressure to ensure the comb is fully seated and that the teeth are completely submerged in the gel solution.
- Polymerization: Allow the stacking gel to polymerize completely for 15-30 minutes at room temperature [23]. Polymerization is indicated by a distinct refractive change at the comb teeth, visible upon careful observation. Avoid moving or disturbing the cassette during this period.
Post-Casting Procedures
- Comb Removal: Once polymerization is complete, carefully remove the comb with a slow, steady, straight-upward motion. Jerky or uneven removal can damage the wells. If the gel is not used immediately, it can be wrapped in moist paper towel and plastic film, then stored at 4°C for up to one week [23].
- Well Rinsing: After comb removal, rinse the wells gently with deionized water or running buffer to remove any unpolymerized acrylamide.
Quality Control and Troubleshooting
A properly cast stacking gel is critical for optimal electrophoresis performance. The table below outlines common issues, their causes, and recommended solutions.
Table: Troubleshooting Common Stacking Gel Casting Issues
| Observation | Potential Cause | Corrective Action |
|---|---|---|
| Non-parallel bands during electrophoresis | Uneven or curved interface between stacking and resolving gels [46]. | Ensure a flat resolving gel surface by using an isopropanol or water overlay during its polymerization. Pour the stacking gel immediately after removing the overlay and rinsing [46] [23]. |
| Sample leaking from wells | Wells torn or damaged during comb removal; incomplete polymerization; old gel [46]. | Remove comb slowly and steadily after placing the gel in the running chamber filled with buffer. Use fresh APS and TEMED. Avoid using old precast gels. Check wells for integrity by pre-loading with dye [46]. |
| Failure to polymerize | Degraded APS or TEMED; incorrect ratios; oxygen inhibition [23] [45]. | Prepare fresh APS solution (store ≤1 week at 4°C) and ensure TEMED is not expired. Use recommended reagent volumes and mix thoroughly after adding initiators [23]. |
| Air bubbles trapped under comb teeth | Comb inserted too quickly or straight down. | Insert the comb at a ~45-degree angle to allow air to escape and slowly straighten it as it is seated. |
Workflow Visualization
The following diagram illustrates the complete workflow for casting the stacking gel, from preparation after resolving gel polymerization to the final ready-to-use gel.
Visual Guide to Stacking Gel Casting Workflow
The meticulous casting of the stacking gel, with particular attention to creating a uniform interface with the resolving gel and the proper insertion of the comb, is a fundamental technique for achieving high-resolution protein separation in SDS-PAGE. The procedure outlined in this application note, supported by the principles of the discontinuous buffer system, provides researchers with a reliable protocol to ensure proteins are concentrated into sharp initial bands. Mastery of this technique, including the adherence to reagent specifications and an understanding of common troubleshooting points, is indispensable for generating reproducible and interpretable data in protein analysis for research and diagnostic applications.
Sodium dodecyl sulfate-polyacrylamide gel electrophoresis (SDS-PAGE) is a foundational technique in biochemistry, molecular biology, and drug development for separating protein mixtures based on molecular weight [13] [10]. The principle relies on protein denaturation by SDS, which confers a uniform negative charge, allowing separation to occur primarily through a molecular sieving effect within a polyacrylamide gel matrix [29] [48]. The porosity of this matrix, determined by the acrylamide concentration, is the critical factor controlling resolution of different protein sizes [13] [10]. This application note provides a detailed guide for researchers on selecting optimal acrylamide percentages and executing reliable protocols for casting discontinuous SDS-PAGE gels, framed within the context of method development and optimization.
The Science of SDS-PAGE Separation
In SDS-PAGE, proteins are denatured, reduced, and coated with negatively charged SDS molecules, creating a uniform charge-to-mass ratio [48] [10]. When an electric field is applied, these protein-SDS complexes migrate through the cross-linked polyacrylamide gel, where the mesh-like network acts as a molecular sieve. Smaller proteins navigate the pores more easily and migrate faster, while larger proteins are retarded [48] [10].
The electrophoresis system is "discontinuous," utilizing two distinct gel layers with different functions and compositions [48]. The stacking gel (lower acrylamide concentration, pH ~6.8) concentrates all protein samples into a sharp band before they enter the resolving gel. This is achieved through a sophisticated buffer system where the leading chloride ions (from Tris-HCl) and trailing glycine zwitterions (from the running buffer) create a narrow voltage gradient that focuses the proteins [48]. The resolving gel (variable acrylamide concentration, pH ~8.8) is where actual size-based separation occurs. The higher pH causes glycine to become fully negatively charged, eliminating the stacking effect. Proteins then migrate at rates inversely proportional to the logarithm of their molecular masses [29] [48].
Selecting Acrylamide Concentration by Protein Size
The optimal acrylamide percentage for the resolving gel is primarily determined by the molecular weight of the target protein(s). Using an inappropriate gel percentage can result in poor resolution, with proteins either migrating too slowly and failing to separate or moving too rapidly and running off the gel [13] [14].
Table 1: Acrylamide Gel Percentage Selection Guide
| Protein Size Range (kDa) | Recommended Gel Percentage (%) | Separation Characteristics |
|---|---|---|
| 4 - 40 | 20% [13] [14] | Optimal for very small polypeptides; creates a tight mesh |
| 12 - 45 | 15% [13] [29] [14] | Ideal for resolving low molecular weight proteins |
| 10 - 70 | 12 - 12.5% [13] [14] | Standard range for many common proteins |
| 15 - 100 | 10% [13] [14] | Versatile for a broad mix of medium-sized proteins |
| 25 - 200 | 7.5 - 8% [13] [14] | Suitable for larger proteins; more open gel structure |
| >200 | 5% [13] | Best for very high molecular weight complexes |
Experimental Considerations:
- Single Concentration Gels: Use when analyzing proteins of similar size for optimal resolution within a specific range [13].
- Gradient Gels: Employ when a sample contains proteins of widely differing molecular weights (e.g., complex cell lysates). These gels provide a continuous gradient of acrylamide (e.g., 4-20%), resolving a very broad size range on a single gel and often eliminating the need for a stacking gel [13] [10].
- Membrane Proteins: Note that helical transmembrane proteins often exhibit anomalous migration on SDS-PAGE, where their mobility can be affected by the gel's acrylamide concentration in unpredictable ways. Specialized algorithms or Ferguson plot analysis may be required for accurate molecular weight determination [49].
Detailed Protocol: Casting a Discontinuous SDS-PAGE Gel
Research Reagent Solutions
Table 2: Essential Reagents for SDS-PAGE Gel Casting
| Reagent | Function | Typical Composition / Notes |
|---|---|---|
| 30% Acrylamide/Bis Solution | Forms the gel matrix; pore size depends on final concentration. | 29:1 or 37.5:1 ratio of acrylamide to bis-acrylamide [14]. CAUTION: Neurotoxin—wear gloves. [13] [29] |
| Resolving Gel Buffer | Sets pH for separation; high pH defines glycinate charge. | 1.5 M Tris-HCl, pH 8.8, 0.4% SDS [29] |
| Stacking Gel Buffer | Sets pH for protein stacking; creates charge discontinuity. | 0.5 M Tris-HCl, pH 6.8, 0.4% SDS [29] |
| 10% Ammonium Persulfate (APS) | Polymerization initiator. | Freshly prepared in water is recommended for reliable polymerization [13] [39]. |
| TEMED | Polymerization catalyst; stabilizes free radicals. | Added last to initiate gel solidification [13] [29]. |
| 10% SDS | Anionic detergent included in gels to maintain protein denaturation. | Ensures proteins remain linear and charged during electrophoresis [48]. |
| Water-Saturated Butanol or Isopropanol | Overlay to exclude oxygen and create a flat gel interface. | Butanol is common; isopropanol is an alternative to prevent damage to some apparatus [13] [29] [14]. |
| Running Buffer | Conducts current and provides ions for electrophoresis. | 25 mM Tris, 192 mM Glycine, 0.1% SDS, pH ~8.3 [29] [48]. |
Step-by-Step Gel Casting Protocol
Safety Note: Acrylamide monomer is a potent neurotoxin and can be absorbed through the skin. Always wear appropriate personal protective equipment (PPE) including gloves when handling solutions or gels [13] [29].
Part A: Preparing and Pouring the Resolving Gel
- Assemble the Gel Cassette: Clean the glass plates thoroughly with distilled water, ethanol, and/or acetone to remove any gel debris or contaminants [13] [14]. Assemble the plates in the casting frame according to the manufacturer's instructions. Perform a leak test by filling the cassette with water and checking for drips; pour out the water once confirmed sealed [39].
- Mix the Resolving Gel Solution: For a 10 mL resolving gel, combine the components in a beaker in the order listed in Table 3, adding TEMED last. Mix gently to avoid introducing air bubbles. Polymerization begins immediately upon adding TEMED, so work efficiently [13] [14].
Table 3: Resolving Gel Recipes for Different Percentages (Total Volume: 10 mL)
| Component | 5% Gel | 10% Gel | 12% Gel | 15% Gel |
|---|---|---|---|---|
| dH₂O | 5.61 mL [13] | 3.98 mL [13] | 3.28 mL [13] | 2.34 mL [13] |
| 1.5 M Tris-HCl (pH 8.8) | 2.5 mL [13] | 2.5 mL [13] | 2.5 mL [13] | 2.5 mL [13] |
| 10% SDS | 100 µL [13] | 100 µL [13] | 100 µL [13] | 100 µL [13] |
| 30% Acrylamide/Bis | 1.67 mL [13] | 3.3 mL [13] | 4.0 mL [13] | 5.0 mL [13] |
| 10% APS | 50 µL [13] | 50 µL [13] | 50 µL [13] | 50 µL [13] |
| TEMED | 5 µL [13] | 5 µL [13] | 5 µL [13] | 5 µL [13] |
- Pour and Overlay the Gel: Immediately pipette the gel solution into the assembled cassette, leaving sufficient space for the stacking gel and comb (approx. 2.5 cm from the top) [14]. Carefully overlay the gel solution with 500 µL of water-saturated butanol or isopropanol to exclude air and ensure a flat, even surface [13] [14].
- Polymerize: Allow the gel to polymerize completely for 15-60 minutes at room temperature. Polymerization is complete when a distinct schlieren line is visible between the set gel and the overlay liquid. Pour off the overlay, rinse the gel surface with dH₂O, and use a lint-free tissue to wick away all residual liquid [13] [14].
Part B: Preparing and Pouring the Stacking Gel
- Mix the Stacking Gel Solution: In a clean beaker, combine the components for the stacking gel as listed in Table 4. Add APS and TEMED last and mix gently.
Table 4: Standard Stacking Gel Recipe (Total Volume: 5 mL)
| Component | Volume |
|---|---|
| dH₂O | 3.05 mL [13] |
| 0.5 M Tris-HCl (pH 6.8) | 1.25 mL [13] |
| 10% SDS | 50 µL [13] |
| 30% Acrylamide/Bis | 650 µL [13] |
| 10% APS | 25 µL [13] |
| TEMED | 10 µL [13] |
- Pour and Comb Insertion: Pour the stacking gel solution directly onto the polymerized resolving gel. Fill to the top of the plates. Immediately insert a clean comb of the desired well number (e.g., 10- or 15-well) without introducing air bubbles [29] [14].
- Final Polymerization: Allow the stacking gel to polymerize for 20-30 minutes. Once set, carefully remove the comb in a straight, vertical motion to prevent distorted wells [14]. The gel is now ready for electrophoresis or can be wrapped in moist tissue paper, sealed in plastic film, and stored at 4°C for several weeks [14].
Critical Troubleshooting and Pro-Tips
- Leakage: The most common issue during casting or running. Ensure glass plates are clean, the casting frame is properly assembled on a flat surface, and the gasket is in good condition [39].
- Slow or Failed Polymerization: This is typically due to old or degraded APS. Prepare a fresh 10% APS solution. TEMED can also degrade over time and should be kept tightly sealed [13] [39].
- Overheating/Smiling Bands: Running the gel at too high a voltage can generate excessive heat, causing bands to curve ("smile" or "frown"). Use the manufacturer's recommended voltage, or run the gel in a cold room or with an ice pack in the tank [39].
- Poor Resolution/Smearing: This can be caused by dirty plates, old running buffer, or protein overloading. Always use clean equipment and fresh cathode buffer for critical runs [39]. Ensure samples are properly denatured by heating at 95°C for 5 minutes before loading [29].
- Difficulty Handling Gels: Low-percentage and gradient gels are very fragile. After electrophoresis, separate the plates under slowly running water to help the gel release smoothly [39].
Mastering the selection of acrylamide percentage and the art of casting reliable SDS-PAGE gels is a fundamental skill that underpins successful protein analysis in research and drug development. By understanding the principles of discontinuous gel electrophoresis and adhering to the detailed protocols and troubleshooting guidelines outlined in this application note, researchers can achieve consistent, high-quality separations tailored to their specific protein targets. This reliability forms a solid foundation for downstream applications such as Western blotting, mass spectrometry, and other critical proteomic analyses.
Within the broader context of research on casting SDS-PAGE gels with resolving and stacking layers, ensuring complete gel polymerization stands as a critical prerequisite for obtaining reliable, reproducible protein separation data. Incomplete polymerization leads to aberrant electrophoretic patterns that compromise experimental integrity, particularly in drug development where quantitative accuracy is paramount. This application note establishes a standardized protocol for verifying gel polymerization, incorporating quantitative assessment methods and structured troubleshooting guides to support research quality assurance.
The polymerization of polyacrylamide gels is a chemical process initiated by ammonium persulfate (APS) and catalyzed by TEMED (N,N,N',N'-Tetramethylethylenediamine), resulting in a cross-linked polymer matrix that serves as a molecular sieve [50] [51]. When this process is incomplete, the resulting gel exhibits structural heterogeneity that manifests as distinct failure modes during electrophoresis, including sample leakage, distorted band migration, and poor resolution [52]. Implementing rigorous quality control checks before electrophoretic runs prevents the costly loss of valuable samples and ensures the generation of high-quality data for scientific analysis.
The Critical Role of Polymerization in SDS-PAGE Performance
Complete gel polymerization establishes the consistent pore structure necessary for size-based protein separation. The polyacrylamide gel matrix forms when acrylamide and bis-acrylamide cross-link into a three-dimensional network, with pore size determined by the concentration of acrylamide and the ratio of bis-acrylamide to acrylamide [51]. This matrix must be structurally uniform to ensure that proteins migrate strictly according to molecular weight rather than being influenced by gel inconsistencies.
Common indicators of polymerization failure include non-parallel protein bands, samples leaking from wells during or after loading, and poor band resolution despite adequate electrophoresis time [52]. These artifacts directly stem from structural defects in the gel matrix. Incomplete polymerization creates heterogeneous pore sizes that distort protein migration paths, while weak well walls fail to contain samples. Such defects irrevocably compromise data quality, potentially leading to erroneous molecular weight determinations or incorrect assessments of protein expression levels in drug development research.
Comprehensive Quality Control Assessment Protocol
Visual Inspection and Physical Examination
A systematic approach to quality control begins with visual and physical assessment of cast gels before use. Researchers should employ the following verification methods:
Tilt Test for Polymerization Completion: Gently tilt the gel cassette to approximately 45 degrees and observe the gel interface. A fully polymerized gel will remain intact with no movement of the gel matrix relative to the plates, whereas unpolymerized solution will flow or separate [14]. This simple test provides immediate feedback on polymerization status.
Interface Integrity Check: Examine the boundary between the stacking and resolving gels. This interface should appear straight and uniform across the entire gel width. An uneven interface suggests inconsistent polymerization that will cause distorted band migration [52].
Well Wall Assessment: After comb removal, inspect wells for structural integrity using a dye test. Fill wells with loading dye containing a visible marker (e.g., bromophenol blue) and check for leakage into adjacent wells or through the well bottoms [52]. Intact wells will maintain distinct dye compartments without cross-contamination.
Experimental Validation Run
For critical applications, perform a validation electrophoretic run with control samples before loading experimental samples:
- Load control wells with molecular weight markers and a known protein standard.
- Run at standard voltages for 15-20 minutes until the dye front enters the resolving gel.
- Examine initial band formation for straightness and parallelism.
- Abort the run if irregularities appear and recast the gel.
This pre-screening approach conserves valuable experimental samples while verifying gel performance under actual running conditions.
Detailed Experimental Workflow for Quality Control
The following diagram illustrates the integrated quality control workflow for verifying SDS-PAGE gel polymerization before experimental use:
Quantitative Assessment Parameters
For objective quality assessment, researchers should document the following parameters during quality control checks:
Table 1: Quality Control Assessment Criteria for Gel Polymerization
| Quality Parameter | Acceptance Criteria | Failure Indicators | Measurement Method |
|---|---|---|---|
| Polymerization Time | 30-45 minutes for resolving gel [14] | Polymerization completes in <20 minutes or >60 minutes | Timed observation |
| Gel Interface Linearity | Straight, uniform boundary between stacking and resolving layers [52] | Visible curvature or irregular interface | Visual inspection against straight edge |
| Well Wall Integrity | No leakage of loading dye between wells [52] | Dye leakage or well wall collapse | Dye retention test |
| Band Pattern | Parallel protein bands across all lanes [52] | Smiling/frowning bands or non-parallel migration | Electrophoretic validation with standards |
Documentation and Quality Records
Maintain detailed records for each gel batch, including:
- Date of preparation and researcher identifier
- Acrylamide percentage and batch information
- Polymerization initiation and completion times
- Quality control check results and any observations
- Validation run outcomes when performed
This documentation supports traceability and facilitates troubleshooting of persistent issues while providing essential metadata for experimental reproducibility.
Troubleshooting Polymerization Problems
Common Polymerization Failures and Solutions
Table 2: Troubleshooting Guide for Polymerization Issues
| Problem | Potential Causes | Corrective Actions |
|---|---|---|
| Incomplete Polymerization | Degraded APS, insufficient TEMED, oxygen inhibition | Prepare fresh APS solution monthly [53]; Ensure adequate TEMED; Top gel with isopropanol during polymerization [52] [14] |
| Non-parallel Bands | Uneven polymerization, poor gel interface | Use isopropanol overlay for flat resolving gel surface [52]; Ensure consistent gel solution mixing |
| Sample Leakage from Wells | Damaged wells during comb removal, incomplete stacking gel polymerization | Remove comb carefully with gel submerged in running buffer [52]; Increase stacking gel polymerization time |
| Poor Protein Separation | Incorrect acrylamide percentage, incomplete resolving gel polymerization | Optimize acrylamide concentration for target protein size [52] [45]; Verify complete resolving gel polymerization before pouring stacking layer |
Preventive Measures for Consistent Polymerization
- Reagent Quality Control: Store acrylamide solutions at 4°C in dark; prepare fresh 10% APS solution monthly or more frequently; ensure TEMED is protected from light and air [53].
- Environmental Consistency: Maintain stable temperature during polymerization (20-25°C); avoid excessive vibration or disturbance during the process.
- Technique Standardization: Use consistent mixing procedures; measure reagents accurately; add TEMED immediately before casting.
The Scientist's Toolkit: Essential Materials for Polymerization QC
Table 3: Essential Research Reagent Solutions for Polymerization Quality Control
| Reagent/Material | Function | Quality Control Application |
|---|---|---|
| 30% Acrylamide/Bis Solution | Forms the gel matrix backbone | Use consistent batch for reproducible pore size; store at 4°C protected from light |
| 10% Ammonium Persulfate (APS) | Polymerization initiator | Prepare fresh monthly; aliquot for single-use to maintain activity [53] |
| TEMED | Polymerization catalyst | Accelerates free radical formation; add immediately before casting [51] [14] |
| Isopropanol | Overlay solution | Creates anaerobic environment for even polymerization; produces straight gel interface [52] [14] |
| Loading Dye with Tracking dye | Well integrity testing | Verifies well wall structure without sample loss; confirms no cross-well leakage [52] |
| Molecular Weight Standards | Migration quality control | Validates separation performance during test runs; identifies migration anomalies [54] |
Implementing rigorous quality control checks for gel polymerization represents a fundamental component of robust SDS-PAGE methodology within protein research and drug development. The systematic approach outlined in this application note—encompassing visual inspection, physical validation, and documentation—enables researchers to preemptively identify polymerization failures before they compromise experimental results. By standardizing these quality assessment protocols, laboratories can significantly enhance the reliability and reproducibility of protein separation data, thereby supporting the generation of high-quality scientific evidence in pharmaceutical development and basic research applications.
Troubleshooting Casting Issues and Optimizing for High-Resolution Results
In the context of a broader thesis on casting SDS-PAGE gels with resolving and stacking layers, this application note addresses three common polymerization challenges that compromise experimental reproducibility. Sodium Dodecyl Sulfate-Polyacrylamide Gel Electrophoresis (SDS-PAGE) remains a foundational technique in biochemical research and drug development, relying on precisely cast polyacrylamide gels to separate proteins by molecular weight. The discontinuous buffer system, comprising a stacking gel (pH ~6.8) and a resolving gel (pH ~8.8), requires optimal polymerization to create the molecular sieving effect [55] [1]. When gel casting fails, researchers encounter artifacts that distort protein migration, leading to inaccurate molecular weight determination, purity assessment, and expression analysis. This note provides detailed methodologies for diagnosing and resolving leaky wells, uneven polymerization, and smiling bands—critical issues that undermine data integrity in protein research.
Understanding SDS-PAGE Gel Polymerization
The Chemistry of Gel Formation
Polyacrylamide gel formation is a free radical-induced polymerization reaction catalyzed by ammonium persulfate (APS) and tetramethylethylenediamine (TEMED). APS generates sulfate free radicals that initiate polymerization, while TEMED, an organic base, accelerates the reaction by catalyzing the decomposition of APS to form additional free radicals [1]. The resulting gel matrix consists of cross-linked acrylamide and bis-acrylamide chains creating a three-dimensional network with tunable pore sizes. The pore size determines the resolving power and is controlled by the total acrylamide percentage and the crosslinker ratio [14]. Proper polymerization requires precise chemical balance—insufficient catalysts lead to delayed or incomplete setting, while excessive catalysts can cause rapid, exothermic polymerization resulting in gel distortion [36].
The Discontinuous Buffer System
SDS-PAGE employs a discontinuous buffer system with two distinct gel layers optimized for different functions. The stacking gel (lower acrylamide concentration, pH 6.8) concentrates protein samples into narrow zones before they enter the resolving gel. The resolving gel (higher acrylamide concentration, pH 8.8) separates proteins based on molecular size [55] [1]. This system leverages the unique properties of glycine in the running buffer. At pH 6.8 in the stacking gel, glycine exists predominantly as zwitterions with minimal mobility, creating a steep voltage gradient that focuses protein-SDS complexes into sharp bands between highly mobile chloride ions (leading ions) and slow-moving glycine (trailing ions) [55]. When this interface reaches the resolving gel at pH 8.8, glycine becomes negatively charged and migrates rapidly, depositing proteins at the top of the resolving gel where size-based separation begins [55] [1]. Any imperfection in gel casting disrupts this delicate system, compromising separation efficiency.
Troubleshooting Common Casting Problems
Leaky Wells: Causes and Resolution
Leaky or damaged wells allow sample leakage between lanes, resulting in cross-contamination, distorted bands, and lost samples [56]. This typically occurs during comb removal or sample loading when the well structures tear or fracture.
Table 1: Troubleshooting Leaky Wells
| Problem Cause | Diagnostic Signs | Resolution Protocol |
|---|---|---|
| Comb removal damage | Torn well walls, uneven well bottoms, distorted shapes | Remove comb after placing gel in running chamber filled with buffer [56]. Gently wiggle comb straight up without twisting. |
| Improper polymerization | Gels overly soft or sticky; wells deform easily | Ensure complete stacking gel polymerization (wait 30+ minutes) before comb removal [36]. Verify fresh APS and TEMED. |
| Aged or poor-quality gels | Wells appear melted or irregular; occurs with stored gels | Use freshly cast gels. For precast gels, check expiration dates and storage conditions [56]. |
| Well puncturing | Localized leakage from specific wells after loading | Use fine tips and avoid touching well bottoms/sides during loading [56]. Pre-check wells with loading dye. |
Preventive Protocol:
- After pouring stacking gel, insert comb at a slight angle to minimize air bubbles.
- Allow complete polymerization for 30-45 minutes at room temperature [36].
- Place gel in electrophoresis apparatus and fill with running buffer before comb removal [56].
- Slowly remove comb vertically upward without lateral movement.
- Pre-check well integrity by loading buffer with tracking dye before loading valuable samples.
Uneven Polymerization: Causes and Resolution
Uneven polymerization creates irregular gel matrices with non-uniform pore sizes, manifesting as non-parallel protein bands, wavy migration fronts, and inconsistent separation between lanes [56].
Table 2: Troubleshooting Uneven Polymerization
| Problem Cause | Diagnostic Signs | Resolution Protocol |
|---|---|---|
| Inadequate or degraded catalysts | Prolonged or failed polymerization; white streaks or soft spots | Use fresh APS (prepare monthly) and TEMED; store properly [36]. Increase TEMED by 15% if polymerization >45 minutes. |
| Improper temperature | Slow polymerization at low temperatures; rapid, exothermic reaction with bubbles at high temperatures | Cast gels at consistent room temperature (20-25°C) [36]. Avoid cold surfaces. |
| Poor quality acrylamide | Failure to polymerize even with fresh catalysts; discolored solution | Use high-quality, fresh acrylamide solutions. Discard discolored stocks [36]. |
| Oxygen inhibition | Non-polymerizing layer at top interface; soft upper portion | Top resolving gel with isopropanol or water to exclude oxygen during polymerization [56] [14]. |
| Incomplete degassing | Streaks or bubbles within polymerized gel | Degas acrylamide solution for 5-10 minutes before adding catalysts [36]. |
Optimized Casting Protocol:
- Prepare reagents: Use fresh 30% acrylamide:bis-acrylamide (37.5:1), 1.5M Tris-HCl (pH 8.8), 0.5M Tris-HCl (pH 6.8), 10% SDS, 10% APS, and TEMED [14].
- Resolving gel formulation: For 15mL of 10% resolving gel: 5mL acrylamide, 3.75mL Tris-HCl (pH 8.8), 150μL 10% SDS, 6mL H₂O. Mix thoroughly [14].
- Degas and catalyze: Degas solution for 5 minutes. Add 75μL 10% APS and 7.5μL TEMED. Mix gently without introducing bubbles [14].
- Pour and overlay: Immediately pipette between glass plates. Top with 1-2mm of isopropanol or water for a straight interface [56] [14].
- Polymerize: Allow 30-45 minutes for complete polymerization. A distinct refractive interface indicates proper setting.
- Stacking gel formulation: After removing overlay, prepare stacking gel (15mL: 1.98mL acrylamide, 3.78mL Tris-HCl pH 6.8, 150μL 10% SDS, 9mL H₂O). Add 75μL 10% APS and 15μL TEMED [14].
- Comb insertion: Pour stacking gel, insert comb, and polymerize 30 minutes.
Smiling Bands: Causes and Resolution
"Smiling bands" refer to the upward-curving migration pattern where bands at gel edges migrate faster than center bands. This phenomenon primarily results from excessive heat generation during electrophoresis that causes non-uniform gel expansion [57].
Table 3: Troubleshooting Smiling Bands
| Problem Cause | Diagnostic Signs | Resolution Protocol |
|---|---|---|
| Excessive voltage | Overheating throughout gel; smiling accompanied by band smearing | Reduce voltage to 10-15V/cm gel length [57]. For mini-gels, use 100-120V instead of 150-200V. |
| Inadequate cooling | Temperature gradient across gel; warmer edges than center | Use cooling apparatus, run in cold room, or place ice packs in buffer chambers [57]. |
| Edge effect | Distortion primarily in peripheral lanes with empty adjacent wells | Load all wells with samples or buffer; avoid empty peripheral wells [57]. |
| Non-uniform gel thickness | Varying band curvature patterns unrelated to position | Ensure glass plates are clean and evenly spaced; use uniform spacers [36]. |
Heat Management Protocol:
- Optimize running conditions: For standard mini-gels, use constant voltage of 100-120V instead of 150-200V [57].
- Implement active cooling: Place gel apparatus in cold room (4°C) or use integrated cooling systems [57].
- Passive cooling: Insert ice packs into buffer chambers or surround apparatus with ice bath.
- Pre-electrophoresis: For high-percentage gels, pre-run at lower voltage for 15-30 minutes to establish temperature equilibrium.
- Buffer circulation: Gently stir buffer during run to distribute heat evenly.
Research Reagent Solutions
The quality and preparation of reagents fundamentally impact gel polymerization and performance. The following table details essential materials and their functions in SDS-PAGE gel casting.
Table 4: Essential Research Reagents for SDS-PAGE Gel Casting
| Reagent | Function | Optimal Preparation & Storage |
|---|---|---|
| Acrylamide/Bis-acrylamide | Forms polyacrylamide matrix; concentration determines pore size | 30% w/v solution (37.5:1 ratio); filter sterilize; store dark at 4°C; discard if discolored [14]. |
| TEMED | Catalyst that accelerates polymerization by generating free radicals from APS | Store at room temperature; use undiluted; minimal exposure to air [14]. |
| Ammonium Persulfate (APS) | Free radical initiator for polymerization reaction | 10% w/v solution in water; aliquot and store at -20°C; use within 1 month [14]. |
| Tris-HCl Buffer | Maintains pH during polymerization and electrophoresis | 1.5M pH 8.8 (resolving gel); 0.5M pH 6.8 (stacking gel); filter sterilize; store at 4°C [14]. |
| SDS (Sodium Dodecyl Sulfate) | Anionic detergent that denatures proteins and confers negative charge | 10% w/v solution; store at room temperature; may precipitate in cold—warm to dissolve [55]. |
| Glycine | Trailing ion in discontinuous buffer system; mobility shift focuses proteins | Running buffer: 25mM Tris, 192mM glycine, 0.1% SDS, pH 8.3 [55]. |
Experimental Workflow for Quality Control
Implementing systematic quality control protocols ensures consistent, reproducible gel polymerization. The following workflow outlines a standardized approach to gel casting, troubleshooting, and validation.
Diagram 1: Quality control workflow for SDS-PAGE gel casting and troubleshooting.
Advanced Technical Considerations
Acrylamide Percentage Optimization
Protein separation efficiency depends on appropriate acrylamide concentration matching target protein size. The following DOT script visualizes the relationship between acrylamide percentage and resolvable molecular weight ranges.
Diagram 2: Relationship between acrylamide percentage and protein separation range based on [14].
Molecular Mechanisms of Smiling Bands
Understanding the thermal dynamics behind smiling bands informs effective prevention strategies. The following diagram illustrates the causal pathway leading to this common artifact.
Diagram 3: Causal pathway and prevention strategies for smiling bands in SDS-PAGE.
Mastering SDS-PAGE gel casting requires understanding the biochemical principles underlying polymerization and the discontinuous buffer system. The troubleshooting methodologies presented here for leaky wells, uneven polymerization, and smiling bands provide researchers with systematic approaches to diagnose and resolve common casting problems. Implementation of the quality control workflow, reagent management protocols, and optimized casting techniques ensures reproducible, high-resolution protein separation. As SDS-PAGE remains fundamental to protein characterization in research and drug development, attention to these technical details directly impacts experimental reliability and data quality. Future work will explore advanced polymerization monitoring techniques and quantitative quality assessment metrics to further standardize gel casting protocols across laboratories.
Optimizing Acrylamide Concentration for Superior Band Separation
Sodium dodecyl sulfate-polyacrylamide gel electrophoresis (SDS-PAGE) stands as a cornerstone technique in biochemistry and molecular biology, universally employed for separating complex protein mixtures by molecular size [49] [9]. The fundamental principle relies on the sieving effect created by a cross-linked polyacrylamide gel matrix, through which SDS-coated proteins migrate under an electric field [58]. The porosity of this matrix—and thus its sieving properties—is directly determined by the total concentration of acrylamide and bisacrylamide cross-linker (denoted as %T) [49]. Optimizing this concentration is not merely a procedural detail but a critical determinant for achieving high-resolution separation, accurate molecular weight estimation, and successful downstream analyses such as western blotting [59] [60].
Within the context of advanced research on casting SDS-PAGE gels with resolving and stacking layers, understanding the science behind acrylamide concentration becomes paramount. The Laemmli discontinuous buffer system, the most widely used methodology, employs a two-layer gel structure: a low-percentage stacking gel that concentrates protein samples into sharp initial bands, and a higher-percentage resolving gel where the actual size-based separation occurs [9] [58]. The strategic optimization of acrylamide concentration in the resolving gel allows researchers to tailor the pore size to their specific protein targets, ensuring that proteins of interest migrate at optimal rates for clear distinction from closely sized species [61]. This application note provides a detailed, practical guide for researchers and drug development professionals to systematically optimize acrylamide concentration, thereby achieving superior band separation in their electrophoretic analyses.
Core Principles: Acrylamide Concentration and Gel Porosity
The Polyacrylamide Matrix as a Molecular Sieve
The separation medium in SDS-PAGE is formed through the polymerization of acrylamide monomers into long chains, which are cross-linked by bisacrylamide to create a porous three-dimensional network [23] [10]. The pore size within this network is inversely related to the total acrylamide concentration; higher percentages create denser gels with smaller pores, while lower percentages yield more open structures with larger pores [10]. During electrophoresis, linearized SDS-protein complexes must navigate through this labyrinth. Smaller proteins traverse the matrix with relative ease, while larger proteins are progressively hindered, leading to a size-dependent separation [23] [58]. This sieving effect is the physical basis for the relationship between a protein's migration distance and its molecular weight.
The Discontinuous Gel System: Stacking and Resolving Layers
The power of the standard Laemmli system lies in its discontinuous nature, utilizing two distinct gel layers with different acrylamide concentrations, pH, and ionic compositions [9] [58]. The stacking gel typically has a low acrylamide concentration (4-5%) and a pH of 6.8. Its primary function is not to separate proteins by size, but to concentrate all protein samples from the relatively large well volume into an extremely sharp, unified band before they enter the resolving gel. This is achieved through a complex interplay of ions from the Tris-glycine running buffer (pH 8.3) and the Tris-HCl gel buffers [58]. The leading chloride ions (from the gel) and trailing glycinate ions (from the buffer) create a steep voltage gradient that "stacks" the proteins into a thin zone, dramatically improving final resolution [58].
In contrast, the resolving gel features a higher, carefully optimized acrylamide concentration (commonly 8-15%) and a higher pH (8.8). Once the stacked protein band enters this layer, the glycinate ions overtake the proteins, the voltage gradient dissipates, and the primary separation based on molecular size begins within the defined pore structure of the gel [58]. The precise concentration of acrylamide in this resolving layer is the key variable that researchers must optimize for their specific application.
Practical Guidance for Gel Concentration Selection
Standard Gel Percentages for Defined Molecular Weight Ranges
Selecting the appropriate acrylamide concentration is the most direct way to influence separation quality. The table below provides standard recommendations for resolving proteins within specific molecular weight ranges.
Table 1: Recommended Acrylamide Concentrations for Protein Separation
| Protein Molecular Weight Range | Recommended Gel Concentration (%T) |
|---|---|
| 100 - 600 kDa | 4% - 8% [59] [61] |
| 50 - 500 kDa | 7% [59] |
| 30 - 300 kDa | 10% [59] |
| 15 - 100 kDa | 10% - 12% [59] [61] |
| 10 - 200 kDa | 12% [59] |
| 12 - 45 kDa | 15% [61] |
| 4 - 40 kDa | Up to 20% [61] |
| 3 - 100 kDa | 15% [59] |
The Power and Application of Gradient Gels
For complex samples containing proteins with a broad molecular weight distribution, or when the target protein size is unknown, linear gradient gels offer a superior alternative to single-concentration gels [61]. These gels are cast with a continuous gradient of acrylamide, typically from a low percentage at the top to a high percentage at the bottom (e.g., 4-20%) [61] [10].
The key advantages of gradient gels are threefold:
- Broad Separation Range: A single gradient gel can resolve proteins across a very wide mass range, eliminating the need to run multiple single-percentage gels [61].
- Sharper Bands: As a protein migrates, its leading edge encounters progressively smaller pores and slows down, while the lagging edge continues to move relatively faster. This compresses the protein band, resulting in sharper, more defined bands compared to a uniform gel [61].
- Improved Resolution of Similar-Sized Proteins: The sharpening effect and the extended path length over which separation occurs can better resolve proteins with slight differences in molecular weight [61].
Table 2: Choosing a Gradient Gel for Your Experiment
| Range of Protein Sizes | Low / High Acrylamide Percentages | Application |
|---|---|---|
| 4 – 250 kDa | 4% / 20% | Discovery work; analyzing complex, unknown samples [61] |
| 10 – 100 kDa | 8% / 15% | A targeted approach for a broad mid-range, avoiding multiple gels [61] |
| 50 – 75 kDa | 10% / 12.5% | Optimized for resolving similarly sized proteins within a narrow range [61] |
Figure 1: A decision workflow for selecting the optimal acrylamide concentration, guiding researchers through the choice between single-percentage and gradient gels based on their experimental needs.
Detailed Experimental Protocol: Casting a 12% Tris-Glycine Resolving Gel
This protocol provides a detailed methodology for preparing a standard 12% Tris-Glycine resolving gel, suitable for separating proteins in the 10-200 kDa range, followed by a 5% stacking gel [59] [23]. The volumes are suitable for a mini-gel format (e.g., 8 x 10 cm plates with 1.0 mm spacers).
Reagent Preparation
Table 3: Reagent Recipes for SDS-PAGE Gels
| Reagent | Composition / Preparation |
|---|---|
| 30% Acrylamide/Bis Solution | 29.2 g acrylamide + 0.8 g N,N'-methylenebisacrylamide; dissolve in ~80 mL deionized water; adjust final volume to 100 mL. Filter through a 0.45 µm membrane and store at 4°C in a dark bottle. Safety Warning: Acrylamide monomer is a potent neurotoxin. Wear gloves, a lab coat, and work in a fume hood when handling [23]. |
| Resolving Gel Buffer (1.5 M Tris-HCl, pH 8.8) | 18.15 g Tris base dissolved in ~80 mL deionized water. Adjust pH to 8.8 with HCl. Adjust final volume to 100 mL with deionized water. |
| Stacking Gel Buffer (1.0 M Tris-HCl, pH 6.8) | 12.1 g Tris base dissolved in ~80 mL deionized water. Adjust pH to 6.8 with HCl. Adjust final volume to 100 mL with deionized water. |
| 10% (w/v) SDS | 10 g SDS dissolved in 100 mL deionized water. |
| 10% (w/v) Ammonium Persulfate (APS) | 0.1 g APS dissolved in 1.0 mL deionized water. Prepare fresh weekly and store at 4°C. |
| TEMED | N,N,N',N'-Tetramethylethylenediamine. Store at 4°C. |
| Running Buffer (10X Stock) | 30.3 g Tris base, 144.0 g glycine, 10.0 g SDS. Dissolve in deionized water to a final volume of 1 L. Dilute to 1X before use [23]. |
| Sample Buffer (2X Laemmli Buffer) | 2.5 mL 1.0 M Tris-HCl (pH 6.8), 4.0 mL 10% SDS, 2.0 mL Glycerol, 1.0 mL β-mercaptoethanol (or 200 mM DTT), 0.01 g Bromophenol Blue. Add deionized water to 10 mL. Aliquot and store at -20°C [23] [58]. |
Step-by-Step Gel Casting Procedure
Assemble the Gel Cassette: Clean the glass plates and spacers thoroughly. Assemble the cassette according to the manufacturer's instructions and ensure it is properly sealed in the casting stand.
Prepare the Resolving Gel Mixture: In a small beaker or flask, combine the components for a 10 mL resolving gel mixture as shown below. Add TEMED last, as it will immediately initiate polymerization.
Table 4: Resolving Gel Formulation (12%, 10 mL)
Component Volume Deionized Water 3.3 mL 30% Acrylamide/Bis Solution 4.0 mL 1.5 M Tris-HCl (pH 8.8) 2.5 mL 10% SDS 100 µL 10% APS 50 µL TEMED 10 µL Cast the Resolving Gel: Immediately after adding TEMED, swirl the mixture gently and pour it between the glass plates, leaving space for the stacking gel (approx. 1-2 cm below the top of the shorter plate). Carefully overlay the gel solution with isopropanol or water-saturated butanol to exclude oxygen and create a flat, even interface. Allow polymerization to proceed for 20-30 minutes at room temperature.
Prepare and Cast the Stacking Gel: Once the resolving gel has polymerized, pour off the overlay and rinse the top of the gel with deionized water. Remove residual liquid with a filter paper. Prepare the 5% stacking gel mixture as shown below.
Table 5: Stacking Gel Formulation (5%, 5 mL)
Component Volume Deionized Water 3.4 mL 30% Acrylamide/Bis Solution 0.83 mL 1.0 M Tris-HCl (pH 6.8) 0.63 mL 10% SDS 50 µL 10% APS 25 µL TEMED 5 µL Complete the Gel Assembly: Pour the stacking gel solution onto the resolved gel. Immediately insert a clean sample comb without introducing air bubbles. Allow the stacking gel to polymerize for 15-20 minutes. Once set, the gel can be used immediately or stored wrapped in moist paper towels and plastic film at 4°C for up to 2-3 days.
Advanced Considerations and Troubleshooting
Anomalous Migration of Helical Membrane Proteins
A critical consideration for drug development professionals is that helical membrane proteins, which comprise the majority of drug targets, frequently exhibit anomalous migration on SDS-PAGE [49]. Their observed molecular weight may be unpredictably larger or smaller than their actual formula weight. Research has shown that this anomaly is not random; the direction and magnitude of the gel shift are controlled by the acrylamide concentration [49]. At lower gel percentages (e.g., 11-13%), larger membrane proteins (≥ ~30 kDa) may migrate faster than globular standards, while at higher percentages (≥14%), their mobility is reduced. This effect is attributed to their higher hydrophobicity leading to increased SDS binding (increasing net charge) and a larger effective molecular size [49]. When working with membrane proteins, researchers should interpret mobilities with caution and may need to empirically determine the optimal gel percentage for accurate analysis.
Essential Reagent Solutions for Research
Table 6: The Scientist's Toolkit: Key Reagents for SDS-PAGE Optimization
| Reagent / Solution | Critical Function |
|---|---|
| SDS (Sodium Dodecyl Sulfate) | Anionic detergent that denatures proteins and confers a uniform negative charge, allowing separation primarily by size [23] [9]. |
| Acrylamide / Bis-acrylamide | Monomer and cross-linker that polymerize to form the porous gel matrix which acts as a molecular sieve [23] [10]. |
| APS (Ammonium Persulfate) & TEMED | Catalyst system that generates free radicals to initiate and accelerate the polymerization reaction of acrylamide [23] [10]. |
| Tris-Glycine Buffers | The standard discontinuous buffer system (stacking gel pH 6.8, resolving gel pH 8.8, running buffer pH 8.3) that enables protein stacking and sharp band formation [49] [58]. |
| Reducing Agents (DTT, β-Mercaptoethanol) | Break disulfide bonds in proteins, ensuring complete denaturation into monomeric subunits for accurate molecular weight analysis [60] [9]. |
| Protein Molecular Weight Markers | A set of proteins of known size run alongside samples to allow estimation of the molecular weights of unknown proteins [10]. |
Troubleshooting Common Separation Issues
Even with an optimized acrylamide concentration, other factors can compromise band separation.
Table 7: Troubleshooting Guide for Suboptimal SDS-PAGE Results
| Issue | Potential Cause | Solution |
|---|---|---|
| Smearing or Streaking Bands | Incomplete denaturation; protein degradation; sample overload [60]. | Ensure complete heating at 95°C for 5 min in sample buffer; add fresh protease inhibitors; reduce loading amount [23] [60]. |
| Vertical Streaks | Air bubbles trapped in the gel during casting; particulates in sample [23]. | Degas acrylamide solution before adding TEMED; centrifuge samples post-denaturation before loading [23] [60]. |
| Aberrant Migration | Uneven or insufficient SDS binding; improper buffer pH [23] [58]. | Use fresh sample buffer; ensure correct buffer preparation; for glycosylated/phosphate proteins, note they may run anomalously [58]. |
| "Smiling" Bands (curved upwards) | Overheating during electrophoresis, causing uneven migration across the gel [60]. | Run gel at a lower voltage; use a cooling stirrer in the tank buffer; ensure adequate buffer volume for heat dissipation [60]. |
| Poor Polymerization | Degraded APS or TEMED; oxygen inhibition [23]. | Prepare fresh APS solution; ensure no leaks in gel cassette; overlay gel properly during polymerization [23]. |
Figure 2: A systematic troubleshooting workflow for diagnosing and resolving common issues leading to poor band separation in SDS-PAGE.
Resolving Sample Leakage and Distorted Peripheral Lanes (Edge Effect)
Within the broader research on casting SDS-PAGE gels with resolving and stacking layers, two frequent technical challenges significantly impact the reliability and reproducibility of experimental results: sample leakage from wells and the distortion of bands in peripheral lanes, known as the edge effect. These anomalies compromise data quality by preventing accurate protein separation, quantification, and analysis. Sample leakage can lead to protein loss, cross-contamination between lanes, and smeared bands, while the edge effect causes uneven migration and distorted band shapes in the outermost lanes, rendering quantitative comparisons invalid. This application note details the underlying causes of these issues and provides validated, detailed protocols for their prevention and resolution, ensuring the integrity of data generated for critical applications in drug development and proteomic research.
Understanding and Troubleshooting Sample Leakage
Primary Causes and Corrective Actions
Sample leakage occurs when protein samples diffuse out of the wells before or during electrophoresis, leading to a loss of sample, smeared bands, and sometimes a completely blank gel. The root causes are often related to the physical properties of the sample buffer and loading technique [62]. The table below summarizes the main causes and corresponding solutions.
Table 1: Troubleshooting Guide for Sample Leakage
| Cause of Leakage | Description | Corrective Action |
|---|---|---|
| Insufficient Glycerol | The loading buffer lacks adequate glycerol, which provides density to help the sample sink and remain in the well. | Increase the concentration of glycerol in the Laemmli buffer [62]. |
| Air Bubbles in Wells | Air bubbles trapped in the well displace the sample, causing it to spill over into adjacent wells or diffuse out. | Before loading, rinse each well with a small amount of running buffer to displace air bubbles [62]. |
| Overfilling Wells | Loading a volume exceeding the well's capacity causes immediate spillage and cross-contamination. | Do not load the well more than 3/4 of its total capacity [62]. |
| Delay in Starting Electrophoresis | A long lag between sample loading and applying the electric current allows samples to diffuse haphazardly out of the wells. | Minimize the time between loading the first sample and starting the run. Begin electrophoresis immediately after loading is complete [63]. |
Detailed Protocol: Prevention of Sample Leakage
This protocol ensures sample retention within the wells from preparation to the start of the run.
Reagents and Materials:
- Protein samples
- 2X Laemmli Sample Buffer: 125 mM Tris-HCl (pH 6.8), 4% SDS, 20% glycerol, 0.02% bromophenol blue. Add 10% β-mercaptoethanol (BME) or 100 mM DTT fresh before use [64].
- SDS-PAGE Running Buffer: 25 mM Tris, 192 mM glycine, 0.1% SDS, pH 8.3 [64].
- Micropipettes and fine gel-loading tips.
Procedure:
- Sample Preparation: Mix the protein sample with an equal volume of 2X Laemmli buffer. The final concentration of 20% glycerol is critical for sample density [64].
- Denaturation: Heat the mixture at 70-100°C for 5-10 minutes to fully denature the proteins, then briefly centrifuge to collect the entire sample at the bottom of the tube.
- Well Preparation: Using a micropipette with a fine tip, slowly draw up approximately 10 µL of running buffer. Gently insert the tip into the bottom of the well and slowly expel the buffer to displace any air bubbles. Repeat for all wells to be loaded.
- Sample Loading: Using fresh loading tips, slowly load the sample into the well. Carefully monitor the volume to ensure it does not exceed three-quarters of the well's total capacity.
- Immediate Electrophoresis: Once all samples are loaded, immediately place the lid on the electrophoresis chamber and apply the appropriate voltage to begin the run. The electric current will promptly pull the proteins into the gel matrix, preventing diffusion.
Understanding and Mitigating the Edge Effect
The Mechanism and Impact of the Edge Effect
The edge effect is a phenomenon where protein bands in the outermost lanes (leftmost and rightmost) of an SDS-PAGE gel appear distorted, bent, or run at a different speed compared to the inner lanes. This occurs due to an uneven electric field across the gel. When the peripheral wells are left empty, the current bunches up and flows more intensely through the populated inner lanes, which have a higher resistance, while it spreads out and moves faster through the less resistant, empty peripheral lanes. This creates a "smiling" or "frowning" effect in the outer lanes, compromising the accuracy of molecular weight estimation and quantitative analysis [63].
Detailed Protocol: Elimination of the Edge Effect
The most effective and straightforward method to prevent the edge effect is to ensure a uniform electric field by loading all lanes.
Reagents and Materials:
- Experimental protein samples.
- Control samples: Protein ladder/molecular weight marker, control cell lysate, or BSA.
Procedure:
- Gel Selection: Choose a gel with a number of wells that matches, or is less than, the total number of experimental and control samples you plan to run.
- Lane Planning: Design your loading scheme to ensure that no peripheral well is left empty.
- Loading Peripheral Lanes: Load your protein ladder, a control sample, or a dummy sample (e.g., Laemmli buffer alone or a non-critical protein sample) into the first and last wells of the gel.
- Loading Experimental Samples: Load your experimental samples into the remaining inner wells.
- Electrophoresis: Proceed with electrophoresis under standard conditions. With all wells loaded, the electric field will be uniform across the entire gel, resulting in straight, evenly migrating bands in every lane [63].
Integrated Workflow for Robust SDS-PAGE
The following workflow diagram integrates the key steps from the protocols above to prevent both sample leakage and the edge effect in a single, cohesive process.
Diagram: Integrated workflow to prevent leakage and edge effects.
The Scientist's Toolkit: Essential Reagents and Materials
The consistent performance of SDS-PAGE relies on the quality and proper use of key reagents. The following table outlines critical solutions, their compositions, and functions relevant to preventing the issues discussed.
Table 2: Key Research Reagent Solutions for SDS-PAGE
| Reagent/Material | Composition / Key Feature | Primary Function in Protocol |
|---|---|---|
| Laemmli Sample Buffer | Tris-HCl, SDS, 20% Glycerol, Bromophenol Blue, BME/DTT [64] | Denatures proteins and provides density to prevent sample leakage from wells. |
| SDS-PAGE Running Buffer | Tris, Glycine, 0.1% SDS [64] | Conducts current and maintains pH; used to rinse wells to remove air bubbles. |
| Protein Ladder (MW Marker) | Pre-stained or unstained proteins of known molecular weight. | Serves as a molecular weight reference and is ideal for loading into peripheral wells to prevent edge effect. |
| 30% Acrylamide/Bis Solution | Acrylamide and bis-acrylamide (typically 29:1 or 37.5:1 ratio) [14] | Forms the polyacrylamide gel matrix that acts as a molecular sieve for protein separation. |
| TEMED & Ammonium Persulfate (APS) | TEMED and 10% APS solution [14] [64] | Catalyzes the polymerization of acrylamide to form a stable gel. |
Within the meticulous process of casting and running discontinuous SDS-PAGE gels, the anomalies of sample leakage and edge effect are preventable. As detailed in these application notes, the root causes are not mysteries but are often tied to specific oversights in technique and experimental design. By adhering to the provided protocols—ensuring adequate glycerol concentration, proper well-loading practices, immediate commencement of electrophoresis, and, most critically, loading all peripheral lanes—researchers and drug development professionals can eliminate these issues. The resulting gels, with sharp, straight, and reliably resolved protein bands, form a robust foundation for accurate quantitative analysis and trustworthy scientific conclusions.
Sodium dodecyl sulfate-polyacrylamide gel electrophoresis (SDS-PAGE) remains a cornerstone technique for protein separation based on molecular weight, enabling critical analyses in biochemical research and drug development [65] [1]. Despite its widespread use, researchers frequently encounter poor band resolution—manifested as smeared, diffuse, or distorted protein bands—which compromises data integrity and experimental outcomes. This application note systematically addresses three fundamental parameters that significantly impact separation quality: voltage settings, buffer integrity, and electrophoresis run time. Within the broader context of thesis research on casting SDS-PAGE gels with resolving and stacking layers, we provide evidence-based protocols and quantitative guidance to optimize these critical factors, ensuring high-resolution protein separation for reliable analytical results.
Key Factors Influencing Band Resolution
Applied Voltage and Electrophoresis Conditions
The voltage applied during SDS-PAGE directly controls migration rate and resolution through heat generation and its effects on protein mobility. Inconsistent voltage leads to uneven band patterns, while excessive voltage causes overheating and band distortion [23] [5].
Table 1: Voltage Optimization Guidelines for SDS-PAGE
| Gel Stage | Recommended Voltage | Purpose | Considerations |
|---|---|---|---|
| Stacking Phase | 80 V | Concentration of proteins into sharp bands | Lower voltage allows proper stacking at stacking gel interface [23] [5] |
| Separating Phase | 100-120 V | Size-based separation of proteins in resolving gel | Higher voltage improves resolution but requires cooling to prevent heat artifacts [23] [5] [14] |
| Alternative Method | 100-150 V | Constant voltage for convenience | Suitable for thinner gels (0.75-1.5 mm); ensure cooling system is active [14] |
Experimental Protocol: Voltage Optimization
- Assemble gel apparatus in electrophoresis tank filled with running buffer [29]
- Set power supply to constant voltage mode: 80 V for initial stacking phase
- Monitor migration of tracking dye (bromophenol blue); when dye front enters separating gel, increase voltage to 120 V for separating phase
- For constant voltage runs: set to 100-150 V with cooling plate or ice bath
- Run until dye front reaches bottom of gel (typically 60-90 minutes) [23]
Buffer Integrity and Composition
The discontinuous buffer system is fundamental to SDS-PAGE resolution, with chemical integrity and proper pH being critical factors. Buffer degradation or incorrect formulation causes poor stacking, smeared bands, and aberrant migration [65] [24].
Table 2: SDS-PAGE Buffer System Components and Functions
| Component | Composition | Function | Stability & Quality Control |
|---|---|---|---|
| Running Buffer | 25 mM Tris, 192 mM glycine, 0.1% SDS, pH 8.3 [23] | Conducts current, maintains pH for migration | Prepare fresh weekly; check pH before use; discard if cloudy [65] |
| Separating Gel Buffer | 1.5 M Tris-HCl, 0.1% SDS, pH 8.8 [23] [29] | Creates high-pH environment for separation | Stable at 4°C for 1 month; filter (0.45 µm) to remove particulates |
| Stacking Gel Buffer | 0.5 M Tris-HCl, 0.1% SDS, pH 6.8 [23] [29] | Creates low-pH environment for protein stacking | Stable at 4°C for 1 month; check pH critically for proper stacking |
Experimental Protocol: Buffer Preparation and Quality Control
- Tris-Glycine-SDS Running Buffer (1L):
- Dissolve 3.03 g Tris base, 14.4 g glycine, and 1.0 g SDS in 900 mL deionized water
- Adjust to pH 8.3, bring volume to 1L [29]
- Store at 4°C; visually inspect for precipitation before use
- Buffer Quality Assessment:
- Measure pH before each use; deviations >0.2 units require fresh preparation
- Conduct blank run without samples to detect buffer-related artifacts
- Compare migration of standards to historical data for consistency checks
Electrophoresis Run Time and Monitoring
Incomplete or prolonged electrophoresis run times directly impact band resolution and separation efficiency. Optimal run time ensures complete separation without loss of low molecular weight proteins from the gel bottom [5] [29].
Experimental Protocol: Run Time Optimization
- Load molecular weight markers in at least one lane per gel
- Add tracking dye (bromophenol blue) to all samples [24] [29]
- Begin electrophoresis at recommended voltages
- Monitor dye front migration:
- Standard mini-gels: Run until dye front is ~0.5-1.0 cm from bottom (≈60-90 minutes)
- Longer gels may require 2-4 hours for complete separation
- For unknown samples, run preliminary gels to determine optimal separation time
Integrated Workflow for Optimal Resolution
The following workflow diagram summarizes the systematic approach to addressing poor band resolution through optimized voltage, buffer, and run time parameters:
The Scientist's Toolkit: Essential Reagents and Materials
Table 3: Key Research Reagent Solutions for SDS-PAGE Optimization
| Reagent/Material | Function | Quality Considerations |
|---|---|---|
| Acrylamide/Bis-acrylamide (30% solution, 37.5:1) [23] [14] | Forms polyacrylamide gel matrix for molecular sieving | Neurotoxic; use gloves. Prepare fresh monthly or purchase fresh stock [5] [29] |
| Ammonium Persulfate (APS) 10% solution [23] [29] | Initiates polymerization reaction | Prepare fresh weekly or store at 4°C ≤1 week; degraded APS causes failed polymerization [23] |
| TEMED [23] [29] | Catalyzes polymerization reaction | Store cool and dry; use fresh; quality critical for consistent gel formation |
| Tris Buffer Salts [23] [29] | Maintain pH in gels and running buffer | High-purity grade; check pH meticulously with calibrated meter |
| Sodium Dodecyl Sulfate (SDS) [24] [1] | Denatures proteins and confers uniform charge | Use high-purity grade; fresh solutions ensure complete protein denaturation |
| Dithiothreitol (DTT) or β-mercaptoethanol [23] [24] | Reducing agent breaks disulfide bonds | Prepare fresh reducing agent in sample buffer for complete linearization |
| Molecular Weight Standards [23] [24] | Reference for size estimation and process control | Include in every run to monitor electrophoresis performance |
Optimal SDS-PAGE band resolution requires precise control of voltage conditions, maintenance of buffer integrity, and appropriate run times. Through systematic implementation of the protocols and guidelines presented herein, researchers can significantly improve protein separation quality, enhancing the reliability of downstream analyses including western blotting and mass spectrometry. These optimized parameters are particularly crucial for thesis research involving custom-cast gels with resolving and stacking layers, where subtle variations in technique can substantially impact experimental outcomes in both basic research and drug development applications.
Within the broader context of research on casting SDS-PAGE gels with resolving and stacking layers, the reliability of experimental outcomes directly depends on the quality of materials used. Two of the most critical, yet sometimes overlooked, proactive practices are the use of fresh electrophoresis buffers and the implementation of proper gel storage protocols. These preemptive measures are fundamental to preventing common artifacts such as poor band resolution, smearing, and distorted migration, thereby ensuring the integrity of protein separation data essential for researchers and drug development professionals [66] [36]. This application note details the critical protocols and quantitative data supporting these practices.
The Critical Role of Fresh Buffers
Electrophoresis buffers are not merely conductive media; they maintain precise pH and ionic strength, which are vital for consistent protein denaturation, charge uniformity, and stable migration during SDS-PAGE.
Consequences of Using Compromised Buffers
Deterioration of buffer quality directly impacts experimental results, as outlined in the table below.
Table 1: Common Issues from Compromised Buffers and Their Effects
| Observed Problem | Root Cause in Buffer | Impact on Experiment |
|---|---|---|
| Poor band resolution [36] | Overused or improperly formulated buffers; incorrect ion concentration [66] [67] | Suboptimal current flow and pH maintenance, leading to blurred or overlapping bands. |
| Band smearing [36] | High salt concentration in the sample buffer. | Sample precipitation and streaking during electrophoresis. |
| Unusually long or fast run times [36] | Buffers that are too concentrated or too diluted. | Altered electrical resistance, causing incorrect migration rates. |
| Smiling bands (curved bands) [67] | Buffer overheating due to high current in overused buffer. | Uneven heat distribution across the gel, distorting band shape. |
Protocol for Buffer Preparation and Use
Materials:
- Tris Base
- Glycine
- SDS (Sodium Dodecyl Sulfate)
- Deionized Water
- pH Meter
10X Running Buffer Recipe (1 L):
- 30.0 g Tris Base
- 144.0 g Glycine
- 10.0 g SDS
- Deionized water to 1 L [14] [67].
- Do not adjust pH; the final solution should be approximately pH 8.3.
Method:
- Weigh all components accurately and dissolve in approximately 800 mL deionized water.
- Once completely dissolved, bring the final volume to 1 L. This is the 10X stock solution.
- For use, dilute the stock to 1X with deionized water (e.g., 100 mL stock + 900 mL water) [14].
- Store the 10X stock at room temperature. It is considered good practice to prepare fresh 1X working solution before each run or as frequently as possible [66].
- Discard 1X buffer after one use to prevent alterations in ionic strength and pH from electrolysis and buffer depletion.
Ensuring Proper Gel Storage
Whether using hand-cast or commercial pre-cast gels, proper storage is essential to maintain the polymerized matrix's integrity and performance.
Guidelines for Sthand-Cast Gels
A robust protocol for storing hand-cast gels ensures their viability for several weeks.
Method for Short-Term Storage (For use within a few weeks):
- After polymerization, carefully remove the gel from the casting cassette.
- Wrap the gel in a dampened lint-free tissue or filter paper. The paper should be moist but not dripping wet.
- Seal the wrapped gel completely in cling film to prevent dehydration.
- Label the package with the gel percentage, thickness, and date.
- Store the packaged gel at 4°C [14].
Table 2: Gel Storage Troubleshooting
| Storage Issue | Potential Consequence | Proactive Solution |
|---|---|---|
| Dehydration | Shrunken, cracked, or unusable gel. | Ensure tight sealing with cling film and use damp (not wet) paper. |
| Condensation | Well distortion and dilution of sample. | Allow the sealed gel to acclimatize to room temperature before unwrapping. |
| Extended Storage | Degradation of polyacrylamide, leading to poor resolution and soft gels. | Label with date and use within a few weeks; monitor performance over time. |
Stability of Pre-cast Gels
For pre-cast gels, always adhere to the manufacturer's specified storage conditions and expiration dates. Using gels past their expiration date is a common cause of poor resolution, as the cross-linked matrix can degrade over time [36].
The Scientist's Toolkit: Essential Research Reagent Solutions
The following table details key reagents and materials critical for successful SDS-PAGE, emphasizing the importance of their freshness and proper handling.
Table 3: Essential Reagents for SDS-PAGE
| Reagent/Material | Function | Proactive Practice for Optimal Results |
|---|---|---|
| Acrylamide/Bis-Acrylamide (30-40% stock) | Forms the porous gel matrix for size-based protein separation. | Store at 4°C in the dark; discard if crystals form. Use high-quality, fresh solutions for consistent polymerization [14] [36]. |
| APS (Ammonium Persulfate) | Initiator of the polymerization reaction. | Prepare a 10% (w/v) solution in water and aliquot. Store at 4°C for short-term (1-2 weeks) or at -20°C for longer stability. Fresh APS is critical for complete gel polymerization [14] [36]. |
| TEMED | Catalyst that accelerates the polymerization reaction. | Store at room temperature, tightly sealed. Ensure freshness for consistent gel setting times [14]. |
| Tris Buffers | Provides the appropriate pH for stacking (pH 6.8) and resolving (pH 8.8) [14]. | Prepare with high-purity Tris and pH accurately. Store at 4°C to prevent microbial growth. |
| Electrophoresis Running Buffer | Conducts current and maintains stable pH during the run. | Use a fresh 1X working solution diluted from a concentrated stock for each run to ensure correct ionic strength [66] [67]. |
| SDS (Sodium Dodecyl Sulfate) | Denatures proteins and confers a uniform negative charge. | Use high-purity SDS in buffers and sample preparation. Precipitation indicates age or cold storage; re-dissolve or replace. |
Experimental Workflow: From Gel Casting to Electrophoresis
The following diagram illustrates the integrated workflow, highlighting the critical control points for buffer freshness and gel storage that ensure successful protein separation.
Proactive management of electrophoresis buffers and gel storage is not a mere procedural detail but a foundational aspect of rigorous and reproducible SDS-PAGE research. By adhering to the protocols outlined herein—specifically, the use of freshly prepared buffers and the implementation of validated gel storage methods—researchers can significantly mitigate the risk of experimental artifacts. These practices ensure high-quality protein separation, which is paramount for accurate analysis in downstream applications such as Western blotting and mass spectrometry, thereby accelerating the pace of discovery in drug development and basic biological research.
Validating Gel Performance and Comparative Analysis in Modern Applications
Within the broader research on casting SDS-PAGE gels with resolving and stacking layers, the ability to objectively benchmark gel quality is paramount. Reproducibility and band sharpness are two critical metrics that directly impact the reliability and interpretability of experimental data. Band sharpness reflects the resolution of the separation process, while reproducibility ensures that results are consistent across multiple experiments and laboratories. This application note provides detailed protocols and methodologies for the quantitative assessment of these key parameters, enabling researchers to standardize quality control for SDS-PAGE gels.
Quantitative Benchmarks for Gel Quality
Key Metrics for Band Sharpness and Reproducibility
Table 1: Key Quantitative Metrics for Assessing Gel Quality
| Metric | Description | Measurement Method | Target Value/Benchmark |
|---|---|---|---|
| Band Resolution | Distinctness of separation between adjacent protein bands. | Visual inspection and analysis of lane plot profiles using software like ImageJ [68]. | Sharp, distinct peaks with minimal merging or smearing [68]. |
| Sensitivity | Minimum amount of protein detectable as a distinct band. | Serial dilution of a standard protein (e.g., Bovine Serum Albumin) [68]. | Colloidal CBB-G: can detect down to 74.1 ng with the naked eye; down to 1 ng/band with optimized protocols [68]. |
| Migration Reproducibility | Consistency of a protein's migration distance (and thus calculated MW) across gels and replicates. | Internal calibration of migration using mass spectrometry; comparison with reference databases [69]. | High consistency in MW estimation across replicates; >88% identification reproducibility in replicated analyses [69] [70]. |
| Identification Reproducibility | Consistency in protein identification from gel bands in proteomic workflows. | Overlap in proteins identified from replicate gel slices processed by GeLC-MS/MS [70]. | Overlap of >80% in protein identification between replicate procedures [70]. |
| Quantitative Reproducibility | Consistency in protein abundance measurements. | Label-free quantitation (e.g., spectral counting) across replicate samples [70]. | High positive correlation in quantitative response (e.g., R² = 0.94) [70]. |
Research Reagent Solutions for Quality Assessment
Table 2: Essential Materials for Benchmarking Experiments
| Item | Function in Quality Assessment | Examples / Notes |
|---|---|---|
| Standard Protein Mixtures | Provide known reference bands for assessing resolution, sharpness, and for molecular weight calibration [71]. | BSA (66 kDa), Ovalbumin (45 kDa), Carbonic Anhydrase (30 kDa) [71]. |
| Prestained Molecular Weight Markers | Allow visual tracking of electrophoresis progress and preliminary size estimation during the run [72]. | Precision Plus Protein Unstained Standards [71], prestained protein ladders [72]. |
| Coomassie Staining Solutions | Visualize separated protein bands. The staining protocol directly impacts band sharpness and background [68]. | Colloidal CBB-G staining; improved protocols include a fixation step (40% methanol, 10% acetic acid) to prevent protein diffusion [68]. |
| Image Analysis Software | Quantify band intensity, sharpness, and molecular weight through densitometry and plot profile analysis [68] [71]. | ImageJ (Fiji) is widely used for generating lane plot profiles and quantifying band areas [68] [71]. |
| Mass Spectrometry | Serves as an orthogonal method for validating protein identity and accurate molecular weight, crucial for establishing migration reproducibility [69]. | Used to create databases of accurate electrophoretic migration patterns for thousands of proteins [69]. |
Experimental Protocols
Protocol 1: Assessing Band Sharpness and Resolution
This protocol details a method to quantitatively evaluate the sharpness and resolution of protein bands, incorporating a fixation step that significantly improves results [68].
1. SDS-PAGE Separation:
- Prepare and cast discontinuous SDS-PAGE gels with appropriate stacking and resolving layers [73] [14].
- Load a total cell protein extract (e.g., 20 µg and 6.7 µg from rice endosperm) alongside a prestained molecular weight marker [68].
- Run the gel using a standard protocol (e.g., 90 V for 30 min, then 150 V for ~60 min) until the dye front reaches the bottom [68].
2. Gel Staining with Improved Fixation:
- Fixation: After electrophoresis, transfer the gel to a fixation solution (40% methanol, 10% acetic acid) and incubate for 30 minutes with gentle shaking. This step prevents protein diffusion during subsequent washes [68].
- Staining: Briefly rinse the gel with ultrapure water. Incubate in colloidal Coomassie Brilliant Blue G-250 (CBB-G) staining solution for 2 hours or overnight with shaking [68]. The staining solution contains 0.02% (w/v) CBB G-250, 5% (w/v) aluminium sulfate, 10% (v/v) ethanol, and 2% (v/v) orthophosphoric acid [68].
- Destaining: Rinse the gel briefly with water and destain in a solution of 10% ethanol and 2% orthophosphoric acid for 3-5 minutes. Perform a final wash with ultrapure water for 10 minutes to remove colloidal particles [68].
3. Image Acquisition and Analysis:
- Capture a high-resolution digital image of the stained gel.
- Use image analysis software (e.g., ImageJ) to generate lane plot profiles [68].
- Assess band sharpness by examining the distinctness and narrowness of peaks in the plot profile. Compare the results with gels stained using standard protocols without fixation [68].
Protocol 2: Evaluating Reproducibility via GeLC-MS/MS
This protocol leverages mass spectrometry to assess the reproducibility of protein separation and identification across multiple gels, using a streamlined "whole gel" processing method [70].
1. Sample Preparation and SDS-PAGE:
- Separate complex protein lysates (e.g., from human HCT116 cells or mouse tissue) by SDS-PAGE. Run multiple replicate gels for the same sample [70].
2. Whole Gel Processing:
- After electrophoresis, stain the gel with a compatible stain (e.g., Coomassie).
- Scan the gel and excise the entire lane. Do not slice the gel at this stage [70].
- Process the intact gel lane through all washing, reduction, and alkylation steps. This "whole gel" approach standardizes processing and reduces hands-on time and variability compared to processing individual slices [70].
- After alkylation, slice the entire lane into 5-20 equal fractions based on the molecular weight marker as a guide [70].
3. In-Gel Digestion and MS Analysis:
- Subject each gel slice to in-gel tryptic digestion [70].
- Analyze the resulting peptides from each fraction by LC-MS/MS [70].
4. Data Analysis for Reproducibility:
- Combine database search results from all slices of a single gel lane to obtain a global protein list for that sample [70].
- Compare the protein identifications from replicate gel lanes. Calculate the percentage overlap in identified proteins.
- For quantitative reproducibility, use label-free methods like spectral counting and calculate the correlation (R²) between protein abundances from different replicate runs [70].
Workflow for benchmarking gel quality, covering both band sharpness and reproducibility.
Data Analysis and Interpretation
Image Analysis for Band Sharpness
- Using ImageJ for Plot Profiles: Open the gel image in ImageJ. Convert it to 8-bit if necessary. Draw a line rectangle along the lane of interest and run the "Gel Plot" function to generate a profile [71]. The resulting plot shows signal intensity against migration distance.
- Interpreting Plot Profiles: Sharp, well-resolved bands appear as distinct, narrow peaks with a high amplitude. Poor resolution is indicated by broad, overlapping peaks or a smeared profile [68]. The improved colloidal CBB-G method with fixation demonstrates more distinct peaks with better resolution across all molecular weights compared to standard methods [68].
Statistical Analysis for Reproducibility
- Calculation of Overlap: For identification reproducibility from GeLC-MS/MS data, the overlap is calculated as the number of proteins common to two replicate analyses divided by the total number of unique proteins identified in both, expressed as a percentage. Reproducible workflows show >80% overlap [70].
- Quantitative Correlation: For spectral count data, plot the counts for each protein from one replicate against the counts from the second replicate. A linear regression analysis yielding a high R² value (e.g., 0.94) indicates excellent quantitative reproducibility [70].
Data analysis pathways for quantifying band sharpness and reproducibility metrics.
The purity of monoclonal antibodies (mAbs) is a Critical Quality Attribute (CQA) that must be rigorously monitored throughout biopharmaceutical development and manufacturing to ensure patient safety, drug efficacy, and batch-to-batch consistency [74] [75]. Purity analysis focuses on detecting and quantifying product-related impurities, including size variants such as aggregates (high molecular weight species, HMW) and fragments (low molecular weight species, LMW), as well as charge variants resulting from post-translational modifications [74] [76].
This application note details two principal electrophoretic techniques—SDS-PAGE and CE-SDS—for assessing mAb purity. We place specific emphasis on the critical role of properly casting discontinuous gels (with stacking and resolving layers) for SDS-PAGE, framing this methodology within broader research on gel electrophoresis. The protocols and data provided herein are designed to serve as a practical guide for researchers, scientists, and drug development professionals.
Fundamental Principles and Techniques
SDS-PAGE: A Discontinuous Gel System
Sodium Dodecyl Sulfate-Polyacrylamide Gel Electrophoresis (SDS-PAGE) is a foundational technique for separating proteins based on their molecular weight [1]. Its principle relies on the binding of SDS, an anionic detergent, to denatured proteins, which confers a uniform negative charge and masks intrinsic charge differences. Separation occurs as these linearized proteins migrate through a polyacrylamide gel matrix under an electric field, with smaller proteins moving faster than larger ones [77] [1].
The discontinuous buffer system, utilizing gels with distinct stacking and resolving layers, is crucial for achieving high-resolution separation [77] [1]. The diagram below illustrates the workflow and the underlying mechanism of this discontinuous system.
The stacking gel (pH ~6.8) has a low acrylamide concentration and large pores. Here, glycine from the running buffer (pH 8.3) becomes a zwitterion with minimal charge, creating a steep voltage gradient between highly mobile chloride ions (from the gel buffer) and the slower glycine. Protein mobilities fall between these two fronts, compressing them into a sharp, unified band before entering the resolving gel [77] [1].
The resolving gel (pH ~8.8) has a higher acrylamide concentration, creating a tighter molecular sieve. Upon entering this layer, glycine gains a strong negative charge and overtakes the proteins. The proteins, now released from the voltage gradient, separate based solely on their molecular size as they migrate [77] [1].
CE-SDS: An Automated, Quantitative Evolution
Capillary Electrophoresis with SDS (CE-SDS) is an advanced technique that automates and quantifies the principles of SDS-PAGE. Samples are injected into a capillary filled with a replaceable SDS-gel matrix and separated via electrophoresis. Detection, typically by UV absorbance at 220 nm, occurs near the distal end of the capillary, providing a quantitative electropherogram [78] [75]. CE-SDS offers superior resolution, reproducibility, and automation compared to traditional gel-based methods, making it the preferred technique for regulated, quality control (QC) environments [78] [75].
Experimental Protocols
Protocol: SDS-PAGE for mAb Purity Analysis
This protocol describes the detailed procedure for casting and running a discontinuous SDS-PAGE gel to analyze mAb purity and size variants [77] [1] [79].
The Scientist's Toolkit: Key Reagents for SDS-PAGE
| Reagent | Function/Brief Explanation |
|---|---|
| Acrylamide/Bis-acrylamide | Forms the polyacrylamide gel matrix; concentration determines pore size [1]. |
| SDS (Sodium Dodecyl Sulfate) | Anionic detergent that denatures proteins and confers uniform negative charge [77] [1]. |
| TEMED & Ammonium Persulfate (APS) | Catalyzes the polymerization of acrylamide [1]. |
| Tris-HCl Buffers | Provides the required pH for stacking (pH 6.8) and resolving (pH 8.8) gels [77]. |
| Glycine | Key ion in the running buffer; its charge-state change enables the discontinuous system [77]. |
| β-Mercaptoethanol (BME) or DTT | Reducing agent that breaks disulfide bonds for analysis under reduced conditions [1]. |
Procedure:
- Gel Casting:
- Prepare the resolving gel: Mix components (e.g., Tris-HCl pH 8.8, acrylamide, SDS, APS, TEMED) and pour into the gel cassette. Top immediately with a layer of isopropanol or water to ensure a uniform, flat interface. Allow to polymerize completely [1] [79].
- Prepare the stacking gel: After removing the isopropanol, pour the stacking gel mixture (e.g., Tris-HCl pH 6.8, low-percentage acrylamide, APS, TEMED) and insert the gel comb without introducing bubbles. Polymerize fully [1] [79].
Sample Preparation: Dilute the mAb sample to 0.2-0.5 mg/mL. Mix with SDS-PAGE sample buffer (containing SDS and a reducing agent like BME if reduced conditions are required) and heat at 70-95°C for 5-10 minutes to denature [78] [1].
Electrophoresis: Assemble the gel in the running chamber filled with Tris-Glycine-SDS running buffer (pH ~8.3). Load prepared samples and molecular weight markers. Apply a constant voltage (e.g., 150-200 V) until the dye front migrates to the bottom of the gel [78] [77].
Detection and Analysis: Stain the gel with a protein stain (e.g., Coomassie Blue). Image the gel and use software to quantify band intensities to assess purity and estimate molecular weight [78].
Protocol: CE-SDS for mAb Purity Analysis
This protocol outlines a standard method for mAb purity analysis using CE-SDS under non-reduced conditions, suitable for a system like the BioPhase 8800 [78] [80] [75].
Procedure:
- Sample Preparation: Dilute the mAb to 1.0 mg/mL in SDS sample buffer. For non-reduced analysis, add iodoacetamide (IAM) to alkylate free thiols and prevent disulfide bond scrambling. Heat the sample at 70°C for 3-10 minutes to denature [80] [75].
- Instrument Setup: Use a bare fused-silica capillary. Conditioning, separation, and shutdown methods are programmed into the instrument software (e.g., BioPhase software) [80].
- Separation: Hydrodynamically or electrokinetically inject the sample. Apply an electric field (e.g., 500 V/cm) for separation. UV detection at 220 nm records the protein peaks as they pass the detector [78] [80].
- Data Analysis: The instrument software (e.g., 32 Karat, BioPhase software) automatically generates an electropherogram and quantifies the peak areas, reporting the percentage of the main IgG species and impurities like LMW fragments [78] [80].
Data Presentation and Comparative Analysis
Quantitative Comparison of Techniques
The following table summarizes a direct comparison between SDS-PAGE and CE-SDS for analyzing the same normal and heat-stressed IgG sample, highlighting the performance differences [78].
Table 1: Direct comparison of SDS-PAGE and CE-SDS performance in mAb purity analysis
| Parameter | SDS-PAGE | CE-SDS |
|---|---|---|
| Resolution | Lower; bands can be diffuse. | Higher; sharp peaks, baseline separation of fragments [78]. |
| Quantitation | Semi-quantitative via band intensity; lower accuracy. | Fully quantitative with high accuracy and precision [78] [75]. |
| Signal-to-Noise Ratio | Lower, making impurity bands difficult to quantify [78]. | Significantly higher, enabling reliable detection and quantitation of low-abundance species [78]. |
| Detection of Nonglycosylated IgG | Not resolved [78]. | Easily detected and quantified, a significant functional advantage [78]. |
| Reproducibility | Moderate; manual steps introduce variability. | High; automated system provides excellent repeatability and intermediate precision (%CV < 2.5% for main peak) [78] [75]. |
| Throughput & Automation | Low; manual casting, loading, staining, and destaining. | High; automated sample injection and data analysis, no staining required [78] [75]. |
Application in Forced Degradation Studies
Forced degradation studies, such as thermal stress, are critical for evaluating mAb stability. The table below shows representative quantitative data obtained from CE-SDS analysis of a mAb subjected to heat stress, demonstrating its ability to monitor changes in purity and impurity profiles over time [75].
Table 2: CE-SDS analysis of a monoclonal antibody under thermal stress (50°C)
| Sample Condition | Intact IgG (%) | Total LMW Fragments (%) | Total HMW Aggregates (%) | Key Observations |
|---|---|---|---|---|
| Initial (0 days) | > 99.0 | < 1.0 | < 0.5 | High initial purity. |
| After 3 days | 95.2 | 3.5 | 1.3 | Initial increase in fragments and aggregates. |
| After 7 days | 89.7 | 7.8 | 2.5 | Time-dependent decrease in intact mAb. |
| After 14 days | 82.5 | 14.1 | 3.4 | Significant fragmentation and aggregation. |
Advanced Applications and orthogonal Techniques
While CE-SDS is excellent for size variant analysis, a comprehensive purity assessment requires orthogonal techniques. Liquid Chromatography-Mass Spectrometry (LC-MS) is increasingly used for in-depth characterization. LC-MS provides intact mass measurement, glycoform distribution, and identification of specific post-translational modifications (e.g., deamidation, oxidation) with high specificity, complementing the data from electrophoretic techniques [74] [81].
Furthermore, CE-SDS methods can be optimized using Analytical Quality by Design (AQbD) principles to ensure robustness and regulatory compliance throughout the method lifecycle [74].
Sodium dodecyl sulfate-polyacrylamide gel electrophoresis (SDS-PAGE) is a foundational analytical technique for protein characterization that has become indispensable in modern food science. This method enables the separation, identification, and characterization of proteins across diverse food products based on their molecular weight [82]. The technique's development began following the discovery of electrophoresis principles, with modern SDS-PAGE methodology being established by Laemmli in 1970 [82]. The robustness and versatility of SDS-PAGE make it particularly valuable for analyzing complex food matrices, where it provides critical insights into protein composition, functionality, and structural changes induced by food processing. Within food science, SDS-PAGE serves as a powerful tool for safety verification, quality control, and the detection of adulterants and allergens across various food categories, including cereals, pulses, dairy products, meats, seafood, and plant-based alternatives [82].
Principles of SDS-PAGE
SDS-PAGE separates protein complexes into their individual subunits based on molecular weight through a combination of chemical treatment and electrophoretic migration. The anionic detergent sodium dodecyl sulfate (SDS) denatures proteins by binding to them in a constant ratio, approximately 1.4 g SDS per 1.0 g protein [83]. This binding linearizes the proteins and imparts a uniform negative charge density, effectively masking the proteins' intrinsic charge [47]. When reducing agents such as β-mercaptoethanol or dithiothreitol (DTT) are added, they break disulfide bonds that link protein subunits, further ensuring complete denaturation [82] [83].
During electrophoresis, an electric field is applied across a polyacrylamide gel matrix. The negatively charged SDS-protein complexes migrate toward the positive electrode at rates inversely proportional to their molecular size [47]. Smaller proteins navigate the gel's porous network more easily and migrate farther, while larger proteins are more hindered [21]. This relationship between migration distance and molecular weight allows for size-based separation and estimation.
The polyacrylamide gel concentration determines the effective separation range, with higher acrylamide percentages creating smaller pores that better resolve lower molecular weight proteins [47]. The discontinuous buffer system employing stacking and resolving gels sharpens protein bands for enhanced resolution [47].
SDS-PAGE Protocol for Food Protein Analysis
Gel Casting with Resolving and Stacking Layers
The discontinuous gel system comprising separating and stacking layers is crucial for achieving sharp protein bands. Below is a standardized protocol for casting SDS-PAGE gels optimized for food protein analysis.
Reagent Preparation
- Acrylamide/Bis-acrylamide (30%): 29.2% acrylamide and 0.8% bis-acrylamide in deionized water. Caution: Unpolymerized acrylamide is a neurotoxin that can pass through unbroken skin; wear gloves and work in a fume hood [84].
- Resolving Gel Buffer (1.5 M Tris-HCl, pH 8.8): Weigh 181.7 g Tris base, dissolve in 800 mL deionized water, adjust to pH 8.8 with HCl, and bring final volume to 1L.
- Stacking Gel Buffer (0.5 M Tris-HCl, pH 6.8): Weigh 60.6 g Tris base, dissolve in 800 mL deionized water, adjust to pH 6.8 with HCl, and bring final volume to 1L.
- 10% Sodium Dodecyl Sulfate (SDS): Weigh 10 g SDS and dissolve in 100 mL deionized water.
- 10% Ammonium Persulfate (APS): Weigh 0.1 g APS and dissolve in 1 mL deionized water. Prepare fresh before use.
- TEMED (N,N,N',N'-Tetramethylethylenediamine): Store at 4°C and use as supplied.
- Running Buffer (10X): 250 mM Tris, 1.92 M glycine, 1% SDS. Dilute to 1X before use.
- Sample Buffer (2X Laemmli Buffer): 125 mM Tris-HCl (pH 6.8), 4% SDS, 20% glycerol, 0.02% bromophenol blue. Add 10% β-mercaptoethanol for reducing conditions.
Gel Casting Procedure
- Assemble glass plates in casting stand with appropriate spacers (0.75-1.5 mm thickness). Test for leaks with deionized water [84] [14].
- Prepare resolving gel mixture according to Table 1 for desired percentage. Add TEMED and APS last to initiate polymerization [84].
- Pour resolving gel immediately after adding TEMED and APS, leaving space for stacking gel (approximately 2 cm below comb) [21].
- Overlay with saturated butanol or isopropanol to create a flat interface and exclude oxygen that inhibits polymerization [84].
- Allow polymerization for 30-45 minutes at room temperature. A distinct refractive interface indicates complete polymerization.
- Remove overlay liquid, rinse gel surface with deionized water, and wick away excess with filter paper [21].
- Prepare stacking gel mixture (typically 4-6% acrylamide) as specified in Table 1. Add TEMED and APS last.
- Pour stacking gel onto polymerized resolving gel, insert comb avoiding bubbles, and allow to polymerize for 30 minutes [21].
- Remove comb carefully to prevent well damage. Rinse wells with running buffer to remove unpolymerized acrylamide.
Table 1: SDS-PAGE Gel Formulations for Different Protein Size Ranges
| Component | 8% Resolving Gel | 10% Resolving Gel | 12% Resolving Gel | 15% Resolving Gel | 6% Stacking Gel |
|---|---|---|---|---|---|
| 30% Acrylamide | 4.0 mL | 5.0 mL | 6.0 mL | 7.5 mL | 2.0 mL |
| 1.5 M Tris-HCl (pH 8.8) | 3.75 mL | 3.75 mL | 3.75 mL | 3.75 mL | - |
| 0.5 M Tris-HCl (pH 6.8) | - | - | - | - | 3.78 mL |
| 10% SDS | 150 µL | 150 µL | 150 µL | 150 µL | 150 µL |
| Deionized H₂O | 7.0 mL | 6.0 mL | 5.0 mL | 3.5 mL | 9.0 mL |
| 10% APS | 75 µL | 75 µL | 75 µL | 75 µL | 75 µL |
| TEMED | 7.5 µL | 7.5 µL | 7.5 µL | 7.5 µL | 15 µL |
| Total Volume | 15 mL | 15 mL | 15 mL | 15 mL | 15 mL |
| Optimal Protein Separation Range | 25-200 kDa [14] | 15-100 kDa [14] | 10-70 kDa [14] | 4-40 kDa [14] | N/A |
Table 2: Gel Thickness and Sample Volume Capacity
| Number of Wells | 0.75-mm Thick Gel | 1.00-mm Thick Gel | 1.50-mm Thick Gel |
|---|---|---|---|
| 5 | 70 µL | 105 µL | 166 µL |
| 10 | 33 µL | 44 µL | 66 µL |
| 15 | 20 µL | 36 µL | 40 µL |
Sample Preparation and Electrophoresis
Food Protein Extraction and Preparation
- Protein Extraction: Extract proteins from food matrices using appropriate buffers. For plant-based foods, use Tris-HCl buffer (pH 8.0) with protease inhibitors. For animal tissues, use RIPA buffer. Concentrate dilute proteins by precipitation if necessary [82].
- Protein Denaturation: Mix protein extract with equal volume of 2X Laemmli buffer. For reducing conditions, include 5% β-mercaptoethanol or 100 mM DTT [82] [21].
- Heat Denaturation: Incubate samples at 95-100°C for 5-10 minutes in a heating block or water bath [21].
- Clarification: Centrifuge at 12,000-16,000 × g for 30 seconds to pellet insoluble material [21].
- Protein Quantification: Adjust loading volumes based on protein concentration determined by Bradford, Lowry, or BCA assays. Typical loads range from 10-50 µg per well for Coomassie staining.
Electrophoresis Conditions
- Assemble gel apparatus in electrophoresis tank with inner and outer chambers filled with 1X running buffer.
- Load samples and molecular weight markers into wells using microsyringe or pipette.
- Connect power supply and run at constant voltage: 90V until dye front enters resolving gel, then increase to 150V until dye front reaches bottom (~1-2 hours) [21].
- Terminate run when bromophenol blue tracking dye is approximately 0.5-1 cm from bottom.
Protein Visualization
Coomassie Staining:
- Place gel in Coomassie Brilliant Blue R-250 staining solution (0.1% Coomassie in 40% methanol, 10% acetic acid) for 15-60 minutes with gentle agitation [21].
- Destain with multiple changes of 40% methanol, 10% acetic acid until background is clear and bands are visible [21].
- Preserve gel in 7% acetic acid or document immediately.
Alternative Staining:
- Silver Stain: Higher sensitivity (ng range) but more complex protocol.
- Fluorescent Stains: Sypro Ruby or Flamingo for high sensitivity with linear quantitation.
Food Science Applications
Protein Profiling and Characterization
SDS-PAGE enables comprehensive protein profiling across diverse food categories, providing essential information about protein composition, integrity, and functionality. In cereal science, it effectively evaluates critical storage proteins including gliadins and glutenins, which determine dough elasticity and baking quality [82]. The technique characterizes hydrophobic proteins responsible for gelling properties and albumins/globulins contributing to foaming capacity [82]. For pulse proteins, SDS-PAGE identifies antinutritional factors like lectins and trypsin inhibitors while monitoring changes during processing [82]. In dairy applications, the method tracks casein and whey protein profiles, enabling assessment of heat treatments and detection of protein degradation during storage [83]. Meat and seafood analysis utilizes SDS-PAGE for species authentication, quality evaluation, and monitoring proteolytic degradation during spoilage [82]. Plant-based alternative products benefit from SDS-PAGE for ingredient selection, process optimization, and final product characterization [82] [83].
Allergen Detection and Analysis
SDS-PAGE plays a crucial role in food allergen research and detection, particularly when combined with immunoblotting techniques. The method separates allergenic proteins from complex food matrices for subsequent identification and characterization. Major food allergens analyzed include peanut proteins (Ara h 1, Ara h 2, Ara h 3), tree nut allergens, soy proteins (Gly m 4, Gly m 5), milk proteins (casein, whey), and egg proteins [85]. SDS-PAGE enables monitoring of processing techniques aimed at reducing allergenicity, such as thermal treatment, enzymatic hydrolysis, fermentation, high-pressure processing, and cold plasma treatment [85]. The technique, combined with Western blotting, assesses the effectiveness of these processing methods by detecting changes in protein structure and IgE-binding capacity [85]. Allergen detection thresholds established through SDS-PAGE and complementary methods provide critical safety information, with minimum eliciting doses ranging from 0.03 mg for walnut to 2.4 mg for milk [85]. The method also detects potential cross-contamination in production facilities and verifies "free-from" label claims [83].
Quality Control and Process Monitoring
SDS-PAGE serves as an essential quality control tool throughout food production chains, ensuring product consistency, authenticity, and safety. The technique assesses raw material quality and lot-to-lot consistency of protein ingredients, particularly when switching suppliers or building supply chain redundancy [83]. It monitors the impact of processing parameters including heat treatments, enzymatic modifications, fermentation, and hydrolysis on protein molecular weight distribution and functionality [83]. SDS-PAGE detects economic adulteration, such as addition of lower-value proteins to premium products, by comparing banding patterns against authentic references [83]. Shelf-life studies utilize SDS-PAGE to track protein degradation, particularly enzymatic hydrolysis that affects product quality during storage [83]. In complex processes like cheese aging, the method monitors proteolysis of dairy proteins into peptides of different molecular weights, which directly impact flavor development and texture [83]. For meat and seafood products, SDS-PAGE helps evaluate protein degradation indicators of freshness and quality [82].
Table 3: Key Food Allergens and Detection Thresholds
| Food Product | Major Allergenic Proteins | ED01 (mg) | ED05 (mg) |
|---|---|---|---|
| Walnut | Jug r 1-4 | 0.03 | 0.08 |
| Cashew | Ana o 1-3 | 0.05 | 0.80 |
| Mustard | Sin a 1, Bra j 1 | 0.07 | 0.40 |
| Celery | Api g 1-5 | 0.07 | 1.50 |
| Sesame | Ses i 1-7 | 0.10 | 0.20 |
| Hazelnut | Cor a 1-14 | 0.10 | 3.50 |
| Peanut | Ara h 1-8 | 0.20 | 2.10 |
| Egg | Ovomucoid, ovalbumin | 0.20 | 2.30 |
| Milk | Casein, β-lactoglobulin | 0.20 | 2.40 |
The Scientist's Toolkit: Essential Reagents and Materials
Table 4: Essential Research Reagent Solutions for SDS-PAGE
| Reagent/Material | Function/Purpose | Typical Composition/Notes |
|---|---|---|
| Acrylamide/Bis-acrylamide | Gel matrix formation | 30% solution, 37.5:1 ratio; Neurotoxin when unpolymerized [84] |
| Tris-HCl Buffers | pH maintenance during electrophoresis | 1.5 M, pH 8.8 (resolving); 0.5 M, pH 6.8 (stacking) [84] |
| Sodium Dodecyl Sulfate (SDS) | Protein denaturation and charge masking | 10-20% solution; Anionic detergent [82] [21] |
| Ammonium Persulfate (APS) | Polymerization initiator | 10% solution in water; Prepare fresh [84] |
| TEMED | Polymerization catalyst | Accelerates free radical formation [84] |
| β-mercaptoethanol/DTT | Disulfide bond reduction | Added to sample buffer for reducing conditions [82] |
| Coomassie Brilliant Blue | Protein staining | 0.1% in 40% methanol, 10% acetic acid [21] |
| Molecular Weight Markers | Size calibration | Pre-stained or unstained protein standards |
| Running Buffer | Conducting medium for electrophoresis | 25 mM Tris, 192 mM glycine, 0.1% SDS [21] |
| Sample Buffer (Laemmli) | Protein denaturation and loading | Tris-HCl, SDS, glycerol, bromophenol blue, β-mercaptoethanol [82] |
SDS-PAGE remains a fundamental and versatile analytical technique in food protein science, providing critical insights into protein composition, structural modifications, and functionality across diverse food systems. Its applications in protein profiling, allergen detection, and quality control make it indispensable for ensuring food safety, authenticity, and quality. The methodology's robustness, coupled with its relative simplicity and cost-effectiveness, ensures its continued relevance in both research and industrial settings. When properly executed with appropriate gel formulations and standardized protocols, SDS-PAGE delivers reliable data for characterizing food proteins in their native state or following processing treatments. As food systems evolve with emerging protein sources and processing technologies, SDS-PAGE will maintain its position as a cornerstone technique for protein analysis, particularly when integrated with complementary methods like Western blotting and mass spectrometry for comprehensive food protein characterization.
Sodium Dodecyl Sulfate-Polyacrylamide Gel Electrophoresis (SDS-PAGE) and Capillary Electrophoresis-Sodium Dodecyl Sulfate (CE-SDS) represent two evolutionary stages in the analysis of protein purity and molecular weight. SDS-PAGE has served as a fundamental tool in biochemistry and molecular biology laboratories for decades, providing a robust method for separating proteins based on their molecular size. The technique relies on a discontinuous buffer system and a polyacrylamide gel matrix with varying pore sizes to achieve separation. Within the context of casting SDS-PAGE gels with resolving and stacking layers, understanding the comparative advantages and limitations of this traditional method against the increasingly automated CE-SDS platform is essential for modern researchers, scientists, and drug development professionals. This application note provides a detailed technical comparison of these methodologies, supported by quantitative data and optimized experimental protocols.
The foundational principle shared by both techniques involves the binding of SDS to proteins, creating uniformly charged complexes that can be separated primarily based on molecular size. SDS, an anionic surfactant, disrupts non-covalent bonds in protein molecules and confers a consistent negative charge-to-mass ratio [86]. This process effectively linearizes proteins and masks their intrinsic charges, ensuring that separation occurs primarily according to molecular weight rather than charge characteristics [78]. While this core principle remains consistent between the two methods, their implementation, automation, detection capabilities, and application in regulated environments differ significantly, necessitating a thorough comparative analysis for appropriate method selection in research and quality control settings.
Principles of SDS-PAGE
Fundamental Mechanisms and Gel Architecture
The SDS-PAGE technique employs a discontinuous buffer system utilizing a stacking gel (pH ~6.8) and a resolving gel (pH ~8.8) to achieve optimal protein separation [86]. The stacking gel features a lower percentage of acrylamide (typically 4-5%) that allows for freer protein movement, while the resolving gel contains a higher percentage (typically 8-12% or higher) that creates a molecular sieving effect responsible for separating proteins by size [86]. When an electric current is applied, the negatively charged protein-SDS complexes migrate toward the positively charged anode, with their movement through the polyacrylamide matrix impeded according to their hydrodynamic size - larger molecules experience greater resistance and migrate slower than smaller molecules [4].
The ingenious design of the discontinuous system lies in its use of different pH environments and ion mobility. In the stacking gel at pH 6.8, glycine from the running buffer (pH 8.3) exists primarily as zwitterions with minimal net charge, resulting in lower mobility [86]. Chloride ions (from Tris-HCl in the gel) display high mobility, creating a steep voltage gradient that concentrates protein samples into a narrow zone before they enter the resolving gel. When this protein front reaches the resolving gel at pH 8.8, glycine ions gain negative charge and migrate faster, leaving the proteins to separate based on size in the uniform polyacrylamide matrix [86]. This process effectively concentrates initially diffuse protein samples into sharp bands, significantly enhancing resolution.
Critical Reagents and Their Functions
The following table outlines essential reagents used in SDS-PAGE and their specific functions:
Table 1: Key Research Reagent Solutions for SDS-PAGE
| Reagent | Function | Typical Composition |
|---|---|---|
| SDS (Sodium Dodecyl Sulfate) | Denatures proteins and confers negative charge | 1-2% solution in buffers |
| Acrylamide/Bis-acrylamide | Forms porous gel matrix for molecular sieving | Typically 30% acrylamide: 0.8% bis solution |
| TEMED/Ammonium Persulfate | Catalyzes acrylamide polymerization | 0.1% TEMED, 0.1% APS |
| Tris-HCl Buffer | Maintains pH in stacking (6.8) and resolving (8.8) gels | 0.5M-1.5M depending on application |
| Glycine | Leading ion in discontinuous buffer system | 25mM in running buffer, 192mM in gel buffers |
| β-mercaptoethanol/DTT | Reduces disulfide bonds | 1-5% in sample buffer |
| Coomassie Brilliant Blue | Protein stain for visualization | 0.1% in methanol:acetic acid solution |
Principles of CE-SDS
Automated Capillary-Based Separation
CE-SDS represents an automated, quantitative evolution of traditional SDS-PAGE methodology. In this technique, protein separation occurs within a fused-silica capillary filled with a replaceable SDS-gel polymer matrix rather than a traditional polyacrylamide gel [78]. Samples are injected into the capillary inlet electrokinetically or via pressure, followed by application of a high voltage (typically 500 V/cm) that drives protein migration through the separation matrix [78] [87]. Quantitative detection occurs near the distal end of the capillary using UV absorbance (typically 220 nm) or laser-induced fluorescence (LIF) detection systems, generating electropherograms where proteins appear as peaks with specific migration times [78].
The separation mechanism in CE-SDS maintains the fundamental principle of protein-SDS complexes migrating according to molecular size, but with several distinct advantages. The capillary format significantly reduces Joule heating effects due to its high surface area-to-volume ratio, improving separation efficiency [88]. Furthermore, the automated nature of CE-SDS eliminates manual gel casting, sample loading, staining, and destaining steps required in traditional SDS-PAGE [88]. Detection occurs in real-time without additional processing, and data analysis is automated through dedicated software that calculates relative migration times and corrected peak area percentages [87]. This automation enhances reproducibility while reducing operator-dependent variability and total analysis time.
Detection Modalities in CE-SDS
Modern CE-SDS instruments offer multiple detection options optimized for different sensitivity requirements. UV detection at 220 nm is most common, taking advantage of peptide bond absorbance [78]. For enhanced sensitivity, laser-induced fluorescence (LIF) detection provides superior signal-to-noise ratios for low-abundance impurities but requires sample labeling with fluorescent dyes [87]. More recently, native fluorescence detection (NFD) has been implemented, utilizing the intrinsic fluorescence of tryptophan residues (with contributions from tyrosine and phenylalanine) upon excitation at 280 nm [87]. This label-free approach offers sensitivity comparable to LIF without the potential artifacts introduced by chemical derivatization, while providing significantly improved baseline stability compared to UV detection [87].
Comparative Technical Analysis
Performance Metrics and Applications
Table 2: Quantitative Comparison of SDS-PAGE and CE-SDS Performance Characteristics
| Parameter | SDS-PAGE | CE-SDS |
|---|---|---|
| Separation Principle | Molecular sieving through polyacrylamide gel | Molecular sieving through polymer matrix in capillary |
| Sample Throughput | 10-20 samples per gel, ~2-4 hours | 8-96 samples per run, ~15-45 minutes |
| Detection Method | Staining (Coomassie, silver) | UV (220 nm), LIF, or Native Fluorescence |
| Quantitation | Densitometry (semi-quantitative) | Direct UV/LIF/NFD (fully quantitative) |
| Data Output | Band patterns on gel | Electropherograms with peak retention times |
| Molecular Weight Determination Trueness | 0.93-1.03 (relative to reference MW) [89] | 1.00-1.11 (relative to reference MW) [89] |
| Impurity Detection Sensitivity | ~5-10% (Coomassie), ~1-5% (silver) | ~0.1-2% (UV), ~0.01-0.1% (LIF/NFD) [87] |
| Glycosylation Detection | Limited resolution | Can resolve glycosylated and non-glycosylated forms [78] |
| Inter-assay Precision (%RSD) | 10-15% | 0.1-0.4% for migration time, 0.3-0.5% for peak area [87] |
| Sample Consumption | ~10-20 μg | ~0.1-1 μg |
The data reveal that CE-SDS offers significant advantages in precision, sensitivity, and quantitation compared to traditional SDS-PAGE. The automated nature of CE-SDS reduces operator-dependent variability, resulting in exceptional reproducibility with %RSD values below 0.5% for critical parameters [87]. This level of precision is particularly valuable in regulated environments where method robustness is essential. Furthermore, CE-SDS demonstrates superior capability in detecting low-level impurities and resolving structurally similar variants such as glycosylated and non-glycosylated antibodies, a critical attribute in biopharmaceutical development where these modifications can significantly impact therapeutic efficacy and safety [78].
Operational Considerations and Limitations
Despite its performance advantages, CE-SDS presents certain operational considerations. The technology requires significant capital investment in instrumentation and proprietary reagents, which may be prohibitive for some laboratories [88]. Method development can be complex, often requiring optimization of multiple parameters including sample preparation, injection conditions, separation temperature, and detection settings [90]. Additionally, some researchers have noted that CE-SDS separations are performed in series rather than parallel, making direct lane-to-lane comparisons less convenient than with traditional SDS-PAGE [88]. For specialized applications such as two-dimensional gel electrophoresis, SDS-PAGE remains the established methodology without a direct CE-SDS equivalent [88].
Experimental Protocols
SDS-PAGE Protocol for Protein Separation
Sample Preparation:
- Dilute protein samples to 0.2-1 mg/mL in appropriate buffer.
- Mix sample with 4× Laemmli buffer (containing Tris-HCl, SDS, glycerol, bromophenol blue, and β-mercaptoethanol or DTT) at 3:1 ratio [86].
- Heat denature at 70-95°C for 5-10 minutes to ensure complete unfolding and reduction (if using reducing agents).
- Centrifuge briefly (10,000 × g, 1 minute) to collect condensate.
Gel Casting (Discontinuous System): Resolving Gel (10%, 10 mL volume):
- 3.3 mL 30% acrylamide/bis solution (29:1)
- 2.5 mL 1.5 M Tris-HCl (pH 8.8)
- 4.1 mL deionized water
- 0.1 mL 10% SDS
- 0.1 mL 10% ammonium persulfate
- 0.004 mL TEMED Mix without introducing bubbles and pour immediately, leaving space for stacking gel. Overlay with isopropanol or water to ensure even polymerization.
Stacking Gel (4%, 5 mL volume):
- 0.67 mL 30% acrylamide/bis solution (29:1)
- 0.63 mL 1.0 M Tris-HCl (pH 6.8)
- 3.6 mL deionized water
- 0.05 mL 10% SDS
- 0.05 mL 10% ammonium persulfate
- 0.005 mL TEMED After resolving gel polymerizes (20-30 minutes), remove overlay, add stacking gel, and insert comb avoiding bubbles.
Electrophoresis:
- Assemble gel in electrophoresis chamber filled with running buffer (25 mM Tris, 192 mM glycine, 0.1% SDS, pH 8.3).
- Load 5-20 μL of prepared samples and molecular weight markers into wells.
- Run at constant voltage: 80-100 V through stacking gel, 120-150 V through resolving gel.
- Stop when bromophenol blue dye front reaches bottom of gel (approximately 60-90 minutes).
Detection and Analysis:
- Carefully remove gel from cassettes and place in fixation solution (40% ethanol, 10% acetic acid) for 30 minutes.
- Stain with Coomassie Blue (0.1% in fixation solution) for 1-2 hours with gentle agitation.
- Destain with multiple changes of 10% acetic acid, 10% methanol until background is clear and bands are visible.
- Image gel using densitometry system and analyze band intensities with appropriate software (e.g., Alpha View, ImageJ) [78].
CE-SDS Protocol for mAb Purity Analysis
Sample Preparation (Non-reduced):
- Prepare IgG sample at 1 mg/mL in SDS sample buffer (40 mM phosphate, pH 6.5, 1% SDS) [90].
- Add iodoacetamide (IAM) to 10 mM final concentration for alkylation to prevent disulfide bond scrambling [90].
- Heat denature at 70°C for 3-10 minutes [78] [87].
- Centrifuge briefly (10,000 × g, 2 minutes) to remove particulates.
Sample Preparation (Reduced):
- Prepare IgG sample at 1 mg/mL in SDS sample buffer.
- Add β-mercaptoethanol (BME) to final concentration of 5% or DTT to 50 mM for reduction [87].
- Heat denature at 70°C for 10 minutes [87].
- Cool to room temperature and centrifuge briefly before analysis.
Instrument Setup and Analysis (BioPhase 8800 System):
- Install bare fused silica capillary (30.2 cm length, 50 μm ID) in cartridge [87].
- Condition new capillary with: 10 vol of 0.1 N NaOH (5 min), 10 vol deionized water (5 min), and 10 vol sieving gel buffer (10 min) [87].
- Set capillary temperature to 25°C and detection to UV 220 nm or native fluorescence (excitation 280 nm, emission 350 nm) [87].
- Perform hydrodynamic or electrokinetic sample injection (5 kV for 20 seconds) [78].
- Separate with applied voltage of 15 kV (reverse polarity) for 30-35 minutes using SDS-MW gel buffer (pH 8, 0.2% SDS) [87].
- Between runs, rinse capillary with: 2 vol 0.1 N HCl (2 min), 2 vol deionized water (2 min), and 4 vol sieving gel buffer (3 min) [90].
Data Analysis:
- Identify peaks based on migration time relative to internal standard (10 kDa) [87].
- Integrate peaks using instrument software (e.g., 32 Karat, BioPhase software) with corrected peak area percentage (CPA%) calculation [78] [87].
- Assign peaks based on reference standards: intact mAb (~150 kDa), heavy-heavy (HH) fragments, heavy-light (HL) fragments, heavy chain (H, ~50 kDa), light chain (L, ~25 kDa), and other clipping species [87].
Workflow Visualization
Application in Biopharmaceutical Development
The application of CE-SDS has become particularly valuable in biopharmaceutical development, where precise quantification of monoclonal antibody (mAb) purity represents a critical quality attribute (CQA) [90]. Regulatory guidelines increasingly recommend the adoption of Analytical Quality by Design (AQbD) principles for method development and validation, with CE-SDS well-suited to this framework [90]. Through systematic optimization using Design of Experiments (DoE), CE-SDS methods can be developed to achieve robust performance within a method operable design region (MODR), ensuring reliability throughout the product lifecycle [90].
For mAb analysis, CE-SDS enables specific assessment of fragmentation, glycosylation status, and aggregate formation under both reduced and non-reduced conditions [78] [90]. Under non-reduced conditions (CE-NR), the technique can monitor product-related impurities including aggregates and fragments for stability assessment, while reduced conditions (CE-R) allow separation of glycosylated heavy chain, non-glycosylated heavy chain, and light chains for comprehensive purity evaluation [90]. The exceptional resolution of CE-SDS enables detection of nonglycosylated IgG variants that often co-migrate with their glycosylated counterparts in traditional SDS-PAGE, providing crucial information since glycosylation significantly impacts therapeutic antibody function [78].
SDS-PAGE remains a fundamental technique in protein analysis, particularly for educational purposes, method development, and applications requiring visual confirmation of results. Its discontinuous buffer system with stacking and resolving layers continues to provide effective protein separation with relatively accessible equipment requirements. However, for quantitative analysis in research and regulated environments, CE-SDS offers significant advantages in automation, precision, sensitivity, and throughput. The transition from gel-based to capillary-based SDS electrophoresis represents a natural technological evolution, with CE-SDS increasingly becoming the gold standard for purity analysis of biopharmaceutical products where accurate quantification and regulatory compliance are paramount. As electrophoretic technologies continue to advance, further integration of AQbD principles and enhanced detection modalities will likely expand the applications and capabilities of both methodologies in protein characterization.
Sodium Dodecyl Sulfate-Polyacrylamide Gel Electrophoresis (SDS-PAGE) has served as a cornerstone technique for protein separation by molecular weight for decades. However, contemporary research and drug development demand greater efficiency, reproducibility, and data richness. The technique is undergoing a transformative evolution shaped by three powerful trends: automation, which streamlines workflows and enhances reproducibility; miniaturization, which reduces reagent consumption and enables high-throughput analysis; and digital integration, which unlocks new potential for data analysis and collaboration. These advancements are crucial for accelerating biomanufacturing, diagnostic applications, and the development of robust bioeconomy solutions [91]. This application note details the protocols and technologies driving these changes, providing researchers with the tools to modernize their SDS-PAGE workflows.
Current Market and Technological Drivers
The global SDS-PAGE market, valued at approximately $1.5 billion in 2023, is projected to reach $2.5 billion by 2033, growing at a compound annual growth rate (CAGR) of about 5.2% [92]. This growth is fueled by expanding applications in pharmaceutical development, clinical diagnostics, and biotechnology, where the technique is indispensable for monitoring protein purity, detecting degradation products, and ensuring batch-to-batch consistency [93] [92].
Table 1: Key Market Drivers and Applications for Advanced SDS-PAGE
| Driver | Application | Impact |
|---|---|---|
| Biopharmaceutical Expansion | Therapeutic protein production and quality control (QC) | Creates demand for reliable, high-throughput protein analysis tools for regulatory submissions [92]. |
| Personalized Medicine | Biomarker discovery and validation | Increases need for sophisticated, sensitive protein analysis in clinical laboratories [92]. |
| Investment in Life Sciences | Academic and core facility research | Drives upgrades to state-of-the-art, automated electrophoresis equipment [93] [92]. |
| Focus on Proteomics | Analysis of post-translational modifications and protein-protein interactions | Creates a robust market for specialized, high-resolution SDS-PAGE applications [93] [92]. |
Core Technological Advancements
Automation in SDS-PAGE Workflows
Automation technologies are being integrated across the entire SDS-PAGE workflow, from sample preparation to data analysis. Automated gel casting stations ensure perfect polymerization consistency, while robotic liquid handlers enable precise, high-throughput sample loading, eliminating human error and improving throughput [92]. These systems are vital for accessing the vast parametric space required to optimize microbial conversions and other bioprocesses [91]. Furthermore, automated imaging platforms with high-resolution cameras reduce analysis time from hours to minutes [92].
Miniaturization and Microfluidic Systems
Miniaturization is a key innovation, significantly reducing sample and reagent volumes while accelerating run times. Microfluidic and capillary electrophoresis platforms have introduced high-resolution separation capabilities within a miniature footprint [93] [94]. These systems leverage narrow-bore channels and electrokinetic sample injection for rapid analysis cycles, making them particularly attractive for contract research organizations (CROs) and diagnostic labs seeking efficiency and scalable solutions, especially when sample quantities are limited [94].
Digital and AI Integration
Digital transformation is reshaping protein separation workflows. Cloud-based image processing tools enable remote access to gel images and facilitate collaboration across geographically dispersed teams [94]. Most significantly, artificial intelligence (AI)-driven band recognition algorithms deliver accelerated data interpretation and reduce subjective biases associated with manual annotation [94] [92]. The integration of AI and machine learning with traditional protocols allows researchers to extract more meaningful data, leading to improved accuracy in protein identification and quantification [92].
Advanced Protocol: Automated and Digitally-Enhanced SDS-PAGE
This protocol builds upon the traditional Laemmli method, integrating modern advancements for a high-throughput, data-rich workflow.
The Scientist's Toolkit: Essential Reagents and Equipment
Table 2: Key Research Reagent Solutions and Equipment for Advanced SDS-PAGE
| Item | Function | Advanced Formulation |
|---|---|---|
| Precast Gradient Gels | Polyacrylamide matrix for protein separation. | Ultraviolet-transparent polymer matrices with preloaded molecular weight standards for superior resolution and consistency [94]. |
| Multiplexed Sample Buffer | Denatures proteins and provides negative charge. | Includes unique fluorescent barcodes for multiplexing, allowing simultaneous analysis of multiple samples in a single well [92]. |
| High-Sensitivity Stains | Visualizes separated protein bands. | Specialized stains (e.g., fluorescent dyes) enabling detection at unprecedented sensitivity levels for limited samples [92]. |
| Automated Electrophoresis Station | Houses the gel and provides electric current. | Integrated with temperature control and automated gel loading modules for unprecedented reproducibility [94]. |
| Digital Imager & AI Software | Captures and analyzes gel images. | High-resolution cameras coupled with cloud-based, AI-driven software for real-time monitoring and automated band detection [94] [92]. |
Step-by-Step Automated Workflow
- Automated Sample Preparation: In a 96-well plate, mix protein samples with a multiplexed sample loading buffer. Use a robotic liquid handler to add reducing agents and heat the sealed plate to 95°C for 5 minutes [91].
- Module Loading: Place a commercial precast gradient gel cassette into an automated electrophoresis station. The system's barcode reader automatically recognizes gel specifications (e.g., percentage, well format).
- Automated Loading and Run Initiation: The instrument's robotic arm precisely loads the denatured samples from the 96-well plate into the gel wells. The user selects the pre-programmed run method (constant voltage or power) via a touchscreen interface to initiate separation.
- Real-Time Digital Monitoring: During the run, the integrated digital imager can monitor the migration of the dye front. Data is streamed to a cloud-based platform for remote observation.
- Post-Run Processing and Staining: After the run, the gel is automatically transferred to a staining station, which performs all incubation and washing steps with high-sensitivity fluorescent stain.
- AI-Powered Image Analysis: The stained gel is imaged. The image is automatically uploaded to an AI-powered analysis platform that detects bands, calculates molecular weights, and quantifies band intensity, generating a standardized report.
The following workflow diagram illustrates the integrated stages of this automated SDS-PAGE process.
Data Management and Interpretation in the Digital Age
The shift towards digital workflows generates large, complex datasets that require sophisticated management and analysis tools. A key development is the creation of centralized databases for electrophoretic migration patterns. For instance, one resource provides accurate migration data for approximately 10,000 human proteins, determined by coupling SDS-PAGE with mass spectrometry [69]. This allows researchers to compare their experimental results against a reference, improving the reliability of Western blot data and aiding in antibody validation.
Table 3: Quantitative Data on SDS-PAGE Market and Performance
| Parameter | Current/Forecast Data | Notes |
|---|---|---|
| Global Market Size (2023) | USD 1.5 Billion | Base year for projections [92]. |
| Projected Market Size (2033) | USD 2.5 Billion | Illustrates steady growth trajectory [92]. |
| CAGR (2024-2033) | 5.2% | Compound Annual Growth Rate [92]. |
| Database Scale | ~10,000 human proteins | Number of proteins with accurately characterized migration patterns [69]. |
| Primary Advantage of Precast Gels | Superior resolution and batch consistency | Reduces hands-on time and variability versus manual casting [94]. |
The logical architecture of this integrated digital ecosystem is shown below, highlighting how data flows from the instrument to the end-user.
The convergence of automation, miniaturization, and digital integration is fundamentally enhancing the capabilities of SDS-PAGE. Automated platforms ensure reproducibility and unlock high-throughput potential, while miniaturized systems conserve precious samples and reduce costs. Most profoundly, digital integration and AI are transforming SDS-PAGE from a qualitative tool into a robust, quantitative method integrated within larger proteomic and biomanufacturing workflows. Looking forward, the integration of SDS-PAGE with mass spectrometry and the development of portable, point-of-care systems will further expand its applications, ensuring this foundational technique remains a critical enabler of scientific and therapeutic breakthroughs [92].
Conclusion
Mastering the art of casting SDS-PAGE gels with precise stacking and resolving layers remains fundamental to achieving accurate protein separation. A deep understanding of the underlying principles, coupled with a meticulous casting protocol and robust troubleshooting strategies, forms the foundation for reliable, reproducible results. As the technique continues to be validated across diverse fields—from biopharmaceutical development to food science—its integration with emerging technologies like automation and capillary electrophoresis promises enhanced quantitative analysis and throughput. By adhering to these best practices, researchers can ensure the continued relevance and power of SDS-PAGE in addressing complex protein analysis challenges in biomedical and clinical research.
References
- 1. SDS-PAGE: A Cornerstone of Protein Analysis in Modern ... [https://www.metwarebio.com/sds-page-protein-analysis/]
- 2. SDS-PAGE: The science behind all those bubbles [https://www.antibodiesinc.com/pages/sds-page-demystified?srsltid=AfmBOoqbYO2pWh0SYf_81Ok-6BuMl56ZD4G9_lqczRDypnmQO9F897IA]
- 3. Principle and Protocol of Sodium Dodecyl Sulphate- ... [https://www.creativebiomart.net/blog/principle-and-protocol-of-sodium-dodecyl-sulphate-polyacrylamide-gel-electrophoresis-sds-page]
- 4. How Does SDS-PAGE Work? [https://www.creative-proteomics.com/resource/how-does-sds-page-work.htm]
- 5. SDS-PAGE Gel Electrophoresis [https://www.protocols.io/view/sds-page-gel-electrophoresis-7hnhj5e.html]
- 6. SDS-PAGE Optimization for Western Blot [https://www.bosterbio.com/protocol-and-troubleshooting/western-blotting-optimization/sds-page?srsltid=AfmBOooeCffx-KfWKikQmBarnDJVkoFgRrGwpYVCWbW2R1iL7X11Gk4J]
- 7. A time-saving one-step polyacrylamide gel with a colored ... [https://www.sciencedirect.com/science/article/abs/pii/S0003269724002240]
- 8. What is SDS-PAGE? Uses, How It Works & Top Companies ... [https://www.linkedin.com/pulse/what-sds-page-uses-how-works-top-companies-2025-clearsedge-research-kztwf]
- 9. SDS-PAGE [https://en.wikipedia.org/wiki/SDS-PAGE]
- 10. Overview of Protein Electrophoresis [https://www.thermofisher.com/us/en/home/life-science/protein-biology/protein-biology-learning-center/protein-biology-resource-library/pierce-protein-methods/overview-electrophoresis.html]
- 11. The principle and method of polyacrylamide gel ... [https://www.mblbio.com/bio/g/support/method/sds-page.html]
- 12. SDS-PAGE Protocol from EnCor Biotechnology Inc. [https://files.encorbio.com/protocols/SDS-PAGE.htm]
- 13. How to choose an acrylamide gel concentration for western ... [https://hellobio.com/how-to-choose-an-acrylamide-gel-concentration-for-western-blot/]
- 14. An Easy SDS-PAGE Gel Recipe & 10-Step Protocol [https://bitesizebio.com/59429/sds-page-gel-recipe/]
- 15. 1.15: SDS-PAGE [https://bio.libretexts.org/Bookshelves/Biotechnology/Lab_Manual%3A_Introduction_to_Biotechnology/01%3A_Techniques/1.15%3A_SDS-PAGE]
- 16. SDS-PAGE - Mullins Lab - [https://mullinslab.ucsf.edu/sds-page/]
- 17. How SDS-PAGE Works: 7 Key Points Every Scientist ... [https://bitesizebio.com/580/how-sds-page-works/]
- 18. SDS-PAGE: The science behind all those bubbles [https://www.antibodiesinc.com/pages/sds-page-demystified?srsltid=AfmBOorvFdABXmovE3xJYdJPdcpIU112q9aAGqwhDIi7fwkBOnRZfzT_]
- 19. Western Blot SDS-PAGE [https://www.novusbio.com/support/support-by-application/western-blot-sds-page?srsltid=AfmBOoqCFo5HZUmYtPS2Osm37GwfsZE0wuG8laDOLsxlUjfIMZmx5SF_]
- 20. Introduction to SDS-PAGE - Separation of Proteins Based ... [https://www.sigmaaldrich.com/US/en/technical-documents/protocol/protein-biology/gel-electrophoresis/sds-page?srsltid=AfmBOopayXZGK2PEgq2h6qk30QpD_gX-OBaseVErq3h-xn_AMVrSDv8E]
- 21. SDS-PAGE Protocol [https://neutab.creative-biolabs.com/sds-page-analysis.htm]
- 22. How to Master SDS-PAGE Gel & Western Blot [https://www.neobiotechnologies.com/resources/sds-page-gel-western-blot/?srsltid=AfmBOoovzNDlF1UFx67nzoFfGscvI8wZpW2d_T6zdd5tu9qhGWq9EYPl]
- 23. How Does SDS-PAGE Work? A Comprehensive Guide [https://www.metwarebio.com/how-sds-page-works-guide/]
- 24. Overview of SDS-PAGE [https://www.creative-proteomics.com/resource/overview-of-sds-page.htm]
- 25. SDS-PAGE: The science behind all those bubbles [https://www.antibodiesinc.com/pages/sds-page-demystified?srsltid=AfmBOoqL0SZqA-q5IiPelnLEGIibdd3So3SoDWjfJZC8zHxFjmDnWDV9]
- 26. APS (Ammonium persulphate) is used in SDS-PAGE [https://www.letstalkacademy.com/aps-ammonium-persulphate-is-used-in-sds-page/]
- 27. SDS Page Gel Electrophoresis PAGE [https://williams.chemistry.gatech.edu/course_Information/4581/techniques/gel_elect/page_protein.html]
- 28. SDS-PAGE Electrophoresis [https://www.bocsci.com/blog/sds-page-separation-of-proteins-based-on-size/?srsltid=AfmBOooUFWOCuESaDvPumVN_4lYuOkqZUxxFEpdaXGRdql0CiyH2ahpn]
- 29. Protein analysis SDS PAGE [https://www.qiagen.com/us/knowledge-and-support/knowledge-hub/bench-guide/protein/protein-analysis/protein-analysis-sds-page]
- 30. A Complete Guide to Handcasting SDS-PAGE Gels [https://blog.abclonal.com/blog/a-complete-guide-to-handcasting-sds-page-gels]
- 31. SDS-PAGE: The science behind all those bubbles [https://www.antibodiesinc.com/pages/sds-page-demystified?srsltid=AfmBOoq3HAL8v_8GrtQeTlxcuymORoSwSZFtt0qQ8pXzP_JmjxJJxGQQ]
- 32. How to Perform 1D SDS - PAGE | News-Medical [https://www.news-medical.net/whitepaper/20200930/How-to-Perform-1D-SDS-PAGE.aspx]
- 33. - SDS and Western Blot —Bio-101 PAGE Gel [https://bio-protocol.org/p140]
- 34. SDS-PAGE Protocol & Troubleshooting - Creative Biolabs [https://www.creativebiolabs.net/sds-page.htm]
- 35. 14.2: Casting SDS-PAGE gels [https://bio.libretexts.org/Bookshelves/Cell_and_Molecular_Biology/Book%3A_Investigations_in_Molecular_Cell_Biology_(O'Connor)/14%3A_SDS-PAGE/14.02%3A_Casting_SDS-PAGE_gels]
- 36. Troubleshooting Sodium Dodecyl Sulfate- Polyacrylamide ... [https://www.hycultbiotech.com/sds-page/troubleshooting/]
- 37. Troubleshooting SDS-PAGE Gel Running Issues [https://www.goldbio.com/blogs/articles/troubleshooting-sds-page-gel-running-issues?srsltid=AfmBOorwf_m-XsrkgqETF9JRKPEPQTuMEfUWSMIdT5Q1Suf3esVxoHlE]
- 38. SDS-PAGE: The science behind all those bubbles [https://www.antibodiesinc.com/pages/sds-page-demystified?srsltid=AfmBOorbKEEmgZ549e9HHwUgvTgCKDAXulk-KPcixwvS159PG2dM_M2K]
- 39. The Practical Guide to Running a Perfect Homemade SDS ... [https://bitesizebio.com/25239/making-sds-page-gel-practical-guide/]
- 40. Troubleshooting Gel Casting/ Polymerization Issues in ... [https://www.goldbio.com/blogs/articles/troubleshooting-gel-casting-polymerization-issues-in-sds-page?srsltid=AfmBOoqDWXuCcoaJQjkhyB5Jvyf9SRnlvJOjVo0ljfPbfjOEIz8HaTqx]
- 41. Sodium Dodecyl Sulfate Polyacrylamide Gel Electrophoresis [https://www.sciencedirect.com/topics/biochemistry-genetics-and-molecular-biology/sodium-dodecyl-sulfate-polyacrylamide-gel-electrophoresis]
- 42. SDS-PAGE: The science behind all those bubbles [https://www.antibodiesinc.com/pages/sds-page-demystified?srsltid=AfmBOoocWPlc-7ufKApdYXref0U7-VgICnYRw_xak1a3-dqowzbGqZNz]
- 43. Protein Electrophoresis Using SDS-PAGE: A Detailed ... [https://www.goldbio.com/blogs/articles/protein-electrophoresis-sds-page-overview?srsltid=AfmBOor1H2MpVxHI3rA9alNVs4pkusO9UWXCTCetJP4f7T1GtAMilCMF]
- 44. Protein Gel Casting Cassettes [https://www.thermofisher.com/us/en/home/life-science/protein-biology/protein-gel-electrophoresis/protein-gels/protein-gel-casting-cassettes.html]
- 45. SDS-PAGE guide: Sample preparation to analysis [https://www.abcam.com/en-us/knowledge-center/western-blot/sds-page-guide]
- 46. Troubleshooting Gel Casting/ Polymerization Issues in ... [https://www.goldbio.com/blogs/articles/troubleshooting-gel-casting-polymerization-issues-in-sds-page?srsltid=AfmBOoo7Ec1wzWMB5NZyRevrUBI3NVuyj_yiBtA7J9r2EmSJBz9q_xsx]
- 47. 13.11: Lab Technique - SDS-PAGE [https://bio.libretexts.org/Courses/West_Los_Angeles_College/Biotechnology/13%3A_Biotechnology_Lab_Protocols/13.11%3A_Lab_Technique_-_SDS-PAGE]
- 48. SDS-PAGE: The science behind all those bubbles [https://www.antibodiesinc.com/pages/sds-page-demystified?srsltid=AfmBOopF4Uo_oSC4cPvSyceKpCpmlvS4KMAq56wK45bqU4HHyb1AzoN6]
- 49. determines the direction and magnitude of... Acrylamide concentration [https://pmc.ncbi.nlm.nih.gov/articles/PMC3785759/]
- 50. SDS-PAGE: The science behind all those bubbles [https://www.antibodiesinc.com/pages/sds-page-demystified?srsltid=AfmBOooiAo2alWNH1pvvG-4A4mq-9A4VGOvmoHacla9inNr67Ic-SWrG]
- 51. Overview of Protein Electrophoresis [https://www.thermofisher.com/tr/en/home/life-science/protein-biology/protein-biology-learning-center/protein-biology-resource-library/pierce-protein-methods/overview-electrophoresis.html]
- 52. Troubleshooting Gel Casting/ Polymerization Issues in ... [https://www.goldbio.com/blogs/articles/troubleshooting-gel-casting-polymerization-issues-in-sds-page?srsltid=AfmBOoqW4QeyumbEPcE-MLTI-RDLNu0Om3pASjbmrfWf568BBcNGxrC0]
- 53. SDS-PAGE V.2 [https://www.protocols.io/view/sds-page-chqut5ww.html]
- 54. Analysis of protein gels (SDS-PAGE) [https://www.ruf.rice.edu/~bioslabs/studies/sds-page/gellab3.html]
- 55. SDS-PAGE: The science behind all those bubbles [https://www.antibodiesinc.com/pages/sds-page-demystified?srsltid=AfmBOooHMfLh459sV32Nzx6LZfYAqOHhorV8d7cRe8sqziyCs7_JDLNE]
- 56. Troubleshooting Gel Casting/ Polymerization Issues in ... [https://www.goldbio.com/blogs/articles/troubleshooting-gel-casting-polymerization-issues-in-sds-page?srsltid=AfmBOoqVuQkk5V8BucXAXA_5c4MgcWFGAYg0_2IRPHpTzpoIPuj5rEKh]
- 57. Troubleshooting SDS-PAGE Gel Running Issues [https://www.goldbio.com/blogs/articles/troubleshooting-sds-page-gel-running-issues?srsltid=AfmBOor9XQjwYkZJe4mIEP5rQ1JIc9s_GEVwcQfzLnkdGXKylc32mq8U]
- 58. SDS-PAGE: The science behind all those bubbles [https://www.antibodiesinc.com/pages/sds-page-demystified?srsltid=AfmBOop8UpI6k4zerXML9lhInAMrcx6ZJeudQRDw30Kf-HK_vhvdr9e8]
- 59. SDS-PAGE Optimization for Western Blot [https://www.bosterbio.com/protocol-and-troubleshooting/western-blotting-optimization/sds-page?srsltid=AfmBOopJd8vyL-TJvjwuc7J_qFe_L2looZjKSma1PUpHQadY6zjuyZ6F]
- 60. Tips for Optimal SDS-PAGE Separation [https://www.rockland.com/resources/tips-for-optimal-sds-page-separation/?srsltid=AfmBOoqquVF11qwRZ2gVSboJczaxfQkVO4s0FXbdol2s5th5YpPSeBZ9]
- 61. A Guide to Gradient Gels: The Why's and How's [https://bitesizebio.com/47184/gradient-gels/]
- 62. Troubleshooting SDS-PAGE Sample Preparation Issues [https://www.goldbio.com/blogs/articles/troubleshooting-sds-page-sample-preparation-issues?srsltid=AfmBOoqnDQBytmkwRDIoMhSqA8PA-OugmnWVVzYsNrZ_mrr8oM3iRhIS]
- 63. Troubleshooting SDS-PAGE Gel Running Issues [https://www.goldbio.com/blogs/articles/troubleshooting-sds-page-gel-running-issues?srsltid=AfmBOopbN4K9SR6xz18TnyH3lIBQOnqfStyKc1YMdBPZEOda_R8WFEuM]
- 64. SDS-PAGE: The science behind all those bubbles [https://www.antibodiesinc.com/pages/sds-page-demystified?srsltid=AfmBOordFo2jJRVFLciHlS90DLY7GSLJnsExTfsqgA0KOrExsTkWTmSQ]
- 65. Polyacrylamide Gel Electrophoresis, How It... | Technology Networks [https://www.technologynetworks.com/analysis/articles/polyacrylamide-gel-electrophoresis-how-it-works-technique-variants-and-its-applications-359100]
- 66. 6 Best Tips for Troubleshooting Poor Band Separation on ... [https://azurebiosystems.com/blog/6-tips-for-troubleshooting-poor-band-separation-on-sds-page-gels/]
- 67. Troubleshooting SDS-PAGE Gel Running Issues [https://www.goldbio.com/blogs/articles/troubleshooting-sds-page-gel-running-issues?srsltid=AfmBOorNZ0tKx4gGb4SMiHUq3Oxvy6W7ou5FtYNMvKQ6yEv_FSFUe6fI]
- 68. Higher resolution protein band visualisation via improvement ... [https://chembioagro.springeropen.com/articles/10.1186/s40538-022-00297-0]
- 69. A Database of Accurate Electrophoretic Migration Patterns ... [https://www.sciencedirect.com/science/article/pii/S0022283622005605]
- 70. Whole gel processing procedure for GeLC-MS/MS based ... [https://proteomesci.biomedcentral.com/articles/10.1186/1477-5956-11-17]
- 71. A protocol for recombinant protein quantification by ... [https://pmc.ncbi.nlm.nih.gov/articles/PMC7294310/]
- 72. SDS-PAGE and Coomassie staining - QB3 Berkeley [https://qb3.berkeley.edu/education/lab-fundamentals-bootcamp/manual/proteins/protein-gels/]
- 73. SDS-PAGE: The science behind all those bubbles [https://www.antibodiesinc.com/pages/sds-page-demystified?srsltid=AfmBOorAZcr8Lz0SnAb48fjRtDm6W5_IwaFUGH4LNXPo4sint0ZAC_c6]
- 74. Advances in monoclonal antibody purity control [https://www.sciencedirect.com/science/article/abs/pii/S1046592825000671]
- 75. Assessing the Comparability of Degradation Profiles ... [https://pmc.ncbi.nlm.nih.gov/articles/PMC12472202/]
- 76. Analysis of Monoclonal Antibodies by Capillary ... [https://www.mdpi.com/2297-8739/8/1/4]
- 77. SDS-PAGE: The science behind all those bubbles [https://www.antibodiesinc.com/pages/sds-page-demystified?srsltid=AfmBOop7PjdDZk0fdaHsANac1RpaVGUESE_dJwtgcG2VUeQBgaHXRjjB]
- 78. Comparing SDS-PAGE and CE-SDS for Antibody Purity ... [https://www.bioprocessintl.com/qa-qc/comparing-sds-page-and-ce-sds-for-antibody-purity-analysis]
- 79. Troubleshooting Gel Casting/ Polymerization Issues in ... [https://www.goldbio.com/blogs/articles/troubleshooting-gel-casting-polymerization-issues-in-sds-page?srsltid=AfmBOoqHJNb_ZpQH2p25xSZ8S8U6h34e2JsB1KD7eiM-b3ecgtE3tG6V]
- 80. Monoclonal antibody CE-SDS purity analysis with ... [https://sciex.com/tech-notes/biopharma/monoclonal-antibody-ce-sds-purity-analysis-with-the-sciex-low-ph]
- 81. Accelerating Monoclonal Antibody Quality Control [https://www.chromatographyonline.com/view/accelerating-monoclonal-antibody-quality-control-the-role-of-lc-ms-in-upstream-bioprocessing]
- 82. Deciphering food proteins: The applications of SDS-PAGE ... [https://www.sciencedirect.com/science/article/abs/pii/S2212429225003025]
- 83. SDS-PAGE in Food Science: Elevating Protein Insight and ... [https://www.eurofinsus.com/food-testing/resources/sds-page-in-food-science-elevating-protein-insight-and-product-integrity/]
- 84. SDS PAGE [https://www.protocols.io/view/sds-page-g7hubzj6x.html]
- 85. Advances in Food Processing Techniques for Allergenicity ... [https://pmc.ncbi.nlm.nih.gov/articles/PMC12651889/]
- 86. SDS-PAGE: The science behind all those bubbles [https://www.antibodiesinc.com/pages/sds-page-demystified?srsltid=AfmBOorODbN_KMHlW3Vq8IKnCEVsa6agGWUVc9c6rzsIEcbOCs5JExME]
- 87. Intermediate precision study of the CE-SDS assay on ... [https://sciex.com/tech-notes/biopharma/intermediate-precision-study-of-ce-sds-assay-on-biophase8800-with-native-fluorescence-detection]
- 88. Capillary Gel Electrophoresis: An Alternative to SDS-PAGE? [https://bitesizebio.com/24080/capillary-gel-electrophoresis-an-alternative-to-sds-page/]
- 89. A comparative study of CE-SDS, SDS-PAGE, and Simple ... [https://pubmed.ncbi.nlm.nih.gov/33185281/]
- 90. Application of Analytical Quality by Design to the ... [https://www.sciencedirect.com/science/article/abs/pii/S0731708524004266]
- 91. high-throughput technologies and automated workflows to ... [https://www.sciencedirect.com/science/article/pii/S0958166925000643]
- 92. Revolutionary Advances in SDS-PAGE Technology Drive [https://www.openpr.com/news/4047935/revolutionary-advances-in-sds-page-technology-drive]
- 93. SDS-PAGE Electrophoresis Market Size & Share 2025-2032 [https://www.360iresearch.com/library/intelligence/sds-page-electrophoresis]
- 94. SDS-PAGE Electrophoresis Market - Global Forecast 2025- ... [https://www.researchandmarkets.com/reports/6140756/sds-page-electrophoresis-market-global?srsltid=AfmBOopp7-pSTW19nL7TIG_Dy-cxUWtjdxnhxIo2EpqeZpg8gBTW0D99]