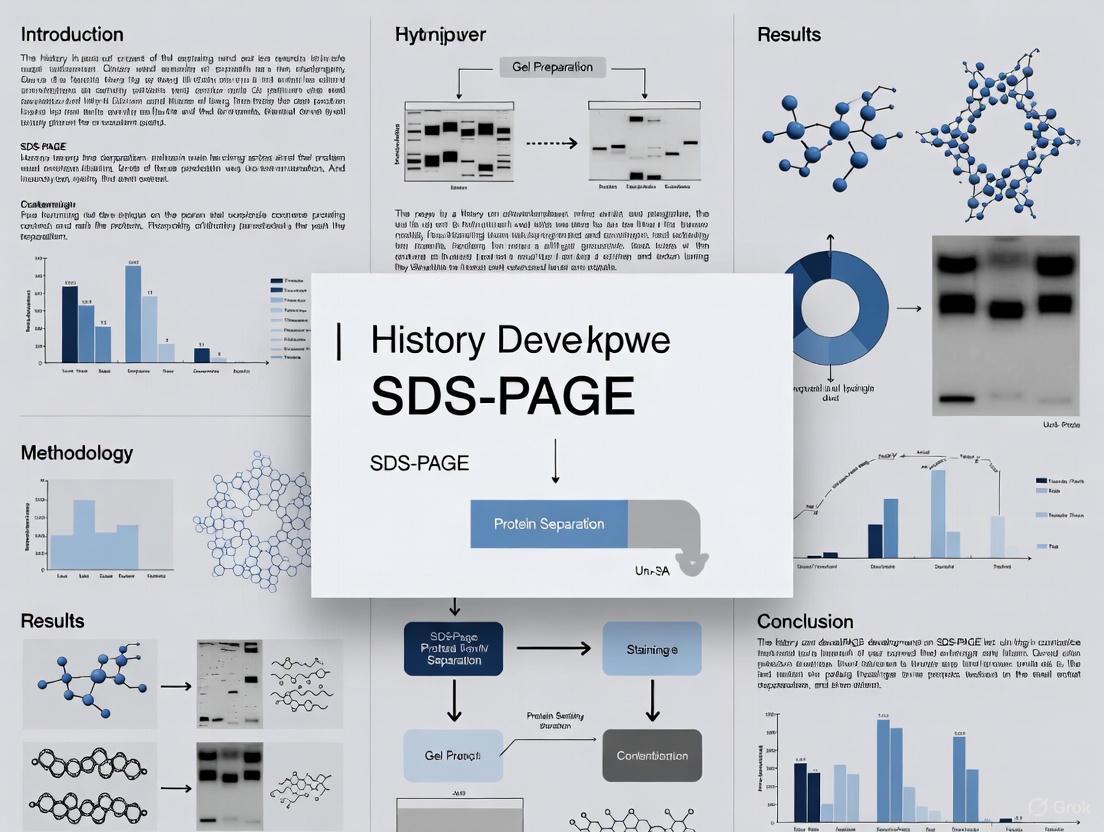
From Tube Gels to Capillaries: The Evolution and Enduring Impact of SDS-PAGE in Biomedical Research
This article provides a comprehensive overview of the Sodium Dodecyl Sulfate-Polyacrylamide Gel Electrophoresis (SDS-PAGE) technique, tracing its revolutionary development from its foundational breakthroughs in the 1960s to its current status...
From Tube Gels to Capillaries: The Evolution and Enduring Impact of SDS-PAGE in Biomedical Research
Abstract
This article provides a comprehensive overview of the Sodium Dodecyl Sulfate-Polyacrylamide Gel Electrophoresis (SDS-PAGE) technique, tracing its revolutionary development from its foundational breakthroughs in the 1960s to its current status as a cornerstone of protein analysis. Tailored for researchers, scientists, and drug development professionals, we explore the core principles that underpin the method's reliability, detail its versatile applications in biopharmaceuticals and food science, and provide actionable troubleshooting guidance. Furthermore, the article critically evaluates SDS-PAGE against modern automated successors like Capillary Electrophoresis-SDS (CE-SDS), offering insights into method selection for quality control and regulatory filings to drive informed decision-making in therapeutic development.
The Pioneering Breakthrough: How SDS-PAGE Revolutionized Protein Science
The development of sodium dodecyl sulfate-polyacrylamide gel electrophoresis (SDS-PAGE) in 1970 by Ulrich K. Laemmli represents a watershed moment in the history of analytical biochemistry [1] [2]. This revolutionary technique transformed protein analysis by enabling high-resolution separation of polypeptide chains based primarily on molecular weight. Prior to this innovation, researchers navigated a complex landscape of electrophoretic methods fraught with technical challenges and limitations that significantly constrained biochemical research capabilities. This article examines the historical development of electrophoretic techniques before Laemmli's seminal contribution, detailing the methodological hurdles, instrumental limitations, and scientific necessities that ultimately spurred the creation of modern SDS-PAGE. Understanding this pre-SDS-PAGE era provides crucial context for appreciating both the technical achievement this methodology represented and its profound impact on subsequent advances in molecular biology, biochemistry, and drug development.
Historical Development of Early Electrophoretic Methods
The foundations of electrophoresis were established long before the technique was applied to biological macromolecules. The earliest observations of electrokinetic phenomena date to 1807, when Russian professors Peter Ivanovich Strakhov and Ferdinand Frederic Reüss at Moscow University noted that clay particles dispersed in water would migrate under the influence of a constant electric field [3]. Throughout the 19th and early 20th centuries, scientists including Johann Wilhelm Hittorf, Walther Nernst, and Friedrich Kohlrausch conducted systematic experiments to measure the properties and behavior of small ions moving through aqueous solutions, developing general mathematical descriptions of solution electrochemistry [3]. Kohlrausch's work was particularly significant, producing equations that described the behavior of varying concentrations of charged particles in solution, including sharp moving boundaries of migrating particles [3].
The modern era of protein electrophoresis began with Arne Tiselius, who designed a groundbreaking moving-boundary electrophoresis apparatus in 1931 while conducting his PhD studies [3]. This system, described in his influential 1937 paper, represented a major advancement for analyzing colloidal mixtures [3]. The Tiselius apparatus employed U-shaped glass tubes and utilized optical detection methods based on August Toepler's schlieren technique from the 1860s, which measured slight variations in optical properties in inhomogeneous solutions [3]. Despite its innovative design, the Tiselius method suffered from significant limitations, particularly its inability to completely separate electrophoretically similar compounds [3].
The period from the late 1940s through the 1950s witnessed transformative advances with the introduction of zone electrophoresis methods that used solid or gel matrices as supporting media [3]. In 1950, Tiselius himself coined the term "zone electrophoresis" to describe these methods, which separated compounds into discrete and stable bands or zones rather than moving boundaries [3]. A pivotal advancement came in 1955 when Oliver Smithies introduced starch gel as an electrophoretic substrate, enabling more efficient separation of proteins and facilitating analysis of complex protein mixtures with minute differences [3]. Despite these improvements, researchers continued to face significant technical challenges related to pore size control, gel stability, and reproducibility throughout much of the 20th century [3].
Table: Major Developments in Electrophoresis Before SDS-PAGE
| Year | Development | Key Innovator(s) | Significance |
|---|---|---|---|
| 1807 | First observation of electrokinetic phenomena | Strakhov & Reüss | Noted clay particle migration in electric field |
| 1931 | Moving-boundary electrophoresis apparatus | Tiselius | Enabled electrophoretic analysis of colloidal mixtures |
| 1950 | Zone electrophoresis concept | Tiselius | Introduced separation into discrete bands/zones |
| 1955 | Starch gel electrophoresis | Smithies | Efficient separation of complex protein mixtures |
| 1959 | Discontinuous PAGE system | Davis & Ornstein | Stacking effect for better resolution |
| 1960s | SDS introduction for proteins | Maizel et al. | Demonstrated molecular weight-based separation |
The 1960s witnessed critical innovations that would eventually lead to Laemmli's breakthrough. Baruch Davis and Leonard J. Ornstein developed discontinuous polyacrylamide gel electrophoresis at New York's Mt. Sinai Hospital, creating a system that used different buffer systems to concentrate proteins into narrow bands before separation [1] [2]. Their work established polyacrylamide as the matrix of choice due to its transparency, biological inertness, controllable pore size, and mechanical strength [1] [2]. During this same period, Jacob V. Maizel Jr. and colleagues pioneered the use of SDS for poliovirus protein analysis, demonstrating that polypeptide chains coated with SDS migrated through acrylamide gels in proportion to their molecular weight [1] [2]. However, these early SDS gels produced broad bands, limiting their utility for complex protein mixtures [1].
Technical Limitations and Methodological Challenges
Resolution and Separation Efficiency Constraints
Early electrophoretic methods suffered from fundamental limitations in resolution capacity that severely restricted their analytical utility. Moving-boundary electrophoresis, while innovative for its time, could not achieve complete separation of complex protein mixtures [3]. The technique relied on creating moving boundaries of charged particles in free solution without a stabilizing matrix, resulting in significant diffusion and remixing of separated components [3]. This inherent limitation meant that researchers could only partially resolve mixtures into broad fractions rather than discrete molecular species.
The introduction of supporting media such as filter paper, starch gels, and early forms of polyacrylamide gels marked a substantial improvement but still fell short of modern standards. Starch gels, while offering better separation than paper electrophoresis, had inconsistent pore sizes due to natural variations in starch polymers [3]. This variability led to poor reproducibility between experiments and laboratories, complicating comparative analyses. Early polyacrylamide gels represented a step forward with more controllable pore sizes, but the polymerization process was difficult to standardize, resulting in batch-to-batch variations that affected separation efficiency [3].
The fundamental challenge faced by all pre-SDS-PAGE methods was simultaneously resolving proteins based on multiple properties including size, charge, and shape. Without a reliable means to negate charge differences, proteins with similar molecular weights but different charge characteristics would migrate at different rates, complicating interpretation and preventing accurate molecular weight determination [4]. This limitation was particularly problematic for studies of protein purity or when comparing proteins across different species or tissues.
Molecular Weight Determination Challenges
Before the development of SDS-PAGE, determining the molecular weight of proteins was a formidable challenge requiring specialized equipment and extensive experimental procedures. The primary method for molecular weight estimation involved analytical ultracentrifugation, a technique pioneered by Theodor Svedberg in the 1920s [1] [2]. This approach required expensive instrumentation, substantial quantities of purified protein, and considerable technical expertise [1]. The process was time-consuming, often requiring days to complete a single analysis, and was inaccessible to most research laboratories.
Early attempts to correlate electrophoretic mobility with molecular weight encountered significant obstacles due to the influence of protein charge heterogeneity. Without a uniform charge-to-mass ratio, proteins with identical molecular weights but different amino acid compositions would migrate to different positions in the gel [4]. Researchers attempted to address this limitation by performing electrophoresis under various pH conditions or using mathematical corrections for charge differences, but these approaches were cumbersome and of limited accuracy [4].
The introduction of SDS as a protein denaturant by Maizel and colleagues represented a conceptual breakthrough but initially failed to deliver high-resolution separations [1] [2]. In these early implementations, SDS-protein complexes migrated as broad bands, resulting in poor resolution that was adequate only for simple protein mixtures like poliovirus (with four protein components) but insufficient for complex samples such as T4 phage structural proteins [1]. The fundamental insight that would eventually solve this problem—combining SDS denaturation with the discontinuous buffer system of Ornstein and Davis—had not yet been realized.
Sample Preparation and Handling Difficulties
Protein sample preparation before the standardization of SDS-PAGE presented numerous technical challenges that could compromise experimental results. The critical importance of immediate sample heating after addition to SDS-containing buffer was not widely recognized, leading to protease activity that degraded proteins of interest [5]. Researchers discovered that even minute amounts of protease (as little as 1 picogram) could cause significant degradation if samples were left at room temperature for extended periods before heating [5].
The heating process itself introduced artifacts, particularly cleavage of acid-sensitive aspartic acid-proline bonds when samples were heated at 95-100°C for standard periods [5]. This problem necessitated careful optimization of heating conditions, with some researchers adopting lower temperatures (75°C) to preserve acid-labile peptide bonds while still inactivating proteases [5].
Keratin contamination presented a persistent challenge, particularly when working with the sensitive silver staining methods that became available in the 1970s [5]. Keratin from skin, dander, or hair could introduce heterogeneous contaminating bands around 55-65 kDa on reducing SDS gels, complicating data interpretation [5]. Preventing such contamination required rigorous practices including aliquoting of buffers, use of filtered tips, and dedicated clean areas for sample preparation.
The requirement for concentrating dilute protein samples introduced additional methodological complexities. Techniques such as lyophilization, spin concentration, dialysis against concentrated polyethylene glycol (PEG), or absorption by dry PEG, Aquacide, or Sephadex were employed but risked protein loss, denaturation, or introduction of interfering substances [5]. For samples with high nucleic acid content, viscosity presented a significant obstacle that required additional treatment steps such as Benzonase nuclease digestion, vigorous vortexing, or sonication to shear nucleic acids prior to electrophoresis [5].
Table: Common Artifacts and Challenges in Pre-SDS-PAGE Sample Preparation
| Challenge | Cause | Impact | Workaround |
|---|---|---|---|
| Protease degradation | Delay between sample buffer addition and heating | Multiple bands from protein cleavage | Immediate heating at 75-100°C |
| Asp-Pro bond cleavage | Excessive heating at high temperatures | Specific peptide bond cleavage | Heating at 75°C for 5 minutes |
| Keratin contamination | Skin, dander, or hair contact | Spurious bands at 55-65 kDa | Strict avoidance of contamination |
| Sample viscosity | High nucleic acid content | Streaking and poor resolution | Nuclease treatment or sonication |
| Carbamylation | Urea contamination with cyanate | Charge heterogeneity and mass shifts | Use of mixed-bed resins or scavengers |
The Experimental Workflow: Methodologies and Protocols
Tube Gel Electrophoresis Protocol
Before the advent of slab gel systems, polyacrylamide gel electrophoresis was performed using tube gels cast in glass cylinders with diameters of 1-3 mm [6]. This format severely limited throughput, as each tube could accommodate only one sample [6]. The experimental workflow began with meticulous gel preparation, requiring careful casting of polyacrylamide solutions into glass tubes that were then mounted vertically in specialized electrophoresis apparatus.
The gel composition for discontinuous systems followed the principles established by Davis and Ornstein, with a large-pore stacking gel layered on top of a small-pore separating gel [1] [2]. The stacking gel typically contained 4% acrylamide with Tris-HCl buffer at pH 6.8, while the separating gel ranged from 7.5% to 10% acrylamide with Tris-HCl buffer at pH 8.8 [7]. Polymerization was initiated by adding the catalyst TEMED and the radical initiator ammonium persulfate (APS) [7]. The process required careful timing and technique to avoid introducing bubbles or creating irregular gel surfaces that would distort protein migration.
Protein samples were prepared in buffer systems that varied depending on the specific method but typically included sucrose or glycerol to increase density, a tracking dye (usually bromophenol blue), and appropriate ionic components [5]. For native PAGE, samples were mixed with non-denaturing buffers that preserved protein structure and activity [4]. For early SDS-PAGE methods following Maizel's approach, samples included SDS and reducing agents but lacked the optimized buffer systems that would later characterize Laemmli's method [1].
Electrophoresis runs typically required several hours, with constant voltage applied to the gel apparatus [1]. The process was complicated by the need to carefully extract the fragile gel from the glass tube after separation, often requiring specialized tools or techniques to avoid tearing the gel. As recalled by researchers who worked with Laemmli, "we cracked [the tubes] with a hammer, and then sliced the gel lengthwise for drying" [2] – a process that risked both personal injury and damage to the separation.
Detection and Analysis Methods
Protein detection in early electrophoretic methods relied primarily on staining techniques with varying sensitivity and specificity. Coomassie Brilliant Blue staining, adapted from textile industry dyes, became the most widely used method for general protein detection [2]. This technique typically involved fixing proteins in the gel with acidic methanol or ethanol solutions, followed by staining with Coomassie Blue dye and subsequent destaining to visualize protein bands against a clear background [4]. While relatively simple and inexpensive, Coomassie Blue staining had limited sensitivity, detecting approximately 0.5-1.0 μg of protein per band [5].
For higher sensitivity detection, researchers turned to silver staining methods that could detect as little as 0.1 ng of protein per band [5]. However, these methods were technically demanding, requiring multiple processing steps with carefully controlled reaction times and conditions [5]. The enhanced sensitivity also made these methods more susceptible to interference from contaminants such as keratin or chemicals leaching from plasticware [5].
Radioactive labeling provided another detection approach, particularly for tracking newly synthesized proteins or for applications requiring extreme sensitivity [6]. Proteins were labeled with radioactive isotopes such as ³⁵S-methionine or ¹⁴C-amino acids prior to electrophoresis, then detected by autoradiography using X-ray film [6]. While highly sensitive, this approach required specialized facilities, safety protocols, and extended exposure times ranging from days to weeks.
Analysis of separated proteins was primarily qualitative, with researchers comparing band patterns between samples run in parallel tubes [6]. Quantitative analysis was challenging due to variations between individual tube gels, necessitating careful normalization and replication. Molecular weight estimation remained problematic before the widespread adoption of SDS-PAGE, as migration distance depended on both size and charge characteristics of native proteins [4].
The Scientist's Toolkit: Essential Research Reagents and Materials
The electrophoretic methods preceding SDS-PAGE relied on a specific set of reagents and materials that defined both the capabilities and limitations of protein separation technology during this period. These components formed the essential toolkit for researchers exploring protein complexity through electrophoresis.
Table: Essential Research Reagents in the Pre-SDS-PAGE Era
| Reagent/Material | Composition/Type | Function | Technical Challenges |
|---|---|---|---|
| Polyacrylamide | Acrylamide + bisacrylamide crosslinker | Creating porous gel matrix | Neurotoxicity; polymerization variability |
| Starch Gels | Hydrolyzed potato starch | Alternative separation matrix | Batch variability; inconsistent pore size |
| Tris Buffers | Tris(hydroxymethyl)aminomethane | pH maintenance during electrophoresis | pH sensitivity to temperature |
| Ammonium Persulfate | (NH₄)₂S₂O₈ | Free radical initiator for polymerization | Short shelf life; variable activity |
| TEMED | N,N,N',N'-Tetramethylethylenediamine | Polymerization catalyst | Toxicity; accelerated gel setting |
| Coomassie Blue R-250 | Triphenylmethane dye | Protein staining after separation | Limited sensitivity (0.5-1.0 μg) |
| Glycine | Amino acid | Trailing ion in discontinuous systems | Charge state dependent on pH |
- Polyacrylamide Matrix: The foundation of PAGE systems, composed of acrylamide monomer and methylenebisacrylamide crosslinker [7]. Researchers prepared gels from stock solutions, with the acrylamide:bisacrylamide ratio and total concentration determining pore size and separation characteristics [7]. The neurotoxicity of unpolymerized acrylamide required careful handling, and variability in polymerization conditions affected reproducibility [1].
Buffer Systems: Discontinuous buffer systems pioneered by Ornstein and Davis employed different pH and ionic composition in stacking versus separating gels [1] [2]. Typical formulations included Tris-HCl at pH 6.8 for stacking gels and Tris-HCl at pH 8.8 for separating gels, with Tris-glycine as the running buffer [7]. The careful optimization of leading ions (chloride) and trailing ions (glycinate) created the stacking effect essential for sharp band formation [2].
Staining Reagents: Coomassie Brilliant Blue in its R-250 formulation served as the workhorse stain for protein detection [2]. Staining protocols required fixing solutions (typically methanol or ethanol with acetic acid), staining solution, and destaining solutions to remove background dye [4]. The process required large volumes of solvents and extended processing times, typically several hours to overnight.
Specialized Additives: For difficult protein samples, researchers employed various additives including urea (6-8 M) for additional denaturation of stubborn proteins, nonionic detergents like Triton X-100 for membrane proteins, and specific protease inhibitors to prevent sample degradation during preparation [5]. Each introduction risked introducing artifacts or interfering with subsequent analysis.
The challenges faced by researchers in the pre-SDS-PAGE era created both formidable obstacles and the necessary conditions for revolutionary innovation. The limitations of moving-boundary electrophoresis, starch gels, and early polyacrylamide methods highlighted the critical need for a separation technique that could resolve complex protein mixtures by molecular weight while eliminating confounding factors such as charge heterogeneity and structural differences. These methodological constraints directly influenced experimental design and interpretation throughout the 1950s and 1960s, limiting the scope of biochemical inquiry and complicating the study of complex biological systems.
The convergence of key technological developments—including the introduction of SDS as a denaturing agent, the refinement of polyacrylamide matrix chemistry, and the theoretical framework of discontinuous buffer systems—created the foundation upon which Laemmli would build his transformative method. The specific research context of T4 phage assembly, with its dozens of structural proteins requiring precise identification and characterization, provided the necessary impetus for developing a high-resolution separation technique [1] [2]. This historical trajectory demonstrates how methodological advances often emerge from the intersection of theoretical understanding, technical capability, and specific research imperatives.
The transition from the pre-SDS-PAGE era to modern protein analysis methods represents more than merely technical improvement—it marks a fundamental shift in how researchers approach the study of protein structure and function. The limitations detailed in this review contextualize both the enormous impact of SDS-PAGE on biological research and the continued innovation in electrophoretic techniques that extends to contemporary methods such as capillary electrophoresis and microfluidic separation platforms [8] [9]. Understanding this historical development enriches our appreciation of current methodologies and informs future technical innovations in biomolecular analysis.
The development of the discontinuous buffer system for sodium dodecyl sulfate polyacrylamide gel electrophoresis (SDS-PAGE) by Ulrich K. Laemmli in 1970 represents a watershed moment in the history of biochemical analysis. This technical innovation, detailed in his seminal Nature paper "Cleavage of structural proteins during the assembly of the head of bacteriophage T4," provided researchers with an unprecedentedly high-resolution method for separating complex protein mixtures according to molecular weight [10] [2]. The Laemmli system emerged from a specific scientific challenge—the need to resolve the numerous structural proteins of bacteriophage T4—but its impact rapidly permeated every corner of molecular biology and biochemistry [1]. What distinguished Laemmli's approach was its ingenious adaptation of the discontinuous buffer system pioneered by Ornstein and Davis, which he modified to work under denaturing conditions with SDS [2] [1]. This technical guide explores the historical context, fundamental principles, methodological details, and enduring legacy of the Laemmli system, framing its development within the broader history of SDS-PAGE technique research.
Historical Context: The Problem Preceding the Solution
The Scientific Landscape Pre-Laemmli
Prior to Laemmli's work, protein electrophoresis faced significant limitations in resolving complex protein mixtures. Traditional continuous buffer systems produced broad, poorly resolved bands that were inadequate for analyzing samples with multiple protein components [2]. Discontinuous polyacrylamide gel electrophoresis had been invented by Baruch Davis and Leonard J. Ornstein, who described their work in classic papers published in the Annals of the New York Academy of Sciences [2] [1]. Their system utilized a stacking gel that concentrated proteins into narrow bands before they entered the separating gel, significantly improving resolution. However, this early discontinuous system separated proteins based on their native charge and molecular weight, which limited its utility for hydrophobic structural proteins [2] [1].
Concurrently, Jacob V. Maizel Jr. had pioneered the use of SDS for dissociating and solubilizing viral proteins, demonstrating that in the presence of SDS, polypeptide chains migrated through acrylamide gels approximately proportional to their molecular weight [2]. This critical insight established the foundation for molecular weight-based separation but suffered from poor resolution due to broad band migration [2] [1]. These early SDS gels were adequate for simple viruses like poliovirus with only four protein components but proved insufficient for complex systems like bacteriophage T4, which contained dozens of structural proteins [1].
Laemmli's Driving Motivation
Laemmli's specific research challenge involved analyzing the structural proteins of the capsid of bacteriophage T4 [2] [1]. As a postdoctoral fellow in Aaron Klug's laboratory at the Medical Research Council's Laboratory of Molecular Biology (MRC LMB) in Cambridge, UK, Laemmli sought to understand T4 head assembly using conditional lethal mutants developed by the groups of R. H. Epstein, Edward Kellenberger, and R. S. Edgar [1]. These mutants, including temperature-sensitive (ts) and nonsense (amber) mutants, blocked the expression of specific structural proteins and often led to the accumulation of morphogenetic intermediates in virus assembly [1].
The critical barrier Laemmli encountered was his inability to determine the protein composition of these capsid structures, as they did not dissociate under native conditions [2] [1]. While he could isolate the capsid structures from phage-infected cells, contemporary electrophoretic methods could not resolve the numerous protein components. This impasse motivated Laemmli to seek a high-resolution method that could separate denatured protein complexes, leading to his systematic investigation of buffer systems that would eventually yield the discontinuous SDS-PAGE method [2].
Table: Historical Development Leading to the Laemmli System
| Year | Researcher(s) | Contribution | Limitation |
|---|---|---|---|
| 1964 | Ornstein & Davis | Discontinuous native PAGE system | Separated proteins by native charge, not molecular weight |
| 1966-67 | Maizel et al. | Introduced SDS for viral protein dissociation | Broad bands, poor resolution for complex mixtures |
| 1970 | Laemmli | Discontinuous SDS-PAGE with stacking and resolving gels | Initial neurotoxicity exposure risks during preparation |
Fundamental Principles of the Laemmli System
The Discontinuous Buffer Concept
The Laemmli system's revolutionary power derives from its sophisticated use of discontinuous buffer chemistry to concentrate samples into extremely sharp bands before separation. The system employs three distinct discontinuities—pH, gel concentration, and ionic composition—that work in concert to achieve remarkable resolution [2] [4]. The fundamental insight was recognizing that the stacking phenomenon described by Ornstein could be made to work for SDS-polypeptide complexes, theoretically obtaining high resolution under denaturing conditions [2] [1].
In the Laemmli system, the stacking gel features a lower percentage of acrylamide (typically 4-5%) and a lower pH (approximately 6.8) compared to the separating gel, which has a higher acrylamide concentration (variable based on protein size) and higher pH (approximately 8.8) [4] [11]. The running buffer contains glycine, which at the stacking gel pH exists primarily in its zwitterionic form with minimal net mobility [12]. Chloride ions from the Tris-HCl buffer migrate rapidly as the leading ion, while glycine migrates slowly as the trailing ion. SDS-coated proteins, with their intermediate mobility, become compressed between these two ion fronts into an extremely thin starting zone—often only 10-20 micrometers thick—before entering the separating gel [2] [12].
Molecular Sieving and Size-Based Separation
Once proteins enter the separating gel, the increase in pH to approximately 8.8 causes glycine molecules to become predominantly negatively charged, eliminating the trailing ion effect and establishing a uniform electric field [4] [11]. At this stage, separation occurs primarily through molecular sieving, where the cross-linked polyacrylamide matrix acts as a molecular sieve [4] [11]. Smaller proteins navigate the porous network more easily and migrate faster, while larger proteins encounter greater frictional resistance and migrate more slowly [4].
The polyacrylamide gel matrix is formed through copolymerization of acrylamide and bis-acrylamide (N,N'-methylenebisacrylamide), creating a three-dimensional network with controllable pore sizes [4]. The pore size is inversely related to the polyacrylamide percentage, with lower percentages (e.g., 7-10%) suitable for high molecular weight proteins and higher percentages (e.g., 12-15%) optimal for lower molecular weight proteins [4] [13]. This molecular sieving effect, combined with the uniform charge-to-mass ratio imparted by SDS binding (approximately 1.4 g SDS per 1 g protein), ensures that separation occurs almost exclusively based on polypeptide chain length rather than native charge or conformation [4] [11].
Table: Buffer Components and Their Functions in the Laemmli System
| Component | Concentration | Function | Mechanism of Action |
|---|---|---|---|
| SDS (Sodium Dodecyl Sulfate) | 0.1-1% in buffers | Denaturation & uniform charge | Binds proteins (~1.4g SDS/g protein), masks intrinsic charge |
| Tris-HCl | Stacking: 125 mM (pH 6.8)Resolving: 375 mM (pH 8.8) | pH maintenance | Creates pH discontinuity for stacking effect |
| Glycine | 192 mM in running buffer | Trailing ion | Mobility depends on pH, enables stacking |
| Glycerol | 10-20% in sample buffer | Density agent | Ensures samples sink into wells |
| Bromophenol Blue | 0.001-0.01% | Tracking dye | Visualizes migration progress |
| β-mercaptoethanol/DTT | 1-5% | Reducing agent | Breaks disulfide bonds |
Methodology: The Laemmli Protocol in Detail
Reagent Preparation and Gel Formulation
The Laemmli method requires careful preparation of specific reagents and buffers to ensure optimal performance. The core components include acrylamide/bis-acrylamide solution, Tris buffers at different pH values, SDS, ammonium persulfate (APS) as a polymerization catalyst, and N,N,N',N'-tetramethylethylenediamine (TEMED) as a polymerization accelerator [13]. Safety precautions are essential during preparation, as acrylamide is a potent neurotoxin that can be absorbed through the skin [2] [13].
Table: Standard Laemmli Buffer and Gel Compositions
| Component | Stacking Gel | Resolving Gel | Running Buffer | Sample Buffer (2X) |
|---|---|---|---|---|
| Tris-HCl | 125 mM, pH 6.8 | 375 mM, pH 8.8 | 25 mM | 125 mM, pH 6.8 |
| Acrylamide | 4-5% | 7.5-15% (variable) | - | - |
| SDS | 0.1% | 0.1% | 0.1% | 2-4% |
| Glycine | - | - | 192 mM | - |
| APS | 0.05% | 0.05% | - | - |
| TEMED | 0.1% | 0.1% | - | - |
| Glycerol | - | - | - | 10-20% |
| Bromophenol Blue | - | - | - | 0.001-0.01% |
| β-mercaptoethanol | - | - | - | 5% (or DTT 100 mM) |
The separating gel is prepared first by mixing appropriate volumes of acrylamide/bis-acrylamide solution (typically 30% acrylamide, 0.8% bis-acrylamide), separating gel buffer (1.5 M Tris-HCl, pH 8.8, 0.4% SDS), water, APS, and TEMED [13]. The concentration of acrylamide in the resolving gel depends on the target protein size range, with lower percentages (7.5-10%) optimal for high molecular weight proteins and higher percentages (12-15%) better for lower molecular weight proteins [4] [13]. After pouring the separating gel, it is typically overlayered with water-saturated butanol or water to create a flat interface and promote even polymerization [13].
Once the separating gel has polymerized (approximately 20-30 minutes), the stacking gel is prepared using lower concentration acrylamide (4-5%), stacking gel buffer (0.5 M Tris-HCl, pH 6.8, 0.4% SDS), water, APS, and TEMED [13]. This solution is poured atop the polymerized separating gel, and a comb is inserted to create sample wells. The stacking gel polymerizes within 10-20 minutes, after which the gel is mounted in the electrophoresis apparatus and submerged in running buffer (25 mM Tris, 192 mM glycine, 0.1% SDS, pH 8.3) [13].
Sample Preparation and Electrophoresis Conditions
Protein samples are prepared for SDS-PAGE by mixing with Laemmli sample buffer, which typically contains 62.5 mM Tris-HCl (pH 6.8), 2% SDS, 10% glycerol, 0.01% bromophenol blue, and 5% β-mercaptoethanol or 100 mM dithiothreitol (DTT) as reducing agents [12] [13]. The mixture is heated at 95-100°C for 5-10 minutes to ensure complete denaturation and reduction of disulfide bonds [4] [13]. Heating linearizes the proteins and facilitates uniform SDS binding at a constant weight ratio (approximately 1.4 g SDS per 1 g protein), which confers a consistent negative charge proportional to polypeptide length [4] [11].
The prepared samples are loaded into wells, and electrophoresis is initiated. For standard mini-gels (8 × 8 cm), typical running conditions involve constant voltage (100-200 V) or constant current (20-40 mA) for 45-90 minutes, until the bromophenol blue tracking dye reaches the bottom of the gel [13]. The gel apparatus must be connected with the correct polarity, with proteins migrating toward the anode (positive electrode) due to the negative charge imparted by SDS [4] [13].
Protein Detection and Visualization
Following electrophoresis, separated proteins are visualized using various staining techniques. Coomassie Brilliant Blue staining is the most common method, offering a balance between sensitivity (detecting ~50-100 ng protein per band) and ease of use [13]. The gel is incubated in Coomassie staining solution (0.05% Coomassie Brilliant Blue R-250, 40% ethanol, 10% acetic acid) for 30 minutes to several hours, followed by destaining (40% ethanol, 10% acetic acid) to remove background stain [13].
For higher sensitivity, silver staining can detect 2-5 ng of protein per band but is less quantitative and may not stain all proteins equally [13]. Fluorescent dyes such as SYPRO Ruby offer excellent sensitivity with linear quantification capabilities and are compatible with downstream mass spectrometry analysis [11]. After staining, protein bands can be analyzed by gel imaging systems, and molecular weights estimated by comparison with protein standards of known molecular weight run in parallel lanes [4] [11].
Technical Evolution and Modern Adaptations
From Tube Gels to Slab Gels
The original Laemmli gels were cast in glass tubes, which required cracking with a hammer and slicing the gel lengthwise for drying and staining [2]. This methodology was labor-intensive and limited the number of samples that could be compared simultaneously. The subsequent development of slab gel systems by William Studier and Pat O'Farrell represented a significant advancement, enabling multiple samples to be run in parallel on a single gel [2]. This innovation dramatically improved reproducibility and throughput, making comparative analysis of protein samples more efficient and reliable.
Modern slab gel electrophoresis systems typically employ vertical arrangements where the gel is cast between two glass or plastic plates and mounted in buffer chambers that contain the cathode (upper chamber) and anode (lower chamber) [4] [14]. Alternative horizontal systems place the unsupported gel on a cooling plate with buffer connection established via wicks, offering greater versatility for various electrophoretic applications including isoelectric focusing [14]. Recent improvements in horizontal PAGE systems have addressed electric field inhomogeneity through novel electrode designs that apply the electric field simultaneously from both top and bottom of the gel, improving band resolution [14].
Modifications and Enhanced Applications
The fundamental Laemmli method has spawned numerous modifications to address specific research needs. Two-dimensional (2D) PAGE combines isoelectric focusing in the first dimension with SDS-PAGE in the second dimension, providing the highest resolution for complex protein mixtures [4]. This technique can resolve thousands of proteins on a single gel and has become an indispensable tool in proteomic research [4].
Native SDS-PAGE (NSDS-PAGE) represents another significant adaptation, reducing SDS concentrations and eliminating reducing agents and heating steps to preserve protein function while maintaining high resolution [15]. This modification allows retention of enzymatic activity and metal cofactors in resolved proteins, addressing a significant limitation of standard denaturing SDS-PAGE [15]. Studies have demonstrated that NSDS-PAGE retains 98% of bound Zn²⁺ in proteomic samples compared to only 26% retention with standard SDS-PAGE, with seven of nine model enzymes retaining activity after separation [15].
Other technical enhancements include gradient gels with progressively increasing acrylamide concentration for broader separation ranges, precast gels for improved reproducibility and convenience, and specialized buffer systems optimized for specific protein classes [4] [14]. The integration of SDS-PAGE with western blotting for immunodetection and mass spectrometry for protein identification has further expanded its analytical utility [11] [14].
The Scientist's Toolkit: Essential Reagents and Materials
Table: Essential Research Reagent Solutions for Laemmli SDS-PAGE
| Reagent/Material | Composition/Specification | Function in Experiment |
|---|---|---|
| Acrylamide/Bis-acrylamide | 30% acrylamide, 0.8-2.7% bis-acrylamide | Gel matrix formation; cross-linking determines pore size |
| Tris-HCl Buffer | 1.5 M, pH 8.8 (resolving)0.5 M, pH 6.8 (stacking) | pH maintenance; creates discontinuous buffer system |
| SDS Solution | 10-20% aqueous solution | Protein denaturation; uniform charge impartation |
| Ammonium Persulfate (APS) | 10% fresh aqueous solution | Polymerization initiator for polyacrylamide gels |
| TEMED | N,N,N',N'-Tetramethylethylenediamine | Polymerization catalyst; accelerates free radical formation |
| Glycine | Electrophoresis grade | Trailing ion in running buffer; enables stacking effect |
| Protein Molecular Weight Markers | Pre-stained or unstained protein ladders | Molecular weight estimation and migration monitoring |
| Coomassie Staining Solution | 0.05% Coomassie R-250, 40% ethanol, 10% acetic acid | Protein detection after separation |
| β-mercaptoethanol or DTT | 14.3 M (pure) or 1 M stock solution | Disulfide bond reduction; complete protein denaturation |
| Sample Loading Buffer | 62.5 mM Tris-HCl (pH 6.8), 2% SDS, 10% glycerol, 5% β-mercaptoethanol, 0.01% bromophenol blue | Sample preparation for electrophoresis |
Impact and Legacy in Modern Biomedical Research
Transformation of Molecular Biology and Biochemistry
The introduction and widespread adoption of the Laemmli system fundamentally transformed protein research, providing a simple, rapid, and highly reproducible method for analyzing complex protein mixtures [2] [1]. With over 290,000 citations to date, Laemmli's original 1970 Nature paper stands as one of the most cited scientific publications in history, testament to its profound impact across multiple biological disciplines [1]. The method's simplicity, requiring only microgram quantities of protein and basic laboratory equipment, made sophisticated protein analysis accessible to virtually any research laboratory [4] [11].
The Laemmli system played a crucial role in elucidating the assembly pathways of bacteriophage T4, allowing identification of the numerous structural proteins and their processing during capsid maturation [2] [1]. This breakthrough immediately extended to other viral systems and cellular processes, enabling researchers to dissect complex protein pathways with unprecedented resolution. The method became indispensable for routine protein analysis, including purity assessment, molecular weight determination, expression monitoring, and quality control of protein preparations [4] [11].
Foundation for Subsequent Technological Developments
The discontinuous SDS-PAGE system served as a foundational technology that enabled numerous subsequent methodological advances in protein science. Western blotting (immunoblotting), which combines SDS-PAGE separation with specific antibody detection, relies entirely on the high-resolution protein separation provided by the Laemmli system [11] [14]. This technique became essential for protein identification, quantification, and post-translational modification analysis across research and diagnostic applications.
Similarly, the integration of SDS-PAGE with mass spectrometry-based proteomics represents another transformative development built upon Laemmli's method [11]. Excised protein bands from SDS-PAGE gels can be subjected to in-gel digestion and mass spectrometric analysis for protein identification, characterization of modifications, and quantitative proteomic studies [11]. This approach has become a cornerstone of modern proteomics, enabling systematic analysis of complex protein mixtures from cells, tissues, and biological fluids.
The Laemmli system also provided the technical foundation for two-dimensional gel electrophoresis (2D-PAGE), which combines isoelectric focusing with SDS-PAGE to resolve complex protein mixtures based on both charge and molecular weight [4]. This high-resolution separation technique has been instrumental in proteomic studies aimed at comprehensive protein profiling of biological systems [4].
Contemporary Applications and Future Directions
Current Applications in Drug Development and Biomedical Research
In contemporary drug development, the Laemmli SDS-PAGE system remains an indispensable tool for biopharmaceutical characterization and quality control. Monoclonal antibodies, recombinant proteins, and other biologic therapeutics are routinely analyzed using discontinuous SDS-PAGE to assess purity, integrity, and lot-to-lot consistency [16]. The technique provides critical quality attribute data on protein molecular weight, aggregation status, and fragmentation patterns that regulatory agencies require for product release [16].
In diagnostic applications, western blotting based on SDS-PAGE separation serves as a confirmatory test for numerous infectious diseases, autoimmune disorders, and neurological conditions [11]. The HIV western blot, for instance, remains a gold standard for confirmation of HIV infection, detecting specific antibodies against viral proteins separated by molecular weight [11]. Similarly, western blot analysis of tau protein isoforms and amyloid-beta species in cerebrospinal fluid provides important biomarkers for Alzheimer's disease diagnosis and progression monitoring [11].
Emerging Modifications and Future Perspectives
Recent technical innovations continue to refine and enhance the original Laemmli method. Advanced horizontal electrophoresis systems with improved electrode designs address electric field inhomogeneity issues, producing sharper protein bands and better resolution [14]. The integration of field inversion gel electrophoresis (FIGE) techniques, originally developed for DNA separation, with protein PAGE reduces band diffusion and increases protein concentration in bands, further enhancing resolution [14].
The development of specialized buffer systems that preserve metal binding and enzymatic activity, such as Native SDS-PAGE (NSDS-PAGE), expands the analytical capabilities of traditional SDS-PAGE into functional proteomics [15]. These modifications enable researchers to simultaneously achieve high-resolution separation and retention of biological activity, opening new possibilities for studying metalloproteins and functional enzyme complexes [15].
As proteomic technologies continue to evolve, the Laemmli system maintains its relevance through compatibility with downstream analysis methods. Pre-fractionation of complex protein samples by SDS-PAGE prior to liquid chromatography-mass spectrometry (LC-MS/MS) analysis improves proteome coverage by reducing sample complexity [11]. Similarly, the extraction of proteins from specific gel bands for targeted analysis facilitates characterization of specific protein forms or modifications of interest [11].
The enduring legacy of the Laemmli system lies not only in its continued widespread use more than five decades after its development but also in its role as a conceptual framework that inspired generations of researchers to develop increasingly sophisticated methods for protein analysis. As biotechnology continues to advance, the fundamental principles established by Laemmli's discontinuous design remain embedded in modern protein separation science, a testament to the elegant efficiency of this transformative methodology.
The era preceding the development of modern SDS-PAGE was characterized by methodological constraints that significantly limited the resolution and reproducibility of protein analysis. Early electrophoretic techniques utilized starch gel, which provided a rudimentary matrix for separation but lacked the uniformity and resolving power required for detailed protein characterization [17]. Researchers also conducted electrophoresis within cylindrical tubes fashioned from polyacrylamide, which were notoriously difficult to standardize. The process of retrieving the resolved proteins often involved the crude but necessary practice of manually cracking these fragile glass tubes, a procedure that risked damaging the gel and compromising the separation [18]. This technological landscape presented a formidable bottleneck for biochemical research, particularly in complex fields such as virology and structural biology, where high-resolution analysis of protein mixtures was paramount. The imperative for a more robust, reproducible, and higher-resolution technique set the stage for a series of key technological transitions that would culminate in the discontinuous buffer slab gel system, a cornerstone of modern molecular biology.
The Laemmli Breakthrough: A Discontinuous System for High Resolution
The pivotal transition in SDS-PAGE methodology occurred in 1970 through the work of Ulrich K. Laemmli at the Medical Research Council (MRC) Laboratory of Molecular Biology in Cambridge. While investigating the control of virus assembly within phage-infected cells, Laemmli refined the existing PAGE method by incorporating the anionic detergent sodium dodecyl sulfate (SDS) into a discontinuous buffer system [19] [20]. This system was ingeniously designed with two distinct layers of polyacrylamide gel, each serving a specific function, and buffers of different compositions and pH levels. Laemmli's original paper, a cornerstone of biochemical methodology, has been cited nearly 300,000 times, a testament to its transformative impact [19].
The core innovation lay in the system's ability to focus protein samples into extremely narrow bands before they entered the separating gel, thereby achieving a resolution previously unattainable. The discontinuous system comprises several key components, with the stacking gel and separating gel working in concert. The stacking gel, with a lower acrylamide concentration (typically 4-5%) and a pH of 6.8, serves to concentrate the protein sample into a sharp zone. The separating (or resolving) gel, with a higher acrylamide concentration (ranging from 8% to 15%) and a pH of 8.8, is where the actual size-based separation occurs [21] [22]. This entire process is driven by a discontinuous buffer system involving Tris-HCl in the gels and Tris-Glycine at pH 8.3 in the running buffer [21]. The fundamental principles governing this system are the uniform charge conferred by SDS and the molecular sieving effect of the polyacrylamide gel matrix.
Table 1: Core Components of the Laemmli Discontinuous Buffer System
| Component | Composition & pH | Primary Function |
|---|---|---|
| Stacking Gel | Low acrylamide (e.g., 4%), pH 6.8 [21] | Concentrates protein samples into a narrow zone before entry into the separating gel. |
| Separating Gel | Higher acrylamide (e.g., 8-15%), pH 8.8 [21] | Resolves proteins based on their molecular weight via the sieving effect of the polyacrylamide matrix. |
| Electrode Buffer | Tris-Glycine, pH 8.3, with 0.1% SDS [21] | Conducts current and establishes the ionic conditions for the "stacking" and "unstacking" of proteins. |
| SDS (Sodium Dodecyl Sulfate) | Anionic detergent in sample buffer and gels [20] | Denatures proteins and confers a uniform negative charge, masking intrinsic charge differences. |
| Reducing Agents (DTT, β-mercaptoethanol) | Added to sample buffer [22] | Breaks disulfide bonds in proteins, ensuring complete denaturation and linearization. |
The Principle of Uniform Charge and Molecular Sieving
The revolutionary nature of SDS-PAGE lies in its elegant simplification of protein separation. The technique relies on two foundational principles. First, SDS binding linearizes the proteins and imparts a uniform negative charge. SDS, an anionic detergent, binds to hydrophobic regions of proteins at a consistent ratio of approximately 1.4 grams of SDS per 1 gram of protein. This binding coat effectively masks the proteins' intrinsic electrical charges, ensuring that the charge-to-mass ratio is nearly identical for all proteins [21] [22]. Second, the polyacrylamide gel matrix acts as a molecular sieve. The gel is created by polymerizing acrylamide and a cross-linker, typically N,N'-methylenebisacrylamide (Bis), forming a three-dimensional network with pores of defined sizes [22]. When an electric field is applied, the negatively charged SDS-protein complexes migrate toward the anode. Their progress is impeded by the gel matrix, with smaller proteins navigating the pores more easily and thus migrating faster, while larger proteins are retarded [20]. The selection of the appropriate acrylamide concentration is critical for optimizing separation for a given protein size range.
Table 2: Polyacrylamide Gel Percentage and Optimal Protein Separation Range
| Acrylamide Concentration (%) | Effective Separation Range (kDa) |
|---|---|
| 7 | 50 - 500 [21] |
| 10 | 20 - 300 [21] |
| 12 | 10 - 200 [21] |
| 15 | 3 - 100 [21] |
The Mechanism of the Stacking Gel
The operation of the stacking gel is a masterclass in exploiting biochemical principles. When the power is applied, the key player becomes the glycine from the running buffer. At the pH of the stacking gel (6.8), glycine exists predominantly in a zwitterionic state, carrying both positive and negative charges and thus possessing very low mobility in the electric field [21]. The chloride ions (from Tris-HCl) in the gel, however, are highly mobile. This discrepancy creates a narrow zone with a steep voltage gradient between the fast-moving chloride front and the slow-moving glycine front. The SDS-coated proteins, whose electrophoretic mobility is intermediate between chloride and glycine, are swept up and compressed into this narrow, migrating zone [21]. This procession continues until it reaches the interface with the separating gel.
Upon entering the separating gel with its higher pH of 8.8, the glycine molecules lose a proton and become predominantly negatively charged. Their mobility increases dramatically, and they quickly overtake the proteins. Once the glycine front passes, the proteins are left in a uniform buffer environment and begin their separation based solely on molecular weight as they migrate through the pores of the separating gel [21]. This entire process ensures that all proteins of a given molecular weight enter the resolving gel simultaneously as an extremely fine band, which is the ultimate source of the high resolution achieved by the Laemmli system.
Figure 1: SDS-PAGE Workflow from Stacking to Separation
The Scientist's Toolkit: Essential Reagents and Materials
The transition to the modern SDS-PAGE protocol requires a specific set of reagents and equipment. The following table details the essential components for performing a standard SDS-PAGE analysis, drawing from both historical and contemporary protocols [20] [23] [22].
Table 3: Essential Research Reagent Solutions and Materials for SDS-PAGE
| Category | Item | Function / Description |
|---|---|---|
| Core Reagents | Acrylamide/Bis Solution (e.g., 30%) | Monomer and cross-linker for forming the polyacrylamide gel matrix [23]. |
| Tris-HCl Buffers (1.5M pH 8.8, 1M pH 6.8) | Buffering agents for the separating gel (pH 8.8) and stacking gel (pH 6.8) [23]. | |
| Sodium Dodecyl Sulfate (SDS), 10% | Anionic detergent that denatures proteins and confers uniform negative charge [23]. | |
| Ammonium Persulfate (APS) & TEMED | Catalysts for the polymerization of acrylamide [23] [22]. | |
| Sample Preparation | SDS-PAGE Loading Buffer | Contains SDS, glycerol, tracking dye, and a buffer to prepare the protein sample [23]. |
| Reducing Agents (DTT or β-mercaptoethanol) | Added to loading buffer to break disulfide bonds for complete protein denaturation [22]. | |
| Running & Staining | Running Buffer (Tris-Glycine-SDS) | Conducts current and maintains pH during electrophoresis [23]. |
| Protein Molecular Weight Marker | A mixture of proteins of known sizes for estimating the molecular weight of unknowns [23]. | |
| Staining Solution (Coomassie Blue, Silver Stain) | Visualizes separated protein bands on the gel post-electrophoresis [20] [23]. | |
| Equipment | Gel Electrophoresis Unit | Includes casting stand, glass plates, spacers, comb, and tank with lid and power supply [23]. |
Evolution of Technique: From Method Refinement to Permanent Records
Following Laemmli's foundational development, the technique continued to evolve through numerous refinements aimed at improving its reliability, application range, and utility. One significant advancement was the introduction of methods for creating a permanent record of the separation. While wet gels can be analyzed, they are fragile and the bands can diffuse over time. Drying the polyacrylamide slab gel onto a solid support became a critical step, especially for autoradiography, permanent record-keeping, and subsequent densitometry analysis [18].
Early drying methods, however, were plagued by the frequent problem of gel cracking, primarily caused by rapid dehydration or air trapped between the gel and the supporting cellophane sheets [18]. This prompted technical improvements, such as the development of a simple air-drying method using a sieve acrylic plate (SAP). This modified protocol involves presoaking the gel in a solution containing methanol and glycerol, sandwiching it between wet cellophane sheets supported by the SAP and a frame, and strategically using a hypodermic needle to vent trapped air pockets. This combination of modifications resulted in dried gels that were crack-free, softer, and maintained their original size, preserving the integrity of the protein separation pattern for future reference [18].
The applications of SDS-PAGE also expanded dramatically. Beyond its initial use in dissecting viral assembly pathways [19], it became a cornerstone technique across diverse fields. In food science, SDS-PAGE is used for protein profiling, allergen detection, and quality assessment across various products like cereals, dairy, meats, and plant-based alternatives [17]. In clinical diagnostics, it is employed in HIV confirmatory testing (Western blot) and for analyzing proteinuria [23]. The technique's versatility is further demonstrated by its various forms, such as reducing versus non-reducing SDS-PAGE to analyze disulfide bonds, and Tricine-SDS-PAGE, which is better suited for separating lower molecular weight proteins (< 30 kDa) [17].
The journey from hammer-cracked tubes to the sophisticated slab gel systems of today represents a profound technological transition that fundamentally shaped modern biochemistry and molecular biology. The Laemmli system's ingenious design, leveraging a discontinuous buffer and the denaturing power of SDS, solved the critical problem of resolution that plagued earlier methods. Its principles of uniform charge masking and molecular sieving created a robust, reproducible, and highly adaptable platform for protein analysis. The subsequent refinements in gel drying, staining, and specialized protocols further cemented its utility. Even as new technologies emerge, SDS-PAGE remains an indispensable and ubiquitous tool in laboratories worldwide, serving as a primary step in protein characterization, quality control, and a gateway to advanced techniques like Western blotting and mass spectrometry. Its development stands as a testament to how a single methodological innovation can accelerate discovery across virtually all domains of the life sciences.
Sodium Dodecyl Sulfate-Polyacrylamide Gel Electrophoresis (SDS-PAGE) stands as a foundational technique in biochemistry, enabling the high-resolution separation of proteins based primarily on their molecular weight. This transformative capability hinges on the unique properties of the anionic detergent SDS, which masks proteins' intrinsic charges and unfolds their native structures. This article details the core mechanisms by which SDS confers a uniform negative charge and facilitates size-based separation, framed within the historical development of the technique. We provide quantitative data on SDS-protein interactions, detailed experimental methodologies, and essential reagent specifications to serve researchers and drug development professionals in the accurate application and understanding of this indispensable tool.
Prior to the landmark development of SDS-PAGE by Ulrich K. Laemmli in 1970, the electrophoretic separation of proteins was a significant challenge due to the complex and heterogeneous nature of protein molecules [1] [2]. Unlike DNA, which possesses a uniform negative charge from its sugar-phosphate backbone, proteins are amphoteric molecules; their net charge is determined by the ionization of side chains of constituent amino acids and is heavily dependent on the pH of their environment [24]. Consequently, in a native state and under an electric field, different proteins in a mixture would migrate in different directions and at rates influenced by their variable charge and three-dimensional shape, preventing separation based solely on molecular size [24] [4].
The need to unravel complex protein interactions, particularly in virus assembly pathways, drove the development of a denaturing electrophoretic system. Laemmli, while working on the structural proteins of bacteriophage T4 at the MRC Laboratory of Molecular Biology, successfully refined the discontinuous gel system of Ornstein and Davis by incorporating SDS as a key denaturing agent [1] [2]. His innovation transformed protein analysis by creating a system where separation was determined almost exclusively by polypeptide chain length, a principle that remains the gold standard for protein separation today [20] [7].
The Fundamental Role of Sodium Dodecyl Sulfate (SDS)
Sodium Dodecyl Sulfate (SDS) is an anionic detergent with a distinct amphipathic structure: a hydrophilic sulfate head group and a hydrophobic 12-carbon tail [24]. This structure is central to its two primary functions in protein denaturation and charge conferral.
Mechanism of Protein Denaturation and Charge Conferral
The process by which SDS prepares proteins for size-based separation involves two synergistic mechanisms:
- Protein Unfolding: The hydrophobic tails of SDS molecules interact strongly with the hydrophobic regions of proteins, while the ionic parts disrupt non-covalent interactions (hydrogen bonds, ionic bonds, and hydrophobic interactions) that stabilize secondary and tertiary structures [24] [20]. This results in the denaturation of the protein into a linear polypeptide chain.
- Charge Masking and Uniform Charge Conferral: SDS binds to the denatured polypeptide backbone in a constant weight ratio, as summarized in Table 1. This extensive binding coats the protein with a layer of negatively charged sulfate groups, effectively overwhelming the protein's intrinsic charge. The resulting SDS-polypeptide complexes all carry a large, uniform negative charge per unit mass [7] [4] [22].
Table 1: Quantitative Data on SDS-Protein Binding
| Parameter | Value | Experimental Basis |
|---|---|---|
| SDS Binding Ratio | 1.4 g SDS / 1 g protein | Consistent across most polypeptides [7] |
| Molecular Ratio | ~1 SDS molecule / 2 amino acids | Based on average amino acid molecular weight [7] |
| Critical Micelle Concentration (CMC) | 7-10 mM | Concentration in aqueous solution where micelles form [7] |
| Protein Denaturation Threshold | >0.1 mM SDS (unfolding begins); >1 mM SDS (most proteins denatured) | Required concentration in experimental buffers [7] |
The Denaturation Workflow
The following diagram illustrates the systematic process by which SDS and ancillary treatments denature a native protein into a linear, uniformly charged complex:
Figure 1: The protein denaturation workflow for SDS-PAGE. Treatment with SDS, heat, and reducing agents collaboratively linearizes proteins and confers a uniform negative charge.
As outlined in Figure 1, sample preparation for SDS-PAGE involves:
- SDS Binding: The sample is mixed with an excess of SDS to ensure complete denaturation and binding [24] [7].
- Heat Treatment: The sample is heated (typically 95°C for 5 minutes) to break hydrogen bonds that stabilize secondary structures like alpha-helices and beta-sheets, further facilitating linearization [24] [7].
- Reducing Agents: To fully linearize proteins, disulfide bonds are cleaved by adding reducing agents such as Dithiothreitol (DTT) or β-Mercaptoethanol (BME) [24] [7]. This ensures multi-subunit proteins dissociate into their individual polypeptide chains.
The Electrophoretic System: From Charge to Separation
With all proteins in the sample converted into linearly charged SDS-polypeptide complexes, the mixture is ready for electrophoretic separation. This occurs within a polyacrylamide gel matrix, which acts as a molecular sieve [24] [4].
The Polyacrylamide Gel Matrix
Polyacrylamide gels are formed through the polymerization of acrylamide monomers cross-linked by N,N'-methylenebisacrylamide (Bis). The polymerization is catalyzed by ammonium persulfate (APS) and N,N,N',N'-Tetramethylethylenediamine (TEMED) [24] [4]. The pore size of the resulting gel is determined by the total concentration of acrylamide (%T) and the degree of cross-linking (%C), allowing for separation optimization based on the target protein size range, as detailed in Table 2.
Table 2: Polyacrylamide Gel Percentage and Protein Separation Range
| Gel Percentage (% Acrylamide) | Effective Separation Range (kDa) | Common Applications |
|---|---|---|
| 8% | 25 - 200 | Large proteins [20] |
| 10% | 15 - 100 | Standard range for most proteins [20] |
| 12% | 10 - 60 | Smaller proteins |
| 4-20% Gradient | 5 - 300 | Broad range separation; enhances resolution across sizes [20] [22] |
The Discontinuous Buffer System
A key innovation in Laemmli's method is the use of a discontinuous buffer system with two distinct gel layers [1] [2] [7]:
- Stacking Gel: A large-pore gel at neutral pH (∼6.8). Here, glycine ions from the running buffer exist in a zwitterionic state with low mobility. This creates a sharp voltage gradient that "stacks" all protein complexes into a very thin, focused band before they enter the resolving gel.
- Resolving Gel: A small-pore gel at basic pH (∼8.8). As the stacked proteins enter this gel, the pH increase causes glycine ions to become fully negatively charged and migrate faster. The proteins are then "unstacked" and enter the sieving matrix of the resolving gel, where their migration is determined solely by size.
The following diagram illustrates the complete SDS-PAGE workflow and the principle of size-based separation:
Figure 2: The SDS-PAGE workflow. Proteins are stacked in the first gel layer before entering the resolving gel, where smaller proteins migrate faster through the porous matrix than larger ones.
Essential Reagents and Experimental Protocol
The Scientist's Toolkit: Key Research Reagents
A successful SDS-PAGE experiment requires a specific set of reagents, each with a critical function, as cataloged below.
Table 3: Essential Reagents for SDS-PAGE
| Reagent | Function / Role in SDS-PAGE |
|---|---|
| Sodium Dodecyl Sulfate (SDS) | Anionic detergent; denatures proteins and confers uniform negative charge [24] [20]. |
| Acrylamide / Bis-Acrylamide | Monomer and cross-linker; forms the porous polyacrylamide gel matrix [24] [4]. |
| Ammonium Persulfate (APS) | Initiator; generates free radicals to begin acrylamide polymerization [24] [4]. |
| TEMED | Catalyst; accelerates polymerization by facilitating radical formation from APS [24] [4]. |
| Dithiothreitol (DTT) / β-Mercaptoethanol (BME) | Reducing agents; cleave disulfide bonds to fully linearize proteins [24] [7]. |
| Tris-HCl Buffers | Maintains specific pH in stacking (pH 6.8) and resolving (pH 8.8) gels for discontinuous system [7] [4]. |
| Glycine | Component of running buffer; acts as a trailing ion in the stacking gel for protein concentration [7]. |
| Coomassie Blue / Silver Stain | Protein stains; used for visualizing separated protein bands post-electrophoresis [20] [7]. |
Detailed Experimental Protocol
Protocol: Standard SDS-PAGE for Protein Separation
I. Gel Casting
- Prepare Resolving Gel: Mix acrylamide/bis-acrylamide solution at the desired percentage (e.g., 10% for 15-100 kDa proteins), Tris-HCl (pH 8.8), SDS, and water. Add APS and TEMED last to initiate polymerization, then immediately pipette the solution into a gel cassette. Layer with isopropanol or water-saturated butanol to create a flat interface and exclude oxygen [24] [7].
- Prepare Stacking Gel: After the resolving gel polymerizes, pour off the overlaying alcohol. Mix a low-percentage acrylamide solution (e.g., 4-5%) with Tris-HCl (pH 6.8), SDS, APS, and TEMED. Pour onto the resolving gel and insert a sample comb to create wells [24] [7].
II. Sample Preparation
- Dilute protein samples in SDS Sample Buffer (typically containing Tris, glycerol, SDS, and a tracking dye like bromophenol blue).
- Add a reducing agent (DTT or BME) to a final concentration of 10-100 mM for DTT or 1-5% for BME [7].
- Heat the samples at 95°C for 5 minutes (or 70°C for 10 minutes) to ensure complete denaturation [7].
III. Electrophoresis
- Assemble the gel cassette in the electrophoresis tank and fill the chambers with Tris-Glycine-SDS Running Buffer [7].
- Load prepared protein samples and a molecular weight marker (protein ladder) into the wells.
- Apply a constant voltage: 80-100 V through the stacking gel, then 120-150 V through the resolving gel. Run until the dye front reaches the bottom of the gel [20] [4].
IV. Post-Electrophoresis Analysis
- Staining: Dismantle the gel and stain with Coomassie Brilliant Blue for general protein detection or a more sensitive silver stain to visualize low-abundance proteins [20].
- Analysis: Image the gel and compare the migration distance of sample protein bands to the molecular weight marker to estimate molecular sizes [20] [22].
The core principle of SDS-PAGE—the conferral of a uniform negative charge by SDS—elegantly solves the historical challenge of separating proteins based on size. By masking intrinsic charges and unfolding complex tertiary structures, SDS reduces all proteins to linear, negatively charged polypeptides whose migration through a polyacrylamide gel is inversely proportional to the logarithm of their molecular mass. This principle, embedded within Laemmli's discontinuous buffer system, has proven to be robust, reproducible, and indispensable. From its origins in fundamental virology research to its current status as a cornerstone of modern biochemistry, quality control, and drug development, SDS-PAGE remains an essential technique, enabling scientists to decipher the complex world of proteins.
SDS-PAGE in Practice: Protocols and Versatile Applications from Lab to Industry
The development of sodium dodecyl sulfate-polyacrylamide gel electrophoresis (SDS-PAGE) represents a cornerstone achievement in biochemical analysis, enabling researchers to separate proteins with unprecedented resolution based on molecular weight. In the 1960s, researchers such as Baruch Davis and Leonard Ornstein made significant contributions to polyacrylamide gel electrophoresis by introducing the concept of discontinuous gel electrophoresis. However, the pivotal breakthrough came in 1970 when Ulrich Laemmli refined the method by incorporating SDS, creating a system that dramatically improved the resolution of protein bands [20]. This innovation transformed protein analysis, providing a reliable method that separates proteins primarily by molecular weight while masking intrinsic charge differences, making it an indispensable tool in molecular biology laboratories worldwide [20].
The Laemmli system remains the foundation for modern protein separation techniques, though continuous improvements have focused on reducing runtime while maintaining resolution through optimized buffer compositions and increased applied voltage [20]. The enduring relevance of SDS-PAGE is evidenced by its critical role in western blotting, protein purity assessment, and various protein analytics, highlighting its adaptability and lasting significance in biochemical research [20].
Principles of SDS-PAGE
The Role of SDS in Protein Denaturation
SDS-PAGE separates proteins based on their molecular weight through the synergistic action of SDS and polyacrylamide gel. Sodium dodecyl sulfate (SDS), an anionic detergent, plays two critical roles: it denatures proteins by breaking non-covalent interactions and unfolds them into linear chains, and it confers a uniform negative charge to all proteins proportional to their polypeptide chain length [20] [25] [26].
This process masks the intrinsic charges of amino acid side chains, ensuring that during electrophoresis, proteins migrate solely based on molecular weight rather than shape or inherent charge [25] [27] [26]. The hydrophobic region of SDS interacts with hydrophobic protein regions, while the ionic part disrupts non-covalent interactions, resulting in complete denaturation to primary structure [26].
Electrophoresis and Molecular Sieving
The denatured, negatively-charged proteins are then subjected to electrophoresis through a polyacrylamide gel matrix, which acts as a molecular sieve [20]. Under the influence of an electric field, proteins migrate toward the positive electrode (anode), with smaller proteins moving faster through the gel pores while larger proteins encounter greater resistance and migrate more slowly [20] [25]. This size-dependent migration allows accurate determination of molecular weight when compared to appropriate standards [20].
Materials and Reagents
Research Reagent Solutions
The following table details essential reagents and materials required for SDS-PAGE:
Table 1: Essential Reagents and Materials for SDS-PAGE
| Reagent/Material | Function/Purpose |
|---|---|
| Acrylamide/Bis-acrylamide | Forms the polyacrylamide gel matrix that acts as a molecular sieve [26] |
| SDS (Sodium Dodecyl Sulfate) | Denatures proteins and confers uniform negative charge [20] [26] |
| Tris-HCl Buffers | Maintains appropriate pH for gel polymerization and electrophoresis [23] |
| Ammonium Persulfate (APS) | Initiator of acrylamide polymerization reaction [23] [26] |
| TEMED | Catalyst that drives formation of persulfate free radicals for gel polymerization [23] [26] |
| Loading Buffer | Contains SDS, glycerol, tracking dye, and often reducing agents for sample preparation [23] |
| Running Buffer | Conducts current and maintains pH during electrophoresis [23] |
| Coomassie Brilliant Blue | Anionic dye that binds proteins for visualization [23] |
| Beta-Mercaptoethanol (BME) or DTT | Reducing agents that break disulfide bonds for complete denaturation [26] |
Step-by-Step Workflow
Sample Preparation
Proper sample preparation is critical for successful SDS-PAGE analysis:
Combine Sample with Loading Buffer: Mix protein solution with SDS-PAGE loading buffer containing SDS, glycerol, tracking dye (e.g., bromophenol blue), and often a reducing agent [23]. A common reducing agent is β-mercaptoethanol (BME) or dithiothreitol (DTT), which breaks disulfide bonds critical for proper folding [25] [26].
Denature Proteins: Heat the sample at 95-100°C for 3-10 minutes in a heat block [25] [23]. This heating step destroys hydrogen bonds that stabilize secondary and tertiary structures, facilitating complete protein denaturation to linear forms [26].
Centrifuge: Briefly centrifuge at approximately 15,000 rpm for 30 seconds to collect condensed sample and remove any debris [25] [23].
Gel Casting
The discontinuous gel system consists of two distinct layers:
Diagram 1: Gel Casting Workflow
Resolving Gel Preparation:
- The resolving gel (separating gel) typically contains higher acrylamide concentration (8-15%) with pH approximately 8.8 [26].
- Mix acrylamide/bis-acrylamide solution with Tris-HCl (pH 8.8), SDS, APS, and TEMED [23].
- Pour the mixture into assembled glass plates to a level about 2 cm below the top of the shorter plate [23].
- Immediately overlay with water, ethanol, or isopropanol to exclude oxygen which inhibits polymerization and to create a flat interface [25] [26].
- Allow to polymerize for 20-30 minutes at room temperature [25].
Stacking Gel Preparation:
- The stacking gel contains lower acrylamide concentration (4-5%) with pH approximately 6.8 [26].
- After resolving gel polymerization, remove the overlay, rinse with water, and wick away remaining liquid [23].
- Pour stacking gel solution on top of the resolving gel and immediately insert a comb to create sample wells [25].
- Allow to polymerize for at least 1 hour at room temperature [23].
The stacking gel concentrates protein samples into a tight band before they enter the resolving gel, significantly improving resolution [27] [26]. This concentration occurs due to differences in migration rates of glycine ions, chloride ions, and proteins in the discontinuous buffer system [25].
Electrophoresis
Once the gel is polymerized and samples are prepared:
Assemble Electrophoresis Apparatus: Remove the comb and assemble the gel cassette into the electrophoresis chamber [23]. Add freshly prepared running buffer to both upper and lower chambers, ensuring the gel is completely submerged [25].
Load Samples: Load prepared protein samples and molecular weight markers into wells using a micropipette. For homemade gels, adding bromophenol blue to the stacking gel (final concentration ~0.003%) can help visualize wells during loading [28].
Run Electrophoresis: Apply constant voltage according to the following guidelines:
Table 2: SDS-PAGE Running Conditions and Gel Percentage Selection
| Gel Percentage | Optimal Protein Separation Range (kDa) | Voltage Conditions | Approximate Run Time |
|---|---|---|---|
| 8% | 25-200 kDa [20] | 90V until dye enters resolving gel, then 150V until completion [23] | 40-60 minutes [20] |
| 10% | 15-100 kDa [20] | 90V until dye enters resolving gel, then 150V until completion [23] | 40-60 minutes [20] |
| 12% | 12-60 kDa [20] | 90V until dye enters resolving gel, then 150V until completion [23] | 40-60 minutes [20] |
| 4-12% Gradient | Broad range (e.g., 14-200 kDa) [27] | Constant 200V [27] | ~30 minutes [27] |
Run the gel until the dye front (typically bromophenol blue) reaches the bottom of the gel [25]. For extended runs or high voltages, placing the apparatus in ice or a cold room can prevent buffer overheating [27].
Protein Visualization and Staining
After electrophoresis, proteins must be visualized:
Gel Removal: Carefully remove the gel from the apparatus and separate the glass plates using a spatula [25]. Transfer the gel to an appropriate container for staining.
Staining: Submerge the gel in Coomassie staining solution. A typical recipe contains 0.008% Brilliant Blue R250 dye with 50% methanol and 10% acetic acid, though recipes vary [27]. Stain with gentle shaking for 15 minutes to 3 hours depending on desired sensitivity [27] [23].
Destaining: Remove stain solution and submerge gel in destain solution (typically containing methanol and acetic acid, or just water) to remove background dye [20] [23]. Destain with gentle shaking for 10-minute intervals, changing solution until protein bands are clear against a light background [23].
Imaging and Documentation: Photograph the gel using a white light transilluminator or gel documentation system [27] [23]. For Coomassie-stained gels, sensitivity typically reaches 20-100 ng of protein per band [27].
Diagram 2: Post-Electrophoresis Workflow
Troubleshooting and Optimization
Common Issues and Solutions
Smiling or Frowning Bands: Often caused by uneven heating during electrophoresis. Ensure proper heat dissipation by running at appropriate voltage and using cooling if necessary [20].
Poor Resolution: May result from insufficient run time, incorrect acrylamide concentration, or improper buffer preparation. Allow sufficient run time and choose appropriate gel percentage for target protein size [20].
Incomplete Protein Separation: Can occur due to insufficient run time or incorrect acrylamide concentration. Adjust gel percentage based on protein size and ensure adequate run time [20].
Optimization Tips
Gel Percentage Selection: Higher acrylamide concentrations create smaller pores ideal for separating smaller proteins, while lower concentrations suit larger proteins [20]. Gradient gels provide a range of pore sizes to separate proteins of various molecular weights in a single run [20].
Sample Loading: Avoid overloading wells; do not exceed 20 μg for complex protein mixtures or 2 μg for purified protein [27]. Load similar volumes across wells and include molecular weight standards in at least one well [27].
Buffer Considerations: Running buffer can typically be reused once, but monitor for overheating [27]. Clean wells with running buffer before loading samples to promote even migration [27].
Advanced Applications and Alternatives
Western Blotting
SDS-PAGE is commonly used as the first step in western blotting, where separated proteins are transferred to a membrane for subsequent antibody detection and protein identification [20] [23].
Two-Dimensional Electrophoresis
Two-dimensional electrophoresis (2-DE) first separates proteins by isoelectric point and then by molecular weight using SDS-PAGE in the second dimension. This technique enables visualization of thousands of proteins in a single gel, facilitating analysis of post-translational modifications and protein isoforms [20].
Native SDS-PAGE Modifications
A modified method called native SDS-PAGE (NSDS-PAGE) reduces SDS concentration and eliminates heating and reducing agents, allowing some proteins to retain enzymatic activity and metal cofactors while still achieving good separation resolution [15]. This technique preserves functional properties in many enzymes while maintaining high resolution separation [15].
SDS-PAGE remains a fundamental technique in biochemistry and molecular biology decades after its development, demonstrating the enduring power of Laemmli's innovative approach. The step-by-step workflow from sample preparation through gel casting, electrophoresis, and staining provides researchers with a reliable method for protein separation based on molecular weight. While the core principles remain unchanged, ongoing modifications and optimization continue to enhance the technique's utility for diverse applications from basic research to drug development and diagnostic applications. Proper execution of each step—from careful sample preparation with appropriate denaturation and reduction to optimal gel percentage selection and running conditions—ensures high-resolution results that form the foundation for downstream protein analysis techniques.
The development of sodium dodecyl sulfate polyacrylamide gel electrophoresis (SDS-PAGE) in 1970 by Ulrich K. Laemmli represents one of the most transformative methodological advances in modern biology and biochemistry [2] [1]. This technique emerged from fundamental investigations into virus assembly within bacteriophage T4-infected cells at the Medical Research Council Laboratory for Molecular Biology in Cambridge, UK [1]. Laemmli's key insight was adapting discontinuous buffer systems, originally described by Ornstein and Davis, to work with SDS-denatured proteins, enabling high-resolution separation of polypeptide chains based on molecular weight [2] [1]. His method resolved a critical bottleneck in analyzing tightly-associated structural proteins of phage T4 that resisted dissociation under native conditions [2]. The subsequent refinement to include reducing agents provided researchers with a powerful toolkit for elucidating protein subunit architecture and the role of disulfide bonds in stabilizing protein structure.
The fundamental principle of SDS-PAGE relies on the fact that SDS, an anionic detergent, binds to proteins at a relatively constant ratio (approximately 1.4 g SDS per 1 g protein), imparting a uniform negative charge density that masks the protein's intrinsic charge [11]. This charge uniformity ensures that separation occurs primarily based on molecular size rather than charge or shape [29] [11]. The critical distinction between reducing and non-reducing SDS-PAGE lies in the treatment of disulfide bonds—covalent linkages between cysteine residues that stabilize protein tertiary and quaternary structures [30]. These methodological variants offer complementary information about protein composition and structural organization, making them indispensable techniques in biochemical research and biopharmaceutical development.
Fundamental Principles: Disulfide Bonds and Electrophoretic Mobility
Disulfide bonds represent crucial post-translational modifications that stabilize protein structures in both eukaryotic and prokaryotic organisms [30]. These covalent linkages form between the thiol groups of cysteine residues and exist in two primary forms: intrachain disulfide bonds (within a single polypeptide chain) that stabilize tertiary structure, and interchain disulfide bonds (between separate polypeptide chains) that stabilize quaternary structure [30]. In vivo, disulfide bond formation occurs primarily in the endoplasmic reticulum of eukaryotic cells and the periplasmic space of prokaryotes during protein folding and maturation [30].
The presence or absence of disulfide bonds significantly impacts protein behavior in SDS-PAGE. Under non-reducing conditions, disulfide bonds remain intact, preserving the covalent linkages between cysteine residues [31]. This means that subunits connected by interchain disulfide bonds will migrate as a single unit, and proteins with intrachain disulfides will maintain a more compact structure despite being denatured by SDS [32]. In contrast, under reducing conditions, adding reducing agents such as β-mercaptoethanol (BME) or dithiothreitol (DTT) breaks disulfide bonds, allowing individual polypeptide chains to separate and migrate independently based on their molecular weights [32] [31].
The electrophoretic mobility of proteins in SDS-PAGE is primarily determined by molecular size when disulfide bonds have been reduced [29] [11]. However, under non-reducing conditions, proteins with intact disulfide bonds often exhibit faster migration through the gel matrix than their fully reduced counterparts because the compact structure created by disulfide bonds allows easier passage through the polyacrylamide mesh [31]. This differential migration behavior provides crucial information about a protein's disulfide bond structure and subunit composition.
Methodological Comparison: Reducing vs. Non-Reducing SDS-PAGE
Core Components and Mechanisms
Table 1: Key Components of Reducing and Non-Reducing SDS-PAGE
| Component | Reducing SDS-PAGE | Non-Reducing SDS-PAGE | Function |
|---|---|---|---|
| SDS | Present | Present | Denatures proteins, imparts uniform negative charge [29] [11] |
| Reducing Agent | β-mercaptoethanol or DTT | Absent | Breaks disulfide bonds [32] [31] |
| Sample Buffer | Contains reducing agent | Lacks reducing agent | Prepares proteins for electrophoresis [11] |
| Protein State | Fully denatured into individual polypeptides | Denatured but disulfide bonds preserved [31] | Determines separation basis |
| Separation Basis | Molecular weight of subunits | Molecular weight of disulfide-linked complexes [32] | Impacts band interpretation |
Comparative Analysis of Applications
Table 2: Information Provided by Reducing vs. Non-Reducing SDS-PAGE
| Analysis Type | Reducing SDS-PAGE | Non-Reducing SDS-PAGE |
|---|---|---|
| Subunit Composition | Reveals individual polypeptide chains and their molecular weights [11] | Shows intact complexes with covalent linkages [31] |
| Disulfide Bond Detection | Indirectly through comparison with non-reducing gels | Directly shows presence of disulfide-stabilized structures [30] [31] |
| Quaternary Structure | Identifies non-covalent subunit interactions when compared with non-reducing gels | Distinguishes between covalent and non-covalent subunit interactions [32] |
| Protein Purity | Assesses purity based on individual polypeptide components [11] | Evaluates purity of intact covalent complexes |
| Molecular Weight Estimation | Accurate for individual polypeptide chains | Accurate for disulfide-linked complexes [11] |
The strategic application of both reducing and non-reducing SDS-PAGE enables researchers to distinguish between subunits connected by disulfide bonds versus those associated through non-covalent interactions [32]. For example, consider a protein complex where subunits A and C are linked by a disulfide bond, while subunits B and D associate through non-covalent interactions. Under non-reducing conditions, subunits A and C migrate as a single band with combined molecular weight, while subunits B and D separate according to their individual sizes. Under reducing conditions, the disulfide bond between A and C is broken, allowing all four subunits to migrate independently based on their molecular weights [32]. This comparative approach provides critical insights into protein architecture that would be impossible to obtain using either method alone.
Figure 1: Experimental Workflow for Comparing Reducing and Non-Reducing SDS-PAGE
Experimental Approaches and Protocols
Basic Protocol for Disulfide Bond Analysis
The following protocol adapts established methods for analyzing disulfide bond formation in protein samples, derived from current biochemical methodologies [30]. This approach enables researchers to distinguish between disulfide-linked complexes and non-covalent associations.
Sample Preparation:
- Prepare protein sample in appropriate lysis buffer containing detergent to solubilize membranes and release protein content [30].
- Divide sample into two equal aliquots for reducing and non-reducing conditions.
- For reducing conditions, add β-mercaptoethanol to a final concentration of 1-5% or DTT to 10-100 mM, then heat at 95-100°C for 5-10 minutes [11].
- For non-reducing conditions, omit reducing agents but still include SDS and heat denaturation.
- Add loading buffer containing glycerol to increase density and tracking dye (e.g., bromophenol blue) to monitor migration [11].
Gel Electrophoresis:
- Use standard SDS-polyacrylamide gel with stacking gel (4-5% acrylamide, pH ~6.8) and separating gel (concentration appropriate for protein size range, pH ~8.8) [11].
- Load molecular weight standards alongside experimental samples in adjacent lanes.
- Apply constant voltage (typically 100-200 V) until tracking dye reaches the bottom of the gel [11].
Visualization and Analysis:
- Following electrophoresis, stain proteins using Coomassie Brilliant Blue, silver staining, or fluorescent dyes such as SYPRO Ruby [11].
- Compare band patterns between reducing and non-reducing conditions.
- Identify bands present only under non-reducing conditions as disulfide-linked complexes.
- Note bands with differential migration speeds between conditions, which may indicate intrachain disulfide bonds creating more compact structures [31].
Research Reagent Solutions
Table 3: Essential Reagents for SDS-PAGE Disulfide Bond Analysis
| Reagent | Composition/Type | Function in Experiment |
|---|---|---|
| SDS (Sodium Dodecyl Sulfate) | Anionic detergent | Denatures proteins, imparts uniform negative charge [29] [11] |
| β-mercaptoethanol | Reducing agent | Breaks disulfide bonds in reducing conditions [32] |
| DTT (Dithiothreitol) | Alternative reducing agent | Breaks disulfide bonds, less volatile than β-mercaptoethanol [11] |
| Polyacrylamide Gel | Acrylamide and bis-acrylamide | Sieving matrix for size-based separation [11] |
| Tris-Glycine Buffer | Tris base, glycine, SDS | Running buffer for electrophoresis [11] |
| Coomassie Brilliant Blue | Protein stain | Visualizes separated protein bands [11] |
| Molecular Weight Standards | Proteins of known molecular weight | Reference for estimating protein size [11] |
| N-Ethylmaleimide (NEM) | Alkylating agent | Optional: Blocks free thiols to prevent disulfide exchange [30] |
Technical Considerations and Applications
Data Interpretation Guidelines
Interpreting results from comparative reducing and non-reducing SDS-PAGE requires careful analysis of band patterns. The following guidelines assist in accurate data interpretation:
- Multiple bands under non-reducing conditions converting to single band under reducing conditions: This pattern suggests the presence of disulfide-bonded oligomers that dissociate into identical subunits when reduced [31].
- Differential migration speed for the same protein between conditions: A protein that migrates faster under non-reducing conditions likely contains intrachain disulfide bonds that maintain a more compact structure [31].
- Disappearance of high-molecular-weight bands under reducing conditions: These represent intermolecular disulfide bonds that are broken by reducing agents, releasing individual subunits [32].
- No difference in band patterns between conditions: Indicates subunits associate through non-covalent interactions rather than disulfide bonds [32].
For quantitative analysis, researchers can measure band intensities using gel imaging software. The relative abundance of different complexes can provide insights into folding efficiency and the presence of misfolded aggregates [11]. When analyzing proteins with multiple disulfide bonds, partial reduction may generate intermediate bands representing species with some disulfide bonds intact.
Common Applications in Research and Development
The reducing versus non-reducing SDS-PAGE methodology finds diverse applications across biological research and pharmaceutical development:
- Antibody characterization: Reducing SDS-PAGE separates heavy and light chains, while non-reducing conditions show intact antibodies with interchain disulfide bonds [31]. This is crucial for quality control in therapeutic antibody production.
- Analysis of protein folding intermediates: By analyzing samples at different time points during refolding, researchers can track disulfide bond formation and identify folding intermediates [30].
- Quality assessment of recombinant proteins: Comparing reducing and non-reducing gels helps verify proper disulfide bond formation in expressed proteins, detecting misfolded aggregates or incorrect disulfide pairing [30].
- Diagnosis of protein misfolding diseases: Aberrant disulfide bond formation can be detected in diseases where protein misfolding occurs, providing insights into disease mechanisms.
The combination of reducing and non-reducing SDS-PAGE represents a powerful methodological approach for analyzing protein subunit composition and disulfide bond structure. This technique, rooted in Laemmli's foundational development of high-resolution SDS-PAGE, continues to provide critical insights into protein architecture more than five decades after its introduction [2] [1]. The comparative analysis enabled by these complementary methods allows researchers to distinguish between covalent and non-covalent subunit interactions, monitor protein folding states, and verify structural integrity of recombinant proteins.
As protein therapeutics continue to dominate the pharmaceutical landscape, the ability to accurately characterize disulfide bond formation remains essential for drug development and quality control. The enduring utility of reducing versus non-reducing SDS-PAGE in research laboratories worldwide testifies to its fundamental importance in advancing our understanding of protein structure and function.
Molecular Weight Determination and Purity Assessment in Biotherapeutic Development
The development of biotherapeutics, including monoclonal antibodies, fusion proteins, and other recombinant protein products, requires rigorous analytical characterization to ensure product safety and efficacy. Among the most fundamental techniques for this purpose is Sodium Dodecyl Sulfate-Polyacrylamide Gel Electrophoresis (SDS-PAGE), a method developed by Ulrich K. Laemmli in 1970 that has since become indispensable in protein analysis [2] [1]. The technique's origins trace back to investigations of virus assembly within phage-infected cells at the Medical Research Council's Laboratory of Molecular Biology in Cambridge, UK, where Laemmli sought to resolve the complex mixture of structural proteins in phage T4 [2]. His work built upon earlier developments in discontinuous gel electrophoresis by Ornstein and Davis and the application of SDS to protein separation by Maizel [1].
The historical significance of SDS-PAGE lies in its ability to provide high-resolution separation of proteins under denaturing conditions, enabling researchers to separate complex protein mixtures by molecular size. Laemmli's key innovation was developing a buffer system that allowed SDS-polypeptide complexes to concentrate and "stack" at a buffer discontinuity before entering the separating gel, resulting in sharply resolved bands [2] [1]. This technical breakthrough transformed protein analysis and now provides critical support for biotherapeutic development, where assessing molecular weight and purity is essential for characterizing drug substances, identifying impurities, and ensuring batch-to-batch consistency.
Fundamental Principles of SDS-PAGE
Core Mechanism of Molecular Weight Separation
SDS-PAGE separates proteins based primarily on their molecular mass through two complementary mechanisms: protein denaturation with SDS and molecular sieving through a polyacrylamide gel matrix [33] [7]. The anionic detergent sodium dodecyl sulfate (SDS) binds extensively to protein molecules in a ratio of approximately 1.4 g SDS per gram of protein, which corresponds to roughly one SDS molecule per two amino acids [7]. This binding confers several crucial effects: First, it disrupts and unfolds the protein's secondary and tertiary structures, masking the protein's intrinsic charge. Second, it imparts a uniform negative charge density to all proteins, ensuring they migrate toward the anode when placed in an electric field [33]. Consequently, differences in intrinsic charge among proteins become negligible, and separation occurs primarily according to molecular size rather than charge [7].
The polyacrylamide gel serves as a molecular sieve with tunable pore sizes controlled by the concentration of acrylamide and cross-linker (bis-acrylamide) [33]. Lower percentage gels (e.g., 8-10%) with larger pores facilitate better separation of high molecular weight proteins, while higher percentage gels (e.g., 12-15%) with smaller pores provide superior resolution for lower molecular weight proteins [33] [7]. During electrophoresis, smaller proteins migrate more readily through the gel matrix, while larger proteins encounter greater resistance and migrate more slowly [7]. This relationship between migration distance and molecular weight follows a logarithmic pattern, enabling molecular weight estimation by comparing protein mobility against standard markers [33].
The Discontinuous Buffer System
A critical feature of the Laemmli method is its discontinuous buffer system employing different pH and composition in stacking versus separating gels [2] [1] [7]. The stacking gel (typically pH 6.8) concentrates protein samples into sharp bands before they enter the separating gel (typically pH 8.8) [7]. This stacking phenomenon occurs due to differential mobility of ions in the system: chloride ions (leading ions) migrate fastest, followed by protein-SDS complexes, with glycinate ions (trailing ions) moving slowest in the stacking gel [7]. At the interface between stacking and separating gels, the increasing pH causes glycinate ions to gain charge and overtake proteins, creating a sharp boundary that compresses protein samples into narrow bands [1] [7]. This stacking effect ensures high-resolution separation upon entry into the separating gel.
Table 1: Key Components of SDS-PAGE and Their Functions
| Component | Function | Technical Considerations |
|---|---|---|
| SDS (Sodium Dodecyl Sulfate) | Denatures proteins and confers uniform negative charge | Critical micelle concentration: 7-10 mM; binds ~1.4g/g protein [7] |
| Acrylamide/Bis-acrylamide | Forms cross-linked gel matrix for molecular sieving | Concentration determines pore size; higher % for smaller proteins [33] |
| Tris-Glycine Buffer | Provides conducting medium and pH control | Discontinuous system: pH 6.8 (stacking) and 8.8 (separating) [7] |
| β-mercaptoethanol/DTT | Reduces disulfide bonds | Essential for complete unfolding of multimeric proteins [7] |
| Ammonium Persulfate/TEMED | Catalyzes acrylamide polymerization | Fresh preparation required for consistent gel formation [7] |
SDS-PAGE in Molecular Weight Determination
Experimental Workflow and Protocol
The standard protocol for molecular weight determination begins with sample preparation, where protein samples are mixed with SDS-containing sample buffer and reducing agents such as β-mercaptoethanol or dithiothreitol (DTT) to break disulfide bonds [7] [34]. The mixture is typically heated at 95°C for 5-10 minutes to ensure complete denaturation [33] [34]. For membrane proteins or particularly stable complexes, alternative incubation conditions (e.g., 60°C for 30 minutes or 37°C for 60 minutes) may be necessary to prevent aggregation while ensuring denaturation [35].
Gel preparation involves casting two distinct layers: a resolving gel (typically 6-15% acrylamide depending on target protein size) where separation occurs, and a stacking gel (usually 4-5% acrylamide) that concentrates the sample [33] [7]. The polymerization reaction is initiated by ammonium persulfate (APS) and tetramethylethylenediamine (TEMED) [7]. Pre-cast commercial gels have gained popularity due to their consistency and convenience, with some formulations using Bis-tris buffer systems at nearly neutral pH for enhanced stability and reduced protein modification [7].
Electrophoresis is typically performed at constant voltage (100-200V) using Tris-glycine-SDS running buffer until the dye front (usually bromophenol blue) approaches the gel bottom [33] [34]. Following separation, proteins are visualized using stains such as Coomassie Brilliant Blue (sensitivity: 50-100 ng), silver staining (sensitivity: ~1 ng), or fluorescent dyes like SYPRO Ruby for higher sensitivity detection [33].
Molecular Weight Calculation and Limitations
Molecular weight determination relies on constructing a standard curve using proteins of known molecular weights (markers) run concurrently with samples [33]. The relative mobility (Rf) of each standard protein is calculated as the migration distance from the well divided by the migration distance of the dye front [33]. When Rf values are plotted against the logarithm of molecular weights, a linear relationship typically emerges, enabling estimation of unknown protein molecular weights [33].
This method provides an "apparent molecular weight" rather than absolute molecular mass, as several factors can influence protein mobility [36] [33]. Post-translational modifications such as glycosylation or phosphorylation can alter migration patterns, causing proteins to run at sizes different from their actual polypeptide molecular weight [33]. Membrane proteins often demonstrate anomalous migration, frequently appearing smaller than expected due to incomplete unfolding or differential SDS binding [35]. The accuracy of SDS-PAGE for molecular weight determination is generally within ±10% under optimal conditions [7].
Table 2: Molecular Weight Determination by SDS-PAGE: Applications and Limitations
| Application | Protocol Considerations | Limitations & Solutions |
|---|---|---|
| Initial MW estimation | Use appropriate gel percentage for target size range; include broad-range markers | Apparent MW may differ from actual; confirm by mass spectrometry [33] |
| Recombinant protein validation | Compare observed vs. expected migration; check for full-length expression | Proteolytic degradation may cause extra bands; use protease inhibitors [33] |
| Post-translational modification detection | Look for mobility shifts vs. theoretical size; use deglycosylation enzymes | Glycosylation increases apparent size; treat with PNGaseF for comparison [33] |
| Multimeric protein analysis | Compare reducing vs. non-reducing conditions; use cross-linkers for complexes | Quaternary structure generally lost; use native gels or chemical cross-linking [7] |
Purity Assessment in Biotherapeutic Development
Methodologies for Purity Analysis
SDS-PAGE serves as a fundamental technique for assessing protein purity throughout the biotherapeutic development pipeline [33] [34]. The basic principle is straightforward: a highly pure protein sample should display a single predominant band following separation and staining, while impurities appear as additional bands [34]. For quantitative purity assessment, stained gels are scanned densitometrically, and the relative intensity of the target band is expressed as a percentage of total protein lane intensity [34].
Electrophoretic conditions must be optimized for accurate purity assessment. Sufficient protein should be loaded to detect minor impurities (typically 1-5 μg for Coomassie staining), but not so much that overloading causes smearing or distorted bands [33]. Both reducing and non-reducing conditions provide valuable information: reducing conditions (with DTT or β-mercaptoethanol) break disulfide bonds, revealing impurities related to individual subunits, while non-reducing conditions maintain disulfide-linked complexes, providing information about proper folding and aggregation states [7].
For biotherapeutics like monoclonal antibodies, purity analysis often includes examination of both intact molecules and antibody fragments after reduction (heavy and light chains) [37]. This approach can identify common impurities including fragments, aggregates, or misfolded variants that might compromise product quality [33] [34]. The selection of appropriate gel percentages is crucial - lower percentages (8-10%) better separate large aggregates and fragments, while higher percentages (12-15%) provide improved resolution of clipped variants and small impurities [33].
Complementary Techniques for Comprehensive Characterization
While SDS-PAGE provides essential purity information, comprehensive biotherapeutic characterization typically requires orthogonal methods to address its limitations [35] [33]. Size-exclusion chromatography (SEC), particularly using columns like Superdex, effectively detects and quantifies protein aggregates under non-denaturing conditions, providing complementary information to SDS-PAGE [35]. SEC can monitor size homogeneity and detect oligomerization that might be disrupted in SDS-PAGE sample preparation [35].
Ion-exchange chromatography offers charge-based separation that can resolve variants with post-translational modifications or sequence variations that might co-migrate in SDS-PAGE [35]. For example, deamidated or oxidized species often display altered retention in ion-exchange chromatography while potentially showing identical migration in SDS-PAGE [35].
Advanced capillary electrophoresis methods, including CE-SDS, provide automated, quantitative purity analysis with superior precision and quantification capabilities compared to traditional slab gel electrophoresis [38] [37]. Recent innovations such as SDS-capillary agarose gel electrophoresis (SDS-CAGE) offer baseline hump-free separation of therapeutic proteins across a wide molecular weight range, addressing long-standing challenges in CE-SDS analysis [37].
Modern Innovations and Future Perspectives
Technological Advances in SDS-PAGE Methodology
The SDS-PAGE landscape has evolved significantly from its origins, with next-generation systems incorporating features that enhance experimental efficiency, reproducibility, and data quality [39]. Advanced pre-cast gel formulations now offer superior resolution and consistency compared to traditional hand-cast gels, while minimizing inter-batch variability [39]. Automated sample loading systems reduce human error and improve throughput, particularly valuable in quality control environments where multiple batches require simultaneous analysis [39].
Digital imaging and analysis platforms represent another significant advancement, with high-resolution cameras and sophisticated software enabling real-time monitoring of protein migration, automated band detection, and improved quantification [39]. These systems reduce analysis time from hours to minutes while providing more objective and reproducible results [39]. The integration of artificial intelligence and machine learning algorithms with traditional SDS-PAGE protocols is further enhancing data extraction, leading to improved accuracy in protein identification and quantification [39].
Multiplexed SDS-PAGE formats allowing simultaneous analysis of multiple samples or protein targets within a single gel have dramatically increased laboratory productivity [39]. Novel buffer systems and gradient gel technologies provide enhanced separation capabilities for challenging protein mixtures, while specialized staining methods enable detection at unprecedented sensitivity levels [39]. These technological advances are particularly valuable in applications with limited sample quantities, such as during early development stages when reference materials are scarce [39].
Market Context and Emerging Applications
The global SDS-PAGE market, valued at approximately USD 1.5 billion in 2023 and projected to reach USD 2.5 billion by 2033, reflects the technique's enduring importance alongside ongoing innovation [39]. While SDS-PAGE remains a workhorse technique in academic research, its applications have expanded substantially into pharmaceutical development, diagnostic laboratories, and biotechnology quality control [39]. The technique's ability to separate proteins based on molecular weight with exceptional resolution makes it indispensable for monitoring protein purity, detecting degradation products, and ensuring batch-to-batch consistency in biopharmaceutical manufacturing [39].
The rise of personalized medicine has created unprecedented demand for sophisticated protein analysis capabilities, with SDS-PAGE systems serving as essential tools for biomarker discovery and validation [39]. Clinical laboratories are implementing automated SDS-PAGE workflows to support diagnostic applications, particularly in areas such as cancer research, neurological disorders, and metabolic diseases where protein expression patterns provide crucial insights [39].
The integration of SDS-PAGE with mass spectrometry platforms represents a powerful analytical workflow that combines separation efficiency with detailed molecular characterization capabilities [39]. This combination is particularly valuable for identifying specific impurities detected in purity assessments, enabling comprehensive characterization of biotherapeutic products [39]. Emerging applications in food safety testing, environmental monitoring, and forensic analysis are further expanding the technique's reach beyond traditional life sciences research [39].
Table 3: Evolution of SDS-PAGE Applications in Biotherapeutic Development
| Era | Primary Applications | Technological Features |
|---|---|---|
| 1970s (Origins) | Phage structural protein analysis [2] | Tube gels, manual casting, hazardous procedures [1] |
| 1980-2000 | Recombinant protein analysis, basic purity assessment | Slab gels, standard pre-cast gels, improved safety [2] |
| 2000-2020 | Biotherapeutic QC, regulatory compliance | Pre-cast gels, digital imaging, CE-SDS alternatives [39] |
| Present & Future | Complex modalities, high-throughput screening | Automation, AI integration, multi-parameter analysis [39] |
From its origins in Laemmli's study of phage T4 assembly to its current role in biotherapeutic development, SDS-PAGE has remained an indispensable tool for molecular weight determination and purity assessment [2] [1]. The technique's enduring value lies in its straightforward principle, cost-effectiveness, and ability to provide rapid, reproducible protein separation [33]. While modern alternatives like capillary electrophoresis offer advantages for specific applications, SDS-PAGE continues to evolve through integration with digital imaging, artificial intelligence, and automated platforms [39].
For biotherapeutic developers, SDS-PAGE provides critical data throughout the product lifecycle, from initial construct validation to final quality control [33] [34]. When complemented with orthogonal techniques like size-exclusion chromatography, ion-exchange chromatography, and mass spectrometry, it forms part of a comprehensive analytical strategy ensuring product safety and efficacy [35]. As the biopharmaceutical landscape expands to include increasingly complex modalities, the fundamental principles of protein separation established by Laemmli continue to provide essential support for therapeutic innovation [39] [37].
The development of Sodium Dodecyl Sulfate-Polyacrylamide Gel Electrophoresis (SDS-PAGE) in 1970 by Ulrich K. Laemmli represents a pivotal moment in analytical biochemistry. While created to resolve the structural proteins of bacteriophage T4 capsids [1] [2], this technique has transcended its original molecular biology applications to become a cornerstone of modern food science. Laemmli's work, conducted at the Medical Research Council Laboratory of Molecular Biology in Cambridge, UK, was motivated by the need to analyze strongly bonded, noncovalently linked structural proteins that were insoluble in aqueous buffers [1]. His refinement of discontinuous buffer systems allowed SDS/polypeptide chains to stack sharply at buffer interfaces, enabling unprecedented resolution of complex protein mixtures [1] [2]. This technical breakthrough, combined with the ongoing development of T4 conditional lethal mutants, opened new avenues for understanding viral self-assembly pathways and protein-protein interactions [1].
Today, SDS-PAGE stands as one of the most widely used techniques in modern biology, with Laemmli's original paper accumulating over 290,000 citations [1] [2]. Its migration from specialized molecular biology laboratories to essential food science tool demonstrates its remarkable versatility and enduring relevance. In food analysis, SDS-PAGE provides researchers and quality control professionals with a robust method for separating proteins based on molecular weight, enabling critical assessments of composition, purity, authenticity, and safety across diverse food matrices [17].
Fundamental Principles of SDS-PAGE Technology
Core Mechanism and Methodology
SDS-PAGE separates protein molecules based on their molecular weight through a combination of molecular sieving and electrophoretic mobility. The technique employs the anionic detergent sodium dodecyl sulfate (SDS), which denatures proteins by binding to hydrophobic regions in a ratio of approximately one SDS molecule per two peptide bonds [17]. This binding confers a uniform negative charge density along the polypeptide backbone, effectively neutralizing the protein's intrinsic charge and allowing separation to occur primarily according to molecular size rather than charge or shape [17] [40].
The polyacrylamide gel matrix serves as a molecular sieve, with pore size controlled by adjusting the concentrations of acrylamide and cross-linking agents. Under an applied electric field, smaller proteins migrate more rapidly through this network, while larger proteins experience greater resistance and migrate more slowly [17]. The discontinuous buffer system developed by Laemmli incorporates a stacking gel that concentrates proteins into sharp bands before they enter the separating gel, significantly enhancing resolution [1] [2].
Two primary variants of the technique are employed based on analytical needs:
- Reducing SDS-PAGE: Incorporates reducing agents such as 2-mercaptoethanol (2-ME) or dithiothreitol (DTT) to break disulfide bonds, unfolding proteins completely and separating oligomeric subunits [17].
- Non-reducing SDS-PAGE: Omits reducing agents, preserving disulfide-cross-linked structures to analyze protein quaternary structure and interactions [17].
Table 1: Standard SDS-PAGE Experimental Protocol
| Step | Description | Key Considerations |
|---|---|---|
| Sample Preparation | Protein extraction and dilution in buffer containing SDS and optional reducing agents [17] [40]. | Denaturation at 90-100°C for 5-10 minutes ensures complete unfolding and SDS binding. |
| Gel Preparation | Casting polyacrylamide gels with stacking and separating regions of appropriate concentrations [17]. | Gel concentration (e.g., 8-16%) should match target protein size range for optimal resolution. |
| Electrophoresis | Application of electric field (typically 100-200V) to drive protein migration through gel matrix [17] [40]. | Tracking dye migration front monitored to determine optimal run time. |
| Visualization | Staining with Coomassie Brilliant Blue, silver stain, or fluorescent dyes to detect protein bands [17] [41]. | Alternative stain-free methods utilize UV-induced fluorescence of tryptophan residues [41]. |
| Analysis | Imaging and densitometry to determine molecular weights and relative abundance [17] [40]. | Comparison with standard protein ladders enables molecular weight estimation. |
Evolution of SDS-PAGE Methodologies
Since Laemmli's initial development, SDS-PAGE technology has evolved significantly. Early implementations used glass tube gels that required mechanical cracking and manual slicing [2] [42], while modern systems predominantly employ slab gels that enable simultaneous analysis of multiple samples [42]. Recent innovations include precast gradient gels with varying acrylamide concentrations that provide superior resolution across broad molecular weight ranges [43]. Additionally, stain-free technologies that detect proteins through UV-induced fluorescence of tryptophan residues eliminate the need for chemical staining procedures, reducing processing time from hours to minutes while enabling potential quantification without analytical standards [41].
Capillary electrophoresis SDS (CE-SDS) platforms represent a significant technological advancement, automating the separation process within narrow-bore capillaries. This approach offers enhanced resolution, quantitative precision, and reduced consumption of reagents and samples while eliminating manual gel casting and staining steps [42]. These systems are increasingly adopted in biopharmaceutical quality control but remain complemented by traditional SDS-PAGE in research and food science applications due to its accessibility and visual clarity [42].
Diagram 1: SDS-PAGE Historical Development and Applications
Critical Applications in Food Science
Protein Profiling and Quality Assessment
SDS-PAGE serves as a fundamental tool for comprehensive protein characterization across diverse food categories, including cereals, pulses, dairy products, meats, seafood, and plant-based alternatives [17]. The technique enables evaluation of protein integrity and quality in raw materials, intermediate products (such as grit, flour, and bran), and finished goods [17]. Specific applications include:
- Cereal Protein Analysis: Identification and characterization of gluten proteins (gliadins and glutenins) from wheat varieties of different origins, correlating protein profiles with functional properties like elasticity [17].
- Dairy Protein Characterization: Assessment of casein micelles and whey proteins in milk products, monitoring changes during cheese aging where proteolysis generates flavor-contributing peptides of varying molecular weights [40].
- Meat and Seafood Speciation: Verification of species authenticity and detection of economic adulteration in meat and seafood products by comparing protein banding patterns to reference standards [17].
- Plant-Based Protein Evaluation: Analysis of novel protein sources, including those from insects and precision fermentation, to assess composition and potential allergenicity [44].
Table 2: SDS-PAGE Applications in Food Categories
| Food Category | Primary Applications | Specific Protein Targets |
|---|---|---|
| Cereals & Pulses | Quality assessment, functionality prediction [17] | Glutenins, gliadins, globulins, albumins |
| Dairy Products | Process control, quality verification [17] [40] | Caseins (α, β, κ), β-lactoglobulin, α-lactalbumin |
| Meat & Seafood | Species authentication, adulteration detection [17] | Myosin, actin, tropomyosin, parvalbumins |
| Plant-Based Alternatives | Protein characterization, quality consistency [17] | Legumin, vicilin, albumins, novel proteins |
| Processed Foods | Allergen detection, quality assessment [17] [40] | Specific markers for milk, egg, peanut, soy |
Allergen Detection and Monitoring
The detection and quantification of allergenic proteins represents a critical application of SDS-PAGE in food safety. The technique enables identification of specific allergenic components in complex food matrices, supporting regulatory compliance and consumer protection [17] [44]. Key implementations include:
- Allergen Fingerprinting: Establishment of reference protein profiles for major allergens including peanut, milk, egg, wheat, soy, tree nuts, and emerging allergens from insect proteins [17] [44].
- Cross-Reactivity Assessment: Evaluation of immunological similarities between novel proteins (such as insect proteins) and known allergens (like crustacea) through comparative banding pattern analysis [44].
- Process Validation: Monitoring the effectiveness of processing techniques in reducing or eliminating allergenicity through protein degradation or modification [44].
- Novel Food Safety Assessment: Characterization of allergenicity risks in alternative proteins, including insect protein and those produced via precision fermentation, where protein profiles may differ from conventional sources [44].
Recent advancements combine SDS-PAGE with immunoassays in Western blotting configurations to enhance detection specificity. This approach is particularly valuable for identifying cross-reactive allergens between insects and crustaceans, information crucial for appropriate allergen labeling and consumer safety [44].
Quality Control and Process Optimization
SDS-PAGE provides critical analytical capabilities for monitoring and maintaining product quality throughout food manufacturing processes. Applications in this domain include:
- Supply Chain Verification: Comparative analysis of protein ingredients from different suppliers to ensure consistency and detect substitution or adulteration [40].
- Process Impact Assessment: Visualization of molecular weight distribution changes resulting from enzymatic or chemical hydrolysis, thermal processing, or fermentation [40].
- Stability Studies: Evaluation of protein integrity throughout product shelf life, detecting degradation products or aggregation that may affect quality or functionality [40].
- Troubleshooting: Investigation of ingredient performance issues or batch-to-batch variations by identifying differences in protein composition or modification [40].
The technique is particularly valuable for defining complex processes such as fermentation and aging, where proteolytic activity generates characteristic peptide profiles that influence final product characteristics. In cheese manufacturing, for example, SDS-PAGE monitors casein degradation patterns that directly impact flavor development and texture [40].
Advanced Methodologies and Experimental Design
Stain-Free SDS-PAGE Quantification
Traditional SDS-PAGE relies on staining intensity for semi-quantitative analysis, but recent innovations enable precise quantification without analytical standards. Stain-free technology utilizes trichloroethanol (TCE) incorporated within polyacrylamide gels, which reacts with tryptophan residues under UV light exposure to produce fluorescent derivatives [41]. This approach offers several advantages:
- Linear Quantification: Demonstrated linear correlation (r² = 0.99) between fluorescence intensity and tryptophan mass across protein loads of 0.2-2.0 μg per band [41].
- Rapid Processing: Elimination of staining and destaining steps reduces post-electrophoresis processing time from >2 hours to 2-5 minutes [41].
- Absolute Quantification Potential: When protein amino acid composition is known, tryptophan content serves as an intrinsic quantification standard, enabling determination of protein concentrations without reference materials [41].
Validation studies using model proteins (β-lactoglobulin and β-casein) demonstrate no significant deviations between concentrations determined by stain-free SDS-PAGE and HPLC analysis, confirming method accuracy [41]. This methodology is particularly valuable for quantifying minor protein components or novel proteins for which purified standards are unavailable [41].
Diagram 2: SDS-PAGE Experimental Workflow
High-Throughput Screening Applications
Innovative array technologies now enable massive screening of food extracts for quality assessment, particularly for allergen detection. These systems immobilize low volumes (40 nL) of protein extracts on polycarbonate chips in spatially defined patterns, then assess biological activity through immunoreactivity with serum IgE from allergic patients [45]. This approach offers:
- High Reproducibility: Optical signal deviations lower than 10% between replicates [45].
- Multiplexing Capability: Simultaneous assessment of multiple allergen sources on a single platform [45].
- Cost-Effective Detection: Compatibility with alternative detection systems including smartphone imaging and digital versatile disc (DVD) readers [45].
- Manufacturer Comparison: Direct comparison of commercial allergen extract quality through standardized signal intensity measurements [45].
This technology emerges as a reliable alternative to traditional electrophoresis, fluorescence chips, and ELISA assays for pharmaceutical quality control of allergen extracts used in diagnostics and immunotherapy [45].
Factors Influencing Analytical Performance
Multiple variables impact the resolution, accuracy, and reproducibility of SDS-PAGE analyses in food applications:
- Gel Composition: Acrylamide concentration and cross-linking density determine effective separation range and resolution [17].
- Buffer Systems: pH and ionic strength affect protein mobility, band sharpness, and separation efficiency [17].
- Sample Preparation: Extraction efficiency, denaturation completeness, and reduction conditions significantly influence results [17] [40].
- Electrophoresis Conditions: Voltage, run time, and temperature affect separation quality and band definition [17].
Optimal method validation requires careful optimization of these parameters for specific food matrices and analytical objectives to ensure reliable data generation.
Table 3: Key Research Reagent Solutions and Functions
| Reagent/Chemical | Function in SDS-PAGE | Application Notes |
|---|---|---|
| Sodium Dodecyl Sulfate (SDS) | Anionic detergent that denatures proteins and confers uniform charge [17] [40] | Critical concentration required for complete unfolding and charge masking |
| Acrylamide/Bis-acrylamide | Forms cross-linked polymer gel matrix for molecular sieving [17] | Concentration ratio determines gel porosity and separation range |
| 2-Mercaptoethanol/DTT | Reducing agents that break disulfide bonds [17] | Essential for analyzing subunit composition in reducing conditions |
| Trichloroethanol (TCE) | Trihalo compound for stain-free fluorescent detection [41] | Reacts with tryptophan under UV to enable quantification |
| Coomassie Brilliant Blue | Protein-binding dye for visualisation [17] [41] | Differential binding to basic amino acids affects staining intensity |
| TEMED/Ammonium Persulfate | Catalyzes acrylamide polymerization [17] | Concentration and freshness impact gel formation and consistency |
Technological Evolution and Emerging Applications
SDS-PAGE continues to evolve with advancements in automation, miniaturization, and digital integration. By 2025, high-throughput systems are expected to become increasingly prevalent, enabling rapid analysis of complex samples [43] [46]. Key trends include:
- Microfluidic Platforms: Chip-based electrophoresis systems that drastically reduce sample volume requirements while accelerating run times [43] [42].
- Digital Integration: Advanced image analysis algorithms that automatically detect bands, quantify intensity, and normalize against internal standards, reducing user bias and enhancing reproducibility [43].
- Method Harmonization: Development of unified solutions that combine traditional gel systems with capillary electrophoresis under cohesive data management frameworks [43].
- Novel Food Applications: Expanding use in characterizing alternative proteins from insects, plant sources, and precision fermentation to support safety assessments and regulatory approvals [44].
Despite these advancements, traditional SDS-PAGE maintains relevance due to its accessibility, visual clarity, and established protocol familiarity within the food science community [17] [40].
From its origins in fundamental virology research to its current status as an indispensable analytical tool, SDS-PAGE has demonstrated remarkable versatility and enduring value across scientific disciplines. In food science, it provides critical capabilities for protein characterization, allergen detection, and quality control that support product development, safety assurance, and regulatory compliance. While emerging technologies like CE-SDS and array-based screening platforms offer enhanced automation and quantification, the visual clarity, methodological flexibility, and accessibility of SDS-PAGE ensure its continued relevance.
Future applications will likely focus on addressing challenges in novel food characterization, processing optimization, and allergen risk assessment, where protein separation and analysis remain fundamental requirements. As the food industry continues to evolve toward alternative proteins and sustainable production methods, SDS-PAGE will maintain its position as a cornerstone analytical technique, bridging decades of scientific heritage with contemporary food safety and quality imperatives.
Achieving Precision: A Practical Guide to Optimizing and Troubleshooting SDS-PAGE
Selecting the Optimal Gel Concentration for Your Target Protein's Molecular Weight
Sodium Dodecyl Sulfate-Polyacrylamide Gel Electrophoresis (SDS-PAGE) stands as a cornerstone technique in molecular biology and biochemistry, enabling the separation of proteins based on their molecular weight. First established in the 1960s and 1970s, with seminal contributions from Ulrick K. Laemmli, this method provided a breakthrough in understanding protein-protein interactions [42]. The initial methodology involved casting polyacrylamide gels in tubes, which had to be cracked open with a hammer for the gels to be sliced and dried before staining—a stark contrast to the pre-cast gels and streamlined systems available today [42]. The subsequent development of slab gels was a drastic improvement, allowing for the simultaneous analysis of multiple samples and solidifying SDS-PAGE as the gold standard for protein separation [42].
The core principle of SDS-PAGE is to negate the influence of a protein's inherent charge and three-dimensional structure, allowing separation to be governed primarily by molecular size. This is achieved by denaturing the proteins with the anionic detergent SDS, which coats the polypeptides in a uniform negative charge and causes them to unfold into linear chains [21] [47]. When an electric field is applied, these SDS-protein complexes migrate through a porous polyacrylamide gel matrix toward the positive anode. Smaller proteins navigate the pores more easily and migrate faster, while larger proteins are retarded, resulting in a size-dependent separation [21] [48]. The selection of an appropriate gel concentration is paramount to achieving high-resolution separation, as the pore size of the gel must be optimized for the specific molecular weight range of the target protein(s).
The Science of Protein Separation by SDS-PAGE
Fundamental Principles of Molecular Sieving
The polyacrylamide gel acts as a molecular sieve. Its pore size is determined by the concentration of acrylamide and the cross-linker, bisacrylamide [49] [48]. A higher percentage of acrylamide creates a denser matrix with smaller pores, ideal for resolving low molecular weight proteins. Conversely, a lower percentage gel has larger pores, allowing high molecular weight proteins to migrate more effectively [50] [48].
The entire process is underpinned by a discontinuous buffer system pioneered by Laemmli, which utilizes a stacking gel and a resolving (or separating) gel with different pH levels and acrylamide concentrations [21] [47]. This system creates a phenomenon that concentrates all protein samples into a razor-thin band before they enter the resolving gel, ensuring they all begin their separation at the same starting line, which dramatically improves resolution and prevents smearing [21] [47].
The SDS-PAGE Workflow
The following diagram illustrates the key stages of the SDS-PAGE workflow, from sample preparation to final analysis.
A Practical Guide to Gel Concentration Selection
Gel Percentage and Protein Size Resolution
The single most critical factor for a successful SDS-PAGE experiment is matching the acrylamide percentage of the resolving gel to the molecular weight of your target protein. Based on established protocols, the following table provides a definitive guide for selecting the optimal gel concentration.
Table 1: Optimal SDS-PAGE Gel Concentrations for Protein Separation
| Protein Molecular Weight Range (kDa) | Recommended Gel Acrylamide Percentage (%) | Key Considerations and Applications |
|---|---|---|
| >200 kDa | 4-6% [50], 4% [48] | Very large proteins require large pore sizes for sufficient migration and resolution. |
| 50-200 kDa | 8% [50] [49] | Suitable for a broad range of large proteins. |
| 25-200 kDa | 8% [49] | An alternative broad range for larger proteins. |
| 15-100 kDa | 10% [50] [49] | A standard workhorse percentage for many common proteins. |
| 30-300 kDa | 10% [48] | A wider range suitable for mid-to-high molecular weight proteins. |
| 10-70 kDa | 12.5% [50] | Ideal for mid-size proteins. |
| 10-200 kDa | 12% [48] | A broad range achieved with higher percentage gels. |
| 12-45 kDa | 15% [50] [49] | Optimal for small to mid-size proteins. |
| 3-100 kDa | 15% [48] | Excellent for high-resolution separation of small proteins. |
| 4-40 kDa | Up to 20% [50] [49] | Very high percentage required to resolve very small proteins and peptides. |
Advanced Selection: Gradient Gels
For complex experiments, gradient gels offer a powerful solution. These gels have a continuous increase in acrylamide concentration (e.g., from 4% to 20% from top to bottom), creating a pore size gradient [50] [49]. They are particularly useful in the following scenarios [50]:
- When your protein of interest has multiple isoforms spanning a wide molecular weight range.
- When probing a single blot for multiple proteins of vastly different sizes.
- For achieving high-resolution separation across a broad spectrum of weights without needing to cast multiple gels.
Essential Protocols and the Scientist's Toolkit
Standard SDS-PAGE Protocol
A robust, generalized SDS-PAGE protocol, adaptable to most protein targets, involves the following key steps [50] [49]:
- Sample Preparation: Dilute protein samples in Laemmli buffer (sample loading buffer), which contains SDS to denature the proteins, a reducing agent (like DTT or β-mercaptoethanol) to break disulfide bonds, glycerol to add density, and a tracking dye [47]. Heat the samples at 95-100°C for 5 minutes to ensure complete denaturation.
- Gel Preparation: Prepare or purchase a pre-cast polyacrylamide gel with an appropriate percentage based on your target protein's weight (refer to Table 1). The gel consists of a stacking gel (low percentage, pH 6.8) layered on top of a resolving gel (optimal percentage, pH 8.8) [47].
- Loading and Running: Load an equal amount of protein (typically 10-50 µg for cell lysates or 10-100 ng for purified protein) into the wells. Include one lane with a molecular weight marker [50] [49]. Fill the electrophoresis tank with 1X running buffer (25 mM Tris, 192 mM glycine, 0.1% SDS, pH 8.3) [50]. Run the gel at a constant voltage (e.g., 100-150 V) until the dye front reaches the bottom of the gel (typically 1-2 hours).
- Visualization and Analysis: Following electrophoresis, proteins can be visualized directly in the gel using stains like Coomassie Brilliant Blue or silver stain, or transferred to a membrane for western blot analysis [40].
The Scientist's Toolkit: Essential Reagents and Materials
Table 2: Essential Reagents and Materials for SDS-PAGE
| Item | Function and Description |
|---|---|
| Sodium Dodecyl Sulfate (SDS) | An ionic detergent that denatures proteins and confers a uniform negative charge, masking their intrinsic charge [21] [47]. |
| Polyacrylamide Gel | A sieving matrix formed by polymerizing acrylamide and bisacrylamide. Pore size is controlled by concentration [49]. |
| Reducing Agent (DTT or β-mercaptoethanol) | Breaks disulfide bonds within and between protein subunits, ensuring complete unfolding [40] [47]. |
| Tris-Glycine Running Buffer | The conductive medium that carries the current. Glycine's charge state is key to the stacking effect in the discontinuous system [50] [47]. |
| Laemmli Sample Buffer | Contains SDS, reducing agent, glycerol, and a tracking dye (e.g., Bromophenol Blue) to prepare and visualize samples during loading and running [47]. |
| Molecular Weight Marker | A mixture of pre-defined proteins of known sizes run alongside samples to estimate the molecular weight of unknown proteins [49]. |
| Protein Stain (Coomassie, Silver Stain) | Chemicals used to visualize the separated protein bands on the gel after electrophoresis [40]. |
Troubleshooting and Advanced Considerations
When Theoretical and Observed Molecular Weights Diverge
A common challenge in SDS-PAGE is when a protein migrates at an apparent molecular weight that differs significantly from its theoretical weight based on amino acid sequence. While post-translational modifications (e.g., glycosylation, phosphorylation) can cause this, the amino acid composition itself is a major factor.
Acidic amino Acid Residues: Research has established a linear correlation between the percentage of acidic amino acids (aspartate-D and glutamate-E) in a protein and its anomalous migration. Proteins with high acidic residue content bind less SDS, reducing their negative charge density and causing them to migrate slower, thus appearing larger than they are [51]. An equation has been derived to quantify this effect: y = 276.5x - 31.33, where x is the percentage of acidic AA, and y is the average ΔMW per amino acid residue [51].
Hydrophobicity and Post-Translational Modifications: Highly hydrophobic proteins may bind more SDS, while glycosylation can hinder SDS binding and alter migration. If a weight discrepancy is observed, consider these factors and use bioinformatics tools to analyze the protein's amino acid sequence [47].
The Future of SDS-Based Separation: Capillary Electrophoresis (CE-SDS)
While slab-gel SDS-PAGE remains a vital tool, technological evolution has led to more advanced methods. Capillary Electrophoresis SDS (CE-SDS) has emerged as a superior automated technique for many applications, particularly in biopharmaceutical development [42].
CE-SDS performs SDS-PAGE within a narrow-bore capillary, offering significant advantages [42]:
- Automation: Eliminates manual gel casting, staining, and imaging.
- Quantitative Precision: Provides accurate, reproducible peak integration superior to band intensity estimation from gels.
- Superior Reproducibility: Removes gel-to-gel variability.
- Higher Resolution: Narrow capillaries minimize band broadening.
- Reduced Toxicity: Avoids handling neurotoxic acrylamide monomers.
This evolution from tube gels to slab gels to automated capillary systems underscores the technique's enduring importance while highlighting the ongoing push for better quantification, reproducibility, and efficiency in protein analysis [42].
Selecting the optimal gel concentration is a fundamental skill that directly dictates the success of any SDS-PAGE experiment. By understanding the principles of molecular sieving and adhering to the guidelines outlined in this document, researchers can confidently choose the right acrylamide percentage—be it a fixed or gradient gel—to achieve clear, high-resolution results. As the technique continues to evolve, with automation through CE-SDS becoming more prevalent, the core principle remains unchanged: effective separation based on molecular weight begins with a well-chosen gel.
Since its systematic description by Laemmli in 1970, SDS-Polyacrylamide Gel Electrophoresis (SDS-PAGE) has stood as a cornerstone technique in biochemistry and molecular biology, enabling the separation of proteins based primarily on their molecular weight. [52] [53] The fundamental principle relies on the coating of proteins with the anionic detergent sodium dodecyl sulfate (SDS), which confers a uniform negative charge, thereby negating the influence of a protein's intrinsic charge and allowing separation through a polyacrylamide gel matrix based largely on size. [52] [54] However, throughout its developmental history and daily application, researchers have contended with analytical artifacts that can compromise data interpretation. These artifacts—including smeared bands, 'smiling' effects, and poor resolution—represent persistent challenges in the technique's narrative. This guide addresses these common issues within the context of the method's evolution, providing a systematic troubleshooting framework for the modern scientist engaged in critical research, including drug development where analytical precision is paramount.
Fundamental Principles of SDS-PAGE
A comprehensive understanding of SDS-PAGE mechanics is a prerequisite for effective troubleshooting. The technique hinges on several key biochemical and physical processes.
- Protein Denaturation and Linearization: SDS unfolds proteins, disrupting their secondary and tertiary structures. The hydrophobic tail of SDS interacts with protein hydrophobic regions, while its ionic portion disrupts non-covalent interactions. This process is typically augmented by heating the sample to 95°C to break hydrogen bonds and treatment with reducing agents like β-mercaptoethanol (BME) or dithiothreitol (DTT) to break disulfide bridges. [52] [54]
- Charge Equilibration: SDS binds to the denatured polypeptide backbone at a relatively constant ratio of approximately 1.4 g SDS per 1 g of protein. This confers a uniform negative charge per unit mass, ensuring all proteins migrate towards the anode when an electric field is applied. [52]
- Molecular Sieving: The polyacrylamide gel, formed by the polymerization of acrylamide and a cross-linker (bis-acrylamide), creates a porous matrix. The pore size, determined by the total acrylamide concentration (%T) and the degree of cross-linking (%C), dictates the migratory velocity of protein-SDS complexes, with smaller proteins migrating faster than larger ones. [53] [54]
- The Discontinuous Buffer System: A key innovation in modern SDS-PAGE is the use of a stacking gel (low acrylamide, pH ~6.8) layered atop a resolving gel (higher acrylamide, pH ~8.8). In the stacking gel, a phenomenon called isotachophoresis concentrates proteins into a sharp band before they enter the resolving gel. This is mediated by the trailing glycine ions (from the running buffer, pH 8.3) which are neutral (zwitterionic) in the stacking gel's acidic pH, and the leading chloride ions from the Tris-HCl in the gel. This creates a narrow voltage gradient that focuses the protein stack, which is then deposited as a sharp line at the interface of the resolving gel, where the higher pH causes glycine to become negatively charged and overtake the proteins. [52] [53]
Figure 1: SDS-PAGE Artifact Troubleshooting Map. This diagram outlines the primary causes (yellow) and corresponding solutions (green) for the three most common SDS-PAGE artifacts. [55] [56] [57]
The Scientist's Toolkit: Essential Reagents for SDS-PAGE
The following table details the key reagents required for successful SDS-PAGE, along with their critical functions in the process. [52] [54]
Table 1: Essential Reagents for SDS-PAGE Analysis
| Reagent | Function in SDS-PAGE |
|---|---|
| SDS (Sodium Dodecyl Sulfate) | Unfolds proteins and confers a uniform negative charge, nullifying intrinsic protein charge. |
| Acrylamide/Bis-acrylamide | Forms the cross-linked polyacrylamide gel matrix that acts as a molecular sieve. |
| TEMED & APS (Ammonium Persulfate) | Catalyzes the free-radical polymerization of acrylamide to form the gel. TEMED generates persulfate free radicals from APS. |
| Tris-HCl Buffer | Provides the buffering system for both stacking (pH ~6.8) and resolving (pH ~8.8) gels. |
| Tris-Glycine-SDS Running Buffer | Carries the current and maintains pH during electrophoresis; glycine is key to the discontinuous stacking effect. |
| β-Mercaptoethanol (BME) or DTT | Reducing agents that break disulfide bonds in proteins to ensure complete linearization. |
| Glycerol | Adds density to the sample buffer, ensuring samples sink to the bottom of the loading wells. |
| Bromophenol Blue | A tracking dye that allows visualization of sample migration during the run. |
Troubleshooting Common Artifacts
Smeared Bands
Band smearing manifests as a continuous, diffuse streak down the lane instead of a sharp, discrete band. This indicates a heterogeneous population of protein sizes or inconsistent migration.
Table 2: Troubleshooting Smeared Bands
| Cause | Detailed Mechanism | Experimental Solution |
|---|---|---|
| Excessive Voltage | High voltage causes Joule heating, leading to localized overheating. This can denature proteins unevenly, disrupt the gel matrix, and cause band diffusion. [55] [56] [57] | Decrease the run voltage by 25-50%. A standard practice is to run a 1-mm-thick gel at 100-150 V or 10-15 V/cm. For sharper bands, use a lower voltage for a longer duration. [55] [56] [58] |
| Protein Overloading | Loading too much protein exceeds the gel's sieving capacity and the SDS binding capacity, leading to incomplete linearization and heterogeneous migration. [55] [59] | Reduce the total protein load. A general guideline is 10-50 µg per well for a standard minigel. Concentrate dilute samples or load a smaller volume. [55] [59] |
| Sample Degradation | Proteases in the sample can cleave proteins into a continuum of smaller fragments during preparation, creating a smear from intact protein down to small peptides. [55] | Always keep samples on ice. Use fresh protease inhibitors in lysis buffers. Avoid multiple freeze-thaw cycles. Centrifuge samples before loading to remove insoluble debris. [55] [57] |
| High Salt Concentration | High ionic strength in the sample creates a local zone of high conductivity, distorting the electric field and leading to irregular migration and smearing. [55] [57] | Dialyze the sample, precipitate the protein (e.g., with TCA), or use a desalting column to exchange the sample into a low-salt buffer compatible with SDS-PAGE. [55] |
| Incomplete Denaturation | If proteins are not fully unfolded and complexed with SDS, they may migrate based on residual structure and charge, not solely on size. [57] | Ensure sample buffer contains fresh SDS and reducing agent (BME/DTT). Boil samples at 95°C for 5-10 minutes. For heat-sensitive proteins, incubate at 60°C for 15-30 minutes. [55] [54] |
The 'Smiling' Effect
The 'smiling' effect, where bands curve upwards at the edges, and its inverse ('frowning'), are primarily physical phenomena related to heat distribution and apparatus setup.
Table 3: Troubleshooting the 'Smiling' and 'Frowning' Effects
| Cause | Detailed Mechanism | Experimental Solution |
|---|---|---|
| Uneven Heat Distribution (Joule Heating) | The center of the gel becomes hotter than the edges during electrophoresis. Warmer gel regions have lower resistance, causing proteins in the center to migrate faster, resulting in an upward curve—a "smile". Conversely, if edges are warmer, a "frown" occurs. [56] [57] [60] | Reduce voltage to minimize heat generation. Use a cooling system: run the gel in a cold room, use a built-in cooling apparatus, or place ice packs in the tank (ensure no short circuit). Using a power supply in constant current mode can help manage heat production. [55] [56] [58] |
| Buffer Leak in Apparatus | A leak from the upper buffer chamber, often around the gaskets of a vertical gel apparatus, can cause buffer levels to drop, particularly affecting the outer lanes. This alters the local electric field and conductivity, leading to faster migration in the affected lanes. [55] [60] | Inspect the gel cassette and electrode assembly for proper seating. Check that gaskets are not worn or damaged. Ensure the apparatus is assembled correctly and the upper chamber is not overfilled. [55] [60] |
| Incorrect Buffer or Gel Age | Expired pre-cast gels or improperly prepared running buffer can have altered ionic strength and pH, disrupting the carefully balanced discontinuous system and leading to uneven migration. [55] [60] | Use fresh running buffer for each run. Check the expiration date of pre-cast gels. For self-cast gels, ensure reagents are fresh and gels are used promptly or stored correctly. [55] [60] |
Poor Band Resolution
Poor resolution results in blurry, poorly separated bands that are difficult to distinguish and analyze. This undermines the primary purpose of SDS-PAGE.
Table 4: Troubleshooting Poor Band Resolution
| Cause | Detailed Mechanism | Experimental Solution |
|---|---|---|
| Incorrect Gel Concentration | The pore size of the gel is not optimized for the molecular weight range of the target proteins. A low % gel won't resolve small proteins; a high % gel will not resolve large proteins effectively. [55] [57] | Use a gel percentage appropriate for your protein size (e.g., 8% for 50-200 kDa, 10% for 20-100 kDa, 12% for 10-60 kDa). For a broad range, use a gradient gel (e.g., 4-20%). [55] |
| Insufficient Run Time | The electrophoresis is stopped before the proteins have migrated sufficiently within the resolving gel to be separated by size. [56] | Run the gel until the dye front (bromophenol blue) is about to run off the bottom. For high molecular weight proteins, a longer run time may be necessary even after the dye has exited. [56] |
| Improper Running Buffer | Depleted or incorrectly prepared running buffer has incorrect ion concentration and pH, impeding proper current flow and protein mobility, leading to diffuse bands. [55] [56] | Always prepare running buffer fresh from a concentrated stock or use it for only a few runs. Ensure the correct components and pH (e.g., Tris-Glycine-SDS, pH 8.3). [55] [56] |
| Faulty Stacking | If the stacking gel does not concentrate the proteins into a sharp band, they will enter the resolving gel as a diffuse zone, resulting in poor resolution from the start. This can be due to wrong pH, old reagents, or air bubbles at the gel interface. [52] [54] | Ensure the stacking and resolving gel solutions are at the correct pH (6.8 and 8.8, respectively). When casting, carefully overlay the resolving gel with water or isopropanol to create a flat interface. Avoid bubbles when pouring the stacking gel. [55] [54] |
Advanced Methodological Considerations
Optimizing Electrophoresis Conditions: Current, Voltage, and Power
The choice of constant current, voltage, or power significantly impacts heat generation and run consistency, representing a critical experimental variable.
- Constant Voltage: The voltage is fixed, while current and power decrease as resistance increases over the run. This is a safer option as it reduces the risk of overheating, but can lead to longer run times and more diffuse bands as migration slows. [58] It is ideal for running multiple chambers from one power pack.
- Constant Current: The current is fixed, ensuring a constant protein migration rate and predictable run times. However, voltage and power will increase to maintain the set current as resistance rises, leading to significant Joule heating. This requires careful monitoring or active cooling (e.g., running in a cold room or with ice packs) to prevent "smiling" or gel distortion. [58]
- Constant Power: A less common mode where power (heat production) is kept constant. Both voltage and current fluctuate, leading to unpredictable migration rates and extended run times, but it minimizes the risk of boiling the gel. [58]
Sample Preparation: The Foundation of Success
Many artifacts originate long before the power is turned on. Meticulous sample preparation is non-negotiable.
- The Laemmli Buffer: The standard sample buffer contains Tris-HCl (buffer), SDS (denaturant), glycerol (density agent), Bromophenol Blue (tracking dye), and a reducing agent (BME or DTT). [52] Ensure this buffer is fresh and correctly prepared.
- Handling Difficult Samples: Hydrophobic or membrane proteins tend to aggregate. Adding 4-8 M urea to the sample buffer can help maintain solubility. [55] [59] For samples with high nuclease or protease activity, more stringent inhibitors and quicker processing are required.
- Loading Technique: Rinse wells with running buffer before loading to remove air bubbles. Do not overfill wells (load no more than 3/4 capacity). Load equal volumes across wells to ensure even migration. [59] Minimize the delay between loading and starting the run to prevent diffusion from the wells. [56]
The journey of mastering SDS-PAGE, much like the history of the technique itself, is one of continuous refinement and problem-solving. From Laemmli's foundational work to the detailed troubleshooting guides of today, the goal remains the same: to achieve clear, interpretable data that advances scientific understanding. For the researcher in drug development, where the characterization of a therapeutic protein or the analysis of a complex cellular lysate can hinge on the quality of a gel, a deep, practical knowledge of resolving these common artifacts is indispensable. By applying the systematic framework outlined here—rooted in the underlying principles of the technique—scientists can diagnose issues with confidence, implement effective solutions, and ensure their SDS-PAGE results are robust, reliable, and ready to inform the next critical step in their research.
The development of high-resolution sodium dodecyl sulfate polyacrylamide gel electrophoresis (SDS-PAGE) represents one of the most transformative technical advances in modern biology and biochemistry [1]. Its creation was not an abstract exercise but was driven by a pressing experimental need: to resolve the complex mixture of structural proteins required for the assembly of bacteriophage T4 [2] [1]. In 1970, Ulrich K. Laemmli, working as a postdoctoral fellow in Aaron Klug's virus structural group at the famed Medical Research Council Laboratory for Molecular Biology in Cambridge, UK, refined the method by incorporating SDS into a discontinuous gel system [2] [20]. This innovation allowed proteins to be separated primarily based on molecular weight with unprecedented resolution [2]. The technique was so revolutionary that Laemmli's original Nature paper has now been cited nearly 300,000 times, a testament to its fundamental role in molecular biology [1] [61].
The historical context is crucial to understanding the technique's requirements. Laemmli's motivation was to analyze the strongly bonded, non-covalently associated structural proteins of the T4 capsid, which did not dissociate under native conditions [2] [1]. Drawing on Jacob V. Maizel Jr.' earlier work with SDS for poliovirus analysis, and the discontinuous gel electrophoresis systems developed by Baruch Davis and Leonard Ornstein, Laemmli applied his deeper knowledge of electrochemistry to find a buffer system where SDS/polypeptide chains would concentrate and stack at a buffer interface [2]. The success of this endeavor opened the door to elucidating viral self-assembly pathways and has since become indispensable for protein analysis across all biological disciplines [1].
This technical guide examines the critical factors governing SDS-PAGE reproducibility within this historical framework, focusing on the interplay between buffer systems, acrylamide ratios, and run conditions that Laemmli and subsequent researchers have optimized.
The Biochemical Principles of SDS-PAGE
The Role of Sodium Dodecyl Sulfate
SDS, an anionic detergent, serves two critical functions in denaturing gel electrophoresis. First, it disrupts the non-covalent bonds—hydrogen bonds, hydrophobic interactions, and ionic bonds—that maintain protein secondary and tertiary structure [11] [20]. This results in the unfolding of proteins into linear polypeptide chains. Second, SDS binds to these denatured polypeptides with high affinity at a relatively constant ratio of approximately 1.4 grams of SDS per gram of protein, which corresponds to about one SDS molecule per two amino acids [11] [7].
This uniform coating imparts a consistent negative charge to all proteins, effectively masking their intrinsic charges [62] [20]. The result is that all SDS-polypeptide complexes assume a similar charge-to-mass ratio [7]. Consequently, when subjected to an electric field within a polyacrylamide gel matrix, proteins migrate solely based on their molecular size rather than their native charge or shape [11] [20]. Smaller proteins navigate the gel pores more easily and migrate faster, while larger proteins encounter greater resistance and migrate more slowly [20].
The Discontinuous Buffer System
The genius of Laemmli's system lies in its discontinuous nature, employing different buffer compositions and pH values in the stacking and separating gels to achieve high-resolution separation [2] [7]. The system creates a temporary, sharp boundary that concentrates protein samples into extremely narrow bands before they enter the separating gel, ensuring all proteins begin their size-based separation simultaneously from a well-defined starting point [62].
The key to this stacking phenomenon is the glycine buffer, whose ionic state changes with pH [62]. In the stacking gel at pH 6.8, glycine exists primarily as a zwitterion with limited mobility [62]. When an electric field is applied, highly mobile chloride ions from the Tris-HCl in the gel form a leading front, while the slower glycine zwitterions form a trailing front [62]. The protein-SDS complexes, with mobilities intermediate between these two ions, are compressed into a thin zone between the leading and trailing fronts [62]. As this zone reaches the separating gel with its higher pH (typically 8.8), glycine becomes predominantly negatively charged (glycinate) and migrates faster, overtaking the proteins and depositing them in a sharp band at the top of the separating gel where size-based separation begins [62].
Critical Factor 1: Buffer System Composition and Preparation
The discontinuous buffer system is fundamental to achieving reproducible, high-resolution protein separation. Each component must be prepared with precision to ensure consistent electrochemistry and migration patterns.
Buffer Components and Their Functions
- Tris-HCl (Gel Buffer): Serves as the primary buffering agent in both stacking and separating gels. The stacking gel typically uses Tris-HCl at pH 6.8, while the separating gel uses Tris-HCl at pH 8.8 [62] [11]. This pH discontinuity is essential for the stacking phenomenon.
- Tris-Glycine-SDS (Running Buffer): The running buffer typically contains 25 mM Tris, 192 mM glycine, and 0.1% SDS at pH 8.3 [62] [7]. Tris maintains the basic pH, while glycine's changing charge state drives the stacking process. SDS in the running buffer helps maintain proteins in a denatured state during electrophoresis.
- Sample Buffer (Laemmli Buffer): The sample buffer contains Tris-HCl (typically 62.5 mM, pH 6.8), SDS (2-3%), glycerol (10%), bromophenol blue (0.0025-0.01%), and a reducing agent [62] [7] [20]. Glycerol adds density for loading, bromophenol blue serves as a tracking dye, and reducing agents break disulfide bonds.
Experimental Protocol for Buffer Preparation
Running Buffer (1L):
- Weigh 3.03 g Tris base and 14.4 g glycine.
- Add to approximately 900 mL deionized water and stir until dissolved.
- Add 10 mL of 10% SDS solution (or 1 g SDS powder).
- Adjust final volume to 1L with deionized water.
- Verify pH is approximately 8.3; do not adjust pH as this will alter ionic composition.
- Store at room temperature; discard if contamination is evident.
4x Sample Buffer (Laemmli Buffer, 10 mL):
- Combine 2.5 mL of 1M Tris-HCl, pH 6.8 (0.25 M final), 4 mL of 10% SDS (4% final), 2 mL glycerol (20% final), and 1 mL of 0.5% bromophenol blue solution.
- Add 0.5 mL β-mercaptoethanol (5% final) or 154 mg DTT (0.4 M final) as reducing agent.
- Adjust volume to 10 mL with deionized water.
- Aliquot and store at -20°C. Avoid repeated freeze-thaw cycles.
Table 1: Buffer Compositions for Discontinuous SDS-PAGE
| Buffer Type | Primary Components | Typical Concentration | pH | Critical Function |
|---|---|---|---|---|
| Stacking Gel | Tris-HCl | 0.125 M | 6.8 | Creates pH environment for glycine zwitterion formation |
| Separating Gel | Tris-HCl | 0.375 M | 8.8 | Provides alkaline environment for size-based separation |
| Running Buffer | Tris, Glycine, SDS | 25 mM Tris, 192 mM Glycine, 0.1% SDS | ~8.3 | Conducts current and maintains protein denaturation |
| Sample Buffer | Tris-HCl, SDS, Glycerol, Bromophenol Blue, Reducing Agent | Varies by component | 6.8 | Denatures proteins and provides loading density |
Critical Factor 2: Acrylamide Concentration and Gel Polymerization
The polyacrylamide gel matrix acts as a molecular sieve, with its pore size directly determining the separation characteristics for different protein sizes. The concentration of acrylamide and the cross-linker bis-acrylamide must be carefully controlled for reproducible results.
Optimizing Acrylamide Concentration for Protein Size
The optimal acrylamide concentration depends on the molecular weight range of the target proteins [11] [20]. Lower percentage gels (e.g., 8%) have larger pores and are better suited for separating high molecular weight proteins, while higher percentage gels (e.g., 15%) have smaller pores that provide better resolution for low molecular weight proteins [20]. Gradient gels, which contain a continuous increase in acrylamide concentration, can separate a broader range of protein sizes in a single run [7] [20].
Table 2: Optimal Acrylamide Concentrations for Protein Separation
| Acrylamide Concentration (%) | Effective Separation Range (kDa) | Typical Applications |
|---|---|---|
| 6-8% | 50 - 200 | Large proteins; antibody heavy chains, structural proteins |
| 10% | 15 - 100 | Standard mixture; whole cell lysates, most enzymes |
| 12% | 10 - 70 | Standard mixture with better low MW resolution |
| 15% | 5 - 50 | Small proteins; peptide analysis, antibody light chains |
Gel Polymerization Chemistry and Protocol
Polyacrylamide gels form through a free-radical polymerization reaction between acrylamide monomers and the cross-linker N,N'-methylenebisacrylamide (bis-acrylamide) [7]. The reaction is catalyzed by ammonium persulfate (APS), which provides the free radicals, and tetramethylethylenediamine (TEMED), which accelerates the radical formation [62] [7]. The standard ratio of bis-acrylamide to acrylamide is typically 1:29 to 1:37 (2.6-3.3% cross-linking) [7].
Protocol for Preparing a 10% Resolving Gel (10 mL):
- Prepare Resolving Gel Solution: Mix 3.3 mL of 30% acrylamide/bis solution (29:1), 2.5 mL of 1.5 M Tris-HCl (pH 8.8), 4.1 mL deionized water, and 100 μL of 10% SDS.
- Initiate Polymerization: Add 50 μL of 10% ammonium persulfate (freshly prepared) and 5 μL TEMED. Mix gently to avoid introducing bubbles.
- Cast the Gel: Immediately pipette the solution into assembled gel plates, leaving space for the stacking gel. Carefully overlay with isopropanol or water-saturated butanol to exclude oxygen and create a flat meniscus.
- Polymerize: Allow gel to polymerize completely (typically 20-30 minutes). A distinct refractive interface will appear when polymerization is complete.
- Prepare and Cast Stacking Gel: After discarding the overlay, prepare stacking gel by mixing 830 μL of 30% acrylamide/bis, 1.26 mL of 1.0 M Tris-HCl (pH 6.8), 2.83 mL deionized water, and 50 μL of 10% SDS. Add 25 μL of 10% APS and 5 μL TEMED, then pour over the resolving gel and insert the sample comb.
- Complete Polymerization: Allow stacking gel to polymerize for 15-20 minutes before use.
Critical Factor 3: Electrophoresis Run Conditions
The conditions under which electrophoresis is performed—including voltage, time, and temperature—significantly impact separation quality, band sharpness, and reproducibility.
Optimizing Voltage and Run Time
Electrophoresis can be performed at constant current, constant voltage, or constant power, with each offering different advantages [7] [20]. Constant voltage is most commonly used for standard analytical gels. Running conditions must balance separation quality with time requirements:
- Standard Mini-Gel Protocol: Run at 80-100 V through the stacking gel to ensure proper band formation, then increase to 120-150 V for the resolving gel until the dye front reaches the bottom [7] [20]. Total run time is typically 45-75 minutes.
- High-Voltage Protocol: Running at higher voltages (e.g., 200 V) can reduce run time to 20-30 minutes but may generate excessive heat, causing band distortion (e.g., "smiling" bands) and potential protein denaturation [20].
- Extended Run Protocol: For better separation of closely sized proteins, running at lower voltages for longer periods (e.g., 80 V overnight) can improve resolution but increases diffusion band broadening.
Excessive run time can cause proteins, particularly low molecular weight species, to migrate off the gel, while insufficient run time results in poor separation and compression of higher molecular weight proteins [20].
Temperature Control and Band Artifacts
Heat generation during electrophoresis is inevitable due to electrical resistance in the gel matrix. Excessive heat can cause:
- Band Distortion: "Smiling" or "frowning" bands due to uneven temperature distribution across the gel [20].
- Gel Dehydration: Localized drying affects buffer conductivity and migration.
- Protein Denaturation: Altered migration patterns, particularly for heat-sensitive proteins.
For reproducible results, maintain consistent running temperatures between 10-25°C. Using a cooling apparatus or running in a cold room is recommended for high-voltage protocols or when analyzing heat-sensitive samples [20].
Table 3: Optimized Electrophoresis Run Conditions
| Condition Type | Voltage/Current | Approximate Duration | Best Use Applications |
|---|---|---|---|
| Standard Analytical | 80V stacking -> 150V resolving | 45-75 minutes | Most routine protein analyses |
| High-Resolution | 100-120V constant | 2-4 hours | Separation of similar molecular weight proteins |
| Rapid Separation | 200V constant | 20-30 minutes | Quick quality checks, multiple runs |
| Preparative Scale | 30-50V constant | Overnight | Preparative runs for protein isolation |
The Scientist's Toolkit: Essential Reagents for SDS-PAGE
Table 4: Essential Research Reagents for SDS-PAGE
| Reagent/Chemical | Critical Function | Technical Notes for Reproducibility |
|---|---|---|
| Acrylamide/Bis-acrylamide | Forms the porous gel matrix for molecular sieving | Use electrophoretic grade; consistent cross-linker ratio (29:1 or 37.5:1) is critical |
| SDS (Sodium Dodecyl Sulfate) | Denatures proteins and confers uniform negative charge | Use high-purity grade; prepare fresh 10% solution to prevent degradation |
| Tris Buffer | Primary buffering agent for gels and running buffer | Use ultrapure grade; precise pH adjustment critical for discontinuous system |
| Glycine | Trailing ion in stacking gel, leading ion in separating gel | Electrophoresis grade; charge state changes drive stacking effect |
| TEMED | Accelerates polymerization by catalyzing radical formation | Store tightly sealed at 4°C; use fresh for consistent polymerization times |
| Ammonium Persulfate (APS) | Free radical initiator for gel polymerization | Prepare fresh 10% solution weekly or use frozen aliquots |
| β-Mercaptoethanol or DTT | Reducing agent for breaking disulfide bonds | DTT is more stable and less odorous; aliquot and store at -20°C |
| Coomassie Brilliant Blue | Protein stain for visualization after electrophoresis | Filter staining solution to remove particulates; consistent destaining time |
| Molecular Weight Markers | Reference standards for size estimation | Include both recombinant and native protein standards; verify integrity |
Advanced Applications and Contemporary Adaptations
The fundamental principles established by Laemmli continue to be refined and adapted for contemporary applications. The original tube gels cracked open with hammers have been replaced by sophisticated slab gel systems and, more recently, capillary electrophoresis platforms [2] [42]. Capillary electrophoresis-SDS (CE-SDS) represents a significant advancement, offering automation, higher resolution, superior reproducibility, and reduced use of toxic reagents compared to traditional SDS-PAGE [42]. This evolution addresses the growing needs of biopharmaceutical development where quantitative precision and regulatory compliance are paramount [42].
Despite these technological advances, the core principles of protein denaturation with SDS, charge normalization, and molecular sieving remain unchanged. Modern proteomics research frequently combines SDS-PAGE separation with mass spectrometric analysis (GeLC-MS), where reproducible fractionation is essential for quantitative accuracy [63]. Innovations such as using DNA ladders mixed with protein samples before PAGE separation have been developed to enable precise, reproducible gel cutting for quantitative applications, particularly when working with limited samples [63].
The reproducibility of SDS-PAGE, a technique born from the need to understand viral assembly, hinges on the precise control of three interconnected factors: the discontinuous buffer system that concentrates proteins into sharp bands, the acrylamide matrix that sieves proteins by size, and the run conditions that govern the electrophoresis process. Mastery of these elements—from the pH-dependent charge states of glycine to the heat dissipation during high-voltage runs—ensures the reliable protein separation that has made SDS-PAGE a cornerstone of biological research for over half a century. As the technique continues to evolve through automation and integration with downstream analytical methods, the fundamental principles established by Laemmli and his contemporaries remain the foundation upon which reproducible protein analysis is built.
The development of sodium dodecyl sulfate-polyacrylamide gel electrophoresis (SDS-PAGE) represents one of the most transformative technical achievements in modern molecular biology. pioneered by Ulrich K. Laemmli in 1970 while working on bacteriophage T4 assembly, the technique revolutionized protein analysis by allowing separation according to molecular weight rather than native charge or structure [1] [2]. Laemmli's method, which has been cited over 300,000 times, built upon earlier discontinuous electrophoresis systems developed by Davis and Ornstein and incorporated SDS denaturation principles explored by Maizel [2] [42]. The original Laemmli system utilized a Tris-glycine buffer system and became the foundation for protein analysis across countless laboratories worldwide.
However, this standard system presented significant limitations for researchers working with low molecular weight proteins and peptides below 20 kDa [64]. These limitations prompted a new wave of methodological refinements, culminating in Schägger and von Jagow's 1987 introduction of Tris-Tricine SDS-PAGE, which specifically addressed the separation challenges for proteins in the 1-100 kDa range [65]. This technical evolution from glycine to tricine-based systems, combined with parallel advancements in gradient gel technology, represents a critical optimization pathway in the ongoing development of protein separation methodologies, particularly relevant for pharmaceutical researchers analyzing therapeutic peptides, antibody fragments, and other low molecular weight biologics.
Technical Limitations of Traditional Glycine-Based Systems
The standard Laemmli SDS-PAGE system employs a discontinuous buffer system where proteins are stacked in the porous stacking gel between highly mobile chloride ions (leading ions) and slower glycinate ions (trailing ions) [66]. While this system provides excellent resolution for proteins in the 30-250 kDa range, its efficiency deteriorates significantly for proteins smaller than 20 kDa due to several fundamental limitations:
Molecular Sieving Limitations
In traditional glycine-based gels, the resolution of smaller proteins is hindered by continuous accumulation of free dodecyl-sulfate (DS) ions in the stacking gel. This buildup creates convective mixing of DS ions with smaller proteins, resulting in fuzzy bands and decreased resolution [66]. The mixing of DS ions with small proteins also interferes with subsequent fixing and staining processes.
Buffer System Incompatibility
The trailing glycine ions (pK 9.6) in the Laemmli system have inappropriate mobility characteristics for effective separation of low molecular weight proteins. As smaller proteins and peptides approach the size of the trailing ions, their differential migration becomes insufficient for clear separation [64] [65]. This problem is exacerbated by the fact that many small peptides comigrate with the SDS micelle front in traditional Tris-glycine systems [64].
Transfer and Retention Challenges
Low molecular weight proteins are particularly susceptible to "over-transfer" during western blotting, where proteins pass completely through the membrane due to insufficient retention [64]. This problem is compounded by the fact that standard transfer protocols and membrane pore sizes are optimized for larger proteins.
Table 1: Performance Comparison: Glycine vs. Tricine SDS-PAGE Systems
| Parameter | Traditional Glycine SDS-PAGE | Tricine SDS-PAGE |
|---|---|---|
| Optimal Separation Range | 30-250 kDa | 1-100 kDa |
| Best Resolution | 20-200 kDa | < 30 kDa |
| Low MW Limit | ~5-10 kDa with poor resolution | 1-2 kDa with good resolution |
| Trailing Ion | Glycine (pK 9.6) | Tricine (pK 8.15) |
| Buffer pH | Basic (pH ~8.8) | Lower pH system |
| SDS Peptide Interference | Significant | Minimal |
Tricine-SDS-PAGE: Fundamental Principles and Mechanisms
Tricine-SDS-PAGE represents a sophisticated modification of the Laemmli Tris-glycine system specifically engineered to overcome the limitations for low molecular weight protein separation. The system substitutes the trailing glycine ions with tricine (N-[2-Hydroxy-1,1-bis(hydroxymethyl)ethyl]glycine), which has different electrochemical properties that enhance separation efficiency in the low molecular weight range [65] [66].
Electrochemical Basis of Enhanced Resolution
The superior separation capabilities of tricine-based systems stem from the strongly differing properties of tricine compared to glycine. With a pK of 8.15 compared to glycine's pK of 9.6, tricine creates a different stacking dynamic that shifts the upper stacking limit down to approximately 30 kDa [64]. This means proteins above 30 kDa are separated from the sub-30 kDa proteins before reaching the separating layer, preventing overloading at the gel interface and maintaining sharp band definition.
The greater ionic mobility of tricine also means that lower percentages of acrylamide can be used in gels to achieve equivalent degrees of separation [64]. Consequently, higher yet moderate acrylamide concentrations can resolve a narrow window of low molecular weight proteins (e.g., a 15% tricine gel for the 5-20 kDa range) without excessive gel stiffness that might hinder transfer or processing.
Separation Mechanism for Small Proteins and Peptides
In the tricine system, the trailing tricine ions have higher electrophoretic mobility than glycine ions at the separating gel pH. This creates a more effective trailing ion boundary that prevents smaller peptides from merging with the SDS micelle front [66]. Many small proteins and peptides that migrate with stacked DS micelles in Tris-glycine systems become well-separated from DS ions in tricine gels, resulting in sharper, cleaner bands and higher resolution [66].
The system is particularly valuable for membrane proteins, hydrophobic peptides, and phosphoproteins, with modified protocols incorporating urea or alternative buffer systems to further enhance resolution for specific applications [67] [65].
Figure 1: Tricine-SDS-PAGE Workflow and Separation Mechanism
Gradient Gels: Complementary Optimization Approach
While tricine-SDS-PAGE optimizes the buffer system for low molecular weight separation, gradient gels provide a complementary approach by creating a pore-size continuum that can resolve proteins across a broader molecular weight range within a single gel.
Principles of Gradient Gel Electrophoresis
Gradient gels are cast with an increasing concentration of polyacrylamide, typically from 4% to 12% or 4% to 20%, creating a corresponding decrease in pore size throughout the gel length [7]. As proteins migrate through the gel, they encounter progressively smaller pores, creating a "pore limit" where each protein band stops migrating when it reaches pores too small for further passage [7].
This technique is particularly valuable for complex samples containing proteins with diverse molecular weights, as it provides excellent resolution across multiple size classes without requiring multiple gels with different acrylamide concentrations.
Synergy with Tricine Buffer Systems
The combination of tricine buffer systems with gradient gels creates a powerful separation methodology for complex mixtures containing both high and low molecular weight components. The tricine buffer optimizes the stacking and initial separation of low molecular weight proteins, while the gradient gel provides optimal pore sizes for each molecular weight class throughout the separation path [7].
This combined approach is especially valuable for proteomic studies, complex biological samples, and quality control of therapeutic protein preparations containing fragments or degradation products.
Comprehensive Experimental Protocols
Tricine-SDS-PAGE Gel Preparation
The following protocol adapts the original Schägger and von Jagow method with modifications from subsequent technical optimizations [65] [66]:
Buffer and Stock Solution Preparation
- Gel Buffer: 3M Tris, 3% SDS, pH adjusted to 8.45 with HCl (always adjust pH before adding SDS)
- Acrylamide Solution A (49.5% T, 3% C): 48g acrylamide + 1.5g N,N'-methylene bisacrylamide per 100ml
- Acrylamide Solution B (49.5% T, 6% C): 46.5g acrylamide + 3.0g N,N'-methylene bisacrylamide per 100ml
- Cathode Buffer (10X stock): 1M Tris, 10M Tricine, 1% SDS, pH 8.25
- Anode Buffer (10X stock): 2M Tris, pH 9.0
- Sample Buffer (2X): 100mM Tris pH 8.0, 24% glycerol, 8% SDS, 0.02% Coomassie blue G-250, 4% 2-mercaptoethanol (reducing) or without 2-ME (non-reducing)
Gel Casting Procedure
Table 2: Tricine Gel Formulations for Different Separation Needs
| Component | Stacking Gel | Spacer Gel | Separating Gel 10% | Separating Gel 16.5% T3 | Separating Gel 16.5% T6 | Separating Gel 16.5% T6 + Urea |
|---|---|---|---|---|---|---|
| Application | All configurations | Proteins >10kDa | Proteins >10kDa | Peptides <10kDa | Peptides <10kDa | Hydrophobic proteins |
| Solution A | 1 ml | 6.1 ml | 6.1 ml | 10 ml | - | - |
| Solution B | - | - | - | - | 10 ml | 10 ml |
| Gel Buffer | 3.1 ml | 10 ml | 10 ml | 10 ml | 10 ml | 10 ml |
| Glycerol | - | - | 4 g | 4 g | 4 g | - |
| Urea | - | - | - | - | - | 10.8 g |
| H₂O to final volume | 12.5 ml | 30 ml | 30 ml | 30 ml | 30 ml | 30 ml |
| TEMED | 10 μl | 20 μl | 20 μl | 20 μl | 20 μl | 20 μl |
| 10% APS | 50 μl | 100 μl | 100 μl | 100 μl | 100 μl | 100 μl |
Gel casting procedure:
- Prepare separating gel mixture according to desired formulation from Table 2
- Add TEMED and APS immediately before casting
- Pour between glass plates, overlay with isopropanol or water-saturated butanol
- After polymerization (30-45 minutes), remove overlay and rinse with water
- Prepare stacking gel mixture, add TEMED and APS, pour on top of separating gel
- Insert sample comb without introducing bubbles
- Allow to polymerize completely (30-60 minutes)
Sample Preparation and Electrophoresis Conditions
Sample Preparation
- Mix protein sample with equal volume of 2X sample buffer
- For reduced conditions, include 2-mercaptoethanol or DTT at final concentrations of 2-5%
- Heat at 40°C for 30 minutes or 90°C for 5 minutes [65]
- Avoid overloading; optimal loading 0.5-2 μg per protein band per well [65]
Electrophoresis Conditions
- Assemble gel apparatus with cathode (upper) and anode (lower) buffers
- Dilute cathode buffer to 1X: 0.1M Tris, 1M Tricine, 0.1% SDS, pH 8.25
- Dilute anode buffer to 1X: 0.2M Tris, pH 9.0
- Run at constant voltage: 30V for initial 60 minutes, then increase to 180V until completion [65]
- Maintain cool temperature using precooled buffers or cold room
- Run time typically 4-16 hours depending on gel size and protein separation needs
Modified Protocol for Phosphoprotein Analysis
Haider et al. (2010) described a modified tricine gel protocol for phosphoprotein analysis by ICP-MS [65]:
- Use single running buffer (25mM Tris, 25mM Tricine, 0.05% SDS) instead of separate cathode/anode buffers
- Modify gel buffer to 2.5M Tris at pH 8.8 instead of 3M Tris pH 8.45
- Use lower acrylamide concentrations (7-10%) for improved resolution of small phosphorylated proteins
Downstream Processing: Transfer, Detection, and Analysis
Western Blotting Optimization for Low MW Proteins
The successful separation of low molecular weight proteins must be paired with optimized transfer and detection protocols to prevent sample loss and maintain resolution:
Membrane Selection
- PVDF Preferred: Protein binding capacity of 170-200 μg/cm² vs. nitrocellulose's 80-100 μg/cm² [64]
- Pore Size: 0.2 μm membranes recommended for proteins <20 kDa; 0.1 μm for proteins <10 kDa [64]
- Membrane Activation: Pre-wet PVDF in 100% methanol before use
Transfer Conditions
- Semi-dry Transfer: Preferred over wet transfer due to shorter transfer times and reduced over-transfer [64]
- Transfer Duration: Reduce transfer time and voltage/current compared to standard protocols
- SDS Removal: Pre-soak gel in SDS-free buffer or water for 5 minutes to remove excess SDS that can accelerate small protein transfer [64]
- Buffer Composition: For protein sequencing applications, use non-glycine transfer buffers (e.g., CAPS buffer: 10mM CAPS, 10% methanol, pH 11.0) [66]
Staining and Visualization Considerations
Traditional staining protocols may require modification to prevent loss of small proteins and peptides:
- Fixation: Use mild fixatives and avoid prolonged fixation that may lead to protein diffusion
- Staining Duration: Reduce staining and destaining times to minimize protein loss
- Detection Sensitivity: Fluorescent stains generally provide highest sensitivity for low abundance small proteins [68]
Figure 2: Evolution of SDS-PAGE Methods for Enhanced Protein Separation
Research Reagent Solutions: Essential Materials
Table 3: Essential Reagents for Tricine-SDS-PAGE and Gradient Gels
| Reagent Category | Specific Components | Function & Importance | Technical Notes |
|---|---|---|---|
| Buffer Components | Tricine (pK 8.15) | Replacement trailing ion for better low MW separation | Critical difference from glycine systems |
| Tris hydrochloride | Gel and running buffer component | Maintain appropriate pH throughout system | |
| SDS (Sodium dodecyl sulfate) | Protein denaturation and charge conferment | Ensures uniform charge-to-mass ratio | |
| Gel Matrix Components | Acrylamide | Principal gel forming monomer | Neurotoxin - handle with appropriate PPE |
| Bis-acrylamide | Cross-linking agent | Concentration affects pore size | |
| TEMED | Polymerization catalyst | Required for free radical generation | |
| Ammonium persulfate (APS) | Polymerization initiator | Fresh preparation recommended | |
| Specialized Additives | Urea (6M) | Further enhances resolution <5 kDa | Particularly for hydrophobic proteins |
| Glycerol | Increases density, improves band sharpness | Helps decrease peptide hydrophobicity | |
| Electrophoresis Components | Coomassie G-250 | Gel tracking dye | Preferred over bromophenol blue for small peptides |
| Precast gradient gels | Commercial alternative to hand-cast | Improve reproducibility, save time | |
| Transfer & Detection | PVDF membrane (0.2 μm) | Superior protein binding for low MW | Greater capacity than nitrocellulose |
| CAPS transfer buffer | Glycine-free transfer for sequencing | Prevents interference with sequencing |
Applications in Pharmaceutical and Biotechnological Contexts
The optimization of protein separation methodologies for low molecular weight proteins has proven particularly valuable in pharmaceutical development and biotechnology applications:
Therapeutic Peptide Characterization
Tricine-SDS-PAGE enables effective quality control of therapeutic peptides, including insulin analogs, antimicrobial peptides, and cytokine fragments, allowing detection of degradation products, aggregation states, and manufacturing inconsistencies [17].
Antibody Fragment Analysis
The technique provides robust analysis of Fab fragments, scFv antibodies, and other engineered antibody derivatives that fall below the effective separation range of traditional glycine-based systems [64].
Biomarker Discovery and Validation
In proteomic approaches to biomarker identification, tricine-SDS-PAGE facilitates detection of low molecular weight proteins and peptides in complex biological samples, enabling discovery of potential diagnostic and prognostic indicators [67].
Vaccine Development
The methodology supports characterization of subunit vaccine components, synthetic peptide antigens, and vaccine conjugates where precise molecular weight determination is critical for quality assurance [42].
Technological Evolution: From Gels to Capillary Systems
While optimized gel-based systems continue to provide robust protein separation, recent technological advancements offer complementary approaches:
Capillary Electrophoresis-SDS (CE-SDS)
CE-SDS systems provide automated, quantitative separation with superior reproducibility and reduced hands-on time compared to traditional gel methods [42]. These systems offer:
- Automation: Elimination of gel casting, staining, and imaging steps
- Higher Resolution: Narrow-bore capillaries minimize band broadening
- Quantitative Precision: Integrated detection provides accurate peak integration
- Reduced Toxicity: Removal of neurotoxic acrylamide reagents [42]
Method Selection Considerations
The choice between traditional gel-based systems and emerging technologies depends on application requirements:
- Tricine-SDS-PAGE: Ideal for method development, preparative applications, and laboratories with budget constraints
- CE-SDS: Preferred for high-throughput quantitative analysis, regulatory submissions, and applications requiring maximal reproducibility [42]
The historical development of SDS-PAGE methodology represents an ongoing optimization process to address evolving research needs. The limitations of the original Laemmli system for low molecular weight proteins stimulated critical innovations, particularly the introduction of tricine-based buffer systems and refined gradient gel technologies. These advanced optimizations have expanded the utility of SDS-PAGE for contemporary applications in drug development, biotechnology, and proteomics where precise characterization of low molecular weight proteins is essential.
The combination of tricine-SDS-PAGE with gradient gels provides researchers with a powerful tool for comprehensive protein analysis across wide molecular weight ranges, while understanding the theoretical principles behind these methods enables appropriate protocol selection and optimization for specific research requirements. As protein therapeutics continue to evolve toward smaller, more engineered formats, these methodological refinements maintain SDS-PAGE as a relevant and indispensable technique in the molecular biology toolkit.
SDS-PAGE vs. CE-SDS: Validating a Classic Tool in the Age of Automation
The development of high-resolution sodium dodecyl sulfate polyacrylamide gel electrophoresis (SDS-PAGE) in 1970 by Ulrich K. Laemmli was intimately tied to investigations of virus assembly within bacteriophage T4-infected cells [1] [2]. Working at the Medical Research Council Laboratory of Molecular Biology (MRC LMB), Laemmli sought to analyze the complex structural proteins of the T4 capsid, which were insoluble and strongly bonded under native conditions [1]. The existing SDS gel methods of the time, such as those used by Jacob V. Maizel Jr. for poliovirus, produced broad bands that were inadequate for resolving the dozens of proteins involved in T4 assembly [1] [2]. Laemmli's breakthrough was applying a discontinuous buffer system to SDS-protein complexes, creating a stacking effect that concentrated samples into sharp bands before separation, thereby achieving unprecedented resolution [1] [2]. This technique, refined through considerable effort and personal hazard, transformed protein analysis and remains a cornerstone of molecular biology, with Laemmli's original paper now cited over 300,000 times [1] [42].
This whitepaper provides a direct technical comparison between traditional SDS-PAGE and its modern capillary electrophoresis counterpart (CE-SDS), focusing on the critical metrics of resolution, reproducibility, and quantitative capabilities. Intended for researchers and drug development professionals, it places this comparison within the historical development of the technique and details the experimental protocols that enable rigorous protein characterization.
Principles of SDS-Based Separation
Core Mechanism of SDS-PAGE
SDS-PAGE separates proteins based primarily on their molecular weight [20]. The anionic detergent SDS denatures proteins by breaking non-covalent interactions and unfolding secondary and tertiary structures. It coats the polypeptide chains, imparting a uniform negative charge that masks the proteins' intrinsic charge [20] [17]. When an electric field is applied, these SDS-polypeptide complexes migrate through a cross-linked polyacrylamide gel matrix, which acts as a molecular sieve. Smaller proteins encounter less resistance and migrate faster, while larger proteins move more slowly, resulting in separation by size [20].
The Laemmli Discontinuous System
The key to Laemmli's high-resolution method is the use of a discontinuous buffer system with a stacking gel and a separating gel [1] [2] [20]. The stacking gel has a larger pore size and different pH, creating a sharp voltage gradient that concentrates all protein samples into a very narrow zone before they enter the separating gel. This stacking phenomenon ensures proteins begin their separation as a fine line, dramatically improving resolution compared to continuous systems where samples are applied in a broader band [1] [2].
Figure 1: SDS-PAGE Workflow and Principles. The process involves sample denaturation followed by electrophoretic separation through stacking and resolving gels.
Evolution to Capillary Electrophoresis (CE-SDS)
While slab-gel SDS-PAGE became the gold standard, the 1980s saw the foundation of an evolution with the development of capillary electrophoresis (CE) by Stellan Hjerten and others [42]. This was later adapted for SDS-based protein separation, creating CE-SDS. This technique replaces the traditional slab gel with narrow-bore capillaries filled with a separation matrix [42]. The process is automated, with proteins migrating through the capillary under an applied voltage and being detected near the outlet, typically by UV absorbance [69] [42]. This shift from a manual, gel-based system to an automated, liquid-based one underpins the significant differences in performance between the two techniques.
Direct Technical Comparison: SDS-PAGE vs. CE-SDS
The following tables provide a detailed, direct comparison of SDS-PAGE and CE-SDS across critical performance parameters and operational characteristics.
Table 1: Performance Comparison: Resolution, Reproducibility, and Quantitation
| Parameter | SDS-PAGE (Slab Gel) | CE-SDS (Capillary) | Key Differentiators |
|---|---|---|---|
| Resolution | Good; can be limited by band broadening and diffusion. | Higher; narrow-bore capillaries minimize band broadening, leading to sharper peaks [42]. | Capillary geometry in CE-SDS provides superior control over band dispersion. |
| Reproducibility | Moderate; subject to gel-to-gel variability, manual casting, loading, and staining [42]. | High; automated separation and injection ensures consistent run conditions [42]. e.g., RSD <0.3% for migration time, <5% for peak area [69]. | Automation in CE-SDS removes user-dependent variables, enhancing precision. |
| Quantitative Capability | Semi-quantitative; relies on staining intensity and densitometry, which has a limited dynamic range and is subjective [42] [20]. | Fully Quantitative; on-column UV detection provides accurate, reproducible peak integration for direct quantification [42]. | Integrated detection in CE-SDS offers superior linearity and accuracy for concentration analysis. |
| Sensitivity | Good with optimal staining (e.g., silver stain); requires multiple post-run steps. | High; direct UV detection avoids analyte loss from staining/destaining steps. | - |
Table 2: Operational and Practical Comparison
| Aspect | SDS-PAGE (Slab Gel) | CE-SDS (Capillary) | Context and Impact |
|---|---|---|---|
| Throughput | Moderate; run times ~40-60 mins, but multiple samples per gel [20]. | High; rapid run times (e.g., 5.5-25 min/sample) with full automation for 48-96 samples [42]. | CE-SDS offers faster time-to-result for large sample sets. |
| Automation | Manual; requires gel casting, sample loading, staining, and destaining [42]. | Full Automation; pre-filled capillaries, automated sample injection, and detection [42]. | CE-SDS drastically reduces hands-on time and labor. |
| Data Output | Band patterns on a gel; requires imaging and software analysis. | Digital electropherograms (peak profiles); data is directly quantitative and easier to archive/compare. | Electropherogram format is more amenable to GMP/GLP environments. |
| Sample Consumption | Low (µL volumes). | Very low (nL volumes). | Beneficial for precious or limited samples. |
| Hazardous Waste | High; involves neurotoxic acrylamide, methanol, acetic acid [42]. | Low; minimal reagents and waste; no toxic gel disposal [42]. | CE-SDS aligns with green laboratory initiatives by reducing toxic waste. |
A key challenge in traditional CE-SDS with dextran-based polymer matrices has been the occurrence of baseline "humps" or waves, which complicate peak identification and quantification, especially for higher molecular weight biopharmaceuticals [69]. A 2025 study demonstrated a breakthrough using a tetrahydroxyborate cross-linked agarose matrix, which enabled rapid, baseline hump-free analysis of a wide molecular weight range of therapeutic proteins, including intact antibodies and large complexes like thyroglobulin (660 kDa) [69]. This innovation in the separation matrix resolves a long-standing problem and enhances the quantitative reliability of CE-SDS.
Detailed Experimental Protocols
Principle: Proteins are denatured, reduced, and separated in a polyacrylamide gel under an electric field based on molecular weight.
Key Reagents and Solutions:
- Resolving Gel Buffer: 1.5 M Tris-HCl, pH ~8.8.
- Stacking Gel Buffer: 0.5 M Tris-HCl, pH ~6.8.
- 30% Acrylamide/Bis Solution: (29:1 or 37.5:1 acrylamide to bis-acrylamide ratio).
- 10% SDS (Sodium Dodecyl Sulfate): Anionic detergent for denaturation and charge masking.
- APS (Ammonium Persulfate): Catalyst for gel polymerization.
- TEMED (Tetramethylethylenediamine): Free radical stabilizer that accelerates polymerization.
- Sample Buffer (2X or 5X Laemmli Buffer): Contains SDS, glycerol, bromophenol blue tracking dye, and stacking gel buffer.
- Running Buffer (10X): 250 mM Tris, 1.92 M Glycine, 1% (w/v) SDS, pH ~8.3.
- Reducing Agent (optional): β-mercaptoethanol (2-ME) or Dithiothreitol (DTT) to break disulfide bonds.
Procedure:
- Gel Casting:
- Prepare the resolving gel by mixing acrylamide, Tris-HCl (pH 8.8), SDS, APS, and TEMED. Pour between glass plates and overlay with water or alcohol for a flat surface.
- After polymerization, prepare the stacking gel (lower acrylamide %) with Tris-HCl (pH 6.8), SDS, APS, and TEMED. Pour on top of the resolving gel and insert a comb.
- Sample Preparation:
- Mix protein sample with an equal volume of 2X Laemmli sample buffer. For reduced conditions, add 1-5% β-mercaptoethanol or 50-100 mM DTT.
- Heat the mixture at 95-100°C for 5-10 minutes to fully denature the proteins.
- Electrophoresis:
- Assemble the gel apparatus and fill tanks with 1X running buffer.
- Load prepared samples and molecular weight markers into the wells.
- Connect to a power supply and run at a constant voltage (e.g., 100-150 V) until the dye front reaches the bottom of the gel (~40-60 minutes).
- Post-Electrophoresis Analysis:
- Staining: Dismantle the gel and stain with Coomassie Blue, silver stain, or a fluorescent dye to visualize protein bands.
- Destaining: If using Coomassie, destain with a methanol-acetic acid solution to remove background dye.
- Imaging & Quantification: Capture an image of the gel using a documentation system. Use densitometry software to estimate molecular weight and perform semi-quantitative analysis of band intensity.
Principle: Denatured SDS-protein complexes are electrophoretically separated within a capillary filled with a sieving matrix, with on-column detection via UV absorbance.
Key Reagents and Solutions:
- SDS-MW Sample Buffer: Contains SDS for denaturation.
- Iodoacetamide (IAM): Alkylating agent for cysteine stabilization in non-reduced analysis.
- Molecular Weight Marker: For system suitability and migration time calibration.
- Capillary Cartridge: Pre-filled with a sieving polymer matrix (e.g., dextran or novel agarose gel [69]).
- Running Buffer: Proprietary SDS-containing buffer.
Procedure:
- Sample Preparation:
- For Reduced Analysis: Mix protein with sample buffer containing a reducing agent (e.g., DTT) and incubate at 70-95°C for 2-10 minutes.
- For Non-Reduced Analysis: First alkylate the sample with IAM to prevent disulfide bond scrambling, then mix with SDS-MW sample buffer (without reductant) and heat.
- Instrument Setup:
- Place samples and reagents in the instrument's autosampler.
- The instrument uses pre-filled capillary cartridges (e.g., Maurice Turbo CE-SDS for speed or Maurice CE-SDS PLUS for high resolution) [42].
- Automated Analysis:
- The instrument automatically performs capillary rinsing, sample injection (typically by electrokinetic injection), and application of the separation voltage.
- Proteins migrate through the capillary matrix. Smaller proteins reach the UV detector first.
- Data Collection and Analysis:
- The detector generates an electropherogram, a plot of UV absorbance versus migration time.
- Software automatically integrates peak areas, allowing for precise quantification of species (e.g., main peak, fragments, and aggregates). Results are highly reproducible with low %RSD for migration time and peak area [69].
Figure 2: CE-SDS Automated Workflow. The process is automated from injection to detection, enhancing reproducibility and throughput.
Essential Research Reagent Solutions
The following table details key reagents and materials essential for performing SDS-PAGE and CE-SDS analyses.
Table 3: The Scientist's Toolkit: Key Reagents for SDS-Based Electrophoresis
| Reagent/Material | Function | Application in SDS-PAGE | Application in CE-SDS |
|---|---|---|---|
| SDS (Sodium Dodecyl Sulfate) | Denatures proteins; confers uniform negative charge. | Core component of sample and running buffers [20]. | Core component of sample buffer [42]. |
| Acrylamide/Bis-acrylamide | Forms cross-linked porous gel matrix for size-based sieving. | Matrix of the resolving and stacking gels [20]. | Replaced by liquid polymers (e.g., dextran) or cross-linked agarose in capillary [69] [42]. |
| Tris-Glycine Buffers | Provides appropriate pH and conductivity for discontinuous electrophoresis. | Used in gel and running buffers [20]. | Not typically used; proprietary buffers are common. |
| DTT or β-Mercaptoethanol | Reducing agents that break disulfide bonds. | Added to sample buffer for "reducing" conditions [20] [17]. | Added to sample buffer for "reducing" analysis [42]. |
| Iodoacetamide (IAM) | Alkylating agent that caps cysteine thiols. | Sometimes used after reduction to prevent reformation of disulfides. | Critical for "non-reduced" analysis to alkylate free cysteines [42]. |
| Coomassie/Silver Stains | Binds proteins for visual detection. | Required for post-electrophoresis band visualization [20]. | Not required; replaced by on-column UV detection. |
| Capillary & Sieving Matrix | The physical medium for separation. | Glass plates with polyacrylamide gel. | Fused silica capillary filled with a replaceable sieving matrix [69] [42]. |
The journey from Laemmli's tube gels to today's automated capillary systems illustrates a consistent drive in biotechnology toward greater precision, efficiency, and data quality. While SDS-PAGE remains an invaluable, accessible tool for qualitative and semi-quantitative analysis, particularly in educational and research settings, CE-SDS has emerged as the superior technology for applications demanding high reproducibility, precise quantification, and regulatory compliance, such as in biopharmaceutical development and quality control [42]. The recent innovation of baseline hump-free agarose matrices for CE-SDS further solidifies its position by solving a persistent analytical challenge [69]. The choice between these techniques is not a matter of obsolescence but of strategic selection based on the project's specific requirements for resolution, reproducibility, and quantitative rigor.
The development of sodium dodecyl sulfate-polyacrylamide gel electrophoresis (SDS-PAGE) in 1970 by Ulrich K. Laemmli represents a watershed moment in molecular biology, creating a foundational technique that would eventually revolutionize biopharmaceutical characterization [2] [1]. Originally devised to unravel the complex structural proteins of bacteriophage T4, Laemmli's method combined the protein-denaturing power of SDS with the discontinuous buffer system pioneered by Ornstein and Davis, enabling high-resolution separation of polypeptides strictly by molecular weight [2]. This technical breakthrough provided the first reliable means to visualize and quantify multiple protein components in complex biological mixtures.
In the contemporary biopharmaceutical landscape, monoclonal antibodies (mAbs) have emerged as cornerstone therapeutics, with over 120 approved for clinical use globally as of 2024 [70]. These complex biomolecules, with molecular weights of approximately 150 kDa, consist of two heavy chains (~50 kDa each) and two light chains (~25 kDa each) stabilized by disulfide bonds [71]. The purity analysis of these therapeutic proteins is paramount, as product-related variants and impurities—including aggregates, fragments, and post-translational modifications—can significantly impact drug safety, efficacy, and immunogenicity [72] [73]. Within this critical quality assessment framework, SDS-PAGE maintains its relevance as an indispensable orthogonal method, providing visual confirmation of molecular integrity and purity throughout bioprocess development and quality control.
Historical Trajectory: From T4 Phage to Therapeutic Antibodies
Laemmli's Foundational Innovation
Laemmli's pivotal 1970 Nature paper emerged from a specific research challenge: deciphering the protein composition of phage T4 head structures that resisted dissociation under native conditions [2] [1]. While Jacob V. Maizel had previously demonstrated that SDS could denature poliovirus particles and that polypeptide-SDS complexes migrated according to molecular weight, these early separations yielded broad bands inadequate for resolving T4's dozens of structural proteins [2].
Laemmli's key insight was applying his deep knowledge of electrochemistry to create a discontinuous buffer system where SDS-polypeptide chains would stack at a buffer interface, dramatically sharpening band resolution [2] [1]. This systematic optimization, conducted with technical assistance from Jonathan King, involved extensive empirical testing of buffer and gel compositions in glass tube gels—a labor-intensive process accompanied by significant exposure to neurotoxic acrylamide and SDS aerosols by contemporary standards [2]. The resulting protocol allowed identification of more than six different proteins in T4 heads and their correlation with specific genetic mutants, fundamentally advancing understanding of viral morphogenesis [2].
Technical Evolution and Adoption
The original methodology underwent crucial refinements that accelerated its adoption:
- Tube-to-Slab Transition: The initial technique using cylindrical glass tubes cracked open with a hammer was superseded by William Studier's slab gel system, enabling simultaneous analysis of multiple samples [2] [42].
- Detection Advancements: Coomassie Blue staining, derived from textile dyes, provided robust protein visualization, while subsequent developments enabled Western blotting and two-dimensional electrophoresis [2].
- Commercial Standardization: Precast gels with standardized formats and buffers improved reproducibility across laboratories, facilitating the technique's migration from basic research to industrial applications [43].
The extraordinary impact of Laemmli's innovation is quantified by its staggering citation count—exceeding 300,000 references—making it one of the most cited scientific papers in history [1] [42].
Analytical Fundamentals: Principles of SDS-PAGE Separation
Mechanism of Molecular Separation
SDS-PAGE separates proteins based primarily on molecular mass through a sophisticated interplay of biochemical and physical principles:
- Protein Denaturation and Charge Conferment: Samples are heated to 95°C in buffer containing SDS (usually 1-2%) and reducing agents such as β-mercaptoethanol or dithiothreitol (DTT). SDS binds to denatured polypeptides at a constant ratio of approximately 1.4 grams SDS per gram of protein, masking intrinsic charge and conferring a uniform negative charge density [7]. Reducing agents cleave disulfide bonds, ensuring complete dissociation into subunit structures [7] [17].
- Discontinuous Buffer System: Laemmli's critical improvement incorporated a stacking gel (pH ~6.8) layered above a resolving gel (pH ~8.8). In the stacking gel, chloride ions (leading ions) and glycine (trailing ions) create a sharp voltage gradient that concentrates protein samples into extremely narrow zones before entering the resolving gel [2] [7].
- Molecular Sieving: As stacked proteins migrate into the polyacrylamide matrix (typically 4-12% acrylamide), smaller molecules navigate pores more readily, while larger entities experience greater resistance, resulting in size-dependent separation [7] [17]. The polyacrylamide concentration determines effective separation range, with higher percentages optimizing resolution for lower molecular weight proteins.
Table 1: SDS-PAGE Experimental Parameters for mAb Analysis
| Parameter | Standard Condition | Purpose | Impact of Variation |
|---|---|---|---|
| Acrylamide Percentage | 4% stacking gel, 10-12% separating gel | Molecular sieving matrix | Higher % improves low MW resolution; lower % improves high MW separation |
| Reducing Agent | 5% β-mercaptoethanol or 10-100 mM DTT | Reduces disulfide bonds | Essential for separating heavy and light chains; omission preserves quaternary structure |
| Sample Heating | 95°C for 5 minutes or 70°C for 10 minutes | Protein denaturation | Incomplete heating causes anomalous migration; excessive heating may cause aggregation |
| Electrophoresis Buffer | Tris-glycine-SDS, pH ~8.3 | Conducts current, maintains pH | Buffer concentration affects migration speed and band sharpness |
| Staining Method | Coomassie Blue, Silver stain, or fluorescent dyes | Protein detection | Varying sensitivity from ~100 ng (Coomassie) to <1 ng (silver stain) |
Critical Methodological Considerations
Several technical factors significantly impact the accuracy and reliability of SDS-PAGE for mAb analysis:
- Gel Composition and Polymerization: The ratio of acrylamide to bis-acrylamide cross-linker (typically 29:1 or 37.5:1) determines pore size distribution. Incomplete polymerization, often from outdated ammonium persulfate (APS) or tetramethylethylenediamine (TEMED), causes poor resolution and batch-to-batch variability [7] [17].
- Sample Buffer Composition: Optimal SDS concentration (typically 1-2%) and adequate reducing agent are essential for complete denaturation. Sample viscosity and salt content must be minimized to ensure clean well loading and uniform band formation [7] [73].
- Electrophoresis Conditions: Constant voltage (typically 100-200V) prevents heat-induced band distortion, while excessive voltage causes smiling effects. Running time must be optimized to prevent smaller proteins from migrating off the gel [7].
mAb Purity Analysis: Experimental Framework and Variant Detection
Comprehensive Analytical Protocol
Sample Preparation for Reduced and Non-Reduced Analysis:
- For reduced conditions, dilute mAb samples to 1 mg/mL in Laemmli buffer containing 100 mM DTT or 5% β-mercaptoethanol. Heat at 95°C for 5 minutes to ensure complete reduction of interchain disulfide bonds [7] [73]. This treatment separates mAbs into heavy chains (~50 kDa) and light chains (~25 kDa) for individual assessment.
- For non-reduced conditions, omit reducing agents while maintaining SDS concentration and heating protocol. This preserves disulfide-linked structures, enabling detection of fragments, half-antibodies, and disulfide-mediated aggregates [73] [17].
- Include appropriate controls: molecular weight markers, previously characterized mAb reference standard, and blank buffer. Precision Plus Protein Kaleidoscope markers or similar provide size calibration across 10-250 kDa range [7].
Gel Electrophoresis and Staining:
- Load 5-20 μL of prepared sample (5-20 μg total protein) per well alongside 5 μL of molecular weight standards [73].
- Perform electrophoresis at constant voltage (100-150V for mini-gel systems) until dye front reaches gel bottom (~60-90 minutes) using Tris-glycine-SDS running buffer [7].
- Visualize proteins with Coomassie Brilliant Blue R-250 (sensitivity ~100 ng/band) or more sensitive silver staining (1 ng/band). For quantitative analysis, Sypro Ruby or similar fluorescent stains provide wider linear dynamic range [7] [17].
Critical mAb Variants: Identification and Significance
SDS-PAGE enables detection and semi-quantification of multiple critical quality attributes in therapeutic antibody development:
- Fragments: Proteolytic cleavage products appearing as bands below expected heavy/light chain positions indicate enzymatic degradation during production or storage [73]. Non-reduced gels particularly reveal Fab/c fragments and single-chain antibodies.
- Aggregates: High molecular weight species retained in well or stacking gel interface represent covalent aggregates, often resulting from oxidative cross-linking or improper disulfide pairing [73].
- Glycoforms: Subtle band heterogeneity in heavy chain regions may indicate variable glycosylation patterns, though resolution is limited compared to chromatographic methods [73].
- Charge Variants: While primarily separated by size, post-translational modifications like deamidation and oxidation can cause minor mobility shifts detectable as band splitting or broadening [71].
Table 2: mAB Variants Detectable by SDS-PAGE
| Variant Type | Molecular Weight Characteristics | Detection Condition | Potential Impact |
|---|---|---|---|
| Half-Antibody | ~75 kDa band | Non-reduced | Incomplete assembly, affects valency and efficacy |
| Heavy Chain Fragments | <50 kDa bands | Reduced & Non-reduced | Proteolytic degradation, potential loss of function |
| Light Chain Fragments | <25 kDa bands | Reduced & Non-reduced | Proteolytic degradation, potential immunogenicity |
| High Molecular Weight Aggregates | Retained in stacking gel/well | Non-reduced | Increased immunogenicity risk |
| Disulfide-linked Dimers | ~300 kDa band | Non-reduced | Altered pharmacokinetics, potential immunogenicity |
| Non-glycosylated Heavy Chain | Slightly faster migration than heavy chain | Reduced | Reduced effector function, altered clearance |
Advanced Techniques: Complementing and Extending SDS-PAGE
Capillary Electrophoresis-SDS (CE-SDS)
While SDS-PAGE remains a foundational technique, capillary electrophoresis-SDS has emerged as a complementary quantitative approach for regulatory filings [42]. CE-SDS provides superior quantification through automated separation in narrow-bore capillaries with on-column UV or laser-induced fluorescence detection, eliminating staining variability and enabling precise peak integration [42]. Key advantages include:
- Automation: Pre-filled capillaries eliminate manual gel casting, staining, and destaining, reducing hands-on time and inter-operator variability [42].
- Quantitative Precision: Integrated detection provides accurate, reproducible peak integration superior to band intensity quantification from stained gels [42].
- Regulatory Acceptance: Automated methodology with data integrity features supports lot-release testing in current Good Manufacturing Practice (cGMP) environments [42].
Two-Dimensional Electrophoresis and Western Blotting
For comprehensive characterization, SDS-PAGE serves as a component in advanced orthogonal methods:
- Two-Dimensional Electrophoresis: Combines isoelectric focusing (first dimension) with SDS-PAGE (second dimension) to resolve thousands of protein variants by both charge and mass, enabling detection of post-translational modifications not visible in one-dimensional analysis [2] [71].
- Western Blotting: Following SDS-PAGE separation, proteins are transferred to membranes for highly specific immunodetection using antibodies targeting specific mAb domains, confirming identity and detecting low-abundance variants [2] [71].
The Scientist's Toolkit: Essential Reagents for mAb Purity Analysis
Table 3: Essential Research Reagents for SDS-PAGE mAb Analysis
| Reagent/Category | Specific Examples | Function & Importance |
|---|---|---|
| Denaturing Agents | Sodium dodecyl sulfate (SDS) | Unfolds proteins, confers negative charge proportional to mass |
| Reducing Agents | Dithiothreitol (DTT), β-mercaptoethanol, Tris(2-carboxyethyl)phosphine | Reduces disulfide bonds for subunit analysis |
| Gel Matrix Components | Acrylamide, bis-acrylamide, ammonium persulfate (APS), TEMED | Forms porous polyacrylamide gel for molecular sieving |
| Buffer Systems | Tris-HCl, Tris-glycine, Tricine | Maintains pH and conductivity for electrophoretic separation |
| Molecular Weight Standards | Precision Plus Protein Kaleidoscope, SeeBlue Plus2 | Provides size references for mass determination |
| Detection Reagents | Coomassie Brilliant Blue, Sypro Ruby, Silver Stain | Visualizes separated protein bands |
| Specialty Systems | Precast gels (4-20% gradient), Mini-PROTEAN Tetra systems | Standardized formats for reproducible results |
From its origins in Laemmli's phage T4 assembly studies to its current role in biotherapeutic characterization, SDS-PAGE maintains critical relevance in the purity analysis of monoclonal antibodies [2] [73]. The technique's enduring value lies in its direct visualization of molecular integrity, providing unambiguous detection of fragments, aggregates, and subunit composition that complements quantitative chromatographic methods [73] [42].
While advanced technologies like CE-SDS offer superior quantification for regulatory submissions, the accessibility, simplicity, and visual clarity of SDS-PAGE ensure its continued application throughout therapeutic development—from early candidate screening to manufacturing troubleshooting [42] [43]. Furthermore, the technique's adaptability to varying throughput needs and equipment availability makes it universally applicable across diverse laboratory environments.
Laemmli's seminal contribution thus continues to underpin modern biologics development, demonstrating how a profoundly innovative methodology can transcend its original research context to become an indispensable tool in ensuring the safety and efficacy of therapeutic proteins. As the biopharmaceutical landscape evolves with increasingly complex modalities including bispecific antibodies, antibody-drug conjugates, and fusion proteins, the fundamental principles of SDS-PAGE separation continue to provide critical insights into product quality, upholding a 50-year legacy of scientific excellence in protein characterization.
For decades, sodium dodecyl sulfate-polyacrylamide gel electrophoresis (SDS-PAGE) has served as the foundational technique for protein analysis in molecular biology and biopharmaceutical development. Pioneered in the 1960s and 1970s by Ulrick K. Laemmli, building upon earlier works, this method revolutionized protein separation by molecular weight [42]. The initial methodology involved casting polyacrylamide gels in tubes that required breaking open with a hammer before being sliced and dried for staining—a far cry from today's standardized protocols [42]. The subsequent development of slab gels represented a significant improvement, enabling multiple sample analysis and establishing SDS-PAGE as the gold standard for protein separation, cited in over 300,000 studies [42]. Despite its widespread adoption and contributions to scientific discovery, traditional SDS-PAGE carries substantial limitations including lengthy manual processes, labor-intensive protocols, and significant variability that challenges reproducibility and quantification [74] [75] [76].
The evolution of protein analysis technology has progressively addressed these limitations through automation and enhanced precision. Capillary Electrophoresis with SDS (CE-SDS) represents the modern incarnation of SDS-based protein separation, transforming a historically manual, qualitative technique into an automated, quantitative analytical platform [42]. This transition mirrors broader trends in life sciences toward automated workflows that minimize human intervention, thereby reducing variability and enhancing data reliability. Within the biopharmaceutical industry, where characterization of protein therapeutics demands exceptional precision and reproducibility, CE-SDS has emerged as a regulatory-recognized methodology, with the United States Pharmacopeia (USP) dedicating General Chapter <129> to its application for therapeutic monoclonal antibody analysis [75]. This technical guide examines the specific automation advantages of CE-SDS technology, quantifying its impact on hands-on time and user variability through experimental data and comparative analysis.
Technical Foundations: From Gels to Capillaries
Fundamental Principles of CE-SDS
Capillary Electrophoresis with SDS (CE-SDS) maintains the core separation principle of traditional SDS-PAGE—protein separation based on molecular weight under denaturing conditions—while revolutionizing the implementation platform. In CE-SDS, proteins are denatured with SDS, forming uniformly charged complexes that migrate through a polymer-based sieving matrix within narrow-bore capillaries when subjected to an electric field [42] [76]. This fundamental shift from slab gels to capillary formats enables complete automation of the separation, detection, and data analysis processes.
The technological implementation involves several critical components: (1) replaceable polymer sieving matrices that eliminate the need for cross-linked polyacrylamide gels, (2) automated capillary conditioning between runs ensuring consistency, (3) on-capillary detection systems (typically UV absorbance or fluorescence) that provide real-time data collection, and (4) integrated software for instrument control, data acquisition, and quantitative analysis [76]. The high viscosity of the sieving matrix substantially reduces electroosmotic flow, while the uniform negative charge on SDS-protein complexes minimizes wall interactions—two factors that contribute to the exceptional reproducibility of CE-SDS methods [76].
Historical Development and Technological Evolution
The conceptual foundation for capillary electrophoresis was laid by Stellan Hjertén in 1967, with significant enhancements by James W. Jorgenson and Krynn D. Lukacs in the early 1980s demonstrating successful protein separations in capillaries with internal diameters of 3 mm to 75 µM [42] [76]. Early commercial instruments became available by the end of the 1980s, with the specific technique of CE-SDS gaining prominence as a replacement for SDS-PAGE in the biopharmaceutical industry throughout the 1990s and 2000s [42] [76].
A pivotal advancement came with the transition from gel-filled capillaries to entangled polymer solutions, which eliminated the challenges associated with casting and maintaining cross-linked gels within capillaries [76]. These polymer solutions create a dynamic sieving matrix that is replaced between injections, ensuring consistent performance and eliminating the lifetime limitations of traditional gel-filled capillaries [76]. Modern implementations include cartridge-based systems that further simplify operation through pre-assembled, self-contained consumables that automate capillary conditioning and buffer management [77] [75].
Direct Comparative Analysis: Quantitative Evidence of Automation Advantages
Experimental Design for Methodology Comparison
Rigorous comparative studies have quantified the performance differences between CE-SDS and traditional SDS-PAGE. In one comprehensive technical overview, researchers conducted parallel analysis of standard proteins including bovine serum albumin (BSA) and carbonic anhydrase (CAII) across both platforms [74]. The experimental design involved serial dilutions of proteins across concentration ranges from 3.9 to 2,000 ng/μL, with triplicate measurements on both CE-SDS (Agilent ProteoAnalyzer system) and SDS-PAGE (precast gels from Bio-Rad) platforms [74].
For the SDS-PAGE workflow, samples were diluted with Laemmli buffer, heat-denatured, loaded onto gels alongside molecular weight standards, separated at 200V for approximately 40 minutes, then subjected to fixing, staining with colloidal Coomassie, and destaining before software-based analysis [74]. The CE-SDS workflow utilized automated sample injection, separation in gel-filled capillaries with automated rejuvenation post-run, and real-time detection with automated data analysis using ProSize software [74]. This controlled experimental design enabled direct comparison of critical parameters including sizing accuracy, precision, quantitative linearity, and hands-on time requirements.
Hands-On Time Reduction: Workflow Comparisons
Table 1: Hands-On Time Comparison Between SDS-PAGE and CE-SDS Workflows
| Process Step | SDS-PAGE Time Requirement | CE-SDS Time Requirement | Automation Advantage |
|---|---|---|---|
| Gel Preparation | 30-60 minutes (manual casting) or 10 minutes (pre-cast) | Not applicable (pre-filled capillaries) | Complete elimination of manual steps |
| Sample Preparation | 30-45 minutes (including denaturation) | 30-45 minutes (including denaturation) | Equivalent process |
| Separation Process | 40-90 minutes (manual monitoring) | 5-30 minutes (fully automated) | Unattended operation |
| Staining/Destaining | 3 hours to overnight | Not applicable (on-capillary detection) | Complete elimination |
| Imaging/Analysis | 30-60 minutes (manual imaging + software analysis) | Fully automated (real-time data collection & analysis) | Complete automation |
| Total Hands-On Time | ~90-180 minutes | ~30-45 minutes | 67-75% reduction |
The data reveals a dramatic reduction in hands-on time requirements with CE-SDS, primarily achieved through the elimination of gel-related manual processes and automated detection [75]. While sample preparation remains similar between techniques, every subsequent step in CE-SDS benefits from automation, with the entire separation and analysis process occurring without user intervention [74] [75]. Modern high-throughput CE-SDS systems can process samples in as little as 5.5 minutes per sample, further enhancing productivity gains in large-scale studies [42].
Variability Reduction: Precision Data
Table 2: Precision Comparison Between SDS-PAGE and CE-SDS for Protein Sizing
| Protein/Analyte | Sizing Method | Average % Error (Accuracy) | % CV (Precision) | Concentration Dependency |
|---|---|---|---|---|
| BSA (66 kDa) | CE-SDS | 4.81% | 1.53% | None observed |
| SDS-PAGE | 10.25% | 13.71% | Significant effect | |
| CAII (29 kDa) | CE-SDS | 3.55% | Not specified | None observed |
| SDS-PAGE | 19.43% | Not specified | Significant effect | |
| Heavy Chain (Reduced mAb) | CE-SDS (BioPhase 8800) | Not specified | < 0.4% (intra-capillary) | Not specified |
| Not specified | < 0.3% (inter-capillary) | Not specified |
The precision data demonstrates remarkable consistency in CE-SDS systems compared to traditional SDS-PAGE [74] [78]. The concentration-dependent effects observed in SDS-PAGE, where accuracy and precision varied across the dilution series, were absent in CE-SDS, which maintained consistent performance regardless of sample concentration [74]. This independence from concentration effects provides particular value in analytical scenarios where protein concentration may vary between samples or be unknown prior to analysis.
Intermediate precision studies on modern CE-SDS platforms like the BioPhase 8800 system demonstrate exceptional reproducibility, with %RSD values below 0.1% for relative migration time and below 0.4% for corrected peak area percentage of the heavy chain in monoclonal antibody analysis [78]. This level of precision substantially exceeds what can be achieved with manual SDS-PAGE protocols, where gel-to-gel variability, staining inconsistencies, and manual interpretation introduce significant measurement uncertainty [74] [76].
Workflow Comparison: Manual vs. Automated Protein Analysis
The Scientist's Toolkit: Essential Reagents and Materials
Successful implementation of CE-SDS methodology requires specific reagents and materials optimized for capillary-based separations. The following table details key components for CE-SDS analysis:
Table 3: Essential Research Reagent Solutions for CE-SDS Analysis
| Reagent/Material | Function/Purpose | Example Products/Formats |
|---|---|---|
| Sieving Polymer Matrix | Replaceable separation medium for size-based protein separation | BioPhase CE-SDS Protein Analysis Kit (SCIEX), Agilent Protein Broad Range P240 Kit |
| SDS Sample Buffer | Protein denaturation and SDS-complex formation | CE-SDS sample buffer (included in kits), Invitrogen NuPAGE LDS sample buffer |
| Reducing Agents | Reduction of disulfide bonds for reduced analysis | β-mercaptoethanol (β-ME), DTT |
| Alkylating Agents | Cysteine alkylation for non-reduced analysis | Iodoacetamide (IAM) |
| Molecular Weight Standards | Size calibration and migration time normalization | ProteinSimple IgG Standard, Bio-Rad Precision Plus Protein Standards |
| Capillary Cartridges | Separation channel with detection window | BioPhase BFS capillary cartridge, Maurice CE-SDS cartridges |
| Internal Standards | Migration time correction and system suitability | 10 kDa internal standard (SCIEX kits) |
| Wash Solutions | Capillary conditioning between runs | Acid and base washes (included in kits) |
Modern CE-SDS platforms typically employ kit-based workflows that provide pre-formulated, optimized reagents specifically designed for particular instrument systems [78]. These kits ensure consistency, simplify method development, and enhance reproducibility across laboratories and operators. Complete kits typically include sieving polymer, sample buffer, internal standards, and wash solutions in pre-aliquoted formats with optimized concentrations for robust performance [77] [78].
Advanced Detection Methods: Enhancing Sensitivity and Simplification
Recent technological advancements in detection systems have further enhanced the capabilities of CE-SDS platforms. While UV absorbance at 220 nm has been the traditional detection method, limitations in sensitivity and baseline noise have driven the development of alternative approaches [78]. Laser-induced fluorescence (LIF) detection provides enhanced sensitivity but requires time-consuming fluorescent dye labeling procedures that can introduce artifacts [76].
The emergence of native fluorescence detection (NFD) represents a significant advancement, utilizing the intrinsic fluorescence of aromatic amino acids (primarily tryptophan) for sensitive, label-free detection [79] [78]. This technology provides several key advantages: (1) elimination of dye labeling steps simplifies sample preparation and reduces hands-on time, (2) enhanced sensitivity (up to 10x improvement over UV detection) enables detection of low-abundance impurities, and (3) superior baselines with reduced noise facilitate easier and more accurate peak integration [79] [78].
Comparative studies demonstrate that NFD provides significantly improved signal-to-noise ratios for fragment detection—185 for NFD versus 78 for UV detection in one USP IgG study—while maintaining excellent reproducibility with %RSD values below 0.4% for corrected peak area percentages [78]. This enhanced detection capability further reduces the need for manual data review and baseline correction, contributing to the overall automation advantage of modern CE-SDS platforms.
Regulatory Acceptance and Industry Application
The transition from SDS-PAGE to CE-SDS has gained substantial momentum in biopharmaceutical development, particularly for therapeutic monoclonal antibodies and related products. Regulatory authorities including the United States Pharmacopeia (USP) have formally recognized CE-SDS methodology, with the USP General Chapter <129> providing specific guidelines for its application in therapeutic monoclonal antibody analysis [75]. This formal recognition underscores the reliability and reproducibility of properly validated CE-SDS methods for critical quality attribute assessment.
Industry applications span the entire biopharmaceutical development lifecycle, including cell culture development, recovery process design, formulation development, stability studies, and product characterization [76]. In manufacturing environments, CE-SDS supports in-process monitoring, clone selection, impurity assessment, and lot release testing [76]. The quantitative nature, excellent precision, and automated operation of CE-SDS make it particularly valuable for comparability studies following manufacturing process changes, where demonstrating consistent product quality is regulatory requirement [76].
The technology has proven applicable to diverse biotherapeutic modalities including monoclonal antibodies, bispecific antibodies, antibody-drug conjugates (ADCs), fusion proteins, vaccines, and viral vectors for gene therapy applications [42] [79]. This versatility across molecule classes further enhances the value proposition of CE-SDS implementation in biopharmaceutical development organizations.
The evolution from traditional SDS-PAGE to automated CE-SDS represents a paradigm shift in protein analysis, delivering substantial improvements in both efficiency and data quality. The automation advantage of CE-SDS manifests primarily through dramatic reductions in hands-on time (67-75% less than SDS-PAGE) and significant decreases in operator-induced variability (CVs improved from >13% to <0.4% in some applications) [74] [75] [78]. These advantages stem from the elimination of manual gel handling, staining, and destaining steps, coupled with automated injection, separation, and data analysis.
For the biopharmaceutical industry and research laboratories alike, the implementation of CE-SDS technology translates to enhanced productivity, improved data reliability, and greater regulatory confidence. The continuing advancement of CE-SDS platforms, including the development of cartridge-based systems, high-throughput configurations, and sensitive detection methods like native fluorescence, further strengthens the value proposition of this automated methodology [42] [79] [78]. As protein therapeutics grow increasingly complex, the automation advantage of CE-SDS will play an increasingly critical role in ensuring their thorough characterization, consistent quality, and successful development.
The development of sodium dodecyl sulfate-polyacrylamide gel electrophoresis (SDS-PAGE) in 1970 by Ulrich K. Laemmli marked a revolutionary advancement in protein science, enabling researchers to separate complex protein mixtures with unprecedented resolution [1] [2]. Working at the Medical Research Council Laboratory of Molecular Biology in Cambridge, Laemmli sought to analyze the structural proteins of bacteriophage T4 capsids, which were notoriously difficult to resolve with existing techniques [1]. His key innovation was adapting discontinuous buffer systems to work with SDS-denatured proteins, creating a method that would become one of the most widely cited techniques in biological science [1] [2]. The original methodology involved casting polyacrylamide gels in glass tubes, which required cracking open with a hammer followed by slicing, drying, and staining the gels – procedures that exposed researchers to neurotoxic acrylamide and respiratory hazards from SDS aerosols [1] [2].
The subsequent evolution of protein separation technologies has transformed this foundational method into sophisticated analytical tools suitable for modern quality control (QC) environments. The transition from tube gels to slab gels, and more recently to capillary electrophoresis systems, represents a continuous effort to improve reproducibility, throughput, and safety while maintaining the fundamental separation principles established by Laemmli [2] [42]. For QC laboratories in biopharmaceutical development, this historical progression informs contemporary strategic decisions about method selection that must balance throughput, data quality, and regulatory requirements. Understanding this technological evolution provides crucial context for selecting appropriate separation methods that meet today's rigorous analytical standards while honoring the fundamental biochemical principles that make SDS-based separations so valuable for protein characterization.
Foundational Principles of SDS-Based Protein Separation
The fundamental mechanism underlying all SDS-based separation techniques relies on the uniform negative charge imparted by SDS binding to denatured proteins, allowing migration through a sieving matrix primarily according to molecular weight rather than native charge or structure [20]. When proteins are denatured in the presence of SDS and reducing agents, they unfold into linear polypeptides that bind approximately one SDS molecule per two amino acid residues, creating a consistent charge-to-mass ratio [20]. This uniform charge distribution enables electrophoretic separation based almost exclusively on molecular size as proteins migrate through the cross-linked polyacrylamide matrix under an applied electric field [20].
The separation process depends critically on the pore size of the polyacrylamide gel, which is determined by the concentration of acrylamide and bisacrylamide cross-linker [80]. Higher acrylamide concentrations create denser matrices with smaller pores that better resolve lower molecular weight proteins, while lower percentages provide larger pores more suitable for separating high molecular weight proteins [80]. This relationship allows researchers to optimize resolution for specific protein size ranges by selecting appropriate gel percentages, as detailed in Table 1.
Table 1: Gel Percentage Recommendations for Optimal Resolution of Different Protein Sizes
| Protein Molecular Weight Range | Recommended Gel Percentage |
|---|---|
| 100-600 kDa | 4% |
| 50-500 kDa | 7% |
| 30-300 kDa | 10% |
| 10-200 kDa | 12% |
| 3-100 kDa | 15% |
The discontinuous buffer system developed by Laemmli remains a critical component of modern SDS-PAGE, employing a stacking gel that concentrates proteins into a sharp zone before they enter the separating gel where size-based fractionation occurs [1] [2]. This stacking effect, achieved through differences in pH and ionic composition between the stacking and resolving regions, significantly enhances band sharpness and resolution compared to continuous buffer systems [2]. The fundamental understanding of these electrochemical principles, which Laemmli brought from his Swiss technical education, continues to underpin both traditional gel electrophoresis and modern capillary-based implementations [1].
Modern Methodologies: From SDS-PAGE to CE-SDS
Traditional SDS-PAGE Systems
Traditional SDS-PAGE remains widely used in research and quality control environments despite the emergence of more advanced technologies. The method involves casting polyacrylamide gels between glass plates, loading prepared protein samples into wells, and applying an electric current (typically 100-150 volts) for 40-60 minutes until the dye front reaches the gel bottom [20]. Proteins are subsequently visualized using staining methods with varying sensitivity levels: Coomassie Blue for general detection, silver staining for enhanced sensitivity, or fluorescent stains for quantitative proteomic applications [20]. Modern implementations often use pre-cast gels to improve reproducibility and reduce exposure to neurotoxic acrylamide monomers [42].
The optimization of SDS-PAGE conditions requires careful attention to multiple parameters. For high molecular weight proteins (>100 kDa), lower percentage gels (e.g., 8-10%) improve migration and separation, while higher percentages (12-15%) provide better resolution for smaller proteins (<30 kDa) [80]. Gradient gels, which contain an increasing acrylamide concentration from top to bottom, can resolve proteins across a broader molecular weight range in a single run [20]. Troubleshooting common issues like smiling bands (addressed by ensuring even current distribution) or incomplete separation (improved by adjusting run time and acrylamide concentration) is essential for obtaining publication-quality results [20].
Capillary Electrophoresis SDS (CE-SDS)
Capillary Electrophoresis SDS (CE-SDS) represents a significant technological evolution from traditional gel-based methods, offering automated, quantitative analysis with minimal manual intervention [42]. Originally developed from the work of Stellan Hjerten and later enhanced by James Jorgenson and Krynn Lukacs, CE-SDS performs separations in narrow-bore capillaries filled with replaceable polymer matrices rather than cross-linked polyacrylamide gels [42]. This format provides several advantages for QC environments, including automated operation, superior reproducibility, and reduced analysis time.
The Maurice platform exemplifies modern CE-SDS systems, offering cartridges tailored to specific throughput and resolution needs [42]. The Turbo CE-SDS cartridge provides rapid results (5.5 minutes per sample) for high-throughput applications during upstream and downstream processing, while the CE-SDS PLUS cartridge offers enhanced resolution (25 minutes per sample) for analytical development and QC product release [42]. Both formats generate electropherograms with quantitative data on protein size and purity, with software features that can present results in a familiar gel-like format for easier method transition and data interpretation [42].
Comparative Analysis: Key Factors for Method Selection
Throughput and Efficiency
Throughput requirements often dictate the choice between SDS-PAGE and CE-SDS methods in quality control settings. Traditional SDS-PAGE typically processes 10-15 samples per gel with run times of 40-90 minutes, plus additional time for staining, destaining, and imaging [20] [42]. While multiple gel apparatus can be run in parallel, the manual handling requirements limit overall throughput. For CE-SDS systems, automated sample loading and processing enable continuous operation with minimal intervention, processing 48-96 samples in unattended runs [42]. The dramatically reduced hands-on time – primarily limited to sample preparation and instrument loading – makes CE-SDS particularly advantageous for laboratories analyzing large sample numbers or requiring rapid turnaround times for lot release testing.
Table 2: Throughput and Technical Comparison Between SDS-PAGE and CE-SDS
| Parameter | Traditional SDS-PAGE | CE-SDS |
|---|---|---|
| Samples Per Run | 10-15 samples per gel | 48-96 samples in automated runs |
| Hands-on Time | High (gel casting, loading, staining, imaging) | Low (primarily sample preparation and instrument loading) |
| Run Time | 40-90 minutes, plus staining/destaining (hours) | 5.5-25 minutes per sample, no staining required |
| Reproducibility | Moderate (gel-to-gel variability) | High (minimal run-to-run variation) |
| Quantitative Capability | Semi-quantitative (densitometry of stained bands) | Highly quantitative (direct UV detection) |
| Data Output | Band patterns on gels | Digital electropherograms with peak integration |
Data Quality and Analytical Performance
The data quality requirements for regulatory submissions strongly influence method selection for biopharmaceutical QC. Traditional SDS-PAGE provides semi-quantitative data through band intensity measurements after staining, but this approach suffers from limited linear dynamic range and subjectivity in band detection [20]. In contrast, CE-SDS employs on-capillary UV detection that generates highly quantitative electropherograms with accurate peak integration, enabling precise quantification of main species and impurities [42]. The superior resolution of CE-SDS, particularly for proteins smaller than 25 kDa, provides more detailed characterization of product variants and degradation products [42].
The reproducibility of CE-SDS methods significantly exceeds traditional gel-based approaches due to standardized capillary dimensions, controlled temperature regulation, and automated matrix filling [42]. This reduced variability is particularly valuable for comparative analyses throughout product development and manufacturing. Additionally, CE-SDS demonstrates excellent linearity (R² values of 0.99 have been reported for serially diluted AAV9 samples), supporting its use for quantitative applications [42]. For these reasons, leading biopharmaceutical companies increasingly list CE-SDS as a primary method in regulatory filings for commercial biotherapeutics including monoclonal antibodies, bispecifics, ADCs, and viral vectors [42].
Regulatory Compliance Considerations
Method selection for quality control must address evolving regulatory expectations across different markets. The United Nations Globally Harmonized System (GHS) provides a standardized framework for hazard communication, but its implementation varies significantly by country, affecting Safety Data Sheet (SDS) requirements for chemical components [81] [82]. These regional differences impact documentation needs, with the European Union requiring REACH registration numbers and specific hazard statements that may not apply to US submissions [83] [82].
From an analytical perspective, regulatory agencies increasingly expect validated, quantitative methods with demonstrated precision and accuracy for lot release testing [42]. While SDS-PAGE remains acceptable for many applications, CE-SDS provides the robust validation data and precise quantification that align with current regulatory preferences. The technology's ability to generate digital data compatible with electronic record-keeping systems (e.g., CFR 21 Part 11 compliance) further supports its adoption in GMP environments [42]. Companies must also consider that regulatory expectations continue to evolve, with trends favoring methods that provide higher resolution and better quantification for complex biologics [42].
Implementation Strategies for Quality Control
Method Transition and Validation
Transitioning from SDS-PAGE to CE-SDS requires strategic planning to maintain data continuity while adopting improved methodologies. Initial comparative studies should demonstrate equivalence or superiority of the new method using well-characterized reference standards [42]. The NIST monoclonal antibody reference material provides a valuable system for establishing separation performance and comparing results across platforms [42]. Method validation should follow ICH guidelines, establishing precision, accuracy, specificity, linearity, and range for the intended application [42].
For QC laboratories implementing CE-SDS, the Maurice system offers method templates that can be customized for specific molecule classes [42]. The Compass for iCE software includes lane view features that present data in familiar gel-like formats alongside quantitative electropherograms, facilitating technical transfer and staff training [42]. This dual data representation helps bridge the conceptual gap between traditional gel electrophoresis and capillary-based separations during method transition periods.
Workflow Integration and Resource Allocation
Successful implementation of separation methodologies requires careful consideration of workflow integration and resource allocation. The following diagram illustrates the decision-making process for method selection based on application requirements:
Laboratories must assess sample volumes, staffing expertise, and equipment budgets when selecting separation platforms. While CE-SDS requires higher initial capital investment, it offers lower per-sample costs and significantly reduced labor requirements over time [42]. For facilities with limited budgets or irregular testing needs, commercial pre-cast gels provide a middle ground, offering better reproducibility than hand-cast gels without major equipment investments [20] [42]. Effective workflow integration also considers downstream applications, with Western blotting requiring traditional SDS-PAGE, while purity analysis and quantitation benefit from CE-SDS methodologies [20] [42].
Essential Research Reagent Solutions
Successful implementation of SDS-based separation methods requires appropriate selection of reagents and materials. The following table details key components essential for both traditional SDS-PAGE and modern CE-SDS workflows:
Table 3: Essential Reagents and Materials for SDS-Based Separations
| Reagent/Material | Function | Implementation Considerations |
|---|---|---|
| Acrylamide/Bis-acrylamide | Forms the polyacrylamide gel matrix that acts as a molecular sieve | Neurotoxic monomer; pre-cast gels reduce exposure; concentration determines pore size [20] |
| SDS (Sodium Dodecyl Sulfate) | Denatures proteins and confers uniform negative charge | Purity affects resolution; typically used at 1-2% concentration [20] |
| Reducing Agents (DTT, BME) | Breaks disulfide bonds to fully denature proteins | Essential for accurate MW determination; must be fresh for activity [20] |
| Molecular Weight Markers | Provides size references for protein identification | Pre-stained markers visualize migration; unstained markers provide accurate size estimation [20] |
| Buffers (Tris-Glycine) | Creates pH environment for electrophoresis and stacking phenomenon | Discontinuous buffer systems critical for Laemmli method resolution [1] [2] |
| Staining Reagents | Visualizes separated proteins (Coomassie, silver, fluorescent stains) | Sensitivity varies: Coomassie (μg), silver (ng), fluorescent (sub-ng) [20] |
| Capillary Cartridges | Separation matrix for CE-SDS systems (Turbo and PLUS varieties) | Maurice system cartridges optimized for throughput vs. resolution needs [42] |
| Protein Ladders | Size standards for CE-SDS quantification | Provides reference peaks for accurate molecular weight determination [42] |
The evolution of SDS-based protein separation from Laemmli's original tube gels to modern capillary electrophoresis represents a continuous pursuit of improved reproducibility, throughput, and data quality [1] [2] [42]. For quality control in biopharmaceutical development, strategic method selection requires careful balancing of these factors against regulatory requirements and operational constraints. While traditional SDS-PAGE remains valuable for specific applications like Western blotting and educational settings, CE-SDS offers compelling advantages for GMP environments requiring quantitative data, regulatory compliance, and high throughput [42].
The ongoing adoption of CE-SDS by leading biopharmaceutical companies for regulatory filings signals a methodological shift that aligns with the increasing complexity of biologic therapeutics [42]. As the industry advances toward more targeted therapies including bispecific antibodies, antibody-drug conjugates, and gene therapy vectors, the demand for robust analytical methods with precise quantification will continue to grow [42]. By understanding both the historical foundations and contemporary implementations of SDS-based separations, QC professionals can make informed decisions that balance methodological rigor with practical efficiency, ensuring product quality while maintaining development momentum.
Conclusion
SDS-PAGE remains an indispensable, robust, and accessible technique in the scientific toolkit, with its foundational principles continuing to inform modern protein analysis. While its historical significance is cemented by its simplicity and effectiveness, the evolution toward automated, quantitative methods like CE-SDS highlights the industry's drive for higher reproducibility and efficiency, particularly in regulated biopharmaceutical environments. The future of protein separation lies not in the obsolescence of SDS-PAGE, but in its strategic integration with next-generation technologies. Its enduring role in education, initial discovery, and method validation ensures that the legacy of this pioneering technique will continue to underpin advancements in biomedical research, therapeutic development, and quality control for years to come.
References
- 1. Using T4 genetics and Laemmli's development of high ... [https://pmc.ncbi.nlm.nih.gov/articles/PMC9576892/]
- 2. Ulrich Laemmli's Development of SDS Polyacrylamide Gel ... [https://fnl.mit.edu/ulrich-laemmlis-development-of-sds-polyacrylamide-gel-electrophoresis/]
- 3. History of electrophoresis [https://en.wikipedia.org/wiki/History_of_electrophoresis]
- 4. Overview of Protein Electrophoresis [https://www.thermofisher.com/us/en/home/life-science/protein-biology/protein-biology-learning-center/protein-biology-resource-library/pierce-protein-methods/overview-electrophoresis.html]
- 5. Common artifacts and mistakes made in electrophoresis [https://pmc.ncbi.nlm.nih.gov/articles/PMC7295095/]
- 6. Nucleic Acid Gel Electrophoresis—Overview and History [https://www.thermofisher.com/us/en/home/life-science/cloning/cloning-learning-center/invitrogen-school-of-molecular-biology/na-electrophoresis-education/na-separation-overview.html]
- 7. SDS-PAGE [https://en.wikipedia.org/wiki/SDS-PAGE]
- 8. Advances in capillary electrophoresis: the challenges to ... [https://www.sciencedirect.com/science/article/pii/000326709185061V]
- 9. Recent trends in capillary electrophoresis for complex ... [https://pubmed.ncbi.nlm.nih.gov/28791719/]
- 10. Cleavage of structural proteins during the assembly ... [https://pubmed.ncbi.nlm.nih.gov/5432063/]
- 11. Overview of SDS-PAGE [https://www.creative-proteomics.com/resource/overview-of-sds-page.htm]
- 12. Laemmli Buffer: The 5 Critical Components [https://bitesizebio.com/44540/laemmli-buffer-what-is-it-for-anyway/]
- 13. Protein analysis SDS PAGE [https://www.qiagen.com/us/knowledge-and-support/knowledge-hub/bench-guide/protein/protein-analysis/protein-analysis-sds-page]
- 14. Improved Separation in Horizontal Protein SDS-PAGE with ... [https://pmc.ncbi.nlm.nih.gov/articles/PMC10660703/]
- 15. Native SDS-PAGE: High Resolution Electrophoretic ... [https://pmc.ncbi.nlm.nih.gov/articles/PMC4517606/]
- 16. Laemmli, U.K. (1970) Cleavage of Structural Proteins ... [https://www.scirp.org/reference/referencespapers?referenceid=3101488]
- 17. Deciphering food proteins: The applications of SDS-PAGE ... [https://www.sciencedirect.com/science/article/abs/pii/S2212429225003025]
- 18. A simple method of drying polyacrylamide slab gels that ... [https://pmc.ncbi.nlm.nih.gov/articles/PMC7852843/]
- 19. Using T4 genetics and Laemmli's development of high- ... [https://www.sciencedirect.com/science/article/pii/S0021925822009061]
- 20. - SDS guide: Sample preparation to analysis | Abcam PAGE [https://www.abcam.com/en-us/knowledge-center/western-blot/sds-page-guide]
- 21. How SDS - PAGE Works: 7 Key Points Every Scientist Should Know [https://bitesizebio.com/580/how-sds-page-works/]
- 22. SDS-PAGE: A Cornerstone of Protein Analysis in Modern ... [https://www.metwarebio.com/sds-page-protein-analysis/]
- 23. SDS-PAGE Protocol [https://neutab.creative-biolabs.com/sds-page-analysis.htm]
- 24. Protein Electrophoresis Using SDS-PAGE: A Detailed ... [https://www.goldbio.com/blogs/articles/protein-electrophoresis-sds-page-overview?srsltid=AfmBOoqE6vpsUMXCL8F_fwnSo-Sd-LGg6Vcir_7Zp0OImRva47G0Hvpi]
- 25. The principle and method of polyacrylamide gel ... [https://www.mblbio.com/bio/g/support/method/sds-page.html]
- 26. Protein Electrophoresis Using SDS-PAGE: A Detailed ... [https://www.goldbio.com/blogs/articles/protein-electrophoresis-sds-page-overview?srsltid=AfmBOopbiTy6qghKZUDbD4Kd2V2dM2bYxgv_W-SCZrLtN4M2n10SFNZj]
- 27. How to Perform 1D SDS-PAGE [https://www.news-medical.net/whitepaper/20200930/How-to-Perform-1D-SDS-PAGE.aspx]
- 28. SDS-PAGE: The Easy Way to Find the Wells [https://bitesizebio.com/3285/sds-page-the-easy-way-to-find-the-wells/]
- 29. Gel Electrophoresis, PAGE, SDS - Biochemistry [https://www.medschoolcoach.com/gel-electrophoresis-page-sds-page-mcat-biochemistry/]
- 30. Analysis of Disulfide Bond Formation - PMC [https://pmc.ncbi.nlm.nih.gov/articles/PMC5743216/]
- 31. Compare reducing and non-reducing SDS-PAGE. What do ... [https://brainly.com/question/47397123]
- 32. SDS-PAGE Strategies: Videos & Practice Problems - Pearson [https://www.pearson.com/channels/biochemistry/learn/jason/protein-techniques/sds-page-strategies]
- 33. Applications and Advantages of SDS-PAGE in Protein ... [https://www.mtoz-biolabs.com/applications-and-advantages-of-sds-page-in-protein-molecular-weight-determination.html]
- 34. SDS-PAGE Based Protein Purity Analysis Service [https://www.mtoz-biolabs.com/pharm-purity-analysis-sds-page.html]
- 35. Performing a Purity and Homogeneity Check [https://www.sigmaaldrich.com/US/en/technical-documents/technical-article/protein-biology/protein-purification/purity-homogeneity-check?srsltid=AfmBOorRBFEXRNBpiPHyrgxsP3SkelRUW11ssaTb8hsvxsLzId2q3OSs]
- 36. Molecular Weight Determination by Electrophoresis of SDS ... [https://www.bio-techne.com/resources/literature/molecular-weight-determination-by-electrophoresis-of-sds-denatured-proteins]
- 37. Rapid baseline hump-free analysis of therapeutic proteins ... [https://www.sciencedirect.com/science/article/pii/S0003267025005410]
- 38. Comparing SDS-PAGE with Maurice for Protein Purity ... [https://www.bio-techne.com/resources/literature/comparing-sds-page-maurice-ce-sds-protein-purity-analysis]
- 39. Revolutionary Advances in SDS-PAGE Technology Drive [https://www.openpr.com/news/4047935/revolutionary-advances-in-sds-page-technology-drive]
- 40. SDS-PAGE in Food Science: Elevating Protein Insight and ... [https://www.eurofinsus.com/food-testing/resources/sds-page-in-food-science-elevating-protein-insight-and-product-integrity/]
- 41. Protein quantification by means of a stain-free SDS-PAGE ... [https://www.sciencedirect.com/science/article/abs/pii/S0889157516300229]
- 42. The Evolution of SDS-Based Protein Separation [https://www.bio-techne.com/resources/blogs/advantages-of-ce-sds]
- 43. SDS-PAGE Electrophoresis Market Size & Share 2025-2032 [https://www.360iresearch.com/library/intelligence/sds-page-electrophoresis]
- 44. Review of Methods for the Detection of Allergens in Novel ... [https://science.food.gov.uk/article/125903-review-of-methods-for-the-detection-of-allergens-in-novel-food-alternative-proteins]
- 45. Massive Screening of Food Extracts for Quality Assessment ... [https://pmc.ncbi.nlm.nih.gov/articles/PMC11674539/]
- 46. What is SDS-PAGE? Uses, How It Works & Top Companies ... [https://www.linkedin.com/pulse/what-sds-page-uses-how-works-top-companies-2025-clearsedge-research-kztwf]
- 47. SDS-PAGE: The science behind all those bubbles [https://www.antibodiesinc.com/pages/sds-page-demystified?srsltid=AfmBOoopC9gBzMySfRs_SyeURCYgfpA11Y52SYJNSqEwVYv-t5q8j6bX]
- 48. SDS-PAGE Optimization for Western Blot [https://www.bosterbio.com/protocol-and-troubleshooting/western-blotting-optimization/sds-page?srsltid=AfmBOopqm-qlYlwF4DZiOP3Iqj7zxgoXsPVOsHTZW8dlMoRAp7ayIp1_]
- 49. Electrophoresis in western blot [https://www.abcam.com/en-us/technical-resources/guides/western-blot-guide/electrophoresis]
- 50. Western Blot SDS-PAGE [https://www.novusbio.com/support/support-by-application/western-blot-sds-page?srsltid=AfmBOopGE6NWjtkhe_7BlsqIN3_v_VuIr3IeddPhE2tL_8rUdZSG5DuC]
- 51. An equation to estimate the difference between ... [https://www.nature.com/articles/srep13370]
- 52. SDS-PAGE: The science behind all those bubbles [https://www.antibodiesinc.com/pages/sds-page-demystified?srsltid=AfmBOopQc3XqvqG6fkY6_KksKsb69g1TC9Wz-PGN5ng8HTwyMFToLgu_]
- 53. SDS-PAGE Analysis of proteins: Principles, methodology ... [https://deepscienceresearch.com/dsr/catalog/book/107/chapter/407]
- 54. Protein Electrophoresis Using SDS-PAGE: A Detailed ... [https://www.goldbio.com/blogs/articles/protein-electrophoresis-sds-page-overview?srsltid=AfmBOoqCcGmkyzlSn_U6CnSCXv5MKkeLD_FSQ3OhI0yj9GTBLICtz2VQ]
- 55. Troubleshooting Sodium Dodecyl Sulfate- Polyacrylamide ... [https://www.hycultbiotech.com/sds-page/troubleshooting/]
- 56. Troubleshooting SDS-PAGE Gel Running Issues [https://www.goldbio.com/blogs/articles/troubleshooting-sds-page-gel-running-issues?srsltid=AfmBOoqzyP7yyXmMgAKz-EbGDKCm04u4uOF9noUDUtwpGA2PURgTvGY7]
- 57. Troubleshooting Common Electrophoresis Problems and ... [https://www.labx.com/resources/troubleshooting-common-electrophoresis-problems-and-artifacts/5539]
- 58. Constant Current or Voltage in SDS-PAGE [https://bitesizebio.com/51744/constant-current-or-voltage-in-sds-page/]
- 59. Troubleshooting SDS-PAGE Sample Preparation Issues [https://www.goldbio.com/blogs/articles/troubleshooting-sds-page-sample-preparation-issues?srsltid=AfmBOoq1Z9vH0ADY7KCB35MkNI8esUrwRe8TMVEAI-wHPfjS8_crp9Hk]
- 60. Upside-down smiley occurs when running SDS PAGE [http://www.protocol-online.org/biology-forums-2/posts/24754.html]
- 61. Using T4 genetics and Laemmli's development of high ... [https://pubmed.ncbi.nlm.nih.gov/36067882/]
- 62. SDS-PAGE: The science behind all those bubbles [https://www.antibodiesinc.com/pages/sds-page-demystified?srsltid=AfmBOoonnpxVY_rm34Lqj9EYnpkxdw4Ys_IrFJh8Ix-avHtmzV5OzPZA]
- 63. Use of DNA ladders for reproducible protein fractionation ... [https://pmc.ncbi.nlm.nih.gov/articles/PMC2667379/]
- 64. Tech Tips | In search of low molecular weight proteins [https://www.ptglab.com/news/blog/tech-tips-in-search-of-low-molecular-weight-proteins/?srsltid=AfmBOor8wdJ3McoDnk5wUphiFiajUliha2vWIqrcUZ9GEWNxSBRKxfpm]
- 65. Tris Tricine SDS PAGE: What is it and how to PERFORM it? [https://info.gbiosciences.com/blog/tris-tricine-sds-page-what-is-it-and-how-to-perfrom-it]
- 66. Specialized Protein Gels Support— Getting Started [https://www.thermofisher.com/us/en/home/technical-resources/technical-reference-library/protein-electrophoresis-western-blotting-support-center/specialized-protein-gels-support/specialized-protein-gels-support-getting-started.html]
- 67. Tricine-SDS-PAGE [https://pubmed.ncbi.nlm.nih.gov/30426416/]
- 68. SDS PAGE [https://www.bostonbioproducts.com/research-and-discovery/sds-page/]
- 69. Rapid baseline hump-free analysis of therapeutic proteins ... [https://pubmed.ncbi.nlm.nih.gov/40409905/]
- 70. Advances in Techniques for the Structure and Functional ... [https://pmc.ncbi.nlm.nih.gov/articles/PMC12467787/]
- 71. Analytical Techniques for the Characterization and ... [https://pmc.ncbi.nlm.nih.gov/articles/PMC9967501/]
- 72. 5 Critical Insights You Need to Know About Antibody ... [https://precisionantibody.com/insights-about-antibody-characterization/]
- 73. Method Robustness and Reproducibility for Monoclonal ... [https://www.chromatographyonline.com/view/method-robustness-and-reproducibility-for-monoclonal-antibody-purity-analysis]
- 74. Explore High-Quality Automated ... | Technology Networks [https://www.technologynetworks.com/biopharma/application-notes/explore-high-quality-automated-electrophoresis-for-protein-analysis-385017]
- 75. Resolve SDS - PAGE Disadvantages with CE - SDS [https://www.bio-techne.com/cn/instruments/ice/advantages-ce-sds-over-sds-page]
- 76. Capillary Electrophoresis in the Biopharmaceutical Industry [https://www.chromatographyonline.com/view/capillary-electrophoresis-biopharmaceutical-industry-part-i]
- 77. How to power up your biotherapeutic protein analysis [https://www.news-medical.net/whitepaper/20240111/How-to-power-up-your-biotherapeutic-protein-analysis.aspx]
- 78. Intermediate precision study of the CE-SDS assay on ... [https://sciex.com/tech-notes/biopharma/intermediate-precision-study-of-ce-sds-assay-on-biophase8800-with-native-fluorescence-detection]
- 79. The SCIEX BioPhase 8800 system harnesses new native ... [https://sciex.com/about-us/press-releases/2025/the-sciex-biophase-8800-system-harnesses-new-native-fluorescence-detection-for-protein-based-ce-assays]
- 80. SDS-PAGE Optimization for Western Blot [https://www.bosterbio.com/protocol-and-troubleshooting/western-blotting-optimization/sds-page?srsltid=AfmBOoqIL0Km6uSCogyEdheJF1rJ2QIouBUCDRya2vuoadrVR-Y4ER-C]
- 81. GHS Safety Data Sheet Authoring and Maintenance [https://www.complianceandrisks.com/blog/ghs-safety-data-sheet-authoring-and-maintenance-a-complete-guide-to-compliance-excellence/]
- 82. Safety data sheets simplified: can a single SDS serve all ... [https://www.ricardo.com/en/news-and-insights/industry-insights/safety-data-sheets-simplified-can-a-single-sds-serve-all-markets]
- 83. SDS Section 3: Key Requirements You Should Know [https://sphera.com/resources/blog/sds-section-3-key-requirements-you-should-know/]