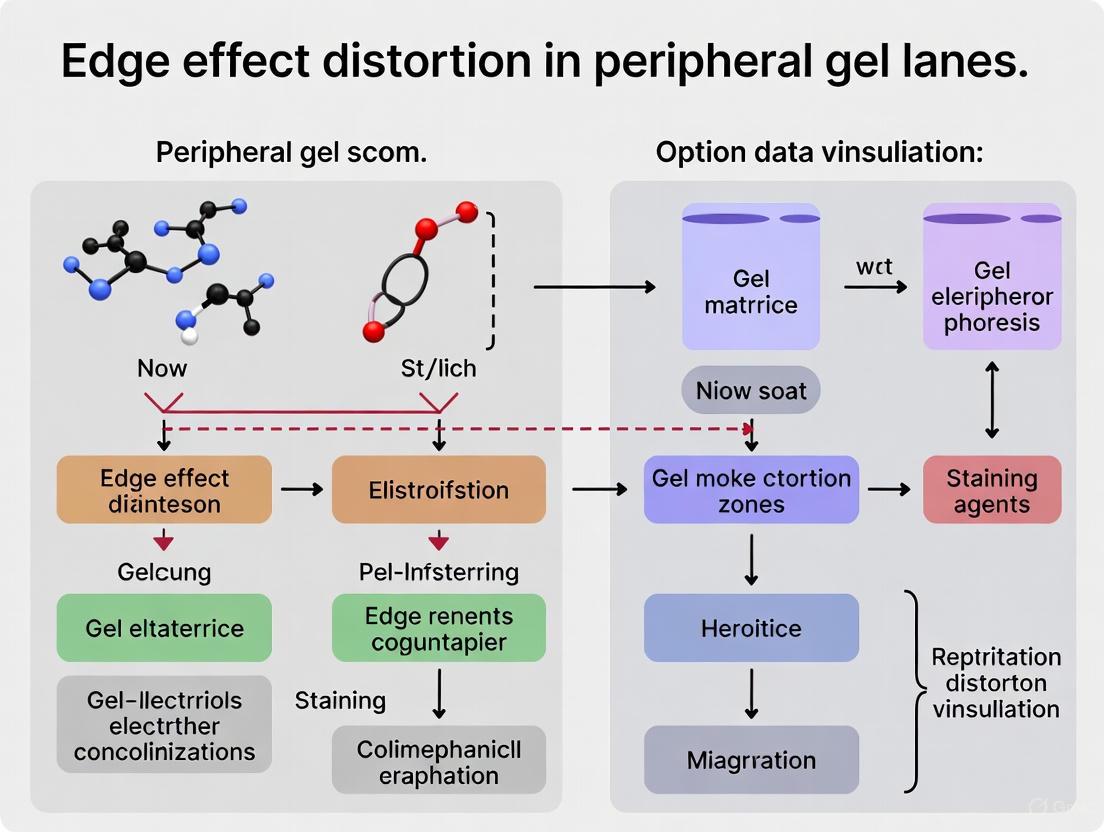
Defeating the Edge Effect: A Researcher's Guide to Preventing Distortion in Peripheral Gel Lanes
This article provides a comprehensive guide for researchers and drug development professionals on addressing the edge effect, a common phenomenon in gel electrophoresis where peripheral lanes exhibit distorted bands.
Defeating the Edge Effect: A Researcher's Guide to Preventing Distortion in Peripheral Gel Lanes
Abstract
This article provides a comprehensive guide for researchers and drug development professionals on addressing the edge effect, a common phenomenon in gel electrophoresis where peripheral lanes exhibit distorted bands. Covering foundational principles to advanced validation, we explore the causes of this artifact—primarily uneven electrical and thermal fields—and detail practical methodologies to prevent it, such as strategic well-loading and buffer system selection. The content includes robust troubleshooting protocols for persistent issues and introduces modern validation techniques, including AI-powered image analysis, to ensure data integrity and reproducibility in quantitative applications.
Understanding the Edge Effect: Causes and Consequences for Data Integrity
Frequently Asked Questions (FAQs)
What is the "edge effect" in gel electrophoresis? The edge effect describes the phenomenon where samples in the outermost lanes (peripheral lanes) of a gel migrate differently and appear distorted compared to samples in the inner lanes. This results in bent, smeared, or misshapen bands on the leftmost and rightmost sides of the gel, which can compromise the accuracy of your analysis [1].
What causes the edge effect? The primary cause is uneven electrical field distribution and heat dissipation across the gel. When the wells at the very edges of the gel are left empty, it creates an uneven resistance path for the electric current. This causes the current to "bunch up" and travel more intensely through the outer lanes that contain sample, and less through the empty ones, leading to faster migration and distorted bands in the peripheral lanes [1].
How can I prevent the edge effect? The most effective and straightforward preventive measure is to avoid leaving any wells empty [1]. If you do not have enough experimental samples to fill the entire gel, load your protein ladder, a control sample, or a dummy protein sample (e.g., a common protein from lab stock) into the outermost wells. This ensures a more uniform electrical field across the entire gel [1].
Troubleshooting Guide: Edge Effect
Visual Identification of the Edge Effect
The hallmark sign of the edge effect is a clear discrepancy in band morphology between the inner and outer lanes. The bands in the center of the gel will appear straight and properly resolved, while the bands in the leftmost and rightmost lanes will be distorted, often bending inwards or outwards [1].
The table below outlines the primary cause and recommended solution for resolving the edge effect.
| Primary Cause | Recommended Corrective Action |
|---|---|
| Empty wells at the periphery of the gel [1]. | Load all peripheral wells with samples. Do not leave outer wells empty; use protein ladders, control samples, or buffer to fill unused wells [1]. |
Detailed Troubleshooting Protocol
Problem: Bands in the peripheral lanes (leftmost and rightmost) are distorted, while bands in the center lanes appear normal [1].
Explanation: This distortion is a classic symptom of the edge effect. It occurs because the electric current density is higher in lanes adjacent to empty wells, causing samples in these lanes to migrate faster and unevenly [1].
Step-by-Step Resolution:
- Identify the Issue: Compare the band shapes in the outer lanes to those in the inner lanes. Confirm that the distortion is consistent with the edge effect.
- Modify Loading Pattern: In all subsequent experiments, make it a standard practice to load samples into every well at the edges of the gel.
- Utilize Control Samples: If you lack enough experimental samples for the outer wells, load your molecular weight ladder, a known positive control, or a non-precious protein sample into these wells [1].
- Verify Results: After implementing the new loading pattern, the bands in all lanes, including the periphery, should migrate at a uniform speed and appear straight.
Experimental Protocol for Mitigation
Objective: To achieve uniform migration and straight bands across all lanes of an SDS-PAGE gel by preventing the edge effect.
Materials:
- Standard SDS-PAGE gel casting and running equipment.
- Protein samples.
- Protein molecular weight ladder.
- Running buffer (e.g., Tris-Glycine-SDS).
Methodology:
- Cast the Gel: Prepare and cast your SDS-PAGE gel as per your standard protocol.
- Strategic Sample Loading:
- Plan your loading strategy before beginning. Identify which wells are the leftmost and rightmost in your gel.
- Crucial Step: Ensure these peripheral wells are not left empty.
- Load your protein ladder into one of the outer wells.
- Load a control sample (e.g., a previously verified sample) into the other outer well.
- If no controls are available, load any protein sample that will not interfere with your analysis.
- Run the Gel: Proceed with electrophoresis under standard conditions for your experiment (e.g., constant voltage).
- Visualization: After staining and destaining, observe the gel. The band distortion in the peripheral lanes should be eliminated.
Troubleshooting Workflow
The following diagram outlines the logical process for identifying and correcting the edge effect.
Research Reagent Solutions
The table below lists key materials and their functions for experiments susceptible to the edge effect.
| Item | Function in Mitigating Edge Effect |
|---|---|
| Protein Molecular Weight Ladder | An ideal sample to load into an empty peripheral well to ensure uniform current flow. |
| Control Protein Sample | A known sample (e.g., a purified protein standard) used to fill empty wells and prevent distortion. |
| SDS-PAGE Gel Running Buffer (e.g., Tris-Glycine-SDS) | Maintains consistent ionic strength and pH during electrophoresis, supporting uniform migration when wells are properly loaded [1]. |
Frequently Asked Questions (FAQs)
Q1: What is the "edge effect" in gel electrophoresis? The "edge effect" is a phenomenon where the samples in the outermost lanes (peripheral lanes) of a gel migrate differently, often showing distorted or curved bands, compared to the samples in the central lanes. This occurs due to an uneven electrical and thermal field across the gel when outer wells are left empty [2].
Q2: Why do empty wells cause this distortion? Empty wells alter the path of least resistance for the electric current. With no sample in the peripheral wells, the electrical field bends inwards towards the adjacent sample-containing lanes. This results in a stronger field strength at the edges, causing samples in lanes next to empty wells to migrate faster and unevenly, leading to distorted bands [2] [3].
Q3: How does this relate to thermal fields? The uneven electrical field leads to uneven heat generation across the gel. Lanes experiencing a stronger electrical field, typically at the edges, generate more heat (Joule heating). This temperature gradient can cause the gel matrix to expand unevenly, further contributing to band distortion and the characteristic "smiling" or "frowning" patterns [4] [5].
Q4: What is the most straightforward way to prevent the edge effect? The most effective prevention is to avoid leaving any wells empty [2]. If you have unused wells on the periphery of your gel, load them with a dummy sample, such as a protein or DNA ladder, a control sample, or just loading buffer [2]. This ensures a uniform distribution of ions and resistance across the gel, stabilizing both electrical and thermal fields.
Troubleshooting Guide: Edge Effect and Band Distortions
Problem Identification
You observe distorted, curved, or misshapen bands specifically in the outermost lanes of your gel, while the central lanes appear normal. The gel may exhibit a "smiling" effect where bands in the peripheral lanes curve upwards [4] [5].
Root Cause Analysis
The primary cause is empty peripheral wells, which lead to:
- Uneven Electrical Fields: Altered and bent current pathways [2] [3].
- Localized Heating: Increased heat generation in edge lanes due to higher current density [4] [5].
- Matrix Instability: Potential gel collapse or phase segregation under non-uniform conditions [3].
The following workflow outlines the primary cause and the straightforward solution for this common issue:
Quantitative Data on Experimental Parameters
The table below summarizes key parameters that influence field uniformity and their optimal settings to prevent the edge effect.
Table 1: Experimental Parameters for Mitigating Edge Effects
| Parameter | Sub-Optimal Condition (Causes Distortion) | Recommended Condition (Prevents Distortion) | Primary Effect |
|---|---|---|---|
| Well Loading [2] | Leaving peripheral wells empty | Load all peripheral wells with sample, ladder, or buffer | Normalizes electrical resistance across gel |
| Buffer Conductivity [3] | Very low conductivity buffers | Use buffers with appropriate ionic strength | Reduces field-strength dependency of distortions |
| Field Strength [4] [5] [3] | Very high voltage (>15 V/cm) | Use moderate voltage; lower voltage for longer runs | Minimizes uneven heating and gel deformation |
| Gel Polymerization [3] | Low catalyst concentration, gel aging | Ensure proper, fresh gel chemistry with standard catalyst levels | Prevents gel collapse and internal phase segregation |
Step-by-Step Prevention Protocol
This protocol provides a detailed method to set up an electrophoresis run that ensures uniform electrical and thermal fields.
Objective: To achieve straight, well-resolved bands across all lanes of an agarose or polyacrylamide gel.
Materials:
- Prepared gel (agarose or PAGE)
- Gel running buffer (e.g., TAE, TBE, or SDS-PAGE buffer)
- Protein or DNA molecular weight ladder
- Experimental samples in loading buffer
- Additional loading buffer (for dummy loads)
- Electrophoresis tank and power supply
Procedure:
- Gel Preparation: After polymerization, carefully remove the comb to avoid damaging the wells [6].
- Loading Strategy:
- Identify all peripheral (outermost) wells on the left and right sides of the gel.
- If you lack enough experimental samples to fill all peripheral wells, load your protein or DNA ladder into one of the outer wells [2].
- For any remaining empty peripheral wells, load a volume of loading buffer equal to your sample volumes. This provides the necessary ionic content to normalize the electrical field [2].
- Buffer and Run Conditions:
- Place the gel in the electrophoresis tank and fill it with running buffer until the gel is submerged under 3–5 mm of buffer [4].
- Ensure the electrodes are correctly connected [6].
- Apply a moderate voltage as recommended for your gel type. For agarose gels, 80-120V is common. Running at a lower voltage for a longer time minimizes heating and is preferable if band sharpness is critical [4] [5].
- Post-Run Analysis: Visualize the gel. You should observe a uniform migration pattern across all lanes, with the dye front and bands running straight and parallel.
Research Reagent Solutions
Table 2: Essential Materials for Troubleshooting Edge Effects
| Item | Function in Prevention | Technical Considerations |
|---|---|---|
| Molecular Weight Ladder | Ideal substance to load into peripheral wells to normalize electrical resistance [2]. | Choose a ladder with bright, sharp bands for clear visualization. |
| Loading Buffer (Dummy Load) | Contains ions and glycerol; can be used to fill empty peripheral wells, ensuring consistent current flow [2]. | Use the same loading buffer as for your samples to maintain consistency. |
| TAE or TBE Buffer | Standard running buffers maintain pH and provide ions for conductivity [4] [5]. | TBE has higher buffering capacity and is better for longer runs; ensure it is freshly prepared [4]. |
| High-Quality Gel Combs | To form wells with uniform shape and integrity, preventing sample leakage and distortion from the start [6]. | Ensure combs are clean and undamaged. Avoid pushing the comb to the very bottom of the gel cassette [6]. |
Lane distortions in gel electrophoresis are a significant technical challenge that can directly compromise the reproducibility and accuracy of quantitative data in molecular biology research. These distortions, which manifest as bent, wavy, or irregular migration patterns of samples in gel lanes, introduce systematic errors that affect both qualitative interpretation and quantitative measurements of nucleic acid or protein samples. Particularly in peripheral gel lanes, the so-called "edge effects" create substantial obstacles for research requiring precise quantitation, such as gene expression analysis, protein quantification, and quality control in drug development pipelines. Understanding the root causes of these distortions and implementing standardized corrective methodologies is essential for maintaining data integrity across experiments and laboratories. This guide provides a comprehensive framework for identifying, troubleshooting, and preventing lane distortion artifacts to ensure reliable experimental outcomes.
Types and Characteristics of Lane Distortions
Lane distortions can manifest in various forms, each with distinct visual characteristics and underlying causes. The table below summarizes the primary distortion types and their impacts on data analysis.
Table 1: Common Types of Lane Distortions and Their Characteristics
| Distortion Type | Visual Characteristics | Primary Causes | Impact on Data |
|---|---|---|---|
| Smiling Effect | Bands curve upward in center lanes, forming a crescent shape [7] | Uneven heating across the gel, often from high voltage [7] | Incorrect size estimation; impaired band comparison across lanes |
| Inward Deviation | Lanes curve toward the center of the gel [3] | Gel collapse due to low catalyst concentration, temperature, or aging [3] | Distorted migration distances; compromised molecular weight calculation |
| Outward Distortion | Lanes bend toward the edges of the gel [3] | Use of low conductivity buffers; high field strength [3] | Misalignment between lanes; inaccurate quantitation across samples |
| Faint Bands | Bands appear fuzzy, unclear, or undetectable [6] | Low sample quantity, degradation, or suboptimal staining [6] | Incomplete or missing data; inability to quantify target molecules |
| Smeared Bands | Bands appear diffuse, blurry, and poorly resolved [6] | Sample overloading, degradation, or poorly formed wells [6] | Poor resolution of similar-sized fragments; inaccurate quantitation |
Troubleshooting Guide: Resolving Lane Distortions
Frequently Asked Questions (FAQs)
Q1: Why do the bands in my gel curve upward in the center lanes (the "smiling effect")? The "smiling effect" occurs primarily due to uneven heating across the gel, which causes samples in the center to migrate faster than those on the sides [7]. This is often exacerbated by running the gel at high voltage. To resolve this, run the gel at a lower voltage to minimize heat generation and ensure the electrophoresis tank is functioning properly without loose contacts that could create an uneven electric field [7].
Q2: What causes my peripheral gel lanes to bend inward toward the center? Inward deviations in peripheral lanes are often linked to physical instability in the gel matrix itself. This can result from a decreased ammonium persulfate (APS) concentration (e.g., as low as 0.03%), which can induce phase segregation in the gel, especially at low running temperatures [3]. Other contributing factors include gel aging, solvent effects, and hydrolysis.
Q3: How can I prevent faint or absent bands that make quantitation impossible? Faint bands typically result from insufficient sample quantity, sample degradation, or issues with detection [6]. Ensure you load a minimum of 0.1–0.2 μg of DNA per millimeter of gel well width, use molecular biology-grade reagents and nuclease-free techniques to prevent degradation, and verify that your staining protocol is optimal for your sample type and gel thickness [6].
Q4: My bands are smeared and poorly resolved. How can I fix this? Smeared bands are commonly caused by sample overloading, well damage during loading, or suboptimal electrophoresis conditions [6]. Avoid overloading wells (stick to the 0.1–0.2 μg/well width guideline), use care when pipetting to avoid puncturing well bottoms, and ensure you apply the appropriate voltage and run time for your nucleic acid size range [6]. For DNA, using a denaturing gel can also help.
Q5: Why are my bands poorly separated, making it hard to distinguish individual fragments? Poor band separation often stems from using an incorrect gel percentage for your target fragment size or from sample-related issues [6]. Ensure the agarose or polyacrylamide concentration is appropriate (higher percentages for smaller fragments). Also, avoid sample overloading and ensure your sample is free of excessive protein or salt, which can interfere with mobility [6].
Systematic Troubleshooting Workflow
The following diagram outlines a logical, step-by-step workflow for diagnosing and resolving common lane distortion problems.
Diagram 1: Lane Distortion Troubleshooting Workflow
Experimental Protocols for Minimizing Distortions
Standardized Protocol for Agarose Gel Electrophoresis
Objective: To separate DNA fragments while minimizing lane distortions for accurate quantitation and reproducibility.
Materials:
- Agarose (molecular biology grade)
- Electrophoresis buffer (TAE or TBE)
- DNA ladder and samples
- Loading dye
- Nucleic acid stain (e.g., SYBR Safe, EtBr)
- Gel casting tray and comb
- Power supply
Methodology:
- Gel Preparation: Prepare an agarose solution in an appropriate buffer (TAE for fragments >1 kb, TBE for smaller fragments) at a concentration suitable for your target DNA size range [7]. For example, use 0.8-1% agarose for standard PCR fragments.
Casting: Allow the gel to solidify completely (typically 30-45 minutes) at room temperature before carefully removing the comb to prevent well damage [6].
Sample Preparation: Mix DNA samples with loading dye containing a density agent (e.g., glycerol) to ensure samples sink properly into wells. Load an appropriate amount of sample (0.1-0.2 μg DNA per mm of well width) to prevent overloading [6] [7].
Electrophoresis: Submerge the gel in running buffer with 3-5 mm of buffer covering the surface [7]. Run at a constant voltage appropriate for your gel size (e.g., 5-8 V/cm for mini-gels) to prevent the "smiling effect" from excessive heat [7].
Visualization: Stain the gel according to your stain's protocol, ensuring sufficient staining time for thicker or higher-percentage gels [6].
Specialized Protocol for Addressing Edge Effects in Peripheral Lanes
Objective: To specifically minimize distortions in peripheral lanes that are critical for comparative analyses.
Materials:
- As in Protocol 4.1, with emphasis on high-quality reagents
- Thermometer for monitoring gel temperature
Methodology:
- Gel Environment Optimization: Use a continuous buffer system rather than discontinuous systems, which are more prone to boundary deformation at edges [3]. For polyacrylamide gels, ensure consistent ammonium persulfate concentration (avoid extremely low concentrations like 0.03%) and maintain stable running temperature above suspected critical points (e.g., above 11°C for Michov buffer system) [3].
Apparatus Setup: Place an empty lane or a lane with buffer only between the sample lanes and the gel edge to create a buffer zone. This helps mitigate the stark transition between the gel and the tank buffer.
Running Conditions: Use moderate field strengths (below 15 V/cm for some buffer systems) as higher field strengths exacerbate outward distortions in peripheral lanes [3]. Consider using a buffer with higher ionic conductivity if appropriate for your samples.
Temperature Control: Run the gel in a cold room or with a circulating water cooling system if available to maintain even temperature distribution across the entire gel surface.
The following diagram illustrates the complete workflow for an experiment designed to minimize edge effects, from preparation to analysis.
Diagram 2: Edge Effect Minimization Workflow
The Scientist's Toolkit: Essential Reagents and Materials
The following table details key reagents and materials essential for achieving reproducible, high-quality gel electrophoresis results with minimal distortions.
Table 2: Research Reagent Solutions for Optimal Gel Electrophoresis
| Reagent/Material | Function | Usage Notes |
|---|---|---|
| TAE Buffer (Tris-Acetate-EDTA) | Running buffer for DNA electrophoresis [7] | Preferred for longer fragments (>1 kb); compatible with enzymatic reactions; not ideal for long runs [7] |
| TBE Buffer (Tris-Borate-EDTA) | Running buffer for DNA electrophoresis [7] | Better separation of small DNA fragments; higher ionic strength suitable for long runs; not recommended with enzymatic steps [7] |
| DNA Ladder | Molecular weight standard for sizing and quantitation [7] | Choose ladders with appropriate number of bands for your size range; chromatography-purified for high purity [7] |
| SYBR Safe DNA Gel Stain | Fluorescent nucleic acid detection [6] | More sensitive than EtBr; load at least 1 ng DNA per band; requires appropriate light source for visualization [6] |
| Loading Dye | Visualize migration and increase sample density [7] | Contains dyes (e.g., Orange G, xylene cyanol) that migrate at known rates; choose dyes that won't mask bands of interest [7] |
| Ammonium Persulfate (APS) | Polyacrylamide gel catalyst [3] | Concentration critical for gel stability; avoid very low concentrations (e.g., 0.03%) to prevent gel collapse and inward deviations [3] |
The table below consolidates key quantitative findings from research on lane distortions, providing a quick reference for experimental planning and validation.
Table 3: Quantitative Parameters in Lane Distortion Research
| Parameter | Optimal Range | Impact Outside Range | Source |
|---|---|---|---|
| Field Strength | <15 V/cm (for Michov buffer system) [3] | Outward lane distortions pronounced at higher field strengths [3] | Starita-Geribaldi et al. |
| APS Concentration | >0.03% [3] | Gel collapse and inward deviations at lower concentrations [3] | Starita-Geribaldi et al. |
| Sample Load | 0.1-0.2 μg DNA/mm well width [6] | Faint bands (underloading) or smearing/warped bands (overloading) [6] | Thermo Fisher Scientific |
| Running Buffer Depth | 3-5 mm over gel surface [7] | Poor resolution, band distortion, or gel melting with insufficient buffer [7] | Thermo Fisher Scientific |
| Critical Temperature | >11°C (for Michov buffer system) [3] | Phase segregation and gel collapse near suspected critical endpoint [3] | Starita-Geribaldi et al. |
FAQs on Buffer Conductivity and Gel Distortion
1. How does buffer conductivity directly influence lane distortions in gel electrophoresis? Buffer conductivity, determined by its ionic strength, is crucial for maintaining a stable and uniform electric field across the gel. Low conductivity buffers can lead to pronounced outward lane distortions (where lanes curve outward) because they result in higher local field strengths and uneven heating [3]. Conversely, if the running buffer is too diluted, it can cause samples to migrate too fast and appear as diffuse smears [8]. Proper ionic strength ensures consistent current flow, which is the driving force for uniform protein or nucleic acid separation [8] [9].
2. What is the "edge effect" and what are its primary causes? The "edge effect" is a phenomenon where the bands in the outermost lanes (the periphery) of a gel appear distorted or curved compared to the straight bands in the center lanes [8]. This is often visually identified as a "smiling" shape. The primary cause is uneven distribution of the electric field and heat across the gel [8] [10]. This can be exacerbated by:
- Empty peripheral wells: Leaving the outermost wells empty contributes to this unevenness [8].
- High voltage: Running the gel at a very high voltage generates excessive heat, which is often less effectively dissipated at the edges [8] [11] [10].
- Loose contacts or apparatus design: Issues with the electrophoresis tank setup can also create an uneven electric field [10].
3. What practical steps can I take to minimize peripheral lane distortion? You can minimize edge effect distortion by implementing the following steps:
- Avoid empty wells: Do not leave the outermost wells empty. Load them with a protein ladder, a control sample, or a dummy sample with loading buffer [8].
- Optimize voltage: Run the gel at a lower voltage for a longer duration to minimize heat production [8] [11]. A standard practice is 5-15 V/cm of gel [11].
- Control temperature: Perform electrophoresis in a cold room, use the apparatus's cooling unit, or place ice packs in the tank to manage heat [8] [11].
- Ensure proper setup: Check that the electrophoresis tank is level and that all electrodes are clean and making proper contact [12] [10].
4. Besides buffer, what other factors can cause band smiling and distortion? While buffer conductivity is key, other factors can cause similar distortions:
- Catalyst concentration: A decreased ammonium persulfate (APS) concentration can induce phase segregation in the gel matrix at low temperatures, leading to inward deviations in lanes [3].
- Gel aging and hydrolysis: Older gels can undergo hydrolysis, which alters their structure and contributes to lane distortions [3].
- Gel thickness: Thicker gels can cause bands to diffuse and may contribute to uneven running [13].
- Improper buffer volume: Insufficient running buffer covering the gel can lead to poor resolution, band distortion, and even gel melting [10].
Troubleshooting Guide: Common Distortion Issues
| Observation | Possible Cause | Troubleshooting Solution |
|---|---|---|
| Smiling bands (curved bands) [8] [10] | Excessive heat generation during electrophoresis; Uneven electric field [10]. | Run gel at lower voltage [8]; Use a cold room or ice packs [8]; Check tank for loose contacts [10]. |
| Distorted peripheral lanes (Edge effect) [8] | Empty wells at the periphery of the gel. | Load all outer wells with ladder or control samples [8]. |
| Smeared bands [8] [12] | Voltage too high; Overloaded DNA; Excessive heating. | Reduce voltage [8]; Load less DNA [12]; Ensure correct buffer concentration and volume [8] [10]. |
| Bands not properly separated [8] | Gel run time too short; Improper buffer preparation; Acrylamide concentration too high. | Run gel longer; Remake running buffer to ensure correct ion concentration [8]; Use lower % acrylamide gel [8]. |
| Rate of migration too fast [8] | Running buffer too diluted; Very high voltage. | Use running buffer with proper salt concentration [8]; Reduce voltage [8]. |
Experimental Protocols for Investigating Distortion
Protocol 1: Systematic Analysis of Buffer Ionic Strength
Objective: To determine the effect of buffer conductivity on lane straightness and band resolution.
- Materials: Acrylamide or agarose gel setup, standard protein or DNA ladder, power supply.
- Buffers: Prepare your standard running buffer (e.g., Tris-Glycine for SDS-PAGE) at three different concentrations: 0.5x, 1x, and 2x.
- Method:
- Cast three identical gels.
- Load the same samples and ladder on each gel in an identical pattern, ensuring all peripheral wells are filled [8].
- Run each gel with one buffer concentration at a constant voltage (e.g., 150V for SDS-PAGE) [11]. Monitor the initial current.
- Stop the run when the dye front reaches the bottom of the gel [8].
- Visualize and document the gels. Compare the straightness of lanes, sharpness of bands, and the occurrence of smiling or distortion.
- Expected Outcome: The 1x buffer should yield the straightest lanes. The 0.5x buffer may show outward lane distortions and faster, diffuse migration [8] [3], while the 2x buffer might generate more heat and show signs of smiling if not properly cooled [11].
Protocol 2: Evaluating the Impact of Field Strength and Temperature
Objective: To correlate field strength (V/cm) with heat generation and lane distortion.
- Materials: Gel setup, thermometer or thermal camera, standard samples.
- Method:
- Cast two identical gels and load them identically.
- Run the first gel at a high field strength (e.g., 20 V/cm) and the second at a low field strength (e.g., 8 V/cm) [11].
- Monitor and record the buffer temperature at regular intervals during the run for both gels.
- After completion, compare the two gels for band smiling and resolution.
- Expected Outcome: The gel run at a higher field strength will have a higher final buffer temperature and is more likely to exhibit smiling bands and reduced resolution. The gel run at a lower voltage will have straighter bands but a longer run time [8] [11].
Signaling Pathways and Logical Relationships
Research Reagent Solutions
| Reagent / Material | Function in Addressing Distortion |
|---|---|
| High-Quality Buffer Components | Ensures correct ionic strength and pH for consistent conductivity and stable electric field [8] [9]. |
| TEMED & Fresh APS | Provides efficient and uniform gel polymerization, creating a consistent matrix to prevent internal distortions [3] [13]. |
| Pre-cast Gels | Offer standardized, high-quality gel matrix with consistent acrylamide concentration and polymerization, minimizing variables that cause distortion [8]. |
| DNA/Protein Ladders | Used to fill empty peripheral wells to combat the edge effect; also serve as critical size and distortion controls [8] [12]. |
| Cooling Apparatus / Ice Packs | Directly counteracts Joule heating, a primary cause of smiling and band distortion [8] [11]. |
Proactive Strategies: Practical Methods to Eliminate Edge Effect in Your Workflow
In gel electrophoresis, the "edge effect" is a common phenomenon where samples in the peripheral lanes (outermost lanes) of a gel migrate differently, often appearing distorted or curved compared to samples in the central lanes. This inconsistency can compromise data integrity, experimental reproducibility, and accurate interpretation of results. The primary cause is uneven electrical field distribution and heat dissipation across the gel, particularly when outer wells are left empty. This guide provides troubleshooting strategies and practical solutions to mitigate edge effect, ensuring uniform sample migration and reliable data across all lanes.
Troubleshooting Guide: Edge Effect Distortion
Problem: Bands in the periphery of my gel are distorted or curved compared to those in the center.
Observed Symptoms: Lanes on the far left and right sides of the gel show bands that are smeared, curved ('smiling' bands), or otherwise distorted. The samples running in the middle of the gel appear normal and well-resolved [14].
Primary Explanation: This "edge effect" is due to empty wells at the periphery of the gel. When the outermost wells are not loaded with sample, it disrupts the uniform flow of the electric current through the gel. This causes uneven heating and electrical field strength at the edges, leading to aberrant migration of samples in the neighboring lanes [14].
Recommended Solution: Do not keep wells empty when loading your gel. If you do not have enough experimental samples to fill the entire gel, load the remaining wells with protein ladder or any other available control protein (e.g., lab stock proteins). This ensures a consistent buffer interface and electrical resistance across the entire gel, promoting even current flow and preventing distortion in the peripheral lanes [14].
Frequently Asked Questions (FAQs)
Q1: What is the underlying physical cause of the edge effect? The edge effect is caused by an uneven distribution of the electric field and subsequent heat generation across the width of the gel. When peripheral wells are empty, the electrical current encounters less resistance at the edges compared to the center. This heterogeneity leads to faster and uneven heating in the outer regions, which alters the migration rate of samples and causes band distortion, often manifesting as a "smiling" or curved appearance [14] [4].
Q2: I only have a few samples to run. Is it acceptable to just load my samples in the center wells and leave the outer wells completely empty? No, this is not recommended and is a direct cause of edge effect. Leaving the outer wells empty will lead to distorted bands in your outermost sample lanes. To ensure well-to-well uniformity, you must load all peripheral wells. The most straightforward strategy is to load your protein or DNA ladder in multiple outer wells, or use a control sample to fill the gaps [14] [15].
Q3: Can the edge effect be caused by factors other than empty wells? While empty wells are the primary cause, other factors can exacerbate or contribute to similar distortion. These include running the gel at a very high voltage, which generates excessive and uneven heat [14] [4], or problems with the electrophoresis tank setup, such as loose contacts that create an irregular electric field [4]. Ensuring proper equipment function and optimal running conditions is essential.
Q4: How does preventing edge effect contribute to research rigor and reproducibility? Inconsistent sample migration due to edge effect introduces a significant technical variable that can obscure true biological results and lead to erroneous conclusions. By implementing standardized loading practices that prevent edge effect, you enhance the reliability and reproducibility of your data within and across experiments. This is a critical step in maintaining rigor for downstream applications like Western blotting and diagnostic assays [16].
Experimental Protocols for Mitigating Edge Effect
Protocol 1: Standard Gel Loading to Prevent Edge Effect
This protocol ensures uniform electrical field distribution for consistent sample migration.
- Prepare Samples and Reagents: Prior to gel casting, ensure all protein samples, DNA ladders, and control samples are prepared and mixed with the appropriate loading dye.
- Load the Gel Strategically:
- Load your experimental samples in the central lanes of the gel.
- Load molecular weight ladders (e.g., protein ladder, DNA ladder) in the first and last wells of the gel cassette.
- Fill any remaining empty wells between your samples and the ladders with a control protein or additional ladder. The goal is to have every well occupied.
- Run the Gel Under Optimal Conditions: Begin electrophoresis promptly after loading samples. Use a constant voltage appropriate for your gel size (e.g., a standard practice is ~150V for a mini-gel). Avoid excessively high voltages that generate disproportionate heat [14].
Protocol 2: Counterbalanced Gel Loading for High-Throughput Research
For rigorous quantitative studies, a counterbalanced loading design accounts for potential residual variability.
- Experimental Design: When running multiple gels for a single experiment, distribute your samples across the gels in a randomized block design. Ensure that a representative from each experimental condition is present on every gel, and that the same loading pattern (e.g., ladders on the outside) is consistently applied.
- Lane Position Covariate: During data analysis, treat the lane position (e.g., lane number) as a covariate in your statistical model. This allows the model to account for any minor migration differences that might still occur from the center to the edge of the gel, even with all wells loaded [16].
- Statistical Analysis: Analyze your data using methods such as Analysis of Covariance (ANCOVA) or Linear Mixed Models (LMMs) that can incorporate lane position as a fixed or random effect, thereby isolating biological effects from technical artifacts [16].
Table 1: Troubleshooting Edge Effect and Band Distortion
| Problem | Primary Cause | Recommended Solution | Key Reference |
|---|---|---|---|
| Distorted peripheral bands ("Edge Effect") | Empty wells at the gel periphery | Load all outer wells with ladder or control sample | [14] |
| "Smiling" or curved bands across all lanes | Excessive heat generation from high voltage | Reduce voltage and/or run gel in a cold room/with cooling | [14] [4] |
| Smeared bands across the gel | Voltage too high; uneven heating | Run gel at lower voltage for a longer duration | [14] [6] |
| Poor band resolution and separation | Gel run time too short; improper buffer | Run gel until dye front nears bottom; remake running buffer | [14] |
Table 2: Research Reagent Solutions for Gel Electrophoresis
| Reagent/Material | Function | Specifications & Best Practices |
|---|---|---|
| Protein/DNA Ladder | Sizing standard and well-filler | Use to occupy peripheral wells; ensures consistent current flow and provides molecular weight reference. |
| Control Protein/Lysate | Experimental control and well-filler | A known lab stock sample can be used to fill empty wells, maintaining uniform buffer resistance. |
| Gel Running Buffer | Conducts current and maintains pH | Prepare with correct ion concentration (e.g., 1X TAE or TBE); improper concentration affects current flow and resolution [14] [4]. |
| Agarose/Polyacrylamide | Separation matrix | Use percentage appropriate for target molecule size; higher % for better resolution of smaller molecules [6] [4]. |
Workflow Visualization
Diagram Title: Edge Effect Troubleshooting Path
In the context of research focused on mitigating edge effect distortion in peripheral gel lanes, the optimization of buffer chemistry and concentration is a foundational prerequisite. A core manifestation of this problem, often termed the "edge effect," results in distorted bands in the outermost lanes of a gel, compromising data integrity and reproducibility [17]. This artifact is frequently a direct consequence of non-uniform current flow and heat distribution across the gel, parameters that are critically governed by the composition and ionic strength of the electrophoresis buffer. This guide provides targeted troubleshooting and methodologies to help researchers identify and rectify buffer-related issues to achieve uniform current flow and reliable, publication-quality results.
Frequently Asked Questions (FAQs)
FAQ 1: What is the direct link between my running buffer and the "edge effect" causing distorted outer lanes?
The edge effect, where bands in peripheral lanes are distorted compared to those in the center, is often due to an uneven electric field and associated Joule heating across the gel [18]. The running buffer is responsible for carrying the current, and its ionic strength directly influences this. An incorrect or depleted buffer can alter the system's resistance, leading to inconsistent heating and migration [18]. This effect is exacerbated when outer wells are left empty, as the neighboring lanes experience a different local environment. Ensuring the correct concentration and freshness of your buffer, along with loading all peripheral wells, is key to mitigating this issue [17].
FAQ 2: How does buffer concentration affect the speed and resolution of my gel run?
The buffer's ionic strength is a double-edged sword. A buffer with an ionic strength that is too high increases the share of current carried by the buffer ions, which can slow sample migration and generate excessive heat [19]. This heat can cause band smiling, smearing, and even gel melting. Conversely, a buffer with an ionic strength that is too low reduces the overall current, leading to poor conductivity, slow runs, and reduced resolution [9] [18]. An optimal ionic strength ensures sufficient current flow for efficient migration while minimizing heat-related artifacts.
FAQ 3: Can using an old or contaminated running buffer really impact my results?
Yes, significantly. Over time and with reuse, buffers can become depleted, contaminated, or experience microbial growth [20] [18]. A depleted buffer will have altered ionic strength and pH, directly impacting band resolution and migration patterns [17] [18]. Contaminated buffers can introduce nucleases or proteases that degrade your samples, leading to smeared bands or a complete loss of signal [18]. For consistent and reliable results, it is best practice to prepare fresh running buffer regularly and to filter it if it shows any signs of contamination.
Troubleshooting Guide: Buffer-Related Issues
The following table outlines common symptoms, their buffer-related causes, and specific solutions.
| Observed Problem | Potential Buffer-Related Cause | Recommended Solution |
|---|---|---|
| "Smiling" or "frowning" bands (curved bands) [4] [17] [18] | Incorrect or depleted buffer causing uneven heat dissipation (Joule heating). | Use fresh buffer at the correct concentration; run gel at a lower voltage to reduce heat [18]. |
| Poor band resolution (bands are fuzzy or poorly separated) [17] [18] | Depleted running buffer altering pH/ionic concentration; incorrect ionic strength. | Remake running buffer with proper salt concentration; ensure it is fresh [17] [18]. |
| Very slow migration of samples [19] | Buffer ionic strength too high; buffer is old or depleted. | Prepare fresh buffer at the correct specification; check for excessive dilution [19]. |
| Very fast migration, leading to diffuse smears [17] | Running buffer is too diluted (low ionic strength). | Remake running buffer with the proper salt concentration [17]. |
| Horizontal gel melting or severe distortion | Excessive heat from high ionic strength buffer or high voltage; insufficient buffer volume. | Use correct buffer concentration; ensure gel is fully submerged with 3–5 mm of buffer covering it [4]. |
| High background in Western blot after transfer | Contaminated buffers (e.g., microbial growth in old TBS/Tween). | Prepare fresh, filtered buffers; clean trays and containers thoroughly [20]. |
Experimental Protocol: Optimizing Buffer Conditions
This protocol provides a systematic method for evaluating and optimizing your electrophoresis buffer to minimize edge effects and ensure uniform current flow.
Objective: To determine the optimal buffer concentration and running conditions for sharp, well-resolved bands across all lanes of an agarose or polyacrylamide gel.
Materials:
- Research Reagent Solutions:
- Agarose or Acrylamide/Bis-acrylamide: For gel matrix formation [21].
- 10X Running Buffer Stock (e.g., TAE, TBE, or Tris-Glycine): To be diluted to various working concentrations.
- DNA/Protein Ladder: A well-characterized size standard.
- Test Samples: Known samples of varying sizes/molecular weights.
- Staining Solution (e.g., SYBR Safe, Coomassie Blue): For visualization.
- Deionized Water: For buffer preparation.
Methodology:
- Buffer Preparation: From a single 10X stock solution, prepare three different working solutions: one at the standard concentration (e.g., 1X), one at a higher concentration (e.g., 1.2X), and one at a lower concentration (e.g., 0.8X). Filter all buffers through a 0.45 µm filter.
- Gel Casting: Pour identical gels (same percentage, thickness, and well count). Use the same batch of gel matrix to minimize variability.
- Experimental Setup: Load the same DNA ladder and test samples in the same order on each gel, ensuring all outer wells are loaded [17]. Run the gels in their respective buffers simultaneously under identical voltage conditions.
- Data Collection:
- Run Monitoring: Note the initial current reading for each tank.
- Imaging: After electrophoresis and staining, capture high-resolution images of each gel under consistent lighting.
- Analysis: Compare the gels for:
- Band Straightness: Assess the degree of smiling/frowning, particularly in peripheral lanes.
- Band Sharpness: Evaluate resolution and smearing.
- Migration Consistency: Check that the same ladder fragments migrate to identical positions across gels.
The workflow for this optimization experiment is summarized in the following diagram:
Expected Outcome: The gel run with the optimally concentrated buffer will display straight, sharp bands across all lanes with minimal lane-to-lane variation in migration distance. The buffer that is too concentrated will likely show "smiling" and slower migration, while the dilute buffer may show "frowning," fast migration, and poor resolution.
Essential Research Reagent Solutions
The following table details key reagents and their functions in ensuring uniform current flow.
| Reagent | Primary Function in Optimization | Key Consideration |
|---|---|---|
| Running Buffer (TAE/TBE/Tris-Glycine) | Carries current, maintains stable pH, crucial for uniform electric field [9] [19]. | Concentration is critical. High ionic strength causes heat; low strength causes poor resolution. Always use fresh. |
| Agarose / Polyacrylamide | Forms the porous gel matrix through which molecules separate. | Pore size affects resolution. Lower % for larger molecules, higher % for smaller molecules [4] [21]. |
| Sample Loading Buffer | Provides dye tracking and density for sample loading [9]. | Dyes can mask bands of similar size; choose dyes appropriate for your target fragment sizes [4]. |
| DNA/Protein Ladder | Provides a reference for sizing and assessing run quality. | A clear, well-resolved ladder is essential for diagnosing buffer and gel issues [4]. |
| Power Supply | Provides the electrical field for electrophoresis. | Using a constant current mode can help maintain a more uniform temperature [18]. |
Frequently Asked Questions: Edge Effect Distortion
Q1: What is the "edge effect" in gel electrophoresis?
- A1: The edge effect describes the distortion of bands in the outermost lanes (peripheral lanes) of an agarose or polyacrylamide gel. Instead of running straight, these bands may appear curved, bent, or "smiling," which can compromise the accuracy of molecular weight determination and quantitative analysis [22] [3].
Q2: What causes bands in the peripheral lanes to distort?
- A2: The primary cause is uneven distribution of electrical current and heat across the gel. When the outer lanes are left empty, the electrical current density and the resulting heat dissipation are not uniform. The gel's center typically becomes warmer than the edges, causing molecules in the warmer center to migrate faster, resulting in curved or "smiling" bands [22]. This phenomenon is more pronounced in low conductivity buffers and is field strength dependent [3].
Q3: How can I prevent the edge effect in my experiments?
- A3: The most effective and straightforward preventive measure is to avoid leaving any wells empty. If you do not have enough experimental samples to fill the gel, load the outermost lanes with a dummy sample, such as a protein ladder, a control lysate, or a sample buffer, to ensure even current flow across the entire gel [22].
Q4: Besides empty wells, what other factors can cause band distortion?
- A4: Several setup and running conditions can contribute:
- Excessive Voltage: Running the gel at too high a voltage generates excessive heat, which exacerbates temperature gradients and can cause band smiling and smearing [22].
- Improper Buffer Levels: Inadequate or uneven immersion of the gel in running buffer can create irregularities in the electric field. Always ensure the gel is properly submerged according to your apparatus manufacturer's instructions.
- Old or Improperly Prepared Buffers: Running buffers with incorrect ion concentrations can disrupt proper current flow and pH maintenance, leading to poor band resolution and potential distortions [22].
- A4: Several setup and running conditions can contribute:
Troubleshooting Guide: Peripheral Lane Distortion
The following table outlines common symptoms, their causes, and methodological solutions to ensure your apparatus contact and gel immersion are optimal.
| Symptom | Primary Cause | Experimental Protocol & Solution |
|---|---|---|
| "Smiling" bands (curved bands in outer lanes) [22] | Empty peripheral wells causing uneven heating and current density. | Load all peripheral wells. Fill unused outer lanes with a control protein/ladder or 1X sample buffer. |
| "Smiling" bands across all lanes [22] | Excessive heat generation throughout the gel during electrophoresis. | Reduce the running voltage. Run the gel at a lower voltage (e.g., 80-120V) for a longer duration. Perform electrophoresis in a cold room or use a built-in cooling apparatus. |
| Distorted bands on gel periphery with empty lanes [22] [3] | Electrical field strength distortion due to an incomplete conductive pathway. | Ensure uniform gel immersion. Verify the running buffer completely and evenly covers the gel. Check that the apparatus is properly assembled and electrodes are making full contact. |
| Fuzzy or diffuse bands [20] | Inconsistent contact between gel and buffer, or bubbles trapped at the gel interface. | Inspect and clean the apparatus. Before assembly, ensure the gaskets and glass plates are clean. After pouring the gel, carefully check for and remove any air bubbles from the well bottoms. |
| Uneven transfer and "dumbbell" bands (during Western blotting) [20] | Poor contact between gel and membrane in the transfer stack, often due to air bubbles or misalignment. | Ensure a perfectly assembled transfer stack. Use the "roll and press" method with a glass tube to exclude all air bubbles. Confirm the gel and membrane are correctly aligned and the cassette is closed securely. |
Research Reagent Solutions
The following table details key materials and reagents essential for mitigating edge effects and ensuring reproducible gel electrophoresis.
| Item | Function in Protocol |
|---|---|
| Protein Ladder/Marker | Serves as a molecular weight standard and is ideal for loading into peripheral lanes to prevent edge effect distortion. |
| Sample Buffer (1X) | A cost-effective dummy sample for loading into unused wells to maintain uniform current flow without interfering with experimental samples. |
| TBST or PBST Buffer | Used for washing steps; must be fresh and filtered to prevent particulate contamination that can cause speckled backgrounds in downstream applications like Western blotting [20]. |
| Mild Non-Abrasive Soap | Essential for cleaning the gel apparatus after each use to remove residual gel polymers and salts, ensuring consistent electrical contact for future runs [23]. |
Experimental Workflow for Preventing Edge Effects
The diagram below visualizes the logical workflow for troubleshooting and preventing edge effect distortion, emphasizing critical setup checks.
Troubleshooting Guides
FAQ: What is the edge effect and what causes it in my experiments?
The edge effect describes the consistent variability in experimental results observed in the peripheral wells of multi-well plates or the outer lanes of gels, compared to those in the center [24] [25].
In cell culture, this is primarily caused by uneven evaporation from the outer wells of a microplate, which leads to changes in medium concentration, osmolarity, and cell growth conditions [24] [26]. In SDS-PAGE and Western blotting, the edge effect manifests as distorted bands in the peripheral lanes, often due to temperature gradients and uneven electrical field distribution across the gel [25] [27].
FAQ: What specialized equipment can prevent edge effect?
Specialized equipment is designed to create a uniform physical environment for every well or lane. Key solutions include:
- Thermal Inserts and Blocks: These are specialized plate holders designed to perfectly accommodate specific plates. They ensure complete thermal transfer from the block to the entire plate, minimizing the temperature gradients that cause evaporation and edge effects. The key is that the insert must match your plate type precisely for effective heat distribution [28].
- Specialized Microplates with Evaporation Barriers: Some manufacturers offer plates with integrated design features to combat evaporation. For example, the Thermo Scientific Nunc Edge plate features a moat surrounding the outer wells. This moat can be filled with a sterile liquid (e.g., water or PBS) to create a buffer zone that humidifies the local environment and drastically reduces media evaporation from the critical outer wells during long incubations [26].
- Protective Covers and Chambers: Simple, dedicated covers that seal over the entire plate and thermal block can be highly effective. These create an individual incubation chamber that shields the plate from ambient air currents and fluctuations in humidity, thereby eliminating the primary environmental causes of edge effect [28].
FAQ: How do I correct for edge effect during data analysis in Western blotting?
Even with preventative measures, some variability may remain, which can be corrected during analysis through normalization.
- Use an Internal Loading Control: This involves using an antibody against a constitutively and stably expressed "housekeeping" protein (e.g., Actin, GAPDH, Tubulin) loaded in all lanes. The signal from your target protein is then normalized to the signal from this loading control for each lane. This corrects for variations in protein loading, transfer efficiency, and edge effect [29] [30].
- Validate Your Loading Control: It is critical to ensure that your chosen housekeeping protein is not affected by your experimental conditions. Many common loading controls can change expression under various treatments, so validation is essential for accurate normalization [29] [30].
- Total Protein Normalization: A more advanced method is to normalize the target protein signal to the total protein loaded in each lane, using a stain like Revert 700. This method does not rely on a single protein and can provide a more robust baseline for comparison, effectively correcting for transfer variation and edge effects [29].
Key Reagent Solutions
The following table summarizes key reagents and materials used to mitigate edge effect.
Table 1: Research Reagent Solutions for Edge Effect Mitigation
| Item | Function in Mitigation | Key Considerations |
|---|---|---|
| Thermal Insert | Ensures even heat distribution to the entire plate, minimizing thermal gradients [28]. | Must be perfectly matched to the plate type for effective thermal transfer [28]. |
| Specialized Moat Plates | The surrounding moat acts as a reservoir for sterile liquid, creating a humidified buffer zone against evaporation [26]. | Ideal for long-term cell culture assays. |
| Sterile Water/PBS | An inert liquid used to fill empty outer wells or plate moats to maintain local humidity [24] [26]. | More cost-effective than using culture media for this purpose [24]. |
| Glycerol | Adding 10-15% (v/v) glycerol to the sample-well gel in SDS-PAGE can eliminate protein band "edge tailing" [31]. | Makes protein bands sharp and straight in Weber-Osborn-type SDS-PAGE [31]. |
| Housekeeping Protein Antibodies | Essential for detection of loading controls (e.g., Actin, GAPDH) used to normalize data and correct for lane-to-lane variability [29] [30]. | Must be validated to ensure stable expression under your specific experimental conditions [29]. |
Experimental Protocols
Detailed Protocol: Mitigating Edge Effect in Cell Culture Plates
This protocol outlines the use of a specialized moat plate to achieve uniform cell growth conditions.
Objective: To minimize evaporation-induced edge effect in a 96-well plate during a 72-hour cell culture assay.
Materials:
- Nunc Edge 96-Well Plate (or equivalent specialized plate with evaporation barrier) [26]
- Sterile, deionized water
- Multichannel pipette and sterile reservoirs
- Cell suspension and culture media
- CO₂ incubator (humidity maintained at ≥95%)
Method:
- Plate Preparation: Aseptically fill the peripheral moat of the plate with approximately 5 mL of sterile water using a multichannel pipette and reservoir. Take care not to spill into the inner experimental wells.
- Cell Seeding: Seed your cells into the inner wells of the plate according to your experimental design. The outermost wells can be used for experimental samples or filled with PBS if desired.
- Incubation: Carefully place the prepared plate into the CO₂ incubator. To further stabilize the environment, minimize the number of times the incubator door is opened during the culture period [26].
- Analysis: Proceed with your assay. The uniform volume and concentration in all wells, resulting from prevented evaporation, will lead to more consistent and reliable data.
This workflow leverages specialized equipment to create a stable microenvironment, as shown in the following diagram.
Detailed Protocol: Correcting for Edge Effect in Western Blot Analysis
This protocol describes how to use a loading control to normalize for lane-to-lane variability during data analysis.
Objective: To normalize target protein signal to correct for uneven transfer and edge effect in Western blotting.
Materials:
- Membrane with transferred proteins
- Primary antibody for your target protein
- Validated primary antibody for a housekeeping protein (Loading Control)
- Appropriate secondary antibodies
- Blocking buffer (e.g., 5% BSA in TBST)
- Detection reagents and imaging system
Method:
- Blocking and Incubation: After transfer, block the membrane following standard protocols. Incubate the membrane with a cocktail of primary antibodies containing both your target-specific antibody and the loading control antibody. Ensure the loading control is a different molecular weight than your target [30].
- Detection: Incubate with appropriate secondary antibodies and detect using your imaging system. The loading control should be visible in every lane.
- Quantification and Normalization:
- Use imaging software to quantify the band intensity for both your target protein and the loading control in each lane.
- For each lane, calculate the normalized target signal using the formula:
Normalized Target = (Intensity of Target Band) / (Intensity of Loading Control Band)[29]. - Use these normalized values for all subsequent statistical analysis and comparisons between lanes. This corrects for variations in loading, transfer efficiency, and binding due to edge effect [29] [30].
The logical process for selecting and using a loading control is outlined below.
Troubleshooting Persistent Distortions: From Simple Fixes to Advanced Optimization
Edge effect distortion is a common issue in SDS-PAGE (Sodium Dodecyl Sulfate–Polyacrylamide Gel Electrophoresis) where the protein bands in the outermost lanes (left and right periphery) of the gel appear distorted or curved compared to the straight, well-resolved bands in the central lanes [8]. This phenomenon occurs when the empty wells at the periphery of the gel create an uneven electric field, causing proteins in the edge lanes to migrate at a different speed and in a distorted pattern [8]. For researchers and scientists in drug development, this distortion can compromise the accuracy of molecular weight determination, quantitation, and the analysis of protein expression or purity.
This guide provides a systematic method to diagnose and resolve this specific issue.
Diagnostic Flowchart
The following flowchart provides a step-by-step method for identifying the cause of distortion in your gel. The subsequent sections of this guide contain the detailed questions, answers, and experimental protocols referenced in the flowchart.
Frequently Asked Questions (FAQs) & Troubleshooting
Q1: What is the "edge effect" and how does it cause distortion in my gel? The edge effect occurs when the outermost wells on the left and right sides of the gel cassette are left empty [8]. This creates an uneven electrical field across the gel during electrophoresis. The current density is higher through the central, sample-filled lanes compared to the empty peripheral lanes. This imbalance causes the samples in the lanes adjacent to the empty wells to migrate faster and in a curved or distorted pattern, a phenomenon directly linked to the edge effect [8].
Q2: My entire gel shows curved bands, not just the edges. What does this indicate? If all bands across the gel have a curved "smiling" appearance, the most likely cause is excessive heat generation during the run [8]. Running the gel at too high a voltage causes the gel to warm up, which can lead to uneven expansion and faster migration in the center of the gel, curving all bands upwards. This is distinct from the edge effect, which specifically affects the peripheral lanes.
Q3: How can I confirm if my running buffer is causing issues? Improperly prepared running buffer can lead to poor band resolution and unusual migration patterns across all lanes [8]. The ions in the running buffer are crucial for conducting current. An incorrect salt concentration or pH will disrupt the current flow and pH stability, leading to suboptimal protein separation [8]. To confirm, a good practice is to remake the running buffer fresh according to the standard protocol (e.g., for Tris-Glycine-SDS buffer) and compare the results from a new gel run.
Experimental Protocols for Diagnosis and Validation
Protocol 1: Eliminating the Edge Effect This is the primary corrective action for distortion isolated to the peripheral lanes.
- Gel Loading Strategy: When loading your gel, make a conscious effort not to leave any well empty [8].
- Sample Preparation: If you have fewer samples than available wells, load your protein ladder in the outermost wells on both the left and right sides. Alternatively, load a control protein sample, buffer, or loading dye mixed with a non-reactive protein (like Bovine Serum Albumin) into any remaining empty wells [8].
- Execution: Run the gel as usual. This simple step ensures a uniform electric field across the entire gel, which should resolve the distortion in the peripheral lanes.
Protocol 2: Optimizing Running Conditions to Prevent Heat Distortion This protocol addresses smiling bands across the entire gel.
- Voltage Adjustment: A standard practice is to run mini-gels at a constant voltage of around 150V [8]. If you observe smiling, reduce the voltage to 100-120V. While this will increase the total run time, it significantly reduces heat generation.
- Temperature Control: Run the gel in a cold room (4°C) or use a gel apparatus with a cooling core. Alternatively, you can place the entire gel tank in an ice bath during the run [8].
- Validation: Compare the band shape from a gel run with optimized, cooler conditions to one run at a higher voltage. The bands should be straighter.
Protocol 3: Verifying Running Buffer Integrity This protocol systematically tests if the running buffer is the source of poor resolution.
- Buffer Preparation: Prepare a fresh batch of running buffer from scratch. For a standard Tris-Glycine-SDS buffer, this involves dissolving Tris base, Glycine, and SDS in deionized water to the correct molarity and pH. Ensure all components are fully dissolved.
- Comparative Run: Pour the fresh buffer into the electrophoresis chamber. Run one gel with the fresh buffer and, if possible, a duplicate gel with the old buffer, using the same protein samples and ladder.
- Analysis: Compare the two gels. Improved band sharpness and resolution in the fresh buffer gel indicate that the previous buffer had degraded or was improperly made [8].
Research Reagent Solutions
The table below lists key materials and their specific functions in the context of preventing and diagnosing gel distortion.
| Reagent/Material | Function & Rationale |
|---|---|
| Protein Ladder/Standard | Loaded into empty peripheral wells to prevent the edge effect by ensuring all wells are filled, creating a uniform electrical field [8]. |
| Control Protein Sample (e.g., BSA) | An alternative to the ladder for filling empty wells; provides a known protein band pattern for comparison. |
| Tris-Glycine-SDS Running Buffer | Conducts electric current and maintains optimal pH for protein separation; fresh, properly prepared buffer is critical for sharp band resolution [8]. |
| Pre-cast or Hand-cast Polyacrylamide Gels | The matrix for protein separation; ensuring consistent gel polymerization and concentration is key to even migration. |
| Power Supply | Provides the constant voltage needed for electrophoresis; running at a moderate, consistent voltage (e.g., 100-150V) prevents heat-induced distortion [8]. |
| Cooling Apparatus (Cold Room/Ice Bath) | Dissipates heat generated during electrophoresis, preventing the "smiling" effect caused by gel warming and expansion [8]. |
Frequently Asked Questions (FAQs)
Q1: What is the "smiling effect" in gel electrophoresis and what causes it? The "smiling effect" describes a phenomenon where DNA or protein bands in the center lanes of a gel migrate faster than those in the peripheral lanes, forming a curved, crescent, or smiling shape [32] [33]. This is primarily caused by uneven heating across the gel, usually resulting from running the gel at too high a voltage. The uneven temperature distribution causes differential migration rates, with the warmer center lanes migrating faster [32].
Q2: How does temperature specifically affect protein separation in native gels? Temperature has a pronounced effect on the separation of native proteins. In traditional polyacrylamide gels, heat can cause band smearing and reduced resolution [34]. However, when using advanced matrices like Pluronic thermal gels, temperature can be used as a tunable parameter to control gel viscosity and pore size. This allows for dynamic control over the separation, enabling higher resolution for native proteins by adjusting the temperature to optimize the matrix properties for specific protein sizes [35] [34].
Q3: What is the "edge effect" and how is it related to heat gradients? The "edge effect" occurs when the right and leftmost lanes of a gel are distorted, often showing band bending or different migration patterns compared to central lanes [33]. This distortion is directly related to heat dissipation patterns across the gel. Lanes at the periphery can experience different temperatures than those in the center due to heat transfer to the surrounding apparatus and buffer. This creates a thermal gradient across the gel width, leading to inconsistent migration rates between peripheral and central lanes [3].
Q4: Can the buffer type and concentration influence heat-related distortions? Yes, the buffer composition significantly impacts heat-related effects. The ionic strength of the buffer influences how much current—and consequently heat—is generated during the run [19]. Low conductivity buffers have been specifically associated with pronounced outward lane distortions in both continuous buffer systems and stacking gels, and this effect is field-strength dependent [3]. Proper buffer selection and preparation are therefore critical for minimizing heat-induced artifacts.
Troubleshooting Guide: Heat-Related Artifacts
The following table summarizes common issues, their causes, and specific solutions related to voltage, temperature, and edge effect control.
| Observed Problem | Primary Cause | Recommended Solutions |
|---|---|---|
| "Smiling" Bands (curved bands) [32] [33] | Uneven heating from excessive voltage [32] [33]. | • Reduce the run voltage.• Use a cooling apparatus (cold room or circulating chillers) [33].• Run the gel at a lower voltage for a longer duration [33]. |
| "Edge Effect" (distorted peripheral lanes) [33] [3] | Empty peripheral wells and lateral heat gradients [33]. | • Avoid empty wells on gel edges [33].• Load samples, ladder, or dummy protein (e.g., BSA) in all peripheral lanes [33].• Ensure proper buffer conductivity to minimize inherent distortions [3]. |
| Smeared Bands (poor resolution) [33] [34] | Excessive heat denatures proteins or causes band diffusion [33]. In native PAGE, heat can disrupt protein structure [34]. | • Optimize voltage (10-15 V/cm is a common starting point) [33].• For native proteins, consider temperature-responsive gels (e.g., Pluronic F-127) for better heat management [34].• Confirm running buffer concentration is correct [33]. |
| Gel Collapse or Inward Lane Deviations [3] | Extreme temperature sensitivity from low catalyst (e.g., APS) concentration, leading to phase segregation [3]. | • Increase ammonium persulfate (APS) concentration during gel polymerization (e.g., above 0.03%) [3].• Avoid running gels at critically low temperatures where phase segregation occurs [3]. |
Experimental Protocols for Minimizing Heat Gradients
Protocol 1: Standard Optimization for Agarose or SDS-PAGE Gels
This protocol outlines standard practices for minimizing heat gradients in conventional agarose and polyacrylamide gel electrophoresis.
Materials:
- Gel electrophoresis apparatus
- Power supply
- Pre-cast or hand-cast gel
- Running buffer (TAE, TBE, or Laemmli buffer)
- Cooling method: chilled water circulator, gel cooler, or access to a cold room
Method:
- Voltage Calibration: Calculate the optimal voltage based on gel size. A general guideline is 8-10 V/cm of gel length (measured between electrodes). For a mini-gel (8 cm length), this translates to ~80 V [32] [33].
- Apparatus Setup: Ensure the gel tank is on a level surface. Fill the tank with running buffer so the gel is submerged under 3-5 mm of buffer. Insufficient buffer can lead to overheating and band distortion [32].
- Temperature Control:
- Option A (Active Cooling): Connect the gel apparatus to a recirculating chiller set to 4-10°C if available.
- Option B (Passive Cooling): Perform the run in a 4°C cold room.
- Option C (Internal Cooling): If no cold room is available, the buffer tank can be packed with ice packs around the central chamber, ensuring no direct contact with the gel cassette [33].
- Lane Loading: Load protein or DNA samples into wells. Load control samples (e.g., ladder) or dummy samples into peripheral wells to prevent the edge effect [33].
- Electrophoresis: Start the run at the predetermined, optimized voltage. Monitor the run, and if smiling is observed, pause and further reduce the voltage.
Protocol 2: Advanced Method Using Thermal Gel Electrophoresis
This protocol utilizes Pluronic thermal gels, whose viscosity can be dynamically controlled with temperature, offering a novel approach to managing heat and improving resolution [35] [34].
Materials:
- Pluronic F-127 (PF-127): A thermal gel polymer (e.g., from Millipore Sigma) [34].
- Microfluidic device or standard gel cassette.
- Programmable temperature control stage or incubator.
- Standard electrophoresis power supply and buffers.
Method:
- Gel Preparation: Prepare the thermal gel solution by dissolving PF-127 in the appropriate aqueous buffer (e.g., Tris-HCl) at a cold temperature (e.g., 5°C) where it exists as a low-viscosity liquid [34]. A common working concentration is 15-30% (w/v) [34].
- Loading: Load the liquid thermal gel into the separation chamber (microfluidic device or cassette) while cold.
- Temperature-Programmed Separation:
- Begin the separation at a lower temperature (e.g., 10°C) where the gel has lower viscosity.
- Apply a temperature gradient during the run (e.g., from 10°C to 25°C). The increasing temperature causes the polymer to form a more viscous gel with different sieving properties [35] [34].
- This dynamic control allows for the optimization of separation resolution in real-time, counteracting the negative effects of Joule heating by turning temperature into a useful parameter.
- Analysis: Proteins or nucleic acids are detected as they separate. This method has been shown to provide two-fold higher resolution for native proteins compared to standard PAGE, with five-fold faster analysis times [34].
Visual Guide: Troubleshooting Heat and Voltage Issues
The diagram below maps the decision-making process for diagnosing and resolving common heat-related gel issues.
Research Reagent Solutions
The following table lists key reagents and materials essential for experiments focused on mitigating heat gradients and edge effects.
| Reagent/Material | Function/Application | Key Considerations |
|---|---|---|
| Pluronic F-127 (PF-127) [35] [34] | A temperature-responsive thermal gel used as a smart separation matrix. | Enables dynamic control of viscosity and pore size with temperature, allowing optimized resolution and management of heat effects [35]. |
| Low EEO Agarose [13] | A high-purity agarose with low electroendosmosis (EEO) for nucleic acid gels. | Minimizes reverse flow of buffer, which reduces heat-related artifacts and improves resolution, especially for large DNA fragments [13]. |
| TEMED & APS (Catalysts) [13] [3] | Polymerization initiators for polyacrylamide gels. | Concentration is critical; low APS concentration (<0.03%) can cause gel collapse and inward lane deviations at low running temperatures [3]. |
| Tris-Glycine & Tris-Acetate Buffers [32] [34] | Common running buffers for protein (SDS-PAGE) and DNA gels. | Buffer ionic strength and type (e.g., Tris-Acetate for large DNA fragments) influence current and heat generation. Use the correct concentration [32] [33]. |
| Recirculating Chiller [33] | Active cooling system for the gel apparatus. | Provides precise temperature control throughout the run, effectively eliminating thermal gradients that cause smiling and smearing [33]. |
This technical support guide addresses two critical factors affecting gel electrophoresis reliability: catalyst concentration and gel aging. Within the broader research on edge effect distortion in peripheral gel lanes, understanding and controlling these variables is essential for obtaining reproducible, high-quality data in drug development and scientific research. The following troubleshooting guides and FAQs provide targeted solutions for common experimental challenges.
Troubleshooting Guide: Catalyst Concentration and Gel Aging
Table 1: Troubleshooting Gel Polymerization and Integrity Issues
| Problem Observed | Potential Cause | Troubleshooting Solution | Related Issue |
|---|---|---|---|
| Lanes with inward deviations and faint bands in retracted zones [3] | Decreased ammonium persulfate (APS) concentration, potentially leading to phase segregation [3]. | Optimize APS concentration; a concentration as low as 0.03% has been linked to issues, especially at low run temperatures [3]. | Gel collapse can exacerbate lane distortions, including edge effects [3]. |
| Bands not separating properly; smeared or blurry appearance [36] | Acrylamide concentration in the resolving gel is incorrect [36]. | Optimize acrylamide percentage for your target protein size; use a lower percentage for high molecular weight proteins [36]. | Poor resolution affects all lanes, making edge effect analysis difficult. |
| Protein samples leaking from wells [36] | Wells damaged during comb removal or due to using an old gel [36]. | Remove comb after placing the gel in the running chamber filled with buffer. Use fresh gels and handle with care [36]. | Well damage can cause sample leakage between adjacent lanes, distorting peripheral lanes. |
| "Smiling" or "frowning" bands (uneven migration) [18] | Uneven heat distribution (Joule heating) across the gel during electrophoresis [18]. | Run the gel at a lower voltage, use a cooling system (cold room or ice packs), or use a power supply with constant current mode [18]. | Edge effects are a specific form of distortion often linked to uneven electrical and thermal fields [37]. |
| Bands in peripheral lanes are distorted (Edge Effect) [37] | Empty wells at the periphery of the gel altering the electric field [37]. | Load protein or ladder into all empty wells to create a uniform buffer and current flow across the entire gel [37]. | Directly addresses the edge effect in peripheral lanes. |
Table 2: Effects of Gel Aging and Storage
| Issue | Consequence | Preventive Measure |
|---|---|---|
| Gel Hydrolysis/Aging [3] | Can contribute to inwardly distorted lane patterns and general gel degradation [3]. | Use freshly cast gels for critical experiments. Store polymerized gels appropriately (e.g., hydrated and refrigerated) for short periods only. |
| Sample Leakage [36] | Use of old gels can lead to compromised well integrity, causing samples to leak [36]. | Avoid using precast gels that are near or beyond their expiration date [36]. |
Experimental Protocols for Key Investigations
Protocol 1: Optimizing Ammonium Persulfate (APS) Concentration
Objective: To determine the optimal APS concentration that ensures complete polymerization without causing gel collapse or lane distortions, particularly at lower running temperatures.
Methodology:
- Gel Casting: Prepare a series of standard SDS-PAGE resolving gel solutions (e.g., 10% acrylamide) while varying the APS concentration (e.g., 0.01%, 0.03%, 0.05%, 0.1%).
- Polymerization: Add a constant volume of TEMED to each solution, pour the gels, and top with isopropanol. Allow to polymerize completely [36].
- Electrophoresis: Cast stacking gels uniformly. Load identical protein ladders and samples into all wells. Run the gels at a standard voltage (e.g., 150V) under a controlled, cool temperature (e.g., 4°C or as per [3]).
- Analysis: Visualize the protein bands. Examine the gels for signs of phase segregation, such as inward lane deviations, faint bands in retracted zones, or general band distortion [3].
Protocol 2: Investigating the Edge Effect with Filled vs. Empty Peripheral Wells
Objective: To empirically demonstrate the impact of empty peripheral wells on lane distortion and validate the solution of loading all wells.
Methodology:
- Gel Preparation: Cast two identical SDS-PAGE gels.
- Sample Loading:
- Gel A (Control): Load protein samples or ladder into every well of the gel.
- Gel B (Test): Load protein samples only in the central wells, leaving the outermost left and right wells empty [37].
- Electrophoresis: Run both gels simultaneously under identical conditions (same voltage, buffer, and time).
- Analysis: Compare the band migration in the lanes adjacent to the empty wells in Gel B to the corresponding lanes in Gel A. Look for distortions such as smiling, frowning, or smearing specifically in the peripheral lanes of Gel B [37].
Frequently Asked Questions (FAQs)
Q1: How does the concentration of ammonium persulfate (APS) actually affect my gel? APS, along with TEMED, is a catalyst that initiates the polymerization reaction between acrylamide and bisacrylamide. An excessively low APS concentration can lead to incomplete or weak polymerization, making the gel prone to collapse or phase separation, especially under the thermal stresses of electrophoresis. This can manifest as inward-curving lanes and faint bands [3]. Conversely, very high concentrations are unnecessary and may lead to overly rigid gels.
Q2: My gel ran perfectly a week ago, but today the bands are distorted. Why? This is a classic sign of gel aging. Over time, polyacrylamide gels can undergo hydrolysis, which breaks down the polymer network. This degradation alters the gel's pore structure and mechanical integrity, leading to increased fragility and distorted migration patterns during electrophoresis [3]. For reproducible results, it is always best to use freshly cast gels.
Q3: What is the "edge effect" and how is it related to my gel's polymerization quality? The edge effect is the distortion of bands in the outermost lanes of a gel, often caused by an uneven electric field. This occurs when peripheral wells are left empty, changing the local buffer conductivity and heat dissipation compared to the gel's center [18] [37]. While polymerization quality is a separate issue, a poorly polymerized gel may be more susceptible to all forms of distortion, including the edge effect. Ensuring complete, even polymerization is a foundational step for a high-quality run.
Q4: I've optimized my catalyst and loaded all wells, but I still see smiling bands. What else should I check? "Smiling" bands, where bands curve upward at the edges, are primarily caused by uneven heating across the gel, with the center being hotter than the edges [18] [37]. After addressing gel polymerization and well loading, focus on temperature control:
- Reduce the voltage to minimize Joule heating.
- Use a cooling apparatus. Run the gel in a cold room or use an integrated cooling unit in your electrophoresis tank.
- Ensure your running buffer is fresh and at the correct concentration [18].
Research Reagent Solutions
Table 3: Essential Materials for Gel Polymerization and Electrophoresis
| Reagent/Material | Function | Technical Considerations |
|---|---|---|
| Ammonium Persulfate (APS) | Catalyst that generates free radicals to initiate acrylamide polymerization. | Prepare fresh solutions for consistent results. Concentration must be optimized to prevent gel collapse [3]. |
| TEMED | Co-catalyst that accelerates the polymerization reaction by stabilizing free radicals. | The rate of polymerization is dependent on TEMED concentration. Use a consistent amount. |
| Acrylamide/Bis-acrylamide | Monomer and crosslinker that form the porous gel matrix for sieving molecules. | Concentration determines pore size. Adjust percentage based on target protein size for optimal resolution [36]. |
| Isopropanol | Used to overlay the resolving gel during polymerization to ensure a flat, uniform interface. | Creates an oxygen-free, even surface that prevents meniscus formation and ensures a straight gel top [36]. |
| Tris-Glycine-SDS Running Buffer | Provides ions to carry current and maintains pH for proper protein charge and migration. | Must be prepared correctly; incorrect ion concentration/pH leads to poor resolution and band artifacts [37]. |
Workflow and Relationship Diagrams
This protocol is framed within the context of a broader thesis on addressing edge effect distortion in peripheral gel lanes. Edge effect is a common phenomenon in gel electrophoresis where the bands in the outermost lanes of a gel appear distorted compared to those in the center lanes, compromising data integrity and quantification [38]. This distortion occurs due to uneven heat distribution and electric field strength across the gel, particularly affecting lanes at the periphery [18]. The following integrated protocol provides a standardized approach to prevent this issue and ensure consistent, high-quality results across all gel lanes, which is crucial for reproducible research and reliable drug development applications.
Troubleshooting Guides and FAQs
Troubleshooting Common Gel Electrophoresis Issues
Table: Troubleshooting common gel electrophoresis problems
| Problem | Possible Causes | Recommended Solutions |
|---|---|---|
| Edge Effect Distortion | Empty peripheral wells; uneven heat distribution; non-uniform electric field [18] [38] | Load all wells, including peripherals, with samples or control proteins; ensure even buffer levels; use constant current power supply [38] |
| Smeared Bands | Sample degradation; excessive voltage; incorrect gel concentration; high salt concentration in sample [6] [18] | Use nuclease-free reagents; lower voltage; select appropriate gel percentage; desalt samples before loading [6] |
| Poor Band Resolution | Incorrect gel percentage; sample overloading; incorrect run time; voltage too high [6] [18] | Optimize gel concentration for target size range; reduce sample amount; adjust run time; lower voltage for longer duration [6] |
| Faint or Absent Bands | Low sample quantity; sample degradation; incorrect staining; electrophoresis setup errors [6] [18] | Load 0.1–0.2 μg of DNA/RNA per mm well width; ensure proper sample handling; optimize staining; verify power connections [6] |
| "Smiling" or "Frowning" Bands | Uneven heat dissipation (Joule heating); incorrect buffer concentration; high salt in samples [18] | Reduce voltage; use constant current power supply; ensure fresh buffer; desalt samples [18] |
Frequently Asked Questions (FAQs)
Why are the bands in my outermost lanes distorted while the center lanes appear normal? This "edge effect" is typically caused by uneven heating across the gel and empty peripheral wells. The center of the gel becomes hotter than the edges during electrophoresis, causing differential migration rates. Additionally, empty wells at the edges can create an irregular electric field. To resolve this, load all wells with samples or control proteins and consider running the gel at a lower voltage or using a cooling apparatus [38].
How can I prevent smearing in my protein or nucleic acid gels? Smearing indicates sample degradation or suboptimal running conditions. For proteins, ensure complete denaturation and use fresh reducing agents. For nucleic acids, use nuclease-free reagents and labware. In both cases, avoid running gels at excessively high voltages, which can cause overheating and band diffusion. Also, verify that your gel percentage is appropriate for the size of your target molecules [6] [18].
What is the most critical factor for achieving sharp, well-resolved bands? The gel concentration is paramount as it determines the sieving properties and resolution for your specific target molecules. Use lower percentage gels for larger molecules and higher percentages for smaller molecules. Additionally, avoid overloading wells and ensure optimal run time and voltage [18].
My gel appears blank after staining, with no visible bands, even in the ladder. What should I check first? This typically indicates a problem with the electrophoresis setup rather than the samples. First, verify that the power supply was correctly connected and functioning during the run. Check that the electrodes were properly oriented (negative electrode at the well side for nucleic acids) and that there was no short circuit. If using pre-stained markers, confirm they have not deteriorated [6] [18].
Standard Operating Procedure for Flawless Gels
Materials and Reagent Solutions
Table: Essential research reagents for gel electrophoresis
| Reagent/Material | Function/Purpose |
|---|---|
| Agarose or Polyacrylamide | Forms the porous matrix that separates molecules based on size. |
| Electrophoresis Buffer (e.g., TAE, TBE, or SDS-PAGE buffer) | Conducts current and maintains stable pH during electrophoresis. |
| Loading Dye | Provides density for well loading and visual tracking of migration progress. |
| DNA/RNA Protein Ladder | Provides molecular weight standards for sizing unknown samples. |
| Staining Solution (e.g., Ethidium Bromide, SYBR Safe, Coomassie) | Enables visualization of separated molecules. |
| Gel Combs | Creates wells in the gel for sample loading. |
Step-by-Step Protocol to Minimize Edge Effects
Step 1: Gel Preparation and Casting
- Prepare agarose or polyacrylamide gel at the appropriate percentage for your target molecules. For nucleic acids >1000 bp, use 0.8-1.2% agarose; for smaller fragments, use higher percentages (1.5-3.0%). For proteins, use polyacrylamide gels with percentages tailored to protein size [6].
- Use a clean, level casting tray. Ensure the comb is clean and properly positioned—do not push it all the way to the bottom of the gel, as this can cause sample leakage [6].
- Allow sufficient time for complete polymerization (for polyacrylamide) or solidification (for agarose) before removing the comb.
Step 2: Sample Preparation
- For DNA/RNA samples, mix with an appropriate loading dye. Ensure sample concentration is within the detectable range (typically 0.1-50 ng/μL for DNA, depending on the assay) [39].
- For proteins, denature samples completely in loading buffer containing SDS and reducing agents [38].
- For all sample types, avoid high salt concentrations, which can cause band distortion and smearing [6] [39].
Step 3: Gel Loading (Critical for Edge Effect Prevention)
- CRITICAL STEP: Load all wells across the entire gel, including the outermost lanes. If you have fewer samples than wells, load molecular weight ladders, control samples, or loading dye buffer in the empty peripheral wells [38].
- Load consistent sample volumes across wells to ensure even migration.
- Avoid introducing air bubbles into wells during loading.
Step 4: Electrophoresis Run Conditions
- Submerge the gel completely in running buffer, ensuring even buffer levels across the entire gel.
- Apply appropriate voltage: typically 5-15 V/cm for agarose DNA gels. Higher voltages generate more heat, exacerbating edge effects [18].
- Use constant current mode if available, as it helps maintain a more uniform temperature [18].
- For extended runs (>2 hours), use a buffer with high buffering capacity and consider buffer recirculation [6].
- Monitor gel temperature during runs. If necessary, run in a cold room or use a cooling apparatus to minimize heat-related distortion.
Step 5: Visualization and Analysis
- After electrophoresis, stain and visualize the gel according to standard protocols for your application.
- When analyzing results, compare band migration patterns across all lanes, noting any consistent anomalies in peripheral lanes that might indicate residual edge effects.
Diagram: Experimental workflow for preventing edge effect distortion. The pathway highlights critical steps specifically addressing edge effect prevention throughout the standard gel electrophoresis process.
This integrated protocol provides a standardized approach for achieving consistent, high-quality gel electrophoresis results by specifically addressing the challenge of edge effect distortion. By implementing these detailed methodologies—particularly the critical step of loading all peripheral wells and controlling run conditions—researchers can significantly improve data reliability across all gel lanes. This procedure establishes a foundation for reproducible research essential for both basic scientific investigation and drug development applications.
Validating Your Results: Traditional and AI-Powered Analysis of Gel Uniformity
FAQs: Understanding Edge Effect Distortion
Q1: What is edge effect distortion in gel electrophoresis? Edge effect distortion is a phenomenon where the bands in the outermost lanes (peripheral lanes) of a gel become distorted compared to those in the center lanes. This is often due to uneven electrical field distribution and heat dissipation across the gel, particularly when the outermost wells are left empty [40].
Q2: What are the primary causes of edge effect distortion? The main cause is leaving the peripheral wells empty, which alters the path of the electric current and leads to uneven heating and field strength at the edges of the gel [40] [3]. This can be exacerbated by high voltage, which generates excessive heat, and by variations in gel polymerization [3].
Q3: What is the most straightforward way to prevent edge effect distortion? The most effective and simple mitigation strategy is to avoid leaving any wells empty. If you do not have enough experimental samples to fill the gel, load the outermost wells with a protein ladder, a control sample, or a dummy loading buffer to ensure a uniform electric field across all lanes [40].
Q4: Can adjustments to running conditions help minimize distortion? Yes, running the gel at a lower voltage for a longer duration helps minimize heat generation, which is a key contributor to the "smiling" effect and lane distortion. Using a cold room or a cooling apparatus can further mitigate heat-related issues [40] [4].
Q5: Are some gel types more prone to edge effects? Yes, factors like gel composition can influence distortion. For instance, using a lower concentration of ammonium persulfate (APS) catalyst during polyacrylamide gel polymerization can, under certain conditions like low temperature, lead to phase segregation and inward lane deviations [3].
Troubleshooting Guide: Edge Effect and Associated Issues
Problem: Distorted Bands in Peripheral Lanes (Edge Effect)
- Observed Problem: The bands in the leftmost and rightmost lanes are curved or distorted, while central lanes appear normal [40].
- Possible Cause: Empty wells at the periphery of the gel leading to an uneven electrical field [40].
- Solution:
Problem: "Smiling" Bands Across the Entire Gel
- Observed Problem: Bands curve upwards, forming a crescent or "smiling" shape [40] [4].
- Possible Cause: Excessive heat generation during electrophoresis, often from running at too high a voltage [40] [4].
- Solution:
Problem: Poor Band Resolution or Improper Separation
- Observed Problem: Bands are blurry, broad, or poorly resolved [40] [6].
- Possible Causes and Solutions:
- Short Run Time: Ensure the gel is run long enough for the dye front to approach the bottom [40].
- Incorrect Gel Concentration: Use a lower acrylamide percentage, especially for high molecular weight proteins [40] [41].
- Improper Running Buffer: Remake the running buffer to ensure correct ion concentration and pH [40].
Experimental Protocol: Benchmarking Mitigation Strategies for Edge Effect
This protocol outlines a controlled experiment to systematically compare the effectiveness of different strategies in mitigating edge effect distortion.
Materials and Reagents
- Protein Sample: A standardized protein or cell lysate preparation.
- Molecular Weight Marker.
- SDS-PAGE Gels: Pre-cast or hand-cast gels of identical percentage (e.g., 10% or 12%).
- SDS-PAGE Running Buffer: Tris-Glycine-SDS.
- Sample Loading Buffer: Laemmli buffer.
- Equipment: Gel electrophoresis unit, power supply.
Experimental Setup and Procedure
- Sample Preparation: Prepare identical aliquots of your protein sample mixed with loading buffer.
- Gel Loading - Strategy Comparison: Load the same amount of sample into the central 6-8 lanes of all gels. Then, apply the different mitigation strategies to the peripheral wells as follows:
- Gel A (Control for Edge Effect): Leave the outermost wells on both the left and right empty.
- Gel B (Loaded Edges): Load the outermost wells with the same protein sample used in the center lanes.
- Gel C (Ladder Edges): Load the outermost wells with a molecular weight marker.
- Gel D (Buffer Edges): Load the outermost wells with 1x sample loading buffer.
- Electrophoresis: Run all gels simultaneously under identical conditions. To also test a heat-mitigation strategy, you can run one set of gels (A-D) at a standard voltage (e.g., 150V) and a duplicate set at a lower voltage (e.g., 100V).
- Staining and Imaging: After electrophoresis, stain the gels (e.g., with Coomassie Blue) using a standardized protocol and capture high-resolution images under consistent lighting.
Data Analysis and Benchmarking
- Qualitative Analysis: Visually inspect the gels for band straightness and distortion in the central versus peripheral lanes for each strategy.
- Quantitative Analysis: Use gel analysis software to measure band intensities and shapes. Key metrics could include:
- Band Curvature: Quantify the deviation from a straight line.
- Band Sharpness: Measure the full width at half maximum (FWHM) of bands in different lanes.
The workflow for this controlled experiment is summarized in the diagram below:
The following table summarizes the expected outcomes of the different strategies based on established principles.
Table 1: Benchmarking Matrix for Edge Effect Mitigation Strategies
| Mitigation Strategy | Ease of Implementation | Expected Impact on Band Straightness | Potential Drawbacks |
|---|---|---|---|
| Loaded Edges (Sample) | High | High | Consumes additional sample. |
| Ladder Edges | High | High | Consumes ladder; may not be suitable if ladder is limited. |
| Buffer Edges | High | Moderate to High | Minimal resource usage; highly practical. |
| Reduced Voltage | Moderate | High (for heat reduction) | Increases run time significantly. |
| Active Cooling | Low | High | Requires specialized equipment (cold room, cooler). |
Research Reagent Solutions
Table 2: Essential Materials for Edge Effect Experiments
| Item | Function | Example/Note |
|---|---|---|
| Acrylamide/Bis-acrylamide | Forms the porous gel matrix for size-based separation. | Use consistent batches for reproducibility [41]. |
| Tris-Glycine-SDS Running Buffer | Maintains pH and provides ions for current conduction; SDS keeps proteins denatured. | Prepare fresh or reuse 1-2 times at most [40] [42]. |
| Protein Molecular Weight Marker | Allows estimation of protein size and assessment of band migration. | Load in peripheral wells as a mitigation strategy [40]. |
| Sample Loading Buffer (Laemmli) | Provides dye to track migration and glycerol to help sample sink into wells. | Can be used to fill empty wells [40] [4]. |
| Ammonium Persulfate (APS) & TEMED | Catalyze the polymerization of acrylamide. | Concentration should be controlled to avoid gel artifacts [3]. |
In molecular biology and drug development research, gel electrophoresis remains a fundamental analytical technique for separating nucleic acids and proteins. The integrity of experimental data hinges heavily on the quality of the electrophoretic run, which researchers traditionally assess through two primary visual metrics: the migration pattern of the DNA or protein ladder and the sharpness of the resulting bands. These metrics serve as the first line of troubleshooting, providing immediate, visual feedback on technical execution. Within the specific context of investigating edge effect distortions—a phenomenon where bands in peripheral lanes exhibit abnormal migration—these quality indicators become paramount. A distorted ladder or smeared bands can invalidate experimental comparisons across lanes, compromising data on protein quantification, nucleic acid size determination, and sample purity. This guide details a systematic approach to diagnosing and resolving common gel electrophoresis issues, with particular emphasis on mitigating the edge effect to ensure data reliability across all lanes.
Troubleshooting Guides & FAQs
Why are my bands smeared or diffused?
Smeared bands appear as blurry, poorly resolved streaks rather than crisp, distinct lines. This common issue can stem from problems at various stages of the experiment.
- Possible Cause 1: Excessive Voltage. Running the gel at too high a voltage generates significant heat, which can denature samples and cause bands to diffuse [43].
- Solution: Adopt a lower voltage for a longer run time. A standard practice is to run SDS-PAGE gels at around 150V, or more generally, at 10-15 Volts/cm of gel length [43].
- Possible Cause 2: Sample Overloading. Loading too much protein or DNA into a well overwhelms the gel's separation capacity, leading to trailing smears [6] [44].
- Possible Cause 3: Sample Degradation. Nucleases or proteases can partially degrade the sample, creating a population of fragments of varying sizes that appear as a smear [6] [44].
- Solution: Use nuclease-free or protease-inhibitor-containing reagents and labware. Always wear gloves and practice good laboratory hygiene to prevent contamination [6].
- Possible Cause 4: Improper Gel Polymerization. An unevenly polymerized gel, caused by inefficient agarose melting or incorrect acrylamide catalyst concentrations, creates pores of inconsistent size, resulting in smeared migration [44].
Why are my bands smiling or frowning?
"Smiling" (bands curve upwards at the edges) or "frowning" (bands curve downwards) effects indicate uneven migration across the width of the gel.
- Possible Cause: Uneven Heat Distribution. The primary cause is uneven heating of the gel apparatus, often because the center becomes hotter than the edges. This causes samples in the center lanes to migrate faster than those on the periphery [43] [4].
- Solution:
- Reduce Voltage: Run the gel at a lower voltage to minimize heat generation [43] [4].
- Use a Cooling System: Perform electrophoresis in a cold room or use an integrated cooling unit in the tank [43].
- Ensure Proper Apparatus Setup: Check for loose contacts or other issues in the electrophoresis tank that might cause an uneven electric field [4].
- Solution:
Why are the bands in my peripheral lanes distorted (Edge Effect)?
The edge effect is a specific form of distortion where bands in the outermost lanes (left and right) are curved or distorted compared to the straight bands in the central lanes.
- Possible Cause: Empty Peripheral Wells. When the wells at the edges of the gel are left empty, the electric field strength and buffer ion flow become uneven across the gel, concentrating at the edges and causing faster or distorted migration in the adjacent lanes [43].
- Solution: Never leave peripheral wells empty. If you do not have enough experimental samples to fill the gel, load the outermost wells with a control protein, a DNA ladder, or a dummy sample like Laemmli buffer to normalize the electric field across the entire gel [43].
Why are my bands poorly separated?
Poorly separated bands appear closely stacked and cannot be differentiated easily, compromising size resolution.
- Possible Cause 1: Incorrect Gel Concentration. Using a gel percentage that is not optimal for the size range of your target molecules prevents effective sieving [43] [6].
- Possible Cause 2: Insufficient or Excessive Run Time. The gel has not been run long enough for adequate separation, or has been run so long that bands of similar size have started to diffuse into each other [43] [6].
- Solution: A standard practice is to run the gel until the dye front is nearing the bottom. Optimize the run time based on the size of your target; high molecular weight proteins or large DNA fragments may require longer runs [43].
- Possible Cause 3: Improper Running Buffer. Old, contaminated, or incorrectly prepared running buffer has incorrect ion concentration or pH, disrupting the flow of current [43] [6].
Why did my protein samples run off the gel?
The gel appears blank in the region where protein samples were expected, or the lower molecular weight bands of the ladder are missing.
- Possible Cause: Gel Over-run. The electrophoresis was allowed to continue for too long, causing the proteins or DNA fragments, particularly the smaller ones, to migrate out of the bottom of the gel into the running buffer [43].
- Solution: Stop the electrophoresis when the dye front reaches the bottom of the gel. For high molecular weight targets, running slightly longer may be acceptable, but monitoring the migration of key ladder bands is crucial [43].
Why are my bands faint or invisible?
Faint bands are unclear and difficult to visualize, which can be due to issues with sample preparation, staining, or visualization.
- Possible Cause 1: Low Sample Quantity. The amount of DNA or protein loaded is below the detection limit of the stain [6] [4].
- Solution: Increase the amount of sample loaded. For DNA stained with EtBr or SYBR Safe, load at least 20 ng per band; for more sensitive stains like SYBR Gold, 1 ng per band may suffice [4].
- Possible Cause 2: Low Sensitivity of Stain. The stain may be old, degraded, or not suitable for the type of nucleic acid (e.g., using a double-strand specific stain for RNA) [6].
- Solution: Use a fresh stain batch. For thick or high-percentage gels, allow a longer staining period for the dye to penetrate. Consider stains with higher affinity for your target [6].
- Possible Cause 3: Incorrect Sample Preparation. The sample may not have been prepared correctly, or the loading dye may mask bands of a similar size [6].
Data Presentation: Quantitative Troubleshooting Guide
The following tables consolidate key quantitative data and recommendations for resolving common gel electrophoresis issues.
Table 1: Troubleshooting Band Sharpness and Migration Issues
| Problem | Primary Cause | Recommended Solution | Key Quantitative Parameter |
|---|---|---|---|
| Smeared Bands | Excessive Voltage [43] | Lower voltage, extend run time | SDS-PAGE: 10-15 V/cm; Agarose: 110-130 V [43] [44] |
| Sample Overloading [6] | Reduce sample load | DNA: 0.1-0.2 μg/mm well width [6] | |
| Smiling/Frowning Bands | Uneven Heat Distribution [43] [4] | Run at lower voltage; use cooling system | Reduce voltage by 20-30% from standard protocol |
| Edge Effect Distortion | Empty Peripheral Wells [43] | Load all peripheral wells with sample/ladder | Load control samples in outermost lanes [43] |
| Poor Band Separation | Incorrect Gel Concentration [43] [6] | Adjust gel percentage for target size | High MW: Low % gel; Low MW: High % gel [6] |
| Insufficient Run Time [43] | Extend run time appropriately | Run until dye front is ~0.5-1 cm from gel bottom | |
| Samples Ran Off Gel | Gel Over-run [43] | Stop run when dye front reaches bottom | Monitor ladder for loss of low MW bands [43] |
| Faint Bands | Low Sample Quantity [6] [4] | Increase sample load | DNA: Min. 20 ng/band (EtBr); 1 ng/band (SYBR Gold) [4] |
Table 2: Research Reagent Solutions for Gel Electrophoresis
| Reagent | Function | Key Considerations |
|---|---|---|
| DNA Ladders | Sizing and quantitation reference [4] | Choose a ladder with a band range and number appropriate for your target fragment sizes [4]. |
| Agarose | Matrix for nucleic acid separation | Select concentration based on DNA size: 0.8-1.2% for general purpose, 2-3% for small fragments (<500 bp) [6] [4]. |
| Polyacrylamide | Matrix for high-resolution protein/nucleic acid separation | Used for resolving smaller molecules (e.g., proteins, <1000 bp nucleic acids) with finer resolution than agarose [6]. |
| Nucleic Acid Stains | Visualize separated DNA/RNA bands | Options include EtBr (toxic), SYBR Safe/Gold (safer, sensitive), and GelRed/GelGreen [44]. Sensitivity and excitation source vary. |
| Loading Buffer/Dye | Densify sample for well loading; provide migration tracking | Contains a dense agent (e.g., glycerol) and tracking dyes. Ensure dye migration sizes do not mask your bands of interest [6] [4]. |
| TAE Buffer | Running buffer for DNA electrophoresis | Better for resolving larger fragments (>1 kb); compatible with enzymatic reactions post-electrophoresis [4]. |
| TBE Buffer | Running buffer for DNA electrophoresis | Provides better resolution for small DNA fragments; higher buffering capacity suitable for long runs [4]. |
Experimental Protocols
Protocol: Standard Agarose Gel Electrophoresis for DNA Analysis
Objective: To separate and analyze DNA fragments by size using an agarose gel.
Materials:
- Electrophoresis chamber and power supply
- Agarose powder
- 1x TAE or TBE Buffer
- DNA ladder and samples
- Loading dye
- Nucleic acid stain
- Gel documentation system
Methodology:
- Gel Preparation: Prepare an agarose gel solution by dissolving the correct percentage of agarose in 1x running buffer by heating until completely clear. Allow to cool to ~50-60°C, then add nucleic acid stain if using the pre-cast method. Pour into a sealed gel tray with a well comb inserted and allow to solidify completely [44].
- Sample Preparation: Mix DNA samples and ladder with an appropriate volume of 6x loading dye.
- Gel Running Setup: Place the solidified gel into the electrophoresis chamber and submerge it with 1x running buffer, ensuring the gel is covered by 3-5 mm of buffer. Carefully remove the comb [4].
- Sample Loading: Load the prepared samples and ladder into the wells. Critical Step: Ensure the outermost wells are loaded with either a ladder or a control sample to prevent edge effect distortion [43].
- Electrophoresis: Connect the lid to the power supply, ensuring the correct polarity (DNA migrates to the anode/red). Run the gel at a constant voltage (e.g., 110-130 V for a mini-gel) until the dye front has migrated sufficiently for resolution [44].
- Visualization: Turn off the power supply. Carefully transfer the gel to a gel doc system and image using the appropriate light source for the stain used.
Protocol: Mitigating Edge Effects in Discontinuous SDS-PAGE
Objective: To achieve uniform protein band migration across all lanes, minimizing peripheral lane distortion.
Materials:
- SDS-PAGE gel casting system
- Acrylamide solution (stacking and resolving)
- APS and TEMED
- Protein ladder and samples
- 1x SDS-PAGE running buffer
- Protein stain (e.g., Coomassie Blue)
Methodology:
- Gel Casting: Cast a standard discontinuous SDS-PAGE gel according to your laboratory's protocol, ensuring the resolving gel has a uniform surface before overlaying with isopropanol or water.
- Strategic Well Loading: Once the gel is polymerized and ready for loading, the key step is to load every well on the gel. If the number of experimental samples is less than the total number of wells, load the following:
- Lanes 1 and the last lane (peripheral lanes): Load with a standard protein ladder or a control protein sample [43].
- Remaining interior lanes: Load with experimental samples. Any still-empty wells between experimental samples should be loaded with 1x Laemmli buffer or a non-critical control sample.
- Controlled Electrophoresis: Run the gel using a controlled voltage. To further minimize heat-related smiling, consider running the gel at a lower voltage (e.g., 100-120 V) for a longer duration, or perform the run in a cold room [43].
- Analysis: After staining, confirm that band migration and sharpness are consistent from the first to the last lane. The ladder bands in the peripheral lanes should be as straight as those in the center.
Visualization: Troubleshooting Workflows
The following diagram illustrates a systematic decision-making process for diagnosing and resolving common gel anomalies, with a specific branch for addressing edge effects.
Diagram 1: Gel Electrophoresis Troubleshooting Logic Flow. This chart outlines a step-by-step diagnostic path for common gel issues. The highlighted branch shows the specific diagnosis and solution for edge effect distortion, which is critical for research focused on this phenomenon.
Technical Support Center: FAQs and Troubleshooting Guides
This technical support center is designed within the context of advanced research on addressing edge effect distortion in peripheral gel lanes. It provides targeted solutions for researchers, scientists, and drug development professionals leveraging AI-based tools to overcome common and complex challenges in gel electrophoresis image analysis.
FAQ: Addressing Common Experimental Challenges
Q1: What is the "edge effect" and how can I prevent it in my gel experiments? The edge effect is a phenomenon where protein bands in the outermost lanes (left and right periphery) of an SDS-PAGE gel appear distorted or curved compared to bands in the center [45]. This occurs primarily when wells at the edge of the gel are left empty during sample loading. Troubleshooting Guide: Do not keep wells empty [45]. If you have unused wells, load them with a protein ladder, a control sample, or any available protein from your lab stock to ensure a uniform electric field across all lanes [45].
Q2: My gel bands are smeared. What are the primary causes and solutions? Smeared bands appear blurry, diffused, and poorly resolved, which can be caused by issues at various stages of the experiment. Troubleshooting Guide: The table below summarizes the causes and solutions for smeared bands.
| Possible Cause | Recommended Solution |
|---|---|
| Running gel at too high voltage | Run the gel at a lower voltage (e.g., 10-15 V/cm) for a longer time [45]. |
| Sample Overloading | Load 0.1–0.2 μg of sample per millimeter of gel well width to prevent overloading [6]. |
| Sample Degradation | Use molecular biology-grade reagents and nuclease-free labware. Follow good lab practices like wearing gloves [6]. |
| Poorly Formed Wells | Use a clean comb, avoid pushing it to the bottom of the gel, and remove it carefully after solidification [6]. |
| Gel Thickness | Cast horizontal agarose gels with a thickness of 3–4 mm to prevent band diffusion [6]. |
Q3: My protein bands are not properly separated or resolved. How can I improve resolution? Poorly separated bands appear as a single broad band or as closely stacked, dense bands that are difficult to differentiate [45] [6]. Troubleshooting Guide:
- Gel Run Time: Ensure the gel is run long enough. A standard practice is to run until the dye front is near the bottom, though high molecular weight proteins may require longer [45].
- Gel Concentration: Use a lower acrylamide percentage in your resolving gel, especially for high molecular weight proteins [45]. Confirm the gel percentage is appropriate for your target fragment sizes [6].
- Running Buffer: Remake your gel running buffer to ensure the correct ion concentration and pH for proper current flow and protein separation [45].
Q4: How does an AI tool like GelGenie improve upon traditional gel analysis? Traditional software relies on classical algorithms to convert lanes into 1D intensity profiles, a rigid process that often misses faint bands, clips band boundaries, or generates false positives [46]. In contrast, GelGenie uses an AI-based segmentation approach. AI Methodology: The system is trained on a vast dataset of manually-labelled gel images to classify every pixel in an image as either 'band' or 'background' [46]. This pixel-level segmentation is not constrained by preconceived notions of lane or band shape, allowing it to accurately identify bands even under sub-optimal conditions like high background, warping, or diffuse bands [46]. This results in a more accurate, consistent, and single-click analysis that minimizes user intervention and bias.
Experimental Protocol: Validating AI Quantitation with a Model System
This protocol outlines a method to validate the quantitation accuracy of an AI tool like GelGenie using a DNA mass ladder, a common scenario in gel analysis [46].
1. Sample Preparation:
- Generate a dataset of gel images by loading standard commercial DNA ladder samples (e.g., from ThermoFisher or New England Biolabs) into each lane [46].
- Purposefully select images that exhibit a range of conditions, from ideal (sharp, distinct bands) to harsh (faint, blurry, overlapping bands) to simulate real-world variability [46].
2. Manual Segmentation and Traditional Analysis:
- Manually segment all bands from each gel image to establish a ground-truth dataset [46].
- In parallel, conduct a traditional gel band analysis on the same images using standard software (e.g., GelAnalyzer) [46].
3. Linear Regression for Quantitation:
- For each lane, hold out a set of bands (e.g., 5 bands) from the analysis.
- Perform a linear regression between the volumes (or optical densities) of the remaining bands and their known, manufacturer-provided mass values.
- Use the resulting linear fit to predict the masses of the held-out bands.
- Calculate the percentage error between the predicted and true mass values.
- Repeat this process multiple times for each lane, holding out different bands each time, to compute an average quantitation error [46].
4. Data Analysis and Validation:
- Compare the quantitation error distributions obtained from the AI tool (GelGenie) and the traditional software against the manual segmentation ground truth.
- Studies have shown that the quantitation error from AI-based segmentation is statistically no different from that of background-corrected traditional software, but it achieves this with significantly greater speed and consistency [46].
Gel Quantitation Validation Workflow
The Scientist's Toolkit: Research Reagent Solutions
The following table details essential materials and their functions for gel electrophoresis experiments focused on quality and quantitation.
| Research Reagent / Material | Function / Explanation |
|---|---|
| Protein or DNA Ladder | A standard containing molecules of known sizes. Essential for estimating the molecular weight of unknown samples and for validating quantitation methods [46]. |
| Gel Running Buffer | Maintains optimal pH and provides ions to ensure proper current flow during electrophoresis. Incorrect buffer preparation leads to suboptimal band resolution [45]. |
| Acrylamide/Bis-Acrylamide | The monomer and crosslinker used to form the polyacrylamide gel matrix. The ratio and percentage determine the gel's pore size and resolving capabilities [45]. |
| AI-Based Analysis Software (GelGenie) | An open-source application that uses a trained machine learning model to automatically and accurately segment bands from gel images, enabling objective quantitation [46] [47]. |
| Collagen-based Nerve Conduits | An advanced biomaterial used in peripheral nerve regeneration research. It serves as a biocompatible scaffold to bridge nerve gaps and support axonal repair [48]. |
Edge effect distortion is a common phenomenon in gel electrophoresis where samples in the peripheral lanes (the leftmost and rightmost lanes) migrate differently and produce skewed bands compared to samples in the central lanes. This inconsistency can compromise the quantitative data fidelity of experiments, leading to inaccurate sizing and quantification of DNA, RNA, or protein samples. This technical guide addresses the causes, quantitative impact, and proven solutions for mitigating this issue to ensure reliable and reproducible results.
Troubleshooting Guides
Problem: Skewed or Distorted Bands in Peripheral Lanes
Observed Issue: The bands in the outermost lanes of the gel appear bent, skewed, or smeared compared to the sharp, straight bands in the center lanes. [49]
Possible Causes and Solutions:
| Cause | Explanation | Troubleshooting Step |
|---|---|---|
| Empty Peripheral Wells | The number one cause of the "edge effect." Empty wells alter the electric field path, causing it to curve inwards towards the adjacent sample-containing lanes and distorting migration. [49] | Do not leave peripheral wells empty. If all wells are not used for samples, load DNA ladder, control samples, or loading buffer in the outermost wells to create a uniform buffer interface. [49] |
| Uneven Gel Temperature | The center of the gel can become warmer than the edges during a run, leading to faster migration in the central lanes (a "smiling" effect). [4] | Ensure even heat distribution. Run the gel at a lower voltage for a longer duration. Use an electrophoresis system with a cooling apparatus or run the gel in a cold room. [49] [4] |
| High Salt Concentration in Samples | Residual salts from PCR or purification can create localized ionic strength differences, distorting the electric field and causing uneven migration, often more pronounced at the edges. [50] | Purify samples before loading. Use ethanol precipitation or a commercial PCR cleanup kit to remove excess salts. [50] |
| Improper Buffer Level | An insufficient or excessive volume of running buffer covering the gel can lead to poor conductivity and band distortion. [4] | Submerge the gel properly. Ensure the gel is covered with 3–5 mm of running buffer. [4] |
| Loose Contacts or Uneven Gel Casting | Physical imperfections in the gel tank setup or the gel itself can create an uneven electric field. [4] [50] | Check apparatus for loose wires. Ensure the gel casting tray is level and the gel is polymerized evenly. [4] [50] |
Problem: Poor Resolution or Improper Separation of Bands
Observed Issue: Bands across the gel, particularly in peripheral lanes, are blurry, overlapping, or fail to separate properly. [49]
Possible Causes and Solutions:
| Cause | Explanation | Troubleshooting Step |
|---|---|---|
| Incorrect Gel Concentration | Using a gel percentage unsuitable for the size of your target fragments impedes optimal separation. [4] | Choose the optimal agarose concentration. Lower percentages (e.g., 0.8-1%) are better for large DNA fragments; higher percentages (e.g., 1.5-2%) are better for small fragments. [4] |
| Improper Running Buffer | Using the wrong buffer or an improperly prepared buffer with incorrect ion concentration disrupts current flow and pH, hindering separation. [49] | Use fresh, correct running buffer. TAE is better for larger fragments (>1 kb); TBE provides superior resolution for smaller fragments. [4] |
| Gel Run Too Short or Too Long | Insufficient run time does not allow for proper separation, while excessive run time can cause bands to migrate off the gel. [49] | Optimize run time. A standard practice is to run the gel until the dye front is 75-80% down the gel. Adjust based on the size of your target fragments. [49] |
Frequently Asked Questions (FAQs)
Q1: What exactly is the "edge effect" in gel electrophoresis? A1: The edge effect is a distortion in the migration of samples loaded in the outermost lanes of a gel. It is primarily caused by a distortion of the electric field when the peripheral wells are left empty, leading to curved or skewed bands that compromise quantitative analysis and comparison with samples in central lanes. [49]
Q2: How can I quantitatively assess the severity of edge effect in my gel system? A2: You can perform a simple quantitative assay by loading the same DNA ladder or control sample in every lane of a gel. After electrophoresis, measure the migration distance of key bands (e.g., a 1 kb band) in each lane. Calculate the relative migration distance (Rf) for each band. The standard deviation of the Rf values for the same band across different lanes, particularly comparing central vs. peripheral lanes, provides a quantitative measure of lane-to-lane variability. Advanced software can also be used for this analysis. [51]
Q3: Are there any specific sample preparation steps to prevent distortion? A3: Yes. Purifying your samples to remove contaminants like salts and proteins is crucial. High salt concentrations in samples are a known cause of skewed migration patterns. [50] Additionally, ensure you are not overloading the wells with too much DNA, as this can also cause band distortion and smearing. [4]
Q4: My bands are "smiling" (curving upwards at the edges). Is this the same as the edge effect? A4: "Smiling" is a specific visual manifestation often associated with the edge effect. It is typically caused by uneven heating across the gel, where the center becomes warmer and samples migrate faster, creating a crescent shape. This falls under the broader category of edge-related distortions and can be mitigated by running the gel at a lower voltage to minimize heat generation. [49] [4]
Experimental Protocol: Quantifying Lane Fidelity
This protocol is designed to systematically measure and compare data fidelity between central and peripheral lanes.
Objective: To quantitatively determine the degree of migration distortion in peripheral lanes compared to central lanes under standard gel electrophoresis conditions.
Materials:
- Standard DNA ladder (e.g., 1 kb ladder)
- Standardized DNA sample (e.g., a linearized plasmid of known size)
- Agarose
- Electrophoresis chamber and power supply
- Gel documentation system
- Image analysis software (e.g., GelExplorer, ImageJ) [51]
Methodology:
- Gel Casting: Prepare a standard 1% agarose gel. Leave the first and last wells (the peripheral wells) empty.
- Sample Loading:
- Load the same DNA ladder into one of the central wells (e.g., well 5 or 6 on a 10-well gel).
- Load the same standardized DNA sample into all remaining wells, including the wells immediately adjacent to the empty peripheral wells.
- Electrophoresis: Run the gel at a constant voltage (e.g., 100V) until the dye front has migrated sufficiently.
- Image Capture: Document the gel under UV light using a gel documentation system. [52]
- Data Analysis:
- Measure the migration distance (in mm) of at least three distinct bands from the ladder and the primary band from the standardized sample in each lane.
- For each band in the standardized sample, calculate the apparent size (in bp) based on the ladder in the central lane.
- Compare the apparent size of the sample in the peripheral lanes to its known true size.
- Quantitative Metric: Calculate the percentage size error for the sample in each lane:
[(Apparent Size - Known Size) / Known Size] * 100.
Expected Outcome: Lanes adjacent to the empty peripheral wells will show a higher percentage size error and greater variance in migration distance compared to central lanes, quantitatively demonstrating the edge effect.
Signaling Pathways and Workflow Visualization
Causes and Solutions for Edge Effect
Workflow for Quantifying Lane Fidelity
The Scientist's Toolkit: Research Reagent Solutions
| Item | Function/Benefit | Technical Note |
|---|---|---|
| DNA Ladder | Essential for sizing and quantifying DNA fragments. Acts as an internal control in every gel. | Choose a ladder with a high number of sharp bands in your target size range for accurate quantification. [4] |
| TAE Buffer | Running buffer ideal for the separation of larger DNA fragments (>1 kb) and for gels that will be used for downstream enzymatic steps. [4] | |
| TBE Buffer | Running buffer that provides superior resolution for smaller DNA fragments and is more stable for long runs. [4] | Not recommended if the DNA will be used in enzymatic reactions post-purification. |
| Sample Loading Dye | Contains a dense agent (e.g., glycerol) to help samples sink into wells and visible dyes to track migration progress. | Be aware of the migration size of the dyes (e.g., bromophenol blue ~500 bp) to avoid masking your bands of interest. [4] |
| PCR Clean-up Kit | Removes excess salts, enzymes, and nucleotides from PCR reactions, preventing salt-induced lane distortion. [50] | A critical step for sample purification before loading on sensitive gels (e.g., sequencing gels). |
| SYBR Safe/SYBR Gold | Highly sensitive fluorescent nucleic acid gel stains. SYBR Gold is more sensitive than EtBr and SYBR Safe, allowing detection of fainter bands. [4] | Load as little as 1 ng of DNA per band when using SYBR Gold. [4] |
Conclusion
The edge effect is a preventable artifact that, when unaddressed, undermines the reliability of gel electrophoresis data. A combined strategy—rooted in understanding its electrophoretic causes, implementing simple loading practices, and meticulously controlling run conditions—is highly effective for mitigation. The adoption of rigorous, standardized protocols ensures consistent results across experiments and between users. Looking forward, the integration of AI-based analysis tools promises a new standard of objectivity in gel quantification, transforming a traditionally qualitative technique into a more robust, quantitative method. For the scientific community, mastering these principles is not merely about obtaining prettier gels; it is a fundamental requirement for ensuring data integrity in critical downstream applications, from basic research to drug discovery and diagnostic development.
References
- 1. Troubleshooting SDS-PAGE Gel Running Issues [https://www.goldbio.com/blogs/articles/troubleshooting-sds-page-gel-running-issues?srsltid=AfmBOop74u93leVGWk6BH9hKKLzvc8ZRQLn08r3l00leGjUpVPgv6SK-]
- 2. Troubleshooting SDS-PAGE Gel Running Issues [https://www.goldbio.com/blogs/articles/troubleshooting-sds-page-gel-running-issues?srsltid=AfmBOopRF4Jm7nZbh63LjLzKjOmnj7Kg0u_x53ZUSw3kjZqZloIbAK3u]
- 3. Lane distortions in gel electrophoresis patterns [https://pubmed.ncbi.nlm.nih.gov/8404821/]
- 4. Eight Tips to Improve Gel Electrophoresis Results [https://www.thermofisher.com/us/en/home/brands/thermo-scientific/molecular-biology/molecular-biology-learning-center/molecular-biology-resource-library/spotlight-articles/8-DNA-ladder-tips.html]
- 5. Mastering Gel Electrophoresis: 10 Tips and Tricks for ... [https://americanlaboratorytrading.com/mastering-gel-electrophoresis-10-tips-and-tricks-for-successful-results/?srsltid=AfmBOoo6T3tov4OrwAXORQ9HoME7_Uw7g5OQ81zzuKcE5vkRE_HxbMcX]
- 6. Nucleic Acid Gel Electrophoresis Troubleshooting [https://www.thermofisher.com/us/en/home/life-science/cloning/cloning-learning-center/invitrogen-school-of-molecular-biology/na-electrophoresis-education/na-electrophoresis-troubleshooting.html]
- 7. Eight Tips to Improve Gel ... | Thermo Fisher Scientific - IT [https://www.thermofisher.com/it/en/home/brands/thermo-scientific/molecular-biology/molecular-biology-learning-center/molecular-biology-resource-library/spotlight-articles/8-DNA-ladder-tips.html]
- 8. Troubleshooting SDS-PAGE Gel Running Issues | GoldBio [https://goldbio.com/articles/article/troubleshooting-sds-page-gel-running-issues]
- 9. Overview: Electrophoresis Buffers [https://www.bostonbioproducts.com/electrophoresis-buffers-overview/]
- 10. Eight Tips to Improve Gel ... | Thermo Fisher Scientific - RU [https://www.thermofisher.com/ru/ru/home/brands/thermo-scientific/molecular-biology/molecular-biology-learning-center/molecular-biology-resource-library/spotlight-articles/8-DNA-ladder-tips.html]
- 11. Constant Current or Voltage in SDS-PAGE [https://bitesizebio.com/51744/constant-current-or-voltage-in-sds-page/]
- 12. Interpreting Electrophoresis Gels | Bento Lab [https://bento.bio/resources/bento-lab-advice/interpreting-electrophoresis-gels-with-bento-lab/]
- 13. Five Considerations for the Nucleic Acid Gel ... [https://www.thermofisher.com/us/en/home/life-science/cloning/cloning-learning-center/invitrogen-school-of-molecular-biology/na-electrophoresis-education/na-electrophoresis-considerations.html]
- 14. Troubleshooting SDS-PAGE Gel Running Issues [https://www.goldbio.com/blogs/articles/troubleshooting-sds-page-gel-running-issues?srsltid=AfmBOorYqrf76673NLIFjWNcaofjoancWS4tbHRsUE_8qp7yhgSL42PL]
- 15. Eliminating Edge Effect in Cell Culture Plates [https://midsci.com/resources/blog/eliminatingedgeeffect.tpp/!ut/p/z1/04_Sj9CPykssy0xPLMnMz0vMAfIjo8zijYwcjTwMgw0C3J29jQ0CXU2MDAzdnA0NTI30w8EKDHAARwP9KGL041EQhd94L0IWAH1gVOTr7JuuH1WQWJKhm5mXlq8fkZqTmZuZB_RlXnpqSnpqalpaanKJXklBAdBBUXiNNDSEKsDjqILc0Igqn7RgT0dFRQD-Q1RW/dz/d5/L2dJQSEvUUt3QS80TmxFL1o2XzIyQTJIMVMwUEdDSzMwUUU0MjAxRkMxMDUy/?srsltid=AfmBOoqa71ORln3YqTQZw7yHal60mi7V1wu8gpHhorwvQhdMRWHy7_qX]
- 16. Improving rigor and reproducibility in western blot experiments ... [https://pmc.ncbi.nlm.nih.gov/articles/PMC11405887/]
- 17. Troubleshooting SDS-PAGE Gel Running Issues [https://www.goldbio.com/blogs/articles/troubleshooting-sds-page-gel-running-issues?srsltid=AfmBOopuLT5MS57p8FkyzYtv9ZbGeQBx8UO3_64wX7IFS34zEcRgXonr]
- 18. Troubleshooting Common Electrophoresis Problems and ... [https://www.labx.com/resources/troubleshooting-common-electrophoresis-problems-and-artifacts/5539]
- 19. Electrophoresis - StatPearls - NCBI Bookshelf - NIH [https://www.ncbi.nlm.nih.gov/books/NBK585057/]
- 20. The 8 Western Blot Failures and How to Prevent Them (2025 ... [https://wildtypeone.substack.com/p/the-8-western-blot-failures-and-how?utm_campaign=post&triedRedirect=true]
- 21. Gel Electrophoresis Steps [https://azurebiosystems.com/blog/gel-electrophoresis-steps/]
- 22. Troubleshooting SDS-PAGE Gel Running Issues [https://www.goldbio.com/blogs/articles/troubleshooting-sds-page-gel-running-issues?srsltid=AfmBOoqM2X8_L_hflFuGG1Q9cIuiNgrDM-Jabf7Rl5RgYeZ_U7M3LQbh]
- 23. Guidelines for Cleaning and Preparing External [https://www.aium.org/resources/official-statements/view/guidelines-for-cleaning-and-preparing-external--and-internal-use-ultrasound-transducers-and-equipment-between-patients-as-well-as-safe-handling-and-use-of-ultrasound-coupling-gel]
- 24. How to Conquer Edge Effect in TC Plates – GMP Plastic [https://gmpplastic.com/blogs/useful-articles-on-lab-supplies-faq-section/how-to-conquer-edge-effect-in-tc-plates]
- 25. Troubleshooting SDS-PAGE Gel Running Issues [https://www.goldbio.com/blogs/articles/troubleshooting-sds-page-gel-running-issues?srsltid=AfmBOooPHezKr-xK11espnfFXZK90HJo--4yZLBv37j3c_0pBtK7hplD]
- 26. Reducing the edge effect - Advancing Cell Culture [https://www.thermofisher.com/blog/cellculture/reducing-the-edge-effect/]
- 27. Western Blot Troubleshooting [https://www.thermofisher.com/us/en/home/life-science/protein-biology/protein-biology-learning-center/protein-gel-electrophoresis-information/western-blot-troubleshooting.html]
- 28. Can you prevent “edge effect” on plates? [https://www.mecour.com/faq/ordering/prevent-edge-effects]
- 29. Normalize Western Blots to Correct for Technique Variability [https://www.licorbio.com/applications/quantitative-western-blots/normalization]
- 30. Recommended controls for western blot [https://www.abcam.com/en-us/technical-resources/guides/western-blot-guide/recommended-controls-for-western-blot]
- 31. Elimination of Protein Band "Edge Tailing" in Weber- ... [https://pubmed.ncbi.nlm.nih.gov/8238891/]
- 32. Eight Tips to Improve Gel Electrophoresis Results [https://www.thermofisher.com/ar/es/home/brands/thermo-scientific/molecular-biology/molecular-biology-learning-center/molecular-biology-resource-library/spotlight-articles/8-DNA-ladder-tips.html]
- 33. Troubleshooting SDS-PAGE Gel Running Issues [https://www.goldbio.com/blogs/articles/troubleshooting-sds-page-gel-running-issues?srsltid=AfmBOoqqpld4B8X1gpTmNNYhV0mSSexlpF3eUvKkVsc8YR3r3nq9kydb]
- 34. Controlling the separation of native proteins with ... [https://pmc.ncbi.nlm.nih.gov/articles/PMC10033466/]
- 35. A review of electrophoretic separations in temperature- ... [https://www.sciencedirect.com/science/article/abs/pii/S0003267023008346]
- 36. Troubleshooting Gel Casting/ Polymerization Issues in ... [https://www.goldbio.com/blogs/articles/troubleshooting-gel-casting-polymerization-issues-in-sds-page?srsltid=AfmBOoq3bn326DXJqXSAGRKy7IR8003SB6anZowpZCXg_GZfH2sY2JKB]
- 37. Troubleshooting SDS-PAGE Gel Running Issues [https://www.goldbio.com/blogs/articles/troubleshooting-sds-page-gel-running-issues?srsltid=AfmBOoq-4nSFSh_y_GupYNb-xj-M53s1XgcXxKWagn021ZL_PVV8p9Fa]
- 38. Troubleshooting SDS-PAGE Gel Running Issues [https://www.goldbio.com/blogs/articles/troubleshooting-sds-page-gel-running-issues?srsltid=AfmBOooooPDBmWcmOiDgeto0dK-fZjKXvAy7WxmrX9c4wK5V6z95TLfB]
- 39. Resources | CENTRE FOR HEALTH GENOMICS AND ... [https://cumming.ucalgary.ca/research/cat/health-genomics/resources]
- 40. Troubleshooting SDS-PAGE Gel Running Issues [https://www.goldbio.com/blogs/articles/troubleshooting-sds-page-gel-running-issues?srsltid=AfmBOopF75PEfDSDcmiHvY68n9mq2BcCWjYHYAvhBj8oAqeIq1IiJ2vW]
- 41. Optimization of Electrophoresis Gel Concentration [https://www.aatbio.com/resources/application-notes/optimization-of-electrophoresis-gel-concentration]
- 42. Optimizing Gel Electrophoresis: Best Practices for Sample ... [https://www.gelepchina.com/news/optimizing-gel-electrophoresis-best-practices-for-sample-volume-voltage-and-timing/]
- 43. Troubleshooting SDS-PAGE Gel Running Issues [https://www.goldbio.com/blogs/articles/troubleshooting-sds-page-gel-running-issues?srsltid=AfmBOooVLqHG6Fuj_U9NLhtxzoU7ZeASHeGt406Xa_fakPND-WGRlEta]
- 44. Troubleshooting Nucleic Acid Gel Electrophoresis—Solved in ... [https://www.yeasenbio.com/th/blogs/molecular-biology/troubleshooting-nucleic-acid-gel-electrophoresis-solved-in-one-go]
- 45. Troubleshooting SDS-PAGE Gel Running Issues [https://www.goldbio.com/blogs/articles/troubleshooting-sds-page-gel-running-issues?srsltid=AfmBOoq1kmQieK_Rzj9oZlrOCNnsaXUhkB5TSYIygpo8QcXtmuC_G2OO]
- 46. GelGenie: an AI-powered framework for gel ... [https://www.nature.com/articles/s41467-025-59189-0]
- 47. mattaq31/GelGenie [https://github.com/mattaq31/GelGenie]
- 48. Peripheral Nerve Regeneration Reimagined: Cutting-Edge ... [https://pmc.ncbi.nlm.nih.gov/articles/PMC12383415/]
- 49. Troubleshooting SDS-PAGE Gel Running Issues [https://www.goldbio.com/blogs/articles/troubleshooting-sds-page-gel-running-issues?srsltid=AfmBOoof07-NqLWBo3iD-dGaAg50k1zOmTcMdvl0KbTi6TGYMi06dPxn]
- 50. What causes skewed lanes in a DNA gel electrophoresis ... [https://biology.stackexchange.com/questions/15386/what-causes-skewed-lanes-in-a-dna-gel-electrophoresis-experiment]
- 51. Quantitative analysis of electrophoresis data: novel curve ... [https://pmc.ncbi.nlm.nih.gov/articles/PMC146501/]
- 52. Gel Documentation Systems Market Size 2025 to 2034 [https://www.precedenceresearch.com/gel-documentation-systems-market]