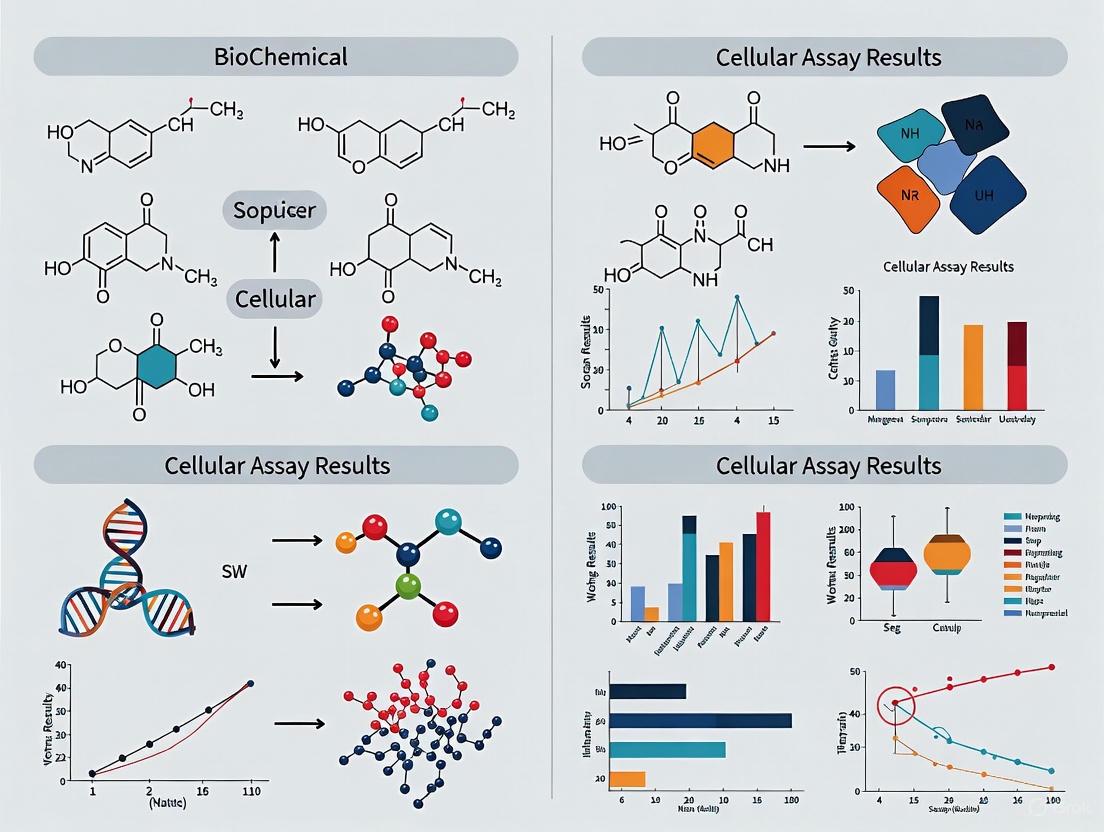
Bridging the Gap: Strategies to Resolve Discrepancies Between Biochemical and Cellular Assay Results in Drug Discovery
Inconsistencies between biochemical assay (BcA) and cell-based assay (CBA) results are a persistent challenge that can delay research progress and drug development.
Bridging the Gap: Strategies to Resolve Discrepancies Between Biochemical and Cellular Assay Results in Drug Discovery
Abstract
Inconsistencies between biochemical assay (BcA) and cell-based assay (CBA) results are a persistent challenge that can delay research progress and drug development. This article provides a comprehensive framework for scientists and drug development professionals to understand, troubleshoot, and resolve these discrepancies. We explore the foundational reasons for the activity gap, including critical differences in physicochemical conditions. The article then details methodological improvements for assay design, practical troubleshooting techniques to overcome common pitfalls, and validation strategies to ensure biological relevance. By synthesizing current scientific understanding with practical applications, this guide aims to enhance data reliability and improve the translational success of drug discovery campaigns.
Understanding the Divide: Why Biochemical and Cellular Assay Results Diverge
A persistent and critical challenge in drug discovery is the frequent inconsistency between activity values obtained from biochemical assays (BcAs) and cell-based assays (CBAs) [1]. This discrepancy can significantly delay research progress and drug development pipelines [1].
Biochemical assays typically measure binding affinity (Kd, Ka) or inhibition (IC50, Ki) using purified protein targets in simplified, well-controlled buffer systems like phosphate-buffered saline (PBS) [1]. In contrast, cellular assays validate biological activity within the complex intracellular environment of living cells [1]. It is common for IC50 values derived from CBAs to be orders of magnitude higher than those measured in BcAs [1].
This technical support center provides troubleshooting guidance and solutions for researchers grappling with these discrepancies, framed within the broader context of improving translation between in vitro and cellular data.
FAQs: Addressing Common Investigator Questions
Q1: Why do my compound's potency (IC50) values differ so dramatically between purified enzyme assays and cellular assays?
Several factors account for these discrepancies:
- Intracellular Physicochemical Conditions: The intracellular environment differs markedly from standard assay buffers. Key differences include macromolecular crowding, high viscosity, distinct salt compositions (high K+/low Na+), and variable cosolvent content [1].
- Membrane Permeability: The compound must effectively cross the cell membrane to reach its intracellular target.
- Compound Stability: The compound may be metabolized or degraded within the cellular environment.
- Protein-specific Factors: Target specificity, expression levels, and post-translational modifications can differ between purified systems and cells [1].
Experimental data shows that in-cell Kd values can differ by up to 20-fold or more from their corresponding BcA values measured in standard buffers like PBS [1].
Q2: What are the primary limitations of common buffer systems like PBS in replicating biologically relevant conditions?
PBS is designed to mimic extracellular fluid, not the intracellular milieu. Its shortcomings include [1]:
- Incorrect Cation Ratio: PBS is dominated by Na+ (157 mM) with low K+ (4.5 mM), the reverse of intracellular conditions (K+ ~140-150 mM, Na+ ~14 mM).
- Lacks Crowding and Viscosity: PBS does not account for the high concentration of macromolecules (~20-30% of cytoplasmic volume) that cause molecular crowding and increased viscosity, which can significantly alter binding affinity and enzyme kinetics [1].
- No Lipophilicity Modulation: The cytosolic environment contains various cosolvents that affect solution lipophilicity, which is not replicated in PBS.
Q3: How can I troubleshoot a significant loss of potency when moving from a BcA to a CBA?
Follow this systematic troubleshooting guide:
- Check Permeability: Use predictive software or assays (e.g., Caco-2, PAMPA) to estimate cellular permeability.
- Assess Stability: Incubate the compound with cell culture medium and cell lysates, then analyze by LC-MS to detect degradation.
- Verify Solubility: Ensure the compound remains soluble at the working concentration in the CBA medium.
- Modify Biochemical Assay Conditions: Repeat your BcA using a cytoplasm-mimicking buffer (see Section 4) to see if the gap with the CBA narrows.
- Confirm Target Engagement: Use techniques like cellular thermal shift assays (CETSA) to verify the compound is engaging with the intended target inside the cell.
Q4: My protein assay is giving inconsistent results between BcA and CBA sample types. Which method should I choose?
The choice of protein quantification assay is critical, as both Bradford and BCA assays have different sensitivities and compatibilities. The table below summarizes key differences to guide your selection [2].
Table: Guide to Selecting a Protein Quantification Assay
| Feature | Bradford Assay | BCA Assay |
|---|---|---|
| Principle | Dye binding (Coomassie Blue) to basic/aromatic residues [2] | Reduction of Cu²⁺ to Cu¹⁺ by proteins in alkaline medium [2] |
| Sensitivity | High (1-20 µg/mL) [2] | Moderate (25-2000 µg/mL); can be as low as 0.5 µg/mL [2] [3] |
| Compatibility with Detergents | Low tolerance [2] | High tolerance [2] |
| Compatibility with Reducing Agents | Low tolerance [4] | High tolerance (Note: standard BCA is incompatible; use a Reducing Agent Compatible version) [4] |
| Assay Time | Quick (5-10 minutes) [2] | Longer (up to 2 hours) [2] |
| Protein-to-Protein Variability | High variability (biased toward arginine) [2] | More consistent response [2] |
Troubleshooting Guide: Common Experimental Issues and Solutions
Table: Troubleshooting BcA-CBA Discrepancies
| Problem | Potential Causes | Recommended Solutions |
|---|---|---|
| Low or No Cellular Activity | Poor membrane permeability, efflux by transporters, instability. | • Use prodrug strategies.• Check for efflux transporters (e.g., P-gp).• Analyze compound stability in cell lysate. |
| Unexpectedly High Cellular Toxicity | Off-target effects, compound aggregation. | • Perform counter-screens against common off-targets.• Check for colloidal aggregation. |
| Inconsistent CBA Results | Cell line drift, variable protein expression, mycoplasma contamination. | • Use low-passage cells.• Authenticate cell lines regularly.• Test for mycoplasma. |
| Steep or Shallow SAR in CBA | Physicochemical properties (e.g., logP, solubility) dominating over binding affinity. | • Analyze trends in physicochemical properties (e.g., cLogP).• Measure cellular compound levels. |
| Protein Assay Interference | Incompatible substances in lysis or sample buffer [4]. | • Dilute sample in a compatible buffer.• Precipitate protein to remove interferents (e.g., using TCA/acetone) [4].• Dialyze or desalt samples [4]. |
Experimental Protocols
Protocol 1: Designing a Cytoplasm-Mimicking Buffer for Biochemical Assays
To bridge the BcA-CBA gap, perform biochemical assays under conditions that better approximate the intracellular environment [1].
Key Components:
- Cations: 140-150 mM K+, 10-14 mM Na+ [1].
- Crowding Agents: Add macromolecular crowders like Ficoll PM-70, PEG, or bovine serum albumin to achieve 20-30% w/v. This mimics the excluded volume effect of the cytoplasm [1].
- pH Buffer: Use HEPES or PIPES buffered to pH 7.2-7.4.
- Reducing Environment (Use with Caution): The cytosol is reducing. Dithiothreitol (DTT) or β-mercaptoethanol can be added, but note that they may disrupt proteins reliant on disulfide bonds [1].
Methodology:
- Prepare a base buffer with the correct K+/Na+ ratio and pH.
- Gradually introduce crowding agents to your assay and observe the effect on binding affinity or enzyme kinetics.
- Systematically compare the Kd or IC50 values obtained in standard buffer versus the cytoplasm-mimicking buffer. A shift toward the CBA value suggests the discrepancy is partly due to physicochemical differences.
Protocol 2: Direct Measurement of In-Cell Kd Values
Advanced techniques like NMR spectroscopy or fluorescence-based methods can be used to measure protein-ligand Kd values directly within living cells, providing the most relevant affinity data [1].
Workflow Overview: This workflow outlines the process of comparing compound activity across different assay environments to identify and address discrepancies.
The Scientist's Toolkit: Key Research Reagent Solutions
Table: Essential Reagents for Investigating BcA-CBA Discrepancies
| Reagent / Material | Function / Application | Key Considerations |
|---|---|---|
| Macromolecular Crowders (Ficoll, PEG, BSA) | Mimics the crowded intracellular environment in BcAs to study its effect on binding affinity and kinetics [1]. | Different crowders have different properties; use a combination to best simulate cytoplasm. |
| Cytoplasm-Mimicking Buffer | Provides a more physiologically relevant ionic and pH environment for in vitro assays compared to PBS [1]. | Ensure correct K+/Na+ ratio (~150mM/10mM) and osmolarity. |
| BCA Protein Assay Kit | Preferred for quantifying protein concentrations in samples containing detergents or reducing agents, common in cell lysates [2]. | More tolerant of common contaminants than the Bradford assay [4]. |
| Permeability Assay Kits (e.g., Caco-2, PAMPA) | Predicts a compound's ability to passively cross cell membranes, a key factor for CBA activity. | Helps differentiate between poor potency and poor delivery. |
| Cellular Thermal Shift Assay (CETSA) | Confirms target engagement directly in the cellular environment, validating that a compound reaches its intended protein target. | Provides critical evidence linking biochemical binding to cellular phenotype. |
Conceptual Framework: The Intracellular Environment
The intracellular environment is a complex and crowded milieu that profoundly influences molecular interactions. The following diagram conceptualizes key factors that contribute to the discrepancy between simple biochemical assays and cellular environments.
Frequently Asked Questions (FAQs)
1. Why are my IC50 values from cellular assays consistently higher than those from biochemical assays? This is a common discrepancy often caused by differences in the assay environments. Biochemical assays use simplified, controlled buffer systems (like PBS), while cellular assays account for the complex intracellular environment, which can alter a compound's apparent activity. Key factors include differences in macromolecular crowding, cytoplasmic viscosity, ionic strength, and salt composition (specifically K+/Na+ ratios) between your assay buffer and the actual cell interior [1].
2. My compound shows excellent potency in a purified enzyme assay but no activity in cells. The compound is soluble and stable. What could be wrong? Beyond solubility and stability, the issue likely lies with the physicochemical (PCh) conditions of your assay buffer. Standard buffers like PBS mimic extracellular fluid (high Na+, low K+), but your intracellular target exists in a different environment (high K+, low Na+, high crowding, different viscosity). This can cause the binding affinity (Kd) you measure in vitro to be significantly different—sometimes by more than 20-fold—from the true affinity inside a cell [1]. You should consider using a cytoplasm-mimicking buffer for your biochemical assays.
3. How can I design a biochemical assay that better predicts cellular activity? To bridge the activity gap, design your biochemical assays to more closely mirror the intracellular environment. This involves moving beyond standard PBS and using buffers that simulate cytoplasmic conditions. Focus on:
- Crowding: Add macromolecular crowding agents (e.g., Ficoll, dextrans) to mimic the dense cellular interior.
- Ionic Composition: Use a buffer with high K+ (~140-150 mM) and low Na+ (~14 mM) instead of the reverse [1].
- Viscosity and Lipophilicity: Adjust these parameters to match cytoplasmic conditions, as they can influence diffusion and binding behavior [1].
4. What is the significance of the "selective permeability" of team boundaries mentioned in some organizational studies for my lab work? While not a direct experimental factor, the concept highlights the importance of knowledge flow. In a research context, "selective permeability" means ensuring your team is open to external knowledge and techniques from other fields (e.g., learning new methods from biophysics or clinical labs) while also protecting deep work time. Balancing this openness with focused internal work is crucial for innovation and effectively addressing complex problems like the biochemical-cellular assay gap [5].
Troubleshooting Guide: Discrepancies Between Biochemical and Cellular Assay Results
Use the following flowchart to systematically diagnose and resolve the activity gap in your experiments. The process employs a "divide-and-conquer" approach to isolate the problem [6] [7].
Detailed Troubleshooting Steps
Step 1: Confirm Compound Solubility and Stability
- Action: Check the solubility limit of your compound in both your biochemical assay buffer (e.g., PBS) and your cell culture media. Ensure it exceeds the highest concentration used in your assays. Perform stability tests (e.g., LC-MS) to confirm the compound does not degrade under assay conditions.
- Why: Poor solubility can lead to underestimation of potency, while chemical degradation can result in a complete loss of activity [1].
Step 2: Verify Cellular Membrane Permeability
- Action: Use predictive software or experimental assays (e.g., Caco-2 model, PAMPA) to assess your compound's ability to passively diffuse across cell membranes. For compounds targeting intracellular sites, low permeability is a common cause of failure in cellular assays.
- Why: A compound must efficiently enter the cell to engage its target. Even with high biochemical affinity, poor permeability will lead to weak cellular activity [1].
Step 3: Evaluate Your Biochemical Assay Buffer
- Action: Compare the composition of your biochemical assay buffer to intracellular fluid. Standard phosphate-buffered saline (PBS) has high sodium (~157 mM) and low potassium (~4.5 mM), which is the inverse of the cytoplasmic environment (high K+ ~150 mM, low Na+ ~14 mM) [1].
- Why: Binding affinity (Kd) is sensitive to the physicochemical environment. Using an " extracellular-like" buffer like PBS to study an intracellular target can yield misleading affinity data [1].
Step 4: Design a Cytoplasm-Mimicking Buffer
- Action: Reformulate your biochemical assay buffer to better mimic the intracellular milieu. The table below outlines key components to adjust.
| Buffer Component | Standard PBS (Extracellular-like) | Cytoplasm-Mimicking Buffer (Intracellular-like) | Function in Assay |
|---|---|---|---|
| Potassium (K+) | ~4.5 mM | ~140-150 mM | Dominant intracellular cation; affects electrostatic interactions [1]. |
| Sodium (Na+) | ~157 mM | ~10-15 mM | Dominant extracellular cation; reversing the K+/Na+ ratio is critical [1]. |
| Macromolecular Crowders | None | Ficoll-70, Dextrans, PEG | Mimics crowded cellular interior; can alter Kd and reaction kinetics [1]. |
| pH | 7.4 | 7.2-7.4 | Maintain near physiological cytosolic pH. |
| Viscosity Modifiers | None | Glycerol, Sucrose | Adjusts solution viscosity to match cytoplasmic conditions [1]. |
Step 5: Investigate Off-Target Binding and Metabolism
- Action: If the discrepancy persists after optimizing the buffer, the compound may be binding to other cellular components (e.g., lipids, serum proteins) or being metabolized by cellular enzymes before reaching its target.
- Why: The complex cellular environment contains many potential interaction partners not present in a purified biochemical assay. Use cellular thermal shift assays (CETSA) or other proteomic approaches to confirm target engagement in cells.
Experimental Protocol: Measuring Kd in a Crowded, Cytoplasm-Mimicking Buffer
This protocol provides a detailed method for determining the dissociation constant (Kd) under conditions that more accurately reflect the intracellular environment.
1. Objective: To determine the binding affinity (Kd) of a small-molecule inhibitor for its purified protein target in a buffer system that mimics the physicochemical conditions of the cytoplasm.
2. Key Research Reagent Solutions
| Reagent | Function/Explanation |
|---|---|
| Purified Target Protein | The protein of interest, purified to homogeneity. |
| High-K+/Low-Na+ Buffer | Base buffer (e.g., 20 mM HEPES, 140 mM KCl, 14 mM NaCl, 1 mM MgCl₂, pH 7.2) to replicate intracellular ion balance [1]. |
| Ficoll-70 or Dextran | Macromolecular crowding agent. Used at 5-20% (w/v) to simulate the high concentration of macromolecules in the cytoplasm (~50-400 g/L) [1]. |
| Fluorescent Tracer Ligand | A fluorescently labeled ligand for the target protein, required for many binding assays (e.g., fluorescence polarization/anisotropy (FP/FA) or TR-FRET). |
| Test Compound | The unlabeled small molecule inhibitor whose Kd is being determined. |
| Automated Liquid Handler | (Recommended) For improved robustness and to minimize human error in sample preparation for serial dilutions and assay assembly, especially in high-throughput settings [8]. |
3. Procedure:
- Step 1: Buffer Preparation. Prepare two versions of the High-K+/Low-Na+ Buffer: one without crowder (control) and one containing your chosen crowding agent (e.g., 10% Ficoll-70).
- Step 2: Serial Dilution. Using the crowded buffer, prepare a 2-fold serial dilution of your test compound in a 96-well or 384-well assay plate. A 12-point dilution series is typically sufficient.
- Step 3: Assay Assembly. To each well containing the compound, add a constant concentration of the purified target protein and the fluorescent tracer ligand. The final concentration of the tracer should be below its Kd to ensure sensitivity to competition.
- Step 4: Incubation. Seal the plate and incubate in the dark at room temperature or 37°C for 2-4 hours to reach binding equilibrium.
- Step 5: Signal Detection. Read the signal using a compatible plate reader (e.g., for FP/FA or TR-FRET).
- Step 6: Data Analysis. Plot the signal vs. the logarithm of the compound concentration. Fit the data to a sigmoidal dose-response curve to determine the IC50. Use the Cheng-Prusoff equation (for competitive inhibition) or other appropriate model to calculate the Ki, which is equivalent to the Kd under these conditions [1].
4. Expected Outcome: The Kd value measured in the crowded, cytoplasm-mimicking buffer is often weaker (higher nM or μM) and may be a more accurate predictor of cellular activity than the Kd measured in a simple buffer like PBS. This protocol helps bridge the gap between biochemical and cellular assay results [1].
Visualizing the Experimental Workflow
The following diagram illustrates the logical flow of the key experiment described above, from buffer preparation to data analysis.
Frequently Asked Questions (FAQs)
FAQ 1: Why is there often a discrepancy between the activity (e.g., IC₅₀) of a compound measured in a biochemical assay and its activity in a cellular assay?
It is common to observe IC₅₀ values from cell-based assays (CBAs) that are orders of magnitude higher than those from biochemical assays (BcAs) [1]. While factors like poor membrane permeability, low solubility, or chemical instability of the compound are often blamed, a critical factor is the difference in physicochemical (PCh) conditions between the simplified in vitro assay and the complex intracellular environment [9] [1]. Standard buffers like PBS (Phosphate-Buffered Saline) mimic extracellular fluid, not the cytoplasm [1]. Differences in macromolecular crowding, viscosity, ionic composition, and lipophilicity can significantly alter a ligand's binding affinity (Kd) and the observed enzyme kinetics [1]. In-cell Kd values have been shown to differ from their corresponding BcA values by up to 20-fold or more due to these effects [1].
FAQ 2: What are the key limitations of using a common buffer like PBS (Phosphate-Buffered Saline) for studying intracellular targets?
PBS is designed to mimic extracellular conditions and is inadequate for simulating the intracellular environment for several key reasons [1]:
- Incorrect Ionic Composition: The dominant cation in PBS is Na⁺ (157 mM), with low K⁺ (4.5 mM). This is the inverse of the cytoplasmic environment, which is characterized by high K⁺ (~140-150 mM) and low Na⁺ (~14 mM) [1].
- Lacks Crowding and Viscosity: PBS does not account for the high concentration of macromolecules (~30-60% by weight) in the cytoplasm, which creates a crowded, viscous environment that affects molecular diffusion and binding behavior [1] [10].
- No Lipophilicity Modulation: The cytosol contains various cosolvents that affect hydrophobic interactions, a parameter not replicated in simple saline buffers [1].
FAQ 3: How can I experimentally determine protein-ligand interactions in a more physiologically relevant context?
Advanced proteomics techniques like the Peptide-centric Local Stability Assay (PELSA) and its high-throughput version, HT-PELSA, enable the identification and affinity measurement of protein-ligand interactions directly in crude cell, tissue, and bacterial lysates [11]. This method detects protein regions stabilized or destabilized by ligand binding through limited proteolysis and mass spectrometry, allowing for the generation of dose-response curves and determination of EC₅₀ values on a proteome-wide scale [11]. This provides binding data in a context that preserves some of the native cytoplasmic environment.
FAQ 4: How does the cellular uptake of a compound affect the correlation between assay types?
The nominal concentration of a compound applied to a cellular assay is not the same as the free intracellular concentration available to bind its target. Cellular uptake, efflux, and intracellular binding all influence this effective concentration. One study on estrogenic chemicals demonstrated that correcting the active concentrations for the experimentally determined free intracellular concentration significantly improved the correlation between cell-free and cell-based assay results (from r=0.623 to r=0.887) [12]. Therefore, assessing cellular toxicokinetics is crucial for accurate translation of activity between assay systems [12].
Troubleshooting Guide: Bridging the Gap Between Biochemical and Cellular Assays
Problem: Inconsistent Structure-Activity Relationship (SAR)
- Observation: An increase in binding affinity in biochemical assays across a series of compounds does not translate to a proportional increase in cellular activity [1].
- Possible Cause & Solution:
- Cause: The biochemical assay buffer (e.g., PBS) does not reflect the cytoplasmic conditions that ultimately influence the binding event. Factors like crowding and ionic strength can differentially affect the binding of various analogs [1].
- Solution: Reformulate your biochemical assay buffer to more closely mimic the intracellular environment. Refer to Table 2 for key parameters to adjust.
Problem: Unexpectedly Weak Cellular Activity Despite Strong Biochemical Potency
- Observation: A compound shows excellent Kd and IC₅₀ values in a purified system but is much less active in cells.
- Possible Causes & Solutions:
- Cause 1: Permeability Issue. The compound cannot efficiently cross the cell membrane to reach its intracellular target.
- Solution: Measure the compound's logP and use predictive models (e.g., Lipinski's Rule of Five) to assess permeability. Consider experimental methods to determine intracellular concentration [12].
- Cause 2: Buffer Mismatch. The compound's binding is sensitive to cytoplasmic-specific conditions like high K⁺ or macromolecular crowding.
- Solution: Repeat the biochemical affinity measurement using a cytoplasm-mimicking buffer (see Reagent Toolkit below) to see if the Kd value changes significantly [1].
- Cause 1: Permeability Issue. The compound cannot efficiently cross the cell membrane to reach its intracellular target.
Quantitative Data: Cytoplasm vs. Standard Buffer
Table 1: Key Physicochemical Parameters of the Cytoplasm vs. Standard Assay Buffer (PBS). [1]
| Parameter | Intracellular Cytoplasm | Standard Buffer (PBS) | Impact on Binding & Kinetics |
|---|---|---|---|
| Major Cations | High K⁺ (140-150 mM), Low Na⁺ (~14 mM) [1] | High Na⁺ (157 mM), Low K⁺ (4.5 mM) [1] | Can alter protein structure and electrostatic interactions. |
| Macromolecular Crowding | High (20-40% of volume occupied) [1] [10] | None | Can enhance binding affinity (EC) for some proteins by 2000% due to excluded volume effect [1]. |
| Viscosity | High (due to crowding) [1] | Low (near water) | Affects diffusion rates and conformational dynamics of macromolecules [1]. |
| Redox Potential | Reducing (due to glutathione) [1] | Oxidizing | Can affect proteins with disulfide bonds or cysteine residues crucial for activity [1]. |
| Water Activity | ~50% as hydration water bound to macromolecules [10] | ~100% as bulk solvent | Alters solvation and hydrophobic effects [10]. |
Table 2: Documented Impacts of Cytoplasmic Conditions on Experimental Measures. [1] [11]
| Assay Measure | Impact of Cytoplasmic/Crowded Conditions |
|---|---|
| Protein-Ligand Kd | In-cell Kd values can differ by up to 20-fold or more from values measured in standard dilute buffer [1]. |
| Enzyme Kinetics | Can be significantly altered, with changes of up to 2000% reported under molecular crowding conditions [1]. |
| Binding Affinity (EC₅₀) | HT-PELSA allows precise determination of pEC₅₀ in lysates; values for kinase-staurosporine interactions showed a median coefficient of variation of 2% across replicates [11]. |
Experimental Protocols
Protocol 1: Designing a Cytoplasm-Mimicking Buffer for Biochemical Assays
This protocol outlines the steps to create a more physiologically relevant buffer for studying intracellular targets.
- Principle: To reconstitute biochemical assays in a buffer that incorporates the key ionic, crowding, and viscosity parameters of the eukaryotic cytoplasm, thereby generating data more predictive of cellular activity [1].
- Reagents: See "The Scientist's Toolkit" section below.
- Procedure:
- Base Buffer: Start with a standard buffer like HEPES or Tris, adjusted to cytoplasmic pH (~7.2).
- Ionic Adjustment: Add potassium salts (e.g., KCl) to achieve a K⁺ concentration of ~140-150 mM. Keep Na⁺ concentration low (~10-15 mM) [1].
- Crowding Agent: Add a macromolecular crowding agent like Ficoll PM-70, dextran, or PEG to achieve 20-40% of the volume occupancy. This mimics the excluded volume effect [1].
- Viscosity Modifier: If needed, use glycerol or other viscogens to adjust the solution viscosity to near cytoplasmic levels. Note that crowding agents also increase viscosity [1].
- Stabilizers: Consider adding osmolytes (e.g., TMAO, glycerol) or co-factors (e.g., Mg²⁺, ATP) to help maintain protein stability and function, especially for prolonged assays [13].
- Validation: Compare the Kd, IC₅₀, or enzyme kinetics of a standard inhibitor/ligand in the new buffer versus standard PBS. A significant shift indicates the target's sensitivity to cytoplasmic conditions [1].
Protocol 2: High-Throughput Peptide-centric Local Stability Assay (HT-PELSA)
This protocol summarizes the workflow for identifying protein-ligand interactions and determining binding affinities in complex lysates [11].
- Principle: Ligand binding stabilizes specific protein regions, making them less susceptible to proteolysis. HT-PELSA uses limited proteolysis followed by mass spectrometry to detect these stabilized peptides in a high-throughput 96-well format, enabling the generation of dose-response curves and EC₅₀ calculation [11].
- Workflow Diagram:
- Key Steps: [11]
- Lysate Preparation: Prepare crude lysates from cells, tissues, or bacteria.
- Ligand Incubation: Incubate lysates with the test compound across a range of concentrations in a 96-well plate. Include vehicle-only controls.
- Limited Proteolysis: Add trypsin for a short, fixed period (4 minutes) at room temperature.
- Peptide Separation: Pass the digest through a C18 plate to retain intact proteins and large fragments, allowing the stabilized peptides to elute.
- Mass Spectrometry: Analyze the eluted peptides using LC-MS/MS (e.g., Orbitrap Astral mass spectrometer).
- Data Analysis: Identify peptides whose abundance increases with ligand concentration (stabilized). Plot dose-response curves to calculate EC₅₀ values for each stabilized protein.
The Scientist's Toolkit: Key Research Reagents
Table 3: Essential Reagents for Mimicking Cytoplasmic Conditions. [1] [13]
| Reagent | Function in Cytoplasm-Mimicking Buffers | Example(s) |
|---|---|---|
| Potassium Chloride (KCl) | Provides the high K⁺ concentration found intracellularly [1]. | ~140-150 mM KCl |
| Macromolecular Crowding Agents | Mimics the excluded volume effect of high macromolecule concentration in the cytoplasm [1]. | Ficoll PM-70, Dextran, PEG |
| Viscosity Modifiers | Adjusts the buffer viscosity to match the cytoplasmic environment [1]. | Glycerol, Sucrose |
| Osmolytes & Stabilizers | Enhances protein stability and folding under the stressful conditions of purification or assay [13]. | Glycerol, TMAO, Amino acids (e.g., Glycine) |
| Reducing Agents | Mimics the reducing environment of the cytosol (use with caution as they may break disulfide bonds) [1]. | DTT, TCEP, β-mercaptoethanol |
| Protease Inhibitors | Prevents degradation of the target protein during assay setup, especially in lysates [13]. | PMSF, Protease Inhibitor Cocktails |
| Cofactors | Aids in stabilizing the native structure and function of some proteins [13]. | Mg²⁺, ATP, GTP, NAD⁺ |
Troubleshooting Guide: Addressing PBS-Related Assay Discrepancies
Problem 1: Inconsistent Activity Measurements Between Biochemical and Cellular Assays
Symptom: IC₅₀ or Kd values obtained from biochemical assays (BcAs) using PBS buffer do not correlate with results from cell-based assays (CBAs). The discrepancy can be orders of magnitude [10] [1].
Why This Happens: PBS is formulated to mimic extracellular fluid, not the intracellular environment where most drug targets are located [10]. This fundamental mismatch in physicochemical (PCh) conditions alters molecular interactions.
Solution:
- Replace PBS with a cytoplasm-mimicking buffer for biochemical assays. Key modifications include:
- Adjust cation ratios: Use high K⁺ (140-150 mM) and low Na⁺ (~14 mM) instead of the high Na⁺ (157 mM) and low K⁺ (4.5 mM) in PBS [10] [1].
- Add macromolecular crowding agents to simulate the dense cellular interior [10].
- Modify viscosity and cosolvent content to better reflect cytoplasmic lipophilicity [10].
- Validate compound activity using intracellular target engagement assays like NanoBRET TE to measure potency in live cells [14].
Problem 2: Unreliable Protein-Ligand Binding Affinity (Kd) Data
Symptom: Kd values measured in simplified buffer systems like PBS do not predict binding affinity in a cellular context [10].
Why This Happens: The cytosolic environment significantly influences chemical equilibrium. Factors like macromolecular crowding can cause in-cell Kd values to differ from PBS-based measurements by up to 20-fold or more [10] [1].
Solution:
- Perform binding assays under conditions that mimic cytoplasmic crowding. Protein crystals can serve as a useful model for the cytoplasmic environment, as they share similar PCh characteristics regarding water content and molecular packing [10].
- Consider using crystallographic data to estimate Kd values in crowded environments, as this approach can provide more physiologically relevant binding information [10].
Problem 3: Altered Enzyme Kinetics in Standard Buffers
Symptom: Enzyme kinetic parameters (e.g., Km, Vmax) obtained in PBS do not reflect enzymatic activity in cells.
Why This Happens: Cytoplasmic crowding conditions can alter enzyme kinetics by up to 2000% compared to dilute buffer systems [10] [1]. Standard PBS lacks these crowding elements.
Solution:
- Supplement buffers with macromolecular crowding agents such as polyethylene glycol (PEG) or Ficoll to simulate intracellular conditions [10] [1].
- Measure enzyme kinetics under these physiologically relevant conditions to obtain data that better predicts cellular behavior.
Quantitative Comparison: PBS vs. Cytosolic Environment
Table 1: Key Physicochemical Differences Between PBS and Cytosol
| Parameter | PBS (Standard Assay Condition) | Cytosolic Environment | Impact on Molecular Interactions |
|---|---|---|---|
| Dominant Cation | Na⁺ (157 mM) [10] [1] | K⁺ (140-150 mM) [10] [1] | Alters electrostatic interactions and protein stability [10]. |
| Minor Cation | K⁺ (4.5 mM) [10] [1] | Na⁺ (~14 mM) [10] [1] | Affects ion-sensitive regulatory proteins and enzymes [10]. |
| Macromolecular Crowding | Absent or very low [10] | High (≈80-200 mg/ml macromolecules) [10] | Can change Kd values by up to 20-fold or more; dramatically alters enzyme kinetics [10] [1]. |
| Viscosity | Similar to water [10] | Higher than water [10] | Influences diffusion rates and conformational dynamics of macromolecules [10]. |
| Redox Potential | Oxidizing [10] | Reducing (high glutathione) [10] | Affects cysteine oxidation states, protein folding, and stability [10]. |
Table 2: Consequences of Using PBS for Intracellular Target Studies
| Assay Type | Common Result in PBS | Typical Outcome in Cellular Context | Potential Discrepancy |
|---|---|---|---|
| Biochemical Binding (Kd) | High-affinity binding [10] | Weaker or no binding [10] [14] | Up to 20-fold difference in Kd [10] [1] |
| Enzyme Inhibition (IC₅₀) | Low IC₅₀ (high potency) [14] | Higher IC₅₀ (lower potency) [14] | Potency decreases due to permeability, crowding [14] |
| Compound Potency | May show poor binding [14] | Can show increased potency [14] | Potency increases due to cellular trapping, PTMs [14] |
Experimental Protocol: Cytoplasm-Mimicking Buffer Assay
Method for Measuring Protein-Ligand Interactions in Physiologically Relevant Buffers
Background: This protocol describes how to determine ligand binding affinity (Kd) under conditions that mimic the intracellular environment, minimizing the discrepancy between biochemical and cellular assays [10].
Reagents:
- Standard PBS buffer (control)
- Cytoplasm-mimicking buffer (see "Research Reagent Solutions" below)
- Purified target protein
- Ligand/inhibitor of interest
- Assay reagents for detection
Procedure:
- Prepare Buffer Systems:
- Create both standard PBS and cytoplasm-mimicking buffer according to the formulations provided in the Research Reagent Solutions section.
- Ensure both buffers are equilibrated to 37°C before use [10].
Set Up Binding Reactions:
- Use identical concentrations of purified target protein in both buffer systems.
- Titrate ligand across a concentration range relevant to your target.
- Incubate reactions at 37°C to reach equilibrium [10].
Measure Binding:
- Use your preferred method to quantify binding (e.g., fluorescence polarization, surface plasmon resonance, etc.).
- Ensure measurements account for potential differences in viscosity between buffer systems [10].
Data Analysis:
- Calculate Kd values for both buffer conditions using standard binding models.
- Compare results with cellular activity data from assays like NanoBRET Target Engagement [14].
- Note any improvements in correlation between biochemical and cellular data when using the cytoplasm-mimicking buffer.
The Scientist's Toolkit: Research Reagent Solutions
Table 3: Essential Reagents for Physiologically Relevant Assays
| Reagent/Solution | Function | Application Notes |
|---|---|---|
| Cytoplasm-Mimicking Buffer | Replicates intracellular ion composition, crowding, and viscosity [10]. | Formulate with high K⁺ (140-150 mM), crowding agents (e.g., PEG, Ficoll). Avoids the high Na⁺ of PBS [10] [1]. |
| Macromolecular Crowding Agents | Simulates volume exclusion and altered thermodynamics of the crowded cell interior [10]. | PEG and Ficoll are common choices. Significantly impact Kd values and enzyme kinetics [10]. |
| NanoBRET Target Engagement Assay | Directly measures compound binding to intracellular targets in live cells [14]. | Validates biochemical binding data in a physiologically relevant context; identifies potency shifts [14]. |
| Dithiothreitol (DTT) | Maintains reducing environment similar to cytosol [10]. | Use with caution as it may disrupt proteins reliant on disulfide bonds [10]. |
| Phosphate-Buffered Saline (PBS) | Standard buffer for extracellular-like conditions and cell maintenance [10]. | Not recommended for studying intracellular molecular interactions due to non-physiological ion composition [10]. |
Frequently Asked Questions (FAQs)
Why is there often a discrepancy between biochemical assay (BcA) and cell-based assay (CBA) results?
This discrepancy occurs because standard biochemical assays using buffers like PBS fail to replicate the complex intracellular environment. The cytoplasm has different ionic composition, high macromolecular crowding, increased viscosity, and distinct lipophilicity compared to simplified in vitro conditions. These physicochemical differences can alter binding affinities (Kd) and compound potency [10] [1].
Can't we just attribute these discrepancies to poor compound permeability or solubility?
While permeability and solubility are important factors, significant discrepancies often remain even when these parameters are well-characterized. The intracellular physicochemical environment itself directly modulates molecular interactions, with in-cell Kd values differing from PBS-based measurements by up to 20-fold or more, independent of compound permeability [10] [1].
My compound shows higher potency in cells than in biochemical assays. How is this possible?
Increased cellular potency can occur through several mechanisms: (1) post-translational modifications in cells can create more favorable binding sites; (2) cellular compartmentalization can locally concentrate compounds (e.g., lysosomal sequestration); (3) drug-drug interactions can modulate activity; (4) the intracellular environment may favor the active conformation of your target [14].
How critical is the K⁺/Na⁺ ratio in mimicking intracellular conditions?
This ratio is crucial. The cytoplasm has a high K⁺ (140-150 mM) to Na⁺ (~14 mM) ratio, while PBS has the reverse. This ionic composition affects electrostatic interactions, protein stability, and the activity of many ion-sensitive proteins. Using PBS with its high Na⁺ level fundamentally misrepresents the ionic environment where most drug targets function [10] [1].
Are there specific techniques for directly measuring binding inside cells?
Yes, techniques like NanoBRET Target Engagement Intracellular Kinase Assays can directly measure compound binding and target occupancy in live cells, providing physiologically relevant potency data that accounts for all cellular complexities [14].
Experimental Workflow: From Standard Buffer to Physiological Conditions
Key Physicochemical Parameters for Cytoplasmic Mimicry
Frequently Asked Questions
FAQ 1: Why do my IC50 values from biochemical and cellular assays for the same compound differ so significantly?
It is common for IC50 values derived from biochemical assays (BcAs) to differ, sometimes by orders of magnitude, from those measured in cell-based assays (CBAs) [1]. This discrepancy arises from fundamental differences in the assay environments. In a simplified biochemical assay, you measure the direct functional inhibition of a purified protein. In a cellular system, the compound must first cross the cell membrane, and its observed potency (IC50) is influenced by cellular factors like permeability, efflux transporters, intracellular metabolism, and the complex physiological environment (e.g., macromolecular crowding, viscosity, and ion concentrations) [1] [15]. Computational studies have shown that these differences are most pronounced for compounds with poor membrane permeability or when the drug's target is deep within a three-dimensional cellular structure, limiting drug access [15].
FAQ 2: I found multiple Ki/IC50 values for my compound-target pair in public databases like ChEMBL. Which one should I trust?
This is a common challenge. A 2024 analysis of ChEMBL32 data revealed significant noise in combined bioactivity data from different sources [16]. When IC50 assays were combined with minimal curation, almost 65% of the data points differed by more than 0.3 log units, and 27% differed by more than one log unit [16]. This variability stems from differences in assay conditions, technologies, and protocols across laboratories [16]. To ensure data quality, adopt a "maximal curation" strategy: prioritize data from assays where critical metadata matches, such as:
- Assay type (e.g., binding vs. functional)
- Target protein variant and organism
- pH, buffer, and substrate identity/concentration [16] This approach was shown to improve data agreement significantly, reducing the proportion of points differing by >0.3 log units to 48% [16].
FAQ 3: When is it valid to convert an IC50 value to a Ki or Kd?
Conversion is most valid for biochemical competition binding assays where the mechanism of inhibition is known and well-defined, such as competitive inhibition [17] [1]. In these cases, you can use established equations like the Cheng-Prusoff equation: Ki = IC50 / (1 + [S]/Km) where [S] is the substrate concentration and Km is the Michaelis constant [1]. However, this conversion relies on several assumptions that may not hold true in more complex systems. It is generally not appropriate to convert an IC50 from a cellular functional assay directly to a Kd, as the IC50 in this context is influenced by all the cellular factors mentioned above and does not solely reflect binding affinity [17] [18].
FAQ 4: My Kd value from a biochemical assay suggests high affinity, but the compound shows weak activity in cells. What are the likely causes?
This is a classic problem in drug discovery. A high affinity (low Kd) measured on a purified protein does not guarantee cellular activity. The most common reasons are:
- Poor Membrane Permeability: The compound cannot efficiently cross the cell membrane to reach its intracellular target [1].
- Efflux by Transporters: Active transporters (e.g., P-glycoprotein) pump the compound out of the cell [1].
- Intracellular Metabolism: The compound is chemically modified or degraded before it can engage the target [1].
- Cytoplasmic Conditions: The intracellular environment (e.g., macromolecular crowding, different pH, ionic strength) can alter the effective binding affinity, with in-cell Kd values shown to differ from in vitro values by up to 20-fold or more [1].
- Target Inaccessibility: In 3D culture or tissue, the compound may not diffuse effectively to all target cells [15].
Documented Quantitative Variations
Table 1: Documented Variability in Public Bioactivity Data (ChEMBL32 Analysis)
| Curation Level | Assay Pairs with >0.3 log unit difference | Assay Pairs with >1.0 log unit difference | Correlation (Kendall's τ) |
|---|---|---|---|
| Minimal Curation | 65% | 27% | 0.51 |
| Maximal Curation | 48% | 13% | 0.71 |
Analysis of overlapping IC50 and Ki measurements for the same compound-target pairs shows significant noise, which is reduced by stringent metadata curation [16].
Table 2: Factors Contributing to Kd vs. IC50 Discrepancies
| Factor | Impact on Kd | Impact on IC50 |
|---|---|---|
| Assay Conditions (pH, salt) | Directly alters binding affinity [1] | Alters functional potency and enzyme kinetics [1] |
| Substrate Concentration ([S]) | No direct effect (intrinsic constant) | Major effect; IC50 increases with [S] in competitive assays [16] [1] |
| Macromolecular Crowding | Can change by up to 20-fold in cells [1] | Influenced by altered Kd and enzyme kinetics [1] |
| Cellular Permeability | No effect (measured on purified system) | Major effect; poor permeability increases IC50 [1] |
| Target Concentration ([P]) | Must be << Kd for accurate measurement | High [P] can inflate IC50 value [19] |
| Assay Technology | Variable effects based on detection method [16] | Variable effects based on functional readout [16] |
Experimental Protocols & Troubleshooting
Protocol 1: Determining Kd via a Competition Binding Assay (AlphaLISA/AlphaScreen)
This protocol is recommended when the expected Kd is above the binding capacity of the beads, which is common for many protein-protein interactions [19].
1. Principle: An untagged version of your protein (inhibitor) competes with a tagged version (tracer) for binding to a bead-immobilized target. The Kd is calculated from the measured IC50 of the displacement curve [19].
2. Key Reagents and Materials:
- Donor and Acceptor Beads: Specific to your tags (e.g., Streptavidin Donor, Protein A Acceptor).
- Biotinylated Protein/Ligand (Tracer): The labeled binding partner.
- His- or GST-Tagged Protein (Target): The protein immobilized on the beads.
- Untagged Protein (Inhibitor): The same protein as the tracer, but unlabeled, for the competition curve.
3. Step-by-Step Workflow:
Workflow for Kd Determination
4. Critical Considerations for Accurate Kd Determination [19]:
- Concentration of Tagged Proteins: The Kd should be at least 10x higher than the concentration of either tagged protein used in the assay.
- Tracer Concentration: The concentration of the tagged "tracer" protein should be at least 10x below the concentration of the tagged "target" protein.
- Bead Saturation: The concentration of both tagged proteins must be below the binding capacity of their respective beads to avoid signal hooking effects.
- IC50 to Kd Conversion: Under these optimized conditions (where [L]/Kd approaches zero), the Kd can be approximated from the IC50 using the relationship: Kd ≈ IC50 [19].
Protocol 2: A Maximal Curation Strategy for Combining Public Bioactivity Data
Follow this protocol to build cleaner datasets from public sources like ChEMBL for machine learning or meta-analysis [16].
1. Identify Overlapping Assays: For your target of interest, query the database for all assays that have tested the same compound.
2. Apply Metadata Filters ("Maximal Curation"): Filter assay pairs by requiring matches on the following parameters, which have been shown to significantly improve data concordance [16]:
- Target ID and Variant: Ensure the exact same protein sequence or construct.
- Assay Organism and Cell Type: e.g., Human vs. Mouse; HEK293 vs. HeLa.
- Assay Type and Technology: e.g., Filter for all "FRET-based enzymatic assays."
- Key Biochemical Parameters: pH, buffer composition, substrate identity, and substrate concentration.
3. Quantify Compatibility: For the remaining overlapping assay pairs, compare the pChEMBL values (-logIC50/-logKi) of shared compounds. Use metrics like:
- R² and Kendall's τ: To assess correlation.
- Fraction differing by >0.3/>1.0 log unit: To quantify practical disagreement [16].
4. Remove Outliers: Exclude data points where values between two assays are exactly the same (suggesting data copying) or differ by exactly 3 log units (suggesting a unit error during ingestion) [16].
The Scientist's Toolkit
Table 3: Essential Research Reagent Solutions for Binding and Activity Studies
| Reagent / Solution | Function in Experiment | Key Considerations |
|---|---|---|
| Cytoplasm-Mimicking Buffer | Replicates intracellular crowding, viscosity, and ion content for more physiologically relevant biochemical Kd measurements [1]. | Should contain high K+ (~150 mM), low Na+ (~14 mM), and crowding agents like Ficoll or PEG to mimic the cytosol [1]. |
| FLUOR DE LYS Substrate/Developer | A coupled enzyme system for detecting deacetylase activity (e.g., HDACs, Sirtuins) in a homogeneous, fluorescent format [20]. | Provides a robust, non-radioactive alternative to traditional assays; sensitive to the enzyme's catalytic function, not just binding. |
| NanoBRET Target Engagement Assay | Measures direct binding of a compound to its target protein in a live-cell environment [17]. | Allows for determination of an apparent Kd (Kd-apparent) in live cells, bridging the gap between biochemical and cellular potency. |
| AlphaLISA/AlphaScreen Beads | Enable bead-based proximity assays for detecting biomolecular interactions without washing steps [19]. | Essential for sensitive, homogeneous Kd determination; choice of bead type (e.g., Streptavidin, Anti-GST) is critical. |
| CELLESTIAL Viability/Cytotoxicity Kits | Measure parameters like ATP levels (ApoSENSOR) or LDH release to assess compound toxicity in cell-based assays [20]. | Crucial for distinguishing specific target-mediated effects from general cytotoxicity in cellular IC50 determinations. |
| ORGANELLE-ID Dyes | Fluorescent dyes for staining specific organelles (e.g., mitochondria, Golgi, ER) in live cells [20]. | Used as a secondary assay to investigate morphological changes and off-target effects hinted at by IC50 discrepancies. |
Troubleshooting Guide
Problem: Saturation binding curve gives an unrealistic Kd value.
- Potential Cause: The binding capacity of the beads has been exceeded, creating a composite curve from multiple equilibria [19].
- Solution: Switch to a competition binding assay format. If using streptavidin beads and you calculate a Kd of ~5-10 nM, it is likely skewed by bead capacity; use competition instead [19].
Problem: High variability in cell-based IC50 measurements.
- Potential Causes:
- Solutions:
- Standardize Cell Culture: Use consistent seeding protocols and passage numbers.
- Use Statistical DOE: Employ Design of Experiments to systematically optimize factors like cell number, reagent concentrations, and incubation times [21].
- Calculate Z'-factor: Ensure your assay has a robust window (Z' > 0.5) before running screens [21].
Problem: My compound is highly potent in a 2D monolayer but ineffective in a 3D spheroid model.
- Potential Cause: Limited drug diffusion into the core of the spheroid. In 2D, all cells are equally exposed, while in 3D, inner cells are protected, leading to a higher overall IC50 [15].
- Solution: Consider the drug's diffusivity and mechanism of action. Cytotoxic drugs that kill all exposed cells may show a larger potency gap between 2D and 3D than anti-mitotic drugs that only affect proliferating cells [15]. Use 3D models earlier in the screening cascade to identify compounds with better penetration properties.
Mimicking the Cell: Designing Physiologically Relevant Biochemical Assays
A persistent challenge in biomedical research and drug discovery is the frequent discrepancy observed between the activity of a compound in a purified biochemical assay (BcA) and its activity in a subsequent cellular assay (CBA). These inconsistencies can delay research progress and hinder drug development [1]. Often, factors such as membrane permeability and solubility are investigated, but a critical and sometimes overlooked source of this gap is the vastly different physicochemical (PCh) environments in which these assays are performed [1]. Standard biochemical buffers, like Phosphate-Buffered Saline (PBS), closely mimic extracellular conditions but fail to replicate the unique intracellular milieu. This technical support document outlines the blueprint for a cytomimetic buffer, a solution designed to mimic the intracellular environment by reconstituting key parameters such as macromolecular crowding, correct ionic balance, and lipophilicity. Employing such buffers can bridge the activity gap between BcA and CBA, leading to more predictive in vitro data and a more robust structure-activity relationship (SAR) [1].
Frequently Asked Questions (FAQs)
1. Why is there often a discrepancy between my biochemical and cellular assay results? While compound-specific factors like permeability play a role, a major cause is the difference in assay environments. Standard biochemical assays use simplified buffers (e.g., PBS) with high sodium, low potassium, and no macromolecular crowding. The intracellular environment, in contrast, is crowded, viscous, has high potassium (~140-150 mM) and low sodium (~14 mM), and different lipophilicity [1]. These PCh conditions can alter protein-ligand binding affinities (Kd values), causing in-cell Kd values to differ from in vitro values by up to 20-fold or more [1].
2. What are the key parameters a cytomimetic buffer must replicate? A well-designed cytomimetic buffer should be formulated to mimic the following core intracellular PCh conditions [1]:
- Ionic Balance: Reverse the sodium-potassium ratio to ~140-150 mM K+ and ~14 mM Na+.
- Macromolecular Crowding: Include high concentrations of inert, water-soluble polymers (e.g., PEG, Ficoll) to simulate the volume exclusion effects of high cytoplasmic macromolecule concentrations (≈ 80-200 mg/mL).
- Lipophilicity/Cosolvents: Incorporate specific cosolvents to mimic the hydrophobic character of the cytoplasmic environment.
- pH: Maintain a physiological cytosolic pH of ~7.2.
- Viscosity: Use viscosity-modifying agents to replicate the higher viscosity of the cytoplasm compared to water.
3. Can I use PBS for studying intracellular targets? PBS is suboptimal for studying intracellular targets because its ionic composition (157 mM Na+, 4.5 mM K+) and lack of crowding agents more closely resemble the extracellular environment [1]. Using PBS may yield binding affinity and enzymatic activity data that do not accurately reflect the compound's behavior inside a cell.
4. How do I validate that my cytomimetic buffer is working? The primary validation is the convergence of assay results. If a compound series shows a better correlation between its biochemical IC50/Kd values (measured in the cytomimetic buffer) and its cellular activity (e.g., IC50 from a cell-based assay), the buffer is functioning as intended [1]. Furthermore, techniques like in-cell NMR or delivering recombinant proteins into living cells can provide direct reference points for intracellular target engagement [22].
Troubleshooting Guides
Problem 1: Poor Correlation Between Biochemical and Cellular Assay Data
| Possible Cause | Solution / Recommended Action |
|---|---|
| Use of non-cytomimetic buffer (e.g., PBS) | Reformulate your biochemical assay buffer to include cytomimetic components. Start with a base buffer that matches intracellular ionic balance (high K+/low Na+) and osmolarity (~300 mOsm) [1]. |
| Insufficient macromolecular crowding | Introduce crowding agents like Ficoll PM-70, PEG 8000, or dextran at concentrations of 80-150 g/L to simulate cytoplasmic crowding [1]. |
| Incorrect ionic composition | Replace the sodium salts in your standard buffer with potassium salts. Aim for a final concentration of 140-150 mM K+ and 10-15 mM Na+ [1]. |
| Neglecting cytoplasmic viscosity | Add viscosity-modifying agents like glycerol or sucrose to increase the buffer's viscosity to levels closer to that of the cytoplasm [1]. |
Problem 2: Experimental Artifacts in Cytomimetic Assays
| Possible Cause | Solution / Recommended Action |
|---|---|
| Crowding agents interfering with detection | Use crowding agents that are inert and do not absorb at the wavelengths used for detection. Test for interference in a no-enzyme/no-compound control. Consider filtering or centrifuging the buffer before use if light scattering is an issue. |
| Increased non-specific binding | The crowded environment may enhance non-specific interactions. Include appropriate controls, such as a non-specific competitor or an inactive enantiomer, to confirm that the measured signal is due to specific binding [23]. |
| Compound solubility issues | The cytomimetic environment can affect compound solubility. Check compound solubility in the new buffer system using methods like dynamic light scattering (DLS) or nephelometry [23]. |
| Altered enzyme kinetics | Be prepared for changes in Km and Vmax, as crowding can significantly affect enzyme kinetics (changes of up to 2000% have been reported) [1]. Ensure your assay is designed to handle potentially different kinetic parameters. |
The Scientist's Toolkit: Key Research Reagent Solutions
The following table lists essential materials for formulating and using cytomimetic buffers.
| Reagent / Material | Function in Cytomimetic Buffer |
|---|---|
| Potassium Chloride (KCl) | The primary salt to establish the high intracellular potassium ion concentration (~140-150 mM) [1]. |
| HEPES or PIPES buffer | A buffering agent to maintain a stable cytosolic pH of ~7.2-7.4. Preferable to phosphate buffers for better biological relevance in ionic mimicry. |
| Macromolecular Crowders (PEG, Ficoll, Dextran) | Inert polymers used to simulate the excluded volume effect of high macromolecular concentrations in the cytoplasm, which can influence binding equilibria and reaction rates [1]. |
| Glycerol or Sucrose | Used to modulate the viscosity of the solution to more closely match the higher viscosity of the cellular interior compared to water [1]. |
| Magnesium-ATP (Mg-ATP) | A critical cofactor for many intracellular enzymes and kinases. Its concentration and the Mg²⁺ balance are vital for replicating intracellular energy metabolism. |
| Dithiothreitol (DTT) | A reducing agent used to mimic the reducing environment of the cytosol (maintained by glutathione). Use with caution as it may break protein disulfide bonds [1]. |
| Protease/Phosphatase Inhibitors | To preserve the integrity of protein targets and signaling states during the biochemical assay, mimicking the regulated proteolytic and signaling environment of the cell. |
Experimental Protocols & Workflows
Protocol 1: Formulating a Basic Cytomimetic Buffer
This protocol provides a starting point for creating a buffer that mimics the fundamental PCh conditions of the cytoplasm.
Materials:
- Ultrapure Water
- HEPES
- KCl
- NaCl
- MgCl₂
- Dithiothreitol (DTT)
- Crowding agent (e.g., Ficoll PM-70, PEG 8000)
- Glycerol
Procedure:
- Base Buffer: In 800 mL of ultrapure water, dissolve the following to final concentrations:
- 20 mM HEPES (pH 7.2 at 37°C)
- 140 mM KCl
- 10 mM NaCl
- 5 mM MgCl₂
- Adjust the pH to 7.2 using KOH.
- Add Crowding and Viscosity Agents: To the base buffer, add:
- 100 g/L Ficoll PM-70 (or PEG 8000) to simulate macromolecular crowding.
- 5-10% (v/v) Glycerol to adjust viscosity.
- 1 mM DTT to create a reducing environment (omit if detrimental to your protein target).
- Final Volume and Sterilization: Bring the final volume to 1 L with ultrapure water. Mix thoroughly until all components are completely dissolved. Filter sterilize (0.22 µm) if necessary for the assay.
- Validation: Compare the Kd or IC50 of a known ligand/inhibitor in this cytomimetic buffer versus standard PBS or Tris buffer. A shift towards values observed in cellular assays indicates successful mimicry [1].
Workflow Diagram: Bridging the Assay Gap with Cytomimetic Buffers
The diagram below outlines the logical workflow for developing and implementing a cytomimetic buffer strategy to address discrepancies between biochemical and cellular assays.
Data Presentation: Quantitative Comparisons
Table 1: Key Physicochemical Parameters of Standard vs. Cytomimetic Buffers
This table summarizes the critical differences between a standard buffer, a cytomimetic buffer, and the actual intracellular environment.
| Parameter | Standard Buffer (PBS) | Intracellular Environment | Cytomimetic Buffer Target |
|---|---|---|---|
| Na+ Concentration | ~157 mM [1] | ~14 mM [1] | 10-15 mM |
| K+ Concentration | ~4.5 mM [1] | ~140-150 mM [1] | 140-150 mM |
| Macromolecular Crowding | None / Very Low | High (80-200 mg/mL) [1] | 80-150 mg/mL |
| Impact on Kd | Reference Kd | Can differ by up to 20-fold or more from in vitro [1] | Kd value shifts towards in-cell measurement |
| Viscosity | ~1 cP (like water) | Higher than water [1] | Increased (e.g., with glycerol) |
| Redox Potential | Oxidizing | Reducing [1] | Reducing (with DTT) |
Table 2: Common Crowding Agents and Their Properties
| Crowding Agent | Typical Working Concentration | Key Characteristics |
|---|---|---|
| Ficoll PM-70 | 50-150 g/L | Inert, branched copolymer of sucrose and epichlorohydrin; low viscosity. |
| Polyethylene Glycol (PEG) | 50-150 g/L | Linear polymer; various molecular weights (e.g., PEG 8000); can sometimes induce protein condensation [22]. |
| Dextran | 50-150 g/L | Complex polysaccharide; can be used to simulate crowding. |
Frequently Asked Questions (FAQs)
1. Why is there often a discrepancy in compound activity data between my biochemical assays (BcAs) and cell-based assays (CBAs)?
The primary reason for this discrepancy is that the standard buffer conditions used in BcAs do not replicate the intracellular environment. Most biochemical assays use buffers like Phosphate-Buffered Saline (PBS), which mimics the high-sodium (∼140 mM), low-potassium (∼5 mM) conditions of the extracellular fluid [1]. However, your drug targets are often located inside the cell, in an environment characterized by high-potassium (∼140 mM), low-sodium (∼10-14 mM) conditions [1] [24]. This difference in ionic composition can significantly alter the binding affinity (Kd) and enzymatic activity of your target, leading to mismatched results. Other factors include the lack of macromolecular crowding, differential viscosity, and variations in cosolvent content in standard BcAs compared to the crowded, viscous interior of a cell [1].
2. What is the specific physiological role of the Na+/K+ gradient that my assays should replicate?
The sodium-potassium gradient is fundamental to cell function. The Na+/K+ ATPase (or sodium-potassium pump) actively transports 3 sodium ions (Na+) out of the cell and 2 potassium ions (K+) into the cell for every ATP molecule consumed [25] [26]. This action:
- Maintains Resting Membrane Potential: The pump creates a net negative charge inside the cell, crucial for the excitability of neurons and muscle cells [26] [27].
- Drives Secondary Active Transport: The energy stored in the Na+ gradient is used to power the transport of other critical molecules, such as glucose and amino acids, into the cell via symporters [26].
- Regulates Cell Volume: By managing ionic content, the pump helps prevent cellular swelling and lysis [26].
3. My biochemical assay uses PBS. What is the main ionic problem with this buffer?
PBS is formulated to mimic blood plasma, not the inside of a cell. Its dominant cation is sodium (Na+ at ~157 mM), with very low levels of potassium (K+ at ~4.5 mM) [1]. This is the inverse of the intracellular environment, where K+ is the dominant cation (~140 mM) and Na+ is low (~14 mM) [28] [1]. Using PBS to study an intracellular target means you are testing your compound under physiologically incorrect ionic conditions, which can distort your activity readings.
Troubleshooting Guide: Assay Discrepancies
Problem: Inconsistent IC50 values between biochemical and cellular assays for the same target.
| Symptom | Potential Cause | Recommended Solution |
|---|---|---|
| IC50 from CBA is significantly higher (less potent) than from BcA. | Reduced compound permeability into cells; compound efflux by transporters; intracellular metabolism. | Perform permeability assays (e.g., Caco-2); use efflux transporter inhibitors; check compound stability in cell lysates. |
| IC50 from CBA is significantly lower (more potent) than from BcA. | Assay buffer ionic conditions do not match the target's native environment [1]. | Reformulate BcA buffer to mimic intracellular ion composition (high K+, low Na+). |
| High variability in CBA results across experimental days. | Fluctuations in cell health, passage number, or confluence affecting ion pump and channel expression. | Standardize cell culture conditions; monitor resting membrane potential health; use consistent, low-passage cells. |
Problem: My compound is active in a purified enzyme assay but shows no effect in a cellular model.
Step-by-Step Diagnosis:
- Verify Target Engagement in Cells: Use a cellular thermal shift assay (CETSA) or similar method to confirm the compound is engaging with its intended target inside the cell.
- Check Cytotoxicity: Perform a cell viability assay (e.g., an ATP-based assay like ApoSENSOR or an LDH release assay) to rule out general cytotoxicity masking a specific effect [20].
- Audit Your Biochemical Assay Buffer: This is a critical step. Compare the salt composition of your BcA buffer to the intracellular milieu.
- Action: Switch from a standard buffer like PBS to an Intracellular-Mimicking Buffer (see Table 1 for formulation).
- Rationale: The enzymatic kinetics and compound binding affinity you observed in the BcA may be an artifact of the non-physiological, high-Na+ environment [1]. Re-testing the purified enzyme in an intracellular-like buffer may reveal a potency that better aligns with your negative cellular data.
Data Presentation: Standard vs. Optimized Buffer Compositions
Table 1: Quantitative comparison of standard extracellular buffer versus a proposed intracellular-mimicking buffer for biochemical assays.
| Parameter | Standard PBS (Extracellular) | Intracellular-Mimicking Buffer | Physiological Intracellular Reference |
|---|---|---|---|
| Na+ Concentration | 157 mM [1] | 10-15 mM | 10-15 mM [1] |
| K+ Concentration | 4.5 mM [1] | 140 mM [28] [1] | 140-150 mM [28] |
| Primary Cation | Na+ | K+ | K+ |
| Typical Use | Maintaining cell viability; extracellular target BcAs | BcAs for intracellular targets | - |
| Impact on Kd | Can alter by up to 20-fold or more compared to in-cell measurements [1] | Aims to replicate in-cell Kd values more closely | - |
Experimental Protocols
Protocol: Formulating and Using an Intracellular-Mimicking Buffer for Biochemical Assays
Objective: To create a buffer system that replicates the ionic strength and cation composition of the cytosol for use in biochemical assays of intracellular targets, thereby improving the translational relevance of the data to cell-based assays.
Background: Standard buffers like PBS reflect extracellular conditions and can misrepresent the activity of compounds targeting intracellular proteins. This protocol provides a baseline formulation for an intracellular-like buffer.
Reagents:
- KCl
- NaCl
- HEPES (or another suitable intracellular pH buffer)
- MgCl₂
- Mg-ATP
- Crowding Agent (e.g., PEG 8000, Ficoll 70)
- Dithiothreitol (DTT)
Method:
- Buffer Preparation:
- Prepare 1 Liter of a base buffer with the following composition:
- 20 mM HEPES (pH 7.2 with KOH)
- 140 mM KCl
- 5 mM NaCl
- 1 mM MgCl₂
- 5 mM DTT (to maintain a reducing environment; omit if it disrupts protein structure) [1]
- Prepare 1 Liter of a base buffer with the following composition:
- Add Energy Source:
- Add 1 mM Mg-ATP to the buffer to support ATP-dependent enzymes and better simulate the energetic cellular state.
- Introduce Macromolecular Crowding (Optional but Recommended):
- To simulate the crowded cellular interior, add a crowding agent like 5-10% (w/v) PEG 8000 or Ficoll 70 [1]. This can significantly impact enzyme kinetics and protein-ligand interactions.
- Assay Execution:
- Use this intracellular-mimicking buffer in place of PBS or Tris-based buffers in your biochemical assay.
- Compare the results (e.g., IC50, Kd) obtained in this buffer with those from standard buffers and your cell-based assay data.
Troubleshooting Note: The optimal concentrations of crowding agents and specific ions may need to be empirically determined for your specific protein target.
Signaling Pathways and Experimental Workflows
Diagram: Na+/K+ ATPase Role in Cellular Ion Homeostasis
Diagram: Workflow for Addressing BcA-CBA Discrepancy
The Scientist's Toolkit: Research Reagent Solutions
Table 2: Essential reagents and materials for optimizing salt composition in assays.
| Item | Function/Benefit | Example Application |
|---|---|---|
| Potassium Chloride (KCl) | Primary source of K+ ions for creating the high-potassium intracellular environment. | Formulating the base of an intracellular-mimicking buffer. |
| HEPES Buffer | A pH buffer suitable for maintaining physiological intracellular pH (∼7.2) during biochemical assays. | Maintaining stable pH in cell-free assays that mimic the cytosol. |
| Macromolecular Crowding Agents (PEG, Ficoll) | Simulate the volume exclusion and altered thermodynamic activity of the crowded cellular interior, which can affect Kd and enzyme kinetics [1]. | Adding to BcA buffers to study protein-ligand interactions under more physiologically relevant conditions. |
| ATP-Regenerating System | Maintains constant ATP levels for assays involving ATP-dependent processes like kinase or pump activity. | Studying the activity of the Na+/K+ ATPase or other ATPases in purified systems. |
| Ouabain / Digoxin | Specific inhibitors of the Na+/K+ ATPase [25] [26]. Used as a tool compound to disrupt the ion gradient in cell-based experiments. | Experimental control to confirm the role of the Na+/K+ gradient in a cellular phenotype or assay readout. |
| Cell Viability Assay Kits (e.g., ATP-based, LDH-based) | Assess the health of cells in CBAs, ensuring that ion gradients are intact and not compromised by cytotoxicity [20]. | Troubleshooting CBA results; validating that compound effects are specific and not due to general cell death. |
Incorporating Macromolecular Crowding Agents to Simulate Cytoplasmic Viscosity
Frequently Asked Questions (FAQs)
1. Why is there often a discrepancy between the activity values obtained from biochemical assays (BcAs) and cell-based assays (CBAs)? Inconsistencies between BcAs and CBAs are common and can delay research progress. Factors include differences in membrane permeability, compound solubility, specificity, and chemical stability. A critical, often overlooked factor is that standard biochemical assays use simplified buffer conditions (like PBS) that do not replicate the crowded intracellular environment. The cytoplasm has high concentrations of macromolecules (200-400 g/L), creating a crowded milieu that affects molecular diffusion, binding affinity, and reaction rates. This difference in physicochemical conditions can cause Kd values measured in cells to differ from those in simple buffers by up to 20-fold or more. [1] [29]
2. What is macromolecular crowding (MMC), and why should I incorporate it into my in vitro assays? Macromolecular crowding is a biophysical phenomenon caused by the high concentration of macromolecules in cellular environments. This creates an excluded volume effect, leading to steric hindrance and altered diffusion. Incorporating MMC into in vitro experiments provides a better mimic of the in vivo state. The effects are profound: MMC can enhance extracellular matrix deposition, influence protein folding and aggregation, alter enzyme kinetics, affect protein-protein association rates, and change ligand-binding affinity. Using crowders can bridge the gap between simplified biochemical assays and more complex cellular environments. [30] [31] [32]
3. What are some commonly used macromolecular crowders, and how do I choose one? Commonly used inert crowders include Ficoll, dextran, polyethylene glycol (PEG), and bovine serum albumin (BSA). The choice depends on your experimental goals, as crowders have different properties:
| Macromolecular Crowder | Key Properties and Common Uses |
|---|---|
| Ficoll | Neutral polysaccharide; often used to enhance collagen deposition and protein refolding. [30] |
| Dextran | Negatively charged polysaccharide; can enhance actin polymerization and spectrin self-assembly. [30] |
| Polyethylene Glycol (PEG) | Can be of varying molecular weights; used to enhance spectrin self-assembly and study phase separation. [30] [33] |
| Bovine Serum Albumin (BSA) | A protein crowder; used to study self-association of proteins like fibrinogen. [30] |
4. I observe unexpected results when using PEG as a crowding agent. What could be happening? Polyethylene glycol (PEG) is a commonly used crowding agent, but its effects can be complex. Recent research shows that PEG can induce phase separation of proteins that show no such propensity under physiological buffer conditions alone. It can also dampen the effects of protein mutations. Therefore, observing phase separation or altered interaction kinetics with PEG may not accurately reflect a protein's intrinsic behavior in a cell. Results obtained with PEG should be interpreted with caution and, if possible, validated with other crowders or methods. [33]
5. How does the molecular weight of a crowding agent affect my experiment? The molecular weight and flexibility of a crowding agent fundamentally impact its effect. There is a sharp distinction between low-mass and high-mass crowders, dictated by the polymer's ability to form a flexible coil. Low-mass agents (like ethylene glycol) often slow association rates inversely with solution viscosity. In contrast, high-mass polymers (like Ficoll-70 or high-mass PEG) form a porous network, and proteins can diffuse and associate relatively freely within the pores, resulting in only slight changes to association rates even at high viscosities. [34]
Troubleshooting Guides
Issue 1: Crowding Agent Interferes with Assay Readout or Causes Precipitation
Problem: The addition of a crowding agent causes high background noise, interferes with a fluorescent or colorimetric signal, or leads to unwanted protein aggregation or precipitation.
Solutions:
- Choose a Neutral Crowder: If using a charged crowder like dextran (negative) is causing issues, switch to a neutral one like Ficoll to minimize non-specific electrostatic interactions. [30]
- Test Compatibility: Before running your full experiment, perform a control test to ensure the crowding agent does not directly react with or quench your detection reagents.
- Optimize Concentration: Start with lower concentrations of the crowding agent (e.g., 5-10% w/w) and gradually increase while monitoring for precipitation. Use statistical design of experiments (DOE) for efficient optimization. [21]
- Consider Tagging: If studying a specific protein, be aware that large fluorescent tags like GFP can sometimes inhibit natural processes like phase separation. Using a smaller tag (e.g., UnaG) may minimize interference. [33]
Issue 2: No Effect or Unexpected Effect on Reaction Kinetics
Problem: After adding crowding agents, the observed reaction kinetics (e.g., association rate, enzyme activity) do not change or change in an unexpected way compared to dilute buffer.
Solutions:
- Verify Crowder Properties: Ensure you are using a high-mass crowder (L/Lp > 2 for polymers) if you expect to see the "porous medium" effect where association rates are less affected by macroviscosity. [34]
- Check Ionic Conditions: Remember that the cytoplasm has high K+ (~150 mM) and low Na+ (~14 mM), which is the inverse of common buffers like PBS. Use a buffer that mimics the intracellular ionic environment for more physiologically relevant results. [1]
- Measure Microviscosity: The macroviscosity of a solution can be misleading. Employ techniques such as fluorescence anisotropy of EGFP or other probes to directly measure the microviscosity and MMC levels in your assay mixture. [32]
- Use a Mixed System: A homogenous solution of one type of crowder may not fully capture the cellular environment. Consider using a mixture of crowders with different shapes (spherical, cylindrical) to better mimic the heterogeneous intracellular milieu. [29]
Issue 3: Inconsistent Results Between Experimental Replicates
Problem: Results from experiments conducted with crowding agents show high variability.
Solutions:
- Standardize Handling: The handling and storage of crowding agent stocks and cell cultures must be rigorously standardized. Passage numbers, confluence, and culture medium should be consistent. [21]
- Characterize Assay Performance: Calculate the Z' factor and coefficient of variations (CV) for your assay to ensure it is robust. A statistical DOE approach can help identify key variables contributing to variability and establish a reliable assay window. [21]
- Control for Cell State: Be aware that MMC is anti-correlated with cell spread area and can vary within a population. Using synchronized cells or measuring the cell spread area as a covariate can improve consistency. [32]
The following table summarizes key quantitative findings on the effects of macromolecular crowding from the literature, providing a reference for expected experimental outcomes.
| Observed Phenomenon | Experimental System | Impact of Crowding | Citation |
|---|---|---|---|
| Protein-Ligand Binding Affinity | In-cell vs. in vitro Kd measurements | Kd values can differ by up to 20-fold or more. [1] | |
| Enzyme Kinetics | Various enzymatic reactions | Reaction rates can change significantly (by as much as 2000%). [1] | |
| Protein-Protein Association Rate (kon) | TEM-BLIP complex with low-mass crowders (EG, PEG200) | kon decreased inversely with solution viscosity. [34] | |
| Protein-Protein Association Rate (kon) | TEM-BLIP complex with high-mass crowders (Ficoll-70) | kon changed only slightly, even at viscosities 12-fold higher than water. [34] | |
| Actin Polymerization | In vitro actin assembly | Increase in the order of magnitude with dextran. [30] | |
| Extracellular Matrix Deposition | Collagen deposition by fibroblasts | Significant increase in collagen deposition under crowded conditions. [30] |
Detailed Experimental Protocols
Protocol 1: Measuring Protein-Protein Association Rates Under Crowded Conditions
This protocol is adapted from studies investigating the TEM-BLIP complex, highlighting the critical differences between low and high-mass crowders. [34]
Key Research Reagent Solutions:
- Proteins: Purified proteins of interest (e.g., β-lactamase TEM and its inhibitor BLIP).
- Crowding Agents: A selection of low and high-mass crowders (e.g., Ethylene Glycol, PEG200, PEG1000, PEG8000, Ficoll-70).
- Assay Buffer: 10 mM Hepes buffer, pH 7.2.
Methodology:
- Prepare Crowded Solutions: Dissolve the crowding agent in the assay buffer to achieve the desired concentration (e.g., 0-40% w/w). Ensure solutions are properly mixed.
- Measure Association Rates:
- Perform experiments under either pseudo-first-order or second-order conditions.
- For pseudo-first-order conditions, hold one protein (e.g., TEM) in large excess (at least 10-fold) over the other (BLIP).
- Mix the proteins in the presence of the crowding agent and initiate the reaction.
- Monitor the formation of the complex over time using a suitable method (e.g., stopped-flow spectroscopy, fluorescence quenching, or surface plasmon resonance).
- Data Analysis:
- Plot the progress of complex formation over time.
- Determine the observed rate constant (kobs) for pseudo-first-order kinetics.
- The second-order association rate constant (kon) is derived from the slope of kobs versus the concentration of the excess protein.
- Compare kon values across different crowding agents and concentrations.
Troubleshooting Note: Validate that the measured rates are consistent between pseudo-first-order and second-order methods, as differences can indicate artifacts. No significant difference should be found between the two methods in a well-behaved system. [34]
Protocol 2: Using Fluorescence Anisotropy of EGFP to Quantify MMC in Live Cells
This protocol outlines a method to directly measure macromolecular crowding levels in the cytoplasm of living cells, providing a direct readout of the intracellular environment. [32]
Key Research Reagent Solutions:
- Cell Line: Adherent cell line of interest.
- Plasmid: Vector for cytoplasmic expression of EGFP.
- Imaging Buffer: Isotonic physiological buffer.
- Crowding Standards: Solutions of known crowders (e.g., BSA, Ficoll) for in vitro calibration.
Methodology:
- Cell Preparation: Transfect cells with the EGFP expression vector and plate onto imaging-grade dishes. Allow cells to adhere and express the protein for 24-48 hours.
- System Setup: Use a fluorescence microscope equipped with polarizers. The configuration should include a polarized laser source (e.g., 488 nm), a beam splitter, and two detectors for parallel (Iparallel) and perpendicular (Iperpendicular) emitted light.
- Calibration (in vitro): Measure the fluorescence anisotropy (r) of purified EGFP in buffers containing known concentrations of crowders (e.g., BSA, Ficoll). This establishes a standard curve linking anisotropy to MMC.
- Cell Measurement:
- Place the sample on the microscope and focus on the cytoplasm of a cell.
- Record the fluorescence intensities in both parallel and perpendicular channels.
- Calculate the steady-state fluorescence anisotropy (r) using the formula: r = (Iparallel - G * Iperpendicular) / (Iparallel + 2 * G * Iperpendicular), where G is an instrument-specific correction factor.
- Data Interpretation: Higher anisotropy values indicate a more crowded environment with increased microviscosity. Compare readings under different conditions (e.g., isotonic vs. hypertonic stress) to track changes in intracellular MMC.
The Scientist's Toolkit
| Research Reagent Solution | Function in Experiment |
|---|---|
| Ficoll 70/400 | Neutral, inert polysaccharide crowder used to mimic excluded volume effects and enhance macromolecular assembly, such as collagen deposition. [30] |
| Dextran | Negatively charged polysaccharide crowder; used to study effects on actin polymerization, protein self-association, and amyloid formation. [30] [29] |
| Polyethylene Glycol (PEG) | A flexible polymer crowder of variable molecular weights; often used to induce crowding, study phase separation, and stabilize nucleic acid structures. [30] [34] [33] |
| Bovine Serum Albumin (BSA) | A protein-based crowder; used to study the effects of a biologically relevant protein cosolute on reactions like fibrinogen self-association. [30] |
| Fluorescent Proteins (EGFP) | Genetically encoded probe used as a reporter for macromolecular crowding via measurements of fluorescence anisotropy or lifetime. [32] |
| Cytoplasm-Mimicking Buffer | A buffer solution with high K+ (~150 mM) and low Na+ (~14 mM) to better replicate the intracellular ionic milieu, as opposed to standard PBS. [1] |
Visualizing Concepts and Workflows
Diagram 1: How Crowding Alters Molecular Interactions
Diagram Title: Crowding Enhances Binding via Excluded Volume
Diagram 2: Workflow for a Crowded In Vitro Assay
Diagram Title: Developing a Crowded Biochemical Assay
Frequently Asked Questions
Q1: Why is there a discrepancy between my biochemical assay results and cellular assay results when studying redox-active compounds? A primary cause is the difference between a purified system and a complex cellular environment. In a biochemical assay, your compound interacts directly with its target. In a cellular assay, the compound must enter the cell and contend with the cytosolic environment, which contains a specific redox potential and various biomolecules that can alter the compound's activity or stability. Ensuring your experimental conditions, particularly the choice and concentration of redox mediators, accurately reflect the cellular milieu is crucial for bridging this gap [35].
Q2: How does the concentration of a redox mediator impact my experimental results? The concentration of a redox mediator is critical. While higher concentrations might be necessary to achieve a sufficient signal-to-noise ratio in electrochemical measurements, they can introduce significant cytotoxic effects. As mediator concentration exceeds 1 mM, you may observe a substantial increase in reactive oxygen species (ROS) and a sharp decrease in cell viability across various cell lines. This cytotoxicity can directly lead to discrepancies between your biochemical and cellular assays [35].
Q3: What are the key cell health parameters to monitor when using redox mediators? When introducing redox mediators to live cells, you should routinely assess three independent parameters of cell health:
- Reactive Oxygen Species (ROS): Quantified using fluorescence flow cytometry with stains like CellROX Green [35].
- Cell Viability/Proliferation: Measured using luminescence-based assays (e.g., RealTime-Glo) [35].
- Cell Migration: Evaluated using a scratch assay to characterize changes in cell mobility [35].
Q4: Are there computational methods to predict redox potentials for my compounds? Yes, computational methods are available. Traditional first-principles calculations can be challenging and computationally expensive. However, modern approaches combine machine learning with these calculations to achieve more accurate and efficient predictions of redox potentials on an absolute scale. Furthermore, for specific systems like Iron-Sulfur (Fe–S) clusters in proteins, simpler, data-driven regression models have been developed that use features like the cluster's total charge and the average valence of iron atoms to predict redox potentials with high accuracy [36] [37].
Troubleshooting Guides
Problem: Unexpected Cytotoxicity in Cellular Assays with Redox Mediators
| Symptom | Possible Cause | Recommended Action | | : | : | : | | High cell death in treatment groups | Redox mediator concentration is too high | Titrate the mediator concentration down, aiming for ≤ 1 mM, and re-run the viability assay [35]. | | Increased ROS levels | Mediator-induced oxidative stress | Confirm ROS increase with flow cytometry. Consider using a different, less cytotoxic redox mediator [35]. | | Inhibition of cell migration | Cytotoxic effect at high mediator concentration | Perform a scratch assay. If migration is hindered, reduce the mediator concentration [35]. | | Discrepancy between biochemical and cellular activity | Compound degradation or modification in the cytosolic environment | Review the compound's stability under the cytosolic redox conditions. The cellular environment may be altering your compound [35]. |
Problem: Inaccurate Prediction of Redox Potentials
| Symptom | Possible Cause | Recommended Action | | : | : | : | | Large errors (>0.2 V) in predicted vs. experimental potential | Limitations of semi-local density functionals in quantum mechanical calculations | Shift to using hybrid functionals (e.g., PBE0) or utilize machine-learning-aided thermodynamic integration for better accuracy [36]. | | Inaccurate predictions for Fe-S clusters | Complex electronic structure and protein environment not fully captured | Employ a simplified regression model that uses the cluster's net charge and the average iron valence for a more computationally efficient and accurate prediction [37]. | | Inconsistent results from simulations | Inadequate statistical sampling during free energy calculations | Implement machine learning force fields to enable broader phase-space sampling during thermodynamic integration [36]. |
Table 1: Impact of Common Redox Mediators on Cell Health Parameters [35] This table summarizes quantitative effects of redox mediators on Panc1, HeLa, U2OS, and MDA-MB-231 cell lines over 6-8 hours.
| Redox Mediator | Concentration | ROS Increase | Cell Viability | Migration Hindrance |
|---|---|---|---|---|
| Ferro/Ferricyanide (FiFo) | 0.1 mM | Minimal | >90% | No |
| 1 mM | Moderate | ~70-90% | No | |
| 5 mM | Significant | <50% | Yes | |
| Ferrocene Methanol (FcMeOH) | 0.1 mM | Minimal | >90% | No |
| 1 mM | Moderate | ~70-90% | No | |
| 5 mM | Significant | <50% | Yes | |
| Tris(bipyridine) Ru(II) (RuBpy) | 0.1 mM | Minimal | >90% | No |
| 1 mM | Moderate | ~70-90% | No | |
| 5 mM | Significant | <50% | Yes |
Table 2: Performance of Computational Redox Potential Prediction Methods
| Method / Model | System | Key Features | Accuracy (vs. Experiment) | Reference |
|---|---|---|---|---|
| ML-aided First-Principles | Ag²⁺/Ag⁺, Cu²⁺/Cu⁺, Fe³⁺/Fe²⁺ | ML force fields for thermodynamic integration; hybrid functionals | ~0.1-0.15 V error | [36] |
| Linear Regression Model | Fe-S Clusters in Proteins | Net charge & average Fe valence | 0.12 V average error; 88% accuracy | [37] |
| Density Functional Theory (DFT) | Fe-S Clusters | Poisson-Boltzmann solvation corrections | 0.1 - 0.3 V error | [37] |
Detailed Experimental Protocols
Protocol 1: Assessing Redox Mediator Impact on Cell Health
This protocol outlines a comprehensive approach to evaluate the effects of redox mediators on cell health, using three independent assays [35].
Materials:
- Cell lines (e.g., Panc1, HeLa)
- Redox mediators (e.g., FiFo, FcMeOH, RuBpy)
- DMEM media with 10% FBS
- CellROX Green reagent
- RealTime-Glo MT Cell Viability Assay reagents
- 6-well and 96-well plates
- Flow cytometer (e.g., BD LSRFortessa)
- Microplate reader (e.g., GloMax Explorer)
Procedure: A. Reactive Oxygen Species (ROS) Quantification by Flow Cytometry
- Cell Seeding and Treatment: Seed cells in a 6-well plate and grow to 80–90% confluence. Incubate the cells with your redox mediator at varying concentrations (e.g., 0.1 mM, 1 mM, 5 mM) for 6 hours.
- Staining: After incubation, stain the cells with CellROX Green oxidative stress stain at a concentration of 5 μM for 30 minutes.
- Preparation for Analysis: Rinse the cells with DPBS, lift them with trypsin, and centrifuge at 2000 rpm for 8 minutes. Resuspend the cell pellet in 0.5% bovine serum albumin in PBS and keep on ice.
- Flow Cytometry: Analyze the samples using a flow cytometer. Use a gating strategy to first distinguish live cells, then single-cell events, and finally, gate for cells emitting ROS-generated fluorescence in the FITC channel [35].
B. Cell Viability Luminescence Assay
- Cell Seeding: Seed cells in a 96-well plate optimized for the cell line to reach the target confluence.
- Assay Setup: Introduce the redox mediators and the RealTime-Glo viability substrate to the wells.
- Measurement: Place the plate in a microplate reader and measure the bioluminescence at regular intervals to monitor cell viability throughout the exposure time (e.g., up to 8 hours) and during a recovery period [35].
C. Cell Migration Scratch Assay
- Cell Seeding: Seed cells in a 6-well plate and grow to confluence.
- Scratching: Create a thin, uniform "scratch" in the cell monolayer using a sterile pipette tip.
- Treatment and Observation: Rinse the well to remove debris and add fresh media containing the redox mediator. Observe and image the scratch at regular intervals to monitor cell migration into the scratched area over time [35].
Protocol 2: Computational Prediction of Redox Potentials using a Regression Model
This protocol describes a streamlined, data-driven approach to predict the redox potentials of Iron-Sulfur (Fe–S) clusters, leveraging data from the Protein Data Bank (PDB) [37].
Materials:
- A set of Fe–S protein structures from the PDB (resolution < 2.7 Å recommended).
- Software for structure analysis (e.g., PyMOL, VMD) and statistical computing (e.g., Python with Pandas, Scikit-learn).
Procedure:
- Data Preparation: Select a diverse set of unique Fe–S containing proteins from the PDB. Exclude structures with resolutions worse than 2.7 Å to ensure data quality. The dataset should include various cluster configurations ([1Fe–0S], [2Fe–2S], [3Fe–4S], [4Fe–4S]) [37].
- Feature Calculation: For each Fe–S cluster in your dataset, calculate the two primary features:
- Total Charge: Determine the net charge of the cluster itself.
- Average Valence: Calculate the average valence of the iron atoms within the cluster. The valence provides information on Fe-ligand bond lengths and ligand atom types [37].
- Model Application: Input the calculated features into the pre-trained regression model. The model uses the following general form to predict the redox potential (Em): Em = (Regression Coefficient₁ × Total Charge) + (Regression Coefficient₂ × Average Valence) + Intercept [37].
- Validation: Compare the predicted redox potentials with any available experimental data to assess the model's accuracy for your specific system of interest [37].
Workflow and Pathway Visualizations
The Scientist's Toolkit: Research Reagent Solutions
Table 3: Essential Reagents for Redox Studies in Cellular Environments
| Item | Function/Application | Key Considerations |
|---|---|---|
| Ferro/Ferricyanide (FiFo) | Common redox mediator for electrochemical measurements (e.g., SECM, ECL). | Use at low concentrations (≤1 mM) to minimize cytotoxicity and ROS generation [35]. |
| Ferrocene Methanol (FcMeOH) | A common redox mediator used in bioanalytical electrochemistry. | Similar to FiFo, concentration should be carefully optimized to avoid compromising cell health [35]. |
| Tris(bipyridine) Ru(II) (RuBpy) | A widely used mediator, particularly in electrochemiluminescence (ECL) assays. | Can induce significant ROS and reduce viability at high concentrations (>1 mM) [35]. |
| CellROX Green Reagent | Fluorescent dye for quantifying reactive oxygen species (ROS) via flow cytometry. | Maximum excitation/emission at 485 nm/520 nm; use FITC channel for detection [35]. |
| RealTime-Glo Viability Assay | Luminescence-based assay for monitoring cell viability and proliferation in real-time. | Allows for continuous monitoring of cell health during mediator exposure and recovery [35]. |
| Dulbecco's Modified Eagle Medium (DMEM) | Standard cell culture medium for maintaining mammalian cell lines. | Supplement with 10% FBS and antibiotics for cell growth [35]. |
FAQs: Understanding Crowding in Biochemical Research
FAQ 1: Why are my enzyme kinetics parameters (Km and Vmax) different in simple buffer solutions compared to complex cellular assays?
The differences arise because the idealized conditions of most standard biochemical assays (e.g., in phosphate-buffered saline) do not replicate the intracellular environment. The cell cytoplasm is highly crowded, with macromolecules occupying 20–30% of the total volume [38]. This macromolecular crowding affects enzyme kinetics through several mechanisms:
- Excluded Volume Effects: Crowders reduce the available space, which can favor compact enzyme states and shift the equilibrium of protein-protein and protein-substrate interactions, potentially enhancing activity [38] [39].
- Microviscosity: A crowded environment slows diffusion rates, which can hinder substrate access and product release, thereby reducing the catalytic rate (Vmax) [38] [39].
- Soft Interactions: Non-specific, weak chemical interactions (e.g., between enzymes and crowders like PEG or Ficoll) can further modulate enzyme conformation and stability [39] [40].
The net effect on kinetics depends on the balance of these factors. For example, crowding can decrease both Vmax and Km for one reaction direction (e.g., ethanol oxidation by yeast alcohol dehydrogenase) while increasing them for the reverse reaction (acetaldehyde reduction) [39].
FAQ 2: How significant can the discrepancy be between the binding affinity (Kd) measured in vitro and inside a cell?
The discrepancy can be substantial. Direct measurements have shown that protein-ligand Kd values within living cells can differ from their corresponding in vitro values by up to 20-fold or more [1]. This is because the crowded intracellular environment can significantly alter the conformational dynamics of both the protein and the ligand, thereby modulating non-covalent interactions [1] [40].
FAQ 3: My experimental results with crowding agents are inconsistent. What are the key factors I should control for?
Inconsistencies often stem from the properties of the crowding agents themselves. Key factors to consider and control include:
- Size of the Crowder: The molecular weight of the crowding agent relative to your protein of interest is critical. High-molecular-weight crowders (e.g., PEG 3350) can induce compaction in disordered protein regions, while low-molecular-weight crowders (e.g., PEG 1000) might cause expansion [40].
- Concentration: Crowding effects are typically concentration-dependent. At low levels, some parameters may increase, while at higher crowding levels, they may decrease [38].
- Chemical Nature: Synthetic polymers like Ficoll, dextran, and PEG can have different effects, even at the same concentration, due to variations in their chemical structure and their propensity for "soft" interactions with your protein [39].
- Depletion Layers: In solutions with large crowders, a depletion layer can form around the protein, which can diminish the hindering effects of viscosity [39].
Troubleshooting Guides
Problem: Inconsistent Enzyme Activity in Crowded Assays
| Potential Cause | Diagnostic Steps | Recommended Solution |
|---|---|---|
| Confounding viscosity effects | Measure solution viscosity. Check if activity loss correlates with viscosity increase rather than crowder concentration. | Use smaller crowders or adjust data interpretation to account for microviscosity impacting diffusion [39]. |
| Uncontrolled soft interactions | Test multiple types of crowders (e.g., Ficoll, dextran, PEG). If effects vary widely between chemistries, soft interactions are likely. | Use a crowder that best mimics the cellular component you wish to model. Consider using a mixture of crowders [39] [40]. |
| Crowder-induced protein instability | Perform a thermal shift assay or circular dichroism with and without crowders. | Switch to a more inert crowder or optimize buffer conditions (pH, salts) to stabilize the protein [38]. |
Problem: Discrepancy Between Biochemical and Cellular Assay IC50 Values
| Potential Cause | Diagnostic Steps | Recommended Solution |
|---|---|---|
| True physicochemical difference | Measure the biochemical IC50 under cytoplasm-mimicking conditions (see below). | Perform key in vitro assays in a buffer that more accurately mimics the intracellular physicochemical environment [1]. |
| Cellular compound permeability | Measure cellular uptake of the compound using LC-MS/MS. | Optimize compound structure for membrane permeability or use a delivery agent [1]. |
| Off-target effects in cells | Use genetic knockdown/knockout of the target and re-test the compound. | Validate target engagement using cellular thermal shift assays (CETSA) or similar methods [23]. |
Table 1: Observed Effects of Macromolecular Crowding on Enzyme Kinetics
| Enzyme | Crowding Agent | Observed Effect on Kinetics | Proposed Mechanism |
|---|---|---|---|
| Yeast Alcohol Dehydrogenase (YADH) | Ficoll, Dextran | Direction-dependent: Vmax and Km decreased for ethanol oxidation; increased for acetaldehyde reduction. | Excluded volume optimizes hydride transfer; viscosity hinders product release; a depletion layer with large dextrans mitigates viscosity [39]. |
| α-Chymotrypsin | Polyethylene Glycol (PEG) | Decreased turnover number (Kcat). | Crowding decreases structural dynamics, which correlates with a lower catalytic rate for this enzyme [38]. |
| α-Chymotrypsin | Gold Nanoparticles (functionalized) | Substrate-selective increase in activity (Kcat/Km) for a hydrophobic substrate. | The nature of the crowder surface introduces specific interactions that favor certain substrates [38]. |
| Multi-copper Oxidase (Fet3p) | Not Specified | Concentration-dependent: Km and Kcat increase at low crowding; decrease at high crowding. | Low crowding may favor productive encounters; high crowding dominates with diffusion limitation [38]. |
| Tryptophan Synthase | Dextran 70, Ficoll 70 | Rates of conformational transitions reduced; open, less active conformation stabilized. | Slowed dynamics and a shift in the conformational equilibrium toward an inactive form [38]. |
Table 2: Effects of Crowding on Binding Affinity and Protein Conformation
| System / Protein | Crowding Agent | Observed Effect | Proposed Mechanism |
|---|---|---|---|
| SARS-CoV-2 N-protein IDR | High MW PEG (e.g., PEG 2050-35000) | Collapse of the intrinsically disordered region (IDR); increased RNA binding affinity. | Excluded volume effect dominates, compacting the IDR and enhancing ligand binding through entropic effects [40]. |
| SARS-CoV-2 N-protein IDR | Low MW PEG (e.g., PEG 1000) | Expansion of the IDR. | Favorable protein-crowder interactions overcome the excluded volume effect, leading to expansion [40]. |
| General Protein-Ligand Binding | Intracellular Environment | Kd values can be up to 20-fold different from standard buffer. | Combined effects of crowding, distinct ionic composition, and viscosity alter conformational equilibria and interaction energies [1]. |
Experimental Protocols
Protocol 1: Assessing Enzyme Kinetics Under Crowded Conditions
This protocol outlines how to measure Michaelis-Menten parameters (Km and Vmax) in the presence of macromolecular crowding agents, using yeast alcohol dehydrogenase as an example [39].
1. Reagents and Solutions
- Purified enzyme (e.g., YADH).
- Substrates (e.g., ethanol for oxidation, acetaldehyde for reduction).
- Cofactors (e.g., NAD+/NADH).
- Crowding agents: Prepare stock solutions of Ficoll 70, dextran of varying molecular weights, or PEG in your assay buffer.
- Standard assay buffer (e.g., phosphate or HEPES buffer, pH 7.4).
2. Experimental Procedure
- Prepare crowded reaction mixtures: In a series of reactions, keep the concentration of the enzyme and cofactor constant. Add increasing concentrations of the substrate. For the crowded condition, supplement the reaction mix with a specific concentration (e.g., 25-100 g/L) of the crowding agent. Include a no-crowder control.
- Initiate and monitor reactions: Start the reaction by adding the enzyme. Continuously monitor the formation of product (e.g., NADH formation for acetaldehyde reduction) spectrophotometrically or fluorometrically over time.
- Measure initial rates: Calculate the initial velocity (v0) for each substrate concentration from the linear portion of the progress curve.
3. Data Analysis
- For each condition (with and without crowder), plot the initial velocity (v0) against the substrate concentration ([S]).
- Fit the data to the Michaelis-Menten equation:
v0 = (Vmax * [S]) / (Km + [S])using non-linear regression to extract Km and Vmax. - Compare the parameters between crowded and non-crowded conditions to determine the effect.
Protocol 2: Mimicking Intracellular Conditions for Binding Assays
This protocol describes how to set up a buffer that mimics the intracellular environment to measure more physiologically relevant binding constants (Kd) [1].
1. Reagents and Solutions
- Cytoplasm-Mimicking Buffer (CMB) should be prepared with the following components:
- Ionic Composition: High K+ (~140 mM), low Na+ (~14 mM) to reflect the cytosolic balance [1].
- Crowding Agent: Add a macromolecular crowder like Ficoll 70, dextran, or PEG at a concentration of 50-100 g/L to achieve 10-20% volume exclusion [38] [1].
- pH Buffer: Use HEPES or another suitable buffer at pH 7.2-7.4.
- Reducing Environment (Optional, use with caution): Add 1-2 mM DTT or TCEP to mimic the reducing cytosol. Note: Avoid if studying proteins stabilized by disulfide bonds [1].
- Standard Buffer: e.g., Phosphate-Buffered Saline (PBS) for comparison.
2. Experimental Procedure
- Prepare a dilution series of the ligand.
- Incubate a fixed concentration of the protein with different concentrations of the ligand in both the CMB and the standard buffer.
- Use your preferred method (e.g., fluorescence anisotropy, isothermal titration calorimetry, SPR) to measure the fraction of protein bound at each ligand concentration.
3. Data Analysis
- Plot the fraction bound (or a proportional signal) against the ligand concentration.
- Fit the binding isotherm to determine the Kd value in each buffer condition.
- The Kd measured in CMB is expected to be a better predictor of cellular activity.
The Scientist's Toolkit
Table 3: Key Research Reagent Solutions for Crowding Studies
| Reagent | Function in Experiment | Key Considerations |
|---|---|---|
| Ficoll | Synthetic, inert polysaccharide used as a crowding agent. | Less viscous than dextrans of similar molecular weight; good for isolating excluded volume effects [39]. |
| Dextran | Branched polysaccharide used as a crowding agent. | Available in a wide range of molecular weights; viscosity can be a significant confounding factor [39]. |
| Polyethylene Glycol (PEG) | Synthetic polymer commonly used for crowding and precipitation. | Can engage in "soft" interactions with proteins; effects are highly dependent on molecular weight [38] [40]. |
| Cytoplasm-Mimicking Buffer | A buffer designed to replicate the ionic composition (high K+/low Na+), crowding, and pH of the intracellular milieu. | Crucial for bridging the gap between biochemical and cellular assay results [1]. |
Experimental Workflow and Conceptual Framework
Diagram 1: Workflow for Troubleshooting Assay Discrepancies
Diagram 2: Factors Affecting Enzyme Kinetics in Crowded Environments
Solving Common Pitfalls: A Practical Guide to Robust and Interference-Free Assays
In drug discovery and chemical biology, a significant challenge is the frequent discrepancy observed between the activity of a compound in a simplified biochemical assay and its behavior in a more complex cellular environment. [9] This inconsistency can delay research progress and hinder drug development. Often, this disconnect is attributed to factors like a compound's permeability or stability. However, even when these factors are known, differences in activity measurements persist, frequently due to compound-mediated interference in assay readouts. [9] A primary source of such interference in common assay formats involves fluorescence quenching, aggregation, and other optically active phenomena. [41] This guide provides troubleshooting protocols to identify and mitigate these issues, ensuring more reliable and translatable experimental results.
FAQs and Troubleshooting Guides
What are the common types of compound interference in cellular assays?
Compound interference can be broadly divided into two categories: technology-related and biology-related. The following table summarizes the key mechanisms and their impacts on assay data.
Table 1: Common Types of Compound Interference in Cellular Assays
| Interference Type | Mechanism | Impact on Assay Readout | Example |
|---|---|---|---|
| Autofluorescence [41] | Compound itself emits light upon excitation. | False positive signals, elevated background. | Compounds with intrinsic fluorescent properties. |
| Fluorescence Quenching [41] | Compound reduces or extinguishes the fluorescence signal. | False negatives, reduced signal intensity. | Collisional quenching or energy transfer to the compound. [42] |
| Aggregation-Induced Quenching (AIQ) [42] | Dye molecules form aggregates, leading to non-radiative decay of energy. | Significant reduction in fluorescence signal. | BODIPY or other dyes aggregating in aqueous environments. |
| Compound-Mediated Cytotoxicity [41] | Non-specific cell death or injury. | False positives/negatives due to reduced cell count. | Mitochondrial toxins, cytoskeletal poisons. |
| Colloidal Aggregation [41] | Compounds form sub-micrometer aggregates that non-specifically sequester proteins. | Promiscuous inhibition, false positives in target-based assays. | Certain small molecules forming aggregates in aqueous buffer. |
How can I determine if fluorescence quenching is affecting my assay?
A systematic approach is required to diagnose fluorescence quenching. The workflow below outlines key steps and counter-screens.
Detailed Experimental Protocols:
Protocol 1: Cell-Free Control for Quenching.
- Preparation: Prepare your assay buffer in the absence of cells. Add the fluorescent probe (e.g., a dye or a fluorescently-labeled protein) at the same concentration used in your cellular assay.
- Compound Addition: Dispense the buffer-probe mixture into a microplate. Add the test compounds, ensuring a final DMSO concentration consistent with your cellular assay. Include positive (known quencher) and negative (DMSO only) controls.
- Measurement: Incubate for the same duration as your cellular assay and measure the fluorescence intensity using the same instrument settings.
- Analysis: A significant decrease in fluorescence intensity in the test wells compared to the negative control indicates direct compound-probe quenching. [41]
Protocol 2: Orthogonal Assay Using a Different Detection Technology.
- Objective: To confirm the biological activity of a hit compound without relying on fluorescence.
- Method: This depends on your target but could include:
- ELISA (Enzyme-Linked Immunosorbent Assay): Useful for detecting protein levels or post-translational modifications. [43]
- Mass Spectrometry-Based Proteomics: Directly measure target protein abundance, effective for confirming degraders. [44]
- Cellular Thermal Shift Assay (CETSA): Monitor target engagement by measuring protein stability under thermal denaturation.
How can I prevent Aggregation-Induced Quenching (AIQ) in fluorescent dyes?
Aggregation-Induced Quenching (AIQ) is a major cause of signal loss, especially for dyes like BODIPY in aqueous environments. [42] Mitigation strategies focus on molecular design and formulation.
Table 2: Strategies to Mitigate Aggregation-Induced Quenching (AIQ)
| Strategy | Method | Underlying Principle | Application Example |
|---|---|---|---|
| Introducing Bulky Substituents [42] | Attach large alkyl or aryl groups at the meso position of the dye core. | Increases steric hindrance, preventing close π-π stacking of dye molecules. | BODIPY dyes modified with octyl groups. [45] |
| Adding Solubilizing Chains [42] | Incorporate hydrophilic groups (e.g., polyethylene glycol chains) or ionizable groups. | Enhances aqueous solubility and dispersion, reducing the driving force for aggregation. | Water-soluble BODIPY nanoparticles for in vivo imaging. [45] |
| Zig-Zag Molecular Design [45] | Design dimeric dyes with a non-planar, zig-zag architecture. | Disrupts co-facial, planar stacking that leads to H-aggregates and quenching. | 1,4-bisvinylbenzene-bridged BODIPY dimers. [45] |
| Using Surfactants or Carriers [42] | Formulate dyes within nanoparticles, liposomes, or with detergents. | Physically separates dye molecules within a hydrophobic core or micelle. | BODIPY J-aggregates in phospholipid nanoparticles. [45] |
What are the best practices for assay design to minimize interference from the start?
Proactive assay design is the most effective way to minimize the impact of nuisance compounds. [23]
Key Considerations:
- Counterscreens and Controls: Always include a set of control compounds with known interference mechanisms (e.g., autofluorescent compounds, aggregators) to validate your assay's ability to flag such issues. [41] Implement a primary assay and a counterscreen designed to detect the specific interference (e.g., a cell viability assay run in parallel).
- Physiologically-Relevant Buffers: Biochemical assays performed in simplified buffers may not reflect intracellular conditions. Where possible, use buffers that mimic the cytoplasmic environment in terms of pH, salt composition, and molecular crowding to generate more physiologically relevant data. [9]
- Cell Seeding Density: For cellular imaging (HCS) assays, optimize cell seeding density to ensure a sufficient number of cells are analyzed per well, even in the face of moderate compound-mediated cytotoxicity. This prevents data loss due to cell loss. [41]
The Scientist's Toolkit: Research Reagent Solutions
Table 3: Essential Reagents for Mitigating and Studying Compound Interference
| Reagent / Tool | Function | Example Use Case |
|---|---|---|
| Common Fluorescence Quenchers [42] | Used in control experiments to validate quenching mechanisms and probe behavior. | Black Hole Quencher (BHQ), DusQ, and QSY dyes for developing biosensors or as positive controls. |
| Surfactants (e.g., CTAB) [46] | Reduces aggregation of dyes or compounds in aqueous solution. | Used in the synthesis of fluorescent silica nanoparticles to improve dye dispersion and stability. [46] |
| Sodium Borohydride (NaBH4) [47] | Quenches autofluorescence caused by aldehyde-based fixatives in immunofluorescence. | Treatment of fixed cells before staining to reduce background signal. |
| Cytotoxicity Assay Kits | Counterscreen to distinguish specific biological activity from general cell death. | Used in parallel with a primary phenotypic screen to de-prioritize cytotoxic hits. [41] |
| Protein Phosphatase Inhibitors [47] | Preserves phosphorylation states in cell-based assays. | Added to buffers during cell lysis and fixation for phospho-specific immunofluorescence. |
| TRIS(2-carboxyethyl)phosphine (TCEP) [43] | A reducing agent used to maintain cysteine residues and prevent disulfide bond formation. | Used in the labeling and purification of antibodies for probe development. |
Successfully navigating compound interference is critical for robust target validation and drug discovery. By understanding the mechanisms of fluorescence quenching and aggregation, and by implementing the systematic troubleshooting guides, experimental protocols, and best practices outlined above, researchers can significantly improve the quality and reliability of their data. This proactive approach to identifying and mitigating artifacts ensures that resources are focused on compounds with genuine biological activity, thereby bridging the gap between biochemical and cellular assay results. [9] [23] [41]
In the pursuit of new therapeutic compounds, researchers often encounter a frustrating phenomenon: compounds that show promising activity in initial biochemical assays fail to perform in more complex cellular tests. This discrepancy frequently stems from assay artifacts—false signals or interferences that mimic genuine biological activity. These artifacts can mislead research efforts, wasting significant time and resources on pursuing non-viable compounds. The NIH Assay Guidance Manual provides comprehensive strategies to identify, understand, and mitigate these artifacts, enabling researchers to distinguish true biological activity from experimental interference.
Troubleshooting Guides and FAQs
Q1: Why do my compounds show excellent biochemical potency but poor cellular activity?
This common discrepancy can arise from multiple factors, not just the traditionally assumed issues with membrane permeability.
Fundamental Physicochemical Differences: Standard biochemical assays use simplified buffer systems like PBS, which poorly replicate the intracellular environment. The cytoplasm has different ionic composition, with high K+ (140-150 mM) and low Na+ (≈14 mM)—the reverse of PBS. It also features macromolecular crowding, viscosity, and lipophilicity that can significantly alter dissociation constants (Kd). In-cell Kd values can be up to 20-fold or more different from those measured in standard biochemical buffers [1] [9].
Inadequate Intracellular Bioavailability (Fic): A compound's cellular potency is determined by its intracellular bioavailability (Fic), representing the fraction of extracellular compound that reaches intracellular targets in an unbound form. A study of p38α (MAPK14) inhibitors found a median Fic of just 0.088, explaining why compounds were, on average, one order of magnitude less potent in cellular assays compared to biochemical ones. Measuring Fic provides a more accurate prediction of cellular potency than artificial membrane permeability assays alone [48].
Action of Active Transport Systems: Efflux transporters can actively pump compounds out of cells. In one case, a pair of enantiomers with identical biochemical potency (IC50 = 12 nM) showed different cellular potencies due to a 2.3-fold difference in Fic. This was traced to carrier-mediated efflux affecting one enantiomer but not the other [48].
Strategy for Mitigation: Develop biochemical assays in buffers that mimic the intracellular environment (considering crowding agents, ionic composition, and viscosity) and employ assays to measure intracellular bioavailability (Fic) in relevant cell types [1] [48].
Q2: What are PAINS, and how can I identify and avoid them?
Pan-Assay Interference Compounds (PAINS) are chemical compounds that produce false positive results across multiple assay types and biological targets through non-specific mechanisms [49].
Common Mechanisms of PAINS:
- Covalent Thiol Reactivity: Compounds may react non-specifically with cysteine residues on multiple proteins, inhibiting enzyme activity indiscriminately. This can occur via addition-elimination reactions, nucleophilic aromatic substitution, or disulfide bond formation [49].
- Compound Fluorescence Effects: In fluorescence-based assays, some compounds can quench or emit light, interfering with the readout.
- Chemical Aggregation: Compounds can form colloidal aggregates that non-specifically inhibit enzymes.
- Redox Activity: Some compounds can react with oxygen to generate hydrogen peroxide (H2O2), which may inhibit enzymes.
Identification Strategies:
- Cheminformatic Filtering: Use computational tools to flag known PAINS substructures in screening libraries.
- Orthogonal Assays: Confirm activity using a different assay technology (e.g., switch from a fluorescence-based to a radiometric or luminescence-based readout).
- Counter-Screens: Implement specific assays to detect common interference mechanisms, such as thiol-reactivity probes (ALARM NMR, CPM-based assays) or redox-activity tests [49].
Q3: How can I minimize contamination in my sensitive ELISA assays?
Sensitive assays for detecting impurities like Host Cell Proteins (HCPs) can be easily compromised by contamination, leading to false elevations in apparent analyte levels [50].
- Common Contamination Sources and Prevention:
| Contamination Source | Preventive Action |
|---|---|
| Airborne Analytes (from concentrated samples, media, sera) | Perform assays in a dedicated, clean area. Clean work surfaces and equipment thoroughly before starting. |
| Technician Dander/Mucosal Aerosols | Do not talk or breathe over uncovered microtiter plates. Consider using a laminar flow barrier hood for pipetting. |
| Contaminated Pipettes | Avoid using pipettes previously used to dispense concentrated forms of the analyte. Use disposable filter tips. |
| Contaminated Plate Washers | Do not use plate washers that have been exposed to concentrated analyte solutions (e.g., those using BSA-blocked wash buffers). |
| Substrate Contamination (e.g., PNPP) | Withdraw only the needed amount of substrate. Never return unused substrate to the original bottle. |
- Troubleshooting High Background: If you observe high background or non-specific binding (NSB):
Q4: What are the best practices for curve fitting in immunoassay data analysis?
Choosing an inappropriate curve-fitting method can introduce significant inaccuracies, especially at the extremes of the standard curve [50].
Recommended Methods: For immunoassays, which are often inherently non-linear, the most robust and accurate curve-fitting routines are:
- Point to Point
- Cubic Spline
- 4-Parameter Logistic (4PL) [50]
Methods to Avoid:
- Linear Regression: The NIH Assay Guidance Manual strongly warns against using linear regression for most immunoassays. Forcing non-linear data into a linear fit introduces inaccuracy, even if the R-squared value appears good [50].
Validation Tip: To determine the optimal curve fit, "back-fit" the signals from your standards as unknowns. If the back-calculated values do not match the nominal values, your curve-fit algorithm may be introducing artifacts [50].
Key Experimental Protocols
Protocol 1: Assessing Intracellular Bioavailability (Fic)
Purpose: To quantitatively measure the fraction of extracellularly applied compound that is available in the unbound form inside the cell, thereby predicting target engagement for intracellular targets [48].
Workflow:
- Cell Preparation: Use cell types relevant to your pharmacology (e.g., PBMCs for inflammation targets, cancer cell lines for oncology targets). Culture cells under standard conditions [48].
- Compound Incubation: Incubate cells with the test compound at a physiologically relevant concentration for a defined period.
- Separation and Lysis: Rapidly separate cells from the incubation medium by centrifugation through an oil layer or using a fast filtration system. Lyse the cell pellet.
- Concentration Measurement: Use a sensitive method (e.g., LC-MS/MS) to measure the total compound concentration in the cell lysate and the incubation medium.
- Determine Unbound Fraction (fu,cell): In a separate experiment, determine the fraction of unbound compound in the cell interior. This can be done by cellular dialysis or other methods that separate bound from unbound compound [48].
- Calculation:
- Cellular Accumulation (Kp) = [Total Compound] in cells / [Compound] in medium
- Fic = Kp × fu,cell
Interpretation: Fic represents the proportional availability of the unbound drug inside the cell. A low Fic (<0.1) indicates significant "cell drop-off" and explains why a compound with high biochemical affinity may show weak cellular activity [48].
Protocol 2: Counter-Screen for Thiol-Reactive PAINS
Purpose: To identify compounds that act through non-specific, covalent reactivity with protein thiols (cysteine residues), a common mechanism of assay interference [49].
Workflow:
- ALARM NMR: This assay tests the compound's ability to cause conformational changes in a model protein (the La antigen) by disrupting disulfide bonds, indicating promiscuous thiol reactivity [49].
- Protein Mass Spectrometry: Incubate the compound with a model protein (e.g., Rtt109 histone acetyltransferase) and use MS to detect covalent adducts formed with cysteine residues [49].
- Orthogonal Assay: Test the compound in an assay that does not rely on thiol-reactive probes (e.g., switch from a CPM-based assay to a radiometric or antibody-based format). Loss of activity in the orthogonal assay suggests the initial hit was an artifact [49].
- Promiscuity Check: Test the compound against a panel of unrelated enzymes. Inhibition of multiple, structurally diverse targets suggests non-specific interference [49].
Interpretation: Compounds that show positive signals in thiol-reactivity tests, lose activity in orthogonal assays, or inhibit multiple unrelated enzymes should be deprioritized as PAINS [49].
The Scientist's Toolkit: Essential Research Reagent Solutions
The following table details key reagents and their roles in developing robust assays and combating artifacts.
| Research Reagent | Function & Rationale |
|---|---|
| Cytoplasm-Mimicking Buffer | Replaces standard PBS in biochemical assays. Contains high K+ (140-150 mM), crowding agents (e.g., Ficoll), and viscosity modifiers to better replicate the intracellular environment, reducing the gap between biochemical and cellular Kd values [1]. |
| CPM (N-[4-(7-diethylamino-4-methylcoumarin-3-yl)phenyl]maleimide) | A fluorescent thiol-reactive probe used in assays that detect reaction byproducts like CoA. While useful, it is highly susceptible to interference from thiol-reactive compounds, making it a tool for both primary screening and artifact identification [49]. |
| Cyclosporine A | A pan-inhibitor of active transport processes (e.g., efflux pumps). Used in Fic assays to investigate whether poor cellular penetration is due to active efflux [48]. |
| Dithiothreitol (DTT) / β-Mercaptoethanol | Reducing agents used to simulate the reducing environment of the cytosol in biochemical assays. Use with caution, as they can disrupt proteins reliant on structural disulfide bonds [1]. |
| Assay-Specific Diluent | A diluent provided with ELISA kits, formulated to match the matrix of the kit standards. Using it for sample dilution minimizes matrix effects and dilutional artifacts, ensuring accurate recovery of analyte [50]. |
| Triton X-100 | A non-ionic detergent included in assay buffers to mitigate compound aggregation, a common mechanism of PAINS behavior [49]. |
Effectively combating assay artifacts requires a multi-faceted strategy. Key takeaways include adopting physiologically relevant assay conditions that mirror the intracellular environment, rigorously validating screening hits through orthogonal assays and counter-screens for common interference mechanisms like PAINS, and employing robust data analysis practices. By integrating these principles from the NIH Assay Guidance Manual into your workflow, you can significantly enhance the reliability of your data, streamline the drug discovery process, and increase the likelihood of identifying truly effective therapeutic compounds.
In high-throughput screening (HTS), the Z' factor is a crucial statistical metric used to evaluate the quality and robustness of an assay before testing samples. Unlike simpler metrics such as signal-to-background ratio (S/B), which only considers the difference between mean signals, the Z' factor incorporates both the dynamic range and the variability of the positive and negative controls. This provides a more comprehensive assessment of an assay's suitability for HTS campaigns, where reliability and reproducibility across thousands of wells are paramount [51] [52].
The Z' factor is defined by the following equation:
Z' = 1 - [3(σp + σn) / |μp - μn|]
Where:
- μp = mean of the positive control
- μn = mean of the negative control
- σp = standard deviation of the positive control
- σn = standard deviation of the negative control [51] [52]
A perfect assay with zero variability would achieve a Z' factor of 1, while an assay with complete overlap between the positive and negative control distributions would have a Z' factor of 0 [52]. The following table outlines the generally accepted interpretation of Z' factor values in HTS:
Table: Interpretation of Z' Factor Values
| Z' Factor Range | Assay Quality | Interpretation |
|---|---|---|
| 0.8 – 1.0 | Excellent | Ideal separation and low variability; highly robust for HTS [52]. |
| 0.5 – 0.8 | Good | Suitable for HTS [51] [52]. |
| 0 – 0.5 | Marginal | The assay needs optimization; may be acceptable for complex cell-based assays where hits are valuable [51] [53]. |
| < 0 | Poor | Significant overlap between controls; the assay is unreliable for screening [51] [52]. |
The primary advantage of the Z' factor is its ability to account for variability in both controls, providing a realistic prediction of how an assay will perform under real-world screening conditions. This helps minimize false positives and negatives, ensuring efficient use of resources and accelerating the drug discovery process [52].
Key Reagents and Materials for Robust Assay Development
Successful assay development relies on carefully selected reagents and materials. The following table details essential components for optimizing HTS assays.
Table: Essential Research Reagent Solutions for HTS Assay Development
| Reagent/Material | Function in HTS Assay | Key Considerations |
|---|---|---|
| Positive & Negative Controls | Serves as reference points for calculating the Z' factor and defining the assay's dynamic range [51]. | Controls should be representative of the expected hit strength, not overly extreme [53]. |
| Macromolecular Crowding Agents | Mimics the crowded intracellular environment, which can significantly impact enzyme kinetics and molecular interactions [1]. | Helps bridge the activity gap between biochemical and cellular assays [1]. |
| Cytoplasm-Mimicking Buffers | Replaces standard buffers like PBS to better replicate intracellular ionic conditions (e.g., high K+, low Na+) [1]. | Provides a more physiologically relevant environment for biochemical assays [1]. |
| Detection Reagents | Enables measurement of the biological signal (e.g., fluorescence, luminescence) [54]. | Choose interference-resistant, homogenous "mix-and-read" formats like TR-FRET or FP to reduce variability [54] [52]. |
| Microplates | The physical platform for conducting miniaturized, parallel experiments [54]. | Available in 96-, 384-, or 1536-well formats; choice can impact edge effects and evaporation [54] [53]. |
| Validated Compound Libraries | Collections of small molecules screened for biological activity [54]. | Quality is critical to minimize false positives from Pan-Assay Interference Compounds (PAINS) [54]. |
Systematic Troubleshooting for Low Z' Factor Values
A low Z' factor indicates that an assay is not robust enough for reliable screening. The diagnostic workflow below outlines a systematic approach to identify and address the root cause.
Troubleshooting High Signal or Background Variability
If the standard deviations (σp or σn) are too high, consider these specific protocols:
- Optimize Reagent Stability and Concentration: Prepare fresh reagent stocks and perform a titration series to determine the optimal concentration that provides a strong, stable signal without excessive background. For example, in a kinase assay, titrate both the enzyme and ATP concentrations to find the linear range of the reaction [54] [55].
- Standardize Incubation Times and Temperature: Use a thermal sealer for microplates to prevent evaporation during long incubations. For enzymatic reactions, use a time-course experiment to establish the optimal incubation time where the signal is in the linear phase and has not plateaued [54].
- Address Cell-Based Assay Variability: For cell-based assays, ensure consistent cell passage number, seeding density, and health. Use assays with homogenous, "mix-and-read" formats to minimize variability introduced by washing steps. For image-based HCS, ensure adequate replication to account for inherent biological variability [23] [53].
Troubleshooting Low Signal Separation
If the difference between the positive and negative control means (|μp - μn|) is too small, implement the following:
- Increase Substrate Concentration: In enzymatic assays, ensure the substrate concentration is at or above the Km value to maximize the signal window. However, avoid concentrations that lead to substrate inhibition [54].
- Optimize Detection Chemistry: Switch to a more sensitive detection method. For instance, moving from absorbance to a fluorescence-based readout (e.g., BellBrook Labs' Transcreener platform) can significantly increase the dynamic range [54] [52].
- Validate Control Suitability: Ensure the positive control provides a strong, but not overwhelming, signal. A control that is too strong may inflate the Z' factor unrealistically and not reflect the expected hit profile. Conversely, a weak positive control will compress the dynamic range [53].
Advanced Optimization Strategies
Mimicking the Cellular Environment in Biochemical Assays
A persistent challenge in drug discovery is the discrepancy between activity measured in biochemical assays (BcAs) and cellular assays (CBAs). This often arises because standard biochemical buffers (e.g., PBS) do not reflect the intracellular environment [1].
Protocol: Designing a Cytoplasm-Mimicking Buffer To create a more physiologically relevant biochemical assay, modify your standard buffer to include:
- Altered Ionic Composition: Use a high K+ (140-150 mM) / low Na+ (~14 mM) ratio instead of the high Na+/low K+ found in PBS [1].
- Macromolecular Crowding: Add crowding agents like Ficoll, dextran, or PEG at concentrations of 5-20% w/v to simulate the high protein concentration and viscosity of the cytoplasm. This can alter enzyme kinetics and ligand-binding equilibria by a factor of 20 or more [1].
- Physiological pH and Additives: Maintain a pH of 7.0-7.4 and consider adding metabolites like glutathione at reducing concentrations to mimic the cytosolic redox state, if compatible with the target protein's stability [1].
Mitigating Edge Effects and Spatial Bias
Systematic errors across a microplate can severely impact Z' factor.
Protocol: Control Placement and Plate Layout
- Spatial Alternation: When using the first and last columns for controls, alternate positive and negative controls across the available wells in these columns. This ensures controls are evenly distributed across rows and helps identify and correct for spatial gradients [53].
- Randomization: For custom plates, randomize the placement of control wells across the entire plate to avoid any systematic spatial bias. While often impractical for large screens, it is the ideal approach [53].
- QC with Z' Factor: Calculate the Z' factor for each plate during the screening run. Automated systems can be set to flag or discard plates where the Z' factor falls below a predefined threshold (e.g., 0.5), ensuring consistent data quality [52].
Frequently Asked Questions (FAQs)
Q1: My Z' factor is consistently between 0.4 and 0.5. Can I still proceed with my screen? A: While a Z' factor > 0.5 is the standard goal for HTS, a value between 0 and 0.5 may be acceptable for complex cell-based or high-content screening (HCS) assays where the biological phenotype is valuable and more variable. The decision should be based on the cost of false negatives versus the cost of follow-up confirmation assays. If missing a true hit is considered more costly than validating a few false positives, proceeding with a marginal Z' factor may be justified [53].
Q2: What is the difference between Z' factor and Z factor? A: The Z' factor is used during assay development and validation to assess the inherent quality of the assay platform using only positive and negative controls. The Z factor is used during or after the screen to evaluate the assay's performance with the actual test samples included. The Z factor is always less than or equal to the Z' factor [51].
Q3: How many control replicates are needed for a reliable Z' factor calculation? A: It is recommended to run at least 16-32 replicates each for the positive and negative controls to obtain accurate estimates of the means and standard deviations. Using too few replicates can lead to an unreliable Z' factor that does not hold up during the full-scale screen [52].
Q4: Why is Z' factor considered superior to Signal-to-Background (S/B) ratio? A: The S/B ratio only considers the means of the controls (μp/μn) and ignores their variability. Two assays can have the same S/B but vastly different Z' factors if one has high variability. The Z' factor integrates both the signal separation and the variability, providing a much more robust and predictive measure of assay performance [52].
Q5: How can I explain a large discrepancy in IC50 values between my biochemical and cellular assays? A: This is a common issue. Beyond compound permeability and solubility, a major factor is the difference in physicochemical conditions. Standard biochemical assays are performed in simple buffers, while the intracellular environment is crowded, viscous, and has a different ionic composition. These conditions can alter the apparent Kd and enzyme kinetics. Using a cytoplasm-mimicking buffer in your biochemical assay can help bridge this gap [1].
Ensuring Reagent Stability and Managing Liquid Handling Errors
Discrepancies between biochemical and cellular assay results present a significant challenge in drug development, often leading to misinterpretation of a compound's true activity and selectivity. These inconsistencies can stem from two primary technical sources: unpredictable reagent behavior and subtle liquid handling inaccuracies. When unmanaged, these errors contribute to the high failure rates in clinical drug development, where approximately 40-50% of failures are attributed to lack of clinical efficacy and 30% to unmanageable toxicity [56]. This technical support guide provides actionable troubleshooting methodologies to identify, address, and prevent these critical errors, thereby enhancing data reliability and reproducibility in your research.
Frequently Asked Questions (FAQs)
1. How can I tell if my reagent inconsistency is affecting assay results? Reagent issues often manifest subtly rather than as complete failures. Key indicators include abrupt shifts or gradual drifts in quality control (QC) ranges, unexplained increases in false positives/negatives, out-of-range QC results, and proficiency testing errors [57]. These problems may originate from lot-to-lot reagent inconsistencies, improper storage conditions, reconstitution errors, or using reagents past their expiration date [57].
2. What are the first steps I should take when I suspect liquid handling errors? First, determine if the unusual data pattern is repeatable by running the test again to confirm it's not a random error [58]. Check your liquid handler's maintenance history and service status, as instruments sedentary for extended periods often develop issues [58]. Then, characterize the specific error type (e.g., dripping tips, volume inaccuracies, serial dilution problems) to narrow down potential causes, which can range from improper pipetting techniques to mechanical failures [58].
3. Why do my biochemical and cellular assay results show different compound potency? This common discrepancy often relates to differences in reagent stability, cellular permeability, or liquid handling variations that disproportionately affect one assay type. For example, small volume errors in liquid handling can significantly shift inhibitor potency (IC50) values in biochemical assays without necessarily affecting overall assay variability metrics like Z-factor [59]. Additionally, cellular assays incorporate complexity such as membrane permeability and metabolic conversion that biochemical assays lack, making them differentially sensitive to technical variations [56].
4. How often should I perform quality control on my liquid handling systems? Implement regular calibration programs and verification checks suitable for your throughput and accuracy requirements. For high-throughput screening environments where liquid handlers continuously over-dispense or under-dispense critical reagents, the economic impact can reach hundreds of thousands of dollars annually in wasted reagents alone, not including the costs of false positives/negatives [60].
5. What is the most effective way to manage reagent lot-to-lot variability? Conduct rigorous reagent lot crossover studies when introducing new lots, comparing both QC specimens and patient samples to establish acceptable equivalence [57]. Establish agreements with vendors on specifications and quality requirements, particularly for products critical to your operations [57]. Implement prequalification procedures for new reagent shipments using standard control assays to detect issues before they affect experimental results [57].
Troubleshooting Guides
Liquid Handling Error Identification
Table 1: Common Liquid Handling Errors and Solutions
| Observed Error | Possible Source of Error | Possible Solutions |
|---|---|---|
| Dripping tip or drop hanging from tip | Difference in vapor pressure of sample vs. water used for adjustment | Sufficiently prewet tips; Add air gap after aspirate [58] |
| Droplets or trailing liquid during delivery | Viscosity and other liquid characteristics different than water | Adjust aspirate/dispense speed; Add air gaps/blow outs [58] |
| Dripping tip, incorrect aspirated volume | Leaky piston/cylinder | Regularly maintain system pumps and fluid lines [58] |
| Diluted liquid with each successive transfer | System liquid is in contact with sample | Adjust leading air gap [58] |
| First/last dispense volume difference | Sequential dispense artifact | Dispense first/last quantity into reservoir/waste [58] |
| Serial dilution volumes varying from expected concentration | Insufficient mixing | Measure liquid mixing efficiency; optimize mixing parameters [58] |
| False positives/negatives in screening | Over- or under-dispensing of critical reagents | Implement regular calibration and verification checks [60] |
Troubleshooting Workflow:
Reagent Stability Issue Resolution
Table 2: Reagent-Related Issues and Corrective Actions
| Problem | Potential Causes | Corrective Actions |
|---|---|---|
| Lot-to-lot inconsistency | Changes in raw materials; manufacturing variations | Perform reagent lot crossover studies; Establish vendor specifications [57] |
| Reconstitution errors | Improper technique; unclear manufacturer instructions | Standardize procedures; training enhancements [57] |
| Improper storage | Temperature fluctuations; expired reagents | Monitor storage conditions; implement inventory rotation [57] [61] |
| Contamination | Dirty containers; exposure to contaminants | Use sterile techniques; clean storage areas [61] |
| Altered assay performance | Formulation changes affecting chemistry | Reject problematic lots; apply correction factors with proper validation [57] |
| Precipitates in solution | pH changes; salt concentration variations | Analytical testing (pH, conductivity, UV absorbance) [57] |
Reagent Management Protocol:
Experimental Protocols for Error Prevention
Liquid Handler Performance Verification
Purpose: To regularly verify liquid handling accuracy and precision, particularly when transferring critical reagents in biochemical and cellular assays [59] [60].
Materials:
- Calibrated balance (capable of measuring expected liquid masses with appropriate precision)
- Quality-controlled water (HPLC grade or equivalent)
- Appropriate microplates or tubes
- Timer
Procedure:
- Set the liquid handler to dispense target volumes across the expected volume range used in your assays (e.g., 1μL, 10μL, 50μL, 100μL, 200μL)
- Tare the calibrated balance with the dry receiving vessel
- Dispense the target volume into the vessel and record the mass
- Repeat for at least 10 replicates per volume
- Calculate the measured volume using the known density of water at your lab temperature
- Compare measured volumes to target volumes to determine accuracy (% bias) and precision (%CV)
Data Interpretation:
- Establish acceptable performance thresholds based on your assay requirements
- Investigate any volumes showing >5% bias from target or >3% CV between replicates
- Document results for trend analysis over time
Reagent Lot Crossover Study
Purpose: To evaluate consistency between current and new reagent lots before implementation in critical assays [57].
Materials:
- Current reagent lot (soon to be depleted)
- New reagent lot
- Quality control materials
- Archived patient samples (if applicable)
- Appropriate instrumentation
Procedure:
- Select 20-40 patient samples or QC materials that span the assay reportable range
- Test all samples with both reagent lots in a randomized order
- Ensure testing occurs under identical conditions (same instrument, operator, time frame)
- Record all results for comparative analysis
Statistical Analysis:
- Calculate correlation coefficient (r) between lots
- Perform paired t-test to assess significant differences
- Generate Bland-Altman plot to visualize bias across the measurement range
- Apply predefined acceptability criteria based on clinical or analytical requirements
Acceptance Criteria:
- Correlation coefficient r ≥ 0.975
- No statistically significant difference (p > 0.05) in paired t-test
- Mean bias < established clinical allowable total error
The Scientist's Toolkit: Essential Research Reagent Solutions
Table 3: Key Reagent Management and Liquid Handling Resources
| Tool/Resource | Function | Application in Discrepancy Resolution |
|---|---|---|
| Third-party QC Materials | Independent performance verification | Distinguishes reagent issues from instrument problems [57] |
| Automated Liquid Handlers | Reduce human variability in pipetting | Improve reproducibility across biochemical and cellular assays [62] |
| Electronic Lab Notebooks (ELN) | Structured data entry and calibration tracking | Minimizes transcriptional errors and ensures protocol adherence [62] |
| Barcode Labeling Systems | Automated sample and reagent tracking | Prevents mix-ups and tracks reagent usage history [62] |
| Analytical Instrumentation (pH meters, conductivity testers) | Verify reagent specifications | Detects lot-to-lot variations in reagent composition [57] |
| Interlaboratory Peer Group Programs | Comparative performance assessment | Identifies method-specific issues through large-scale data comparison [57] |
| Calibration Management Software | Track equipment status and maintenance schedules | Ensures liquid handlers remain within calibration specifications [62] |
Implementing Orthogonal Assays and Counter-Screens for Hit Validation
Troubleshooting Guide: Addressing Discrepancies Between Biochemical and Cellular Assay Results
FAQ: Navigating Common Hit Validation Challenges
Q1: Our primary biochemical screen identified potent hits, but these compounds show no activity in follow-up cellular assays. What could explain this discrepancy?
This common issue often stems from assay interference in the primary biochemical screen or a lack of cellular permeability. Several mechanisms could be responsible:
- Compound Aggregation: Molecules can form colloidal aggregates that non-specifically inhibit enzymes. This activity disappears in cellular assays where different conditions prevail [63]. A key indicator is detergent-sensitive inhibition; adding non-ionic detergents like Triton X-100 (0.01-0.1%) often abolishes this inhibition [49] [63].
- Assay Technology Interference: Compounds may interfere with the detection method itself (e.g., fluorescence, luminescence) rather than the biological target. Fluorescent compounds can quench or enhance signals, while some compounds directly inhibit reporter enzymes like firefly luciferase [63].
- Chemical Instability: The compound may degrade under cellular assay conditions (e.g., different pH, presence of metabolizing enzymes), rendering it inactive [64].
- Cellular Fitness Issues: The compound might be cytotoxic at the concentrations tested, masking any target-specific activity [65].
Solution Strategy: Implement a counter-screen that mimics the primary assay's detection technology but removes the biological target. This identifies compounds interfering with the assay readout. Additionally, perform a cellular viability assay (e.g., CellTiter-Glo, MTT assay) in parallel with your cellular assay to rule out general cytotoxicity [65] [66].
Q2: How can we be confident that a compound's activity is target-specific and not due to promiscuous or reactive behavior?
Unexpected activity across multiple unrelated targets suggests a compound may be a promiscuous frequent hitter. Common causes include:
- Thiol Reactivity: Compounds can covalently modify cysteine residues in multiple proteins. This is a prevalent form of nonspecific protein reactivity [49] [64].
- Redox Activity: Some compounds can undergo redox cycling, generating hydrogen peroxide which inhibits a wide range of enzymes [63].
- Chelation: Compounds that strongly chelate metal ions can disrupt metalloenzymes non-specifically [63].
Solution Strategy:
- Use Computational Filters: Before expensive experimental work, apply cheminformatic filters (e.g., for Pan-Assay Interference Compounds or PAINS) to flag problematic chemotypes [65] [49].
- Perform Orthogonal Assays: Confirm bioactivity using an assay with a fundamentally different readout technology (e.g., replace a fluorescence-based readout with a luminescence- or absorbance-based one) [65] [66].
- Conduct Specificity Counter-Screens: Test compounds against unrelated enzymes or targets. A truly specific compound should not inhibit irrelevant targets [66].
- Employ Covalent Reactivity Assays: Use assays like ALARM NMR or glutathione (GSH) adduct detection via LC-MS to identify compounds that react with protein or non-protein thiols [49] [64].
Q3: What are the critical steps for validating a hit before declaring it a candidate for lead optimization?
A robust hit validation cascade integrates multiple lines of evidence to eliminate artifacts and confirm specific, potent bioactivity. The core process involves three pillars: Counter-Screens, Orthogonal Assays, and Cellular Fitness Assays [65].
Solution Strategy: Follow a tiered experimental workflow, as visualized below.
Diagram: Hit Triage and Validation Workflow. This workflow outlines the sequential strategy for transforming primary screening hits into validated, high-quality candidates.
Detailed Experimental Protocols
Protocol 1: Implementing a Counter-Screen for Assay Technology Interference
Purpose: To identify compounds that interfere with the detection system (e.g., fluorescence, luminescence) used in your primary assay [65] [63].
Method:
- Assay Design: Replicate the conditions of your primary assay (buffer, incubation time, detection reagents) but omit the key biological component (e.g., the enzyme or cellular target) that initiates the reaction [65].
- Compound Treatment: Add your hit compounds at the same concentration used in the primary screen. Include positive and negative controls.
- Signal Measurement: Read the signal using the same instrument settings as the primary screen.
- Data Analysis: Compounds that produce a signal shift in this counter-assay are likely interfering with the detection technology and should be deprioritized.
Protocol 2: Performing an Orthogonal Assay with a Different Readout
Purpose: To confirm the biological activity of a hit using a different physical or chemical principle, ensuring the effect is real and not an artifact of the primary assay format [65] [66].
Method:
- Assay Selection: Choose a method that measures the same biological outcome but uses a different mechanism. Examples include:
- Replacing a fluorescence readout with luminescence or absorbance [65].
- Using a biophysical method like Surface Plasmon Resonance (SPR) or Thermal Shift Assay (TSA) to confirm direct binding to the target [65].
- In cell-based assays, switching from a bulk population readout to high-content imaging that provides single-cell resolution [65].
- Compound Testing: Test your hit compounds in a dose-response format (e.g., 8-12 point dilution series) in the orthogonal assay.
- Validation: Compounds that show consistent, concentration-dependent activity in both the primary and orthogonal assays are high-confidence hits.
Protocol 3: Conducting a Cellular Fitness Screen
Purpose: To exclude compounds that exhibit general cytotoxicity, which can masquerade as specific activity in cell-based assays or indicate poor therapeutic potential [65] [66].
Method:
- Assay Selection: Use a robust viability or cytotoxicity assay.
- Experimental Setup: Treat cells with your hit compounds in a dose-response manner. Use a relevant cell line, which may be different from the one used in your primary phenotypic screen.
- Data Interpretation: Calculate the TC~50~ (toxic concentration 50%). A good hit should have a therapeutic window, where its bioactive potency (EC~50~/IC~50~) is at least 10-fold lower than its TC~50~ [66].
Table 1: Common Types of Assay Interference and Their Characteristics. This table synthesizes data on various interference mechanisms to aid in problem diagnosis.
| Interference Type | Effect on Assay | Key Diagnostic Characteristics | Recommended Counter-Assay |
|---|---|---|---|
| Compound Aggregation [63] | Non-specific enzyme inhibition; protein sequestration. | - Inhibition is sensitive to detergent (e.g., Triton X-100).- Steep Hill slope in dose-response.- Time-dependent, reversible inhibition. | Dose-response in presence of 0.01-0.1% Triton X-100 [63]. |
| Compound Fluorescence [63] | Alters signal (quenching or enhancement). | - Reproducible, concentration-dependent signal change.- Detectable in a target-less counter-screen. | Pre-read plates after compound addition but before adding detection reagent [63]. |
| Thiol Reactivity [49] [64] | Covalent modification of protein cysteines; promiscuous inhibition. | - ALARM NMR-positive result.- Forms adducts with glutathione (GSH) or Coenzyme A (CoA) in LC-MS.- Activity is diminished by reducing agents like DTT. | ALARM NMR or GSH/CoA adduct detection by LC-MS [64]. |
| Firefly Luciferase Inhibition [63] | Inhibition of the reporter enzyme in luminescent assays. | - Concentration-dependent inhibition of purified luciferase.- Inactive in orthogonal assays with different reporters. | Counter-screen using purified firefly luciferase [63]. |
| Redox Cycling [63] | Generates hydrogen peroxide, inhibiting various enzymes. | - Potency depends on concentration of reducing reagent.- Activity is abolished by adding catalase. | Dose-response with and without catalase (10-100 µg/mL) in the assay buffer [63]. |
Table 2: Research Reagent Solutions for Hit Validation. This table lists key materials and their applications in the validation process.
| Reagent / Assay | Function / Application | Key Considerations |
|---|---|---|
| Triton X-100 [63] | Non-ionic detergent used to disrupt compound aggregates in biochemical assays. | Use at 0.01-0.1% in assay buffer. Loss of activity with detergent suggests aggregation. |
| ALARM NMR [64] | Protein-based NMR assay to detect thiol-reactive and other promiscuous compounds. | A positive readout indicates covalent reactivity or nonspecific protein perturbation. |
| GSH / CoA Adduct Assay [64] | LC-MS-based method to detect covalent adduct formation with non-protein thiols. | Confirms thiol reactivity identified in other assays. CoA is particularly relevant for assays detecting this cofactor. |
| Cellular Viability Assays(e.g., CellTiter-Glo, MTT) [65] | Measure overall cellular health to rule out cytotoxicity as the cause of phenotypic effects. | Run in parallel with, or prior to, mechanistic cellular assays. Aim for >10x separation between bioactive and toxic concentration [66]. |
| CETSA (Cellular Thermal Shift Assay) [67] | Confirms direct target engagement in a physiologically relevant cellular environment. | Provides quantitative data on drug-target binding in intact cells, bridging biochemical and cellular activity gaps. |
| High-Content Imaging(e.g., Cell Painting) [65] | Multiplexed morphological profiling to assess specific phenotype vs. general toxicity. | Uses machine learning to compare cellular states; can predict compound-mediated toxicity. |
Ensuring Biological Relevance: Integrating Orthogonal Data and Advanced Models
FAQs: Addressing Common Questions on Assay Discrepancies
FAQ 1: Why do my IC₅₀ values from biochemical assays often differ from those generated in cell-based assays?
It is common to observe significant differences, sometimes by orders of magnitude, between IC₅₀ values derived from biochemical assays (BcAs) and cell-based assays (CBAs) [1]. Several key factors can account for this discrepancy:
- Membrane Permeability: The compound may be unable to effectively penetrate the cell membrane to reach its intracellular target [68].
- Cellular Efflux: The cell may be actively pumping the compound out, reducing its intracellular concentration [68].
- Off-Target Effects: The compound may be interacting with other non-specific targets within the cell, which can significantly alter the apparent IC₅₀ [68].
- Divergent Physicochemical Conditions: The intracellular environment is vastly different from standard biochemical assay buffers. Factors like macromolecular crowding, viscosity, ionic composition (high K⁺, low Na⁺), and cosolvent content can profoundly influence the binding affinity (Kd) of the interaction, leading to different measured activities [1].
FAQ 2: What are "nuisance compounds" in cellular assays and how can I mitigate their impact?
Nuisance compounds are those that exhibit assay interference or undesirable mechanisms of bioactivity, which can waste significant resources and erode scientific trust [23]. In cellular assays, including high-content screening, these artifacts can arise from more complex biological processes than in cell-free systems. Mitigation strategies include careful assay design, the use of counter-screens to identify common interference mechanisms, and implementing best practices for hit triaging to efficiently flag and address these compounds early in the discovery pipeline [23].
FAQ 3: How can I design my biochemical assay buffer to better predict cellular activity?
To bridge the gap between biochemical and cellular data, consider designing biochemical assay conditions that more accurately mimic the intracellular physicochemical environment [1]. This involves moving beyond standard buffers like PBS (which mimics extracellular fluid) and incorporating key intracellular features:
- Crowding Agents: Add macromolecular crowding agents (e.g., Ficoll, PEG) to simulate the densely packed cellular interior, which can alter binding equilibria and kinetics [1].
- Ionic Composition: Use a potassium-based buffer system (e.g., ~140-150 mM K⁺) with low sodium (~14 mM) to reflect the cytosolic ion balance [1].
- Viscosity Modifiers: Adjust the viscosity of the solution to be more representative of the cytoplasmic environment [1].
Troubleshooting Guide: Discrepancies Between Biochemical and Cellular Assay Data
Use the following table to diagnose and resolve common issues that disrupt your Structure-Activity Relationship (SAR).
| Problem | Possible Causes | Recommended Solutions |
|---|---|---|
| Weaker-than-expected activity in cell-based assays | 1. Poor cellular permeability: Compound cannot enter the cell.2. Active efflux: Transporters are pumping the compound out.3. Compound instability: Compound is metabolized or degraded before acting on the target.4. Incorrect buffer conditions: Biochemical assay buffer does not reflect the intracellular environment [1]. | 1. Assess permeability: Use assays like Caco-2 or PAMPA to measure passive diffusion. Consider structural modifications to improve logP.2. Inhibit efflux: Use selective inhibitors (e.g., Verapamil for P-gp) in a control experiment to check for reduced efflux.3. Check stability: Incubate the compound with cell media and lysates, then analyze by LC-MS to identify degradation products.4. Redesign buffer: Use an intracellular-mimicking buffer with crowding agents and adjusted ionic strength for biochemical assays [1]. |
| Unexpected activity or off-target effects in cellular assays | 1. Non-specific binding: Compound binding to lipids, proteins, or assay components like plastic.2. Target promiscuity: Compound engages multiple targets, including the intended one.3. Assay interference: Compound auto-fluoresces, absorbs light, or precipitates in the assay medium [23]. | 1. Add carrier protein: Include low concentrations of BSA (0.1-1%) in the assay buffer to account for non-specific binding.2. Profile selectivity: Use a broad pharmacological panel (e.g., kinase, GPCR panels) to identify major off-target interactions.3. Run counter-screens: Perform orthogonal, label-free assays (e.g., SPR, CETSA) to confirm the target engagement and rule out assay-specific artifacts [23]. |
| Inconsistent SAR trends between assay types | 1. Compound solubility: Precipitation occurs at higher concentrations in one assay system.2. Mechanism of action: The compound may be a pro-drug requiring metabolic activation, which only occurs in the cellular context.3. Differential binding: The binding affinity is genuinely different under simplified biochemical vs. complex cellular conditions [1]. | 1. Measure solubility: Determine kinetic and thermodynamic solubility in both assay buffers. Use a solubility-enhancing co-solvent (e.g., DMSO ≤0.1%) consistently.2. Investigate metabolism: Incubate the compound with hepatocytes or S9 fractions and test the metabolites for activity.3. Measure in-cell Kd: Use techniques like NMR or cellular thermal shift assays (CETSA) to determine the binding affinity directly in cells and compare it to the purified system value [1]. |
Experimental Protocols
Protocol 1: Performing a Biochemical Assay under Intracellular-Mimicking Conditions
This protocol outlines how to set up a binding or enzymatic assay under buffer conditions designed to simulate the cytosolic environment, thereby generating data more predictive of cellular activity [1].
Key Research Reagent Solutions
| Reagent | Function & Rationale |
|---|---|
| HEPES-K⁺ Buffer (pH 7.2) | A physiologically relevant buffering agent adjusted to cytosolic pH. Using a potassium-based salt (e.g., KCl) mirrors the high K⁺/low Na⁺ intracellular environment [1]. |
| Macromolecular Crowding Agent (e.g., Ficoll PM-70, PEG 8000) | Simulates the excluded volume effect of the densely crowded cytoplasm, which can significantly alter binding equilibria and reaction kinetics [1]. |
| Reducing Agent (e.g., DTT, TCEP) | Mimics the reducing environment of the cytosol (maintained by glutathione). Caution: Use judiciously, as it may disrupt proteins reliant on disulfide bonds [1]. |
| Viscogen (e.g., Glycerol, Sucrose) | Adjusts the solution viscosity to approach that of the cytoplasm, influencing diffusion rates and molecular interactions [1]. |
Methodology:
- Prepare the Intracellular-Mimicking Buffer (IMB): A basic formulation to start with might include:
- 20-50 mM HEPES-K⁺, pH 7.2
- 140 mM KCl
- 5 mM NaCl
- 5 mM MgCl₂
- ~100-200 g/L of a crowding agent like Ficoll PM-70
- 1 mM TCEP (a stable reducing agent)
- Run Parallel Assays: Perform your standard biochemical assay (e.g., fluorescence polarization, enzymatic activity) simultaneously in your standard buffer (e.g., PBS) and in the IMB.
- Include Controls: Ensure that the crowding agents or other additives do not interfere with the detection method (e.g., fluorescence signal).
- Determine Kd or IC₅₀: Fit the dose-response data from both conditions to calculate the binding affinity or inhibitory potency. A well-designed IMB should yield values that are closer to those observed in cellular assays [1].
Protocol 2: Orthogonal Confirmation of Cellular Target Engagement
This protocol describes using the Cellular Thermal Shift Assay (CETSA) to confirm that your compound is engaging with the intended target inside the cell, helping to validate cellular activity data.
Methodology:
- Treat Cells: Incubate cells with your compound of interest or a vehicle control (e.g., DMSO) for a predetermined time.
- Heat Denaturation: Aliquot the cell suspensions and heat each aliquot to a different temperature (e.g., from 45°C to 65°C) for a fixed time (e.g., 3 minutes).
- Cell Lysis: Lyse the heated cells and remove insoluble aggregates by centrifugation.
- Quantify Soluble Target: Analyze the supernatant for the remaining soluble (and thus, folded) target protein. This is typically done by Western blotting or a targeted proteomics method.
- Data Analysis: Compound binding often stabilizes the target protein, leading to a higher fraction of soluble protein at elevated temperatures compared to the DMSO control. This thermal shift is direct evidence of intracellular target engagement.
Data Presentation: Quantifying the Assay Gap
Table 1: Impact of Physicochemical Factors on Molecular Interactions
This table summarizes how key intracellular parameters differ from standard assay buffers and their demonstrated effect on experimental measurements [1].
| Parameter | Standard Biochemical Assay (e.g., PBS) | Intracellular Environment | Observed Impact on Binding & Kinetics |
|---|---|---|---|
| Macromolecular Crowding | Very low (dilute solution) | Very high (20-40% volume occupancy) | Kd values can differ by up to 20-fold or more; enzyme kinetics can change by >2000% [1]. |
| Major Cation | High Na⁺ (~157 mM), Low K⁺ (~4.5 mM) | High K⁺ (~140-150 mM), Low Na⁺ (~14 mM) | Altered electrostatic interactions can affect protein-ligand binding affinity [1]. |
| Viscosity | Low (near water) | Moderately high | Reduces diffusion rates, which can influence binding kinetics [1]. |
| Redox Potential | Oxidizing | Reducing (high GSH/GSSG) | Can affect the oxidation state of cysteine residues, altering protein function and compound binding [1]. |
Visualizing the Workflow and Relationship
The following diagram illustrates the key factors causing discrepancies between assay types and the strategy for alignment.
This workflow outlines the strategic approach for aligning data from different assay types to build a coherent SAR story.
A persistent challenge in drug discovery is the frequent discrepancy observed between the activity of a compound in a simple biochemical assay and its activity in a more complex cellular assay. This inconsistency can delay research progress and drug development. This technical support center is designed to help researchers troubleshoot this specific issue, providing targeted FAQs and guides to enhance the reliability and physiological relevance of your cell-based assay data.
Frequently Asked Questions (FAQs) and Troubleshooting Guides
FAQ 1: Why is there a discrepancy between the IC50 value I obtained in a biochemical assay and the value from my cell-based assay?
It is common to observe significant differences (often orders of magnitude) between IC50 values from biochemical assays (BcAs) and cell-based assays (CBAs) [1] [9]. Several factors contribute to this:
- Cellular Permeability: The compound must cross the cell membrane to reach an intracellular target. Poor permeability can drastically reduce apparent activity in a CBA [1] [69].
- Intracellular Physicochemical Environment: The environment inside a cell is vastly different from a standard biochemical buffer like PBS. Key differences include:
- Macromolecular Crowding: The cytoplasm is densely packed with proteins and other macromolecules, which can alter binding equilibria and enzyme kinetics. Dissociation constant (Kd) values can differ by up to 20-fold or more between standard buffers and a crowded intracellular environment [1] [9].
- Ionic Composition: Standard buffers often have high sodium (Na+) and low potassium (K+) levels, mimicking extracellular fluid. The cytosol, however, has high K+ (~140-150 mM) and low Na+ (~14 mM) concentrations, which can affect protein-ligand interactions [1].
- Viscosity and Lipophilicity: The cytosolic environment is more viscous and has different lipophilic character compared to standard assay buffers, influencing molecular diffusion and binding [1].
- Compound Solubility and Stability: The compound may precipitate, degrade, or be metabolized in the cell culture medium or within the cell itself [1].
- Target Inactivation: In a CBA, the compound might be targeting an inactive form of the kinase or an upstream/downstream kinase, whereas biochemical kinase activity assays typically use the active form of the enzyme [69].
FAQ 2: My cell-based assay has no signal or a very weak assay window. What should I check?
A complete lack of an assay window often points to an instrument setup or reagent issue [69].
- Verify Instrument Setup: Confirm that your microplate reader is configured correctly. For TR-FRET assays, the single most common failure point is the use of incorrect emission filters. Ensure you are using the exact filters recommended for your specific instrument and assay chemistry [69].
- Test Development Reagents: For coupled-assay systems (e.g., Z'-LYTE), test the development reaction separately. Using buffer to replace missing reagents, expose a 0% phosphopeptide control to a high concentration of development reagent to force full cleavage (should yield a high ratio), and ensure a 100% phosphopeptide control is not exposed to development reagent (should yield a low ratio). A properly developed reaction should show a significant difference (e.g., 10-fold) in the ratio between these controls [69].
- Check Cell Health and Assay Conditions: Ensure your cells are healthy, at an appropriate passage number, and were seeded at the correct density. An equilibration period before adding compounds is often critical for consistent responsiveness [70] [71].
FAQ 3: How do I improve the physiological relevance of my cell-based screening?
- Move from 2D to 3D Cultures: While 2D monolayer cultures are simple and high-throughput, they often fail to represent the underlying biology, such as the in vivo extracellular matrix microenvironment. 3D models, like cancer spheroids, can detect subtle cytostatic effects and morphological alterations not seen in 2D cultures, improving predictive power [70] [72].
- Use More Relevant Biochemical Assay Conditions: When developing follow-up biochemical assays, use buffer systems that mimic the intracellular environment (e.g., in crowding, salt composition, and viscosity) rather than standard PBS. This can help bridge the gap between biochemical and cellular results [1] [9].
- Employ Phenotypic Readouts: Utilize high-content screening (HCS) or high-content imaging (HCI). These multiparametric approaches capture complex phenotypes and morphological changes, providing a richer, more mechanistic dataset beyond simple viability [70] [72].
FAQ 4: What are the key factors to ensure reproducibility in my cell-based assays?
- Cell Passage Number: Higher passage numbers can lead to genetic drift and altered phenotypic responses. Use cells within a validated passage range [71].
- Cell Seeding Density: Standardize the number of cells seeded per well. This is critical for consistent cell health and response to compounds, especially in multiwell plates [70].
- Timing of Analysis: The timing of your assay readout is critical. Perform the analysis at a consistent time point after compound addition to ensure results are comparable across experiments [71].
Quantitative Data and Assay Performance
Table 1: Assessing Cell-Based Assay Performance and Data Quality
This table outlines key metrics and parameters for ensuring your cell-based assays are robust and reproducible.
| Metric / Parameter | Definition / Description | Target Value / Consideration |
|---|---|---|
| Z'-Factor [69] | A statistical measure of assay quality and robustness that takes into account the assay window and data variation. | > 0.5: Excellent assay suitable for screening.0.5 - 1.0: Ideal range. |
| Assay Window [69] | The fold-difference between the maximum (top) and minimum (bottom) signal of the assay. | A large window with low noise is ideal. A 10-fold window with a standard deviation of 5% gives a Z' of ~0.82. |
| Cell Seeding Density [70] | The number of cells plated per well. | Varies by cell line and well format (96, 384, 1536). Must be optimized to ensure consistent response. |
| Passage Number [71] | The number of times a cell culture has been subcultured. | Use cells within a low, validated passage range to maintain genotype and phenotype stability. |
| Equilibration Period [70] | The time cells are allowed to recover after seeding before the assay begins. | A period of 24-48 hours is often needed for cells to adhere and resume normal growth. |
Table 2: Advantages and Limitations of Common Cell-Based Assay Types
Choosing the right assay is crucial for obtaining meaningful data.
| Assay Type | Key Advantages | Common Limitations |
|---|---|---|
| Reporter Gene Assays [72] | Quantitative, pathway-specific readouts; highly compatible with HTS formats. | May not reflect post-translational regulation; uses artificial promoter contexts. |
| Viability / Cytotoxicity [72] | Simple, scalable, and cost-effective; ideal for initial toxicity screening. | Provides limited mechanistic insight; may miss subtle cytostatic effects. |
| High-Content Imaging (HCI/HCS) [72] | Captures complex phenotypes and subcellular changes (e.g., morphology, protein localization). | Data-intensive; requires specialized equipment and analysis expertise. |
| Calcium Flux / Electrophysiology [72] | Provides real-time functional data; excellent for ion channels and GPCR targets. | Requires specialized equipment; can be sensitive to variability and signal drift. |
Experimental Workflows and Signaling Pathways
Diagram 1: Troubleshooting Assay Discrepancies
This workflow helps diagnose the root cause of mismatched data between biochemical and cellular assays.
Diagram 2: Key Factors in Physiological Relevance
This diagram illustrates the multi-faceted parameters that contribute to the physiological relevance of a cell-based assay.
The Scientist's Toolkit: Key Research Reagent Solutions
Table 3: Essential Reagents and Materials for Cell-Based Assays
A selection of key tools used in the development and execution of cell-based assays.
| Reagent / Material | Function / Application |
|---|---|
| FLUOR DE LYS HDAC/Sirtuin Assays [20] | Fluorescent-based assay kits for screening modulators of HDAC and Sirtuin activity in a biochemical format. |
| CELLESTIAL Live Cell Assays [20] | A panel of fluorescence-based probes for assessing cell signaling, viability, death pathways, and organelle morphology in live cells. |
| ApoSENSOR Cell Viability Assay [20] | A bioluminescent assay that measures ATP levels for rapid screening of apoptosis and cell proliferation. |
| ORGANELLE-ID-RGB III Kit [20] | A live-cell staining kit containing dyes for the Golgi apparatus, endoplasmic reticulum, and nucleus to examine organelle morphology. |
| cBTE (Cellular Binder Trap Enrichment) [72] | An innovative oocyte-based binding assay that allows DNA-encoded library (DEL) screening inside living cells for physiologically relevant hit identification. |
| Cytoplasm-Mimicking Buffer [1] [9] | A buffer system designed to replicate intracellular conditions (crowding, ion composition, viscosity) to better align biochemical assay results with cellular data. |
Frequently Asked Questions (FAQs)
FAQ 1: Why should I transition from traditional 2D cell-based assays (CBAs) to 3D models for drug screening? Traditional 2D cell cultures suffer from the loss of tissue-specific architecture, mechanical and biochemical cues, and cell-to-cell and cell-to-matrix interactions, making them relatively poor models for predicting in vivo drug responses for certain diseases [73]. In contrast, 3D models, such as spheroids and organoids, better mimic the spatial and microenvironmental information of the in vivo situation [74]. This is crucial for accurately assessing drug efficacy and safety, as demonstrated by studies showing that chemoresistance observed in 3D cancer models more closely mirrors the resistance seen in vivo compared to 2D cultures [73] [75].
FAQ 2: What are the primary types of 3D culture technologies available, and how do I choose? The leading 3D cell culture technologies include multicellular spheroids, organoids, scaffolds, hydrogels, organs-on-chips, and 3D bioprinting [73]. Your choice depends on the research goal. Table 1 summarizes the advantages and disadvantages of each. For high-throughput screening (HTS), spheroids or scaffold-based systems may be ideal. For modeling complex patient-specific biology with high in vivo-like complexity, organoids are superior, though they can be less amenable to HTS [73].
FAQ 3: My patient-derived tumor organoids (PDTOs) are highly heterogeneous in size and shape. How can I reliably analyze drug response? Heterogeneity in PDTOs is a common challenge. A robust solution involves employing high-resolution, dynamic confocal live-cell imaging to track cellular changes (e.g., cell birth and death) within individual organoids over time [74]. From these images, you can measure morphological features (volume, sphericity) and correlate them with live cell counts. Linear growth rate calculations based on either volume or cell counts can then be used to determine differential responses to therapeutics, effectively detecting cytotoxic versus cytostatic effects [74].
FAQ 4: What are the critical steps for successfully establishing and maintaining patient-derived organoid cultures? Successful establishment of patient-derived organoids hinges on three critical steps: (1) Prompt and sterile tissue processing after collection to preserve cell viability, using cold, antibiotic-supplemented transport media [76]. (2) Appropriate tissue preservation; if processing is delayed beyond 6-10 hours, cryopreservation is recommended over refrigeration to minimize a 20-30% loss in viability [76]. (3) Use of a defined extracellular matrix (like Matrigel) and a specialized culture medium containing a cocktail of growth factors (e.g., EGF, Noggin, R-spondin) essential for stem cell maintenance and growth [75] [76].
Troubleshooting Guides
Challenge: Poor Organoid Formation and Growth
| Symptom | Possible Cause | Solution |
|---|---|---|
| Low cell viability post-isolation | Delays in tissue processing; harsh digestion | Process tissue immediately upon collection or use validated cryopreservation protocols. Optimize digestion time and enzyme concentration [76]. |
| Failure to form organoids | Incorrect growth factor composition; low stem cell proportion | Ensure culture medium is supplemented with essential niche factors like EGF, Noggin, R-spondin, and Wnt agonists to support stem cell growth [75] [76]. |
| Variable organoid size and shape | Lack of physical constraints in culture | Utilize bioengineering approaches, such as confining cells in hydrogel microcavities, to reproducibly generate organoids of predefined shape and size [77]. |
| Necrotic core in large organoids | Limited nutrient diffusion | Implement advanced platforms like the OCTOPUS system, which uses micro-engineered chambers for unrestricted solute diffusion, enhancing viability and maturity [77]. |
Challenge: Inconsistencies in Drug Response Data
| Symptom | Possible Cause | Solution |
|---|---|---|
| Inability to distinguish cytostatic vs. cytotoxic effects | Endpoint-only assays lacking dynamic data | Employ dynamic live-cell imaging with vital dyes and fluorescent labels (e.g., H2B-GFP for nuclei, DRAQ7 for dead cells) to track cell birth and death events in real-time [74]. |
| High well-to-well variability in response | Heterogeneous organoid size and morphology | Adopt an analysis workflow that quantifies both organoid-level (volume, sphericity) and cell-level features from the same temporal imaging data to normalize drug response metrics [74]. |
| Poor predictivity of in vivo efficacy | Lack of tissue context (e.g., vasculature, immune cells) | Increase model complexity by creating co-culture systems, such as vascularized organoids, or using organ-on-chip technologies that incorporate fluid flow and multiple cell types [77]. |
Experimental Protocols & Workflows
Protocol 1: Establishing Colorectal Cancer Patient-Derived Organoids (PDOs) for Drug Screening
This protocol is adapted from recent methodologies for generating PDOs from colorectal tumor tissues [74] [76].
1. Tissue Procurement and Processing:
- Collect human colorectal tissue samples under sterile conditions following surgical resection or biopsy, in accordance with IRB-approved protocols.
- Critical Step: Transfer tissue in cold Advanced DMEM/F12 medium supplemented with antibiotics (e.g., penicillin-streptomycin) to avoid contamination. Process immediately or cryopreserve using a freezing medium (e.g., 10% FBS, 10% DMSO in conditioning medium) if a delay >6-10 hours is anticipated [76].
2. Crypt Isolation and Seeding:
- Wash the tissue with PBS and mince into small pieces using a scalpel.
- Digest the tissue in a solution containing collagenase (1.5 mg/mL) and hyaluronidase (20 µg/mL) at 37°C for 30-45 minutes.
- Filter the digested solution through a 100 µm cell strainer and centrifuge to pellet cells.
- Resuspend the cell pellet in a reduced-growth factor basement membrane matrix (e.g., Cultrex or Matrigel).
- Plate the cell-Matrigel mixture as domes in a pre-warmed culture plate and incubate at 37°C for 15-20 minutes to solidify.
- Overlay with organoid growth medium [76].
3. Organoid Culture and Maintenance:
- Culture the embedded cells in a specialized growth medium. A typical formulation for colorectal organoids includes:
- Passage organoids every 1-2 weeks by dissociating the Matrigel dome and mechanically/enzymatically breaking down the organoids into smaller fragments or single cells for re-seeding.
Protocol 2: Multiplexed Imaging-Based Analysis of Drug Response in PDOs
This protocol details a method for quantitatively evaluating drug efficacy and mechanism of action in PDOs [74].
1. Organoid Labeling and Seeding for Assay:
- Generate stably expressing fluorescent reporter lines (e.g., H2B-GFP for labeling nuclei) via lentiviral transduction and FACS sorting [74].
- Seed dissociated organoid cells into a 96-well plate format suitable for high-content imaging. Allow organoids to form and grow for 4 days.
2. Drug Treatment and Live-Cell Imaging:
- Treat organoids with a dose range of the therapeutic compound (e.g., chemotherapeutics like irinotecan). Include controls (e.g., DMSO vehicle) and a positive control for cell death (e.g., staurosporine) [74].
- Critical Step: Add a vital dye (e.g., DRAQ7) to the medium to label dead cells in real-time.
- Place the plate in a confocal live-cell imaging system equipped with an environmental chamber (37°C, 5% CO₂). Acquire high-resolution z-stack images at regular intervals (e.g., every 4-6 hours) over 3-5 days.
3. Quantitative Image Analysis:
- Use image analysis software to perform 4D (3D + time) volumetric reconstruction of the acquired images.
- Measure at the Organoid Level: Calculate total organoid volume, sphericity, and ellipticity over time.
- Measure at the Cell Level: Quantify the number of GFP-positive (live) cells and DRAQ7-positive (dead) cells within each organoid over time.
- Calculate Growth Rates: Derive linear growth rates for each organoid based on the change in live cell number or volume over time. Compare growth rates between treated and control organoids to classify drug effects as cytotoxic (reduction in live cells) or cytostatic (inhibition of growth) [74].
Key Research Reagent Solutions
Table 3: Essential Materials for Organoid Culture and Analysis
| Item | Function/Description | Example |
|---|---|---|
| Basement Membrane Matrix | Provides a 3D scaffold that mimics the extracellular matrix (ECM), essential for organoid formation and growth. | Cultrex Reduced Growth Factor BME, Matrigel [74] [76]. |
| Specialized Basal Medium | A nutrient-rich base for organoid culture medium. | Advanced DMEM/F12 [74] [76]. |
| Essential Growth Factors | Signaling molecules that activate pathways critical for stem cell maintenance and differentiation. | EGF (for proliferation), Noggin (BMP inhibitor), R-spondin (Wnt agonist) [75] [76]. |
| Small Molecule Inhibitors | Used to modulate specific signaling pathways to enhance stem cell survival or direct differentiation. | Y27632 (Rock inhibitor to prevent anoikis), A-83-01 (TGF-β inhibitor) [74] [76]. |
| Dissociation Reagent | Gently breaks down the ECM and organoid structures for passaging or single-cell assays. | Gentle Cell Dissociation Reagent (e.g., from STEMCELL Technologies), TrypLE [74]. |
| Fluorescent Reporters & Vital Dyes | Enable live-cell tracking of cellular processes. H2B-GFP labels nuclei; DRAQ7 labels dead cells. | Lentivirus-H2B-GFP, DRAQ7 [74]. |
Signaling Pathways in Organoid Self-Organization
The self-organization and patterning of organoids are governed by key evolutionarily conserved signaling pathways. Engineering these pathways through the addition of specific agonists and antagonists in the culture medium is fundamental to successfully generating and maintaining organoids [75] [77].
A core challenge in modern drug discovery is the frequent failure of compounds that show promise in initial laboratory tests to produce the same effect in more complex biological systems or in humans. A significant source of this problem is the disconnect between results from simple biochemical assays and subsequent cellular assays [1] [14]. This discrepancy often stems from the choice of cellular model used for validation. Selecting the appropriate cell type—immortalized cell lines, primary cells, or induced pluripotent stem cell (iPSC)-derived cells—is therefore not merely a technical decision, but a critical strategic one that directly impacts the predictive power of your research and the likelihood of translational success.
This guide provides troubleshooting advice and FAQs to help you navigate this complex decision and address the common issue of assay discrepancies.
The table below summarizes the core characteristics of the three main cell models to help you understand their fundamental trade-offs.
Table 1: Core Characteristics of Different Cell Models
| Feature | Immortalized Cell Lines | Primary Cells | iPSC-Derived Cells |
|---|---|---|---|
| Biological Relevance | Low; often cancer-derived, non-physiological [78] [79] | High; closer to native morphology and function [78] [80] | High; human-specific, can model mature phenotypes [78] [81] |
| Reproducibility | High, but prone to genetic drift over time [78] [82] | Low; high donor-to-donor variability [78] | Variable; can achieve high consistency with advanced protocols [78] |
| Scalability | High; easily scaled [78] | Low; difficult to expand [78] | High; can be produced consistently at scale [78] |
| Ease of Use | Simple to culture [78] [79] | Technically complex and time-intensive [78] [79] | Can be complex; requires differentiation expertise [79] |
| Human Origin | Often non-human (e.g., rodent) or cancer-derived [78] | Typically rodent-derived for in vitro studies [78] | Yes; derived from human iPSCs [78] |
Troubleshooting Guide: Addressing Assay Discrepancies
FAQ 1: Why is my compound's IC₅₀ significantly different in cellular assays compared to my biochemical assays?
This is a common issue with several potential causes related to the cellular environment [1] [68] [14].
- Potential Cause 1: The Physicochemical Intracellular Environment. Standard biochemical assay buffers (e.g., PBS) are designed to mimic extracellular fluid, not the intracellular milieu. The cytosol has high macromolecular crowding, different ionic concentrations (high K⁺, low Na⁺), and distinct viscosity, all of which can dramatically alter a compound's effective binding affinity (Kd) [1].
- Troubleshooting Tip: Consider developing biochemical assays that use "cytosolic mimic" buffers. These buffers incorporate crowding agents like Ficoll or PEG and adjusted salt concentrations to better represent the intracellular environment, potentially bridging the gap with cell-based results [1].
- Potential Cause 2: Compound Permeability and Efflux. Your compound may be unable to effectively cross the cell membrane, or active efflux pumps in the cell may be expelling it, leading to a higher-than-expected IC₅₀ in cellular assays [68] [14].
- Troubleshooting Tip: Perform assays to measure intracellular compound concentration. Techniques like the NanoBRET Target Engagement Intracellular Kinase Assay can directly measure compound binding to its target in live cells, bypassing permeability assumptions [14].
- Potential Cause 3: Off-Target Effects and Sequestration. In a complex cellular system, your compound may bind to non-specific targets or become sequestered in organelles like lysosomes. This can either decrease its potency (by reducing free concentration) or unexpectedly increase it (if the sequestered form is active or induces other effects) [14].
FAQ 2: My data from an immortalized cell line doesn't match my primary cell validation data. What went wrong?
This discrepancy is often a result of the fundamental biological differences between these models.
- Potential Cause: Loss of Native Physiology in Cell Lines. Immortalized cell lines, especially those derived from cancers, often shift their resources towards proliferation and survival, losing key functions of the native tissue they are supposed to model [78] [80]. For example, SH-SY5Y neuroblastoma cells frequently lack consistent expression of key ion channels and receptors and fail to form functional synapses, limiting their utility for neurobiology studies [78].
- Troubleshooting Tip: Use immortalized cell lines for initial, high-throughput screening where scalability and robustness are key. However, always plan for validation in a more physiologically relevant system, such as primary cells or iPSC-derived cells, before drawing final conclusions [79]. Be aware that primary cells from different donors will introduce variability, so plan experiments accordingly [78].
FAQ 3: Why are my proliferation/viability assay results misleading?
Many common assays measure metabolic proxies (like ATP levels or MTS reduction) for cell number, which can be unreliable [83].
- Potential Cause: Assay Interference from Phenotypic Changes. A compound's mechanism of action can directly interfere with the assay readout. For instance, drugs that arrest the cell cycle can cause cells to increase in size and mitochondrial mass, leading to an increase in ATP content per cell. An ATP-based viability assay (e.g., CellTiter-Glo) would therefore underestimate the drug's anti-proliferative potency because the signal per cell is higher, even if cell number has decreased [83].
- Troubleshooting Tip: For proliferation and cytotoxicity studies, use a direct cell counting method. High-content image-based assays that stain nuclei provide a more accurate measure of cell number and can simultaneously provide information on cell cycle phase and morphology [83].
The Scientist's Toolkit: Essential Research Reagents
Table 2: Key Reagents for Cell-Based Research
| Reagent / Technology | Function | Key Considerations |
|---|---|---|
| NanoBRET TE Assays | Measures target engagement of compounds against specific kinases in live cells [14]. | Directly assesses intracellular potency, overcoming permeability limitations. |
| opti-ox Technology | Enables precise, deterministic programming of iPSCs into highly consistent somatic cells (ioCells) [78]. | Reduces batch-to-batch variability in iPSC-derived models, enhancing reproducibility. |
| Cytosolic Mimic Buffers | Buffer systems designed to replicate the crowded ionic, and viscous intracellular environment [1]. | Can help align biochemical and cellular assay results. |
| High-Content Imaging | Image-based assays for direct cell counting and morphological analysis [83]. | Avoids pitfalls of metabolic proxy assays for proliferation/viability. |
| M-CSF / L929-Conditioned Medium | Essential for the differentiation of bone marrow precursors into Bone Marrow-Derived Macrophages (BMDMs) [82]. | A standard for generating non-immortalized, physiologically relevant immune cells. |
Decision Workflow and Mechanism of Discrepancy
To visually summarize the strategic choice of cell models and the core reasons for assay discrepancies, refer to the following diagrams.
Diagram 1: A workflow to guide the selection of an appropriate cell model based on project priorities.
Diagram 2: Key factors contributing to the discrepancy between biochemical and cellular assay results.
Establishing Reproducibility Standards and Cross-Lab Validation Protocols
Troubleshooting Guides and FAQs
Frequently Asked Questions
Q1: Why do I get different potency values (e.g., IC50) for the same compound in biochemical versus cellular assays? This is a common issue often caused by differences in the assay environments. Biochemical assays are typically performed in simplified buffers like PBS, which mimics extracellular conditions. In contrast, cellular assays occur in the complex intracellular environment, which has high macromolecular crowding, different ion concentrations (high K+/low Na+), and viscosity. These physicochemical differences can cause Kd values to vary by up to 20-fold or more between the two assay types [10] [1]. Other factors include the compound's membrane permeability, solubility, and metabolic stability within the cell [10].
Q2: What are the most critical steps to ensure my cell-based assays are reproducible across different laboratories? Key steps include: using authenticated, low-passage cell lines; maintaining consistent and documented cell culture conditions (e.g., seeding density, passage number); and employing detailed Standard Operating Procedures (SOPs) for all steps [84] [85]. One inter-laboratory study found that even slight variations in cell seeding density were a major source of variability, leading to astonishing center-to-center variations of up to 200-fold in growth inhibition rates [84].
Q3: My experimental results are inconsistent day-to-day. What should I investigate first? First, check the health and authentication of your cell line. Cell line misidentification or contamination is a pervasive problem that can invalidate results [86]. Next, review critical but often overlooked technical steps. Simple procedures like PBS washing have been identified as significantly changing assay outcomes [84]. Ensure all reagents are properly calibrated and that equipment (e.g., plate readers, pipettes) is functioning correctly [84] [87].
Q4: What is cross-validation in an analytical context, and when should it be performed? Cross-validation is the process of verifying that a validated analytical method produces consistent, reliable, and accurate results when used by different laboratories, analysts, or instruments [88]. It is critical when transferring a method from one lab to another, when multiple labs are involved in a study, or when required for regulatory submissions to bodies like the FDA or EMA [88].
Troubleshooting Guide: Addressing Common Experimental Issues
| Problem Area | Specific Issue | Potential Root Cause | Corrective & Preventive Actions |
|---|---|---|---|
| Biological Materials | Inconsistent cell behavior/response | Cell line misidentification, cross-contamination, or over-passaging [86] [85]. | Use authenticated, low-passage cell banks from reputable sources. Perform regular checks for mycoplasma and authentication (e.g., STR profiling) [85]. |
| Biological Materials | High variability in cellular assay data | Undocumented changes in cell culture conditions (e.g., passage number, seeding density, serum batch) [84]. | Maintain detailed records and SOPs for cell culture. Use consistent reagent batches. Define and adhere to a maximum passage number [84]. |
| Assay Methodology | Discrepancy between biochemical (BcA) and cellular (CBA) IC50 values | Physicochemical differences between simplified assay buffer and complex intracellular environment [10] [1]. | Consider using a cytoplasm-mimicking buffer for BcAs that accounts for crowding, viscosity, and correct ionic balance (high K+/low Na+) [1]. |
| Assay Methodology | Discrepancy between different cell viability assays (e.g., ATP vs. cell count) | Assays measure different parameters (e.g., metabolic activity vs. cell number). A 50% reduction in ATP may not equate to 50% cell death [84]. | Understand the principle and limitations of each assay. Do not treat different viability assays as directly interchangeable. Use orthogonal methods to confirm key findings [84] [87]. |
| Data & Analysis | Inability to reproduce another lab's published results | Lack of access to critical methodological details, raw data, or specific research materials [85]. | Request original protocols and data from authors. When publishing, provide comprehensive methods and share data/materials via repositories [85]. |
| Data & Analysis | Out-of-specification or atypical result during method transfer | Failure of cross-validation to ensure method robustness across labs, analysts, or instruments [88]. | Perform a formal cross-validation: use a predefined protocol, representative samples, and statistical analysis (e.g., ANOVA) to compare results against acceptance criteria [88]. |
Experimental Protocol: Cross-Validation of an Analytical Method
Cross-validation is essential for verifying that an analytical method is robust and reproducible when transferred between laboratories or analysts [88].
1. Define the Scope and Protocol
- Objective: Clearly state what is being compared (e.g., two laboratories, two instruments).
- Parameters: Determine which analytical performance characteristics will be evaluated (e.g., accuracy, precision, linearity).
- Acceptance Criteria: Predefine statistical and performance criteria for success, aligned with guidelines like ICH Q2(R2) [88].
2. Prepare and Distribute Samples
- Use a set of representative, homogeneous, and stable test samples.
- Include quality control samples and blind replicates to assess precision and accuracy [88].
3. Conduct the Analysis
- Each participating laboratory or analyst performs the method independently using the same validated SOP.
- All data, including any observational notes, should be recorded in a standardized format [88].
4. Compare and Analyze Results
- Use statistical tools to compare the datasets. Common methods include:
- ANOVA: To assess inter-laboratory precision and identify significant bias.
- Regression Analysis: To evaluate the correlation and agreement between results.
- Bland-Altman Plots: To visualize the difference between measurements against their average [88].
5. Document and Report
- Prepare a comprehensive report summarizing the study design, results, and statistical analysis.
- If discrepancies are found, perform a root cause analysis (e.g., using a Fishbone diagram or the "Five Whys" technique) and document the resolutions [87] [88].
Standard Operating Procedure (SOP) for Cell Line Authentication and Quality Control
Purpose: To ensure the identity, purity, and stability of cell lines used in research, thereby enhancing experimental reproducibility [84] [86] [85].
Procedure:
- Source: Obtain cell lines from credible, accepted commercial sources or reputable biorepositories [84].
- Authentication: Upon receipt, authenticate the cell line using a robust method such as Short Tandem Repeat (STR) profiling. This should be done before initiating critical experiments.
- Contamination Testing: Test for bacterial, fungal, and mycoplasma contamination.
- Banking: Create a master cell bank upon authentication. From this, create working cell banks. Record the passage number for each vial.
- Culture Conditions: Document and maintain consistent culture conditions (medium, serum, supplements, passaging routine).
- Regular Re-authentication: Periodically re-authenticate the cell line during long-term culture. A common practice is to re-authenticate every 10-20 passages or at the start of a new project series.
- Usage: Use cells from the working bank for experiments and do not culture beyond a pre-defined maximum passage number to avoid phenotypic and genotypic drift [85].
The Scientist's Toolkit: Essential Research Reagent Solutions
| Item / Reagent | Function & Rationale |
|---|---|
| Authenticated Cell Lines | Starting with a genotypically and phenotypically confirmed cell source is the foundation for reproducible cell-based research. It prevents invalid data from misidentified or cross-contaminated lines [86] [85]. |
| Cytoplasm-Mimicking Buffer | A buffer designed to replicate the intracellular environment (e.g., high K+/low Na+, macromolecular crowding agents) for biochemical assays. Its use can help bridge the activity gap between biochemical and cellular assays by providing more physiologically relevant conditions [10] [1]. |
| ATP-Based Viability Assay | A luminescent assay that quantifies cellular ATP levels. It is highly sensitive and provides a rapid readout of cell viability and cytotoxicity. Note that ATP levels reflect metabolic activity and may not always directly correlate with cell number [84] [20]. |
| LDH Cytotoxicity Assay | A colorimetric assay that measures lactate dehydrogenase (LDH) enzyme released upon cell membrane damage. It is a direct marker of cytotoxicity and complements viability assays [20]. |
| Annexin V/Propidium Iodide (PI) | A fluorescence-based assay that distinguishes between healthy, early apoptotic (Annexin V+/PI-), late apoptotic (Annexin V+/PI+), and necrotic (Annexin V-/PI+) cell populations. It is a key tool for mechanistic studies of cell death [20]. |
| FLUOR DE LYS HDAC/Sirtuin Assay | An example of a specialized, robust biochemical assay kit for screening modulators of epigenetic targets like HDACs and Sirtuins. Using such validated kits can enhance reproducibility [20]. |
Workflow and Relationship Visualizations
Troubleshooting Experimental Discrepancies
Biochemical vs Cellular Assay Discrepancy
Conclusion
The discrepancy between biochemical and cellular assay results is not an insurmountable obstacle but a solvable scientific challenge. By understanding the fundamental physicochemical differences between simplified in vitro conditions and the complex intracellular milieu, researchers can design more predictive cytomimetic assays. Methodological refinements that mimic cytoplasmic crowding, ion composition, and lipophilicity, combined with rigorous troubleshooting to eliminate artifacts, are crucial for generating reliable data. Finally, the strategic use of advanced cell models and orthogonal validation creates a cohesive framework that aligns BcA and CBA results. Embracing this integrated approach will significantly enhance the quality of lead optimization, accelerate the drug discovery pipeline, and improve the translation of in vitro findings to clinical success. Future efforts should focus on the standardized development and widespread adoption of defined cytomimetic buffers, as well as the increased utilization of complex cellular systems like 3D organoids for more physiologically relevant screening.
References
- 1. Comparative Analysis of Biochemical and Cellular Assay ... [https://pmc.ncbi.nlm.nih.gov/articles/PMC12429910/]
- 2. Bradford vs BCA Assay: Which to Choose? [https://opentrons.com/applications/bradford-assay/bradford-vs-bca?srsltid=AfmBOoqrC2UOWwHRAk8CeqrF-MtUFoM4JHFSxkhLMv0tEgRIFN8YQ53V]
- 3. How Is BCA Assay Different from Bradford Assay? [https://synapse.patsnap.com/article/how-is-bca-assay-different-from-bradford-assay]
- 4. Protein Assays and Quantitation Support—Troubleshooting [https://www.thermofisher.com/us/en/home/technical-resources/technical-reference-library/protein-assays-analysis-support-center/protein-assays-quantitation-support/protein-assays-quantitation-support-troubleshooting.html]
- 5. Selective permeability of boundaries in a knowledge ... [https://pmc.ncbi.nlm.nih.gov/articles/PMC6360461/]
- 6. How to create a Troubleshooting Guide for your business [https://document360.com/blog/troubleshooting-guide/]
- 7. Troubleshooting Guide: Definition & Examples [https://www.bolddesk.com/blogs/troubleshooting-guide]
- 8. Powerful Diagnostic Tool for Drug Detection in ... [https://www.aau.edu/research-scholarship/featured-research-topics/powerful-diagnostic-tool-drug-detection-development]
- 9. Comparative Analysis of Biochemical and Cellular Assay ... [https://pubmed.ncbi.nlm.nih.gov/40942155/]
- 10. Comparative Analysis of Biochemical and Cellular Assay ... [https://www.mdpi.com/1420-3049/30/17/3630]
- 11. High-throughput peptide-centric local stability assay ... [https://www.nature.com/articles/s41594-025-01699-y]
- 12. The intracellular free concentration of endocrine disrupting ... [https://www.sciencedirect.com/science/article/pii/S1382668925001255]
- 13. All About the Composition of Protein Purification Buffers ... [https://www.goldbio.com/blogs/articles/all-about-the-composition-of-protein-purification-buffers-and-why-it-matters?srsltid=AfmBOorlK3Z7mbclnKtMznL70iXs-Z44Wy5hLvV-U21t7QkaRCJ8w7m9]
- 14. Factors Influencing Compound Potency in Biochemical and ... [https://www.promegaconnections.com/factors-influencing-compound-potency-in-biochemical-and-cellular-assays/]
- 15. Comparison of Drug Inhibitory Effects (IC50) in Monolayer and ... [https://pmc.ncbi.nlm.nih.gov/articles/PMC9773863/]
- 16. Combining IC50 or Ki Values from Different Sources Is a ... [https://pmc.ncbi.nlm.nih.gov/articles/PMC10934815/]
- 17. Exploring the Relationship Between IC50 and Kd in ... [https://www.promegaconnections.com/exploring-the-relationship-between-ic50-and-kd-in-pharmacology/]
- 18. Drug discovery, a biophysics perspective - IC50 and Kd ... [https://www.linkedin.com/pulse/drug-discovery-biophysics-perspective-ic50-kd-f%C3%A9lix-torres-hubiche-wgxre]
- 19. Determining Kd With an Alpha Assay [https://www.revvity.com/ask/determining-kd-alpha-assay]
- 20. Cell-Based Assay or Biochemical Assay? Now That's the ... [https://www.enzo.com/note/cell-based-assay-or-biochemical-assaynow-thats-the-question/]
- 21. Cell Based Assays in Drug Development [https://www.immunologixlabs.com/blog/cell-based-assays-in-drug-development-comprehensive-overview/]
- 22. Protocol for validating liquid-liquid phase separation as a ... [https://www.sciencedirect.com/science/article/pii/S2666166724005756]
- 23. Review Nuisance compounds in cellular assays [https://www.sciencedirect.com/science/article/pii/S2451945621000477]
- 24. Ion Transporter - an overview [https://www.sciencedirect.com/topics/biochemistry-genetics-and-molecular-biology/ion-transporter]
- 25. Physiology, Sodium Potassium Pump - StatPearls - NCBI - NIH [https://www.ncbi.nlm.nih.gov/books/NBK537088/]
- 26. Sodium–potassium pump [https://en.wikipedia.org/wiki/Sodium%E2%80%93potassium_pump]
- 27. Physiology, Resting Potential - StatPearls - NCBI Bookshelf [https://www.ncbi.nlm.nih.gov/books/NBK538338/]
- 28. Potassium: From Physiology to Clinical Implications - PMC [https://pmc.ncbi.nlm.nih.gov/articles/PMC4947686/]
- 29. Modeling Crowded Environment in Molecular Simulations - PMC [https://pmc.ncbi.nlm.nih.gov/articles/PMC6749006/]
- 30. A look into incorporating macromolecular crowding ... [https://pmc.ncbi.nlm.nih.gov/articles/PMC5638150/]
- 31. Underestimated role of macromolecular crowding in ... [https://www.sciencedirect.com/science/article/pii/S2590006425003321]
- 32. Exploring the role of macromolecular crowding and TNFR1 ... [https://elifesciences.org/articles/92719]
- 33. Article Understanding how genetically encoded tags and ... [https://www.sciencedirect.com/science/article/pii/S2667237525000657]
- 34. Effect of Crowding on Protein–Protein Association Rates [https://www.sciencedirect.com/science/article/abs/pii/S0022283603015006]
- 35. The impact of common redox mediators on cellular health [https://pubs.rsc.org/en/content/articlehtml/2025/an/d5an00017c]
- 36. Machine learning-aided first-principles calculations of ... [https://www.nature.com/articles/s41524-024-01295-6]
- 37. Predicting Iron–Sulfur Cluster Redox Potentials [https://pmc.ncbi.nlm.nih.gov/articles/PMC12019745/]
- 38. Structured Crowding and Its Effects on Enzyme Catalysis [https://pmc.ncbi.nlm.nih.gov/articles/PMC6361544/]
- 39. Macromolecular crowding effects on the kinetics of ... [https://www.sciencedirect.com/science/article/pii/S2405580821000509]
- 40. Excluded Volume and Weak Interactions in Crowded ... [https://pmc.ncbi.nlm.nih.gov/articles/PMC10331728/]
- 41. Interference and Artifacts in High-content Screening - NCBI - NIH [https://www.ncbi.nlm.nih.gov/books/NBK615088/]
- 42. Understanding Fluorescence Quenching in BODIPY Dyes [https://probes.bocsci.com/resources/understanding-and-controlling-fluorescence-quenching-in-bodipy-dyes.html]
- 43. Fluorescence quenching-based immunological probe for ... [https://www.frontiersin.org/journals/bioengineering-and-biotechnology/articles/10.3389/fbioe.2023.1295406/full]
- 44. Mechanisms that matter: unbiased cellular screening for ... [https://www.nature.com/articles/s44386-025-00028-z]
- 45. Shortwave infrared absorbing and fluorescent BODIPY J ... [https://pubs.rsc.org/en/content/articlehtml/2025/sc/d5sc03864b]
- 46. Rapid Fluorescence Quenching Detection of Escherichia coli ... [https://pmc.ncbi.nlm.nih.gov/articles/PMC7865786/]
- 47. ICC/IF Troubleshooting [https://www.antibodies.com/applications/immunofluorescence/immunofluorescence-troubleshooting]
- 48. Prediction of intracellular exposure bridges the gap between ... [https://pmc.ncbi.nlm.nih.gov/articles/PMC5544291/]
- 49. PAINS in the Assay: Chemical Mechanisms of ... [https://pmc.ncbi.nlm.nih.gov/articles/PMC4360378/]
- 50. Troubleshooting & FAQs [https://www.cygnustechnologies.com/resources/guidelines?srsltid=AfmBOoqih36FTX3pJ_a7GDr5S81elCW5gMOKOQdiB6SUiFf7-z7XKikf]
- 51. The Z prime value (Z´) [https://www.bmglabtech.com/en/blog/the-z-prime-value/]
- 52. From S/B to Z′: A Better Way to Measure Assay Quality in ... [https://bellbrooklabs.com/z-prime-a-better-way-to-measure-assay-quality-in-hts/?srsltid=AfmBOoqD66gCVpTWmIZl_dxNIb4HqQ6EtKtpJSPG8QNe6u1rnJplPu0e]
- 53. Advanced Assay Development Guidelines for Image-Based ... [https://www.ncbi.nlm.nih.gov/books/NBK126174/]
- 54. High Throughput Screening Assays for Drug Discovery [https://bellbrooklabs.com/high-throughput-screening-assays-drug-discovery/?srsltid=AfmBOor67Z1Dt62lvvFGgJA3jZUvRoeZlNHV7UT9GgB2xlJM9NpZoTEL]
- 55. Resources for Assay Development and High Throughput ... [https://drugdiscovery.msu.edu/facilities/addrc/resources-for-assay-development-and-high-throughput-screening.aspx]
- 56. Why 90% of clinical drug development fails and how to ... [https://pmc.ncbi.nlm.nih.gov/articles/PMC9293739/]
- 57. Managing Reagent Variation [https://clpmag.com/lab-essentials/quality-systems/managing-reagent-variation/]
- 58. Your liquid handling robot is broken. Or is it? (Part 2) [https://www.aicompanies.com/education-training/knowledge-center/your-liquid-handling-robot-is-broken-or-is-it-part-2/]
- 59. Effect of Liquid-Handling Accuracy on Assay Performance [https://www.sciencedirect.com/science/article/pii/S2472630322015333]
- 60. Automated Liquid Handlers As Sources of Error [https://www.bioprocessintl.com/assays/automated-liquid-handlers-as-sources-of-error]
- 61. Common Errors and Pitfalls in Clinical Chemistry Analyzer ... [https://en.seamaty.com/index.php?s=/sys/547.html]
- 62. Avoiding Human Errors in Experiments for Biologics [https://www.dotmatics.com/blog/avoiding-human-errors-in-experiments-for-biologics]
- 63. Apparent Activity in High-Throughput Screening: Origins ... [https://pmc.ncbi.nlm.nih.gov/articles/PMC2878863/]
- 64. Assay interference and off-target liabilities of reported ... [https://www.nature.com/articles/s41467-017-01657-3]
- 65. Brief Guide: Experimental Strategies for High-Quality Hit Selection from... [https://pmc.ncbi.nlm.nih.gov/articles/PMC8293735/]
- 66. ACDD - Our Process - R. Ken Coit College of Pharmacy [https://www.pharmacy.arizona.edu/acdd-our-process]
- 67. Top 5 Drug Discovery Trends 2025 Driving Breakthroughs [https://www.pelagobio.com/cetsa-drug-discovery-resources/blog/drug-discovery-trends-2025/]
- 68. What could cause IC50 or EC50 values to differ between ... [https://www.aatbio.com/resources/faq-frequently-asked-questions/What-could-cause-IC50-or-EC50-values-to-differ-between-biochemical-and-cell-based-assays]
- 69. Drug Discovery Assays Support—Troubleshooting [https://www.thermofisher.com/us/en/home/technical-resources/technical-reference-library/drug-discovery-development-support-center/drug-discovery-assays-support/drug-discovery-assays-support-troubleshooting.html]
- 70. A review for cell-based screening methods in drug discovery [https://pmc.ncbi.nlm.nih.gov/articles/PMC10210057/]
- 71. Troubleshooting Cell-based Assays Ask the Experts to ... [https://www.promega.com/resources/webinars/promega-germany/210730-troubleshooting-cell-based-assays/]
- 72. Unlocking the Potential of Cell-Based Assays in Modern ... [https://www.vipergen.com/unlocking-the-potential-of-cell-based-assays-in-modern-scientific-research/]
- 73. Three-Dimensional Cell Cultures in Drug Discovery and ... [https://pmc.ncbi.nlm.nih.gov/articles/PMC5448717/]
- 74. Comparison of Cell and Organoid-Level Analysis of Patient ... [https://pmc.ncbi.nlm.nih.gov/articles/PMC7372585/]
- 75. 3D and organoid culture in research: physiology ... [https://pmc.ncbi.nlm.nih.gov/articles/PMC8973959/]
- 76. A Practical Guide to Developing and Troubleshooting Patient ... [https://pmc.ncbi.nlm.nih.gov/articles/PMC12566426/]
- 77. Organoids as tools for fundamental discovery and translation ... [https://pmc.ncbi.nlm.nih.gov/articles/PMC11293861/]
- 78. Primary cells vs. cell lines: Is it not time for something better? [https://www.bit.bio/blog/primary-cells-vs-cell-lines]
- 79. Stop Sabotaging Your Science With the Wrong Cell Type [https://www.synthego.com/blog/crispr-cell-type-model/]
- 80. Cell Lines vs. Primary Cells [https://www.stemcell.com/physiological-relevance-of-human-primary-cells-vs-cell-lines]
- 81. Comparative analysis of small molecule and growth factor ... [https://pmc.ncbi.nlm.nih.gov/articles/PMC12240953/]
- 82. Comprehensive review of macrophage models [https://www.frontiersin.org/journals/immunology/articles/10.3389/fimmu.2025.1640935/full]
- 83. A Simple High-Content Cell Cycle Assay Reveals Frequent ... [https://journals.plos.org/plosone/article?id=10.1371/journal.pone.0063583]
- 84. In Vitro Research Reproducibility: Keeping Up High Standards [https://pmc.ncbi.nlm.nih.gov/articles/PMC6916005/]
- 85. Six factors affecting reproducibility in life science research ... [https://www.nature.com/articles/d42473-019-00004-y]
- 86. The Increasing Urgency for Standards in Basic Biological ... [https://pmc.ncbi.nlm.nih.gov/articles/PMC4975040/]
- 87. Troubleshooting Lab Operations: Be Proactive, Not Reactive [https://www.biopharminternational.com/view/troubleshooting-lab-operations-be-proactive-not-reactive]
- 88. Cross-Validation of Analytical Method: What It Is, How & ... [https://pharmaguru.co/cross-validation-in-analyticalytical-methods/]