A Step-by-Step Guide to PCR Setup: From Fundamentals to Advanced Optimization for Researchers
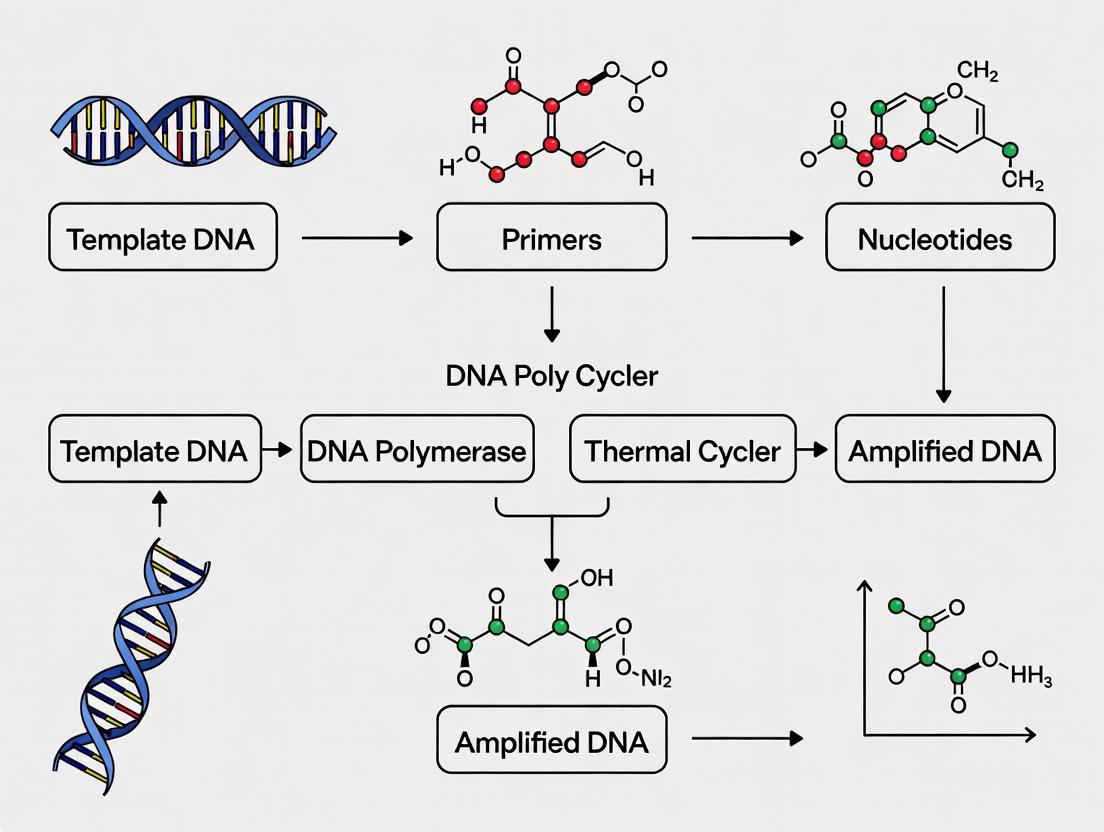
This article provides a comprehensive guide for researchers and drug development professionals on establishing robust Polymerase Chain Reaction (PCR) protocols.
A Step-by-Step Guide to PCR Setup: From Fundamentals to Advanced Optimization for Researchers
Abstract
This article provides a comprehensive guide for researchers and drug development professionals on establishing robust Polymerase Chain Reaction (PCR) protocols. It covers the foundational principles of PCR, delivers a detailed step-by-step methodological protocol for setting up reactions, explores advanced troubleshooting and optimization strategies to enhance specificity and yield, and discusses validation frameworks and comparative analyses of advanced PCR techniques. The content is designed to serve as both a practical laboratory manual and a reference for ensuring reproducibility and reliability in molecular assays, incorporating the latest guidelines and best practices.
Understanding PCR: Core Principles and Essential Components for Success
The Polymerase Chain Reaction (PCR) is a cornerstone technique of modern molecular biology, enabling the amplification of specific DNA sequences from minimal starting material. Since its introduction by Kary Mullis in 1983, PCR has revolutionized biomedical research, clinical diagnostics, and drug development [1]. This process allows researchers to generate millions to billions of copies of a particular DNA segment in a matter of hours, providing sufficient material for analysis, cloning, or detection [2] [3]. The technique's profound impact on science and medicine was recognized with the Nobel Prize in Chemistry in 1993 [1].
At its core, PCR relies on a cyclic process of temperature variations that drive three fundamental steps: denaturation, annealing, and extension. Understanding these mechanistic steps is crucial for researchers aiming to optimize reactions for specific applications, from gene expression analysis to pathogen detection [4]. This technical guide provides an in-depth examination of the PCR mechanism, framed within the context of establishing a robust, step-by-step experimental protocol for research and drug development applications.
The Fundamental Steps of the PCR Cycle
The PCR process employs repeated temperature cycles to achieve exponential amplification of target DNA sequences. Each cycle consists of three critical steps that enable the precise replication of the DNA region flanked by two primer sequences [3].
Denaturation
The denaturation step involves heating the reaction mixture to a high temperature of 94–98°C for 20–30 seconds [3]. At this temperature, the hydrogen bonds between complementary bases in the double-stranded DNA molecule are broken, causing the DNA to separate into two single strands [2]. This separation provides access to the template sequences for primer binding in the subsequent step.
Efficient denaturation is critical for successful amplification. Incomplete separation of DNA strands can lead to reduced yield or amplification failure. The thermostable DNA polymerases used in PCR, such as Taq polymerase, can withstand these repeated high-temperature exposures without significant loss of activity, making automation of the process possible [1].
Annealing
Following denaturation, the temperature is lowered to 50–65°C for 20–40 seconds to allow primers to bind to their complementary sequences on the single-stranded DNA templates [3]. Primers are short, single-stranded DNA sequences (typically 18-25 nucleotides long) that flank the target region to be amplified [2].
The annealing temperature is a critical parameter that must be optimized for each primer set. It is typically set 3–5°C below the calculated melting temperature (Tm) of the primers [5]. Several factors influence annealing efficiency:
- Primer length and sequence: Longer primers with higher GC content generally require higher annealing temperatures
- Magnesium ion concentration: Higher concentrations stabilize primer-template binding
- Primer concentration: Optimal concentrations typically range from 0.1 to 0.5 μM
Specific primer binding is essential for reaction specificity. Mismatched annealing can lead to amplification of non-target sequences, reducing the yield of the desired product and potentially confounding results [3].
Extension
During the extension step, the temperature is raised to 72°C, the optimal temperature for Taq DNA polymerase activity [3]. At this temperature, the polymerase synthesizes new DNA strands by adding nucleotides to the 3' ends of the annealed primers, using the single-stranded DNA as a template [1]. The extension time (30–60 seconds for fragments up to 1 kb) depends on the length of the target amplicon and the processivity of the DNA polymerase [5].
DNA polymerases extend DNA strands in the 5' to 3' direction, incorporating complementary nucleotides (dNTPs) to build new DNA chains [1]. The result is two double-stranded DNA molecules for each original DNA molecule, effectively doubling the amount of target DNA with each complete cycle [3].
Table 1: Temperature and Duration Parameters for Standard PCR Steps
| PCR Step | Temperature Range | Duration | Function |
|---|---|---|---|
| Denaturation | 94–98°C | 20–30 seconds | Separates double-stranded DNA into single strands |
| Annealing | 50–65°C | 20–40 seconds | Allows primers to bind to complementary sequences |
| Extension | 72°C | 30–60 seconds/kb | Synthesizes new DNA strands from primers |
Advanced PCR Variations and Their Mechanisms
While the fundamental three-step process remains consistent across most PCR applications, several advanced variations have been developed to address specific research needs.
Quantitative PCR (qPCR)
Also known as real-time PCR, qPCR enables researchers to monitor DNA amplification as it occurs, rather than just at the endpoint [5]. This technique employs fluorescent reporter molecules (such as SYBR Green or TaqMan probes) to quantify the amount of DNA present in each cycle [4]. The cycle at which the fluorescence crosses a predetermined threshold (quantification cycle or Cq) is inversely proportional to the starting quantity of the target nucleic acid [2].
qPCR offers several advantages over conventional PCR:
- Generation of accurate quantitative data across a wide dynamic range
- Elimination of post-PCR processing (e.g., gel electrophoresis)
- Increased precision to detect small fold changes in gene expression
- Detection down to a single copy of the target sequence [4]
Reverse Transcription PCR (RT-PCR)
RT-PCR combines reverse transcription of RNA into complementary DNA (cDNA) with PCR amplification [2]. This technique is particularly valuable for gene expression analysis, as it allows researchers to amplify and quantify mRNA transcripts [4].
RT-PCR can be performed as either a one-step or two-step procedure:
- One-step RT-PCR: Reverse transcription and PCR amplification occur in the same tube with a single buffer system, offering convenience and reduced contamination risk
- Two-step RT-PCR: Reverse transcription and PCR amplification are performed in separate reactions, providing flexibility to analyze multiple targets from a single cDNA preparation [4]
Quantitative Analysis of PCR Parameters
Table 2: Comparison of Standard PCR and Quantitative PCR
| Parameter | Standard PCR | Quantitative PCR |
|---|---|---|
| Detection Method | End-point (usually gel electrophoresis) | Real-time fluorescence monitoring |
| Output | Qualitative or semi-quantitative | Absolute or relative quantification |
| Dynamic Range | Limited | 8-10 orders of magnitude [5] |
| Throughput | Lower | Higher, with 384-well plates |
| Application Examples | Cloning, mutation detection | Gene expression, viral load quantification |
| Data Analysis | Presence/absence of band | Cq values, standard curves, ΔΔCt method [4] |
The Scientist's Toolkit: Essential PCR Reagents and Equipment
Successful PCR requires precise formulation of reaction components and appropriate instrumentation. The following table details key reagents and equipment essential for establishing a PCR laboratory.
Table 3: Essential Research Reagents and Equipment for PCR Setup
| Component | Function | Considerations |
|---|---|---|
| Template DNA | The DNA containing the target sequence to be amplified | Quality and purity critical; 1-100 ng typically sufficient [2] |
| Primers | Short DNA sequences that define the target region | Specificity, length (18-25 bp), Tm, and GC content important [3] |
| DNA Polymerase | Enzyme that synthesizes new DNA strands | Thermostability (e.g., Taq polymerase); proofreading activity for long amplicons [1] |
| dNTPs | Nucleotide building blocks (dATP, dCTP, dGTP, dTTP) | Balanced concentrations (200 μM each) for efficient incorporation [3] |
| Buffer System | Maintains optimal pH and ionic environment | Typically contains Tris-HCl, KCl; Mg²⁺ concentration critical [3] |
| Magnesium Chloride | Cofactor for DNA polymerase activity | Concentration affects primer annealing and enzyme activity (typically 1.5-2.5 mM) [3] |
| Thermal Cycler | Instrument that automates temperature cycling | Precise temperature control and rapid transitions between steps [1] |
Experimental Protocol: Step-by-Step PCR Setup
Sample Preparation
- Nucleic Acid Extraction: Isolate DNA or RNA from source material (tissue, cells, blood) using appropriate extraction kits. For RNA targets, include DNase treatment to remove genomic DNA contamination.
- Quantification and Quality Assessment: Measure nucleic acid concentration using spectrophotometry (A260/A280 ratio ~1.8-2.0) or fluorometry. Assess integrity by agarose gel electrophoresis.
- Aliquoting: Prepare working dilutions of extracted nucleic acids to ensure consistent template input across reactions.
Reaction Assembly
Master Mix Preparation: Combine all common reaction components in a single tube to minimize pipetting error and ensure reaction consistency:
- 1X PCR Buffer
- 1.5-2.5 mM MgCl₂ (optimize for specific primer-template system)
- 200 μM each dNTP
- 0.1-0.5 μM each forward and reverse primer
- 0.5-2.5 U DNA polymerase per reaction
- Nuclease-free water to volume
Template Addition: Add template DNA (1-100 ng genomic DNA or 1-10 ng cDNA) to individual reaction tubes or plate wells.
- Negative Controls: Include no-template controls (NTC) to detect contamination and no-amplification controls to assess reagent quality.
Thermal Cycling Parameters
- Initial Denaturation: 95°C for 2-5 minutes to ensure complete separation of DNA strands and activate hot-start polymerases [5].
- Amplification Cycles (25-40 cycles):
- Denaturation: 95°C for 15-30 seconds
- Annealing: Primer-specific temperature (50-65°C) for 20-40 seconds
- Extension: 72°C for 30-60 seconds per kilobase of amplicon
- Final Extension: 72°C for 5-10 minutes to ensure complete extension of all products.
- Hold: 4-10°C for short-term storage of amplified products.
Post-Amplification Analysis
- Standard PCR: Analyze 5-10 μL of reaction product by agarose gel electrophoresis with ethidium bromide or SYBR Safe staining. Visualize under UV light to confirm amplicon size and specificity [2].
- qPCR Analysis:
PCR Workflow and Amplification Curve
Quality Control and Troubleshooting
Preventing Contamination
PCR's extreme sensitivity makes it vulnerable to contamination, which can lead to false-positive results [2]. Implement these measures to minimize risk:
- Physical Separation: Perform pre-PCR (reaction setup), PCR (amplification), and post-PCR (analysis) steps in separate areas
- Dedicated Equipment: Use separate pipettes, tips, and lab coats for each work area
- Aerosol-Reduction Tips: Use filter tips during reaction setup to prevent cross-contamination
- UV Irradiation: Expose workstations and reagents to UV light to degrade contaminating DNA
- Enzymatic Controls: Include uracil-N-glycosylase (UNG) treatment to carryover contamination from previous amplifications
Reaction Optimization
When PCR performance is suboptimal, systematically troubleshoot these parameters:
- Magnesium Concentration: Test 0.5 mM increments from 1.0 to 3.0 mM
- Annealing Temperature: Perform temperature gradient PCR (±5°C from calculated Tm)
- Cycle Number: Reduce if non-specific products form; increase if yield is low
- Template Quality: Assess degradation and check for inhibitors (e.g., phenol, heparin, hemoglobin) [2]
Applications in Research and Drug Development
PCR's versatility makes it indispensable across numerous research and pharmaceutical applications:
Basic Research Applications
- Gene Cloning and Expression: Amplify coding sequences for insertion into expression vectors
- Mutagenesis Studies: Introduce specific mutations to study gene function
- Genotyping: Identify genetic variations, including SNPs and insertions/deletions
- Sequencing Support: Generate ample template for Sanger or next-generation sequencing
Drug Development and Clinical Applications
- Biomarker Discovery: Identify and validate genetic markers for disease diagnosis and prognosis
- Pharmacogenomics: Study how genetic variations affect drug response
- Pathogen Detection: Identify bacterial and viral infections with high sensitivity and specificity [2]
- Therapeutic Monitoring: Track microbial load in patients undergoing antimicrobial therapy [6]
The PCR mechanism—comprising denaturation, annealing, and extension—represents a elegantly simple yet powerful process that has transformed molecular biology. Understanding these fundamental steps and their optimization parameters is essential for researchers across diverse fields, from basic science to drug development.
As PCR technologies continue to evolve with improvements in enzyme fidelity, reaction speed, and detection methods, the core three-step cycle remains the foundation upon which these advancements are built. Mastery of both the theoretical principles and practical implementation of PCR provides researchers with a versatile tool for nucleic acid analysis that continues to drive scientific discovery and innovation.
The protocols and guidelines presented in this technical review provide a comprehensive framework for establishing robust PCR methods in research settings, enabling scientists to leverage this fundamental technology to address diverse biological questions and advance drug development pipelines.
The Polymerase Chain Reaction (PCR) is a cornerstone technique of molecular biology, capable of amplifying specific DNA sequences into millions of copies in just hours. Since its introduction by Kary Mullis in the 1980s, it has become an indispensable tool for researchers, scientists, and drug development professionals, with applications ranging from genetic testing and infectious disease diagnostics to forensic analysis and gene expression studies [2] [1]. The power and reliability of this method hinge on the precise preparation and optimization of its core reagents. This technical guide provides an in-depth examination of the five essential components of a PCR reaction, serving as a comprehensive checklist to ensure successful and reproducible results in your research.
The PCR Reagent Checklist
A standard PCR setup requires five critical components: a DNA template, DNA polymerase, primers, deoxynucleoside triphosphates (dNTPs), and a reaction buffer. Each component plays a specific and vital role in the amplification process, and their quality and concentration are paramount for success [7] [8].
Template DNA
The template DNA is the target sequence that will be amplified. It can originate from various sources, including genomic DNA (gDNA), complementary DNA (cDNA), and plasmid DNA [9]. The optimal amount of template DNA required depends on its composition and complexity. Using too much template can lead to nonspecific amplification, while too little can reduce yield [9].
Table 1: Recommended Template DNA Input for a 50 µL PCR Reaction
| Template Type | Recommended Amount | Notes |
|---|---|---|
| Plasmid DNA | 0.1 - 1 ng | Less complex, requires lower input [9] [8]. |
| Genomic DNA (gDNA) | 5 - 50 ng | More complex, requires higher input [9] [8]. |
| cDNA | 1 - 10 ng | Derived from reverse-transcribed mRNA [7]. |
The template must be of high quality and free of contaminants. Impurities such as phenol, proteinase K, ionic detergents, or EDTA can inhibit DNA polymerase activity, leading to reduced efficiency or reaction failure [2]. Traditional DNA extraction methods using SDS and protease K are effective for purifying DNA, while many rapid protocols are also available for clinical testing [8].
DNA Polymerase
DNA polymerase is the enzyme that synthesizes new DNA strands by adding nucleotides to the primers. Taq DNA polymerase, isolated from the thermophilic bacterium Thermus aquaticus, is the most commonly used enzyme due to its thermostability; it remains active after repeated exposure to the high temperatures (over 90°C) required for DNA denaturation [2] [1]. In a standard 50 µL reaction, 1–2 units of DNA polymerase are typically sufficient [9].
Table 2: Common DNA Polymerases and Their Properties
| DNA Polymerase | Source | Proofreading Activity | Typical Application |
|---|---|---|---|
| Taq Polymerase | Thermus aquaticus | No | Standard PCR; produces amplicons with 3' A-overhangs [1]. |
| Pfu Polymerase | Pyrococcus furiosus | Yes (High-fidelity) | PCR cloning, sequencing; lower error rate [9]. |
| Engineered Blends | Recombinant | Varies | Long-range, GC-rich, or fast PCR [9] [1]. |
While Taq polymerase is highly robust, it lacks proofreading (3'→5' exonuclease) activity, making it prone to incorporating errors during amplification [1]. For applications requiring high fidelity, such as cloning or sequencing, using a proofreading polymerase is recommended.
Primers
Primers are short, single-stranded DNA sequences (15–30 nucleotides) that are complementary to the sequences flanking the target DNA region. They provide the starting point for DNA synthesis [9] [8]. A successful PCR requires two primers: a forward primer and a reverse primer.
Table 3: Primer Design Guidelines and Optimization
| Parameter | Optimal Condition | Rationale |
|---|---|---|
| Length | 15 - 30 nucleotides | Balances specificity and binding efficiency [9]. |
| Melting Temperature (Tm) | 55 - 70°C; within 5°C for a pair | Ensures both primers anneal efficiently at the same temperature [9]. |
| GC Content | 40 - 60% | Provides sufficient stability without promoting mispriming [9]. |
| 3' End | Avoid runs of 3 or more G/C; end with a single G or C | Prevents nonspecific amplification while promoting stable binding (primer anchoring) [9]. |
| Concentration | 0.1 - 1.0 µM | Higher concentrations promote mispriming and primer-dimer formation [9]. |
Primers must be designed to avoid self-complementarity (which can form hairpins), complementarity between primers (which can form primer-dimers), and direct repeats [9]. Using validated primer sequences or reputable primer design tools is critical for specificity.
Deoxynucleoside Triphosphates (dNTPs)
dNTPs (dATP, dCTP, dGTP, and dTTP) are the building blocks from which DNA polymerase synthesizes new DNA strands [7]. The four dNTPs should be provided in equimolar concentrations to prevent misincorporation errors [8]. The recommended final concentration for each dNTP in a standard PCR is typically 200 µM [10] [8].
dNTPs are sensitive to freeze-thaw cycles and should be stored at -20°C in small aliquots. Using degraded dNTPs can severely inhibit the PCR reaction [8]. In some specialized applications, the concentration may be adjusted. For example, lower dNTP concentrations (0.01–0.05 mM) can improve the fidelity of non-proofreading polymerases [9]. Furthermore, dTTP can be partially or fully replaced with dUTP to facilitate uracil DNA glycosylase (UDG) treatment, a method to prevent carryover contamination from previous PCR products [9].
Buffer and Cofactors
The PCR buffer provides a stable chemical environment for optimal DNA polymerase activity. A standard 10X buffer often contains:
- Tris-HCl: Maintains a stable pH, usually around 8.0-9.0 [7].
- Potassium Chloride (KCl): Provides monovalent ions that promote primer-template binding [11].
The most critical component is Magnesium Chloride (MgCl₂). Mg²⁺ acts as an essential cofactor for DNA polymerase, stabilizing the enzyme's active site and facilitating the binding of dNTPs during polymerization [9] [8]. The optimal concentration of Mg²⁺ typically ranges from 0.1 to 0.5 mM in the final reaction [10] but often falls between 1.5 and 2.0 mM and requires optimization. Since Mg²⁺ binds to dNTPs, its concentration must be optimized in relation to the dNTP concentration in the reaction [9].
Experimental Protocol: Setting Up a Standard PCR
The following is a detailed methodology for assembling and running a conventional PCR reaction.
Reagent Preparation and Mixing
- Thawing: Thaw all PCR reagents (except the enzyme) on ice. Gently vortex and briefly centrifuge each tube to collect the contents at the bottom [10].
- Reaction Assembly: Prepare a master mix for multiple reactions to minimize pipetting error and ensure consistency. Add components to a thin-walled 0.2 mL PCR tube in the following order [10]:
- Nuclease-free water (to a final volume of 50 µL)
- 10X PCR Buffer (1X final concentration)
- dNTP Mix (200 µM of each dNTP final concentration)
- Forward Primer (0.1-0.5 µM final concentration)
- Reverse Primer (0.1-0.5 µM final concentration)
- Template DNA (see Table 1 for recommended amounts)
- DNA Polymerase (0.05-0.05 units/µL final concentration)
- Mixing: Gently mix the reaction by tapping the tube. Briefly pulse-centrifuge to settle all liquid at the bottom of the tube [10].
- Controls: Always include a negative control (without template DNA) to check for contamination and a positive control (with a template and primers of known performance) to verify reaction success [10].
Thermal Cycling Conditions
Program a thermal cycler with the following standard protocol. Times may need adjustment based on the specific polymerase, primer, and amplicon characteristics.
- Initial Denaturation: 94–95°C for 2–5 minutes [10] [11].
- Amplification Cycles (25–35 cycles):
- Final Extension: 72°C for 5–10 minutes to ensure all amplicons are fully extended [10] [11].
- Final Hold: 4–15°C for short-term storage of the products [11].
Post-PCR Analysis
The most common method to analyze PCR products is agarose gel electrophoresis:
- Prepare an agarose gel (concentration dependent on the expected amplicon size) with an intercalating dye like ethidium bromide.
- Mix a portion of the PCR reaction with a loading dye and load onto the gel alongside a DNA ladder (molecular weight marker).
- Run the gel at an appropriate voltage until bands are sufficiently separated.
- Visualize the gel under ultraviolet light to confirm the presence of a single, sharp band of the expected size [2].
The PCR Workflow
The diagram below illustrates the logical workflow and the three core cycling steps of the Polymerase Chain Reaction.
The Scientist's Toolkit: Research Reagent Solutions
Table 4: Essential Materials and Reagents for PCR
| Item | Function | Key Considerations |
|---|---|---|
| Template Prep Kits | Isolate high-quality DNA/RNA from biological samples (blood, tissue). | Ensure removal of inhibitors like heparin or hemoglobin [2] [7]. |
| Thermostable DNA Polymerase | Enzymatically synthesizes new DNA strands during PCR. | Choose based on application: standard (Taq) vs. high-fidelity (Pfu) [9] [1]. |
| Oligonucleotide Synthesis Service | Provides custom-designed primers. | Essential for targeting unique sequences; purity is critical for cloning [9] [8]. |
| dNTP Solutions | Balanced mixtures of the four nucleotides (dATP, dCTP, dGTP, dTTP). | Use equimolar, neutral-pH solutions; avoid repeated freeze-thaw cycles [9] [8]. |
| PCR Buffers with MgCl₂ | Provides optimal pH, ionic strength, and magnesium cofactor. | Mg²⁺ concentration is a key optimization variable [7] [9]. |
| Thermal Cycler | Automates the temperature cycling process. | Heated lid prevents condensation; thin-walled tubes ensure rapid heat transfer [1] [11]. |
| Nuclease-Free Water | Serves as the reaction solvent. | Prevents degradation of primers, templates, and enzymes. |
| UDG (Uracil-DNA Glycosylase) | Prevents carryover contamination from previous PCRs. | Used with dUTP-containing reactions; cleaves uracil-labeled prior amplicons [9]. |
Meticulous attention to the quality, concentration, and interaction of the five core PCR reagents is the foundation of a successful amplification. This detailed checklist—covering template DNA, polymerase, primers, dNTPs, and buffer/Mg²⁺—provides a systematic framework for researchers to set up robust and reproducible reactions. By following the outlined experimental protocol and utilizing the essential tools in the scientist's toolkit, professionals in research and drug development can optimize their PCR workflows, thereby ensuring the reliability of their data and accelerating the pace of scientific discovery.
The polymerase chain reaction (PCR) is a foundational technique in modern molecular biology, and the selection of the appropriate DNA polymerase is a critical determinant of experimental success. This guide provides an in-depth technical overview of three primary categories of PCR enzymes: standard Taq, Hot-Start, and High-Fidelity DNA polymerases. Within the context of setting up a PCR reaction, we will delineate the distinct properties, applications, and selection criteria for these enzymes. Understanding their specific characteristics—including fidelity, thermostability, and specificity—enables researchers to make informed decisions that enhance amplification yield, accuracy, and efficiency for applications ranging from routine genotyping to next-generation sequencing library preparation.
The polymerase chain reaction (PCR) is a method for exponentially amplifying specific fragments of DNA through repeated thermal cycles. The DNA polymerase enzyme is the core component of this system, catalyzing the synthesis of new DNA strands by incorporating nucleotides complementary to a target template. The earliest PCR protocols utilized the Klenow fragment of E. coli DNA Polymerase I, which had to be replenished after each denaturation cycle due to its heat lability. This limitation was overcome by the discovery and adoption of Taq DNA Polymerase, a thermostable enzyme isolated from the thermophilic bacterium Thermus aquaticus found in the hot springs of Yellowstone National Park [12] [13]. Its ability to withstand the high temperatures required for DNA denaturation (typically >90°C) revolutionized PCR, transforming it into a simple and robust technique performed in a single tube [12].
Today, a wide array of engineered DNA polymerases builds upon the foundation laid by Taq. Choosing the right enzyme is not a one-size-fits-all process; it requires a strategic balance between key enzymatic properties tailored to the specific application. The following sections will dissect these properties and categorize the enzymes, providing a framework for optimal selection.
Key Characteristics of DNA Polymerases
When selecting a DNA polymerase, researchers must evaluate four key characteristics: specificity, fidelity, thermostability, and processivity [14].
- Specificity: This refers to the enzyme's ability to amplify only the intended target sequence, minimizing non-specific amplification and primer-dimer formation. Hot-Start technology is the primary method for enhancing specificity by inhibiting the polymerase's activity at room temperature [14].
- Fidelity: Fidelity is the accuracy of DNA replication, measured as the error rate (number of misincorporated nucleotides per base pair duplicated). Taq polymerase lacks a 3'→5' proofreading exonuclease activity, resulting in a relatively low fidelity. High-fidelity polymerases possess this proofreading function, significantly reducing error rates [14] [13].
- Thermostability: This is the enzyme's ability to retain activity after prolonged exposure to the high temperatures used in PCR, particularly during the denaturation step. While Taq is stable at high temperatures, its half-life drops rapidly above 90°C. Enzymes from hyperthermophilic archaea, such as Pfu, exhibit superior thermostability [14].
- Processivity: Defined as the number of nucleotides incorporated per enzyme-binding event, processivity affects the polymerase's speed and its ability to amplify long templates or sequences with complex secondary structures [14].
The table below summarizes the defining features and optimal use cases for the three main classes of PCR enzymes.
Table 1: Overview of DNA Polymerase Types and Their Applications
| Polymerase Type | Key Features | Proofreading (3'→5' Exo) | Primary Applications | Key Considerations |
|---|---|---|---|---|
| Standard Taq | Thermostable, low fidelity, has 5'→3' exonuclease activity | No | Routine PCR, genotyping, TA cloning | Cost-effective; sufficient for many basic applications. |
| Hot-Start Taq | Inactive at room temperature; activated by heat | No | High-specificity PCR, multiplex PCR, high-throughput setups | Reduces primer-dimers and mis-priming; essential for sensitive assays. |
| High-Fidelity | High accuracy; often has proofreading ability | Yes | Cloning, sequencing, mutagenesis, NGS library prep | Crucial for applications where sequence accuracy is paramount. |
Enzyme Type 1: Taq DNA Polymerase
Origin and Fundamental Properties
Taq DNA Polymerase is a 94 kDa enzyme isolated from Thermus aquaticus [12]. Its optimal functional temperature is 75–80°C, where it can polymerize DNA at a rate of about 150 nucleotides per second [12] [13]. A critical drawback is its lack of 3' to 5' exonuclease proofreading activity, which results in an error rate of approximately 1 in 10⁵ nucleotides incorporated [12] [13]. The enzyme also displays a template-independent terminal transferase activity, often adding a single extra adenosine (A) to the 3' end of PCR products. This "A-overhang" is exploited in TA cloning strategies [13].
Biochemical Requirements and Reaction Conditions
The activity of Taq polymerase is dependent on reaction buffer components. It requires magnesium ions (Mg²⁺) as an essential cofactor, typically provided as MgCl₂ at an optimal concentration of 1.5-2.0 mM [12] [15]. Potassium chloride (KCl) at around 50 mM is also a standard buffer component, which helps to neutralize the negative charge on the DNA backbone and promote primer annealing [12]. The enzyme functions best in a pH range of 8.0-9.4, commonly maintained with Tris-HCl buffer [12].
Table 2: Optimal Reaction Conditions for Taq DNA Polymerase [12] [15]
| Reaction Component | Typical Concentration / Value | Notes on Optimization |
|---|---|---|
| MgCl₂ | 1.5 - 2.0 mM | Too low: no product; too high: non-specific products. |
| KCl | ~50 mM | Can be adjusted to influence specificity for short vs. long products. |
| dNTPs | 200 µM each | Higher concentrations can reduce fidelity. |
| Primers | 0.1 - 0.5 µM each | Should have similar Tm values (within 5°C). |
| Template DNA | 1 pg – 1 µg | Plasmid: 1 pg–10 ng; Genomic: 1 ng–1 µg. |
| Taq Polymerase | 0.5 - 2.0 units/50 µL | 1.25 units is often ideal. |
| pH (Tris-HCl) | 8.0 - 9.4 (at 25°C) | Common commercial buffers are in this range. |
| Initial Denaturation | 95°C for 2 minutes | |
| Cycling Denaturation | 95°C for 15-30 seconds | |
| Annealing | 50-60°C for 15-30 seconds | ~5°C below the primer Tm. |
| Extension | 68°C for 1 min/kb | 45-60 seconds for products <1 kb. |
Enzyme Type 2: Hot-Start DNA Polymerases
The Problem of Non-Specific Amplification
During the setup of a PCR reaction at room temperature, DNA polymerase can exhibit low-level activity. This can lead to the extension of primers that are bound to non-specific sites on the template ("mis-priming") or to other primers ("primer-dimer" formation) [16]. These undesired products compete for reaction reagents and can drastically reduce the yield and sensitivity of the target amplification [16] [17].
Mechanisms of Hot-Start Activation
Hot-Start technology employs various modifiers to inhibit the polymerase until a high-temperature activation step is reached, typically the initial denaturation at 95°C. The diagram below illustrates the core principle and mechanisms of Hot-Start PCR.
The primary Hot-Start technologies are detailed in the table below.
Table 3: Comparison of Common Hot-Start Technologies [16] [18] [14]
| Technology | Mechanism | Benefits | Considerations |
|---|---|---|---|
| Antibody-based | An antibody binds the polymerase's active site, denaturing at high heat. | Fast activation; full enzyme activity restored; widely used. | Animal-origin antibodies add exogenous protein. |
| Chemical Modification | Polymerase is covalently modified to block activity. | Stringent inhibition; animal-origin free. | Requires longer heat activation; can affect long amplicons. |
| Aptamer-based | An engineered oligonucleotide binds the active site. | Fast activation; reversible; animal-origin free. | May be less stringent; stability at room temperature can vary. |
| Affibody-based | A small alpha-helical peptide binds the active site. | Less exogenous protein than antibodies; fast activation. | May be less stringent than antibody-based methods. |
Enzyme Type 3: High-Fidelity DNA Polymerases
The Need for Proofreading
For many applications, such as cloning, protein expression, and next-generation sequencing, the precise nucleotide sequence of the amplified product is critical. Standard Taq polymerase's error rate of ~1 x 10⁻⁵ is often unacceptably high for these purposes [12]. High-fidelity DNA polymerases address this issue by incorporating a 3'→5' exonuclease (proofreading) activity [14]. This activity allows the polymerase to recognize and excise misincorporated nucleotides during DNA synthesis, thereby increasing replication accuracy.
These enzymes are typically isolated from hyperthermophilic archaea. A well-known example is Pfu DNA Polymerase from Pyrococcus furiosus, which has a fidelity approximately 10 times higher than that of Taq [14]. Furthermore, Pfu is about 20 times more stable at 95°C than Taq, making it ideal for challenging templates [14]. Modern "next-generation" high-fidelity enzymes are often engineered via directed evolution, achieving error rates that are 50–300 times lower than Taq [14]. It is important to note that proofreading polymerases typically generate blunt-ended PCR products, unlike the A-overhangs generated by Taq.
Table 4: Quantitative Comparison of DNA Polymerase Fidelity and Characteristics
| Polymerase | Proofreading Activity | Relative Fidelity (vs. Taq) | Error Rate | Extension Rate (nt/s) |
|---|---|---|---|---|
| Taq | No | 1x | ~1 in 10⁵ | ~150 (at 75-80°C) [12] [13] |
| Pfu | Yes | ~10x | ~1 in 10⁶ | < half of Taq [14] |
| Engineered Hi-Fi | Yes | 50x - 300x | ~1 in 10⁷ | Varies; often engineered for high speed and processivity [14] |
A Step-by-Step Guide to PCR Setup and Enzyme Selection
Standardized PCR Protocol
The following protocol outlines a universal starting point for a 50 µL PCR reaction, which can be adapted based on the specific polymerase chosen.
Reaction Mixture Assembly on Ice:
- Combine the following components in a sterile, nuclease-free microcentrifuge tube placed on ice:
- Nuclease-free water to a final volume of 50 µL.
- 10X Reaction Buffer (usually supplied with the enzyme): 5 µL.
- MgCl₂ (25 mM): The concentration must be optimized; start with 3 µL for a final concentration of 1.5 mM [15].
- dNTP Mix (10 mM each): 1 µL for a final concentration of 200 µM each dNTP.
- Forward Primer (10 µM): 0.5 - 2.5 µL (final 0.1 - 0.5 µM).
- Reverse Primer (10 µM): 0.5 - 2.5 µL (final 0.1 - 0.5 µM).
- Template DNA: 1 pg – 1 µg (volume variable) [15].
- Add the DNA polymerase last. For hot-start enzymes, this can be done at room temperature. For standard Taq, keep the tube on ice. Gently mix and briefly centrifuge.
- Combine the following components in a sterile, nuclease-free microcentrifuge tube placed on ice:
Thermal Cycling:
- Transfer the tube to a thermal cycler pre-heated to the initial denaturation temperature (often 95°C). This "hot-start" technique further minimizes pre-cycling activity.
- Run the following typical cycling program [15]:
- Initial Denaturation: 95°C for 2 minutes (activates hot-start enzymes).
- Amplification (25-35 cycles):
- Denature: 95°C for 15-30 seconds.
- Anneal: 50-60°C (Tm-dependent) for 15-30 seconds.
- Extend: 68°C (for Taq) for 1 minute per 1000 base pairs.
- Final Extension: 68°C for 5-10 minutes.
- Hold: 4-10°C.
The Scientist's Toolkit: Essential Research Reagents
Table 5: Key Reagents for PCR Setup and Their Functions
| Reagent / Material | Function / Purpose | Technical Notes |
|---|---|---|
| DNA Polymerase | Enzymatically synthesizes new DNA strands. | Choice (Taq, Hot-Start, Hi-Fi) dictates specificity, fidelity, and yield. |
| 10X Reaction Buffer | Provides optimal pH and ionic conditions. | Typically contains Tris-HCl (pH 8.0-8.4) and KCl. Mg²⁺ is sometimes separate. |
| MgCl₂ Solution | Essential cofactor for polymerase activity. | Concentration is critical and must be optimized; chelated by dNTPs. |
| dNTP Mix | The building blocks (dATP, dCTP, dGTP, dTTP) for DNA synthesis. | Quality and concentration affect yield and fidelity. |
| Oligonucleotide Primers | Define the 5' and 3' boundaries of the DNA fragment to be amplified. | Must be designed for specificity and have matched melting temperatures (Tm). |
| Nuclease-Free Water | Solvent for the reaction. | Essential to prevent degradation of reaction components by contaminants. |
| Template DNA | The source DNA containing the target sequence to be amplified. | Must be of high quality and free of inhibitors (e.g., phenol, EDTA). |
The strategic selection of a DNA polymerase is a fundamental step in designing a robust and reliable PCR experiment. Standard Taq polymerase remains a cost-effective choice for routine applications where ultimate sequence accuracy is not critical. Hot-Start polymerases, available in several varieties, are the default for assays requiring high specificity and sensitivity, especially in diagnostic and high-throughput settings. For applications where the exact DNA sequence is paramount, such as cloning and sequencing, a high-fidelity proofreading polymerase is indispensable. By understanding the technical profiles of these enzymes and applying the structured protocols and comparisons provided in this guide, researchers and drug development professionals can systematically optimize their PCR workflows to achieve consistent and high-quality results.
In the realm of molecular biology, the polymerase chain reaction (PCR) has marked a groundbreaking milestone, serving as an essential tool that plays a pivotal role in genetic analysis, diagnostic testing, and fundamental biological research [19]. Despite its widespread use, achieving optimal PCR conditions remains a critical challenge, with magnesium chloride (MgCl₂) concentration emerging as one of the most crucial parameters affecting reaction success [19]. As a divalent cation, magnesium (Mg²⁺) serves not merely as a passive component but as an indispensable cofactor that actively participates in the core biochemical mechanics of DNA amplification. Its influence extends across the entire PCR process, from enzymatic activation to structural stabilization of nucleic acids. The precise modulation of Mg²⁺ concentration, tailored to specific template characteristics, can significantly improve both the efficiency and specificity of PCR, providing a robust theoretical framework for the development of template-specific optimization strategies [19] [20]. This technical guide examines the multifaceted role of magnesium ions in PCR, providing evidence-based optimization strategies for researchers and drug development professionals engaged in experimental design and protocol development.
Biochemical Mechanisms of Magnesium in PCR
Magnesium ions fulfill multiple indispensable roles in the PCR process through specific biochemical interactions that are fundamental to reaction success.
DNA Polymerase Activation
The most critical function of Mg²⁺ ions lies in their role as an essential cofactor for DNA polymerase activity [19]. Structurally, Mg²⁺ ions facilitate the formation of a catalytically competent complex within the enzyme's active site:
- Enzyme Catalysis: Mg²⁺ ions coordinate the phosphate groups of dNTPs and participate in the nucleotidyl transfer reaction, enabling the formation of phosphodiester bonds between adjacent nucleotides [21].
- Structural Coordination: The ions help position the 3'-OH group of the primer for nucleophilic attack on the α-phosphate of the incoming dNTP, while stabilizing the negative charge on the pyrophosphate leaving group [22].
Without sufficient Mg²⁺ concentrations, DNA polymerase exhibits dramatically reduced enzymatic activity, leading to inefficient amplification or complete reaction failure [21].
Nucleic Acid Stabilization
Beyond its enzymatic role, Mg²⁺ significantly influences the physical properties of DNA through electrostatic interactions:
- Duplex Stability: Mg²⁺ ions neutralize the negative charges on the phosphate backbone of DNA, reducing electrostatic repulsion between strands and thereby stabilizing the double helix [19].
- Melting Temperature Modulation: The analysis shows a strong logarithmic relationship between MgCl₂ concentration and DNA melting temperature (Tₘ), with every 0.5 mM increase in MgCl₂ within the 1.5–3.0 mM range associated with a 1.2°C increase in melting temperature [19] [20].
- Template-Primer Interactions: By stabilizing hybridized complexes, Mg²⁺ influences the efficiency with which primers anneal to their target sequences, directly impacting amplification specificity [19].
Biochemical Fidelity
The concentration of Mg²⁺ further affects the accuracy of DNA synthesis through kinetic mechanisms:
- Rate-Limiting Steps: Studies on human DNA ligase I have revealed that under conditions of limiting Mg²⁺, the nick-sealing step becomes rate-limiting, potentially leading to the premature release of adenylylated DNA intermediates [22].
- Reaction Efficiency: At saturating concentrations of Mg²⁺, the three chemical steps of ligation (enzyme adenylylation, adenylyl transfer to DNA, and nick sealing) occur at similar rates, maximizing ligation efficiency [22].
Table 1: Biochemical Functions of Magnesium Ions in PCR
| Function | Molecular Mechanism | Impact on PCR |
|---|---|---|
| Polymerase Cofactor | Coordinates dNTPs in active site; stabilizes transition state | Essential for catalytic activity; insufficient Mg²⁺ causes reaction failure |
| Nucleic Acid Stabilization | Neutralizes phosphate backbone negative charges | Increases melting temperature; reduces strand separation |
| Fidelity Control | Influences enzyme kinetics and step coordination | Affects accuracy of amplification; suboptimal concentrations increase errors |
| Complex Formation | Facilitates primer-template binding | Enhances specificity; reduces mis-priming |
Figure 1: Biochemical Mechanisms of Magnesium in PCR - This diagram illustrates how magnesium ions interact with key PCR components and influence critical reaction outcomes.
Quantitative Effects on PCR Thermodynamics and Kinetics
The concentration of magnesium chloride exerts quantitatively predictable effects on the physical parameters governing PCR efficiency. A comprehensive meta-analysis of 61 peer-reviewed studies has elucidated precise relationships between MgCl₂ concentration and reaction thermodynamics [19] [20].
Melting Temperature Relationship
The analysis demonstrated a strong logarithmic relationship between MgCl₂ concentration and DNA melting temperature, providing a predictive framework for protocol optimization [19]. Within the clinically relevant range of 1.5-3.0 mM:
- Each 0.5 mM increment in MgCl₂ concentration raises the DNA melting temperature by approximately 1.2°C [19] [20].
- This relationship has profound implications for annealing temperature optimization, particularly for templates with atypical GC content or complex secondary structures.
- The effect is more pronounced in genomic DNA templates compared to simpler plasmid or synthetic oligonucleotide templates [19].
Template-Dependent Optimization
Template characteristics significantly influence optimal Mg²⁺ requirements, necessitating tailored optimization approaches [19]:
- Genomic DNA: Higher complexity templates require elevated Mg²⁺ concentrations (typically 2.0-3.0 mM) to counteract the stabilizing effects of DNA-binding proteins and complex secondary structures [19].
- Plasmid DNA: Less complex templates perform optimally at moderate concentrations (1.5-2.5 mM) due to reduced structural complexity [21].
- GC-Rich Templates: Require higher Mg²⁺ concentrations to stabilize the increased hydrogen bonding and stronger base-stacking interactions characteristic of high GC-content sequences [19].
Table 2: Quantitative Effects of Magnesium Concentration on PCR Parameters
| [MgCl₂] (mM) | ΔTₘ per 0.5 mM Increase | Recommended Template Types | Impact on Efficiency |
|---|---|---|---|
| < 1.0 | Not determined | Not recommended; insufficient for polymerase activity | Severe reduction or complete reaction failure |
| 1.0 - 1.5 | ~1.2°C | Plasmid DNA, short amplicons (<500 bp) | Moderate efficiency; suitable for simple templates |
| 1.5 - 2.5 | ~1.2°C | Standard genomic DNA, routine applications | High efficiency; optimal for most applications |
| 2.5 - 3.5 | ~1.2°C | Complex genomic DNA, GC-rich targets | Enhanced efficiency for challenging templates |
| > 4.0 | Variable; potential plateau effects | Special applications only | Risk of spurious amplification; reduced specificity |
Kinetic Considerations
The magnesium-dependent kinetics of DNA ligase I provide insights into similar mechanisms that may affect DNA polymerase function [22]:
- Multiple Mg²⁺ Binding Sites: DNA ligase I requires multiple Mg²⁺ ions for catalysis, with essential Mg²⁺ ions binding more tightly to ATP than to the enzyme itself [22].
- Changing Affinity: The affinity for Mg²⁺ changes along the reaction coordinate, with different steps in the enzymatic process exhibiting varying magnesium dependencies [22].
- Intermediate Accumulation: Under Mg²⁺-limiting conditions, adenylylated DNA intermediates may be prematurely released into solution, comprising an "Achilles' heel" that threatens genomic stability through persistent breaks [22].
Experimental Optimization Strategies
Systematic optimization of magnesium concentration is essential for developing robust PCR protocols, particularly for novel targets or challenging templates.
Magnesium Titration Protocol
A standardized approach to magnesium optimization ensures reproducible and reliable results across experimental conditions:
Reaction Setup:
- Prepare a master mix containing all reaction components except MgCl₂
- Aliquot equal volumes into individual PCR tubes or plates
- Add MgCl₂ to achieve a concentration gradient spanning 1.0 mM to 4.0 mM in 0.5 mM increments [21]
- Include a negative control (no template) for each concentration tested
Cycling Parameters:
Analysis and Interpretation:
- Assess amplification efficiency via gel electrophoresis or real-time detection systems
- Evaluate specificity by band intensity and absence of secondary products
- Select the lowest Mg²⁺ concentration that provides robust, specific amplification
Integration with Other Parameters
Magnesium optimization does not occur in isolation but interacts with several critical reaction components:
- dNTP Concentration: dNTPs chelate Mg²⁺ ions; therefore, the molar concentration of Mg²⁺ should generally exceed the total dNTP concentration by 0.5-1.0 mM [21].
- Buffer Composition: Tris-HCl, KCl, and other buffer components can influence Mg²⁺ availability and should be maintained at consistent concentrations during optimization [21].
- Primer Design: Primer characteristics, particularly length and GC content, interact with Mg²⁺-dependent annealing efficiency and should be considered holistically [21].
Figure 2: Magnesium Optimization Workflow - This experimental flowchart outlines the systematic process for optimizing magnesium concentration in PCR protocols.
Advanced Applications and Detection Methods
The critical role of magnesium extends to specialized PCR applications and detection methodologies, each with distinct optimization requirements.
Real-Time PCR and FRET Detection
In quantitative real-time PCR (qPCR), magnesium concentration directly influences detection efficiency, particularly in FRET-based assays:
- SYBR Green Chemistry: Intercalating dyes like SYBR Green I require stringent optimization to minimize nonspecific signal while maintaining robust amplification [23] [24].
- Hydrolysis Probes: TaqMan probes rely on the 5'-3' exonuclease activity of DNA polymerase, which is Mg²⁺-dependent, making magnesium concentration crucial for efficient probe cleavage and signal generation [23] [24].
- FRET Probes: Dual-hybridization probes used in FRET (Förster Resonance Energy Transfer) applications exhibit distance-dependent energy transfer that is influenced by Mg²⁺-mediated hybridization efficiency [25] [24].
The application of FRET in PCR enables specific detection without direct labeling or modification of the target biomolecule [25]. This non-radiative energy transfer between donor and acceptor fluorophores occurs when they are in close proximity (1-10 nm), making it ideal for monitoring amplification in real-time with high specificity [25].
Hot Start Methods by Magnesium Sequestration
Innovative approaches to reaction specificity include magnesium sequestration for hot start PCR:
- Principle: Magnesium ions are physically separated from other reaction components until an initial high-temperature activation step, preventing nonspecific amplification during reaction setup [26].
- Implementation: This can be achieved through specialized formulations where Mg²⁺ is complexed with compounds such as aptamers or antibodies that release it upon thermal activation [26].
- Benefits: Magnesium sequestration significantly reduces primer-dimer formation and mis-priming, enhancing specificity particularly for complex templates or low-copy-number targets [26].
The Scientist's Toolkit: Research Reagent Solutions
Table 3: Essential Reagents for Magnesium Optimization in PCR
| Reagent/Category | Function in PCR | Optimization Considerations |
|---|---|---|
| Taq DNA Polymerase | Enzyme that catalyzes DNA synthesis | Standard concentration: 0.5-2.0 units/50 µl reaction; Mg²⁺ acts as essential cofactor [21] |
| MgCl₂ Solution | Source of divalent cations | Typically optimized between 1.5-4.0 mM; concentration affects Tₙ, specificity, and efficiency [19] [21] |
| dNTP Mix | Building blocks for DNA synthesis | Typical concentration: 200 µM each dNTP; chelates Mg²⁺, affecting free ion availability [21] |
| Reaction Buffer | Maintains optimal pH and ionic strength | Often contains Tris-HCl and KCl; can influence Mg²⁺ availability and enzyme activity [21] |
| SYBR Green I | dsDNA-binding fluorescent dye | Used in qPCR; binds all dsDNA, so specificity depends on Mg²⁺-controlled primer annealing [23] [24] |
| TaqMan Probes | Sequence-specific fluorescent probes | 5' nuclease assay requires Mg²⁺ for cleavage; concentration affects signal generation [23] [24] |
| FRET Probe Pairs | Adjacent hybridization probes | Distance-dependent energy transfer affected by Mg²⁺-mediated hybridization [25] [24] |
Magnesium concentration represents a cornerstone parameter in PCR optimization, exerting profound effects on reaction efficiency, specificity, and fidelity through multiple biochemical mechanisms. The quantitative relationship between MgCl₂ concentration and DNA melting temperature—approximately 1.2°C increase per 0.5 mM MgCl₂ within the 1.5-3.0 mM range—provides a predictive framework for evidence-based protocol development [19] [20]. Template-specific optimization remains essential, with complex genomic DNA requiring higher concentrations than simpler templates. Furthermore, specialized applications including real-time PCR with FRET detection and hot start methods through magnesium sequestration demonstrate the expanding utility of precise magnesium control in advanced molecular diagnostics [25] [26]. As PCR continues to evolve as a fundamental tool in research and clinical applications, understanding and optimizing the role of divalent cations will remain critical for developing robust, reproducible, and efficient amplification protocols.
Your PCR Protocol: A Detailed, Step-by-Step Laboratory Guide
Proper pre-polymerase chain reaction (PCR) preparation is a critical determinant for the success of molecular biology experiments, diagnostic assays, and drug development research. This foundational phase, encompassing workspace decontamination and reagent handling, directly impacts amplification efficiency, result accuracy, and experimental reproducibility. Contamination from amplified DNA products, foreign nucleic acids, or improperly handled reagents constitutes the most significant risk, potentially leading to false positives, reduced sensitivity, and erroneous conclusions [27]. This guide details evidence-based protocols for establishing a contamination-minimized workspace and optimizing reagent management, providing researchers with a robust framework for reliable PCR setup within a broader step-by-step research methodology.
Workspace Decontamination
Establishing a Unidirectional Workflow
A core principle of PCR setup is the implementation of a strict unidirectional workflow, physically separating pre-amplification and post-amplification activities. This design prevents amplicons (amplified DNA products) from contaminating reagents, samples, and equipment used in the initial setup phases [27] [28].
- Designated Rooms/Areas: Ideally, four separate rooms should be established. Where this is impractical, physically separated areas within a single laboratory, preferably with separate laminar flow cabinets, must be designated [27]:
- Master Mix Preparation Area: This should be the cleanest area, reserved for handling and aliquoting PCR reagents. No nucleic acid templates or amplified products should enter this space [27].
- Nucleic Acid Extraction/Template Addition Area: A second dedicated area for extracting nucleic acids and adding template DNA to the master mix [27].
- Amplification Area: A separate space housing the thermal cyclers [27].
- Product Analysis Area: A dedicated room for post-PCR analysis, such as gel electrophoresis [27].
- Dedicated Equipment and Supplies: Each area must have its own set of pipettes, filter tips, tube racks, vortexers, centrifuges, lab coats, and gloves. These items must not be moved between areas, especially from post-PCR to pre-PCR zones [27].
Table 1: Decontamination Methods for Different Contaminants and Surfaces
| Decontamination Method | Concentration/Procedure | Primary Use & Contact Time | Key Considerations |
|---|---|---|---|
| Sodium Hypochlorite (Bleach) | 10% solution | Surface decontamination; effective against DNA/RNA; minimum 10-minute contact time [27]. | Make fresh daily; can corrode metal parts and damage plastics; wipe down with sterile water after use to remove residues [27]. |
| Ethanol | 70% solution | Surface cleaning and disinfection; reduces microbial load but does not degrade DNA efficiently [27]. | Often used for routine wiping; must be followed by UV irradiation for effective DNA destruction [27]. |
| Commercial DNA-Degrading Solutions | As per manufacturer's instructions | Surface decontamination; validated to destroy nucleic acids [27]. | A safe alternative to bleach, especially for sensitive equipment; follow vendor guidelines. |
| Ultraviolet (UV-C) Irradiation | N/A | Nucleic acid destruction in closed cabinets; typically 30 minutes [27]. | Only effective in direct line-of-sight; requires regular maintenance and cleaning of lamps; safety precautions needed for user protection [27]. |
| Autoclaving | Standard sterilization cycle (e.g., 121°C, 15-20 psi) | Sterilization of heat-resistant equipment and plasticware [29]. | Achieves sterility but note: "sterility is not the same as DNA-free" [30]. |
Decontamination Procedures
Regular and thorough decontamination of all work surfaces and equipment is non-negotiable. The following procedures should be implemented:
- Routine Surface Decontamination: Before and after each use, wipe down all bench spaces, tube racks, and the exteriors of equipment with a 10% sodium hypochlorite solution, allowing a minimum contact time of 10 minutes, followed by a wipe with sterile water to remove residual bleach. Alternatively, use a validated commercial DNA-degrading decontaminant [27].
- Equipment Decontamination:
- Pipettes: Ideally, sterilize pipettes by autoclaving. If they cannot be autoclaved, clean with 10% sodium hypochlorite (followed by sterile water) or a commercial DNA-degrading agent, and expose to UV light [27].
- Vortexers and Centrifuges: Avoid sodium hypochlorite for these instruments. Instead, wipe with 70% ethanol and expose to UV light, or use a commercial DNA-destroying decontaminant [27].
- Personal Protective Equipment (PPE) and Practice: Personnel must wear gloves and lab coats specific to each designated area. Gloves should be changed frequently, especially when moving between workstations or after handling potential contaminants. Powder-free gloves should be used to avoid assay inhibition [27]. Consistent training and adherence to these Standard Operating Procedures are critical for maximizing worker protection and minimizing contamination [31].
Figure 1: Unidirectional PCR Workflow. The flow of materials and personnel must move sequentially from clean pre-PCR areas to dirty post-PCR areas, never in reverse [27] [28].
Reagent Thawing and Handling
General Principles for PCR Reagents
Proper handling of PCR reagents is essential for maintaining enzyme fidelity and reaction specificity.
- Aliquoting Reagents: To avoid multiple freeze-thaw cycles and the contamination of master stocks, nucleotides, enzymes, and buffers should be aliquoted into single-use volumes upon receipt and stored at -70°C or as recommended by the manufacturer [32] [27].
- Master Mix Preparation: Prepare a single master mix containing all common reagents (water, buffer, dNTPs, primers, enzyme) for multiple reactions. This minimizes pipetting steps, reduces the threat of contamination, and ensures reaction uniformity [27]. The master mix should be prepared on ice or a cold block, and the DNA polymerase (e.g., Taq) should be added last [32].
- Using Controls: Always include well-characterized positive and negative controls. A no-template control (NTC), containing nuclease-free water instead of DNA, is crucial for detecting contamination in reagents [27] [33].
Reagent Thawing Protocols
Thawing techniques significantly impact the stability and performance of sensitive enzymes in PCR reagents. Below are generalized protocols, though manufacturer instructions should always take precedence.
- Rapid-Thaw Protocol for Sensitive Reagents (e.g., Enzymes):
- Remove the reagent vial from the freezer and immediately place it on ice.
- Thaw the reagent completely on ice.
- Gently mix the contents by tapping the tube or by brief, low-speed pulsing in a centrifuge. Do not vortex the PCR mix, as this can denature enzymes [32].
- Briefly centrifuge the tube to collect all liquid at the bottom before opening [27].
- Refrigerated Overnight Thaw for Stable Reagents (e.g., Primers, dNTPs, Buffers):
- Water Bath Thaw for Specific Kits: Some standardized kits (e.g., Illumina sequencing cartridges) specify thawing in a room-temperature water bath for a set duration (e.g., 60-90 minutes). Always use deionized water to prevent corrosion [34] [35].
Table 2: Reagent Thawing and Storage Stability Guide
| Reagent Type | Recommended Thawing Method | Stability After Thawing | Key Handling Notes |
|---|---|---|---|
| Taq DNA Polymerase & Master Mixes | Rapid thaw on ice [32]. | Use immediately or store on ice for short-term use; avoid multiple freeze-thaws [32]. | Always add to the reaction mix last [32]. Gently mix by tapping, do not vortex [32]. |
| Primers (Stocks) | Refrigerator (2°C to 8°C) overnight or at room temperature [33]. | Long-term at -20°C; working aliquots are stable for weeks at 2°C to 8°C. | Aliquot to avoid repeated freezing and thawing [32]. |
| dNTPs | Refrigerator (2°C to 8°C) overnight or on ice. | Long-term at -70°C; aliquots are stable for months at -20°C. | Avoid repeated freeze-thaw cycles; aliquot small volumes [32]. |
| Buffer Solutions | Refrigerator (2°C to 8°C) overnight or at room temperature. | Typically stable for weeks to months at 2°C to 8°C. | Check manufacturer's datasheet for specific stability information. |
| Template DNA | On ice or refrigerator (2°C to 8°C). | Dependent on preparation method; store at -20°C or -80°C for long-term. | Keep on ice during PCR setup [33]. |
The Scientist's Toolkit: Essential Materials
Table 3: Essential Materials for Pre-PCR Preparation
| Item | Function | Key Considerations |
|---|---|---|
| Filtered Pipette Tips | Prevents aerosol-borne contamination from entering pipette shafts and cross-contaminating samples and reagent stocks [32] [27]. | Confirm compatibility with your pipette brand [27]. |
| Nuclease-Free Water | Used as a solvent and negative control; certified to be free of nucleases that would degrade DNA/RNA [33]. | The foundation for all reagent preparations. |
| 10% Sodium Hypochlorite (Freshly Made) | Primary chemical for surface and equipment decontamination; effectively degrades contaminating nucleic acids [27]. | Must be made fresh daily for optimal efficacy [27]. |
| 70% Ethanol | Used for general surface disinfection and wiping down reagent vial exteriors before use [27]. | Does not effectively destroy DNA; must be paired with UV for decontamination [27]. |
| UV-C Lamp | Installed in safety cabinets or closed work areas to irradiate and destroy contaminating DNA on surfaces and equipment [27]. | Requires regular maintenance and cleaning; effective only in direct line-of-sight [27]. |
| Dedicated Pipette Sets | A separate set for each designated pre- and post-PCR area to prevent amplicon carryover [27] [28]. | Should be calibrated regularly and decontaminated frequently [27]. |
| Personal Protective Equipment (PPE) | Powder-free gloves and dedicated lab coats for each area minimize human-derived contamination [30] [27]. | Gloves should be changed frequently and when moving between workstations [27]. |
| Microcentrifuge Tubes & PCR Strips | DNA-free, sterile tubes for preparing and running reactions. | Use thin-walled tubes for optimal thermal conductivity in the cycler. |
Meticulous attention to pre-PCR preparation is the cornerstone of successful molecular experimentation. By rigorously implementing the decontamination strategies and reagent handling protocols outlined in this guide, researchers can establish a robust defense against contamination. This ensures the integrity of results, enhances experimental reproducibility, and forms a solid foundation for all subsequent steps in PCR-based research and diagnostic endeavors. Adherence to these principles, combined with consistent training and quality control, is indispensable for any laboratory committed to generating reliable and meaningful data.
In the step-by-step process of setting up a Polymerase Chain Reaction (PCR), the preparation of a PCR master mix—a pre-mixed, uniform solution of all common reaction components—represents a fundamental stride toward achieving reliable and reproducible results. Master mix formulation eliminates pipetting errors between individual reactions, reduces contamination risks, and ensures reaction component consistency across multiple samples. This technical guide details the calculations, best practices, and optimized protocols essential for formulating master mixes that guarantee both consistency and amplification efficiency, crucial for researchers and drug development professionals in gene expression analysis, cloning, and diagnostic assay development.
The Core Components of a PCR Master Mix
A standard PCR master mix contains all the necessary reagents for DNA amplification, excluding the template DNA and sample-specific primers. The table below summarizes these core components and their standard final concentrations in a typical reaction.
Table 1: Core Components of a PCR Master Mix and Their Standard Final Concentrations
| Component | Function | Typical Stock Concentration | Final Concentration in 50 µL Reaction |
|---|---|---|---|
| Reaction Buffer | Provides optimal chemical environment (pH, salts) for the polymerase [36]. | 10X | 1X [36] [10] |
| Magnesium Chloride (MgCl₂) | Essential cofactor for DNA polymerase activity; concentration significantly impacts specificity and yield [37]. | 25 mM [37] | 1.5 - 2.0 mM [37] [36] |
| Deoxynucleotide Triphosphates (dNTPs) | Building blocks (A, T, C, G) for new DNA strands [36]. | 10 mM each [36] | 200 µM each [37] [36] [10] |
| Forward & Reverse Primers | Short DNA sequences that define the start and end of the DNA segment to be amplified [38]. | 10 µM [36] | 0.1 - 0.5 µM each [37] [10] |
| DNA Polymerase | Enzyme that synthesizes new DNA strands. Thermostable (e.g., Taq) is essential [36]. | 5 U/µL [37] | 1.0 - 2.5 U per reaction [37] [36] |
| Nuclease-Free Water | Inert solvent that brings the reaction to its final volume. | - | - |
Beyond these core components, additives can be included to optimize the reaction, especially for challenging templates:
- DMSO (Dimethyl Sulfoxide): Helps denature DNA templates with high GC content (>60%) by disrupting base pairing. Use at a final concentration of 1-10% [37] [36].
- BSA (Bovine Serum Albumin): Stabilizes the polymerase and can bind inhibitors present in the sample. Use at ~400 ng/µL [37].
Master Mix Calculations: A Step-by-Step Guide
The key to a successful master mix is accurate calculation to ensure every reaction tube contains the correct concentration of every component. The process involves calculating the total volume required for all reactions and then determining the volume of each component needed for that total mix.
The Calculation Workflow
The diagram below outlines the logical sequence for performing these calculations.
Detailed Calculation Example
Assume you need to run 10 PCR reactions, each with a final volume of 50 µL, plus a positive control and a negative control (bringing the total number of reaction setups to 12). You will add 10% extra volume to account for pipetting error. The calculation for the total master mix volume is:
Total Master Mix Volume = (Number of reactions) × (Volume per reaction) + (Extra volume)
Using the values above: Total Master Mix Volume = 12 reactions × 50 µL/reaction + 10% = 660 µL
The following table demonstrates how to calculate the volume of each stock component needed to make this 660 µL master mix. Note that template and primers are typically added separately and are not included in this example master mix.
Table 2: Example Calculation for a 660 µL Master Mix (for 12 reactions + 10% excess)
| Component | Stock Concentration | Final Concentration | Volume per 50 µL Reaction | Total Volume for Master Mix |
|---|---|---|---|---|
| Nuclease-Free Water | - | - | 36.8 µL [36] | 12 × 36.8 µL × 1.1 = 485.8 µL |
| 10X PCR Buffer | 10X | 1X | 5.0 µL [36] | 12 × 5.0 µL × 1.1 = 66.0 µL |
| MgCl₂ | 25 mM [37] | 1.5 mM | 3.0 µL* | 12 × 3.0 µL × 1.1 = 39.6 µL |
| dNTP Mix | 10 mM each | 200 µM each | 1.0 µL [36] | 12 × 1.0 µL × 1.1 = 13.2 µL |
| Taq DNA Polymerase | 5 U/µL | 2.5 U / 50 µL rxn [37] | 0.5 µL [37] | 12 × 0.5 µL × 1.1 = 6.6 µL |
| Total Volume (excluding primers/template) | 46.3 µL | ~611.2 µL |
*Calculated based on stock and desired final concentration: (1.5 mM / 25 mM) × 50 µL = 3.0 µL.
Experimental Protocol: Master Mix Preparation and PCR Setup
This detailed protocol ensures consistency and minimizes the risk of contamination during master mix formulation and reaction setup [39] [36] [40].
Workflow for Master Mix Assembly
The following diagram visualizes the entire assembly process, highlighting the critical practice of creating a master mix.
Step-by-Step Procedure
- Pipetting Practice and Contamination Control: Use filter pipette tips and work in a clean, dedicated space. Calibrated pipettes and reverse pipetting for viscous reagents (like glycerol-containing buffers) improve accuracy [40].
- Master Mix Formulation: In a 1.5 mL microcentrifuge tube, combine the components in the order listed in Table 2. Gently mix the solution by pipetting up and down or by tapping the tube. Briefly centrifuge to collect all liquid at the bottom of the tube [36] [10].
- Aliquoting and Adding Unique Components: Dispense the appropriate volume of master mix into each PCR tube (e.g., 45 µL if 2.5 µL of each primer and 2 µL of template are to be added separately). Then, add the sample-specific primers and template DNA to each tube [36]. This order of addition prevents cross-contamination between samples.
- PCR Amplification: Place the tubes in a thermal cycler and run the appropriate program. A standard three-step protocol includes [36]:
- Initial Denaturation: 94–95°C for 2–5 minutes (also activates hot-start polymerases).
- Cycling (25–35 cycles):
- Denaturation: 94–98°C for 10–30 seconds.
- Annealing: 45–60°C (5°C below primer Tm) for 30 seconds.
- Extension: 72°C for 1 minute per kilobase of product.
- Final Extension: 72°C for 5–10 minutes.
Optimization and Troubleshooting for Maximum Efficiency
Even with precise calculations, optimization may be required for challenging targets or highest efficiency.
Optimization Strategies
- Cycling Conditions: For templates with high GC content (>65%), increase the denaturation temperature to 98°C or include additives like DMSO [41]. Use a gradient thermal cycler to empirically determine the optimal annealing temperature for your primer set [40].
- Primer Design: Primers should be 15–30 nucleotides long with a GC content of 40–60%. The melting temperatures (Tm) of the forward and reverse primers should be within 5°C of each other. Avoid complementarity at the 3' ends to prevent primer-dimer formation [37] [40].
- Polymerase Selection: For routine PCR, a standard Taq polymerase is sufficient. For cloning or sequencing, use a high-fidelity polymerase with proofreading (3'→5' exonuclease) activity. For fast results or difficult templates, use highly processive polymerases designed for fast cycling [37] [41].
Troubleshooting Common Issues
- No Amplification: Check reagent viability, especially the DNA polymerase. Verify primer and template concentrations. Ensure the thermal cycler block temperature is calibrated.
- Non-specific Bands/Background Smear: Increase the annealing temperature gradually. Switch to a hot-start polymerase to prevent primer-dimer formation and mispriming during reaction setup [41]. Reduce the number of PCR cycles or the amount of primer/master mix [42].
- Low Yield: Optimize MgCl₂ concentration (titrate from 1.0 mM to 3.0 mM). Increase template quantity or number of cycles (within 25-35). Ensure extension time is sufficient for the amplicon length [37] [42].
The Scientist's Toolkit: Essential Research Reagent Solutions
Table 3: Key Reagents and Kits for PCR Master Mix Formulation
| Item | Function/Application | Example Product |
|---|---|---|
| Hot-Start DNA Polymerase | Reduces non-specific amplification by inhibiting polymerase activity at room temperature; crucial for specificity in complex multiplex PCR [41]. | Platinum II Taq Hot-Start DNA Polymerase [41] |
| Optimized PCR Master Mix (2X) | Pre-mixed solution of buffer, dNTPs, Mg²⁺, and polymerase; saves time, improves reproducibility, and reduces contamination risk [42]. | Hieff Ultra-Rapid II HotStart PCR Master Mix [42] |
| PCR Additives | Reagents like DMSO, formamide, or BSA that help amplify difficult templates (e.g., GC-rich sequences) or counteract inhibitors in the sample [37]. | DMSO, BSA |
| Nuclease-Free Water | Solvent free of nucleases that could degrade primers, template, or PCR products; essential for reagent stability and reaction success. | Various manufacturers |
| dNTP Mix | Pre-mixed equimolar solution of all four nucleotides (dATP, dCTP, dGTP, dTTP) to ensure balanced and efficient DNA synthesis [36]. | Various manufacturers |
The polymerase chain reaction (PCR) is a foundational technique in molecular biology, yet its success is critically dependent on two fundamental principles: the precise order of assembling reaction components and the rigorous implementation of contamination control measures. This guide details the exact procedures for setting up a PCR reaction, with a specific focus on how proper assembly and anti-contamination strategies directly impact the reliability and reproducibility of experimental results. The principles outlined here form the core of a robust PCR methodology essential for all downstream applications in research and diagnostic development [43] [9].
Contamination control is not merely a supplementary protocol but an integral component of the PCR process itself. The technique's power to amplify a single DNA molecule into billions of copies also makes it uniquely susceptible to false-positive results from amplicon carryover or environmental contaminants [44] [45]. By integrating systematic assembly with proactive sterilization techniques, researchers can achieve consistent, trustworthy amplification.
Critical Reagents for Reaction Assembly
A successful PCR experiment requires the precise combination of specific reagents, each serving a distinct function in the amplification process. Understanding the role and optimal concentration of each component is the first step toward mastering reaction assembly.
Table 1: Essential Components of a Standard PCR Reaction
| Component | Typical Final Concentration/Amount | Function | Key Considerations |
|---|---|---|---|
| Template DNA | 1–1000 ng (genomic DNA); 0.1–1 ng (plasmid DNA) [43] [9] | Provides the target sequence to be amplified. | Higher amounts can cause nonspecific amplification; lower amounts reduce yield [9]. |
| Forward & Reverse Primers | 0.1–1 μM each [9] | Bind flanking regions of the target sequence to define the amplicon. | Primers should have matched melting temperatures (within 5°C) and avoid self-complementarity [43] [9]. |
| DNA Polymerase (e.g., Taq) | 1–2.5 units per 50 μL reaction [43] [46] | Enzyme that synthesizes new DNA strands by incorporating dNTPs. | Thermostable enzymes are essential. Higher concentrations can lead to nonspecific products [9]. |
| dNTPs | 200 μM of each dNTP (dATP, dCTP, dGTP, dTTP) [43] [9] | The building blocks (nucleotides) for new DNA synthesis. | Equimolar concentrations are standard. Higher concentrations may inhibit PCR [9]. |
| Reaction Buffer | 1X concentration [43] [46] | Provides optimal pH and salt conditions for enzyme activity. | Often supplied with the enzyme. May contain Mg²⁺. |
| Magnesium Chloride (MgCl₂) | 1.5–5.0 mM [43] [9] | Essential cofactor for DNA polymerase activity. | Concentration is critical and often requires optimization; it stabilizes DNA and primer binding [9]. |
| Sterile Water | Quantity sufficient (Q.S.) to final volume | Diluent that brings the reaction to its final volume. | Must be nuclease-free to prevent degradation of reagents. |
The Scientist's Toolkit: Specialized Reagent Solutions
Beyond the core components, several specialized reagents can be employed to overcome specific experimental challenges.
Table 2: Additives for PCR Optimization and Troubleshooting
| Reagent Solution | Common Final Concentration | Function | Application Context |
|---|---|---|---|
| Dimethyl Sulfoxide (DMSO) | 1–10% [43] | Disrupts secondary structures in GC-rich templates. | Amplification of difficult, GC-rich DNA targets. |
| Betaine | 0.5 M to 2.5 M [43] | Equalizes the contribution of GC and AT base pairs, reducing strand separation energy. | Amplicons with strong secondary structure or high GC content. |
| Bovine Serum Albumin (BSA) | 10–100 μg/mL [43] | Binds to inhibitors often found in DNA preparations (e.g., phenols, polysaccharides). | Amplification from complex biological samples (e.g., blood, plant extracts). |
| dUTP + Uracil-N-Glycosylase (UNG) | 200 μM dUTP (replacing dTTP); UNG as recommended [9] [45] | Prevents carryover contamination from previous PCR products. UNG degrades uracil-containing DNA before amplification. | Routine diagnostic assays or any scenario with high risk of amplicon contamination. |
Step-by-Step Reaction Assembly Protocol
The order in which reagents are combined can significantly influence reaction performance by minimizing nonspecific interactions and ensuring uniform conditions.
Protocol for Manual Setup
The following methodology is adapted from established basic protocols to ensure reliability and reproducibility [43] [46].
- Preparation: Thaw all PCR reagents completely and keep them on ice throughout the setup process. Wear gloves to prevent nuclease contamination from hands [43].
- Labeling: Label thin-walled 0.2 mL PCR tubes with an ethanol-resistant marker.
- Master Mix Assembly: In a sterile 1.5 mL microcentrifuge tube, combine the reagents for all reactions in the following order. Creating a Master Mix for multiple reactions minimizes pipetting error and ensures consistency across samples [43].
- Sterile Water
- 10X PCR Buffer
- dNTP Mix
- Magnesium Chloride (if not present in the buffer)
- Forward Primer
- Reverse Primer
- DNA Polymerase (gently mix by pipetting up and down 20 times to ensure dispersal) [43]
- Aliquoting: Vortex the Master Mix briefly and aliquot the appropriate volume into each labeled PCR tube.
- Template Addition: Add the required mass of template DNA to each respective tube. For the negative control tube, add an equivalent volume of sterile water instead of template.
- Final Mixing and Sealing: Gently mix the contents of each tube by flicking or brief vortexing. If using a thermal cycler without a heated lid, add a layer of mineral oil (~50 μL) to prevent evaporation [46]. Close tube caps securely.
Quantitative Data for Reaction Setup
The volumes required for a single 50 μL reaction can be scaled for a Master Mix. The table below provides a specific example and a general framework.
Table 3: Example 50 μL PCR Reaction Setup [43]
| Reagent | Stock Concentration | Volume per 50 μL Reaction | Final Concentration/Amount |
|---|---|---|---|
| Sterile Water | N/A | 33 μL | N/A |
| 10X PCR Buffer | 10X | 5 μL | 1X |
| dNTP Mix | 10 mM (total) | 1 μL | 200 μM (each) |
| MgCl₂ | 25 mM | 8 μL | 4.0 mM |
| Forward Primer | 20 μM | 1 μL | 20 pmol |
| Reverse Primer | 20 μM | 1 μL | 20 pmol |
| Template DNA | 2 ng/μL | 0.5 μL | ~1 ng |
| Taq DNA Polymerase | 0.5 U/μL | 0.5 μL | 0.25 U |
| Total Volume | 50 μL |
Comprehensive Contamination Control Strategies
Contamination is a primary cause of PCR failure and false positives. Sources include cross-contamination of samples, plasmid clones, and most significantly, amplification products (amplicons) from previous PCRs, which can accumulate in the laboratory environment [45]. A multi-pronged approach is essential for effective control.
Physical and Workflow Barriers
- Dedicated Workspaces: Maintain strict physical separation of laboratory areas for 1) reagent preparation, 2) sample preparation, and 3) amplification and product analysis. Traffic must be unidirectional from "clean" to "dirty" areas [45].
- Decontamination: Routinely clean workstations, equipment, and pipettes with a 10% sodium hypochlorite (bleach) solution, which causes oxidative damage to nucleic acids, followed by ethanol to remove the bleach [45].
- UV Irradiation: Use UV light boxes to irradiate work surfaces, pipettes, and disposable devices before use. UV light induces thymidine dimers in contaminating DNA, rendering it unamplifiable. This method is simple but has reduced efficacy on short or GC-rich templates [44] [45].
Biochemical Sterilization Techniques
Physical barriers alone are insufficient. Incorporating biochemical methods directly into the reaction mix provides a powerful layer of security.
- Uracil-N-Glycosylase (UNG) System: This is the most widely used contamination control method. In this system, dTTP in the PCR is partially or fully replaced with dUTP. Consequently, all newly synthesized amplicons incorporate uracil. In subsequent PCR setups, the enzyme UNG is added to the master mix. It hydrolyzes any uracil-containing contaminating amplicons before thermal cycling begins. The initial 95°C denaturation step then permanently inactivates the UNG, allowing the new, specific amplification to proceed unhindered [9] [45]. While highly effective, UNG activity can be reduced for G+C-rich targets, and residual activity may degrade new products if not fully inactivated [45].
- Psoralen Treatment: Psoralen compounds can intercalate into DNA and, upon exposure to long-wave UV light, form covalent cross-links that block polymerase extension. Adding psoralen to completed PCR reactions and exposing them to UV light before opening the tubes sterilizes the amplicons, preventing them from becoming future contaminants [45]. However, this method can reduce PCR sensitivity by several orders of magnitude [44].
Meticulous attention to both reaction assembly and contamination control is non-negotiable for successful PCR. The systematic order of addition—starting with water and ending with the DNA polymerase after the creation of a homogeneous Master Mix—ensures reagent stability and reaction homogeneity. This careful assembly, when coupled with a robust, multi-layered anti-contamination strategy incorporating physical barriers and biochemical sterilization like the UNG system, forms the foundation of reliable molecular diagnostics and research. By adhering to these detailed protocols, researchers can minimize false results, enhance reproducibility, and maintain the integrity of their PCR-based assays.
The polymerase chain reaction (PCR) stands as a cornerstone technique in molecular biology, enabling the exponential amplification of specific DNA sequences from minimal starting material. The efficacy of this process hinges critically on the precise configuration of the thermocycler—the instrument that automates the temperature cycles necessary for DNA replication. Within the broader context of setting up a PCR reaction, proper thermocycler programming is not merely a technical step but a fundamental determinant of success, influencing specificity, yield, and fidelity. For researchers and drug development professionals, mastering these parameters is essential for generating reliable, reproducible data in applications ranging from gene cloning and mutation detection to diagnostic assay development. This guide provides an in-depth examination of time and temperature parameters for both standard and challenging GC-rich targets, providing a solid foundation for optimizing amplification protocols within any research workflow.
Core Principles of the PCR Cycle
The fundamental process of PCR relies on repeating a series of three temperature-dependent steps to achieve exponential amplification of a target DNA sequence [1].
- Denaturation: This initial step involves heating the reaction mixture to a high temperature (typically 94–98°C) to separate the double-stranded DNA template into single strands by breaking the hydrogen bonds between complementary bases. This provides the necessary single-stranded templates for the primers to bind.
- Annealing: The reaction temperature is subsequently lowered to allow short, synthetic oligonucleotide primers to bind (or "anneal") to their complementary sequences on the single-stranded DNA templates. The temperature of this step is critical for ensuring the specificity of the amplification.
- Extension: The temperature is raised to the optimal working temperature for the DNA polymerase (typically 68–72°C). In this step, the thermostable DNA polymerase enzyme synthesizes a new DNA strand complementary to the template strand by adding nucleotides to the 3' end of the annealed primers.
These three steps—denaturation, annealing, and extension—comprise one PCR cycle and are typically repeated 25–35 times, theoretically generating millions to billions of copies of the target DNA region [47] [2]. The relationship between these steps is summarized in the workflow below.
Standard PCR Thermocycler Parameters
For most PCR applications involving standard-complexity templates (e.g., plasmid DNA, bacterial genomic DNA, or cDNA) of low to moderate GC content and amplicon sizes up to 5 kb, a set of well-established parameters provides a reliable starting point for protocol development.
Step-by-Step Protocol and Typical Values
A standard PCR run begins with an initial denaturation of 1–3 minutes at 94–98°C. This first, longer denaturation ensures that all complex template DNA, such as genomic DNA, is fully separated into single strands at the start of the cycling process [47] [48]. It also serves to activate hot-start DNA polymerases if they are used.
This is followed by 25–35 cycles of the three core steps [47]:
- Denaturation: 15–30 seconds at 94–95°C [49] [48].
- Annealing: 15–60 seconds at a temperature 3–5°C below the calculated melting temperature (Tm) of the primers [47] [48]. Typical annealing temperatures often fall within the range of 50–60°C.
- Extension: The time for this step is dependent on the length of the amplicon and the synthesis speed of the DNA polymerase. A common guideline is 1 minute per 1000 base pairs (kb) when using enzymes like Taq DNA polymerase [47] [48]. For products less than 1 kb, 45–60 seconds is often sufficient.
After the final cycle, a final extension step of 5–15 minutes at the extension temperature is performed. This ensures that any remaining single-stranded DNA is fully extended, increasing the yield of full-length products. This step is particularly important for protocols like TA cloning, where a 30-minute final extension can ensure proper addition of adenine (A) overhangs by Taq polymerase [47].
Table 1: Standard Thermocycler Parameters for Routine PCR
| Step | Temperature Range | Time Duration | Key Considerations |
|---|---|---|---|
| Initial Denaturation | 94–98°C | 1–3 minutes | Crucial for complex/gDNA; activates hot-start enzymes. |
| Denaturation (Cyclic) | 94–95°C | 15–30 seconds | Longer times can inactivate some polymerases. |
| Annealing | Tm of primers - (3–5°C) | 15–60 seconds | Most critical for specificity; optimize via gradient. |
| Extension | 68–72°C | 1 min/kb | Polymerase-dependent; slower enzymes need more time. |
| Final Extension | 68–72°C | 5–15 minutes | Ensures full-length products; critical for TA cloning. |
| Total Cycles | 25–35 | Fewer cycles for high-copy targets; plateau ~45 cycles. |
The Scientist's Toolkit: Essential Reagents for PCR Setup
The success of a PCR reaction depends not only on the thermocycling profile but also on the quality and concentration of its components. The following table details key reagents and their functions.
Table 2: Essential Research Reagent Solutions for PCR Setup
| Reagent | Typical Final Concentration/Amount | Critical Function |
|---|---|---|
| Thermostable DNA Polymerase | 0.5–2.0 units/50 µL reaction [48] | Enzymatically synthesizes new DNA strands; determines speed and fidelity. |
| PCR Buffer | 1X concentration | Provides optimal pH and salt (e.g., KCl) conditions for the enzyme. |
| Magnesium Chloride (MgCl₂) | 1.5–2.0 mM [48] | Essential cofactor for DNA polymerase; concentration critically affects specificity and yield. |
| dNTP Mix | 200 µM each dNTP [48] | The building blocks (A, T, C, G) for new DNA synthesis. |
| Forward & Reverse Primers | 0.1–0.5 µM each [10] [48] | Define the start and end of the target sequence to be amplified. |
| Template DNA | 1 pg–1 µg, depending on complexity [48] | The source DNA containing the target sequence to be copied. |
| Nuclease-Free Water | To volume | Solvent for the reaction; must be free of contaminants and nucleases. |
Advanced Optimization for Challenging Templates
While standard parameters are effective for many targets, some templates require specialized conditions. GC-rich sequences are a common challenge that demands a systematic optimization strategy.
The GC-Rich Challenge and Optimization Workflow
DNA templates with a GC content exceeding 65% are considered GC-rich [49]. These sequences pose a challenge for several reasons: the stronger hydrogen bonding between G and C bases makes the double helix harder to denature, and they are prone to forming stable intra-strand secondary structures (e.g., hairpins) that can block polymerase progression [50] [49]. Overcoming these issues requires a multi-pronged approach involving adjustments to thermocycling parameters, reaction chemistry, and enzyme selection.
The logical process for troubleshooting and optimizing a PCR, particularly for a difficult target like a GC-rich sequence, can be visualized as a decision tree that incorporates adjustments to multiple parameters.
Detailed Methodologies for GC-Rich Targets
1. Thermocycling Parameter Adjustments:
- Higher Denaturation Temperature: Increase the denaturation temperature during cycling to 98°C to more effectively separate the stubborn double-stranded DNA [49].
- Longer Initial Denaturation: Extend the initial denaturation step to 3–5 minutes to ensure complete melting of the template at the beginning of the run [47].
- Shorter Annealing Times: Use shorter annealing times (e.g., 5–15 seconds) to reduce the opportunity for mispriming and the formation of secondary structures [49].
- Two-Step PCR: If the primer Tm is sufficiently high (e.g., >68°C), consider using a two-step PCR protocol. This combines the annealing and extension steps into one, typically performed at 68–72°C, which can help by maintaining a high temperature that disrupts secondary structures [47] [49].
2. Reaction Chemistry and Additives:
- Organic Additives: Incorporate additives that disrupt base pairing and help denature stable secondary structures.
- DMSO (Dimethyl Sulfoxide): Commonly used at a final concentration of 2–10% [51] [49]. It lowers the effective melting temperature (Tm) of the DNA.
- Betaine: Used at a final concentration of 1–2 M, betaine homogenizes the thermodynamic stability of GC and AT base pairs, which is particularly beneficial for amplifying GC-rich regions [51] [50].
- Mg²⁺ Concentration Optimization: While 1.5–2.0 mM is standard, GC-rich amplifications may require fine-tuning of MgCl₂ concentration. Titrate in 0.5 mM increments up to 4 mM, as excess Mg²⁺ can reduce fidelity and increase non-specific amplification [52] [48].
3. Polymerase Selection: Standard Taq polymerase may struggle with GC-rich templates. Switching to a specialized polymerase blend can be decisive. Many commercial polymerases are specifically engineered for high GC content, often possessing higher processivity and stability, and may be supplied with proprietary buffers that already include stabilizing additives [49] [1].
Table 3: Optimized Parameters for Amplifying GC-Rich DNA Targets
| Parameter | Standard Target | GC-Rich Target (>65% GC) | Rationale for GC-Rich Adjustment |
|---|---|---|---|
| Initial Denaturation | 94–95°C for 1–3 min | 98°C for 2–5 min | Ensures complete separation of stubborn double-stranded DNA. |
| Cyclic Denaturation | 94–95°C for 15–30 sec | 98°C for 10–30 sec | Prevents reformation of stable secondary structures during cycling. |
| Annealing Time | 30–60 seconds | 5–15 seconds [49] | Reduces mispriming and formation of template secondary structures. |
| Polymerase Type | Standard Taq | Specialized GC-rich/High-Fidelity Blends | Engineered for higher stability and processivity through complex structures. |
| Additives | None | DMSO (2.5–5%) [49] or Betaine (1–2 M) [51] | Destabilizes secondary structures and homogenizes DNA melting behavior. |
| Protocol Type | Three-step | Two-step (if primer Tm allows) [49] | Maintains high temperature to keep DNA denatured and prevent hairpins. |
Configuring the thermocycler with precise time and temperature parameters is a foundational skill in molecular biology that bridges the gap between a theoretical PCR setup and successful experimental results. This guide has detailed the core parameters for standard amplification and provided a systematic framework for tackling the pervasive challenge of GC-rich targets. By understanding the principles behind each step—from initial denaturation to final extension—and by leveraging specialized strategies such as temperature adjustments, chemical additives, and advanced polymerases, researchers can achieve specific, efficient, and reliable amplification of even the most recalcitrant DNA sequences. Mastery of these protocols ensures that PCR remains a robust and versatile tool in the pursuit of scientific discovery and drug development.
Agarose gel electrophoresis is a fundamental and indispensable technique in molecular biology laboratories for the post-amplification analysis of polymerase chain reaction (PCR) products. This method provides a direct means to visualize amplified DNA, verify the success of PCR reactions, estimate product size and concentration, and identify potential issues such as non-specific amplification or contamination [53] [38]. Within the broader context of setting up a PCR reaction, this analysis represents a critical quality control checkpoint before proceeding to more expensive or time-consuming downstream applications such as cloning, sequencing, or quantitative analysis [54] [53].
This technical guide provides an in-depth examination of agarose gel electrophoresis principles, methodologies, and troubleshooting approaches, framed specifically for researchers, scientists, and drug development professionals who require robust and reproducible verification of their amplification products.
Principles of Agarose Gel Electrophoresis
Fundamental Mechanism
Agarose gel electrophoresis operates on the principle of separating DNA fragments based on size and charge under the influence of an electric field [55] [38]. The porous matrix of the agarose gel acts as a molecular sieve, through which negatively charged DNA molecules migrate toward the positive electrode (anode) [55]. Smaller DNA fragments navigate the pores more easily and thus travel faster through the gel, while larger fragments encounter greater resistance and migrate more slowly [53] [38]. This differential migration allows for separation of DNA fragments by size, enabling researchers to estimate the length of PCR amplicons by comparing their migration distance to DNA standards of known sizes (DNA ladders) [53].
The visualization of separated DNA fragments is typically achieved using fluorescent nucleic acid stains that intercalate between DNA base pairs [56] [55]. When exposed to the appropriate light source (e.g., UV or blue light), these dyes fluoresce, allowing the amplified products to be visualized as distinct bands against a dark background [53].
The following diagram illustrates the complete workflow for analyzing PCR products via agarose gel electrophoresis, from gel preparation through to result interpretation:
Materials and Reagents
Research Reagent Solutions
The following table details essential materials and reagents required for successful agarose gel electrophoresis:
| Item | Function | Selection Guidelines |
|---|---|---|
| Agarose | Forms the porous gel matrix that separates DNA fragments by size [55] | Concentration typically 1-3% depending on target fragment size; lower percentages for larger fragments, higher for smaller fragments [55] |
| Electrophoresis Buffer (TAE or TBE) | Conducts current and maintains stable pH during electrophoresis [57] | TAE better for larger fragments and downstream applications; TBE provides sharper resolution for smaller fragments (<1 kb) and has greater buffering capacity [57] |
| DNA Stain | Intercalates into DNA and fluoresces under specific light for visualization [55] | Ethidium bromide (mutagenic), SYBR Safe, GelRed/GelGreen (safer alternatives); consider safety and sensitivity requirements [55] |
| DNA Ladder | Molecular weight standard for estimating amplicon size [53] | Contains DNA fragments of known sizes; select ladder with range encompassing expected amplicon size (e.g., 100 bp ladder for 100-1000 bp fragments) [53] |
| Loading Dye | Provides density for well loading and visual tracking of migration progress [58] | Typically contains glycerol or ficoll; may include tracking dyes (bromophenol blue, xylene cyanol) that migrate at predictable rates [58] |
Experimental Protocol
Gel Preparation and Electrophoresis
This section provides a detailed methodology for preparing and running agarose gels for PCR product verification.
Materials Required:
- Agarose powder (molecular biology grade)
- Electrophoresis buffer (TAE or TBE, freshly diluted)
- Nucleic acid stain
- Gel casting tray and comb
- Electrophoresis chamber and power supply
- Heating apparatus (microwave or hot plate)
Procedure:
Gel Casting:
- Prepare electrophoresis buffer at working concentration (0.5x or 1x) from concentrated stock [57].
- Mix appropriate amount of agarose with buffer in a flask (e.g., 1-2g agarose per 100mL buffer) [55]. Do not exceed 50% of flask capacity to prevent boiling over [55].
- Heat mixture until agarose is completely dissolved, indicated by a clear solution without cloudiness [53] [55]. Cover with loose sealing film to reduce evaporation.
- Cool agarose to 50-60°C before adding nucleic acid stain if using pre-cast staining method [55]. Mix thoroughly to ensure even dye distribution.
- Pour gel into casting tray with well comb positioned properly. Allow sufficient time for complete solidification (typically 20-30 minutes at room temperature) [58] [57].
Sample Preparation:
- Mix PCR product with loading dye (typically 1:5 or 1:6 ratio) [58]. The loading dye increases sample density for proper well loading and contains tracking dyes to monitor migration progress.
- Prepare DNA ladder according to manufacturer's instructions, typically mixing with loading dye and buffer.
Gel Electrophoresis:
- Place solidified gel in electrophoresis chamber and cover with running buffer (the same type and concentration used to prepare the gel) [57].
- Carefully load samples and DNA ladder into wells. Include ladder in both first and/or last lanes for accurate size comparison [53].
- Connect electrodes properly (negative electrode/black at sample end, positive electrode/red at opposite end) [58].
- Run gel at constant voltage: 5-8 V/cm distance between electrodes [57]. For most mini-gels, 70-100V is appropriate. Higher voltages can generate excessive heat causing band smearing and gel distortion [55] [57].
- Continue electrophoresis until tracking dye has migrated an appropriate distance (typically ⅔ to ¾ of gel length) for optimal separation [53].
Visualization:
- Carefully transfer gel to imaging system equipped with appropriate light source (UV transilluminator or blue light system).
- Capture digital image of gel under appropriate excitation wavelength for the stain used [53].
- Adjust image contrast if necessary, but maintain original data integrity for accurate interpretation [53].
Data Interpretation and Analysis
Expected Results and Normalization
Successful PCR amplification typically appears as discrete, sharp bands at the expected molecular weight when compared to the DNA ladder [53] [38]. The brightness of the band generally correlates with the amount of DNA present, though this is a semi-quantitative assessment [56]. A properly functioning electrophoresis system will display DNA ladder bands that are clear, distinct, and form a characteristic ladder pattern with good separation across the size range [53].
Quantitative Assessment of Agarose Gel Electrophoresis
While primarily considered a qualitative technique, agarose gel electrophoresis can provide semi-quantitative information when properly standardized. The table below compares different methods for assessing PCR product yield:
| Method | Principle | Sensitivity | Applications | Limitations |
|---|---|---|---|---|
| Agarose Gel Electrophoresis | Separation by size and charge with fluorescent intercalating dyes [56] [38] | ~1-10 ng DNA per band [56] | PCR verification, size estimation, purity assessment [56] [38] | Semi-quantitative, lower sensitivity than other methods [56] |
| Spectrophotometry | UV light absorption at 260nm [56] | ~2-5 ng/μL [56] | Nucleic acid concentration and purity (A260/A280 ratio) [56] | Does not distinguish between DNA, RNA; affected by contaminants [56] |
| Fluorometry | Fluorescent dye binding with specific excitation/emission [56] | ~0.5-1 ng/μL [56] | Highly specific DNA quantification [56] | Requires specific dyes and equipment [56] |
| qPCR | Real-time fluorescence detection during amplification [56] [38] | <0.1 ng/μL [56] | Absolute quantification, gene expression, pathogen detection [56] [38] | Requires specialized equipment and optimization; higher cost [56] [38] |
Research by Wittmeier et al. (2022) demonstrates that band brightness assessment on agarose gels is sufficiently precise for many post-PCR applications, showing strong correlation with more quantitative methods like fluorometry and qPCR [56].
Troubleshooting Common Issues
Even experienced researchers encounter challenges with agarose gel electrophoresis. The following table outlines common problems, their potential causes, and solutions:
| Problem | Possible Causes | Solutions |
|---|---|---|
| Faint or No Bands | Low DNA quantity, sample degradation, incorrect electrophoresis parameters, insufficient stain [58] | Load minimum 0.1-0.2 μg DNA per mm well width [58]; use fresh reagents; verify voltage and buffer; check stain sensitivity and penetration [58] |
| Smeared Bands | Sample overloading, gel too thick, DNA degradation, incorrect voltage, buffer issues [58] [55] | Reduce loading amount (0.1-0.2 μg DNA/mm well width) [58]; use 3-4mm thick gels [58]; use fresh buffer; run at 70-100V [55] [57]; practice nuclease-free techniques [58] |
| Poor Band Separation | Incorrect gel percentage, electrophoresis time too short, incorrect buffer type [58] [55] | Use appropriate agarose percentage (1-3% based on fragment size) [55]; increase run time; use TBE for better resolution of small fragments [57] |
| "Smiling" or Curved Bands | Excessive heating during run, uneven cooling, high salt in samples [55] [57] | Run at lower voltage (50-75V) [57]; use fresh buffer; ensure buffer covers gel completely; dilute high-salt samples before loading [58] |
| Skewed or Crooked Bands | Uneven gel setting, damaged wells, electrode issues, uneven buffer levels [53] | Set and run gel on level surface; check electrode alignment; avoid damaging wells during loading; ensure consistent buffer levels across gel [53] |
Quality Control and Validation
Incorporating Controls
Proper experimental design for PCR verification requires inclusion of appropriate controls to ensure result validity:
- Negative Control: Reaction mixture without template DNA to detect contamination [38].
- Positive Control: Known template that reliably amplifies with the primers to confirm reaction efficiency.
- DNA Ladder: Molecular weight standards in multiple lanes (first, middle, and/or last) for accurate size estimation and detection of migration anomalies [53].
Documentation and Analysis
Maintain comprehensive records of all electrophoresis parameters for quality control and reproducibility:
- Capture high-quality digital images immediately after electrophoresis to prevent band diffusion [53].
- Document gel percentage, buffer type and concentration, voltage, run time, DNA stain used, and ladder type.
- Annotate images with sample identities, ladder band sizes, and any relevant observations [53].
Agarose gel electrophoresis remains a cornerstone technique for post-amplification analysis in PCR-based research and diagnostic development. When performed with attention to methodological details and quality control measures, it provides robust verification of amplification success, product size, and sample quality. Proper troubleshooting of common issues ensures reliable results, while understanding both the capabilities and limitations of this technique allows researchers to make informed decisions about when to proceed to more quantitative analytical methods. As part of a comprehensive PCR workflow, this method serves as an essential gateway to downstream applications, ensuring that only properly amplified and verified products advance in the research pipeline.
Advanced PCR Optimization: Strategies for Perfecting Specificity, Yield, and Fidelity
Within the broader context of establishing a robust, step-by-step Polymerase Chain Reaction (PCR) protocol, encountering amplification failures or artifacts is a common yet surmountable challenge. The polymerase chain reaction is a cornerstone technique in molecular biology, but its sensitivity means that success hinges on the precise interplay of multiple reaction components and cycling conditions [2]. This guide provides a systematic framework for diagnosing and resolving the three most frequent PCR pitfalls: a complete lack of amplification, the appearance of multiple non-specific bands, and the formation of smeared gels. A methodical approach to troubleshooting not only saves valuable time and reagents but also ensures the generation of reliable, reproducible data for downstream applications in research and drug development [59].
The Foundation: Principles of a Robust PCR Setup
A successful troubleshooting process begins with a properly assembled reaction. The following principles are critical for minimizing variables and ensuring consistent results.
Reaction Assembly and Laboratory Practice
PCR reactions should be assembled on ice to minimize non-specific enzyme activity and primer binding before thermal cycling begins [60] [61]. Using a master mix—a homogenous mixture of all common reagents (water, buffer, dNTPs, polymerase)—is highly recommended. This approach ensures consistency across multiple reaction tubes and reduces pipetting errors [43]. Furthermore, maintaining sterile technique and using dedicated, nuclease-free pipettes and tips in a clean workspace are essential for preventing contamination by exogenous DNA or nucleases, which can lead to false positives, smearing, or complete reaction failure [62] [2].
Core Reaction Components
A basic PCR reaction requires several key components, each of which must be within an optimal concentration range to function correctly. The table below summarizes these critical elements and their roles.
Table 1: Essential Components of a PCR Reaction and Their Functions
| Component | Typical Final Concentration | Function | Key Considerations |
|---|---|---|---|
| DNA Template | 1 pg–10 ng (plasmid); 1 ng–1 µg (genomic) [60] | Provides the target sequence to be amplified. | Quality is paramount; degraded or impure template is a major cause of failure [61]. |
| Primers | 0.1–1.0 µM each [60] [9] | Short oligonucleotides that define the start and end of the amplified region. | Must be specific, have compatible Tm, and be free of self-complementarity [43]. |
| DNA Polymerase | 0.5–2.5 units/50 µL reaction [60] | Enzyme that synthesizes new DNA strands. | Hot-start versions are preferred to reduce non-specific amplification [61] [63]. |
| dNTPs | 200 µM each [60] | The building blocks (dATP, dCTP, dGTP, dTTP) for new DNA. | Unbalanced concentrations can reduce yield and fidelity [61] [62]. |
| Magnesium Ions (Mg²⁺) | 1.5–2.0 mM (often adjusted) [60] | Essential cofactor for DNA polymerase activity. | Concentration is critical; too little causes no product, too much causes non-specific bands [60] [62]. |
| Reaction Buffer | 1X concentration | Provides the optimal ionic environment and pH for the polymerase. | Often contains MgCl₂, so its contribution must be accounted for [43]. |
Systematic Diagnosis and Resolution of Common PCR Problems
Problem 1: No Amplification
A complete absence of a PCR product, indicated by no band on a gel or no amplification curve in qPCR, points to a fundamental failure in the amplification process.
Table 2: Troubleshooting Guide for No Amplification
| Possible Cause | Specific Checks & Solutions | Underlying Principle |
|---|---|---|
| Template Issues | - Quality: Re-isolate template; check for degradation on a gel; ensure no carryover of inhibitors (e.g., phenol, EDTA) [61] [62].- Quantity: Increase amount of template; if copy number is very low, increase cycle number to 35-40 [61] [64]. | Inhibitors chelate Mg²⁺ or degrade polymerase. Sufficient template copies are needed to initiate replication [2]. |
| Primer Issues | - Design: Verify specificity to target using BLAST; check for secondary structures [61] [43].- Concentration: Use 0.1–0.5 µM final concentration; too little primer prevents initiation [60] [62].- Tm Calculation: Confirm primer Tms are within 5°C of each other [60]. | Poorly designed primers will not bind to the intended target, halting the reaction before it begins. |
| Cycling Conditions | - Annealing Temperature: Perform a gradient PCR starting ~5°C below the calculated Tm of the lower primer [62].- Denaturation: Ensure initial denaturation step (95°C for 2 min) is included [60]. | An annealing temperature that is too high prevents primer binding; insufficient denaturation keeps DNA double-stranded. |
| Reagent Failure | - Enzyme Activity: Use a fresh aliquot of polymerase; check positive control [59].- dNTPs: Use a fresh, balanced dNTP mix; old dNTPs can degrade [62]. | Enzyme can lose activity over time, especially with improper storage or freeze-thaw cycles. |
The following workflow provides a logical sequence for diagnosing a reaction with no amplification:
Problem 2: Non-Specific Amplification (Multiple Bands)
The appearance of multiple bands, rather than a single clean product, indicates that primers are binding to and amplifying unintended regions of the template DNA.
Table 3: Troubleshooting Guide for Non-Specific Bands
| Possible Cause | Specific Checks & Solutions | Underlying Principle |
|---|---|---|
| Low Stringency | - Annealing Temperature: Increase temperature in 1-2°C increments [61] [62].- Mg²⁺ Concentration: Reduce concentration in 0.2–0.5 mM increments [60] [62]. | Higher stringency promotes only the perfect primer-template matches, reducing off-target binding. |
| Primer Design | - 3' End Specificity: Avoid 3' ends with GC-rich stretches or complementarity [9] [43].- Concentration: Reduce primer concentration (e.g., to 0.1–0.3 µM) [60]. | Promiscuous 3' ends easily extend from mismatched sites; high primer concentration facilitates this. |
| Enzyme & Setup | - Hot-Start Polymerase: Switch to a hot-start enzyme to prevent activity during setup [61] [63].- Pre-heated Lid: Use a thermocycler with a heated lid to prevent condensation and evaporation. | Hot-start polymerase remains inactive until the first high-temperature step, preventing primer dimer formation and mis-priming at low temperatures [63]. |
| Template Quality | - Complexity: For complex genomic DNA, use additives like DMSO or BSA [61] [43].- Quantity: Reduce the amount of template DNA [64]. | Excess template increases the chance of primers finding and binding to partially homologous sites. |
The decision tree below outlines a strategy to increase reaction stringency and eliminate non-specific products:
Problem 3: Smeared Gels
A continuous smear of DNA across the lane, rather than discrete bands, suggests a heterogeneous mixture of DNA fragments or uncontrolled amplification.
Table 4: Troubleshooting Guide for Smeared Bands
| Possible Cause | Specific Checks & Solutions | Underlying Principle |
|---|---|---|
| Excessive Template | - Concentration: Significantly reduce the amount of input template DNA [64]. | Too much template can lead to non-specific initiation and saturation of enzyme, generating a range of fragment sizes. |
| Cycle Number | - Reduction: Lower the number of amplification cycles (stay within 20-35 cycles) [64]. | A high number of cycles can lead to the accumulation of non-specific products and primer-dimers that become visible as a smear [61]. |
| Extension Time | - Duration: Reduce the extension time to be more appropriate for your amplicon size (e.g., 1 min/kb) [60] [64]. | Overlong extension times can allow the polymerase to generate spurious, poorly defined products. |
| Contamination | - Carryover: Use fresh TAE/TBE buffer for gel electrophoresis; use new primer aliquots [64] [63].- Genomic DNA: In RT-PCR, ensure complete removal of genomic DNA. | Accumulated "amplifiable DNA contaminants" from previous PCR runs can cause smearing that is specific to the primer set being used [63]. |
| Template Degradation | - Quality Check: Run template DNA on a gel to check for a clean, high-molecular-weight band. | Degraded template DNA provides a multitude of broken ends for primers to bind to, resulting in a ladder or smear of amplification products. |
The Scientist's Toolkit: Key Reagent Solutions
Beyond the core components, several specialized reagents and kits can be employed to resolve persistent issues.
Table 5: Research Reagent Solutions for PCR Optimization
| Reagent / Kit | Function / Purpose | Example Use Case |
|---|---|---|
| Hot-Start DNA Polymerase | Polymerase is inactive at room temperature, preventing non-specific priming during reaction setup. Activated by high initial denaturation temperature. | Essential for improving specificity and yield, especially with complex templates or low primer annealing temperatures [61] [63]. |
| PCR Additives (e.g., DMSO, BSA, Betaine) | Modifies DNA melting behavior, reduces secondary structure, stabilizes enzymes, and counters PCR inhibitors. | Critical for amplifying GC-rich templates, difficult sequences with strong secondary structure, or templates with known inhibitors [61] [43]. |
| PCR Clean-up Kit | Purifies PCR products by removing excess primers, dNTPs, salts, and enzyme. | Necessary before downstream applications like sequencing or cloning. Also used to purify template DNA before re-amplification [9] [62]. |
| PreCR Repair Mix | Enzymatically repairs damaged DNA templates by fixing nicks, gaps, and base modifications. | Used to salvage precious samples where the template DNA has been damaged (e.g., from formalin-fixed tissues or ancient samples) [62]. |
| dUTP and UDG (UDG Decontamination System) | Prevents carryover contamination from previous PCR products. dUTP is incorporated into new amplicons, and UDG degrades these products before the next PCR. | Used in high-throughput or diagnostic labs where the risk of amplicon contamination between runs is high [9]. |
Successful PCR troubleshooting is a systematic process that relies on a solid foundational protocol and a logical, step-wise approach to diagnosing failures. By understanding the roles and optimal ranges of each reaction component—from template quality and primer design to Mg²⁺ concentration and cycling parameters—researchers can effectively decode the messages conveyed by failed reactions. Whether facing no amplification, non-specific bands, or smeared gels, the solution typically lies in carefully adjusting one variable at a time to restore the delicate balance between amplification efficiency and specificity. Mastering this systematic approach empowers scientists to rescue valuable experiments, optimize new assays with confidence, and generate high-quality, reliable data that accelerates research and drug development.
In the polymerase chain reaction (PCR) process, the annealing step is where primers bind to their complementary sequences on the DNA template. The temperature at which this occurs is not a one-size-fits-all parameter; it is a critical variable that must be precisely optimized for each unique primer-template system. An annealing temperature that is too low can lead to non-specific amplification and primer-dimer formation, where primers bind to non-target sequences or to each other, resulting in unwanted products. Conversely, a temperature that is too high can reduce yield due to poor primer annealing [65] [41].
This guide details two powerful, complementary strategies for achieving optimal annealing conditions: Gradient PCR and Touchdown PCR. Gradient PCR is a high-throughput empirical method for identifying the optimal temperature, while Touchdown PCR is a robust cycling strategy that enhances specificity even when the precise optimal temperature is not known. Mastering these techniques is fundamental to successful PCR setup and reliable research outcomes.
Primer Design Fundamentals
The foundation of any successful PCR is a well-designed pair of primers. Before optimization can begin, primers must adhere to established thermodynamic and structural principles.
Core Design Parameters
The following parameters are essential for designing effective primers [51] [66]:
- Primer Length: Optimal primers are typically 18–30 bases long. This length provides a good balance between specificity and binding efficiency.
- Melting Temperature (Tm): The Tm for both forward and reverse primers should be within 55°C to 65°C and closely matched, ideally within 1–2°C of each other, to ensure both bind with similar efficiency during the annealing step.
- GC Content: Aim for a GC content of 40–60%. This provides sufficient stability without promoting overly strong secondary structures.
- 3'-End Stability: The last five nucleotides at the 3' end, known as the "core," should be rich in G and C bases. This enhances stability and ensures efficient initiation of polymerase extension.
- Specificity: Primers should be unique to the target sequence. Tools like NCBI's Primer-BLAST should be used to check for off-target binding [66] [67].
Avoiding Common Pitfalls
Poorly designed primers lead to failed experiments. Key pitfalls to avoid include [51] [66]:
- Primer Dimers: These occur when primers hybridize to themselves or each other, especially via complementary 3' ends, and are amplified as small products.
- Hairpins: Intramolecular folding within a primer can prevent it from binding to the template DNA.
- Non-specific Annealing: Primers with low complexity or multiple matching sites can bind to and amplify incorrect regions of the template.
Table 1: Essential Primer Design Parameters and Guidelines
| Parameter | Optimal Range | Rationale |
|---|---|---|
| Length | 18–30 nucleotides | Balances specificity and binding efficiency. |
| Melting Temp (Tm) | 55–65°C; primers within 1–2°C | Ensures simultaneous binding of both primers. |
| GC Content | 40–60% | Provides stable yet non-stubborn binding. |
| 3'-End Sequence | GC-rich (GC clamp) | Promotes efficient initiation of polymerase activity. |
Calculating Melting Temperature (Tm)
The primer Tm is the theoretical foundation for selecting a starting annealing temperature. The most basic calculation is a simple formula [68]:
Tm = 2°C × (A + T) + 4°C × (G + C)
Where A, T, G, and C are the number of each respective nucleotide in the primer. For example, a 20-base primer with 10 A/T and 10 G/C would have a Tm = 2°C × (10) + 4°C × (10) = 60°C.
However, it is critical to note that Tm is affected by buffer components, pH, and primer concentration, making any calculated value an approximation [65]. Most protocols recommend setting the initial annealing temperature (Ta) 3–5°C below the calculated Tm of the primers [68]. For greater accuracy, especially for complex primers, use software like IDT's OligoAnalyzer or other primer design tools that utilize more sophisticated algorithms [68] [66].
Optimization Method 1: Gradient PCR
Gradient PCR is an empirical method that uses a thermal cycler's gradient function to test a range of annealing temperatures in a single run, dramatically speeding up the optimization process.
The Gradient PCR Workflow
The process involves setting up identical PCR reactions and placing them in a thermal cycler capable of maintaining a precise temperature gradient across its block during the annealing step [69]. This allows you to test, for example, temperatures from 55°C to 65°C simultaneously.
The diagram below illustrates the workflow for using Gradient PCR to find the optimal annealing temperature.
Implementing and Analyzing Gradient PCR
After running the gradient PCR, analyze the results using gel electrophoresis [69] [33]. You are looking for the lane that shows:
- A single, sharp band of the expected size.
- The brightest band intensity, indicating the highest yield.
The annealing temperature that produces this result is your optimized temperature for standard PCR. Advanced thermal cyclers offer a 2D-gradient function, which can simultaneously optimize both the annealing temperature and the denaturation temperature, providing an even higher level of precision for challenging templates [69].
Optimization Method 2: Touchdown PCR
Touchdown PCR is a strategic modification of the PCR cycling program that enhances specificity by starting with a high, stringent annealing temperature and progressively lowering it to a more permissive one.
Principles and Advantages
In Touchdown PCR, the initial annealing temperature is set ~10°C above the calculated Tm of the primers [65] [68]. Over subsequent cycles, this temperature is gradually decreased (e.g., by 1°C every cycle or every second cycle) until it reaches the calculated Tm or "touchdown" temperature, which is then used for the remaining cycles.
This method favors the accumulation of the desired specific amplicon in the early cycles. At high, stringent temperatures, only primers with perfect complementarity to the target can bind. Once this specific product is generated, it outcompetes non-specific products during the later, lower-temperature cycles [65] [41].
Touchdown PCR Protocol
A robust Touchdown PCR protocol can be broken down into two main phases [65]:
Table 2: Example Touchdown PCR Protocol Based on a Primer Tm of 57°C
| Step | Temperature (°C) | Time | Stage & Cycles |
|---|---|---|---|
| Initial Denaturation | 95 | 3:00 min | |
| Denaturation | 95 | 0:30 min | Stage 1: 10 cycles |
| Annealing | 67 (Tm +10°C) | 0:45 min | |
| Extension | 72 | 0:45 min | |
| Denaturation | 95 | 0:30 min | Stage 2: 15-20 cycles |
| Annealing | Decrease by 1°C/cycle | 0:45 min | |
| Extension | 72 | 0:45 min | |
| Final Extension | 72 | 5:00 min |
The logical flow of a Touchdown PCR program, illustrating the gradual decrease in annealing temperature, is shown below.
The Scientist's Toolkit: Essential Reagents and Materials
Successful PCR optimization relies on high-quality reagents and proper laboratory practices. The following table details key solutions and their functions.
Table 3: Key Research Reagent Solutions for PCR Optimization
| Reagent / Solution | Function / Purpose | Example / Notes |
|---|---|---|
| Hot-Start DNA Polymerase | Reduces non-specific amplification and primer-dimer formation by inhibiting enzyme activity until high temperatures are reached. | Antibody-, affibody-, or aptamer-based inactivation [41]. |
| PCR Master Mix | A pre-mixed solution containing buffer, dNTPs, and polymerase. Saves time, improves reproducibility, and reduces contamination risk. | Promega GoTaq Green Master Mix [33]. |
| MgCl₂ Solution | An essential cofactor for DNA polymerase activity. Concentration must be optimized (typically 1.5-2.0 mM) for specificity and yield [68] [51]. | Often included in 10X reaction buffers; may require titration. |
| PCR Additives | Assist in amplifying difficult templates (e.g., GC-rich sequences). DMSO helps denature stable secondary structures [65] [51]. | DMSO (2-10%), Betaine (1-2 M). |
| Nuclease-Free Water | The solvent for reactions; ensures no enzymatic degradation of primers, templates, or reagents occurs. | Critical for preparing primer stocks and reaction mixes [33]. |
Additional Best Practices
- Keep Reactions Cool: Assemble all reactions on ice to prevent non-specific priming before cycling begins [65].
- Template Quality and Quantity: Use high-quality template DNA. Excessive template can decrease specificity. Recommended amounts are up to 1 ng for plasmid, 10-40 ng for cDNA, and up to 1 μg for genomic DNA [68].
- Cycle Numbers: Keep total cycles (including touchdown phases) below 35 to minimize the appearance of non-specific products [65].
Optimizing the annealing temperature through Gradient and Touchdown PCR is not an optional refinement but a fundamental requirement for robust and reliable PCR. Gradient PCR provides a fast, empirical method to pinpoint the ideal temperature, while Touchdown PCR offers a powerful strategy to enforce high specificity, particularly for challenging primer-template combinations or when the exact Tm is uncertain. By integrating the principles of sound primer design with these systematic optimization protocols, researchers can consistently generate specific, high-yield amplification, forming a solid foundation for downstream applications in cloning, sequencing, and gene expression analysis.
Polymersse Chain Reaction (PCR) serves as a cornerstone technique in molecular biology, enabling the targeted amplification of specific DNA sequences for applications ranging from gene cloning to diagnostic testing [42]. The reliability of this process hinges on the precise optimization of reaction components, which collectively determine the specificity, efficiency, and yield of amplification [52]. Within this framework, the concentrations of magnesium ions (Mg2+), deoxynucleoside triphosphates (dNTPs), and primers represent a critical triumvirate that researchers must carefully balance to achieve successful results.
The process of PCR optimization is akin to "balancing a chain of dominos" where a single unbalanced parameter can create cascading effects that compromise the entire reaction [52]. When these core components are not properly optimized, researchers encounter persistent problems including absent PCR products, inefficient amplification of target templates, nonspecific bands, primer-dimer formation, and mutations resulting from incorrect nucleotide incorporation [52]. This technical guide provides an in-depth examination of Mg2+, dNTP, and primer optimization strategies, presenting systematically collected quantitative data and detailed protocols to enable researchers to establish robust PCR methods within the broader context of setting up a PCR reaction step by step.
Magnesium Chloride (Mg2+) Concentration: The Essential Cofactor
Biochemical Function and Optimization Strategy
Magnesium ions serve as an indispensable cofactor for DNA polymerase enzyme activity, directly influencing polymerization efficiency and fidelity [52]. Biochemically, Mg2+ facilitates the formation of stable complexes between the enzyme and its DNA substrate, while also influencing the annealing of primers to template DNA and the melting characteristics of DNA duplexes [52]. The optimization of Mg2+ concentration is particularly crucial because it affects nearly aspect of the PCR reaction, including nucleic acid hybridization affinity and polymerase activity itself [52].
The optimization process must be empirical, as the optimal Mg2+ concentration depends on several factors including primer composition, template DNA characteristics, buffer composition, and dNTP concentration [52]. The divalent magnesium ions are also necessary for primer binding, and their concentration significantly affects the specificity and efficiency of the overall reaction [52]. When Mg2+ concentrations fall outside the optimal range, researchers may observe either no amplification or excessive nonspecific products, both of which compromise experimental outcomes.
Quantitative Optimization Data and Practical Recommendations
Table 1: Magnesium Chloride (Mg2+) Optimization Parameters
| Concentration Range | Observed Effects | Recommended Applications |
|---|---|---|
| 0.5 mM | Generally insufficient for polymerization | Not recommended for standard PCR |
| 1.5 - 2.0 mM | Standard starting point for optimization | Conventional PCR with simple templates |
| 2.5 - 3.5 mM | Enhanced efficiency for complex templates | High GC content, long fragments, or difficult templates |
| 4.0 - 5.0 mM | Increased nonspecific amplification risk | Special applications requiring titration |
Experimental data from systematic optimization studies demonstrates that different PCR applications require distinct Mg2+ concentrations. For standard PCR applications, a concentration of 2.0 mM represents a conventional starting point [52]. However, research specifically focused on PCR-SSP optimization found that 3.25 µM (approximately 3.25 mM) provided optimal results in a 20 µl reaction system [70]. Another study emphasized that concentrations as low as 0.5 mM and as high as 5.0 mM may be appropriate depending on primer composition and template characteristics [52].
For challenging applications such as amplification of high GC-content templates or long fragments, elevated Mg2+ concentrations in the range of 2.5-3.5 mM often yield superior results [42]. A performance demonstration using the Hieff Ultra-Rapid II HotStart PCR Master Mix showed that higher Mg2+ concentrations facilitated efficient amplification of long fragments and high GC bacterial liquids, achieving higher yields with a 100% detection rate compared to competitor products [42].
Deoxynucleoside Triphosphates (dNTPs): The Building Blocks
Biochemical Role and Concentration Balancing
Deoxynucleoside triphosphates (dNTPs) serve as the fundamental building blocks for DNA synthesis, providing both the nucleotides necessary for chain elongation and the energy required for the polymerization reaction through the hydrolysis of their phosphate bonds [52]. The concentration of dNTPs in a PCR reaction requires precise balancing, as excessive amounts can reduce fidelity by promoting misincorporation, while insufficient concentrations lead to poor yields and premature reaction termination [52].
The optimization of dNTP concentration is particularly important because these molecules chelate magnesium ions, effectively reducing the availability of free Mg2+ for DNA polymerase function [52]. This interdependence necessitates that dNTP and Mg2+ concentrations be optimized in concert rather than in isolation. Research has demonstrated that improper dNTP concentrations represent a common source of PCR failure, often manifesting as weak or absent amplification products even when other reaction parameters appear optimal.
Experimental Data and Concentration Guidelines
Table 2: dNTP Concentration Optimization Parameters
| Concentration Range | Observed Effects | Recommendations |
|---|---|---|
| 0.1 - 0.25 mM | Suboptimal for most applications | May be used for specialized high-fidelity PCR |
| 0.25 - 0.5 mM | Reduced misincorporation, moderate yield | Standard applications, balance of yield and fidelity |
| 0.5 - 0.75 mM | Robust amplification, potential slight fidelity reduction | Standard applications requiring high yield |
| 0.8 - 1.0 mM | Increased misincorporation risk, high yield | Not recommended for cloning or sequencing |
Experimental optimization of PCR-SSP methodology determined that 0.5 mM dNTPs provided optimal amplification results in a 20 µl reaction system [70]. This concentration aligns with general PCR recommendations that suggest a range of 0.2-0.5 mM for standard applications [52]. Importantly, all four dNTPs should be used at equimolar concentrations to prevent incorporation errors and ensure balanced amplification.
For applications requiring high fidelity, such as cloning or sequencing, the lower end of the concentration range (0.2-0.25 mM) is recommended to minimize misincorporation rates [52]. Conversely, when amplifying difficult templates or when maximum yield is desired, concentrations up to 0.5 mM may be appropriate. It is crucial to note that dNTP concentrations exceeding 0.5 mM may increase error rates by promoting misincorporation while providing diminishing returns in terms of product yield [52].
Primer Design and Concentration: The Specificity Determinants
Primer Design Principles for Optimal Binding
Primer design represents the foundation of PCR specificity, as these oligonucleotides determine the binding sites for amplification and thus the accuracy of the resulting products [42]. Effective primers must be complementary to the target sequence while avoiding secondary structures, self-complementarity, or mispriming to non-target sites [52]. The 3' end of the primer is particularly critical, as it serves as the initiation point for DNA synthesis; ideally, the last few bases should be guanine (G) or cytosine (C) to increase primer-template binding stability and reduce mispriming or mismatches [42].
The physical and chemical properties of primers in solution directly influence the optimal annealing temperature, which typically ranges from 55°C to 72°C [2]. Primers are generally 20 to 25 nucleotides long, a length that provides sufficient specificity while maintaining practical binding kinetics [2]. During the annealing phase, primers bind to complementary sequences on single-stranded DNA by pairing their 3' ends to the template strand, providing a starting point for DNA synthesis during the extension phase [2].
Primer Concentration Optimization and Quantitative Guidelines
Table 3: Primer Concentration Optimization Parameters
| Concentration Range | Observed Effects | Optimal Applications |
|---|---|---|
| 0.1 - 0.3 µM | Reduced nonspecific products, potential low yield | High template abundance, prevention of primer-dimers |
| 0.4 - 0.5 µM | Balanced specificity and efficiency | Standard applications, recommended by optimization studies |
| 0.6 - 0.9 µM | Increased yield, potential nonspecific amplification | Low template abundance, difficult templates |
| >1.0 µM | High risk of primer-dimers and nonspecific products | Not recommended for standard applications |
Research indicates that primer concentration significantly impacts PCR outcomes, with excessive concentrations promoting primer-dimer formation and nonspecific amplification, while insufficient concentrations yield poor amplification [52]. Systematic optimization studies have demonstrated that concentrations between 0.2 and 1.0 µM led to increased PCR efficiency, with specific research recommending 0.4-0.5 µM as optimal [52] [42]. For PCR-SSP applications, a concentration of 0.5 µM for specific primers with a control primer concentration of 0.2 µM (ratio of 2:5) provided optimal results [70].
Recent findings suggest that low primer concentrations within the range of 0.2-0.5 µM can reduce non-specific product formation in PCR reactions [52]. The Hieff Ultra-Rapid II HotStart PCR Master Mix protocol specifically recommends a final primer concentration of 0.4-0.5 µM for both forward and reverse primers to ensure consistency and reliable results [42]. This concentration range represents a practical balance between amplification efficiency and reaction specificity for most standard applications.
Integrated Experimental Protocols and Workflows
Systematic Optimization Methodology
The optimization of Mg2+, dNTP, and primer concentrations follows a systematic approach where each parameter is varied while others are held constant to isolate individual effects. This methodology was demonstrated in PCR-SSP optimization research, where amplification was performed in a 20 µl reaction volume and the effect of varying each parameter was studied sequentially [70]. The process begins with Mg2+ optimization, followed by dNTP titration, then polymerase adjustment, and finally primer concentration refinement.
A recommended workflow initiates with standard concentrations (2.0 mM Mg2+, 0.5 mM dNTPs, 0.4 µM primers) followed by systematic variation of each component. For Mg2+, testing should span 1.5-4.0 mM in 0.5 mM increments; for dNTPs, 0.2-0.8 mM in 0.2 mM increments; and for primers, 0.2-0.8 µM in 0.2 µM increments [52] [70]. After each adjustment, results should be evaluated by agarose gel electrophoresis to assess specificity and yield, with the optimal concentration selected before proceeding to the next parameter.
PCR Optimization Workflow
Complementary Optimization Factors
While Mg2+, dNTP, and primer concentrations represent core optimization parameters, several additional factors require consideration for establishing a robust PCR protocol. Template DNA quality and quantity significantly impact results, with recommended lengths of 200-500 bp for efficient amplification and concentrations of 1-100 ng typically sufficient to initiate the reaction [52] [2]. Cycling conditions, particularly annealing temperature, must be optimized in relation to primer characteristics, with standard annealing temperatures of 55°C-65°C for fragments of 100-500 bp [52].
The choice of DNA polymerase also influences optimization requirements, with different enzymes exhibiting varying fidelity, processivity, and tolerance to reaction conditions [52]. For applications requiring high fidelity, enzymes such as Vent or Pfu are preferred, while Taq polymerase remains adequate for generating large amounts of specific target sequences [52]. Recent advancements in PCR master mixes, such as the Hieff Ultra-Rapid II HotStart PCR Master Mix, can reduce optimization requirements by providing robust performance across diverse template types [42].
The Scientist's Toolkit: Essential Research Reagent Solutions
Table 4: Essential PCR Reagents and Their Functions
| Reagent | Function | Optimization Considerations |
|---|---|---|
| Magnesium Chloride (MgCl2) | Essential cofactor for DNA polymerase | Concentration critical; affects enzyme activity, primer annealing, and product specificity |
| dNTP Mix | Building blocks for DNA synthesis | Concentration affects yield and fidelity; chelates Mg2+ ions |
| Oligonucleotide Primers | Define amplification targets | Sequence specificity, concentration, and 3' end composition critical for binding |
| Thermostable DNA Polymerase | Catalyzes DNA synthesis | Selection affects fidelity and efficiency; concentration must be optimized |
| PCR Buffer | Maintains optimal pH and ionic strength | May contain supplemental Mg2+; affects reaction conditions |
| Template DNA | Source of target sequence | Quality and quantity significantly impact amplification success |
The selection of appropriate reagents forms the foundation of successful PCR optimization. High-quality magnesium chloride solutions are essential, as contaminants can inhibit polymerase activity [52]. dNTP solutions should be freshly prepared or properly stored to prevent degradation that leads to unbalanced nucleotide concentrations [42]. oligonucleotide primers require careful design with attention to length (typically 20-25 nucleotides), GC content (40-60%), and absence of secondary structures or self-complementarity [52] [2].
Modern PCR master mixes, such as the Hieff Ultra-Rapid II HotStart PCR Master Mix, provide pre-optimized combinations of reagents that can streamline the optimization process for standard applications [42]. These solutions typically include buffer, Mg2+, dNTPs, and polymerase in optimized ratios, reducing the need for extensive titration. However, for specialized applications or challenging templates, individual optimization of components remains necessary to achieve optimal results.
The fine-tuning of Mg2+, dNTP, and primer concentrations represents a critical process in establishing robust PCR methods that deliver high specificity, yield, and fidelity. The experimental data and optimization strategies presented in this guide provide researchers with a systematic framework for balancing these interdependent parameters to achieve successful amplification across diverse applications. The quantitative recommendations, derived from both general PCR principles and specific optimization studies, offer practical starting points for method development.
Ultimately, the optimal PCR conditions represent a careful balance between sometimes competing objectives—maximum yield, highest specificity, and superior fidelity [52]. By understanding the biochemical roles of each component and following a structured optimization workflow, researchers can develop PCR protocols tailored to their specific experimental needs. This approach ensures reliable, reproducible results that form the foundation for successful downstream applications in research, diagnostics, and drug development.
The polymerase chain reaction (PCR) stands as a cornerstone technique in molecular biology, enabling the exponential amplification of specific DNA sequences for a vast array of applications from basic research to clinical diagnostics [2]. However, the efficiency and specificity of PCR are highly dependent on the nature of the template DNA. Challenging templates, such as those with high guanine-cytosine (GC) content, long amplicons, or derived from suboptimal sample sources, frequently lead to amplification failure, nonspecific products, or poor yield. This guide provides an in-depth, technical framework for overcoming these challenges, structured within the essential steps of PCR reaction setup. By systematically addressing template-specific obstacles through optimized reagent selection, cycling conditions, and specialized methodologies, researchers can achieve robust and reliable amplification even with the most demanding samples, thereby advancing drug development and scientific discovery.
The PCR Foundation: Core Principles and Components
A successful PCR reaction is a carefully balanced system of several key components. Understanding the role and optimization of each is fundamental before addressing specific template challenges.
The core components include template DNA, which can be genomic DNA (gDNA), complementary DNA (cDNA), or plasmid DNA, with optimal input amounts varying by type and polymerase used [9]. The DNA polymerase enzyme is critical for synthesizing new DNA strands, with choices ranging from standard Taq polymerase to specialized high-fidelity or hyperthermostable enzymes [9]. Primers, short synthetic oligonucleotides typically 15–30 bases long, must be designed with appropriate melting temperatures (Tm), GC content, and minimal self-complementarity to ensure specific binding [9]. Deoxynucleoside triphosphates (dNTPs) serve as the building blocks for new DNA, while magnesium ions (Mg²⁺) act as an essential cofactor for polymerase activity [9].
The table below summarizes the recommended concentrations and key considerations for these core components in a standard 50 µL reaction.
Table 1: Core Components of a PCR Reaction and Optimization Guidelines
| Component | Recommended Concentration/Range | Key Considerations |
|---|---|---|
| Template DNA | Plasmid: 0.1–1 nggDNA: 5–50 ng [9] | Higher amounts increase nonspecific amplification; lower amounts reduce yield. |
| DNA Polymerase | 1–2 units [9] | Increase for difficult templates or inhibitor presence. Higher amounts can cause nonspecific products. |
| Primers | 0.1–1 µM [9] | Higher concentrations cause mispriming. Use 0.3–1 µM for degenerate bases or long PCR. |
| dNTPs | 0.2 mM each [9] | Higher concentrations may inhibit PCR. Balance with Mg²⁺ concentration, as Mg²⁺ binds dNTPs. |
| MgCl₂ | 1.5–2.0 mM (varies) [71] | Critical cofactor. Concentration requires optimization; too high causes nonspecific binding, too low reduces activity. |
Strategies for GC-Rich Templates
GC-rich regions (typically >60-65% GC content) present a formidable challenge due to the formation of stable secondary structures, such as hairpin loops, and a higher melting temperature (Tm) caused by three hydrogen bonds between G and C bases [72]. These structures can block the progression of the DNA polymerase, leading to inefficient amplification or complete failure.
Reagent and Buffer Optimization
Successful amplification of GC-rich templates often requires modifying the standard PCR mixture. The following table outlines key reagent-based strategies.
Table 2: Optimization Strategies for GC-Rich PCR
| Strategy | Mechanism of Action | Protocol / Implementation |
|---|---|---|
| PCR Additives | Destabilizes secondary structures, lowers DNA Tm [73] [41]. | Add DMSO at 3-10% (v/v), Betaine, or formamide [71] [73] [41]. |
| Specialized Polymerases | Engineered for high processivity and thermostability to power through structures [41]. | Use enzymes like AccuPrime GC-Rich DNA Polymerase or systems with GC enhancers [72] [41]. |
| Magnesium Concentration | Stabilizes DNA and polymerase interaction [73]. | Titrate MgCl₂ from 1.5 mM to 2.5 mM to find the optimal concentration [71] [72]. |
| Enhanced Denaturation | Applies more energy to melt stable GC bonds [72]. | Increase denaturation temperature to 98°C and/or extend denaturation time [41]. |
Cycling Conditions and Primer Design
Beyond reagents, optimizing the thermal cycling protocol and primer design is crucial.
- Temperature Adjustments: A higher annealing temperature (often 5-7°C above the calculated Tm) can improve specificity [71]. Using a gradient PCR function is highly recommended to determine the optimal annealing temperature empirically [71] [72].
- Primer Design: For GC-rich targets, primers should be designed with a uniform distribution of G and C bases, and the 3' end should avoid stretches of more than three G or C bases to prevent mispriming [9] [73].
- Touchdown PCR: This method starts with an annealing temperature higher than the primer's calculated Tm and gradually decreases it in subsequent cycles. This approach enriches for the specific target in the initial cycles, minimizing nonspecific amplification later on [73] [41].
Strategies for Long Amplicons
Amplifying long DNA fragments (generally >5 kb) introduces challenges like depurination (the loss of purine bases) and an increased probability of introducing errors during DNA synthesis [74].
Polymerase Selection and Cycling Parameters
The choice of DNA polymerase is the most critical factor for long-range PCR. A blend of a non-proofreading polymerase (like Taq) for fast elongation and a proofreading polymerase (with 3' to 5' exonuclease activity) is often used to correct mismatches and ensure high fidelity [74] [75]. Enzymes like Q5 or LongAmp Taq are specifically designed for this purpose, capable of amplifying up to 20 kb and 30 kb, respectively [75].
Cycling conditions must be adapted to minimize DNA damage and allow for complete extension.
- Denaturation: Use very short denaturation times (e.g., 10 seconds) at a high temperature (94–95°C) to reduce depurination of the long template [74].
- Extension: The extension time should be calculated based on the length of the amplicon, typically 1 minute per kilobase, and performed at a slightly lower temperature (68°C instead of 72°C) to further improve the yield of longer products [74].
- Gentle Template Handling: For amplicons above 20 kb, avoid vortexing or excessive pipetting of the DNA template after it's added to the reaction to prevent shearing [75].
The following diagram illustrates the optimized workflow for setting up a long-range PCR reaction.
Strategies for Low-Quality and Inhibitor-Containing Samples
Samples such as formalin-fixed paraffin-embedded (FFPE) tissue, blood, and soil often contain PCR inhibitors or have fragmented DNA, leading to partial or complete amplification failure [71] [76].
Identifying and Overcoming Inhibition
Common inhibitors include heparin, hemoglobin, phenol, SDS, and ethanol [76]. Their presence can be identified by a dilution series experiment; if amplification improves with dilution, inhibition is likely [76]. Solutions include:
- Further Purification: Using phenol-chloroform extraction or dedicated clean-up kits to remove contaminants [76].
- Polymerase Choice: DNA polymerases with high processivity tolerate inhibitors better and are recommended for direct PCR from crude samples [41].
- Sample Dilution: Diluting the template can reduce the concentration of inhibitors to a level that no longer affects the PCR [76].
- Increasing DNA Input: For FFPE-derived DNA, a concentration of at least 2 µg/ml may be necessary for successful amplification [71].
Methodological Solutions
- Hot-Start PCR: This technique prevents nonspecific amplification and primer-dimer formation by keeping the DNA polymerase inactive until the first high-temperature denaturation step. This is particularly beneficial when inhibitor presence reduces reaction efficiency, as it ensures specificity from the outset [9] [41] [77].
- Nested PCR: This two-round amplification method uses two sets of primers. The first set (outer primers) amplifies a larger region, and the second set (nested primers), which bind within the first product, amplifies the specific target of interest. This greatly enhances specificity and sensitivity, making it suitable for low-copy number or degraded templates [41].
The Scientist's Toolkit: Essential Reagents for Challenging PCR
The following table catalogs key reagents and their specific functions for troubleshooting difficult PCR amplifications.
Table 3: Research Reagent Solutions for Challenging PCR Templates
| Reagent / Material | Function / Application | Example Use Case |
|---|---|---|
| Proofreading DNA Polymerase | 3' to 5' exonuclease activity removes mismatches during synthesis, improving fidelity [74]. | Essential for long amplicon PCR to prevent mutated or incomplete products [74]. |
| DMSO (Dimethyl Sulfoxide) | Additive that reduces DNA melting temperature and disrupts secondary structures [73] [41]. | Added at 5% (v/v) to amplify an EGFR promoter region with 88% GC content [71]. |
| Hot-Start DNA Polymerase | Polymerase is inactive at room temperature, preventing nonspecific priming during reaction setup [41] [77]. | Critical for multiplex PCR and reactions with suboptimal DNA quality to improve specificity and yield [41] [77]. |
| 7-deaza-2'-deoxyguanosine | dGTP analog that weakens hydrogen bonding, facilitating denaturation of GC-rich structures [72]. | Used in "Slow-down PCR" protocols for extremely stable GC-rich templates [72]. |
| Specialized GC Buffer | Commercially optimized buffers often containing proprietary enhancers for difficult templates. | OneTaq GC Buffer with GC enhancer from NEB for consistent GC-rich amplification [72]. |
Successfully navigating the complexities of GC-rich regions, long amplicons, and low-quality samples requires a strategic and systematic approach to PCR setup. There is no single universal solution; instead, researchers must view optimization as an iterative process involving careful selection of the DNA polymerase, meticulous tuning of reagent concentrations and cycling parameters, and the adoption of specialized techniques like touchdown or hot-start PCR. By leveraging the strategies and detailed protocols outlined in this guide, scientists and drug development professionals can confidently overcome these common hurdles. This ensures the generation of high-quality, reliable data, thereby accelerating the pace of molecular research and the development of novel therapeutics.
Polymersse Chain Reaction (PCR) is a foundational technique in molecular biology, yet the efficient amplification of complex DNA templates remains a significant challenge for many researchers. GC-rich sequences, secondary structures, and high melting temperatures can severely hinder amplification efficiency, leading to failed experiments and inconclusive results [50]. The strategic use of PCR enhancers represents a critical methodological approach to overcoming these barriers, enabling robust and reliable amplification of problematic targets.
This guide provides an in-depth examination of the most effective PCR enhancers, with a particular focus on DMSO and betaine as primary solutions for challenging templates. Within the broader context of setting up a PCR reaction, the integration of these additives constitutes an advanced optimization step that can determine experimental success. For researchers in drug development and scientific research, mastering these enhancers is essential for working with diverse genetic targets, particularly those with non-ideal amplification characteristics.
Understanding PCR Enhancers: Mechanisms and Applications
PCR enhancers are chemical additives that modify the physical environment of the amplification reaction to facilitate more efficient and specific DNA synthesis. They address specific amplification challenges through distinct biochemical mechanisms, primarily by influencing DNA duplex stability and polymerase activity.
The core challenge with many difficult templates lies in the stability of DNA secondary structures. GC-rich regions (those with >60% GC content) form particularly stable duplexes due to the three hydrogen bonds between guanine and cytosine bases, compared to the two bonds in AT pairs [50]. This increased stability raises the melting temperature (Tm) of the DNA, often beyond standard PCR conditions, and can promote the formation of secondary structures that physically block polymerase progression.
The Role of Enhancers in PCR Setup
When incorporated into the systematic setup of a PCR reaction, enhancers should be considered after optimizing fundamental parameters such as primer design, magnesium concentration, and thermal cycling conditions [47] [9] [43]. Their addition represents a fine-tuning step for targets that resist standard amplification protocols. Understanding their mechanisms allows researchers to make informed decisions about which enhancers to employ for specific challenges, moving beyond trial-and-error approaches.
Key PCR Enhancers: Types, Properties, and Applications
Dimethyl Sulfoxide (DMSO)
Mechanism of Action: DMSO functions primarily by reducing the secondary structural stability of DNA [78]. It achieves this by interacting with water molecules surrounding the DNA strand, disrupting the hydrogen bonding network that stabilizes the double helix. This interaction effectively lowers the melting temperature (Tm) of the DNA, allowing strands to separate more readily at standard denaturation temperatures [78]. Additionally, DMSO can help overcome barriers posed by DNA secondary structures that would otherwise impede polymerase progression.
Applications: DMSO is particularly effective for amplifying GC-rich templates (>60% GC content), where strong hydrogen bonding and stable secondary structures are most problematic [50]. It has demonstrated remarkable success in amplifying challenging markers like the ITS2 DNA barcode from plants, where it achieved a 91.6% success rate compared to 42% without additives [79]. DMSO is also valuable for templates with pronounced secondary structures or for long amplicons where complete denaturation is critical.
Usage Considerations: While beneficial for template denaturation, DMSO also reduces Taq polymerase activity [78]. This dual effect necessitates finding a balance between template accessibility and enzyme efficiency. The typical effective concentration ranges from 2% to 10%, with 5% being a common starting point for optimization [79] [78]. Excessive DMSO concentration can inhibit the PCR reaction, while insufficient amounts may not adequately address the structural challenges.
Betaine
Mechanism of Action: Betaine (also known as trimethylglycine) is an osmoprotectant that enhances PCR through a unique mechanism. It reduces the formation of DNA secondary structures by interacting with negatively charged groups on the DNA backbone, thereby decreasing electrostatic repulsion between strands [78]. Most notably, betaine functions as a PCR-specific equalizer by eliminating the dependence of DNA melting on base pair composition [78]. This property makes it exceptionally valuable for GC-rich templates, as it effectively normalizes the melting temperature across different sequence regions.
Applications: Betaine is primarily indicated for amplifying GC-rich DNA sequences that prove refractory to standard PCR conditions. In comparative studies, it has shown a 75% success rate for challenging plant DNA barcodes, second only to DMSO [79]. The combination of betaine with DMSO has been explored, though evidence suggests they may not provide additive benefits when used together [79]. For the most challenging templates, substituting one for the other may be more effective than combination.
Usage Considerations: Betaine is typically used at concentrations ranging from 0.5 M to 2.5 M, with 1 M being a standard starting point [43] [78]. It's important to use betaine or betaine monohydrate rather than betaine hydrochloride, as the latter can affect reaction pH and consequently enzyme activity [78]. Betaine generally does not inhibit polymerase activity, making it a safer choice than DMSO in some applications.
Formamide
Mechanism of Action: Formamide is an organic solvent that destabilizes the DNA double helix by binding to the major and minor grooves of DNA, thereby disrupting hydrogen bonds and hydrophobic interactions between strands [78]. This action significantly lowers the Tm of DNA, similar to DMSO but through a different molecular mechanism.
Applications: Formamide is particularly useful for reducing non-specific priming and improving amplification efficiency, allowing reactions to produce sufficient product in shorter timeframes [78]. It has shown approximately 16.6% success rate for challenging plant DNA barcodes, making it a secondary option when DMSO or betaine prove insufficient [79].
Usage Considerations: Standard concentrations range from 1% to 5%, though optimization is required for specific templates [78]. Users should be aware of potential effects on other reaction components, including competitive binding with dNTPs and interactions with template DNA and primers.
Other Notable Enhancers
Tetramethylammonium Chloride (TMAC): TMAC increases hybridization specificity by forming a charge shield that reduces electrostatic repulsion between DNA strands [78]. This mechanism stabilizes primer-template binding, allowing for more specific amplification even at higher annealing temperatures. TMAC is particularly valuable when using degenerate primers, with typical concentrations ranging from 15-100 mM.
Bovine Serum Albumin (BSA): BSA functions primarily by binding and removing inhibitors such as phenolic compounds from the reaction system [78]. It also reduces reactant adhesion to tube walls, thereby increasing overall PCR efficiency and yield. BSA is typically used at concentrations of approximately 0.8 mg/ml.
Non-ionic Detergents: Detergents like Triton X-100, Tween 20, and NP-40 disrupt hydrophobic interactions and hydrogen bonding between DNA strands, thereby reducing DNA melting temperature [78]. They are generally used at low concentrations (0.1-1%) and require careful optimization to avoid non-specific amplification.
Table 1: Summary of Key PCR Enhancers and Their Applications
| Enhancer | Typical Concentration | Primary Mechanism | Main Applications | Considerations |
|---|---|---|---|---|
| DMSO | 2-10% (5% common) | Reduces DNA secondary structure, lowers Tm | GC-rich templates (>60%), secondary structures | Reduces Taq polymerase activity; balance required |
| Betaine | 0.5-2.5 M (1 M common) | Equalizes DNA melting temperature, reduces secondary structures | GC-rich templates, difficult amplicons | Use betaine monohydrate, not hydrochloride |
| Formamide | 1-5% | Destabilizes DNA double helix, lowers Tm | Reduces non-specific priming, improves efficiency | May compete with dNTPs; optimize concentration |
| TMAC | 15-100 mM | Increases hybridization specificity via charge shielding | Degenerate primers, specific binding | Enhances primer-template stability |
| BSA | 0.8 mg/ml (approx.) | Binds inhibitors, reduces tube adhesion | Reactions with potential inhibitors | Protects polymerase activity |
| Non-ionic Detergents | 0.1-1% | Disrupts hydrophobic DNA interactions | General enhancement, reduces secondary structures | Can cause non-specific amplification at high concentrations |
Experimental Protocols and Implementation
Systematic Optimization Approach
Implementing PCR enhancers requires a methodical strategy to identify the most effective additive and concentration for a specific application. The following workflow provides a structured approach to this optimization process:
Step 1: Establish Baseline Performance Begin by running your PCR reaction without any enhancers using standardized conditions [43]. This baseline provides a reference point for evaluating enhancement effectiveness. Use optimal primer concentrations (typically 0.1-1 μM), appropriate template amounts (5-50 ng genomic DNA), and standardized cycling parameters [9].
Step 2: Test Individual Enhancers Systematically test each enhancer individually across a range of concentrations:
- DMSO: Test at 2%, 5%, and 10% concentrations [78]
- Betaine: Evaluate at 0.5 M, 1 M, and 1.7 M [78]
- Formamide: Assess at 1%, 3%, and 5% [78] Maintain all other reaction components constant to isolate the effect of each additive.
Step 3: Evaluate Results Analyze amplification products using agarose gel electrophoresis, assessing:
- Specificity: Presence of a single, discrete band of the expected size
- Yield: Intensity of the target band compared to baseline
- Non-specific amplification: Presence of smearing or multiple bands
Step 4: Optimize Concentration For the most promising enhancer, refine the concentration through additional testing. For instance, if 5% DMSO shows improvement but some non-specific binding persists, test 3% and 4% concentrations to find the optimal balance [78].
Case Study: GC-Rich Template Amplification
A recent study on amplifying GC-rich nicotinic acetylcholine receptor subunits from invertebrates demonstrates the practical application of this optimization approach [50]. The researchers faced significant challenges with targets having GC contents of 58% and 65%, which resulted in failed amplification under standard conditions.
Optimization Strategy:
- Initial assessment: Established that conventional PCR failed with both targets
- Additive screening: Tested DMSO, betaine, and other enhancers across a concentration gradient
- Polymerase evaluation: Compared performance of different DNA polymerases with enhancers
- Temperature optimization: Adjusted annealing temperatures in combination with additives
- Primer refinement: Modified primer lengths and sequences to complement enhancer effects
Results: The tailored protocol incorporating DMSO and betaine, increased enzyme concentration, and adjusted annealing temperatures successfully amplified both challenging targets [50]. This case highlights the importance of a multipronged optimization approach involving various organic molecules, DNA polymerases, PCR conditions, and primer adjustments to overcome the challenges of amplifying GC-rich sequences.
Table 2: Troubleshooting Guide for PCR Enhancers
| Problem | Possible Cause | Solution | Preventive Measures |
|---|---|---|---|
| No amplification | Enhancer concentration too high | Test lower concentrations or different enhancer | Use concentration gradients; start with recommended ranges |
| Non-specific bands | Reduced stringency with certain enhancers | Increase annealing temperature; try different enhancer | Combine with hot-start polymerase [80] |
| Smearing | Enzyme activity affected by additive | Titrate enzyme concentration; switch enhancer type | Use enhancer-compatible polymerases |
| Inconsistent results | Additive affecting reaction pH | Use purified forms (e.g., betaine monohydrate) | Aliquot additives for consistency |
| Reduced yield | Inhibitory effect of enhancer | Optimize concentration; combine with co-enhancers | Balance template accessibility with enzyme activity |
The Researcher's Toolkit: Essential Materials and Reagents
Successful implementation of PCR enhancers requires access to appropriate laboratory resources. The following table outlines key reagents and their functions in optimizing PCR with enhancers:
Table 3: Essential Research Reagent Solutions for PCR Enhancement
| Reagent/Category | Specific Examples | Function/Purpose | Application Notes |
|---|---|---|---|
| Primary Enhancers | DMSO, Betaine, Formamide | Reduce secondary structures, equalize melting temperatures | Start with single additives before combinations |
| Specialty Polymerases | Taq, Pfu, proofreading blends | Accommodate enhancers while maintaining activity | Some polymerases more tolerant to specific enhancers |
| Buffer Systems | Mg²⁺-free, customized salt | Allow precise control of reaction conditions | Essential when optimizing cofactor concentrations |
| Template Preparation | Gel extraction kits, clean-up columns | Remove inhibitors that interfere with enhancement | Critical for difficult samples (e.g., soil, blood) |
| Quantification Tools | Spectrophotometer, fluorometer | Accurate template quantification | Essential for reproducible enhancement results |
The strategic implementation of PCR enhancers such as DMSO, betaine, and formamide represents a powerful approach to overcoming the challenges associated with amplifying difficult templates. These additives function through distinct biochemical mechanisms to destabilize DNA secondary structures, reduce melting temperatures, and improve amplification specificity—particularly for GC-rich targets that resist conventional PCR conditions.
When incorporated into a systematic PCR setup workflow, enhancers should be considered after optimizing fundamental parameters like primer design and magnesium concentration. The experimental evidence consistently demonstrates that a methodical optimization approach, using concentration gradients and systematic evaluation, yields the most reliable results. As demonstrated in the case studies, combining enhancer optimization with adjustments to polymerase selection and cycling parameters can successfully amplify even the most challenging targets.
For researchers and drug development professionals, mastering the application of PCR enhancers expands the range of accessible genetic targets and improves the reliability of molecular analyses. This technical capability is increasingly valuable as investigations extend to more diverse and complex genetic elements with non-ideal amplification characteristics.
Ensuring Robustness: Method Validation and Comparative Analysis of PCR Technologies
Assay validation is a critical process in scientific research and drug development, ensuring that analytical methods are reliable and fit for their intended purpose. This guide details the core principles of specificity, sensitivity, and reproducibility, framed within the context of polymerase chain reaction (PCR) assay development. PCR serves as a cornerstone technique in molecular biology, and its validation is paramount for generating credible data in both research and clinical diagnostics [2]. A rigorously validated PCR assay guarantees accurate detection of target sequences, minimizes false results, and enables reproducible findings across different instruments and laboratories. This document provides researchers and drug development professionals with a structured framework, complete with detailed protocols and quantitative benchmarks, for establishing these essential validation parameters.
Core Principles of Assay Validation
The validation of any assay, including PCR, rests on three foundational pillars: specificity, sensitivity, and reproducibility. Each parameter addresses a distinct aspect of assay performance and must be empirically demonstrated through controlled experiments.
- Specificity refers to the assay's ability to accurately detect and measure the intended target without cross-reacting with or being influenced by other non-target components in the sample. In PCR, this means the primers must amplify only the target DNA or RNA sequence [81].
- Sensitivity defines the lowest amount of the target that the assay can reliably detect. This is typically established by determining the Limit of Detection (LOD), the minimal concentration at which the target is consistently identified [81].
- Reproducibility measures the assay's precision and reliability under varying conditions. It assesses the consistency of results when the assay is repeated over time, by different operators, using different instruments, or with different reagent lots [82]. It is often quantified using the Coefficient of Variation (CV), which expresses the standard deviation as a percentage of the mean.
Experimental Protocols for Validation
The following sections provide detailed methodologies for experiments designed to establish each key validation parameter.
Establishing Specificity
This protocol verifies that the assay amplifies only the intended target sequence.
- Reagent Preparation: Prepare a master mix containing your chosen DNA polymerase (e.g., Taq DNA polymerase), dNTPs, reaction buffer, and primers targeting your gene of interest [83].
- Sample Setup:
- Test Reactions: Aliquot the master mix into separate PCR tubes and add template DNA from the target organism or sample.
- Specificity Controls: Include control reactions containing genomic DNA from closely related species or strains that are not expected to be amplified.
- Cross-Reactivity Controls: For multiplex assays, run single-plex reactions with each primer set individually against a template mixture to confirm each product is specific [81].
- Non-Template Control (NTC): Include a reaction with nuclease-free water instead of template to check for contamination or primer-dimer formation.
- Thermal Cycling: Run the PCR using optimized cycling conditions (denaturation, annealing, and extension steps) suitable for your primer-template system [83].
- Analysis:
- Gel Electrophoresis: Analyze PCR products by agarose gel electrophoresis followed by ethidium bromide staining to visualize amplified DNA fragments [83]. The target should produce a single band of the expected size, with no bands in the NTC and specificity controls.
- Melt Curve Analysis (for qPCR): For SYBR Green-based real-time PCR, perform melt curve analysis. A single, sharp peak indicates a specific amplification product. Distinct melting temperatures (Tm) can differentiate between species in a multiplex assay [81].
Determining Sensitivity and Limit of Detection (LOD)
This protocol determines the lowest concentration of the target that the assay can reliably detect.
- Standard Curve Preparation: Create a serial dilution of a known quantity of the target DNA (e.g., plasmid DNA or genomic DNA). A 10-fold serial dilution series is standard (e.g., from 10^6 copies/µL down to 1 copy/µL) [81].
- Assay Run: Amplify the entire dilution series using the validated PCR protocol. For qPCR, each dilution is typically run in multiple replicates (e.g., 20 replicates) [81].
- Data Analysis:
- For each dilution, record the proportion of replicates that produced a positive amplification signal.
- The LOD is defined as the lowest concentration at which 95% or 100% of the replicates are positive [81].
- Documentation: Plot the standard curve, showing the quantification cycle (Cq) values against the logarithm of the starting concentration. The assay's efficiency can be calculated from the slope of this curve [84].
Assessing Reproducibility
This protocol evaluates the assay's precision through intra-assay and inter-assay experiments.
- Sample Selection: Select a minimum of two samples with different target concentrations (e.g., low, medium, and high) [82].
- Intra-Assay (Repeatability) Testing:
- Using the same operator, instruments, and reagent lot, run multiple replicates (e.g., triplicates) of each sample in a single PCR run.
- Record the Cq values for each replicate.
- Inter-Assay (Intermediate Precision) Testing:
- Repeat the assay with the same samples on different days (at least two independent runs) and/or with different operators or reagent lots.
- Record the Cq values for each run.
- Data Analysis:
- For both intra- and inter-assay data, calculate the mean Cq, standard deviation (SD), and Coefficient of Variation (CV%) for each sample at each concentration.
- The CV is calculated as (Standard Deviation / Mean) × 100%. A lower CV indicates higher reproducibility [82].
Quantitative Data and Benchmarks
The following tables summarize typical experimental data and performance benchmarks for a validated PCR assay, based on published studies.
Table 1: Representative Sensitivity and Reproducibility Data from a Simian Plasmodium PCR Assay [81]
| Plasmodium Species | LOD (copies/µL) | Mean Tm (°C) | Intra-Assay CV for Cq (%) | Inter-Assay CV for Cq (%) |
|---|---|---|---|---|
| P. knowlesi | 10 | 85.2 | 0.13 - 0.44 | 0.28 - 0.85 |
| P. cynomolgi | 10 | 78.0 | 0.13 - 0.44 | 0.28 - 0.85 |
| P. inui | 10 | 82.5 | 0.13 - 0.44 | 0.28 - 0.85 |
Table 2: Reproducibility of Standardized Competitive RT-PCR (StaRT-PCR) for ACTB Transcript Quantification [82]
| Assigned NT/CT Ratio | Mean Observed NT/CT Ratio | Coefficient of Variation (CV%) |
|---|---|---|
| 0.1 | 0.101 | 15.8% |
| 0.5 | 0.614 | 9.3% |
| 1.0 | 1.01 | 3.8% |
| 5.0 | 4.68 | 13.4% |
| 10.0 | 9.23 | 8.7% |
Table 3: Key Research Reagent Solutions for PCR Assay Validation
| Reagent / Material | Function / Role in Validation |
|---|---|
| Taq DNA Polymerase | Thermostable enzyme that synthesizes new DNA strands; its quality and consistency are critical for robust amplification [83] [2]. |
| Species-Specific Primers | Short DNA sequences designed to bind exclusively to the target gene; their design is the primary determinant of assay specificity [81]. |
| Target Template (Plasmid DNA) | A known quantity of the target sequence, used for creating standard curves to determine sensitivity (LOD) and efficiency [81]. |
| Non-Target Genomic DNA | DNA from related species or hosts; used as negative controls to empirically demonstrate assay specificity and rule out cross-reactivity [81]. |
| SYBR Green Master Mix | A fluorescent dye that binds double-stranded DNA, enabling real-time quantification and melt curve analysis for specificity confirmation [81]. |
Workflow and Relationship Diagrams
Diagram 1: Assay Validation Workflow
Diagram 2: Specificity in PCR Assays
The rigorous validation of specificity, sensitivity, and reproducibility is not merely a procedural step but a fundamental requirement for generating trustworthy scientific and diagnostic data. The protocols and benchmarks outlined in this guide provide a clear pathway for researchers to establish that their PCR assays are specific for the intended target, capable of detecting it at clinically or biologically relevant levels, and robust enough to deliver consistent results over time and across laboratory settings. Adherence to these principles of assay validation forms the bedrock of data integrity, enabling advancements in research, ensuring the safety and efficacy of therapeutics in drug development, and providing reliable diagnostics in clinical practice.
In the rigorous world of pharmaceutical development and clinical research, the validity of experimental results is paramount. For laboratories, particularly those developing and implementing Polymerase Chain Reaction (PCR) methodologies, operating within a structured validation framework is not merely a best practice but often a regulatory necessity. This guide explores two critical components of this framework: the international management system standards set by the International Organization for Standardization (ISO) and the specific principles of Single-Laboratory Validation (SLV). ISO standards provide the overarching quality management system within which laboratories operate, ensuring consistency, reliability, and international recognition of their processes [85]. Concurrently, SLV offers a practical pathway for an individual laboratory to validate its own analytical methods, such as a novel PCR assay, when full inter-laboratory collaboration is not feasible [86]. Within the context of a broader thesis on establishing a step-by-step PCR research protocol, understanding these guidelines ensures that the resulting data is not only scientifically sound but also meets the stringent requirements of regulatory bodies and the expectations of the scientific community. This document provides an in-depth technical overview of these requirements, with a specific focus on their application in molecular biology and drug development settings.
ISO Management System Standards and Auditing Guidelines
The Role of Management Systems in the Laboratory
A management system is the framework of policies, processes, and procedures that an organization uses to ensure it can fulfill all tasks required to achieve its objectives [85]. In a research or quality control laboratory, these objectives include the generation of accurate, reliable, and reproducible data. ISO management system standards (MSS) are designed to help organizations improve their performance by specifying repeatable steps that they can implement to achieve their goals. The benefits are clear: more efficient use of resources, improved risk management, and an increased capability to deliver consistent and improved services and products [85]. For a laboratory setting, key ISO standards include ISO 9001 for quality management, ISO/IEC 17025 for testing and calibration laboratories, and ISO 15189 for medical laboratories. These standards are built on the principle of the Plan-Do-Check-Act cycle, fostering a culture of continuous improvement—a critical concept in research and development.
ISO 19011: The Auditing Standard
A vital component of any management system is the audit, which enables an organization to verify that its achievements meet its objectives and conform to the standard [85]. ISO 19011 provides guidelines for auditing management systems and is a critical tool for laboratories. It encompasses the principles of auditing, how to manage an audit program, and the conduct of internal or external audits [87] [88]. It also provides guidance on the evaluation of the competence of the individuals involved in the audit process. The 2018 version of the standard integrated a risk-based approach throughout its guidance on managing audit programs [88]. This is particularly relevant for laboratories, where auditing an process like PCR setup would involve verifying that all steps—from reagent qualification to thermal cycling parameters—are controlled and documented, thereby mitigating the risk of invalid results.
The Evolving Landscape: ISO 19011:2025
The field of auditing is dynamic, and the standard is evolving to keep pace. A new revision, ISO 19011:2025, is currently in development and is slated for release in 2025 [89]. This update is expected to refine auditing practices to be more flexible and efficient, with key changes including:
- Expanded Guidance on Remote Auditing: The new standard will incorporate guidance from ISO/IEC TS 17012, legitimizing remote audits as a standard practice. It will address determining feasibility, selecting technology, and mitigating risks related to data security and communication [89].
- Emphasis on Combined and Integrated Audits: It will encourage the simultaneous auditing of multiple management systems (e.g., Quality ISO 9001 and Environmental ISO 14001), which is efficient for laboratories that operate integrated systems [89].
- Updated Annex on Virtual Locations: Annex A will be expanded to provide practical advice on auditing virtual environments and conducting remote evidence collection, a crucial adaptation for modern, distributed research teams [89].
For a laboratory professional, these updates mean that internal audit programs and auditor training must now incorporate digital literacy and the ability to assess processes, like a complex PCR workflow, through hybrid methods.
Single-Laboratory Validation (SLV) Fundamentals
The Principle of SLV
Single-Laboratory Validation (SLV) is a process where a laboratory undertakes to validate an analytical method using its own internal resources, without the immediate need for a full multi-laboratory collaborative trial [90]. This approach is often the first step in the method lifecycle, especially for novel assays or when a laboratory adopts a standard method for the first time. The SLV approach is optimal for determining the Measurement Uncertainty (MU) of an assay because it acts as an assessment of the entire analytical system, incorporating all available information on the final result. This comprehensive view reduces the likelihood of underestimating the uncertainty in the final budget [90]. In the context of PCR research, an SLV would be conducted to prove that a new primer set or a modified amplification protocol is fit for its intended purpose before it is used for critical patient diagnostics or regulatory submissions.
Core Validation Parameters in SLV
The SLV process systematically assesses key performance characteristics of an analytical method. For a quantitative PCR (qPCR) assay, this involves evaluating the following parameters, which form the foundation of the validation:
- Accuracy and Bias: This measures the closeness of agreement between the test result and an accepted reference value. In a laboratory, bias can be assessed through methods such as analyzing certified reference materials (CRMs), participating in external quality assessment (EQA) schemes, or by comparing results to a reference method [90].
- Precision (Repeatability and Reproducibility): Precision evaluates the closeness of agreement between independent test results obtained under stipulated conditions.
- Repeatability expresses precision under the same operating conditions over a short interval of time (e.g., the same operator, same equipment, same day).
- Reproducibility (within-lab) expresses precision under changed conditions over a longer period (e.g., different operators, different days, different reagent batches) [90]. This is typically derived from Internal Quality Control (IQC) data.
- Measurement Uncertainty (MU): MU is a quantitative parameter that characterizes the dispersion of the values that could reasonably be attributed to the measurand. In SLV, MU is calculated by combining the uncertainties from both random (precision) and systematic (bias) sources [90].
Implementing SLV for a PCR Method: A Detailed Protocol
This section provides a step-by-step experimental protocol for validating a quantitative PCR (qPCR) assay using the SLV approach. The process is designed to capture all essential performance characteristics.
SLV Experimental Workflow for qPCR
The following diagram illustrates the logical workflow and key decision points for conducting a Single-Laboratory Validation of a qPCR method.
Step-by-Step Procedural Details
Define the Method Scope and Performance Criteria: Before any experiments begin, explicitly define the analyte, the matrix (e.g., blood, tissue, cell culture), and the required performance standards. For a drug development assay, this may be based on regulatory guidance. Establish acceptance criteria for precision (e.g., CV < 10%), accuracy (e.g., bias within ±15%), and the target measurement uncertainty.
Plan the Validation Experiments:
- Precision: Prepare a panel of samples at multiple concentrations (e.g., low, medium, high) covering the assay's dynamic range. Analyze each level in multiple replicates (e.g., n=5) per run. Repeat this over at least three different days, using different reagent lots and, if possible, different operators to capture within-laboratory reproducibility [90].
- Accuracy/Bias: If available, acquire Certified Reference Materials (CRMs) for the target analyte and analyze them repeatedly. Alternatively, participate in a formal EQA scheme or conduct a method comparison against a reference method. The bias is calculated as:
Bias = (Lab Result - Reference Value)[90]. - Linearity and Range: Serially dilute a high-concentration sample to create a standard curve. Analyze these dilutions to determine the range over which the method provides results that are directly proportional to the analyte concentration. The correlation coefficient (R²) is typically used, with >0.99 being a common target for qPCR.
- Limit of Detection (LOD) and Limit of Quantification (LOQ): Analyze a series of low-concentration samples (including a blank). The LOD is often determined as the concentration 3 standard deviations above the blank signal. The LOQ is the lowest concentration that can be quantified with acceptable precision and accuracy, often set at 10 standard deviations above the blank.
Data Analysis and Calculation of Key Metrics:
- Precision (Random Uncertainty): For each QC level, calculate the Standard Deviation (SD) or Coefficient of Variation (CV). Combine these across levels using the root sum of squares:
Random Uncertainty = √(SD₁² + SD₂² + ...)[90]. - Bias (Systematic Uncertainty): Using EQA data, calculate the Root Mean Square (RMS) of the bias from the consensus result over several surveys:
RMS = √( Σ(Bias²) / n ). The uncertainty of the consensus value (UCref) is also calculated. The overall systematic uncertainty is then:Systematic Uncertainty = √(RMS² + UCref²)[90]. - Combined Measurement Uncertainty: Combine the random and systematic components into a single value:
Combined Uncertainty (u) = √(Random Uncertainty² + Systematic Uncertainty²)[90]. The expanded uncertainty (U) is typically reported as 2 × u, representing a 95% confidence interval.
- Precision (Random Uncertainty): For each QC level, calculate the Standard Deviation (SD) or Coefficient of Variation (CV). Combine these across levels using the root sum of squares:
The table below summarizes the key performance parameters and their typical targets for a validated qPCR assay, based on data collected from the above protocol.
Table 1: Key Performance Parameters for qPCR SLV
| Performance Parameter | Experimental Approach | Calculation Method | Typical Acceptance Criteria (Example) |
|---|---|---|---|
| Precision (Repeatability) | Multiple replicates of same sample within a run | Coefficient of Variation (CV) | CV < 5% |
| Precision (Within-Lab Reproducibility) | Multiple replicates over different days/operators/lots | CV from pooled data | CV < 10% |
| Accuracy/Bias | Analysis of Certified Reference Materials (CRM) or EQA samples | (Mean Measured Value - Reference Value) / Reference Value × 100% | Bias within ±15% |
| Linearity | Analysis of serial dilutions | Coefficient of Determination (R²) from linear regression | R² > 0.990 |
| Limit of Detection (LOD) | Analysis of low-level samples and blanks | Mean(blank) + 3 × SD(blank) | Sufficient to detect target in relevant matrix |
| Measurement Uncertainty | Combination of precision and bias data | u = √(random uncertainty² + systematic uncertainty²) |
Meets fitness-for-purpose requirement |
Integrating ISO 19011 Auditing with SLV Processes
The relationship between the high-level management system guided by ISO 19011 and the technical process of SLV is synergistic. A laboratory's quality management system (QMS), audited against ISO standards, provides the controlled environment in which a valid SLV can be performed. The following diagram illustrates how these two components interact within a laboratory's operational framework.
The Integration in Practice
An internal audit conducted according to ISO 19011 guidelines would examine the entire SLV process. An auditor would check:
- Documented Procedures: Are there controlled documents that describe how to plan, execute, and report an SLV?
- Training Records: Are the scientists performing the SLV competent and trained on both the technical method and the validation protocol?
- Control of Records: Is the raw data from the precision and accuracy studies retained and easily retrievable?
- Management Review: Has the outcome of the SLV, including the final measurement uncertainty, been reviewed and approved by management as part of the QMS?
- Corrective Actions: If the SLV results did not meet pre-defined acceptance criteria, was a root cause investigation performed and documented?
This integrated approach ensures that the SLV is not a standalone technical exercise but a core, governed activity within the laboratory's quality system. The upcoming 2025 revision of ISO 19011, with its emphasis on remote techniques and combined audits, will further streamline this integration for modern, digitally-enabled laboratories [89].
The Scientist's Toolkit: Research Reagent Solutions for PCR Validation
The successful validation of a PCR assay is dependent on the quality and consistency of the core reagents used. The following table details essential materials and their critical functions in the context of developing and validating a robust PCR method.
Table 2: Essential Research Reagent Solutions for PCR Assay Validation
| Reagent/Material | Function | Key Considerations for Validation |
|---|---|---|
| Thermostable DNA Polymerase | Enzyme that catalyzes the synthesis of new DNA strands. | Processivity, fidelity (low error rate), and tolerance to inhibitors are key. Batch-to-batch consistency is critical for reproducibility. |
| Primers (Oligonucleotides) | Short, single-stranded DNA sequences that define the start and end of the amplified target. | Specificity, purity (HPLC-purified), and absence of secondary structures. Sequence must be verified for the intended target. |
| dNTPs (Deoxynucleotide Triphosphates) | The building blocks (A, T, C, G) for new DNA synthesis. | Purity and accurate concentration. Imbalanced dNTP concentrations can reduce polymerase fidelity and affect quantification (qPCR). |
| Probe (for qPCR) | Sequence-specific oligonucleotide with a fluorophore and quencher for real-time detection. | Specificity, quenching efficiency, and spectral compatibility with the detection system. Must be validated alongside primers. |
| Buffer Components (MgCl₂, Salts) | Provides the optimal chemical environment for the PCR reaction. | MgCl₂ concentration is a critical variable that can dramatically affect primer specificity, product yield, and assay reproducibility. |
| Internal Control (IC) | A non-target sequence added to or co-amplified with the sample. | Distinguishes between true target-negative results and PCR inhibition. Must be validated to not compete excessively with the primary target. |
| Certified Reference Materials (CRMs) | A material with a defined and traceable analyte concentration. | Serves as the gold standard for determining method accuracy and bias during SLV. Essential for metrological traceability. |
Navigating the landscape of validation guidelines is a fundamental requirement for any research or drug development professional aiming to generate credible and regulatory-compliant data. The integration of a robust Quality Management System, auditable against ISO 19011, with the rigorous technical process of Single-Laboratory Validation creates a powerful framework for assurance. For scientists establishing a step-by-step PCR research project, this means that from the initial primer design to the final quantification result, every stage can be performed under a system that controls variability, quantifies uncertainty, and is subject to continuous improvement through audit and review. As the standards evolve, particularly with the upcoming ISO 19011:2025 emphasizing remote auditing and integrated systems, laboratories must proactively adapt their practices and training. By adhering to these structured guidelines, researchers can ensure their PCR methods are not only scientifically valid but also stand up to the scrutiny of regulators and the global scientific community, thereby accelerating the translation of research into reliable diagnostics and therapeutics.
The rapid and accurate detection of specific viral variants is a cornerstone of modern molecular diagnostics, influencing critical areas from patient treatment to public health surveillance. Multiplex Reverse Transcription Polymerase Chain Reaction (RT-PCR) assays represent a significant advancement in this field, allowing for the simultaneous detection and differentiation of multiple viral targets in a single reaction [81]. This case study provides an in-depth technical review of the validation process for a hypothetical multiplex RT-PCR assay designed for viral variant detection. The process described herein is framed within a broader research thesis on establishing robust PCR protocols, underscoring the importance of meticulous validation to ensure that an assay is not only technically sound but also clinically reliable. The guidelines followed are aligned with established standards, including the MIQE (Minimum Information for Publication of Quantitative Real-Time PCR Experiments) guidelines and regulatory frameworks such as CLIA and ISO 15189, which are critical for assay credibility and acceptance [54].
Validation Framework and Key Parameters
Before any experimental work begins, a detailed validation plan must be established. This plan defines the purpose of the assay, its intended use, and the specific performance criteria it must meet [54]. The core parameters of assay validation, which form the basis of this case study, are summarized in the table below.
Table 1: Key Analytical Performance Parameters and Their Validation Targets
| Performance Parameter | Validation Target | Experimental Approach |
|---|---|---|
| Analytical Sensitivity (LOD) | Detect ≤ 10 copies/µL with 95% confidence [81] | Probe 10-fold serial dilutions of standard material in ≥20 replicates [81] |
| Analytical Specificity | No cross-reactivity with co-circulating viral strains or host genome | Test against genomic DNA from related viruses and host [81] |
| Precision and Reproducibility | Intra-assay CV < 1.5% for Ct; Inter-assay CV < 2% for Ct [91] [81] | Run replicates across multiple days, operators, and instruments [91] |
| Amplification Efficiency | 90–110% (R² > 0.990) [92] | Generate a standard curve from serial dilutions; analyze slope |
| Dynamic Range | A linear range of at least 5 log concentrations [91] | Test a wide range of known concentrations to identify the linear region |
The following diagram illustrates the overarching workflow of the assay validation process, from initial planning through to ongoing quality assurance.
Experimental Design and Workflow
Assay Development and Optimization
The foundation of a robust multiplex assay lies in careful primer and probe design. For our viral variant assay, primers and probes were targeted to regions of the viral genome that are both conserved enough for reliable detection and variable enough to enable differentiation between variants [81]. Bioinformatics tools are used to align sequences of all target variants and related non-target viruses to ensure specificity. The assay employs a one-step RT-PCR protocol, combining reverse transcription and amplification in a single tube to streamline the workflow and reduce contamination risk. Key reaction components are optimized via a factorial experimental design, varying concentrations of MgCl₂, primers, and probes, as well as testing different annealing temperatures to find conditions that yield high efficiency and distinct detection signals for all targets [54].
Sample Preparation and Controls
Proper sample preparation and the inclusion of comprehensive controls are non-negotiable for a reliable clinical assay. The validation process uses well-characterized archived clinical samples or synthetic RNA controls spiked into an appropriate matrix, such as negative respiratory swab medium [54]. The following controls are included in every run:
- Negative Template Control (NTC): Contains nuclease-free water instead of template to monitor for contamination.
- Positive Controls: Contains known, quantified template for each viral target.
- Internal Control: A non-competitive exogenous RNA sequence spiked into every sample during lysis to monitor nucleic acid extraction efficiency and identify PCR inhibition [54].
The workflow for processing samples and controls is outlined below.
Performance Data and Analysis
Sensitivity, Specificity, and Efficiency
The validated multiplex RT-PCR assay demonstrated a Limit of Detection (LOD) of 10 copies/µL for each viral target, determined by testing 20 replicates of serial dilutions and confirming 95% detection at this level [81]. The standard curves generated for each target were linear over a 5-log dynamic range, with amplification efficiencies between 90% and 105% (R² > 0.990), well within the acceptable performance range [91] [92]. The assay showed 100% analytical specificity, with no cross-reactivity observed when tested against a panel of other common respiratory viruses and human genomic DNA [81].
Table 2: Assay Performance Standards and Acceptance Criteria
| Performance Characteristic | Result | Acceptance Criterion |
|---|---|---|
| Limit of Detection (LOD) | 10 copies/µL | ≤ 20 copies/µL |
| Amplification Efficiency | 90–105% | 90–110% |
| Dynamic Range | 5 logs | ≥ 4 logs |
| Intra-assay Precision (CV of Ct) | 0.13% – 0.44% | < 1.5% |
| Inter-assay Precision (CV of Ct) | 0.28% – 0.85% | < 2.0% |
| Analytical Specificity | No cross-reactivity | 100% specificity against panel |
Precision and Reproducibility
Precision, measuring the random variation in repeated measurements, is critical for an assay's reliability [91]. Both intra-assay (within-run) and inter-assay (between-run) precision were evaluated by testing replicates of quality control samples at different concentrations. The results, quantified by the Coefficient of Variation (CV) of the Cycle threshold (Ct) values, are presented in Table 2. The low CVs confirm that the assay produces highly consistent and reproducible results, which is essential for confidently discriminating true biological changes, such as small fold differences in viral load [91].
Data Analysis and Interpretation
For quantitative analysis, the double delta Ct (2^–ΔΔCt) method is a robust approach, provided that the amplification efficiencies of the target and reference genes are approximately equal and close to 100% [92]. The steps for this analysis are:
- Calculate ΔCt: For each sample, subtract the Ct of the internal reference gene (e.g., RNase P) from the Ct of the viral target (ΔCt = Cttarget – Ctreference).
- Calculate ΔΔCt: Subtract the average ΔCt of the calibrator sample (e.g., a negative control or a low-positive standard) from the ΔCt of the test sample (ΔΔCt = ΔCtsample – ΔCtcalibrator).
- Calculate Fold Change: The expression fold change is given by 2^–ΔΔCt [92].
For qualitative detection (positive/negative), a sample is called positive if the amplification curve crosses the threshold within a pre-defined cycle limit (e.g., Ct < 40) and exhibits the expected melt curve profile or probe fluorescence signature for that variant [81].
Essential Research Reagents and Materials
The successful execution of a validated multiplex RT-PCR assay depends on a suite of high-quality reagents and instruments. The following table details the key components used in this study.
Table 3: Research Reagent Solutions and Essential Materials
| Item | Function / Rationale | Example / Note |
|---|---|---|
| Sequence-Specific Primers & Probes | Targets the conserved/variable regions of the viral genome for specific amplification and differentiation [81]. | Designed using bioinformatics tools; HPLC-purified. |
| One-Step RT-PCR Master Mix | Contains reverse transcriptase, hot-start DNA polymerase, dNTPs, and optimized buffer in a single solution. | Includes MgCl₂ at a pre-optimized concentration. |
| Internal Control Template | Exogenous RNA sequence spiked into every sample to monitor extraction efficiency and rule out PCR inhibition [54]. | A non-competitive MS2 phage RNA is commonly used. |
| Nuclease-Free Water | Serves as a diluent and is used for the Negative Template Control (NTC). | Must be certified free of RNases and DNases. |
| Quantified RNA Standards | Serially diluted to generate standard curves for determining copy number and assessing amplification efficiency [81]. | Used for LOD determination and absolute quantification. |
| Real-Time PCR Instrument | Platform for amplification and real-time fluorescence detection. | Must have multiplexing capability and melt curve analysis. |
This case study has detailed the comprehensive validation of a multiplex RT-PCR assay for viral variant detection, underscoring that a robust assay is built on a foundation of rigorous experimental design and systematic evaluation of performance parameters. The process—from defining the clinical need and optimizing reagents to conclusively demonstrating sensitivity, specificity, and precision—provides a template for developing reliable molecular diagnostics. Adherence to these principles ensures that the assay will generate accurate, reproducible, and clinically meaningful data, ultimately contributing to effective patient management and public health responses. As the field evolves, the integration of new technologies and continuous monitoring of circulating strains will be necessary to maintain the validated status of the assay [54].
In modern molecular biology and diagnostics, the ability to amplify and analyze genetic material is fundamental. Among the most critical tools for this purpose are Polymerase Chain Reaction (PCR) and its advanced derivatives: quantitative PCR (qPCR) and Reverse Transcription PCR (RT-PCR). While these techniques share a common foundation—amplifying nucleic acid sequences—they differ significantly in their mechanisms, outputs, and optimal applications. For researchers, scientists, and drug development professionals, selecting the appropriate method is crucial for experimental success, impacting data quality, cost-efficiency, and procedural workflow. This guide provides an in-depth comparison of these core techniques, complete with standardized protocols and practical selection criteria, to inform the setup of precise and reliable PCR-based research.
Understanding the Core Techniques
PCR (Polymerase Chain Reaction)
PCR, or conventional PCR, is a foundational laboratory technique used to exponentially amplify a specific segment of DNA. The process relies on thermal cycling, which involves repeated heating and cooling to facilitate three core steps: denaturation of double-stranded DNA, annealing of primers to the single-stranded templates, and extension of the primers by a heat-stable DNA polymerase [93] [36]. The result is the creation of millions of copies of the target DNA sequence from a minimal starting amount. A key characteristic of conventional PCR is that analysis of the amplified product is performed only at the end of the process (end-point detection), typically via gel electrophoresis [94]. This method provides a qualitative or semi-quantitative answer, confirming the presence or absence of the target but not its initial quantity [93].
qPCR (Quantitative PCR / Real-Time PCR)
qPCR, also known as Real-Time PCR, builds upon conventional PCR by enabling the detection and quantification of DNA amplification as it occurs in real-time. This is achieved by incorporating fluorescent dyes or probes (e.g., SYBR Green or TaqMan probes) into the reaction. The fluorescence signal increases proportionally to the amount of amplified DNA and is measured during each cycle [94] [93]. This allows for precise quantification of the initial DNA target. The key output is the Cycle threshold (Ct) value, which is the cycle number at which the fluorescence crosses a predetermined threshold. A lower Ct value indicates a higher starting amount of the target [95]. qPCR eliminates the need for post-amplification gel electrophoresis, offering higher throughput, greater precision, and a reduced risk of contamination [94].
RT-PCR (Reverse Transcription PCR)
RT-PCR is a specialized variant designed to detect and amplify RNA. The process begins with a reverse transcription step, where the enzyme reverse transcriptase converts RNA into complementary DNA (cDNA) [96] [93]. This cDNA then serves as the template for a standard PCR amplification. It is critical to distinguish RT-PCR (Reverse Transcription PCR) from RT-qPCR. The former is typically a qualitative or semi-quantitative method used to confirm the presence of RNA (e.g., from gene expression or RNA viruses), with results visualized on a gel [97]. When combined with quantitative detection, the technique is more accurately called RT-qPCR (Reverse Transcription Quantitative PCR), which is used for absolute or relative quantification of RNA molecules, such as in gene expression analysis or viral load measurement [96] [93].
Table: Core Characteristics and Applications of PCR, qPCR, and RT-PCR
| Feature | PCR (Conventional) | qPCR / Real-Time PCR | RT-PCR |
|---|---|---|---|
| Full Name | Polymerase Chain Reaction | Quantitative PCR / Real-Time PCR | Reverse Transcription PCR |
| Nucleic Acid Target | DNA | DNA | RNA (converted to cDNA) |
| Detection Method | End-point (gel electrophoresis) | Real-time (fluorescence) | End-point (gel electrophoresis) or Real-time (if RT-qPCR) |
| Data Output | Qualitative / Semi-Quantitative | Fully Quantitative | Qualitative (Quantitative if RT-qPCR) |
| Primary Applications | Cloning, genotyping, basic detection [94] | Gene expression, pathogen quantification, viral load [94] | Gene expression studies, detection of RNA viruses [93] |
| Key Output Metric | Band size/intensity on a gel | Cycle threshold (Ct) value [95] | Band presence/size (or Ct value for RT-qPCR) |
Workflow and Signaling Pathways
The fundamental workflows for standard PCR and its quantitative counterpart share similar amplification steps but differ critically in how results are detected and interpreted. The following diagram illustrates the core process and detection pathways for both techniques.
Diagram: PCR/qPCR Amplification and Detection Pathways
For experiments requiring RNA analysis, the workflow must first include a reverse transcription step. The methodology for this can be consolidated into a single tube or separated into two distinct reactions, as shown in the following workflow.
Diagram: 1-Step vs. 2-Step RT-PCR/qPCR Workflows
Experimental Protocols
Standard PCR Protocol
The following is a standard protocol for a conventional PCR reaction [98] [36].
Reagent Setup
Assemble the reaction components in a thin-walled 0.2 mL PCR tube on ice. The following table details a typical 50 µL reaction. For multiple reactions, a master mix is recommended to minimize pipetting error and ensure consistency [36].
Table: Standard PCR Reaction Mix (50 µL total volume)
| Component | Final Concentration/Amount | Volume for 1 Reaction (µL) | Function |
|---|---|---|---|
| Sterile dH₂O | n/a | Variable (to 50 µL) | Solvent to achieve final volume |
| 10X Taq Buffer (with MgCl₂) | 1X | 5.0 | Provides optimal chemical environment |
| dNTP Mix | 200 µM each | 1.0 | Building blocks for new DNA strands |
| Forward Primer | 0.1–0.5 µM | 2.5 | Binds to 3' end of the anti-sense strand |
| Reverse Primer | 0.1–0.5 µM | 2.5 | Binds to 3' end of the sense strand |
| Template DNA | 10–500 ng | 2.0 | Contains the target sequence to be amplified |
| Taq DNA Polymerase | 0.05 units/µL | 0.2 | Heat-stable enzyme that synthesizes new DNA |
| Total Volume | 50 µL |
Note: If using a thermal cycler without a heated lid, add a 50 µL overlay of mineral oil to prevent evaporation [98].
Thermal Cycling Parameters
Program the thermal cycler with the following steps [36] [10]:
- Initial Denaturation: 94–95°C for 2–5 minutes. (1 cycle)
- Amplification (Repeat 25–35 cycles):
- Denaturation: 94°C for 30 seconds.
- Annealing: 45–60 seconds. Set temperature 5°C below the primer's Tm.
- Extension: 72°C for 1 minute per kilobase of expected product.
- Final Extension: 72°C for 5–10 minutes. (1 cycle)
- Hold: 4–10°C. (indefinitely)
Post-Amplification Analysis
Analyze the PCR product by agarose gel electrophoresis followed by ethidium bromide (or a safer alternative) staining to visualize the amplified DNA band and confirm its size [98] [36].
qPCR Protocol and Data Analysis
The qPCR protocol is similar to standard PCR but includes fluorescent reagents. The core differences lie in the data analysis and the parameters used for quantification.
Quantification Mathematics
In qPCR, the Cycle threshold (Ct) is inversely correlated to the starting quantity of the target. To generate a standard curve, a serial dilution of a sample with a known concentration (standard) is run alongside the test samples. The Ct values of the standard are plotted against the logarithm of their concentrations [95].
The resulting linear curve is described by the equation: y = mx + b Where:
- y = Ct value
- m = Slope of the curve
- x = log₁₀(concentration)
- b = y-intercept
The concentration of an unknown sample (x) can be calculated from its Ct value (y) by rearranging the equation: x = (y - b)/m [95].
Assay Quality Assessment
Two key parameters define a robust qPCR assay [95]:
- Efficiency (E): Calculated from the slope (m) of the standard curve using the formula: E = [(10⁻¹/ˢˡᵒᵖᵉ) - 1] × 100. Ideal efficiency is 90–110%, corresponding to a slope between -3.6 and -3.3.
- Linearity (R²): The coefficient of determination indicates how well the data fits the regression line. An R² value above 0.99 is considered ideal.
The Scientist's Toolkit: Research Reagent Solutions
Successful PCR experimentation relies on high-quality reagents and a clear understanding of their functions. The following table details essential materials.
Table: Essential Reagents and Materials for PCR Setup
| Reagent / Material | Function | Key Considerations |
|---|---|---|
| Taq DNA Polymerase | Heat-stable enzyme that synthesizes new DNA strands by adding dNTPs [36]. | Proofreading enzymes (e.g., Pfu) offer higher fidelity for cloning [36]. |
| Primers | Short, single-stranded DNA sequences that define the start and end of the target region to be amplified [36]. | Primers must be specific and have matched melting temperatures (Tm) [36]. |
| dNTPs | Deoxynucleoside triphosphates (dATP, dCTP, dGTP, dTTP); the building blocks for DNA synthesis [36]. | Used at equal molar concentrations (e.g., 200 µM each) to prevent polymerase errors [10]. |
| Reaction Buffer | Provides the optimal pH and salt conditions (including Mg²⁺) for Taq polymerase activity [36]. | MgCl₂ concentration is critical and may require optimization; it acts as a cofactor for the polymerase [36]. |
| Fluorescent Probes/Dyes (for qPCR) | Reporters that generate a signal proportional to the amount of amplified DNA [94]. | SYBR Green is cost-effective but binds any dsDNA. TaqMan Probes are highly specific but more expensive [97]. |
| Reverse Transcriptase (for RT-PCR) | Enzyme that synthesizes complementary DNA (cDNA) from an RNA template [96]. | Highly processive enzymes are recommended for long transcripts or RNA with complex secondary structures [96]. |
Comparative Analysis and Selection Guide
Choosing the right technique depends on the experimental question, required data output, and available resources. The following table provides a direct comparison to guide this decision.
Table: Technique Selection Guide Based on Application and Resources
| Criterion | PCR | qPCR | RT-PCR (Qualitative) | RT-qPCR (Quantitative) |
|---|---|---|---|---|
| Best For | Basic detection, cloning, genotyping, educational use [94] | Quantifying DNA, gene expression (DNA level), viral load (DNA viruses) [94] | Confirming RNA presence, detecting RNA viruses [93] | Quantifying RNA, gene expression analysis, viral load (RNA viruses) [93] |
| Quantification | No | Yes | No | Yes |
| Throughput | Low to Moderate | High | Low to Moderate | High |
| Speed of Analysis | Slower (requires gel electrophoresis) | Faster (real-time, automated detection) [94] | Slower (requires gel electrophoresis) | Faster (real-time, automated detection) |
| Cost | Lower equipment and consumable costs [94] | Higher equipment cost; ongoing reagent expenses [94] [93] | Moderate (additional reverse transcription reagents) [93] | High (combines costs of RT and qPCR) [93] |
| Sensitivity & Precision | Moderate | High sensitivity and precision [93] | Moderate | High sensitivity and precision [93] |
| Ease of Use | Simple protocols and basic equipment [93] | Requires specialized equipment and technical knowledge [93] | More complex than PCR due to extra step [93] | Most complex; combines challenges of RT and qPCR [93] |
The selection of an appropriate amplification technique—PCR, qPCR, or RT-PCR—is a foundational decision that directly determines the validity and quality of experimental data in molecular biology and drug development. Conventional PCR remains a powerful, cost-effective tool for simple detection and cloning. In contrast, qPCR is indispensable for applications demanding precise quantification, such as gene expression studies and pathogen load monitoring. When the target of interest is RNA, RT-PCR or its quantitative version, RT-qPCR, becomes essential. By understanding the principles, workflows, and comparative strengths outlined in this guide, researchers can make an informed choice, ensuring their experimental design is robust, efficient, and aligned with their scientific objectives.
The field of molecular diagnostics has evolved significantly beyond conventional Polymerase Chain Reaction (PCR), with digital PCR (dPCR) and isothermal amplification methods emerging as powerful third-generation technologies. These advanced techniques enable precise molecular quantification without standard curves and facilitate rapid detection in resource-limited settings, respectively. Digital PCR, through partitioning samples into thousands of individual reactions, allows absolute quantification of nucleic acids with single-molecule sensitivity [99]. Isothermal amplification techniques, which operate at a constant temperature, eliminate the need for thermal cyclers and provide rapid results crucial for point-of-care testing (POCT) [100]. The integration of these technologies with artificial intelligence, microfluidics, and novel biosensing platforms is revolutionizing molecular diagnostics, enabling applications from liquid biopsy in oncology to rapid pathogen detection in public health [101].
This guide explores the fundamental principles, experimental methodologies, and applications of dPCR and isothermal amplification, providing researchers and drug development professionals with the technical foundation to implement these technologies in their workflows. The content is framed within the broader context of PCR reaction setup, building upon the foundational knowledge of conventional PCR steps while highlighting the transformative capabilities of these advanced methods.
Digital PCR: Principles and Applications
Fundamental Principles and Historical Context
Digital PCR represents the third generation of PCR technology, following conventional PCR and real-time quantitative PCR (qPCR) [99]. The fundamental principle involves partitioning a PCR mixture into a large number of parallel reactions, typically thousands to millions of compartments, so that each partition contains either zero, one, or a few nucleic acid targets according to a Poisson distribution [99]. Following PCR amplification, the fraction of positive partitions is determined through end-point measurement, enabling computation of the absolute target concentration without requiring standard curves [99].
The conceptual foundation for dPCR was established in 1992 when Morley and Sykes combined limiting dilution PCR with Poisson statistics to isolate, detect, and quantify single nucleic acid molecules [99]. The term "digital PCR" was coined in 1999 by Bert Vogelstein and collaborators, who developed a workflow using limiting dilution on 96-well plates combined with fluorescence readout to detect RAS oncogene mutations in colorectal cancer patients [99]. Subsequent technological advancements, particularly in microfabrication and microfluidics, have enabled the commercial dPCR platforms available today.
Comparative Analysis: dPCR vs. qPCR
Table 1: Performance Comparison Between Digital PCR and Quantitative PCR
| Parameter | Digital PCR (dPCR) | Quantitative PCR (qPCR) |
|---|---|---|
| Quantification Method | Absolute quantification using Poisson statistics | Relative quantification requiring standard curves |
| Sensitivity | Higher sensitivity for rare variants and low-abundance targets [102] | Lower sensitivity compared to dPCR |
| Precision | Superior accuracy and consistency, particularly for medium viral loads [102] | More variable results, especially with inhibitors |
| Dynamic Range | Constrained by partition number; may require dilution for high-concentration targets [103] | Broader dynamic range without sample partitioning |
| Throughput | High throughput with automated systems | Established high-throughput capabilities |
| Cost | Higher equipment and consumable costs [102] | Lower cost per reaction |
| Resistance to Inhibitors | More tolerant to PCR inhibitors due to partitioning | Susceptible to inhibition affecting amplification efficiency |
| Applications | Rare mutation detection, liquid biopsy, copy number variation, pathogen detection [99] | Gene expression analysis, routine pathogen detection |
dPCR Partitioning Methods and Platforms
Two major partitioning methods have emerged in dPCR: water-in-oil droplet emulsification and microchambers [99]. Droplet digital PCR (ddPCR) disperses the sample into tiny droplets (pL to nL) within an immiscible oil phase, typically generating monodisperse droplets at high speeds (1-100 kHz) using microfluidic chips [99]. Microchamber-based dPCR uses arrays of thousands of microscopic wells or chambers embedded in a solid chip, offering higher reproducibility and ease of automation but limited by fixed partition numbers and typically higher costs [99].
Commercial dPCR platforms have evolved significantly. The first commercial nanofluidic platform was introduced by Fluidigm in 2006, followed by Applied Biosystems' Quantstudio 3D in 2013 [99]. More recent systems include Qiagen's QIAcuity (originally developed by Formulatrix) and Roche's Digital LightCycler introduced in 2022 [99]. These platforms vary in their partitioning mechanisms, throughput, and detection methods, providing researchers with options tailored to specific application needs.
Experimental Protocol for Digital PCR
The standard dPCR workflow consists of four key steps:
Sample Preparation: Nucleic acids are extracted using appropriate methods. For RNA targets, reverse transcription is performed to generate cDNA. The reaction mixture is similar to conventional PCR but typically includes fluorescent probes for target detection.
Partitioning: The PCR mixture is partitioned into thousands of individual reactions using either droplet generation or microchamber arrays. For ddPCR, this involves creating a water-in-oil emulsion with stabilized droplets. For chip-based systems, samples are loaded into predefined nanowells or microchambers.
Amplification: Partitions undergo thermal cycling in a standard PCR thermocycler. The cycling parameters are similar to conventional PCR but optimized for the specific partition volume and chemistry. A typical protocol includes:
- Initial denaturation: 95°C for 10 minutes
- 40 cycles of:
- Denaturation: 94°C for 30 seconds
- Annealing/Extension: 55-60°C for 60 seconds
- Final extension: 72°C for 5-10 minutes
- Signal stabilization: 4°C hold
Reading and Analysis: Partitions are analyzed using endpoint fluorescence detection. For droplet systems, droplets are flowed past a detector in a microfluidic channel. For chip-based systems, the entire array is imaged using a fluorescence scanner. Data analysis applies Poisson statistics to calculate the absolute target concentration based on the ratio of positive to negative partitions [99].
Isothermal Amplification Methods
Principles and Advantages Over PCR
Isothermal nucleic acid amplification techniques enable the efficient amplification of nucleic acids at a constant temperature, eliminating the need for thermal cycling equipment [100]. This fundamental characteristic provides several significant advantages: reduced operational complexity, faster reaction times (typically 15-60 minutes), lower energy requirements, and better suitability for point-of-care testing and resource-limited settings [100]. The simplified instrumentation and potential for integration with microfluidic devices and biosensors make isothermal methods particularly valuable for rapid diagnostics in field-deployable formats.
These methods leverage various enzymes and reaction mechanisms to achieve exponential or linear amplification without temperature cycling. Many isothermal techniques use strand-displacing DNA polymerases that can initiate synthesis without an initial denaturation step, or they employ specialized enzymes that facilitate continuous nucleic acid synthesis at a single temperature. The development of isothermal amplification has expanded significantly over the past decade, with numerous techniques now available for research and diagnostic applications.
Major Isothermal Amplification Techniques
Table 2: Comparison of Major Isothermal Amplification Techniques
| Technique | Temperature Range | Key Enzymes | Amplification Efficiency | Primary Applications |
|---|---|---|---|---|
| LAMP (Loop-Mediated Isothermal Amplification) | 60-65°C | Bst DNA polymerase | High (exponential) | Pathogen detection, point-of-care diagnostics [104] |
| RCA (Rolling Circle Amplification) | 30-37°C | Phi29 DNA polymerase | Moderate (linear) | miRNA detection, viral identification [100] |
| HCR (Hybridization Chain Reaction) | Room temperature | None (enzyme-free) | Moderate (linear) | Biosensing, in situ hybridization |
| EXPAR (Exponential Amplification Reaction) | 55-60°C | DNA polymerase, nicking enzyme | High (exponential) | miRNA detection, biomarker analysis [100] |
| SDA (Strand Displacement Amplification) | 37-40°C | DNA polymerase, restriction enzyme | High (exponential) | Diagnostic testing, pathogen detection |
| NASBA (Nucleic Acid Sequence-Based Amplification) | 41°C | Reverse transcriptase, RNase H, T7 RNA polymerase | High (exponential) | RNA detection, viral load monitoring |
Experimental Protocol for Loop-Mediated Isothermal Amplification (LAMP)
LAMP is one of the most widely adopted isothermal methods due to its high efficiency, rapid amplification, and robustness. The following protocol outlines the key steps for implementing LAMP:
Primer Design: LAMP requires four to six specifically designed primers that recognize six to eight distinct regions on the target DNA:
- F3 (Forward Outer Primer)
- B3 (Backward Outer Primer)
- FIP (Forward Inner Primer)
- BIP (Backward Inner Primer)
- Optional loop primers (LF and LB) to accelerate reaction
Reaction Setup:
- Prepare reaction mixture containing:
- 1.5-2.5 mM each dNTP
- 4-8 mM MgSO₄
- 0.8-1.6 M betaine (for destabilization of DNA secondary structures)
- 8-16 U Bst DNA polymerase large fragment
- 0.2-1.6 µM each inner primer (FIP, BIP)
- 0.2-0.4 µM each outer primer (F3, B3)
- Template DNA
- Appropriate buffer (typically 20 mM Tris-HCl, 10 mM (NH₄)₂SO₄, 10 mM KCl, 0.1% Triton X-100, pH 8.8)
- Prepare reaction mixture containing:
Amplification:
- Incubate reaction at 60-65°C for 15-60 minutes
- No initial denaturation required
- Reaction can be performed in simple heating blocks or water baths
Detection:
- Monitor turbidity (caused by magnesium pyrophosphate precipitate)
- Use fluorescent intercalating dyes (e.g., SYBR Green)
- Implement colorimetric indicators (pH-sensitive dyes)
- Perform gel electrophoresis for confirmation [104]
miRNA Detection Using Isothermal Methods
Isothermal amplification techniques have proven particularly valuable for detecting microRNAs (miRNAs), which present significant challenges for conventional methods due to their low abundance, short sequence lengths, and high sequence homology among family members [100]. Rolling Circle Amplification (RCA) has emerged as a powerful approach for miRNA detection. The basic RCA principle involves:
- A padlock probe hybridizes to the target miRNA, bringing its 3' and 5' ends into proximity
- T4 RNA ligase joins the ends to form a circular template
- Phi29 DNA polymerase extends a primer complementary to the circular template, generating long single-stranded DNA products
- Detection occurs through various readouts, including fluorescent dyes, colorimetric assays, or electrochemical biosensors [100]
Recent innovations have combined RCA with CRISPR-Cas systems for enhanced sensitivity. For example, Jiang et al. developed a colorimetric method using gold nanoparticles combined with CRISPR-Cas12a and exponential RCA to detect miR-143 at concentrations as low as 1 fM [100].
Research Reagent Solutions and Materials
Successful implementation of digital PCR and isothermal amplification methods requires specific reagents and materials optimized for these technologies. The following table details essential components and their functions:
Table 3: Essential Research Reagents for Next-Generation Amplification Technologies
| Reagent/Material | Function | Application Examples | Technical Notes |
|---|---|---|---|
| Bst DNA Polymerase | Strand-displacing polymerase for isothermal amplification | LAMP, RCA, SDA | Maintains activity at 60-65°C; lacks 5'→3' exonuclease activity |
| Phi29 DNA Polymerase | High-fidelity strand-displacing polymerase | RCA, whole genome amplification | Strong strand displacement; high processivity; 3'→5' exonuclease proofreading |
| T4 RNA Ligase | Joins RNA to RNA or DNA to RNA ends | RCA for miRNA detection | Critical for circular padlock probe formation in miRNA detection |
| Probe-Based Master Mixes | Optimized buffers with fluorescent probes | dPCR, real-time isothermal assays | Contains reference dyes; optimized for partition stability |
| Stabilized dNTPs | Nucleotide substrates for DNA synthesis | All amplification methods | Quality crucial for efficient amplification; stability important for POC devices |
| Partitioning Oil & Surfactants | Creates stable water-in-oil emulsions | Droplet digital PCR | Prevents droplet coalescence during thermal cycling |
| Colorimetric Indicators | Visual detection of amplification | LAMP, HCR | Magnesium pyrophosphate precipitation or pH-sensitive dyes |
| Microfluidic Chips/Cartridges | Sample partitioning and reaction chambers | Commercial dPCR systems | Predefined nanowell arrays or droplet generation circuits |
| Hot-Start Enzymes | Prevents non-specific amplification | All PCR-based methods | Reduces primer-dimer formation; improves assay sensitivity |
Applications and Future Perspectives
Clinical and Research Applications
The unique capabilities of dPCR and isothermal amplification have enabled diverse applications across clinical diagnostics and research:
Oncology and Liquid Biopsy: dPCR has revolutionized cancer diagnostics through liquid biopsy applications, enabling non-invasive monitoring of treatment response and detection of rare mutations [99]. Its exceptional sensitivity allows identification of mutant alleles at frequencies as low as 0.001%-0.01%, making it invaluable for detecting minimal residual disease and emerging resistance mutations [99].
Infectious Disease Diagnostics: Both technologies have transformed pathogen detection. dPCR provides absolute quantification of viral loads without standard curves, proving particularly valuable for viruses like SARS-CoV-2, influenza, and RSV [102]. Isothermal methods like LAMP enable rapid deployment in field settings for outbreak management, with detection times under 30 minutes [104].
MicroRNA Analysis: Isothermal amplification techniques have overcome the challenges of miRNA detection, enabling highly sensitive identification of these short nucleic acids. This capability is crucial as miRNAs emerge as promising biomarkers for various cancers and other diseases [100].
Prenatal Diagnosis: dPCR enables non-invasive prenatal testing through detection of fetal genetic material in maternal blood, including aneuploidies and inherited mutations, with single-molecule resolution [99].
Emerging Trends and Integration with Advanced Technologies
The future evolution of amplification technologies involves integration with other advanced analytical approaches:
AI-Driven Analysis: Artificial intelligence is transforming data analysis in dPCR, with advanced algorithms improving fluorescence signal interpretation, partition classification, and quantification accuracy [101]. Modern deep learning models and foundation algorithms are enhancing automated analysis while reducing manual intervention requirements.
Point-of-Care System Integration: The combination of isothermal methods with microfluidics and miniaturized detectors is creating powerful portable diagnostic systems [101]. These integrated platforms aim to deliver laboratory-quality results in decentralized settings, with potential applications in home testing, primary care, and resource-limited environments.
Multiplexing Capabilities: Next-generation dPCR systems are advancing multiplexing capabilities, allowing simultaneous quantification of multiple targets in a single reaction. Emerging technologies like Countable PCR promise to further enhance multiplexing by eliminating signal interference through spatial separation of amplification events [103].
Therapeutic Monitoring: Both technologies are increasingly employed for monitoring treatment efficacy in infectious diseases, oncology, and genetic disorders, providing precise quantitative data essential for personalized medicine approaches [102].
As these technologies continue to evolve, they are expected to overcome current limitations in dynamic range, multiplexing capacity, and accessibility, further expanding their role in research and clinical diagnostics. The ongoing convergence of molecular biology, nanotechnology, microfluidics, and artificial intelligence promises to deliver even more powerful and accessible amplification platforms in the coming years.
Conclusion
Mastering PCR setup is a cornerstone of modern molecular biology and drug development, requiring a solid grasp of fundamental principles, meticulous execution of protocols, strategic optimization, and rigorous validation. By systematically applying the guidelines outlined—from foundational reagent knowledge and step-by-step assembly to advanced troubleshooting and validation frameworks—researchers can achieve highly specific, efficient, and reproducible amplification. The future of PCR lies in the continued adoption of advanced techniques like qPCR and digital PCR for absolute quantification, the integration of automation for high-throughput applications, and the development of novel assays for emerging pathogens and complex genetic biomarkers, all of which will further propel innovation in biomedical research and clinical diagnostics.
References
- 1. PCR Basics | Thermo Fisher Scientific - US [https://www.thermofisher.com/us/en/home/life-science/cloning/cloning-learning-center/invitrogen-school-of-molecular-biology/pcr-education/pcr-reagents-enzymes/pcr-basics.html]
- 2. Polymerase Chain Reaction (PCR) - StatPearls - NCBI - NIH [https://www.ncbi.nlm.nih.gov/books/NBK589663/]
- 3. Three Steps of PCR Cycle – Denaturation, Annealing, and ... [https://www.letstalkacademy.com/three-steps-of-pcr-cycle-denaturation-annealing-extension/]
- 4. Introduction to Quantitative PCR (qPCR) Gene Expression ... [https://www.thermofisher.com/us/en/home/life-science/pcr/real-time-pcr/real-time-pcr-learning-center/gene-expression-analysis-real-time-pcr-information/introduction-gene-expression.html]
- 5. Quantitative PCR Basics [https://www.sigmaaldrich.com/US/en/technical-documents/technical-article/genomics/qpcr/quantitative-pcr?srsltid=AfmBOooaSNh1GZM3r18mHBvM8U4TpFu5LbWj9eAPa41rnueKWFjpjWA6]
- 6. Comparison of Analytic Methods for Quantitative Real-Time ... [https://pmc.ncbi.nlm.nih.gov/articles/PMC4642823/]
- 7. What Are PCR Reagents? Components, Sources & Uses [https://go.zageno.com/blog/pcr-reagents]
- 8. Five Essential Elements of PCR [https://www.bocsci.com/resources/five-essential-elements-of-pcr.html?srsltid=AfmBOopQD6fw2ttv7El1-sL8hZx_9vEtVlRtb1fP-lG3iNbFtX_IKD3D]
- 9. PCR Setup—Six Critical Components to Consider [https://www.thermofisher.com/us/en/home/life-science/cloning/cloning-learning-center/invitrogen-school-of-molecular-biology/pcr-education/pcr-reagents-enzymes/pcr-component-considerations.html]
- 10. PCR Protocol - PCR Steps - PCR Design Tool [https://www.genscript.com/pcr-protocol-pcr-steps.html]
- 11. Polymerase chain reaction [https://en.wikipedia.org/wiki/Polymerase_chain_reaction]
- 12. Taq Polymerase: what is it and its applications - LGC [https://blog.biosearchtech.com/thebiosearchtechblog/bid/48174/taq-facts]
- 13. Taq polymerase [https://en.wikipedia.org/wiki/Taq_polymerase]
- 14. DNA Polymerase—Four Key Characteristics for PCR [https://www.thermofisher.com/us/en/home/life-science/cloning/cloning-learning-center/invitrogen-school-of-molecular-biology/pcr-education/pcr-reagents-enzymes/dna-polymerase-characteristics.html]
- 15. Guidelines for PCR Optimization with Taq DNA Polymerase [https://www.neb.com/en-us/tools-and-resources/usage-guidelines/guidelines-for-pcr-optimization-with-taq-dna-polymerase?srsltid=AfmBOordqRR8t6GTmISGRrkv5uuXxGwpDME5_GbgpnU-eX-ugiPyZncb]
- 16. How is Hot-Start Technology Beneficial For Your PCR [https://www.thermofisher.com/us/en/home/brands/thermo-scientific/molecular-biology/molecular-biology-learning-center/molecular-biology-resource-library/spotlight-articles/hot-start-technology-benefits-PCR.html]
- 17. What is Hot Start PCR? [https://www.sigmaaldrich.com/US/en/technical-documents/technical-article/genomics/pcr/what-is-hot-start-pcr?srsltid=AfmBOopJqBjnZ--qRj8ZkVpURy6S6r6EViV41KNjN7xfUFuCbqHF6iOJ]
- 18. FAQ: What are Hot Start and WarmStart ® polymerases ... [https://www.neb.com/en-us/faqs/2023/08/02/what-are-hot-start-and-warmstart-polymerases-and-when-would-i-use-them?srsltid=AfmBOorHxVPiAGew75QbsiCq0IdAzvtm3cR4QveL51hHY8AZSiAy2IAh]
- 19. Investigating concentration effects on reaction efficiency ... [https://www.sciencedirect.com/science/article/abs/pii/S0003269725001472]
- 20. Comprehensive review and meta-analysis of magnesium ... [https://pubmed.ncbi.nlm.nih.gov/40436087/]
- 21. Guidelines for PCR Optimization with Taq DNA Polymerase [https://www.neb.com/en-us/tools-and-resources/usage-guidelines/guidelines-for-pcr-optimization-with-taq-dna-polymerase?srsltid=AfmBOor8vSAUN2GK2NlYoPRwIT0JFcx8w4qRCMoNdv3DVWmPg0iQuH6z]
- 22. mechanism of human DNA ligase I reveals... Kinetic [https://pubmed.ncbi.nlm.nih.gov/21561855/]
- 23. Quantitative PCR Basics [https://www.sigmaaldrich.com/US/en/technical-documents/technical-article/genomics/qpcr/quantitative-pcr?srsltid=AfmBOookHYXW455oP58YpWb7E8pD8uFRhU6RSU4pSIm5PP5OiB6e3chG]
- 24. Real-time polymerase chain reaction [https://www.qiagen.com/us/knowledge-and-support/knowledge-hub/bench-guide/pcr/real-time-pcr/real-time-pcr]
- 25. FRET Based Biosensor: Principle Applications Recent ... [https://pmc.ncbi.nlm.nih.gov/articles/PMC10136898/]
- 26. US8026058B2 - PCR hot start by magnesium sequestration [https://patents.google.com/patent/US8026058B2/en]
- 27. Dos and don'ts for molecular testing [https://www.who.int/teams/global-malaria-programme/case-management/diagnosis/nucleic-acid-amplification-based-diagnostics/dos-and-don-ts-for-molecular-testing]
- 28. Tips and Techniques [https://support-docs.illumina.com/LP/Enrich_sgRNA_T20/Content/LP/PIPseq/Enrichment/TipsTechniques.htm]
- 29. Principles of decontamination, sterilization, and disinfection [https://www.selectagents.gov/compliance/guidance/biosafety/appendix1.htm]
- 30. Guidelines for preventing and reporting contamination in ... [https://www.nature.com/articles/s41564-025-02035-2]
- 31. Hazardous Waste - Decontamination | Occupational Safety ... [http://www.osha.gov/hazardous-waste/decontamination]
- 32. PCR Tips - Technical Support [https://www.jax.org/jax-mice-and-services/customer-support/technical-support/genotyping-resources/general-pcr-reminders-dos-and-donts]
- 33. PCR Run Protocol for Bacterial 16S rRNA Gene Amplification [https://www.protocols.io/view/pcr-run-protocol-for-bacterial-16s-rrna-gene-ampli-d5y787zn.html]
- 34. Reagent Stability and Thawing Guidelines for MiSeq ... [https://knowledge.illumina.com/instrumentation/miseq/instrumentation-miseq-reference_material-list/000001674]
- 35. How to thaw and store sequencing reagents for optimal ... [https://knowledge.illumina.com/instrumentation/general/instrumentation-general-reference_material-list/000001533]
- 36. What is Polymerase Chain Reaction (PCR) [https://www.addgene.org/protocols/pcr/]
- 37. Optimizing PCR: Proven Tips and Troubleshooting Tricks [https://www.the-scientist.com/optimizing-pcr-proven-tips-and-troubleshooting-tricks-71660]
- 38. Polymerase Chain Reaction (PCR) - PMC [https://pmc.ncbi.nlm.nih.gov/articles/PMC4102308/]
- 39. Standard PCR Protocol [https://www.sigmaaldrich.com/US/en/technical-documents/protocol/genomics/pcr/standard-pcr?srsltid=AfmBOopmbOwvejJzVF-Jg6aWuTk9k09HfL8BM9NPFxUjcAhtGx6j6jEG]
- 40. 5 Steps to a Better PCR: A Troubleshooting and ... [https://blog.abclonal.com/blog/5-steps-to-a-better-pcr]
- 41. PCR Methods - Top Ten Strategies [https://www.thermofisher.com/us/en/home/life-science/cloning/cloning-learning-center/invitrogen-school-of-molecular-biology/pcr-education/pcr-reagents-enzymes/pcr-methods.html]
- 42. Free Guide: Top 5 PCR Optimization Tips - Yeasen [https://www.yeasenbio.com/blogs/molecular-biology/free-guide-top-5-pcr-optimization-tips]
- 43. Polymerase Chain Reaction: Basic Protocol Plus ... [https://pmc.ncbi.nlm.nih.gov/articles/PMC4846334/]
- 44. Contamination and Sensitivity Issues with a Real-Time ... [https://pmc.ncbi.nlm.nih.gov/articles/PMC86577/]
- 45. Preventing PCR Amplification Carryover Contamination in ... [https://www.annclinlabsci.org/content/34/4/389.long]
- 46. Standard PCR Protocol [https://www.sigmaaldrich.com/US/en/technical-documents/protocol/genomics/pcr/standard-pcr?srsltid=AfmBOorcRPUadfCnJJhBaGf3Ac0cb-9mQy_w1iTJshqDqMhJv8_8X17N]
- 47. PCR Cycling Parameters—Six Key Considerations for ... [https://www.thermofisher.com/us/en/home/life-science/cloning/cloning-learning-center/invitrogen-school-of-molecular-biology/pcr-education/pcr-reagents-enzymes/pcr-cycling-considerations.html]
- 48. Guidelines for PCR Optimization with Taq DNA Polymerase [https://www.neb.com/en-us/tools-and-resources/usage-guidelines/guidelines-for-pcr-optimization-with-taq-dna-polymerase?srsltid=AfmBOopzxS1LQtwI0F-3Pygx_HUuG3N8zxBH3Vp0cNnlcRf2pVGsHHVc]
- 49. Optimizing your PCR [https://www.takarabio.com/learning-centers/pcr/faq/optimization?srsltid=AfmBOopPoQjxEsh66i4Cdbq0aEftScBEejlX-2efFMpXbBjnwTWcxjLr]
- 50. Optimizing PCR amplification of GC-rich nicotinic ... [https://www.sciencedirect.com/science/article/pii/S2405580825001396]
- 51. Optimizing PCR Reaction Conditions for High Fidelity and ... [https://www.labx.com/resources/optimizing-pcr-reaction-conditions-for-high-fidelity-and-yield/5579]
- 52. PCR Optimization: Factors Affecting Reaction Specificity ... [https://www.mybiosource.com/learn/pcr-optimization-factors-affecting-reaction-specificity-and-efficien/]
- 53. Interpreting Electrophoresis Gels [https://bento.bio/resources/bento-lab-advice/interpreting-electrophoresis-gels-with-bento-lab/]
- 54. Validating Real-Time Polymerase Chain Reaction (PCR) Assays [https://pmc.ncbi.nlm.nih.gov/articles/PMC7834634/]
- 55. Troubleshooting Nucleic Acid Gel Electrophoresis—Solved in ... [https://www.yeasenbio.com/blogs/molecular-biology/troubleshooting-nucleic-acid-gel-electrophoresis-solved-in-one-go]
- 56. Agarose gel electrophoresis to assess PCR product yield [https://pubmed.ncbi.nlm.nih.gov/35311378/]
- 57. Troubleshooting Agarose Gels: Top Tips for Perfect Images [https://bitesizebio.com/50016/troubleshooting-agarose-gel/]
- 58. Nucleic Acid Gel Electrophoresis Troubleshooting [https://www.thermofisher.com/us/en/home/life-science/cloning/cloning-learning-center/invitrogen-school-of-molecular-biology/na-electrophoresis-education/na-electrophoresis-troubleshooting.html]
- 59. /qPCR PCR Quick Reference Troubleshooting [https://www.linkedin.com/pulse/pcrqpcr-troubleshooting-quick-reference-biopathogenix-kejac]
- 60. Guidelines for PCR Optimization with Taq DNA Polymerase [https://www.neb.com/en-us/tools-and-resources/usage-guidelines/guidelines-for-pcr-optimization-with-taq-dna-polymerase?srsltid=AfmBOoqDfC5pr2RqENgE584-hAfK2CTI2yzvKuGw_-dgQVoSMoOTdtBG]
- 61. PCR Troubleshooting Guide | Thermo Fisher Scientific - US [https://www.thermofisher.com/us/en/home/life-science/cloning/cloning-learning-center/invitrogen-school-of-molecular-biology/pcr-education/pcr-reagents-enzymes/pcr-troubleshooting.html]
- 62. PCR Troubleshooting Guide [https://www.neb.com/en-us/tools-and-resources/troubleshooting-guides/pcr-troubleshooting-guide?srsltid=AfmBOopFyPOzSfcCwPQ5Tw8xCkWCl0IcGW9GyXQBU5y_L1cX4IIKd-b-]
- 63. : Common... | MyBioSource Learning Center PCR Troubleshooting [https://www.mybiosource.com/learn/pcr-troubleshooting-common-problems-and-solutions/]
- 64. Weak PCR Band Results or Smearing - What To Do [https://www.goldbio.com/blogs/articles/troubleshooting-pcr-part-three-solutions-for-weak-bands-and-smearing?srsltid=AfmBOoobwQvb1456SgjCoZVuEyFNCQSNWn23RZjSvaRjB0yAvLfeyAxE]
- 65. Touchdown PCR: Easy Intro Plus 5 Expert Tips [https://bitesizebio.com/2203/touchdown-pcr-a-primer-and-some-tips/]
- 66. PCR Protocols & Primer Design Guide | Boster Bio [https://www.bosterbio.com/protocol-and-troubleshooting/pcr-protocol?srsltid=AfmBOorklVsF-v5WV4S2kuBydkO3ZeOJ_4U3-KVcXAKQfWA4eX6PJRod]
- 67. An optimized protocol for stepwise optimization of real-time ... [https://www.nature.com/articles/s41438-021-00616-w]
- 68. Faster PCR Optimization [https://bitesizebio.com/31937/optimizing-your-pcr-faster/]
- 69. Improve Yield and Specificity of Your PCR Using the 2D- ... [https://www.eppendorf.com/it-en/lab-academy/life-science/molecular-biology/improve-yield-and-specificity-of-your-pcr-using-the-2d-gradient-function/]
- 70. Establishment of an optimized PCR method using ... [https://www.spandidos-publications.com/10.3892/mmr.2012.1122]
- 71. Optimization of PCR Conditions for Amplification of GC‐ ... [https://pmc.ncbi.nlm.nih.gov/articles/PMC6807403/]
- 72. 5 easy tips to address problems amplifying GC-rich regions [https://bitesizebio.com/24002/problems-amplifying-gc-rich-regions-problem-solved/]
- 73. How to optimize PCR conditions for GC-rich regions? [https://synapse.patsnap.com/article/how-to-optimize-pcr-conditions-for-gc-rich-regions]
- 74. PCR amplification: Long PCR products [https://www.qiagen.com/us/knowledge-and-support/knowledge-hub/bench-guide/pcr/introduction/amplification-of-long-pcr-products]
- 75. Tips for Amplifying Large Amplicons [https://www.neb.com/en-us/tools-and-resources/video-library/tips-for-amplifying-large-amplicons?srsltid=AfmBOooJZe7JUDEFuJlLBe3LOFH9r2EZtcI2DXzN9-ucg_h4SKtoRLXc]
- 76. Poor PCR Efficiency [https://www.thermofisher.com/us/en/home/life-science/pcr/real-time-pcr/real-time-pcr-learning-center/real-time-pcr-basics/real-time-pcr-troubleshooting-tool/gene-expression-quantitation-troubleshooting/poor-pcr-efficiency.html]
- 77. Enhancement of PCR amplification yield and specificity ... [https://pubmed.ncbi.nlm.nih.gov/9793657/]
- 78. of DNA amplification efficiency by using Enhancement additives PCR [https://www.bocsci.com/blog/enhancement-of-dna-amplification-efficiency-by-using-pcr-additives/]
- 79. and DMSO significantly enhance the betaine amplification of... PCR [https://pubmed.ncbi.nlm.nih.gov/32433893/]
- 80. PCR Amplification | An Introduction to PCR Methods [https://www.promega.com/resources/guides/nucleic-acid-analysis/pcr-amplification/]
- 81. Development and validation of a multiplex PCR assay with ... [https://www.nature.com/articles/s41598-025-07337-3]
- 82. Sensitivity and reproducibility of standardized-competitive RT ... [https://pmc.ncbi.nlm.nih.gov/articles/PMC344741/]
- 83. Standard PCR Protocol [https://www.sigmaaldrich.com/US/en/technical-documents/protocol/genomics/pcr/standard-pcr?srsltid=AfmBOop66abd60CTqtBjL58u3ujBCUz-997k0BNO33Hw1BwupTxXskrm]
- 84. PCR/qPCR Data Analysis [https://www.sigmaaldrich.com/US/en/technical-documents/technical-article/genomics/qpcr/data-analysis?srsltid=AfmBOopQ3N3GR3ap2spkEqJ8rTxkPAuRRHB15Q2Mx7EoW0sryJk7AHL6]
- 85. Management system standards [https://www.iso.org/management-system-standards.html]
- 86. Single Lab Validation for Laboratory Methods [https://www.issc.org/single-lab-validation-laboratory-methods]
- 87. ISO/DIS 19011 - Guidelines for auditing management ... [https://www.iso.org/standard/88984.html]
- 88. ISO 19011: Guidelines for Auditing Management Systems [https://asq.org/quality-resources/iso-19011?srsltid=AfmBOoo_GOOGCrBuOtzjVqsZaZqFPXrUv-ramB4BxOi-IUfjDRhLHgND]
- 89. Adapting to Change: What the Upcoming ISO 19011:2025 ... [https://risktrainingprofessionals.com/blog/2025/05/12/adapting-to-change-what-the-upcoming-iso-190112025-revision-means-for-auditors-and-organisations/]
- 90. Single Laboratory Validation [https://pathologyuncertainty.com/single-laboratory-validation/]
- 91. Quantitative PCR (qPCR) Data Analysis [https://www.thermofisher.com/us/en/home/life-science/pcr/real-time-pcr/real-time-pcr-learning-center/gene-expression-analysis-real-time-pcr-information/precision-qpcr.html]
- 92. qPCR Double Delta Ct Analysis in 4 Easy Steps [https://bitesizebio.com/24894/4-easy-steps-to-analyze-your-qpcr-data-using-double-delta-ct-analysis/]
- 93. PCR vs qPCR vs RT-PCR vs RT-qPCR: What's the Difference [https://molsentech.com/post/pcr-vs-qpcr-vs-rt-pcr-vs-rt-qpcr-whats-the-difference/]
- 94. PCR and Real-Time PCR: Differences in Results, Cost ... [https://www.labconsulting.at/pcr-and-real-time-pcr-differences/]
- 95. The mathematics of qRT-PCR in virology [https://virologyresearchservices.com/2025/01/13/the-mathematics-of-qrt-pcr-in-virology/]
- 96. Reverse Transcription Applications [https://www.thermofisher.com/us/en/home/life-science/cloning/cloning-learning-center/invitrogen-school-of-molecular-biology/rt-education/reverse-transcription-applications.html]
- 97. From RNA to results: the essential guide to RT-PCR [https://www.integra-biosciences.com/united-states/en/blog/article/rna-results-essential-guide-rt-pcr]
- 98. Standard PCR Protocol [https://www.sigmaaldrich.com/US/en/technical-documents/protocol/genomics/pcr/standard-pcr?srsltid=AfmBOoqsENGSdDTmMcaiGRnWGemrgCrIrX__UdYH_ZAAqox4MtLthU03]
- 99. Digital PCR: from early developments to its future application ... [https://pubs.rsc.org/en/content/articlehtml/2025/lc/d5lc00055f]
- 100. Advances in Research on Isothermal Signal Amplification ... [https://pmc.ncbi.nlm.nih.gov/articles/PMC12190449/]
- 101. From droplets to diagnosis: AI-driven imaging and system ... [https://www.sciencedirect.com/science/article/pii/S0956566325006177]
- 102. Comparative Performance of Digital PCR and Real-Time RT ... [https://pmc.ncbi.nlm.nih.gov/articles/PMC12474457/]
- 103. The hidden limits of digital PCR and what comes next [https://countablelabs.com/blog/the-hidden-limits-of-digital-pcr-and-what-comes-next]
- 104. Surfaces environmental monitoring of SARS-CoV-2 [https://pubmed.ncbi.nlm.nih.gov/39899502/]