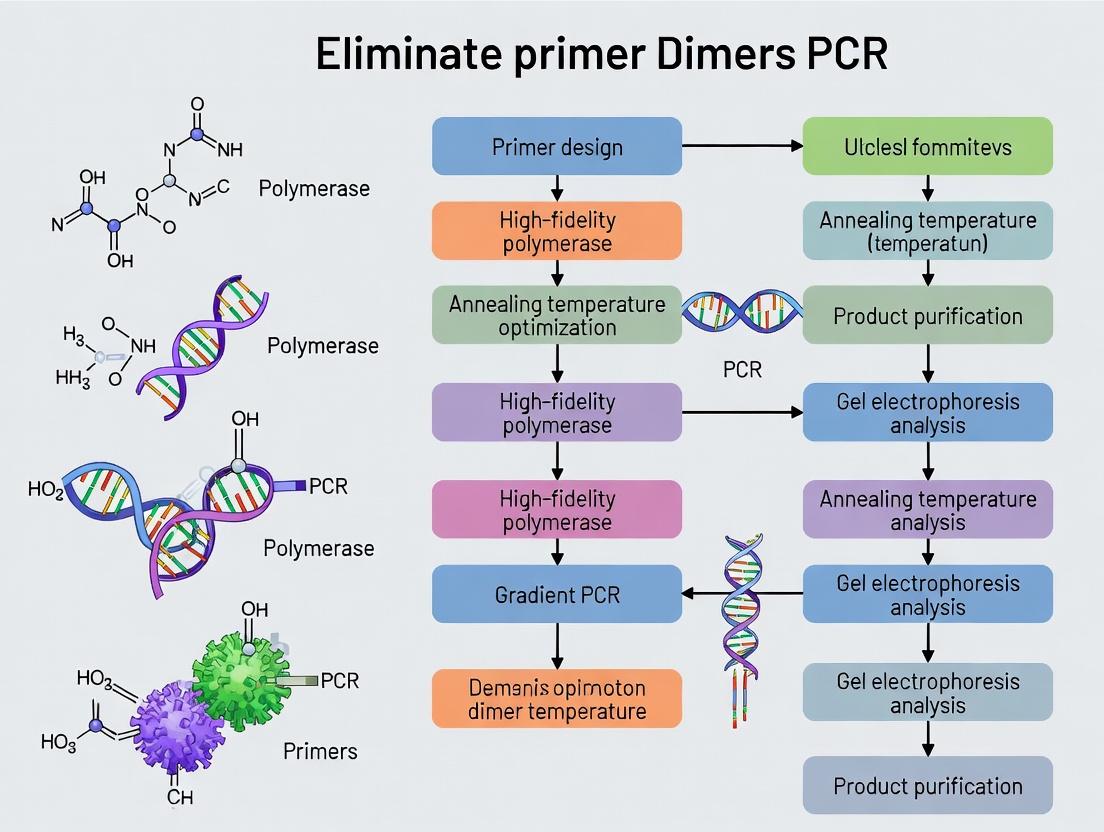
Primer Dimer Elimination: A Complete Guide to Optimizing PCR Specificity and Yield for Biomedical Research
This comprehensive guide addresses the pervasive challenge of primer dimer formation in PCR, a critical obstacle for researchers, scientists, and drug development professionals.
Primer Dimer Elimination: A Complete Guide to Optimizing PCR Specificity and Yield for Biomedical Research
Abstract
This comprehensive guide addresses the pervasive challenge of primer dimer formation in PCR, a critical obstacle for researchers, scientists, and drug development professionals. We explore the fundamental causes of primer dimers, from basic primer design principles to intermolecular interactions. The article provides actionable, step-by-step methodological strategies for prevention, a systematic troubleshooting framework for existing protocols, and advanced validation techniques to confirm specificity. By synthesizing foundational knowledge with modern optimization and validation approaches, this resource empowers professionals to achieve highly specific and efficient amplification, ensuring reliable results in diagnostics, assay development, and genetic research.
What Are Primer Dimers? Understanding the Root Causes of Nonspecific Amplification in PCR
This technical support center is established within the context of thesis research on How to eliminate primer dimers in PCR reactions. Below are troubleshooting guides and FAQs for researchers, scientists, and drug development professionals.
FAQs & Troubleshooting Guide
Q1: What exactly is the molecular structure of a primer dimer? A: A primer dimer is a short, double-stranded DNA artifact formed by the hybridization and subsequent extension of two primers during PCR. Structurally, it involves:
- Self-Dimer: Two identical primers bind via complementary bases in their sequences.
- Cross-Dimer: Two different primers (forward and reverse) bind to each other. The 3' ends of the primers align, allowing polymerase extension to create a stable, amplifiable duplex, typically <100 bp in length. This process outcompetes the intended target for primers, dNTPs, and polymerase.
Q2: How do primer dimers quantitatively impact my PCR efficiency and yield? A: Primer dimers reduce efficiency by sequestering critical reaction components. The impact is most severe in later cycles and in reactions with low target copy numbers.
| PCR Parameter | Without Primer Dimers | With Significant Primer Dimers | Measurement Method |
|---|---|---|---|
| Amplification Efficiency (E) | 90-105% (Ideal: 100%) | Can drop to <70% or be immeasurable | Calculated from standard curve slope. |
| Cq (Quantification Cycle) Delay | None (Cq correlates with input DNA) | Increased Cq (2-6 cycles delay common) | qPCR analysis. |
| Final Amplicon Yield | High, specific product. | Reduced, with non-specific background. | Gel electrophoresis, fluorescence. |
| Limit of Detection (LoD) | Optimal for assay. | Significantly compromised. | Serial dilution of template. |
Q3: My gel shows a low molecular weight smear (~50-100bp). Is this primer dimer? A: Yes, a diffuse smear or broad band in the 50-100 bp range is a classic indicator of primer dimer formation, especially if it is present in the no-template control (NTC). A discrete band may indicate a specific, dominant dimer product.
Q4: My qPCR melt curve shows a peak at a lower temperature than my main product. Is this diagnostic? A: Yes. Primer dimers are shorter and have lower GC content, leading to a lower melting temperature (Tm). A distinct peak 5-15°C below your specific amplicon's Tm peak in the dissociation curve is a strong indicator of primer dimer contamination.
Experimental Protocols for Diagnosis & Mitigation
Protocol 1: In silico Primer Analysis for Dimer Formation
- Objective: Predict potential for self- and cross-dimerization before synthesis.
- Methodology:
- Input your forward and reverse primer sequences into specialized software (e.g., Primer-BLAST, OligoAnalyzer, NUPACK).
- Analyze for 3' complementarity. Pay particular attention to any complementary bases at the 3'-ends, as even a 2-3 base match can initiate dimerization.
- Evaluate ΔG (Gibbs Free Energy) of dimer formation. More negative ΔG values indicate stronger, more stable dimer interactions. Aim for ΔG > -5 kcal/mol for the 3' ends.
- Check for intra-primer secondary structures (hairpins).
Protocol 2: Optimization of Touchdown PCR to Suppress Dimers
- Objective: Favor specific target binding over primer-dimer formation.
- Methodology:
- Set up a standard PCR reaction.
- Program the thermocycler to start with an initial annealing temperature 5-10°C above the calculated Tm of your primers.
- Decrease the annealing temperature by 0.5-1°C per cycle over the next 10-20 cycles (the "touchdown" phase).
- Continue with 15-20 additional cycles at the final, lower annealing temperature.
- This approach enriches specific product early on, which then outcompetes dimers in later cycles.
Protocol 3: Gel Electrophoresis for Primer Dimer Visualization
- Objective: Confirm the presence and relative abundance of primer dimers post-PCR.
- Methodology:
- Prepare a 3-4% high-resolution agarose gel.
- Mix 5 µL of PCR product (including NTC) with loading dye.
- Run the gel at 5-8 V/cm alongside a low molecular weight ladder (25-500 bp).
- Stain with SYBR Safe or ethidium bromide and image. Primer dimers will appear as a diffuse band or smear near the dye front (50-100 bp).
Experimental Workflow for Primer Dimer Investigation
Title: Primer Dimer Troubleshooting Workflow
The Scientist's Toolkit: Research Reagent Solutions
| Reagent / Material | Function in Mitigating Primer Dimers |
|---|---|
| Hot-Start DNA Polymerase | Remains inactive until initial denaturation step, preventing primer extension and dimer formation during reaction setup. |
| PCR Enhancers (e.g., Betaine, DMSO) | Reduce secondary structure and improve primer specificity, thereby decreasing non-specific interactions between primers. |
| dNTP Mix (Optimized Concentration) | Excess dNTPs can promote mispriming; using the correct concentration (typically 200 µM each) improves fidelity. |
| High-Quality Primer Stocks | Resuspended at accurate concentrations (e.g., 100 µM) and stored properly to prevent degradation that can increase non-specific binding. |
| MgClâ‚‚ Solution (Titratable) | Mg2+ concentration is critical; too much can stabilize primer-dimer duplexes and reduce specificity. |
| qPCR Probes (TaqMan) | Provide an additional layer of specificity over intercalating dyes, as signal is generated only upon probe hybridization, ignoring primer dimer fluorescence. |
| 1,1-Bis(4-methoxyphenyl)prop-2-yn-1-ol | 1,1-Bis(4-methoxyphenyl)prop-2-yn-1-ol, CAS:101597-25-5, MF:C17H16O3, MW:268.31 g/mol |
| 2-(Trifluoromethoxy)benzenesulfonyl chloride | 2-(Trifluoromethoxy)benzenesulfonyl chloride, CAS:103008-51-1, MF:C7H4ClF3O3S, MW:260.62 g/mol |
Troubleshooting Guides & FAQs
FAQ: Why do my PCR reactions consistently produce primer-dimer artifacts instead of my target amplicon? Primer dimers form primarily due to complementary sequences, particularly at the 3' ends of your primers. This allows one primer to act as a template for the other, leading to short, easily amplified artifacts that outcompete the desired product. The most common cause is self-complementarity or cross-complementarity between primer pairs, especially 3-4 or more bases at the 3' terminus.
FAQ: How can I quickly check if my primer sequences are prone to dimerization before ordering? Use multiple bioinformatics tools to analyze potential interactions. The key parameters to evaluate are:
- ΔG of Dimerization: The free energy of interaction between primers. More negative values (e.g., below -5 kcal/mol) indicate stable, problematic dimer formation.
- 3'-Complementarity: Any continuous match of 3 or more bases at the 3' ends is a significant risk.
- Hairpin Formation: Internal folding, especially if the 3' end is involved.
Table 1: Quantitative Thresholds for Primer Dimer Risk Assessment
| Parameter | Low Risk | Moderate Risk | High Risk |
|---|---|---|---|
| ΔG of Dimerization (kcal/mol) | > -4.0 | -4.0 to -8.0 | < -8.0 |
| 3' End Complementarity (continuous bases) | ≤ 2 | 3 | ≥ 4 |
| Hairpin ΔG (kcal/mol) | > -2.0 | -2.0 to -4.0 | < -4.0 |
FAQ: What are the critical design rules to prevent primer dimers from the start? Follow these stringent design protocols:
- 3' End Stability: Ensure the last 5 bases at the 3' end have low GC content (1-2 G/C residues ideally) and no self-complementarity.
- Overall Length: Design primers 18-30 nucleotides long.
- Melting Temperature (Tm): Maintain a Tm of 55-65°C for both primers, with a difference of ≤ 2°C between them.
- Avoid Repeats & Runs: Exclude stretches of 4 or more identical nucleotides (e.g., GGGG) or dinucleotide repeats.
- Check Specificity: Use BLAST or similar tools to ensure binding is unique to your target sequence.
Experimental Protocol: In Silico Primer Dimer Analysis
- Purpose: To computationally evaluate and rank primer pairs for dimerization potential.
- Methodology:
- Input your forward and reverse primer sequences into dedicated analysis software (e.g., Primer3Plus, OligoAnalyzer, IDT OligoAnalyzer).
- Run the "Heterodimer" and "Homodimer" analysis functions.
- Record the ΔG values and any predicted dimer structures.
- Use multiple tools for consensus, as algorithms differ.
- Reject any primer pair where the 3' ends show a ΔG of interaction more negative than -5 kcal/mol or show ≥3 base pair complementarity.
Experimental Protocol: Empirical Validation Using Gradient PCR with Low-Template/No-Template Controls
- Purpose: To experimentally confirm in silico predictions under actual cycling conditions.
- Methodology:
- Set up two identical PCR master mixes for your candidate primer pair.
- Tube A: Add the standard amount of template DNA.
- Tube B (No-Template Control - NTC): Add nuclease-free water instead of template.
- Run the reactions on a thermal cycler using a gradient across the annealing temperature (e.g., from 5°C below to 5°C above the calculated Tm).
- Analyze all products, including the NTCs, by high-resolution gel electrophoresis (e.g., 4% agarose or Bioanalyzer).
- Interpretation: Primer dimers will appear as a low molecular weight smear or discrete band in the NTC lane. The optimal annealing temperature is the highest temperature that yields a strong target band in Tube A while eliminating the dimer band in Tube B.
Title: Primer Dimer Prevention & Validation Workflow
The Scientist's Toolkit: Research Reagent Solutions
| Item | Function in Preventing/Managing Primer Dimers |
|---|---|
| Hot-Start DNA Polymerase | Polymerase is inactive until a high-temperature step, preventing extension during reaction setup and low-temperature phases where primer annealing artifacts occur. |
| Proofreading Polymerase Blends (e.g., Q5, Phusion) | Often have higher processivity and specificity, reducing mis-priming and extension of dimerized primers. |
| DMSO or Betaine | Additives that destabilize secondary structures and reduce non-specific primer binding, improving stringency. |
| Touchdown PCR Reagents | Kits or master mixes optimized for protocols that start with a high annealing temperature, increasing specificity before dimers can form. |
| High-Fidelity PCR Buffer | Optimized salt and pH conditions to promote specific primer-template binding over primer-primer interactions. |
| Nuclease-Free Water | Essential for NTCs to confirm dimers are reagent/ primer-derived, not template-derived. |
| Automated Oligo Synthesis Scale (10nm vs. 25nm) | A "de-salted" or lower synthesis scale can contain more failure sequences that may promote non-specific binding. Purified scales (HPLC, PAGE) are recommended. |
| 2,2-Difluorocyclopropanecarboxylic acid | 2,2-Difluorocyclopropanecarboxylic acid, CAS:107873-03-0, MF:C4H4F2O2, MW:122.07 g/mol |
| trans-1,2-Cyclohexanediol | trans-1,2-Cyclohexanediol, CAS:1460-57-7, MF:C6H12O2, MW:116.16 g/mol |
This technical support center is framed within the context of ongoing thesis research focused on systematically eliminating primer-dimers in PCR reactions. Primer-dimers are a primary cause of failed experiments, low yield, and specificity issues. This guide details how optimizing the three pillars—component concentration, reaction chemistry, and thermal cycling conditions—is critical for robust, specific amplification.
Troubleshooting Guides & FAQs
FAQ Category: Concentration & Chemistry
Q1: What are the most critical concentration adjustments to prevent primer-dimer formation? A: The concentration and ratio of primers and Mg²⺠are paramount. Excess primers provide more opportunity for homologous sequences to anneal to each other. Insufficient Mg²⺠can reduce polymerase fidelity and efficiency, but excess Mg²⺠stabilizes nonspecific duplexes like primer-dimers.
Table 1: Optimized Concentration Ranges to Minimize Primer-Dimers
| Component | Typical Problematic Range | Optimized Range for Specificity | Rationale |
|---|---|---|---|
| Primers | 0.5 - 1.0 µM each | 0.1 - 0.5 µM each | Reduces chance of primer-primer interaction. |
| MgClâ‚‚ | > 2.5 mM | 1.5 - 2.0 mM (optimize) | Stabilizes primer-template binding over primer-dimer. |
| dNTPs | > 0.5 mM each | 0.2 - 0.25 mM each | Limits Mg²⺠sequestering; reduces free Mg²âº. |
| DNA Polymerase | High excess | Use manufacturer's recommendation | Excess enzyme can amplify nonspecific products. |
| Template DNA | Very high or low | 10 - 100 ng genomic DNA | High conc. can increase nonspecific binding. |
Q2: How does PCR chemistry (polymerase, additives) influence primer-dimer formation? A: Hot-start polymerases are essential. They remain inactive until the initial denaturation step, preventing polymerase-mediated extension of primer-dimers formed during reaction setup. Additives like DMSO, formamide, or betaine can reduce secondary structure and improve stringency, making primer-template binding more favorable than primer-primer binding.
Experimental Protocol 1: Titration of Mg²⺠and Primer Concentration Objective: To empirically determine the optimal Mg²⺠and primer concentration for a specific primer pair to eliminate primer-dimers. Method:
- Prepare a master mix containing buffer (without Mg²âº), dNTPs, hot-start polymerase, template, and water.
- Aliquot the master mix into a 12-well PCR strip.
- To the columns, add MgClâ‚‚ to final concentrations of: 1.0 mM, 1.5 mM, 2.0 mM, 2.5 mM, 3.0 mM, 4.0 mM.
- To the rows, add forward/reverse primer mix for final concentrations of: 0.1 µM, 0.3 µM, 0.5 µM, 1.0 µM.
- Run the following touchdown cycling program (see Cycling FAQs).
- Analyze products on a 2-3% agarose gel. The condition with the strongest target band and absence of low molecular weight smear (~80-100 bp) is optimal.
FAQ Category: Cycling Conditions
Q3: What thermal cycling modifications are most effective against primer-dimers? A: The annealing temperature and the initial cycles are key. Implementing a "Touchdown" or "Two-Step" PCR protocol drastically reduces primer-dimer.
Q4: What is a Touchdown PCR protocol and how does it help? A: Touchdown PCR starts with an annealing temperature 5-10°C above the calculated primer Tm, then decreases by 0.5-1°C per cycle over 10-20 cycles to the optimal Tm. This ensures that only the most specific primer-template bonds form in the early, critical cycles, giving the target amplicon a competitive advantage that is maintained in later cycles.
Experimental Protocol 2: Two-Step PCR for High-Specificity Amplification Objective: To use a simplified cycling profile that minimizes time at permissive, low-temperature annealing steps. Method:
- Set up reaction with optimized concentrations from Protocol 1.
- Use the following cycling parameters:
- Initial Denaturation: 95°C for 2-5 min (activate hot-start polymerase).
- Amplification (35-40 cycles):
- Denaturation: 95°C for 15-30 sec.
- Combined Annealing/Extension: 68-72°C for 30-60 sec/kb. (Note: Only works if primers have a high Tm, close to the polymerase's optimal extension temperature of ~72°C).
- Final Extension: 72°C for 5 min.
- The high, single-temperature step prevents the low-temperature conditions where primer-dimer annealing is most likely.
FAQ Category: Primer Design & Validation
Q5: Beyond reaction setup, what is the root cause of primer-dimers? A: Complementary sequences, especially at the 3' ends of primers, are the fundamental cause. Even with optimized conditions, poorly designed primers will often form dimers. In silico analysis is non-negotiable.
Experimental Protocol 3: In Silico Primer Dimer Analysis Objective: To computationally assess primer pairs for self- and cross-complementarity. Method:
- Use tools like OligoAnalyzer (IDT) or Primer-BLAST (NCBI).
- Enter the primer sequences.
- Analyze for:
- Self-dimerization: ΔG values > -5 kcal/mol are acceptable. More negative values indicate stable dimers.
- Cross-dimerization: Pay special attention to 3' end complementarity of 3+ bases.
- Hairpin formation: ΔG > -3 kcal/mol is acceptable.
- Re-design primers if analysis shows significant 3' complementarity. Aim for 1-2 GC bases at the 3' end to promote specific binding.
Diagrams
Title: PCR Primer-Dimer Troubleshooting Decision Pathway
Title: Two-Step vs Touchdown PCR Cycle Comparison
The Scientist's Toolkit: Research Reagent Solutions
Table 2: Essential Reagents for Primer-Dimer Elimination
| Reagent / Material | Function & Role in Preventing Primer-Dimers |
|---|---|
| Hot-Start DNA Polymerase | Chemically modified or antibody-bound; inactive at room temp. Prevents extension of misprimed events during setup. Essential. |
| MgClâ‚‚ Solution (25-50 mM) | Critical cofactor. Requires precise titration. Lower concentrations often increase specificity. |
| PCR-Grade Nucleotides (dNTPs) | High-purity dNTPs prevent contaminants that can affect Mg²⺠availability and polymerase fidelity. |
| PCR Additives (DMSO, Betaine) | Destabilize secondary structures, increase stringency, and can promote specific primer-template annealing. |
| Low-Binding Microtubes & Tips | Minimize adsorption of primers and enzyme, ensuring accurate final concentrations in the reaction. |
| Thermal Cycler with Gradient Function | Allows empirical testing of a range of annealing temperatures in a single run to find the optimal stringent temperature. |
| Bioinformatics Software | For primer design analysis (e.g., OligoAnalyzer, Primer-BLAST) to check for self-complementarity before synthesis. |
| High-Resolution Agarose | For gel electrophoresis (2-4%) to clearly resolve target amplicons from low molecular weight primer-dimer artifacts. |
| Keto-Deoxy-Nonulonic acid | Keto-Deoxy-Nonulonic Acid|High-Purity Reference Standard |
| 1-Bromoheptadecane | 1-Bromoheptadecane, CAS:3508-00-7, MF:C17H35Br, MW:319.4 g/mol |
Troubleshooting Guides & FAQs
FAQ 1: Why do I see irregular amplification curves and high Cq values in my qPCR, despite a successful endpoint PCR with the same primers?
- Answer: This is a classic symptom of primer dimer (PD) formation in qPCR. In endpoint PCR, PDs compete with the target but may not prevent visible amplicon detection on a gel. In qPCR, SYBR Green dye binds indiscriminately to all double-stranded DNA, including PDs. Early-cycle PD amplification consumes reagents and generates fluorescence, leading to high quantification cycle (Cq) values, irregular amplification curves, and false-negative or inaccurate quantification results. This is the "qCT Confusion" referenced in the title.
FAQ 2: My PCR product looks clean on an agarose gel, but my subsequent cloning experiment yields an abnormally high percentage of empty vectors or incorrect inserts. Why?
- Answer: Primer dimers, even if faint and invisible next to a strong target band on a gel, are often present in your purified PCR product. These short, blunt-ended duplexes are highly efficient substrates for TA or blunt-end cloning ligases. They outcompete your larger target amplicon for insertion into the vector, leading to cloning failures. Gel extraction may not fully eliminate them if they are similar in size to your product.
FAQ 3: What specific steps can I take during PCR setup to minimize primer dimer formation?
- Answer: Follow this protocol hierarchy:
- Primer Design: Use software (e.g., NCBI Primer-BLAST) to check for 3'-end complementarity. Aim for ΔG > -5 kcal/mol for dimer stability.
- Touchdown/Hot Start: Use a hot-start polymerase and consider a touchdown protocol (e.g., start 3-5°C above calculated Tm, decrease 1°C per cycle for 5-10 cycles).
- Optimize Mg2+: Titrate MgClâ‚‚ concentration (1.5 - 4.0 mM in 0.5 mM steps). Lower Mg2+ can increase specificity.
- Thermal Cycling: Increase the annealing temperature incrementally (by 2°C steps) from the calculated primer Tm.
- Additives: Include PCR additives like Betaine (1M final) or DMSO (2-5% v/v) to reduce secondary structure and improve specificity.
FAQ 4: How can I definitively diagnose primer dimers in my qPCR run?
- Answer: Perform a post-run melt curve analysis. A single, sharp peak at the expected Tm of your target indicates specific amplification. Multiple peaks or a dominant peak at a lower temperature (~70-75°C) indicates non-specific products like primer dimers. See Table 1 for diagnostic criteria.
Table 1: Diagnostic Signatures of Primer Dimers in Downstream Applications
| Application | Observation Indicative of Primer Dimers | Quantitative/Qualitative Impact |
|---|---|---|
| qPCR (SYBR Green) | Melt curve peak at 70-75°C; Early Cq (<15); Amplification in NTC. | False high copy number; Reduced amplification efficiency (>110%); False negatives. |
| Endpoint PCR/Gel | Low molecular weight smear near the gel well. | Reduced target yield; Gel purification contamination. |
| TA/Blunt-End Cloning | >70% white colonies contain empty vector; Sequencing reveals short, random inserts. | Drastically reduced cloning efficiency; Increased screening workload. |
| Sequencing (Direct PCR) | Unreadable or noisy chromatogram after primer binding site. | Failed sequence reaction; Ambiguous base calls. |
Experimental Protocol: Validation of Primer Dimer Impact on Cloning Efficiency
Objective: To empirically demonstrate how primer dimers reduce successful recombinant clone formation.
Materials:
- Purified PCR product (with suspected PDs).
- Cloning vector (e.g., pCR2.1-TOPO).
- Competent E. coli cells.
- Appropriate selective plates (e.g., LB + Amp/X-Gal/IPTG).
- Gel extraction kit.
- Restriction enzymes for colony PCR or diagnostic digest.
Methodology:
- PCR & Analysis: Perform two parallel PCRs with the same target: one optimized (high annealing temp, hot-start polymerase) and one suboptimal (low annealing temp, standard polymerase). Run both products on a high-percentage (3%) agarose gel.
- Gel Purification: Excise the target band from both reactions. Purify using a gel extraction kit. Elute in identical volumes.
- Ligation & Transformation: Set up identical ligation reactions for both purified products using the same vector mass. Transform into competent cells. Plate equal volumes on selective plates.
- Data Collection: Count total (white+blue) colonies after 16-18 hours. Pick 10-12 white colonies from each plate for colony PCR using vector-specific primers (e.g., M13F/R).
- Analysis: Run colony PCR products on a gel. A correct insert size confirms a successful recombinant clone. Calculate the percentage of correct inserts for each condition.
Expected Outcome: The suboptimal PCR product, harboring more PDs, will yield a higher total colony count (due to PD-vector ligation) but a significantly lower percentage of colonies with the correct insert.
The Scientist's Toolkit: Research Reagent Solutions
| Reagent/Material | Function in Mitigating Primer Dimers |
|---|---|
| Hot-Start DNA Polymerase | Remains inactive until initial denaturation at >90°C, preventing primer extension during setup and low-temperature cycles where dimers form. |
| PCR Grade Nucleotides (dNTPs) | High-purity, buffered solutions ensure optimal concentration and Mg2+ balance, critical for fidelity and specificity. |
| Betaine (5M Stock) | A kosmotropic additive that reduces secondary structure and equalizes DNA melting temperatures, improving primer specificity. |
| DMSO (100%) | Disrupts base pairing, especially in GC-rich regions, helping to prevent non-specific primer binding and dimerization. |
| MgCl2 Solution (25mM) | Essential cofactor for polymerase. Precise titration (1.5-4.0mM) is crucial; lower concentrations can enhance specificity. |
| Q5 or Phusion High-Fidelity Polymerase | Engineered polymerases with high processivity and 3'→5' exonuclease (proofreading) activity, which can degrade mis-annealed primers. |
| Solid-Phase Reversible Immobilization (SPRI) Beads | For post-PCR clean-up; allow size-selective binding of DNA to remove short-fragment contaminants like primer dimers. |
| 1-(Mesitylsulfonyl)-3-nitro-1h-1,2,4-triazole | 1-(Mesitylsulfonyl)-3-nitro-1h-1,2,4-triazole, CAS:74257-00-4, MF:C11H12N4O4S, MW:296.3 g/mol |
| Methyl 3-amino-3-deoxy-a-d-mannopyranoside, HCl | Methyl 3-amino-3-deoxy-a-d-mannopyranoside, HCl, CAS:14133-35-8, MF:C7H16ClNO5, MW:229.66 g/mol |
Visualizations
Title: PCR Optimization Workflow vs. Primer Dimer Failure Pathway
Title: Primer Dimer Competition in Cloning Ligation
Technical Support Center
Troubleshooting Guides & FAQs
Q1: My agarose gel shows a low molecular weight smear, but the capillary electrophoresis (CE) trace shows a distinct, sharp peak at ~40-80 bp. What is the discrepancy, and which method is correct?
A: Both are correct but highlight different characteristics. Agarose gel electrophoresis separates by mass and provides a visual "smear" indicative of a heterogeneous mixture of primer dimer (PD) sizes. Capillary electrophoresis with a sensitive dye (e.g., intercalating dye for fragment analyzers) separates by size with single-base-pair resolution, revealing the dominant, specific PD product(s) formed. The sharp CE peak is the actual, most abundant dimer amplicon. Trust the CE data for precise sizing and the gel for a general, qualitative view of overall product purity.
Q2: Why do I see primer dimers on my agarose gel but not in the corresponding capillary electrophoresis trace?
A: This is typically a sensitivity issue. Standard agarose gel with ethidium bromide has a detection limit of ~1-5 ng of DNA. CE systems equipped with high-sensitivity fluorescence detection (e.g., using SYBR Gold derivatives) can detect sub-nanogram amounts. If PD formation is minimal, it may be below the visual detection threshold of the gel but quantifiable by CE. Conversely, if the CE trace shows no PD peak but the gel does, check for gel artifacts (e.g., dye fronts, buffer contaminants) or overloading of the main PCR product on the gel, which can obscure the PD region.
Q3: How should I quantitatively compare primer dimer levels between different PCR optimization experiments?
A: Capillary electrophoresis is the definitive quantitative tool. Use the software-integrated peak area data. Calculate the PD percentage as: (Area of PD Peak(s) / Total Area of all Peaks) * 100%. Agarose gel analysis is only semi-quantitative; use densitometry software on gel images with caution, as staining is not uniform across fragment sizes.
Q4: My capillary electrophoresis shows a peak at the expected primer dimer size, but also a larger, broader peak. What could this be?
A: The sharp peak is the specific primer dimer. The broader, larger peak ahead of it likely represents non-specific amplification products or primer concatemers. Agarose gel would show this as a smear extending above the PD smear. This indicates significant primer homology or low annealing stringency. Redesign primers or increase annealing temperature.
Data Presentation: Comparison of Electrophoresis Methods
Table 1: Comparative Analysis of Agarose Gel vs. Capillary Electrophoresis for Primer Dimer Detection
| Feature | Agarose Gel Electrophoresis | Capillary Electrophoresis (e.g., Fragment Analyzer, Bioanalyzer) |
|---|---|---|
| Detection Principle | Separation by mass through a matrix, visual/UV detection. | Electrokinetic injection, separation in polymer matrix, laser-induced fluorescence detection. |
| Size Resolution | Low (≥10-20 bp difference). | High (1-5 bp resolution in the 35-500 bp range). |
| Sensitivity | Low (~1-5 ng DNA). | Very High (pg-fg levels). |
| Quantification | Semi-quantitative (densitometry possible). | Highly quantitative (precise peak area integration). |
| Sample Throughput | Moderate (12-96 samples per run). | High (up to 96 samples in batch). |
| Data Output | Image (gel photo). | Electropherogram (peak trace) and gel-like image simulation. |
| Key Advantage for PDs | Low cost, intuitive visual of overall product purity. | Precise sizing and objective quantification of dimer formation levels. |
| Primary Limitation | Poor resolution of small fragments, subjective analysis. | Higher cost per sample, requires specialized instrument. |
| Optimal Use Case | Initial, rapid check for gross PD contamination. | Critical for optimization experiments requiring precise PD quantification and sizing. |
Experimental Protocols
Protocol 1: Visualizing Primer Dimers via Standard Agarose Gel Electrophoresis
- Prepare a 3-4% High-Resolution Agarose Gel: Use a high-resolution agarose or MetaPhor agarose in 1X TAE buffer. Add a safe DNA intercalating dye (e.g., 0.5 µg/mL ethidium bromide or equivalent SYBR-safe dye).
- Sample Preparation: Mix 5 µL of your final PCR reaction with 1 µL of 6X DNA loading dye.
- Electrophoresis: Load the mixture alongside an appropriate low-molecular-weight DNA ladder (e.g., 25/50 bp ladder). Run the gel at 5-8 V/cm in 1X TAE buffer until the bromophenol blue dye front has migrated ~2/3 of the gel length.
- Visualization: Image the gel under UV transillumination. Primer dimers will appear as a diffuse smear or faint band between 35-80 bp, below the main amplicon band.
Protocol 2: Quantifying Primer Dimers via Capillary Electrophoresis (Generic Workflow)
Note: This protocol is instrument-agnostic; follow specific manufacturer guidelines for kits (e.g., Agilent High Sensitivity DNA kit, QIAxcel Advanced System).
- Kit Preparation: Thaw and prepare the gel-dye mix, wells, and ladder as per kit instructions. Prime the capillary or cartridge.
- Sample & Ladder Preparation: Dilute 1 µL of PCR product in 9-39 µL of molecular-grade water (typical 1:10 to 1:40 dilution). For the ladder, use the provided size standard.
- Plate Loading: Load the diluted samples and ladder into designated wells of a microplate or cartridge.
- Run Setup: Define the sample plate layout and run method in the instrument software. Select the appropriate separation protocol for the 35-500 bp range.
- Data Analysis: After the run, use the software to integrate peaks. Identify primer dimer peaks by their size (typically 35-80 bp) relative to the ladder. Use peak area data for quantification relative to the main target peak.
Visualization of Analysis Workflow
Diagram Title: PCR Primer Dimer Analysis & Optimization Workflow
The Scientist's Toolkit: Research Reagent Solutions
Table 2: Essential Reagents for Primer Dimer Analysis & Mitigation
| Item | Function & Relevance | Example Product/Brand |
|---|---|---|
| High-Quality, Hot-Start DNA Polymerase | Reduces non-specific priming and extension at low temperatures during reaction setup, the single most effective biochemical tool against PD formation. | HotStarTaq Plus, Q5 High-Fidelity, Platinum Taq. |
| High-Resolution Agarose | Provides better separation of small DNA fragments (like PDs) from primers and dye fronts than standard agarose. | MetaPhor Agarose, NuSieve GTG Agarose. |
| High-Sensitivity DNA Ladder (Low Range) | Essential for accurate sizing of primer dimers (35-100 bp) on both agarose gels and CE traces. | 25/50 bp DNA Ladder, Low Molecular Weight Ladder. |
| Capillary Electrophoresis Kit (High Sensitivity) | Enables precise, automated sizing and quantification of PCR products and PDs. Required for robust optimization data. | Agilent High Sensitivity DNA Kit, QIAxcel DNA High Resolution Kit. |
| PCR Optimizer Kits/Buffers | Contain additives (e.g., DMSO, Betaine, Mg2+ gradients) that can alter primer annealing specificity and reduce PD formation. | PCR Optimizer Kit, GC-Rich Solution. |
| Primer Design Software w/ Dimer Check | Critical for in silico prediction of primer self- and cross-dimers before synthesis. | Primer-BLAST, IDT OligoAnalyzer, NCBI Primer Designing Tool. |
| Solid-Phase Reversible Immobilization (SPRI) Beads | For post-PCR clean-up to remove primers and primer dimers prior to downstream applications like sequencing. | AMPure XP Beads. |
| Methyl beta-D-galactopyranoside | Methyl beta-D-galactopyranoside, CAS:1824-94-8, MF:C7H14O6, MW:194.18 g/mol | Chemical Reagent |
| Methyl beta-D-glucopyranoside | Methyl beta-D-glucopyranoside (CAS 709-50-2) |
Proactive Prevention: Step-by-Step Strategies for Primer Design and Reaction Setup
Technical Support & Troubleshooting Center
FAQs & Troubleshooting Guides
Q1: Despite having a calculated Tm within the recommended 55-65°C range, my PCR yields multiple non-specific bands. What's wrong? A: The problem likely lies in primer secondary structure or a mismatch between primer and actual annealing temperature. The calculated Tm is an estimate. Run a temperature gradient PCR (e.g., from 55°C to 70°C) to find the optimal empirical annealing temperature for your specific primer-template pair. Also, check for primer self-complementarity or cross-dimerization using oligo analyzer software.
Q2: My primers have a GC content of 70%. The reaction is very inefficient. What should I do? A: Excessively high GC content (>65%) promotes stable secondary structures and non-specific binding. Redesign the primers to bring the GC content to the optimal 40-60% range. If redesign is impossible, consider using a PCR additive like DMSO, betaine, or GC-rich enhancer solutions to lower the strand separation temperature and reduce secondary structure.
Q3: I see a prominent primer-dimer band on my gel. How can I diagnose which primer is causing it? A: Run individual primer controls in separate PCR reactions (Primer A alone, Primer B alone with all other components). The lane with the strong dimer band indicates the primer with strong self-complementarity at its 3' end. You must redesign that primer, paying strict attention to 3'-end stability.
Q4: What does "3'-end stability" mean, and how do I calculate it? A: 3'-end stability refers to the Gibbs free energy (ΔG) of the last 5 nucleotides at the 3' end of the primer. A less stable (more positive ΔG) 3' end reduces non-target extension. Use software like OligoAnalyzer or Primer3. The rule of thumb: the ΔG of the 5 bases at the 3' end should be ≥ -9 kcal/mol.
Q5: How do I balance primer length with the need for a high Tm when designing primers for a high-GC template? A: For high-GC templates, increase primer length (e.g., 25-30 bases) to achieve the desired Tm without exceeding 60% GC content. The longer length increases specificity and allows you to maintain Tm while keeping GC percentage in check. Avoid adding G or C clamps arbitrarily.
Table 1: Optimal Ranges for Key Primer Design Parameters
| Parameter | Optimal Range | Critical Threshold | Rationale |
|---|---|---|---|
| Length | 18-25 bases | 15-30 bases (acceptable) | Balances specificity (longer) with efficient binding (shorter). |
| Melting Temp (Tm) | 55-65°C | < 40°C or > 80°C (problematic) | Ensures specific annealing; both primers should have Tm within 2°C. |
| GC Content | 40-60% | < 20% or > 65% (avoid) | Provides stable yet not overly rigid binding; affects Tm. |
| 3'-End ΔG | ≥ -9 kcal/mol | ≤ -12 kcal/mol (prone to dimers) | Low stability at the 3' end minimizes mispriming and dimer formation. |
| 3'-End Nucleotide | G or C preferred | Avoid A at the very 3' end | A "GC clamp" promotes specific binding due to stronger hydrogen bonding. |
Table 2: Troubleshooting Primer Dimers & Non-Specific Amplification
| Symptom | Potential Cause Based on Design Rules | Solution |
|---|---|---|
| Primer-dimer bands only | High 3'-end complementarity (ΔG too low) | Redesign primer(s) for weaker 3'-end stability (last 5 bases). |
| Smear of non-specific products | Tm too low; primer too short; GC% too low | Redesign for higher Tm (increase length/GC%), optimize annealing temp. |
| No product, but dimers present | Primers form stable cross-dimers | Check inter-primer complementarity; separate primer binding sites if possible. |
| Faint specific band + dimers | Overall primer ΔG too negative (too stable) | Increase stringency (raise annealing temp, reduce Mg2+), or redesign. |
Experimental Protocols
Protocol 1: Empirical Annealing Temperature Optimization via Gradient PCR
- Design primers following the golden rules in Table 1.
- Set up a standard PCR master mix. Aliquot equal volumes into 8 tubes.
- Place tubes in a thermal cycler with a gradient block. Set the annealing temperature gradient across the block (e.g., from 50°C to 72°C).
- Run the PCR.
- Analyze products by agarose gel electrophoresis.
- Identify the temperature that yields the strongest specific product with the least non-specific background. Use this as the optimal annealing temperature.
Protocol 2: In-silico Primer Dimer and Hairpin Analysis
- Input your primer sequences into an oligo analysis tool (e.g., IDT OligoAnalyzer, Thermo Fisher Multiple Primer Analyzer).
- Run the "Self-Dimerization" and "Hairpin" checks for each primer individually.
- Run the "Hetero-Dimerization" check for the forward and reverse primer pair.
- Examine the reported ΔG values and dimer/loop structures. Redesign any primer that shows a dimer/hairpin ΔG lower than -8 kcal/mol, particularly if the complementary region involves the 3' end.
Protocol 3: Testing Individual Primer Controls for Dimer Diagnosis
- Prepare three separate PCR reactions:
- Reaction A: Contains only Forward Primer + template + master mix.
- Reaction B: Contains only Reverse Primer + template + master mix.
- Reaction C (Positive Control): Contains both primers + template + master mix.
- Run PCR using your standard cycling conditions.
- Run all three reactions on a high-percentage agarose gel (e.g., 3-4%).
- Visualize. The primer control lane(s) showing a ladder or smear indicate which primer(s) are engaging in primer-dimer artifact formation.
Diagrams
Title: Primer Design and Validation Workflow
Title: Troubleshooting Decision Tree for PCR Artifacts
The Scientist's Toolkit: Research Reagent Solutions
Table 3: Essential Reagents for Optimizing PCR and Eliminating Dimers
| Reagent | Function in Preventing Primer Dimers/Non-Specificity |
|---|---|
| High-Fidelity DNA Polymerase | Enzymes with 3'→5' exonuclease proofreading activity often have optimized buffers that increase specificity and reduce mispriming. |
| Hot-Start Taq DNA Polymerase | Remains inactive until a high-temperature step, preventing primer dimer formation during reaction setup and initial heating. |
| DMSO (Dimethyl Sulfoxide) | Disrupts secondary structures in DNA, particularly useful for GC-rich templates, improving specificity and yield. |
| Betaine | Equalizes the melting temperatures of GC- and AT-rich regions, reducing secondary structure and promoting specific annealing. |
| PCR Enhancers/Additives | Commercial solutions (e.g., Q-Solution, GC-Rich Enhancer) designed to modify DNA melting behavior for problematic templates. |
| dNTP Mix | Balanced concentrations prevent misincorporation. Using high-purity dNTPs minimizes contaminants that can affect fidelity. |
| MgClâ‚‚ Solution | Critical cofactor for Taq polymerase. Excess Mg2+ promotes non-specific binding; titration is key for optimization. |
| Nuclease-Free Water | The solvent for all reagents; prevents degradation of primers/template and enzymatic reactions. |
| Methyl 2,3-O-isopropylidene-beta-D-ribofuranoside | Methyl 2,3-O-isopropylidene-beta-D-ribofuranoside, CAS:4099-85-8, MF:C9H16O5, MW:204.22 g/mol |
| 4-Methylumbelliferyl glucoside | 4-Methylumbelliferyl Glucoside|Fluorogenic Glucosidase Substrate |
Technical Support Center: FAQs & Troubleshooting
FAQ 1: What are the most common causes of false-positive dimer predictions in silico, and how can I mitigate them?
- Answer: False positives often arise from software using overly simplistic thermodynamic models or default parameters not suited to your specific PCR conditions (e.g., salt concentration, probe presence). To mitigate this:
- Calibrate Parameters: Adjust the Na+/K+ and Mg2+ concentration settings in the software to match your lab's master mix formulation.
- Set Appropriate Thresholds: Do not rely on default ΔG (Gibbs Free Energy) thresholds. Establish a validation curve: Run predictions for a set of primers with known experimental outcomes (from gel electrophoresis or melt curve analysis) to determine the ΔG cutoff that correlates with actual dimer formation in your system.
- Inspect Alignment Length: Short, low-complexity alignments (e.g., < 4 contiguous base pairs) often have negligible experimental impact. Configure the software to ignore dimers with alignment regions below a minimum length (e.g., 5 bp).
FAQ 2: My in silico tool predicts no dimers, but I still observe strong dimer bands on my agarose gel. What steps should I take to troubleshoot?
- Answer: This discrepancy suggests either a software limitation or an experimental variable. Follow this troubleshooting guide:
- Re-check Input Sequences: Verify there are no typos or non-standard characters in the FASTA input.
- Cross-validate with a Second Tool: Use an alternative algorithm (e.g., switch from a basic nearest-neighbor model to one incorporating kinetics) to rule out software-specific errors.
- Re-evaluate PCR Conditions: The prediction likely used standard conditions. Experimentally, reduce primer concentration (from 0.5µM to 0.2µM) and use a hot-start polymerase to minimize primer interaction during setup.
- Analyze Potential Heterodimers: If using multiple primer pairs (multiplex PCR), ensure you have analyzed all possible pair-wise combinations (ForwardA vs ReverseB, etc.), not just within each pair.
FAQ 3: How do I interpret conflicting predictions for hairpin stability (ΔG) and melting temperature (Tm) between different software packages?
- Answer: Different tools use different underlying algorithms and parameter sets. Use the following table to compare and decide:
| Software/Tool (Example) | Typical Algorithm Basis | Key Parameter Differences | Recommended Action for Conflict |
|---|---|---|---|
| Primer3 | Nearest-Neighbor Thermodynamics | Often uses SantaLucia 1998 parameters; may assume lower [Na+]. | Treat as a baseline. Its ΔG is often less accurate for short structures. |
| IDT OligoAnalyzer | Nearest-Neighbor Thermodynamics | Uses more recent salt correction models (e.g., SantaLucia 2004). | Consider its output as more current for Tm. Note its dimer prediction is limited. |
| mFold/UNAFold | Partition Function Model | Considers ensemble of structures, not just one optimal fold. | Most rigorous for hairpins. Trust its ΔG if it predicts stability; manually inspect the proposed structure. |
Resolution Protocol: When conflicts occur, prioritize the prediction from the tool whose parameters best match your experimental conditions and which uses the most comprehensive model (Partition Function > Simple Nearest-Neighbor). Experimentally, synthesize and run a CD (Cycling Denaturation) curve on the primer alone to determine its actual melting profile.
FAQ 4: What is a step-by-step protocol for validating in silico dimer predictions experimentally?
- Experimental Validation Protocol: Agarose Gel Electrophoresis of Primer-Dimer Products
- Objective: To empirically confirm dimer formation predicted in silico.
- Reagents: Test primer pair(s), Taq DNA Polymerase (standard), dNTPs, appropriate buffer, DNA gel stain, size ladder.
- Method:
- Set up a standard 25µL PCR reaction without template DNA. Include only primers, master mix, and water.
- Run PCR using your standard cycling protocol.
- Prepare a 3-4% high-resolution agarose gel.
- Load the entire primer-dimer reaction alongside a 50-100bp DNA ladder.
- Run gel electrophoresis at 5-6 V/cm for 60-90 minutes.
- Image the gel. Dimer products will appear as a diffuse smear or discrete band below 100bp.
- Interpretation: Correlate the intensity of the smear/band with the predicted ΔG value from software. Strong bands should align with more negative (stable) predicted ΔG.
The Scientist's Toolkit: Research Reagent Solutions
| Item | Function in Dimer Elimination Research |
|---|---|
| Hot-Start DNA Polymerase | Enzyme remains inactive until initial denaturation step, preventing primer extension during reaction setup where dimer formation initiates. |
| Proofreading Polymerase (e.g., Pfu) | Often has reduced strand displacement activity and higher optimal temperature, minimizing low-temperature mis-priming events. |
| PCR Enhancers (e.g., Betaine, DMSO) | Reduce secondary structure formation and can improve primer specificity by homogenizing DNA melting temperatures. |
| Dual-Labeled Probes (for qPCR) | In probe-based assays, signal is generated only upon probe cleavage, ignoring non-specific amplification products like dimers. |
| High-Fidelity Buffer Systems | Optimized salt and pH conditions to enhance primer-template binding specificity over primer-primer interactions. |
| Nuclease-Free Water (PCR Grade) | Eliminates contaminants that can degrade primers or cause non-specific amplification, ensuring clean baseline reactions. |
| 4'-Nitrophenyl-2-acetamido-2-deoxy-alpha-D-glucopyranoside | 4'-Nitrophenyl-2-acetamido-2-deoxy-alpha-D-glucopyranoside, CAS:10139-02-3, MF:C14H18N2O8, MW:342.3 g/mol |
| 4-Nitrophenyl formate | 4-Nitrophenyl formate, CAS:1865-01-6, MF:C7H5NO4, MW:167.12 g/mol |
Visualizations
Title: Primer Dimer Troubleshooting Workflow
Title: Role of In Silico Tools in Solving Dimer Problems
This technical support center is designed to support researchers within the broader thesis of eliminating primer dimers in PCR. Non-specific amplification, particularly primer-dimer formation, remains a primary cause of failed or inefficient PCRs. Hot-start DNA polymerases are engineered to reduce this by inhibiting polymerase activity at lower temperatures, thereby minimizing off-target interactions during reaction setup and initial heating phases.
Troubleshooting Guides & FAQs
Q1: I switched to a hot-start polymerase, but I still observe primer-dimer bands in my agarose gel. What could be the cause?
- A: Hot-start technology is not a cure-all. Persistent primer dimers suggest issues with primer design or reaction conditions.
- Check Primer Design: Ensure primers have minimal self-complementarity (especially at 3' ends) and cross-complementarity. Use software to check for hairpins and dimer formation. Redesign primers if necessary.
- Optimize Annealing Temperature: Perform a gradient PCR to find the optimal annealing temperature. A temperature that is too low can allow non-specific binding despite the hot-start mechanism.
- Verify Polymerase Activation: Ensure your thermal cycler block is calibrated. The initial denaturation/activation step (often 95°C for 2-5 minutes) must be sufficient to fully release the inhibitory antibody or chemical modification.
Q2: Can I assemble my hot-start PCR master mix on ice and leave it at room temperature before cycling?
- A: While hot-start polymerases are more forgiving than standard Taq, it is not recommended. Although the enzyme is inhibited, primers and template DNA can still interact. For the most stringent prevention of primer-dimer formation, assemble reactions on ice and transfer them to a pre-heated thermal cycler ("true hot-start") or ensure the cycler has a heated lid and fast ramp rates to minimize time below the activation temperature.
Q3: What is the difference between antibody-mediated and chemical modification hot-start mechanisms?
- A: Both aim to inhibit polymerase activity at room temperature.
- Antibody-mediated: A neutralizing antibody binds the active site. It is denatured during the initial activation step, releasing active polymerase. It offers rapid activation.
- Chemical modification (e.g., aptamer-based): The enzyme is chemically blocked or bound by an aptamer. Activation requires a sustained high-temperature step to break the bonds. This can offer a more stringent "hold" at lower temperatures.
- Choice: For routine applications, both work well. For extremely high-sensitivity assays (e.g., single-cell PCR), a chemically modified or engineered enzyme may provide superior specificity.
Q4: How do I choose between a standard Taq-based hot-start and a high-fidelity (HiFi) hot-start polymerase?
- A: The choice depends on your downstream application.
- Use standard hot-start Taq: For routine cloning, genotyping, or PCR where ultimate fidelity is not critical, and you may benefit from non-template-added A-overhangs.
- Use high-fidelity hot-start polymerase: For cloning long fragments, mutation detection, sequencing, or any application where sequence accuracy is paramount. These blends often combine a hot-start modified polymerase with a proofreading enzyme (e.g., Pfu), drastically reducing error rates.
Table 1: Comparison of Common Hot-Start Polymerase Mechanisms
| Mechanism Type | Example | Activation Requirement | Key Advantage | Potential Drawback |
|---|---|---|---|---|
| Antibody-mediated | Anti-Taq antibody | 95°C for 30s - 2 min | Fast activation; robust | Residual activity possible if left at RT for long periods |
| Chemical Modification | Aptamer/ligand bound | 95°C for 2 - 5 min | Very stringent inhibition; stable at RT | Longer activation time required |
| Physical Separation | Wax bead barriers | First denaturation step | Historical method; simple | Less convenient; not common in modern kits |
| Engineered Enzyme | Modified Pfu | Temperature-dependent conformational change | No additives; highly specific | Can be more expensive |
Table 2: Impact of Hot-Start Polymerase on PCR Specificity
| Polymerase Type | Average Primer-Dimer Formation (Gel Densitometry) | Successful Amplification of 1kb Target from 100 pg Genomic DNA | Estimated Error Rate (mutations/bp/cycle) |
|---|---|---|---|
| Standard Taq | High (+++) | 4 out of 10 replicates | ~1 x 10â»âµ |
| Antibody Hot-Start Taq | Low (+) | 9 out of 10 replicates | ~1 x 10â»âµ |
| Chemically Modified HiFi Blend | Very Low/Very Low (+/-) | 10 out of 10 replicates | ~1 x 10â»â¶ |
Experimental Protocols
Protocol 1: Gradient PCR for Annealing Temperature Optimization with Hot-Start Polymerase
Purpose: To empirically determine the optimal annealing temperature (Ta) for a primer pair to minimize primer-dimer and maximize specific product yield.
Prepare Master Mix (on ice):
- 10 µL: 2X Hot-Start Master Mix (contains polymerase, dNTPs, Mg²âº, buffer)
- 1 µL: Forward Primer (10 µM stock)
- 1 µL: Reverse Primer (10 µM stock)
- 1 µL: Template DNA (e.g., 50 ng genomic DNA)
- 7 µL: Nuclease-free Water
- Total Volume: 20 µL per reaction.
Dispense: Aliquot 20 µL of master mix into 8 PCR tubes.
Thermal Cycling: Place tubes in a gradient thermal cycler. Use the following program:
- Step 1 - Activation: 95°C for 2 minutes.
- Step 2 - Denaturation: 95°C for 30 seconds.
- Step 3 - Annealing (Gradient): 55°C to 68°C for 30 seconds. (The cycler will create a temperature gradient across the block).
- Step 4 - Extension: 72°C for 1 minute per kb of product.
- Repeat Steps 2-4 for 34 cycles.
- Final Extension: 72°C for 5 minutes.
- Hold: 4°C.
Analysis: Run all reactions on a 2% agarose gel. Identify the temperature that yields the strongest specific band with the faintest primer-dimer smear.
Protocol 2: Assessing Hot-Start Stringency (Room Temperature Setup Challenge)
Purpose: To compare the robustness of different hot-start polymerases against non-specific amplification.
- Prepare Two Identical Master Mixes (as in Protocol 1) for two different hot-start polymerases (e.g., Antibody vs. Chemically modified). Omit template DNA.
- Condition A (Control): Aliquot mixes and immediately place on ice, then transfer to a pre-heated (95°C) thermal cycler. Start the activation step.
- Condition B (Challenge): Aliquot mixes and leave at room temperature (22-25°C) for 1 hour. Then place in the thermal cycler and start the program.
- Cycling: Use a standard PCR program with a low annealing temperature (e.g., 50°C) to promote primer-dimer formation.
- Analysis: Analyze by agarose gel electrophoresis (3% gel). The polymerase that shows less primer-dimer product in Condition B has higher hot-start stringency.
Diagrams
Title: Mechanism of Hot-Start Polymerases Preventing Primer-Dimers
Title: Troubleshooting Primer-Dimers with Hot-Start Polymerases
The Scientist's Toolkit: Research Reagent Solutions
| Item | Function in Eliminating Primer-Dimers |
|---|---|
| Hot-Start DNA Polymerase | Core reagent. Engineered to remain inactive during reaction setup until a high-temperature activation step, preventing extension of misprimed events. |
| Nuclease-Free Water | Solvent for master mixes. Prevents degradation of primers, template, and enzyme by contaminating nucleases. |
| MgCl₂ Solution | Cofactor for polymerase activity. Concentration must be optimized; excess Mg²⺠can stabilize non-specific primer binding and increase dimer formation. |
| dNTP Mix | Building blocks for DNA synthesis. Balanced concentrations are critical; impurities or imbalances can reduce fidelity and efficiency. |
| PCR Buffer (with additives) | Provides optimal pH and salt conditions. May include additives like betaine or DMSO to improve specificity and amplify difficult templates. |
| Primer Design Software | Essential for in silico analysis of primer self-complementarity, hairpins, and melting temperature (Tm) to design optimal primers before synthesis. |
| Gradient Thermal Cycler | Allows testing of a range of annealing temperatures in a single run to find the optimal balance between specificity and yield. |
| High-Quality Agarose | For high-resolution gel electrophoresis to visualize the target product and distinguish it from primer-dimer smears near the well front. |
| Octyl alpha-D-glucopyranoside | Octyl alpha-D-glucopyranoside, CAS:29781-80-4, MF:C14H28O6, MW:292.37 g/mol |
| 1-Oleoyl-2-acetylglycerol | 1-Oleoyl-2-acetylglycerol, CAS:86390-77-4, MF:C23H42O5, MW:398.6 g/mol |
Technical Support Center
Troubleshooting Guide: Common PCR Issues & Solutions
Issue 1: Persistent Primer Dimer Formation Despite Standard Protocol
- Question: "My PCR reactions consistently yield a strong primer dimer band on the gel, even with optimized primer design. What specific master mix component adjustments should I prioritize?"
- Answer: Primer dimers are often a function of primer annealing kinetics. Prioritize these adjustments in order: 1) Mg2+ concentration: Lower Mg2+ (e.g., from 2.0 mM to 1.0-1.5 mM) can reduce non-specific primer hybridization and extension. Perform a titration (see Protocol A). 2) Proprietary Enhancers: Introduce additives like DMSO (3-5%), formamide (1-3%), or commercial PCR enhancer solutions that can stabilize polymerase and increase primer specificity. 3) Thermal Cycling: Increase the annealing temperature stepwise or use a touchdown PCR protocol.
Issue 2: Reduced or No Target Amplification After Buffer Optimization
- Question: "I titrated Mg2+ and added DMSO to eliminate dimers, but now my target yield is very low or absent. How can I recover amplification without reintroducing dimers?"
- Answer: Over-optimization can inhibit the reaction. Systematically reverse one variable at a time: First, increase Mg2+ in 0.25 mM increments from your lowest point, as Mg2+ is a critical cofactor for polymerase activity. If using a high percentage of additive (e.g., >5% DMSO), reduce it. Consider switching to a "hot-start" polymerase, which remains inactive until the initial denaturation step, preventing low-temperature mispriming.
Issue 3: Inconsistent Results Between Replicates with Proprietary Enhancers
- Question: "I am using a commercial PCR enhancer, but my results are not reproducible across triplicate reactions. What could be the cause?"
- Answer: Viscous or poorly mixed enhancers can lead to pipetting errors. Ensure all master mix components, especially glycerol-based enhancers, are thoroughly vortexed and spun down before use. When adding small volumes (< 1 µL) of enhancer, prepare a master mix for all replicates plus 10% extra to account for pipetting loss. Verify the enhancer is compatible with your specific DNA polymerase.
Frequently Asked Questions (FAQs)
FAQ 1: What is the typical starting range for Mg2+ concentration optimization, and how does it interact with dNTPs? Mg2+ acts as a cofactor for Taq polymerase. Free Mg2+ concentration is crucial, and it is competitively bound by dNTPs, primers, and template DNA. A standard starting range is 1.5 - 4.0 mM. The optimal free Mg2+ is usually between 0.5 - 2.5 mM.
Table 1: Mg2+ and dNTP Interaction Guide
| Total Mg2+ (mM) | dNTP Concentration (mM each) | Approximate Free [Mg2+] | Expected Impact |
|---|---|---|---|
| 1.5 | 0.2 | Very Low | Likely insufficient for polymerase activity. |
| 2.0 | 0.2 | Low to Moderate | Common starting point for optimization. |
| 3.0 | 0.2 | Moderate to High | May increase yield but risk of non-specific products. |
| 2.0 | 0.5 | Low | High dNTPs chelate Mg2+, may require higher total Mg2+. |
FAQ 2: Beyond DMSO, what are other common additive "enhancers" and their proposed mechanisms? Different additives address different problems:
- Betaine (1-1.5 M): Reduces secondary structure in GC-rich templates by equalizing base-pair stability.
- Formamide (1-5%): Destabilizes DNA duplexes, allowing for higher annealing stringency.
- BSA (0.1-0.8 µg/µL): Binds inhibitors often found in crude samples (e.g., humic acid, heparin).
- Commercial Enhancer Solutions: Often proprietary blends of the above, plus stabilizers like trehalose, and may include specially engineered DNA-binding proteins.
FAQ 3: How do I design an experiment to systematically optimize my master mix? Follow a structured matrix approach, changing only one or two variables at a time. See Protocol B for a detailed workflow.
Experimental Protocols
Protocol A: Mg2+ Concentration Titration
Objective: To determine the optimal MgCl2 concentration for specific target amplification while minimizing primer dimer formation. Materials: 10X PCR Buffer (without MgCl2), 25 mM MgCl2 stock, dNTP mix, primers, template, polymerase, nuclease-free water. Method:
- Prepare a 2X Master Mix base containing buffer, dNTPs, primers, polymerase, and template. Omit MgCl2.
- Aliquot equal volumes of the 2X Master Mix into 8 PCR tubes.
- To each tube, add a different volume of 25 mM MgCl2 stock and water to achieve final Mg2+ concentrations of: 0.5, 1.0, 1.5, 2.0, 2.5, 3.0, 3.5, and 4.0 mM.
- Run the thermal cycler using your standard protocol.
- Analyze products by agarose gel electrophoresis. Identify the condition with the strongest target band and the weakest primer dimer signal.
Protocol B: Systematic Optimization of Additives
Objective: To test the combined effect of Mg2+ and a common additive (e.g., DMSO) in a matrix. Materials: As in Protocol A, plus a 100% DMSO stock. Method:
- Prepare a Master Mix base as in Protocol A, but with a fixed, intermediate Mg2+ concentration (e.g., 1.5 mM).
- Set up a 3x3 matrix: Final DMSO concentrations of 0%, 2%, and 4% vs. Final Mg2+ concentrations of 1.5, 2.0, and 2.5 mM.
- For each of the 9 conditions, prepare a reaction tube adjusting the volumes of MgCl2 stock, DMSO stock, and water accordingly.
- Run PCR and analyze by gel electrophoresis. The optimal condition balances high target yield with low non-specific background.
Visualizations
Title: PCR Optimization Workflow to Eliminate Primer Dimers
Title: Dual Role of Mg2+ in Productive vs. Non-Specific PCR
The Scientist's Toolkit: Research Reagent Solutions
Table 2: Essential Reagents for PCR Buffer Optimization
| Reagent | Function in Optimization | Typical Starting Concentration / Note |
|---|---|---|
| MgCl2 Stock (25-50 mM) | Essential cofactor for Taq DNA polymerase. Concentration directly influences primer annealing specificity and enzyme fidelity. | Titrate from 1.0 to 4.0 mM final concentration. |
| dNTP Mix | Substrates for DNA synthesis. Compete with primers for Mg2+ binding; excess can chelate Mg2+. | 0.2 mM each dNTP is standard. Adjust Mg2+ if concentration changes. |
| DMSO (100%) | Additive that reduces secondary structure, lowers DNA melting temperature (Tm), and can improve primer specificity. | Test at 2-5% (v/v) final concentration. |
| Betaine (5M Stock) | Homostabilizing agent that equalizes GC and AT base pairing stability, aiding amplification of GC-rich targets. | Test at 0.5 - 1.5 M final concentration. |
| BSA (Molecular Biology Grade) | Binds to inhibitors present in sample DNA preparations, reducing polymerase inhibition. | Test at 0.1 - 0.8 µg/µL final concentration. |
| Commercial PCR Enhancer | Proprietary blends (e.g., Q-Solution, GC Melt, PCRx Enhancer) designed to address multiple issues like high GC content, secondary structure, and inhibition. | Use per manufacturer's instructions (often 1X final). |
| Hot-Start DNA Polymerase | Engineered polymerase inactive at room temperature, preventing primer-dimer formation during reaction setup. | Replaces standard Taq; crucial for low-copy targets. |
| Mg-Free 10X PCR Buffer | Provides core reaction components (pH, salts) without Mg2+, allowing for precise Mg2+ titration. | Essential for systematic Mg2+ optimization experiments. |
| 1-Oxyl-2,2,5,5-tetramethylpyrroline-3-carboxylate NHS ester | 1-Oxyl-2,2,5,5-tetramethylpyrroline-3-carboxylate NHS ester, CAS:37558-29-5, MF:C13H17N2O5, MW:281.28 g/mol | Chemical Reagent |
| Petromyzonol | Petromyzonol, MF:C24H42O4, MW:394.6 g/mol | Chemical Reagent |
Technical Support Center: Troubleshooting Guides & FAQs
FAQ 1: What is the fundamental difference between Touchdown (TD) and Step-Down (SD) PCR, and when should I choose one over the other to prevent primer dimers?
Answer: Both are progressive stringency protocols, but TD PCR decrements the annealing temperature (Ta) by 0.5–2°C per cycle over a set range (e.g., 70°C to 50°C) during the initial cycles, then continues at the final, lower Ta. SD PCR uses discrete, higher-stringency annealing steps for blocks of cycles (e.g., 5 cycles at 68°C, 5 cycles at 65°C, then 25 cycles at 62°C). Choose TD PCR when your primer Tm is uncertain or varies greatly within a pair, as it scans for the optimal stringency. Choose SD PCR when you have robust primers with known high Tm and want to maximize specificity from the outset by starting at a very high stringency to prevent mispriming and dimer formation.
FAQ 2: Despite using a TD PCR protocol, I still observe primer dimers on my gel. What are the most likely causes and solutions?
Answer: Primer dimers persist due to primer-mediated artifacts. Key troubleshooting steps are:
- Cause A: Initial Annealing Temperature Too Low. If your TD start temperature is below the true optimum, specific yield is low, allowing primers to dimerize in later cycles.
- Solution: Increase the starting Ta by 3–5°C. Ensure it is above the calculated Tm of your primers.
- Cause B: Excessive Primer Concentration. High primer levels promote primer-primer interactions.
- Solution: Titrate primers from 0.1–0.5 µM. 0.2 µM is often sufficient in optimized TD/SD protocols.
- Cause C: Too Many Cycles at the Final Low Temperature. Extended cycling at the permissive Ta allows amplification of dimer artifacts.
- Solution: Reduce the number of cycles at the final Ta (often 10-15 is enough) or implement a "Step-Down" final phase with fewer cycles.
FAQ 3: In Step-Down PCR, how do I determine the appropriate temperature steps and cycle numbers for each block?
Answer: Design the protocol backwards from your desired final annealing temperature (Ta_final). Use the table below as a guide.
Table 1: Step-Down PCR Protocol Design Guide
| Step Block | Annealing Temperature | Number of Cycles | Purpose |
|---|---|---|---|
| 1 (Highest Stringency) | Ta_final + 6°C to +10°C | 2-5 | Only permits binding of perfectly matched primer-target duplexes. Severely limits dimer formation. |
| 2 (Intermediate) | Ta_final + 3°C to +5°C | 2-5 | Gradually relaxes stringency to allow more specific product amplification. |
| 3 (Final) | Ta_final (calculated Tm) | 20-30 | Standard amplification of the now-enriched specific target. |
FAQ 4: Can I combine Hot Start polymerase with TD/SD PCR? Are there any protocol modifications required?
Answer: Yes, combination is highly recommended. Hot Start polymerase remains inactive until the initial denaturation step, preventing primer dimer formation during reaction setup. No major protocol modifications are needed. Ensure the initial prolonged activation step for the Hot Start polymerase (often 95°C for 2-5 minutes) is included before cycling begins.
FAQ 5: How do I optimize extension times and denaturation temperatures for TD/SD PCR, especially for complex templates?
Answer: Follow these rules:
- Denaturation: Use a high temperature (98°C) for 5-10 seconds for complex genomic DNA to ensure complete strand separation. For standard plasmids, 95°C is adequate.
- Extension: Time is based on amplicon length and polymerase speed. For a typical 1kb fragment and a standard Taq (1kb/min), use 1 minute. For high-fidelity enzymes (e.g., 2-4kb/sec), significantly reduce time. Critical: The extension time and temperature (usually 72°C) are held constant throughout all TD/SD annealing stages.
Detailed Experimental Protocol: Touchdown PCR to Eliminate Primer Dimers
Objective: To amplify a specific 750bp target from human genomic DNA while suppressing primer dimer formation.
Reagents & Setup (25 µL Reaction):
- Template: 50-100 ng human genomic DNA
- Primers (Forward & Reverse): 0.2 µM each (final)
- Hot Start High-Fidelity DNA Polymerase: 1.25 units
- dNTP Mix: 200 µM each
- 5X Reaction Buffer (with MgCl2): 1X final
- Nuclease-free water to 25 µL
Thermal Cycling Protocol:
- Initial Denaturation/Activation: 98°C for 2 min (activates Hot Start polymerase).
- Touchdown Cycles (Cycles 1-12):
- Denaturation: 98°C for 10 sec.
- Annealing: Start at 72°C. Decrease by 1°C per cycle for the next 11 cycles (i.e., 72°C, 71°C... 61°C).
- Extension: 72°C for 30 sec.
- Standard Amplification (Cycles 13-35):
- Denaturation: 98°C for 10 sec.
- Annealing: 60°C for 15 sec.
- Extension: 72°C for 30 sec.
- Final Extension: 72°C for 2 min.
- Hold: 4°C.
Analysis: Run 5 µL of product on a 1.5% agarose gel. Expect a single, clean band at 750bp with no smearing or low-molecular-weight primer dimer band (~50-100bp).
Visualizations
Title: Touchdown PCR Thermal Cycling Profile
Title: How TD/SD and Hot-Start PCR Prevent Primer Dimers
The Scientist's Toolkit: Research Reagent Solutions
Table 2: Essential Reagents for High-Specificity PCR
| Reagent Category | Specific Example | Function in Eliminating Primer Dimers |
|---|---|---|
| Hot-Start DNA Polymerase | Hot Start Taq DNA Polymerase, Q5 Hot Start High-Fidelity | Remains inactive at room temperature, preventing non-specific primer extension and dimer synthesis during reaction setup. |
| High-Fidelity Buffer Systems | MgCl2-free buffer with separate Mg2+ solution, additive buffers (e.g., Q5 Reaction Buffer) | Allows precise optimization of Mg2+ concentration (1.5-3.0 mM), which is critical for primer stringency and polymerase fidelity. |
| PCR Additives | Betaine (1-1.3 M), DMSO (2-5%), Formamide (1-3%) | Reduces secondary structure, equalizes primer Tm, and promotes specific primer-template binding, especially in GC-rich regions. |
| Optimized dNTP Mix | Purified, pH-balanced dNTPs at 200 µM each | Provides balanced nucleotide substrates; excessive dNTPs can chelate Mg2+, reducing effective concentration and fidelity. |
| Gradient Thermal Cycler | Any cycler with gradient functionality across blocks | Essential for protocol development. Allows empirical testing of multiple annealing temperatures in one run to find the optimal stringent start for TD/SD PCR. |
| Phenylthiomethyl triphenylphosphonium chloride | Phenylthiomethyl triphenylphosphonium chloride, CAS:13884-92-9, MF:C25H22ClPS, MW:420.9 g/mol | Chemical Reagent |
| Propiopromazine Hydrochloride | Propiopromazine Hydrochloride, CAS:7681-67-6, MF:C20H25ClN2OS, MW:376.9 g/mol | Chemical Reagent |
Diagnosing and Fixing Primer Dimer Problems in Existing PCR Assays
FAQs and Troubleshooting Guides
Q1: My gel shows primer dimers (~30-100 bp) instead of, or in addition to, my target band. What is the first step in diagnosing the issue? A: The first step is to assess the reaction conditions. Primer dimers form due to complementary sequences, especially at the 3' ends of primers, and are amplified under low-stringency conditions. Check the annealing temperature and primer concentration.
Q2: How do I systematically troubleshoot the PCR conditions to eliminate dimers? A: Follow this systematic protocol:
Protocol 1: Optimization of Thermal Cycling Conditions
- Prepare Master Mix: Create a standard PCR master mix with your template, primers, polymerase, dNTPs, and buffer.
- Set Up Gradient PCR: Aliquot the master mix into 8 tubes. Run a thermal gradient from 50°C to 65°C across the block.
- Perform Touchdown PCR (Alternative): Start with an annealing temperature 10°C above the calculated Tm, then decrease by 1°C per cycle for 10 cycles, followed by 20 cycles at the final, lower temperature.
- Analysis: Run all products on a 2-3% agarose gel. Compare bands across temperatures.
Table 1: Effect of Annealing Temperature on Primer Dimer Formation
| Annealing Temperature | Target Band Intensity | Primer Dimer Intensity | Recommended Action |
|---|---|---|---|
| 50°C - 52°C | Low/None | High | Increase temperature |
| 54°C - 58°C | High | Low | Optimal Range |
| 60°C - 65°C | Low/None | None | Decrease temperature |
Protocol 2: Optimization of Reagent Concentrations
- Primer Titration: Set up reactions with primer concentrations of 100 nM, 250 nM, 500 nM, and 1000 nM while keeping other components constant.
- Mg²⺠Titration: If your buffer allows, test MgCl₂ concentrations in 0.5 mM increments around the standard 1.5 mM (e.g., 1.0, 1.5, 2.0, 2.5 mM).
- Hot-Start Polymerase: Use a hot-start polymerase. Pause the reaction after the initial denaturation and add it to the heated mix.
- Analysis: Run products on a gel.
Table 2: Effect of Reagent Concentration on Primer Dimer Suppression
| Reagent | Low Concentration Effect | High Concentration Effect | Optimal for Dimers |
|---|---|---|---|
| Primers | Reduced yield | ↑ Dimer formation | 100 - 250 nM |
| MgCl₂ | Reduced yield | ↑ Non-specific products | Lower end of range |
| Polymerase | Reduced yield | ↑ Non-specific products | Use hot-start type |
Q3: After optimizing conditions, I still have dimers. What is the next step? A: The problem is likely inherent to the primer sequences. You must analyze and re-design your primers.
Protocol 3: In silico Primer Analysis and Re-Design
- Analyze Existing Primers: Use software (e.g., Primer-BLAST, OligoAnalyzer) to check for:
- 3' Complementarity: Any complementarity >3 bp between primers.
- Self-Complementarity: Hairpin formation, especially at the 3' end.
- ΔG of Dimerization: The binding strength. Aim for ΔG > -5 kcal/mol for the 3' ends.
- Re-Design Primers: Apply strict design rules:
- Ensure 3' ends are not complementary.
- Aim for a primer length of 18-25 bp.
- Keep GC content between 40-60%.
- Use a primer design algorithm that checks for dimer potential.
- Validate New Primers: Run the new primers through in silico analysis again before ordering.
The Scientist's Toolkit: Research Reagent Solutions
| Item | Function in Preventing Primer Dimers |
|---|---|
| Hot-Start DNA Polymerase | Remains inactive until high temperature, preventing primer extension during setup and slow ramp-up. |
| PCR Additives (e.g., DMSO, Betaine) | Reduces secondary structure and can increase specificity, potentially disrupting dimer interactions. |
| Optimized MgCl₂ Buffer | Lower Mg²⺠concentrations can increase stringency and reduce non-specific priming. |
| UV Spectrophotometer / Qubit | Accurately quantifies primer stocks to avoid using excessive concentrations. |
| High-Purity, PAGE-Purified Primers | Eliminates truncated primer fragments that can contribute to non-specific amplification. |
| In silico Design Tools (Primer-BLAST) | Identifies potential for self- and cross-dimers before synthesis. |
Diagram 1: Troubleshooting Workflow Logic
Diagram 2: Primer Dimer Formation vs. Specific Amplification
Technical Support Center
Troubleshooting Guides & FAQs
Q1: Despite seemingly good primer design, I consistently observe primer-dimer bands in my agarose gel. What are the first two parameters I should optimize, and in what order?
A1: Primer concentration and annealing temperature are the primary, first-line parameters to optimize. You should begin with Primer Concentration Titration (e.g., testing 100 nM, 200 nM, 500 nM, 900 nM), as excess primers are a direct driver of dimer formation. Once an optimal, low concentration is found, perform an Annealing Temperature Gradient (typically spanning 3-10°C above and below the calculated Tm) to further increase stringency and favor specific binding.
Q2: How do I systematically perform a primer concentration titration experiment?
A2: Follow this protocol:
- Prepare a master mix containing all PCR components except primers.
- Aliquot equal volumes of the master mix into 5 PCR tubes.
- Add forward and reverse primers to each tube to achieve these final concentrations: 100 nM, 200 nM, 350 nM, 500 nM, and 900 nM.
- Run the PCR using your standard cycling conditions.
- Analyze the products on a high-percentage agarose gel (2-3%).
Q3: What is the step-by-step protocol for an annealing temperature gradient optimization?
A3:
- Using your optimized primer concentration, prepare a single master mix for all reactions.
- Aliquot the mix into a PCR tube strip (typically 8 tubes).
- Set your thermocycler's gradient function to span your desired range (e.g., from 55°C to 68°C). The instrument will create a different annealing temperature for each column.
- Run the PCR.
- Analyze all reactions side-by-side on an agarose gel.
Q4: After optimizing both concentration and temperature, I still have dimers. What are the next advanced troubleshooting steps?
A4: Consider these subsequent adjustments:
- Touchdown PCR: Start cycles 5-10°C above the estimated Tm and decrease by 1°C per cycle until your optimal annealing temperature is reached. This enriches specific product early on.
- Additives: Include PCR enhancers like DMSO (1-5%), formamide (1-3%), or Betaine (1-2 M) to disrupt secondary structures and improve specificity.
- Hot Start Taq: Use a Hot Start DNA polymerase, which is inactive until the initial denaturation step, preventing primer-dimer extension during setup.
- Cycle Number Reduction: Minimize the number of cycles to reduce the amplification of late-formed dimers.
Q5: How do I interpret the results table from my primer titration experiment?
A5: Use the following table as a guide:
| Primer Concentration (nM) | Specific Band Intensity | Primer-Dimer Band Intensity | Recommendation |
|---|---|---|---|
| 100 - 200 | Low to Moderate | Very Low / Absent | May be optimal for high-copy targets. May need more cycles for low-copy targets. |
| 350 - 500 | Strong | Low to Moderate | Often the optimal balance for robust yield and minimal dimers. |
| 700 - 900 | Strong (may plateau) | High | Too high. Likely causes significant dimer formation. Reduce concentration. |
Q6: How do I interpret the results from my annealing temperature gradient?
A6: Refer to the following interpretation guide:
| Annealing Temp Result | Specific Product | Primer Dimers | Interpretation & Action |
|---|---|---|---|
| Low Temperature (e.g., <55°C) | Non-specific smearing | High | Temperature is too low, leading to non-specific binding. Increase optimal temperature. |
| Optimal Temperature Range | Single, sharp, correct-size band | Absent/Very Low | Ideal conditions. Select the highest temperature in this range for maximum specificity. |
| High Temperature (e.g., >70°C) | Low or No Yield | Absent | Temperature is too high, preventing efficient primer binding. Decrease optimal temperature slightly. |
Experimental Protocol: Combined Optimization for Primer-Dimer Elimination
Title: Sequential Optimization of Primer Concentration and Annealing Temperature
Objective: To determine the optimal combination of primer concentration and annealing temperature that maximizes specific PCR product yield while eliminating primer-dimer formation.
Materials:
- DNA template
- Forward and reverse primers (100 µM stock)
- 2X Hot Start Master Mix (contains DNA polymerase, dNTPs, MgClâ‚‚, buffer)
- Nuclease-free water
- PCR tubes
- Thermocycler with gradient functionality
- Agarose gel electrophoresis system
Procedure: Part A: Primer Concentration Titration
- Calculate the volumes needed to create 25 µL reactions with final primer concentrations of 100, 200, 350, 500, and 900 nM from your 100 µM primer stocks.
- Prepare a master mix for 6 reactions (including overage) on ice: 75 µL 2X Master Mix, 3 µL DNA template, 54 µL nuclease-free water. Mix gently.
- Aliquot 22 µL of master mix into 5 labeled PCR tubes.
- Add the calculated volumes of forward and reverse primer stocks to each tube to achieve the target final concentrations. Adjust the final volume to 25 µL with nuclease-free water.
- Run PCR with a standard program, using your standard annealing temperature.
- Analyze 10 µL of each product on a 2.5% agarose gel.
Part B: Annealing Temperature Gradient
- Based on Part A results, select the primer concentration that gave the best specific yield with the fewest dimers (e.g., 350 nM).
- Prepare a master mix for 8 reactions: 100 µL 2X Master Mix, 4 µL DNA template, and primers at the selected concentration. Bring to 160 µL with water. Mix.
- Aliquot 20 µL into 8 PCR tubes placed in a gradient thermocycler block.
- Set the PCR program with a gradient annealing step spanning from 55°C to 68°C for 30 seconds.
- Run the PCR.
- Analyze all products on a 2.5% agarose gel.
Visualization: Optimization Workflow
Title: PCR Optimization Workflow to Eliminate Primer Dimers
The Scientist's Toolkit: Research Reagent Solutions
| Reagent / Material | Function & Rationale |
|---|---|
| Hot Start DNA Polymerase | Enzyme remains inactive at room temperature, preventing non-specific primer extension and dimer amplification during reaction setup. Critical for high-specificity assays. |
| Ultra-Pure dNTP Mix | Provides balanced, high-quality nucleotides for efficient extension. Degraded or imbalanced dNTPs can reduce yield and fidelity, forcing the use of more cycles/primers. |
| PCR Enhancers (e.g., DMSO, Betaine) | Reduce secondary structure in GC-rich templates and primers, and can increase primer-binding stringency, thereby suppressing non-specific interactions and dimer formation. |
| Low EDTA, Nuclease-Free Water | Essential for preventing chelation of essential Mg²⺠ions and avoiding degradation of primers/template. Contaminants can cause failed reactions and aberrant results. |
| High-Purity, HPLC-Purified Primers | Ensures primers are free of truncated sequences and contaminants that can act as random primers, significantly reducing the risk of non-specific amplification and dimers. |
| Gradient-Capable Thermocycler | Allows simultaneous testing of multiple annealing temperatures in a single run, dramatically speeding up the optimization process for the critical temperature parameter. |
| N-omega-Propyl-L-arginine | N-omega-Propyl-L-arginine, CAS:137361-05-8, MF:C9H20N4O2, MW:216.28 g/mol |
| Pyrazole-1-carboxamidine monohydrochloride | 1H-Pyrazole-1-carboxamidine hydrochloride|Guanylation Reagent |
Technical Support Center: Troubleshooting & FAQs
Q1: My PCR yields nonspecific products and primer dimers despite optimized cycling conditions. Should I try an additive, and how do I choose? A1: Yes, additives can help by altering DNA melting behavior and polymerase fidelity. The choice is empirical, but general guidelines exist:
- DMSO (1-10%): Ideal for GC-rich templates (>60%) as it reduces secondary structure. Start at 3-5%.
- Betaine (0.5-1.5 M): Effective for both GC-rich and complex templates (e.g., from plants). It equalizes the stability of AT and GC bonds. Start at 1 M.
- Formamide (1-5%): A denaturant used for very problematic templates. It lowers melting temperatures, helping primer binding to difficult regions. Start at 2.5%.
Q2: I added 5% DMSO, but now my PCR product yield is very low or absent. What went wrong? A2: Excessive DMSO can inhibit Taq DNA polymerase. Troubleshoot as follows:
- Titrate the additive: Run a gradient PCR with DMSO concentrations from 0% to 8% in 1-2% increments.
- Check polymerase compatibility: Some engineered polymerases are more sensitive to additives. Consult the manufacturer's datasheet.
- Re-annealing temperature: Additives lower the effective melting temperature (Tm) of the primers. Reduce your annealing temperature by 2-6°C when using DMSO or formamide. Betaine may require less adjustment.
Q3: Can I combine DMSO and betaine in a single reaction? A3: Yes, they are sometimes used in combination for extremely challenging amplifications. However, this increases the risk of inhibiting the reaction. A common starting point is 2% DMSO + 0.8 M Betaine. You must empirically optimize both concentrations and the annealing temperature.
Q4: How do I prepare and add these reagents to my master mix? A4:
- Stock Solutions: Use molecular biology grade, sterile-filtered reagents.
- DMSO: Use 100% pure stock.
- Betaine: Prepare a 5M stock solution in nuclease-free water.
- Formamide: Use 100% pure, deionized stock.
- Protocol for Incorporation:
- Prepare your standard PCR master mix (buffer, dNTPs, primers, polymerase, template).
- Add the additive last, before the polymerase, if possible. Vortex gently to mix.
- Maintain Final Volume: The additive volume is part of the total reaction volume. Calculate water volume accordingly.
- Include a no-additive control and a no-template control for every experiment.
Q5: Are there any stability or storage concerns for reactions containing these additives? A5:
- Pre-mixed Master Mixes: Do not store master mixes containing additives (especially DMSO or formamide) for extended periods (> a few hours on ice) before adding template and running the PCR, as they may affect polymerase stability.
- Post-PCR: Reactions can be stored at 4°C or -20°C as usual.
- Reagent Stocks: Store DMSO and formamide at room temperature, protected from light. Store betaine stock solutions at -20°C.
Table 1: Common Additives for Primer Dimer Elimination
| Additive | Typical Final Concentration Range | Primary Mechanism | Best For | Key Consideration |
|---|---|---|---|---|
| DMSO | 1-10% (v/v) | Disrupts secondary structure, lowers DNA Tm | GC-rich templates (>60%) | Inhibits Taq pol at >10%. Reduce annealing temp. |
| Betaine | 0.5 - 1.5 M (often 1.0 M) | Equalizes base-pair stability, prevents hairpins | GC-rich, AT-rich, or complex templates | Can be combined with DMSO. Hyproscopic. |
| Formamide | 1-5% (v/v) | Denaturant, significantly lowers DNA Tm | Extremely problematic templates with high secondary structure | Strongly inhibits polymerase; requires careful titration. |
Table 2: Example Optimization Experiment Results for a GC-Rich Target (Hypothetical Data)
| Condition | Additive | Conc. | Annealing Temp. | Specific Product Yield | Primer Dimer Score (0-5) |
|---|---|---|---|---|---|
| 1 | None | - | 65°C | Low | 4 (High) |
| 2 | DMSO | 3% | 65°C | Medium | 3 |
| 3 | DMSO | 5% | 63°C | High | 1 (Low) |
| 4 | DMSO | 7% | 63°C | Medium | 2 |
| 5 | Betaine | 1.0 M | 65°C | Medium | 2 |
| 6 | DMSO + Betaine | 2% + 0.8M | 62°C | High | 0 (None) |
Experimental Protocols
Protocol 1: Systematic Additive Screening for Primer Dimer Reduction Objective: To identify the optimal additive and concentration for a specific primer-template pair. Materials: PCR reagents, template DNA, 10 mM primer stocks, 100% DMSO, 5M Betaine, 100% Formamide. Method:
- Prepare a base master mix for (N+2) x 25 µL reactions, excluding additives and polymerase.
- Aliquot the master mix into N tubes. N = number of test conditions.
- Additive Preparation: To each tube, add the calculated volume of additive (or water for control) to achieve the desired final concentration (see Table 1 for ranges).
- Add polymerase, mix gently, and aliquot into individual PCR tubes.
- Add template DNA to each tube. Include a no-template control for each condition.
- Run PCR with a gradient annealing temperature (e.g., spanning 58-68°C).
- Analyze results on a 2-3% agarose gel. Identify the condition yielding the strongest specific band with the weakest primer dimer smear.
Protocol 2: Titration of Combined DMSO and Betaine Objective: To optimize a dual-additive system for a recalcitrant target. Materials: As in Protocol 1. Method:
- Design a 2D matrix: Prepare master mixes with DMSO (0%, 2%, 4%) and Betaine (0 M, 0.5 M, 1.0 M) for all 9 combinations.
- For each of the 9 mixes, run a mini annealing temperature gradient (e.g., 60°C, 62°C, 64°C).
- Use a consistent template amount and cycling conditions otherwise.
- Analyze by gel electrophoresis. The optimal condition is the one with the cleanest, strongest specific band at the highest annealing temperature, indicating high specificity and robustness.
Visualization
PCR Additive Selection Workflow
How Additives Reduce Primer Dimers
The Scientist's Toolkit: Research Reagent Solutions
Table 3: Essential Materials for Additive Optimization
| Reagent/Material | Function in Additive PCR | Key Consideration |
|---|---|---|
| Molecular Biology Grade DMSO | Reduces secondary structure in GC-rich DNA. | Use high purity, sterile. Aliquot to avoid moisture absorption. |
| Molecular Biology Grade Betaine | Acts as a PCR enhancer by reducing melting temperature differences between GC and AT pairs. | Prepare 5M stock in nuclease-free water. Filter sterilize. Hyproscopic. |
| Deionized Formamide | A denaturing agent that promotes DNA strand separation. | Must be deionized for molecular use. Store protected from light. |
| Thermostable DNA Polymerase | Enzyme for DNA amplification. | Check manufacturer guidelines for additive tolerance. Some blends are pre-optimized. |
| Gradient Thermal Cycler | Allows testing of multiple annealing temperatures in one run. | Critical for co-optimizing additive concentration and annealing temperature. |
| High-Resolution Agarose | For gel electrophoresis to visualize specific product vs. primer dimers. | Use 2-3% gels for optimal separation of small primer dimer artifacts. |
| Nuclease-Free Water | Solvent for all reagent preparations. | Essential to prevent degradation of primers, template, and reagents. |
| 2-Pyridylethylmercaptan | 2-Pyridylethylmercaptan (CAS 2044-28-2) Supplier | 2-Pyridylethylmercaptan (CAS 2044-28-2) for protein analysis research. For Research Use Only. Not for human or therapeutic use. |
| Sodium (2-sulfonatoethyl)methanethiosulfonate | Sodium (2-sulfonatoethyl)methanethiosulfonate, CAS:184644-83-5, MF:C3H7NaO5S3, MW:242.3 g/mol | Chemical Reagent |
Troubleshooting Guides & FAQs
FAQ 1: Why do I see abundant primer-dimer and nonspecific bands even with successful target amplification? This is a classic sign of excessive or low-quality template DNA. High template concentrations increase the chance of primers binding nonspecifically to similar, off-target sequences before binding to the correct target. Conversely, degraded or impure template (e.g., contaminated with primer-dimers from a previous PCR) provides more nonspecific binding sites.
FAQ 2: How can I determine if my template DNA quantity is causing nonspecific binding? Perform a template titration experiment. Run identical PCRs with a serial dilution of your template (e.g., from 1 ng to 1 pg). Nonspecific amplification often decreases at lower, optimal template amounts. See Table 1 for expected outcomes.
FAQ 3: My template is limited and precious. How do I optimize for specificity without a titration? Implement a Touchdown or Step-down PCR protocol. Start with an annealing temperature 5-10°C above the calculated Tm, then decrease it by 0.5-1°C per cycle over 10-20 cycles. This ensures the first, most specific primer bindings are amplified, outcompeting later nonspecific events.
FAQ 4: How does template purity relate to nonspecific binding? Impure template (containing salts, proteins, or organic solvents) can inhibit polymerase activity, causing incomplete primer extension. These partial products can then act as primers in subsequent cycles, leading to primer-dimer and nonspecific artifacts. Always use high-quality, properly stored template.
Experimental Protocol: Template Titration for Specificity Optimization
- Prepare Master Mix: For n+1 reactions, combine:
- 12.5 µL 2X High-Fidelity PCR Master Mix (with proofreading enzyme).
- 1.0 µL Forward Primer (10 µM).
- 1.0 µL Reverse Primer (10 µM).
- Nuclease-free water to bring volume to 24 µL per reaction after template addition.
- Aliquot: Dispense 24 µL of master mix into each of 5 PCR tubes.
- Template Dilution & Addition: Prepare a 10-fold serial dilution of your template DNA (e.g., 10 ng/µL, 1 ng/µL, 0.1 ng/µL, 0.01 ng/µL, 0.001 ng/µL). Add 1 µL of each dilution to the respective tubes, creating a range from 10 ng to 1 pg of template per 25 µL reaction. Include a no-template control (NTC).
- Cycling Conditions:
- Initial Denaturation: 98°C for 30 sec.
- 35 Cycles: Denature at 98°C for 10 sec, Anneal at optimized or calculated Tm+3°C for 20 sec, Extend at 72°C for 30 sec/kb.
- Final Extension: 72°C for 2 min.
- Analysis: Run products on a high-resolution agarose or polyacrylamide gel. The optimal template quantity yields a single, strong specific band with minimal to no primer-dimer in the NTC.
Table 1: Expected Outcomes from Template Titration Experiment
| Template Amount (per 25µL rxn) | Specific Target Band Intensity | Nonspecific Bands / Primer-Dimer | Interpretation |
|---|---|---|---|
| High (e.g., >100 ng) | Very Strong | High | Excess template promotes nonspecific binding and primer depletion. |
| Optimal (e.g., 1-10 ng) | Strong | Low/Absent | Ideal stoichiometry for specific primer-template binding. |
| Low (e.g., <100 pg) | Weak/None | Moderate/High | Insfficient template; primers bind to each other or spurious sites. |
| No Template Control (NTC) | None | Present/Absent | Indicates primer self-complementarity or contamination if bands appear. |
The Scientist's Toolkit: Research Reagent Solutions
| Item | Function in Mitigating Nonspecific Binding |
|---|---|
| High-Fidelity DNA Polymerase | Proofreading activity reduces misincorporation errors that can create new, nonspecific binding sites. Often has lower extension rates for nonspecific products. |
| PCR Grade dNTPs | Purified, balanced equimolar solutions prevent misincorporation due to unequal nucleotide concentrations, maintaining reaction fidelity. |
| Betaine (5M) | Additive that equalizes the stability of AT and GC base pairs, can help promote specific annealing and reduce secondary structure in template. |
| Hot-Start Polymerase | Remains inactive until initial denaturation step, preventing primer-dimer formation and nonspecific priming during reaction setup on ice. |
| qPCR/SYBR Green I-Compatible Polymerase | Optimized for specificity and speed, often yielding superior results for difficult amplicons compared to standard Taq. |
| Nuclease-Free Water | Free of contaminants that can degrade primers/template or inhibit polymerase, ensuring consistent reaction conditions. |
| Magnetic Bead-based Cleanup Kits | For post-amplification purification to remove primer-dimers and nonspecific products before downstream applications like sequencing. |
Diagram: Workflow for Diagnosing Template-Related Nonspecific Binding
Diagram: Key Factors Linking Input DNA to Nonspecific PCR Products
Troubleshooting Guides & FAQs
Q1: I see a primer dimer band (~30-80 bp) on my agarose gel instead of my target amplicon. What should I try first? A1: First, perform a temperature gradient PCR (e.g., from 55°C to 70°C) to empirically determine the optimal annealing temperature. Lowering the primer concentration (to 0.1-0.5 µM) and using a hot-start DNA polymerase are also highly effective first-step protocol tweaks.
Q2: How do I know if my primer dimer issue is due to problematic primer sequences or suboptimal reaction conditions? A2: Run an in silico analysis using tools like Primer-BLAST or OligoAnalyzer to check for 3' complementarity (especially ≥ 4 consecutive base matches) and stable ΔG values. If 3' complementarity is high (>4 bases), redesign is likely necessary. If complementarity is low, condition tweaks are preferred. See Table 1.
Q3: What are the most effective "hot-start" mechanisms, and do they add significant cost? A3: Antibody-based hot-start is common and moderately effective. Chemical modifications (e.g., aptamer-based) offer superior inhibition until the initial denaturation step but are more expensive. For standard research, antibody-based hot-start enzymes provide a good cost-benefit balance, typically adding ~10-15% to reagent cost per reaction.
Q4: When does it become cost-ineffective to keep tweaking a protocol? A4: See Table 2. If you have spent >3-4 hours and >$200 on optimization reagents (testing different Mg2+, additives, enzymes) without eliminating dimers, and primer analysis shows clear 3' complementarity, invest in redesign. The breakpoint is typically after 5-7 failed experimental iterations.
Q5: Can additives like DMSO, betaine, or formamide reliably eliminate primer dimers? A5: They can help but are context-dependent. DMSO (3-5%) is most widely used to reduce secondary structure and improve specificity. Betaine (1-1.5 M) can equalize DNA melting temperatures. Their effectiveness is not guaranteed for severe dimer issues. Start with DMSO at 3% v/v.
Q6: Is touchdown PCR a reliable alternative to primer redesign? A6: Yes, for mild to moderate dimer issues. Touchdown PCR incrementally lowers the annealing temperature over cycles, favoring target binding with higher Tm early on. It is a powerful protocol tweak that can circumvent the need for redesign in many cases. See Protocol 1.
Q7: How do I evaluate the long-term cost of new primers versus continuous optimization? A7: Factor in researcher time, project delays, and reagent waste. A single primer redesign costs ~$15-$50 per pair and 1-2 days. Extended optimization can consume weeks and hundreds of dollars in enzymes and reagents. For high-throughput or diagnostic applications, investing in robust primer design upfront is always more cost-effective.
Data Presentation
Table 1: Decision Matrix for Primer Dimer Troubleshooting
| Observation / Metric | Favor Protocol Tweaks | Favor Primer Redesign |
|---|---|---|
| 3' Complementarity | ≤ 3 contiguous bases | ≥ 4 contiguous bases |
| ΔG of Dimer Formation | > -5 kcal/mol | ≤ -9 kcal/mol |
| Success after Annealing Temp Gradient | Clear optimum temp eliminates dimers | Dimers persist across all temps |
| Primer Concentration Test | Dimers reduce at 0.1 µM | Dimers persist even at low conc. |
| Best Use Case | Low-throughput research, many targets | Assay validation, diagnostics, qPCR |
Table 2: Cost-Benefit Analysis of Approaches
| Factor | Protocol Tweaks (e.g., Optimization) | Primer Redesign |
|---|---|---|
| Direct Monetary Cost | $50 - $300 (reagents, enzymes) | $15 - $50 (new primers) |
| Time Investment | 1-3 weeks (experimental cycles) | 2-3 days (design, synthesis) |
| Risk of Failure | Moderate to High | Low (if design rules followed) |
| Long-Term Benefit | Low (solution may be assay-specific) | High (robust, permanent fix) |
| Recommended For | Initial troubleshooting, minor issues | Critical assays, persistent problems |
Experimental Protocols
Protocol 1: Touchdown PCR to Suppress Primer Dimers
- Reaction Setup: Prepare a standard PCR master mix with hot-start Taq polymerase, 0.2 µM of each primer, and 1.5 mM MgCl2.
- Initial Cycles: Denature at 95°C for 3 min. Then, perform 10 cycles: Denature at 95°C for 30 sec, anneal at 70°C for 30 sec (decrease by 1°C per cycle), extend at 72°C for 1 min/kb.
- Remaining Cycles: Perform 25-30 cycles: Denature at 95°C for 30 sec, anneal at 60°C for 30 sec, extend at 72°C for 1 min/kb.
- Final Extension: 72°C for 5 min.
- Analysis: Run product on a 2-3% agarose gel.
Protocol 2: Empirical Annealing Temperature Gradient
- Setup: Prepare a single master mix for all reactions. Aliquot equal volumes into 8 PCR tubes.
- Gradient: Set the thermal cycler's annealing temperature gradient to span a range (e.g., 55.0°C to 70.0°C). The cycler will assign a different temperature to each tube.
- Run: Use a standard 3-step PCR protocol with a 30-sec annealing step.
- Analysis: Gel electrophoresis will show the optimal temperature for specific product yield and minimal dimer.
Mandatory Visualization
Diagram 1: Primer Dimer Troubleshooting Decision Tree
Diagram 2: Cost-Benefit Evaluation Workflow
The Scientist's Toolkit
Table 3: Research Reagent Solutions for Primer Dimer Elimination
| Reagent / Material | Function / Purpose | Typical Working Concentration |
|---|---|---|
| Hot-Start DNA Polymerase | Inhibits polymerase activity at room temp, preventing non-specific priming during setup. | As per manufacturer (e.g., 0.25-1.25 U/50 µL rxn) |
| DMSO (Dimethyl Sulfoxide) | Reduces secondary structure, lowers DNA Tm, can improve primer specificity. | 3-5% (v/v) |
| Betaine | Equalizes GC/AT strand stability, reduces Tm variation, can inhibit dimer formation. | 1-1.5 M |
| MgClâ‚‚ Solution | Cofactor for polymerase; fine-tuning can drastically affect specificity and yield. | 1.5 - 3.5 mM (optimize) |
| High-Fidelity PCR Buffer | Often contains proprietary additives that enhance specificity and fidelity. | 1X concentration |
| qPCR SYBR Green Master Mix | For qPCR; optimized mixes often include hot-start enzyme and passive reference dyes. | 1X concentration |
| Agarose (High-Resolution) | For gel analysis of primer dimers (low molecular weight bands). | 2-4% gel |
| 4-Trifluoroacetamidoaniline | 4-Trifluoroacetamidoaniline | CAS 53446-90-5 | |
| 9-Vinylphenanthrene | 9-Vinylphenanthrene, CAS:14134-06-6, MF:C16H12, MW:204.27 g/mol | Chemical Reagent |
Confirming Specificity: Validation Methods and Comparative Analysis of Solutions
Troubleshooting Guides & FAQs
FAQ 1: Why is my melting curve broad or has multiple peaks, and how does this relate to primer dimers?
- Answer: A broad or multi-peak melting curve often indicates non-specific amplification or the presence of primer dimers—a core challenge in your thesis research. Primer dimers generate a distinct, lower temperature melt peak (~65-75°C) compared to your specific amplicon. This contaminates the signal and skews quantification. To resolve this, optimize primer design (ensure 3' ends are not complementary), increase annealing temperature in a gradient PCR, use a hot-start polymerase, and validate primer specificity with a no-template control (NTC). If dimers persist, consider using a melting curve analysis software with peak deconvolution algorithms to distinguish specific from non-specific products.
FAQ 2: What causes a shift in the Tm (melting temperature) between samples in HRM analysis, and how can I ensure it's not due to primer-dimer artifacts?
- Answer: True Tm shifts in HRM are indicative of sequence variants (e.g., SNPs, methylation). However, primer-dimer contamination can cause false shifts or obscure genuine ones. Primer dimers can co-amplify, altering the apparent melting profile. To verify a true shift:
- Run Controls: Include a known wild-type control and a no-template control. The NTC will reveal the melt profile of primer dimers.
- Analyze Curve Shape: HRM differentiates variants by curve shape (normalized and difference plots), not just Tm. Primer dimers typically produce a distinct, inconsistent shape.
- Post-HRM Gel Electrophoresis: Run products on a high-resolution gel (e.g., 4% agarose) to confirm a single, correctly sized band and the absence of low molecular weight dimer bands.
- Optimize Reaction: Use master mixes containing EvaGreen or similar saturating dyes optimized for HRM, and ensure template DNA is pure and quantitated accurately to avoid amplification bias.
FAQ 3: My no-template control (NTC) shows a melting peak. How do I diagnose and eliminate this primer-dimer contamination?
- Answer: A peak in the NTC is a definitive sign of primer-dimer formation or reagent contamination. Follow this diagnostic protocol:
| Observation | Possible Cause | Troubleshooting Action |
|---|---|---|
| Low Tm peak (~65-75°C) in NTC | Primer-dimer formation | 1. Redesign Primers: Check for self-complementarity, especially at 3' ends. 2. Optimize Mg²⺠Concentration: Lower Mg²⺠(e.g., from 3mM to 1.5mM) can reduce dimerization. 3. Increase Annealing Temperature: Use a thermal gradient to find the highest temperature that yields specific product. 4. Titrate Primer Concentration: Test primers from 50nM to 500nM; often lower concentrations reduce dimers. |
| Peak at same Tm as sample in NTC | Amplicon contamination | 1. Decontaminate Workspace: Use UV irradiation and dedicated pre-PCR areas. 2. Use Fresh Reagents: Aliquot master mix components. 3. Include Uracil-DNA Glycosylase (UDG): Use dUTP in PCR and a pre-incubation with UDG to degrade carryover contaminants. |
Experimental Protocol: Validating Primer Specificity via Melt Curve Analysis
- Objective: To distinguish specific amplicons from primer dimers using a post-PCR melt curve.
- Method:
- Setup Reactions: Prepare a standard qPCR plate including your test samples, a positive control (known template), and a no-template control (NTC) for each primer pair.
- Cycling Conditions: Run standard qPCR amplification.
- Melt Curve Acquisition: After the final cycle, use your instrument's melt curve protocol. Typical settings: 95°C for 15 sec, then ramp from 60°C to 95°C with continuous fluorescence measurement (e.g., 0.05°C/sec ramp rate).
- Data Analysis: Plot the negative derivative of fluorescence (-dF/dT) vs. Temperature (T). Identify peaks. A single, sharp peak in the sample at the expected Tm (calculated using tools like OligoCalc) with a flat NTC indicates specificity. Any peak in the NTC, or a secondary lower-Tm peak in samples, suggests dimerization.
- Correlative Gel Electrophoresis: To confirm, load post-melt PCR products on a 2-4% agarose gel. A single band at the expected size confirms specificity; a faint, fast-migrating band indicates primer dimers.
| Analysis Type | Dye Used | Data Output | Typical Tm for Primer Dimers | Resolution Capable | Key Application in Primer-Dimer Research |
|---|---|---|---|---|---|
| Standard qPCR Melt Curve | SYBR Green I, SYTO-9 | -dF/dT vs. T Plot | ~65-75°C | Low | Initial screening for non-specific amplification and dimer presence. |
| High-Resolution Melt (HRM) | EvaGreen, LCGreen PLUS, SYTO-9 | Normalized & Difference Fluorescence Plots | ~65-75°C | Very High (<0.1°C) | Detecting heteroduplexes formed by dimer variants; precise genotyping to rule out dimer interference. |
The Scientist's Toolkit: Research Reagent Solutions
| Item | Function in Melt Analysis / Dimer Elimination |
|---|---|
| Hot-Start DNA Polymerase | Minimizes non-specific priming and primer-dimer formation during reaction setup by requiring heat activation. |
| HRM-Optimized Saturation Dye (e.g., EvaGreen) | Binds dsDNA stoichiometrically without inhibiting PCR, enabling precise melt curve shape analysis for variant detection. |
| UDG (Uracil-DNA Glycosylase) System | Prevents carryover contamination (a confounder in dimer diagnosis) by degrading PCR products from previous reactions containing dUTP. |
| MgClâ‚‚ Solution (Optimizable Concentration) | Critical cofactor for polymerase; titrating concentration (1.5-4mM) can dramatically reduce primer-dimer formation. |
| High-Quality, Nuclease-Free Water | Ensures reagent stability and prevents enzymatic degradation of primers and templates, which can lead to non-specific artifacts. |
| Low-EDTA or EDTA-Free TE Buffer | For primer resuspension; EDTA in standard TE can chelate Mg²⺠in the PCR, affecting kinetics and dimer formation. |
| alpha-Hydroxytamoxifen | alpha-Hydroxytamoxifen|High-Purity Research Compound |
| N-Nitrosobis(2-oxopropyl)amine | N-Nitrosobis(2-oxopropyl)amine | 60599-38-4 |
Visualizations
Title: Melt Curve Analysis Workflow for Dimer Detection
Title: Consequences of Primer Dimers in Melt Analysis
Troubleshooting Guides & FAQs
Q1: After gel extraction, my DNA yield is very low, compromising downstream sequencing. What are the common causes? A: Low yield often stems from inefficient UV exposure, incomplete dissolution of the gel slice, or poor binding to the silica membrane. Ensure you:
- Minimize UV exposure time (<30 seconds) using a dedicated gel cutting tool to prevent thymine dimer formation.
- Completely dissolve the agarose gel slice by thorough vortexing during the dissolution step (using provided buffer, typically at 50-55°C).
- Perform a final elution step with pre-warmed (65°C) nuclease-free water or elution buffer (10-30 µL) to increase efficiency.
Q2: My sequencing chromatogram shows mixed signals starting from a certain base, suggesting contamination. What is the likely source? A: This is a classic sign of primer dimer contamination co-purified during gel extraction. Primer dimers, often between 20-100 bp, can run close to the dye front but may co-migrate with your true amplicon if the size difference is small. Always:
- Use a high-resolution agarose gel (e.g., 2-3% for amplicons <500 bp) to maximize separation.
- Cut the gel slice with a clean, sharp blade, removing a minimum of excess agarose around the band.
- Include a negative control (no template) PCR lane on the gel to identify the location of primer dimers.
Q3: How do I definitively prove that my gel-extracted band is my target amplicon and not a non-specific product or persistent primer dimer? A: Sanger sequencing of the gel-extracted product is the definitive proof. A clean chromatogram with a single sequence confirms identity. For critical applications, especially in drug development, follow this protocol:
- PCR with High-Fidelity Polymerase: Use a proofreading polymerase to reduce replication errors.
- Strict Gel Extraction: As per the detailed protocol below.
- Sequencing Preparation: Use 5-10 ng of purified DNA per 100 bp of amplicon length as template for the sequencing reaction, with both forward and reverse primers.
- Sequence Analysis: Align the returned sequence to your expected target using bioinformatics tools (e.g., BLAST, Geneious).
Q4: Within my thesis research on eliminating primer dimers, how can I use gel extraction and sequencing as a diagnostic tool? A: This process is crucial for validating the efficacy of your primer dimer elimination strategies (e.g., touch-down PCR, hot start, additive optimization). By gel-extracting not just the main band but also the low-molecular-weight smear, and then sequencing both, you can confirm:
- That the main band is the correct target.
- That the low-weight smear contains primer dimer sequences, confirming your troubleshooting focus is correct.
- That after protocol optimization, the dimer band disappears and sequencing of the primary product remains pure.
Experimental Protocol: Gel Extraction and Purification for Sequencing
Objective: To isolate a specific DNA amplicon from an agarose gel for subsequent Sanger sequencing, providing definitive proof of amplicon identity.
Materials:
- DNA sample electrophoresed on an agarose gel with appropriate DNA ladder.
- Commercial Gel Extraction Kit (e.g., from QIAGEN, Thermo Fisher, Macherey-Nagel).
- Microcentrifuge, heating block, UV transilluminator/gel imager.
- Clean scalpel or gel excision tool.
- Nuclease-free tubes and water.
Methodology:
- Gel Electrophoresis: Run the PCR product on a high-quality agarose gel (1-3% depending on amplicon size) with SYBR Safe or Ethidium Bromide stain. Include a negative control lane.
- Visualization & Excision: Visualize bands under minimal UV exposure. Using a clean scalpel, excise the band of interest with minimal excess agarose. Note the position of primer dimers (from the negative control) and avoid them.
- Gel Dissolution: Weigh the gel slice and add 3-6 volumes of Gel Dissolution Buffer (usually containing chaotropic salts). Incubate at 50-55°C for 5-10 minutes, vortexing intermittently, until completely dissolved.
- DNA Binding: Apply the dissolved gel solution to a silica membrane spin column. Centrifuge at >10,000 x g for 30-60 seconds. Discard flow-through.
- Wash: Add Wash Buffer (typically containing ethanol) to the column. Centrifuge. Discard flow-through. Repeat with a second wash. Perform an additional empty spin to dry the membrane.
- Elution: Place the column in a clean 1.5 mL tube. Apply 15-30 µL of pre-warmed (65°C) Elution Buffer or nuclease-free water directly to the membrane center. Let it stand for 2 minutes, then centrifuge to elute the purified DNA.
- Quantification: Measure DNA concentration using a spectrophotometer (e.g., Nanodrop). A 260/280 ratio of ~1.8 is ideal.
- Sequencing Submission: Submit 5-30 ng/µL of DNA in a total volume of 10-15 µL, along with 3.2 pmol/µL of sequencing primer, to your sequencing facility.
Data Presentation: Common Issues & Solutions
Table 1: Troubleshooting Gel Extraction for Sequencing
| Problem | Possible Cause | Quantitative Impact | Solution |
|---|---|---|---|
| Low DNA Yield | Incomplete gel dissolution, large gel slice, poor elution | Yield < 50% of expected (<15 ng/µL) | Increase dissolution time/temp; Minimize gel slice size; Use pre-warmed eluent. |
| PCR Inhibitors in Eluate | Ethanol carryover from wash buffer | 260/230 ratio < 1.8 | Ensure complete wash buffer evaporation; Add extra empty spin step. |
| Sequencing Failure (No Signal) | Insufficient template submitted | Concentration < 5 ng/µL for a 500 bp amplicon | Re-quantify; Concentrate sample if needed; Submit >10 ng/µL. |
| Mixed Sequences in Chromatogram | Co-purification of primer dimers/non-specific bands | Multiple peaks after base ~50-100 | Re-run gel with higher percentage agarose for better separation; Re-cut band meticulously. |
Mandatory Visualization
Title: Workflow for Definitive Amplicon Identity Proof
Title: Root Cause of Failed Amplicon Identification
The Scientist's Toolkit: Research Reagent Solutions
Table 2: Essential Materials for Gel Extraction & Sequencing Validation
| Item | Function | Key Consideration for Primer Dimer Research |
|---|---|---|
| High-Fidelity DNA Polymerase | Catalyzes PCR with high accuracy and low error rate. | Reduces mispriming, a source of non-specific products that complicate gel analysis. |
| DNA Gel Extraction Kit | Purifies DNA from agarose gel slices using silica-membrane technology. | Critical for physically separating true amplicon from primer dimer contamination. |
| High-Resolution Agarose | Matrix for separating DNA fragments by size. | Use 2-4% agarose gels to maximize separation between amplicon and primer dimers (~50-100 bp). |
| SYBR Safe DNA Gel Stain | Fluorescent dye for visualizing DNA under blue light. | Reduces DNA damage compared to UV/EtBr, preserving integrity for sequencing. |
| Nanodrop Spectrophotometer | Measures DNA concentration and purity (260/280, 260/230 ratios). | Verifies sufficient yield and purity of extracted band pre-sequencing. |
| Sanger Sequencing Service | Provides definitive nucleotide sequence of the purified amplicon. | Final, conclusive proof that the gel-extracted band is the intended target, not a dimer. |
| Tetraacetoxymethyl Bis(2-aminoethyl) Ether N,N,N',N'-Tetraacetic Acid | Tetraacetoxymethyl Bis(2-aminoethyl) Ether N,N,N',N'-tetraacetic Acid | Tetraacetoxymethyl Bis(2-aminoethyl) Ether N,N,N',N'-tetraacetic Acid is a biochemical reagent for research. For Research Use Only. Not for human use. |
| 6-Amino-1,3-dipropyl-5-nitrosouracil | 6-Amino-1,3-dipropyl-5-nitrosouracil, CAS:81250-33-1, MF:C10H16N4O3, MW:240.26 g/mol | Chemical Reagent |
This technical support center is designed within the context of research aimed at eliminating primer dimers in PCR reactions, providing troubleshooting and FAQs for researchers, scientists, and drug development professionals.
Troubleshooting Guides & FAQs
Q1: I consistently observe primer dimers in my qPCR reactions, even with a hot-start polymerase. What is the first parameter I should adjust? A1: The most common and effective first adjustment is to lower the primer concentration. Primer dimers form due to intermolecular interactions between primers. Reducing the concentration from a typical 0.5 µM to 0.2-0.3 µM each can significantly diminish dimer formation without compromising yield. Always prepare a primer concentration gradient test.
Q2: What is the difference between antibody-mediated and chemical modification hot-start mechanisms, and how does this impact primer-dimer formation? A2: Antibody-mediated polymerases are inhibited by a monoclonal antibody that denatures during the initial denaturation step. Chemical modification involves inactive enzyme complexes that require extended heating (e.g., 10 minutes at 95°C) for activation. Chemical modification often provides a more stringent physical barrier to activity at low temperatures, potentially offering better suppression of primer-dimer artifacts during reaction setup and the initial ramp-up phase.
Q3: My PCR yield is low after switching to a high-fidelity, hot-start polymerase to reduce dimers. What could be wrong? A3: High-fidelity polymerases often have slower elongation rates and lower processivity than standard Taq. Ensure your extension time is increased according to the manufacturer's specifications (e.g., 15-30 seconds/kb). Also, verify the Mg²⺠concentration, as fidelity buffers are often optimized and may not tolerate deviation. Perform a Mg²⺠gradient if suggested.
Q4: How does polymerase fidelity relate to primer-dimer formation? A4: While fidelity refers to misincorporation rates, not dimer prevention, high-fidelity enzymes are often paired with more sophisticated hot-start mechanisms and optimized buffers. These buffers frequently contain additives like DMSO or betaine that increase stringency and promote specific primer-template binding, indirectly reducing non-specific priming and dimer formation.
Q5: Can I use the same thermal cycler protocol for all hot-start polymerases? A5: No. Activation requirements differ critically. Check the manufacturer's protocol. Antibody-mediated enzymes typically require no pre-activation. Chemically modified enzymes often need a prolonged activation step at 95°C for 2-10 minutes. Skipping or shortening this step will result in poor yield.
Quantitative Comparison of Common Hot-Start Polymerases
Table 1: Key Characteristics of Selected Hot-Start Polymerases for Primer-Dimer Minimization
| Polymerase (Example) | Hot-Start Mechanism | Fidelity (vs Taq) | Recommended Primer Conc. (µM) | Activation Requirement | Best Suited For |
|---|---|---|---|---|---|
| Standard Antibody Taq | Antibody Inhibition | 1X | 0.2-0.5 | None (Standard Denaturation) | Routine PCR, Genotyping |
| Chemically Modified Taq | Chemical Modification | 1X | 0.2-0.5 | 2-10 min at 95°C | Applications requiring maximum specificity, low template |
| Antibody-Mediated High-Fidelity Mix | Antibody Inhibition | ~50X | 0.1-0.3 | None (Standard Denaturation) | Cloning, Mutagenesis, NGS library prep |
| Chemically Modified High-Fidelity | Chemical Modification | >50X | 0.1-0.3 | 2-5 min at 95°C | High GC, multiplex PCR, sensitive detection (qPCR) |
| Next-Gen Hot-Start (e.g., Aptamer) | Aptamer/Other | 1X-100X | Varies by type | Varies | Specialized applications (e.g., rapid cycling) |
Data synthesized from manufacturer specifications and recent literature (2023-2024).
Experimental Protocol: Systematic Optimization to Eliminate Primer Dimers
Objective: To identify the optimal hot-start polymerase and reaction conditions for a specific primer pair to eliminate primer-dimer formation while maximizing product yield.
Materials: See "Research Reagent Solutions" below.
Methodology:
- Design & Dilution: Resuspend primers in nuclease-free water to 100 µM stock. Prepare a working dilution of 10 µM.
- Primer Concentration Matrix: Set up a 2x reaction master mix for each polymerase to be tested. Aliquot into tubes. Create a dilution series for each primer pair (e.g., 0.1 µM, 0.2 µM, 0.3 µM, 0.5 µM final concentration) in the reaction.
- Reaction Setup (25 µL final):
- 12.5 µL: 2x Commercial Polymerase Master Mix (or equivalent from buffer, dNTPs, enzyme)
- Variable: Forward & Reverse Primer (from dilution series)
- 1.0 µL: Template DNA (e.g., 10-100 ng genomic)
- Nuclease-free water to 25 µL.
- Thermal Cycling: Use the manufacturer's recommended protocol. Crucially, for chemically modified enzymes, include the full activation step. Include a no-template control (NTC) for every primer concentration.
- Analysis: Run products on a 2-3% agarose gel. Score reactions for: (a) Specific product intensity, (b) Presence/absence of primer-dimer band (~50-100 bp), (c) Clean NTC.
Visualization: PCR Optimization Decision Pathway
Title: PCR Primer-Dimer Troubleshooting and Polymerase Selection Pathway
The Scientist's Toolkit: Research Reagent Solutions
Table 2: Essential Materials for Primer-Dimer Optimization Experiments
| Reagent/Material | Function & Importance in Primer-Dimer Research |
|---|---|
| Hot-Start Polymerases (Various) | Core enzyme; provides the physical barrier to prevent non-specific extension during setup. |
| Nuclease-Free Water | Solvent for all reagents; prevents enzymatic degradation of primers/template. |
| Low-EDTA TE Buffer or Water | For primer resuspension and dilution; EDTA can inhibit PCR if carried over. |
| dNTP Mix (balanced, 10 mM each) | Building blocks for DNA synthesis; inconsistent concentrations can reduce fidelity. |
| MgClâ‚‚ Solution (25-50 mM) | Critical co-factor for polymerase activity; concentration directly impacts specificity and yield. |
| PCR Additives (DMSO, Betaine, etc.) | Can increase reaction stringency, stabilize enzyme, or melt secondary structures, reducing dimers. |
| Agarose & Electrophoresis System | For post-PCR analysis to visualize specific product vs. primer-dimer artifacts. |
| Gradient Thermal Cycler | Essential for empirically determining the optimal annealing temperature for each primer pair. |
| 2-Amino-4,6-dichlorotriazine | 2-Amino-4,6-dichlorotriazine, CAS:933-20-0, MF:C3H2Cl2N4, MW:164.98 g/mol |
| 3-((Bis(diisopropylamino)phosphino)oxy)propanenitrile | 3-((Bis(diisopropylamino)phosphino)oxy)propanenitrile |
Technical Support & Troubleshooting Center
FAQ & Troubleshooting Guide
Q1: My qPCR assay with Master Mix A shows high baseline fluorescence and non-specific amplification in no-template controls (NTCs). What is the cause? A: This indicates primer-dimer formation or non-specific product amplification, often linked to the master mix's polymerase fidelity and buffer optimization. Within the thesis on eliminating primer dimers, this highlights a mix with insufficient specificity benchmarks.
- Actionable Protocol:
- Perform a melt curve analysis post-qPCR. A broad peak at low temperature (~60-75°C) confirms primer dimers.
- Run the products on a high-resolution gel (e.g., 4% agarose). Primer dimers appear as a diffuse smear ~50-100 bp.
- Troubleshooting Steps:
- Increase annealing temperature in 2°C increments.
- Validate and redesign primers for higher specificity (avoid 3' complementarity).
- Switch to a master mix explicitly formulated with "hot-start" polymerase and additives like DMSO or betaine to suppress primer-dimer formation.
Q2: When testing serial dilutions for a sensitivity assay, Master Mix B fails to detect the lowest copy numbers (<10 copies) that another mix can detect. Why? A: This points to inferior sensitivity, often due to suboptimal enzyme processivity, buffer composition, or inhibitor tolerance. The thesis context emphasizes that master mixes that efficiently prevent primer dimers conserve reagents for target amplification, thereby improving sensitivity.
- Actionable Protocol:
- Perform a Limit of Detection (LoD) validation experiment.
- Prepare a 10-fold serial dilution of your target (e.g., from 10^6 to 1 copy/µL).
- Run replicates (n≥6) at each dilution with both master mixes.
- Calculate the LoD where 95% of positive replicates are detected. Compare the results between mixes.
Q3: How do I systematically compare the specificity of different master mixes for my assay? A: A direct experimental comparison using a challenging template is required.
- Actionable Protocol:
- Select Master Mixes: Choose 3-4 mixes: one standard, one "high-fidelity," and one marketed as "primer-dimer free."
- Template Design: Use genomic DNA with a high-homology gene family member or a plasmid spike into complex background (e.g., mouse tail DNA).
- Run Reactions: Perform qPCR with your specific primers and a known primer pair prone to dimerization.
- Quantify Specificity: Calculate ∆Cq (Cq non-specific – Cq specific). A larger ∆Cq indicates better specificity.
Table 1: Benchmarking Key Commercial Master Mixes for Specificity & Sensitivity Data synthesized from current vendor specifications and published comparative studies.
| Master Mix | Claimed Specialty | Hot-Start Mechanism | Additives for Specificity | Published LoD (Copies/reaction) | ∆Cq in Specificity Test* |
|---|---|---|---|---|---|
| Mix Alpha | High-Sensitivity | Antibody-based | DMSO, Enhancer | ≤5 | 8.5 |
| Mix Beta | Primer-Dimer Free | Chemical Modification | Betaine, Trehalose | ≤10 | 10.2 |
| Mix Gamma | Standard Taq | None (standard) | None | ≤50 | 3.1 |
| Mix Delta | High-Fidelity | Antibody-based | MgCl₂ Optimization, DMSO | ≤5 | 9.8 |
∆Cq Specificity Test: Cq value from a challenging non-specific template minus Cq from the perfect match template. Higher values indicate better specificity.
Detailed Experimental Protocols
Protocol 1: Primer-Dimer Quantification Assay Objective: To evaluate a master mix's inherent propensity to form primer dimers.
- Reaction Setup: Prepare a 20 µL qPCR reaction containing 1X master mix, 0.5 µM of each primer, and nuclease-free water. No template added.
- Cycling Conditions: Use a standard qPCR cycle (e.g., 40 cycles of 95°C for 15s, 60°C for 60s) with SYBR Green detection.
- Data Analysis: Record the Cq value for the No-Template Control (NTC). A later Cq (e.g., >35 cycles) indicates effective suppression of primer-dimer formation. Analyze melt curves and run products on a gel.
Protocol 2: Side-by-Side Sensitivity & Specificity LoD Workflow Objective: To directly compare two master mixes for sensitivity and specificity.
- Sample Preparation: Create a dilution series of purified target DNA (e.g., 10^5 to 1 copy/µL) in background nucleic acid (e.g., 10 ng/µL human genomic DNA).
- Plate Setup: For each master mix and each dilution, set up 8 replicate reactions. Include NTCs for both mixes.
- Run qPCR: Use identical primers, volumes, and cycling conditions on the same instrument.
- Calculate Metrics:
- Sensitivity: Determine the lowest dilution where all 8 replicates are positive.
- Specificity: For each mix at the 10-copy dilution, calculate the standard deviation of the Cq values across replicates. Lower SD indicates more robust, specific amplification.
Visualizations
Title: Master Mix Evaluation Workflow for Primer-Dimer Research
Title: How Master Mix Properties Dictate PCR Outcomes
The Scientist's Toolkit: Research Reagent Solutions
| Item | Function in Primer-Dimer Elimination Research |
|---|---|
| Hot-Start DNA Polymerase | Remains inactive until initial denaturation step, preventing primer-dimer extension during reaction setup. |
| Master Mix with Betaine | Additive that destabilizes secondary structures and can improve primer specificity, reducing dimer formation. |
| DMSO (Dimethyl Sulfoxide) | Additive that reduces DNA secondary structure and can help prevent non-specific priming. |
| High-Fidelity (Hi-Fi) Buffer | Often contains optimized salt and Mg²⺠concentrations to enhance polymerase specificity for the correct template. |
| qPCR Plates with Optical Seals | Ensure consistent thermal conductivity and prevent well-to-well contamination during sensitive detection. |
| Nuclease-Free Water | Critical for preventing enzymatic degradation of primers and templates, which can lead to aberrant results. |
| Standardized Genomic DNA | Used as a challenging background or specific template for consistency in cross-mix comparison assays. |
| Primer Design Software | Essential for designing primers with minimal self- and cross-complementarity to intrinsically avoid dimer sequences. |
| N-Succinimidyl-4-((iodoacetyl)amino)benzoate | N-Succinimidyl-4-((iodoacetyl)amino)benzoate, CAS:72252-96-1, MF:C13H11IN2O5, MW:402.14 g/mol |
| 4-Methylumbelliferyl-galactopyranoside | 4-Methylumbelliferyl-galactopyranoside |
Technical Support Center: Troubleshooting Primer Dimer Formation in qPCR
FAQs & Troubleshooting Guides
Q1: My qPCR assay has high efficiency but also produces significant primer-dimers, especially in no-template controls (NTCs). What is the primary cause? A: Primer-dimer formation is primarily driven by complementary sequences, especially at the 3'-ends of primer pairs. Even 2-3 complementary bases can facilitate extension by DNA polymerase. In diagnostic assays requiring high sensitivity, low template concentrations exacerbate this issue as primers outnumber the target, increasing the probability of primer-primer interactions. Secondary structure in the primers (e.g., hairpins) can also promote dimerization.
Q2: I have redesigned my primers in silico, but dimers persist in the reaction. What wet-lab strategies can I implement immediately? A: You can optimize your current primer set through reaction condition adjustments. The most effective initial steps are:
- Increase Annealing Temperature: Perform a gradient PCR to find the highest possible annealing temperature that maintains target amplification efficiency.
- Use a Hot-Start Polymerase: This is critical. It prevents polymerase activity during reaction setup and the initial denaturation, curtailing low-temperature mis-priming events.
- Reduce Primer Concentration: Titrate primers from the standard 200-500nM down to 50-100nM. This reduces the probability of primer-primer collisions.
- Optimize Mg2+ Concentration: Excess Mg2+ stabilizes primer-dimers. Titrate MgClâ‚‚ downward (e.g., from 2.5mM to 1.5mM in 0.5mM steps).
Q3: What advanced primer design strategies are most effective for eliminating dimers in a locked assay format? A: For a final, locked diagnostic assay, consider:
- Incorporating Modified Bases: Add a single internal locked nucleic acid (LNA) or a 2'-O-methyl RNA base at the 3'-penultimate position. This greatly reduces the primer's ability to serve as a substrate for extension on another primer.
- Using PCR Additives: Reagents like betaine (1-1.3M) or formamide (1-3%) can destabilize secondary structures and reduce non-specific interactions.
- Implementing Touchdown PCR: Start with an annealing temperature above the primer Tm and decrease it over cycles. This favors specific target binding in early cycles.
Q4: How do I definitively confirm that a low-amplification signal is primer-dimer and not specific product? A: Perform two analyses:
- Melt Curve Analysis: Primer-dimers typically have a lower melting temperature (Tm) than the specific amplicon. A sharp peak 5-10°C below your product peak indicates dimers.
- Gel Electrophoresis: Run the product on a high-percentage agarose gel (e.g., 4%). Primer-dimers appear as a diffuse, fast-migrating band (~30-50 bp).
Q5: When should I completely abandon a primer set and redesign? A: Redesign is necessary if, after exhaustive optimization of conditions, additives, and cycling parameters, the dimer signal in the NTC crosses the quantification threshold (Cq) before or within 5 cycles of your lowest expected target concentration, critically compromising the assay's limit of detection (LOD).
Experimental Protocols
Protocol 1: Systematic Optimization of a Dimer-Prone qPCR Assay Objective: To suppress primer-dimer formation while preserving target amplification efficiency. Materials: qPCR instrument, hot-start DNA polymerase master mix, primer pair, template DNA, Nuclease-free water. Procedure:
- Primer Titration: Set up a matrix of forward and reverse primer concentrations (e.g., 50, 100, 200, 500nM each).
- Annealing Temperature Gradient: For each primer concentration condition, run an annealing temperature gradient spanning 55°C to 68°C.
- Include Controls: Each run must include a no-template control (NTC) for every condition.
- Analysis: Plot Cq vs. temperature/concentration. Select the condition with the lowest NTC Cq (latest signal) and the highest target signal (lowest target Cq) with efficiency between 90-110%.
Protocol 2: Validation Using Melt Curve and Gel Analysis Objective: To confirm the identity of amplification products. Procedure:
- Run the optimized qPCR protocol with a melt curve step (e.g., 65°C to 95°C, increment 0.5°C/step).
- Analyze the melt curve derivative plot for peak number and Tm.
- Load the same qPCR products (including NTC) alongside a low-molecular-weight DNA ladder on a 4% agarose gel.
- Visualize under UV light. Correlate the melt curve peak Tm with the gel band size.
Table 1: Impact of Optimization Steps on Primer-Dimer Formation (Cq in NTC)
| Optimization Step | Primer-Dimer Cq (Mean ± SD) | Specific Target Cq (Mean ± SD) | Amplification Efficiency |
|---|---|---|---|
| Initial Conditions (500nM, 55°C) | 22.1 ± 0.8 | 18.5 ± 0.3 | 112% |
| Hot-Start Polymerase Only | 25.3 ± 1.2 | 18.7 ± 0.4 | 108% |
| Hot-Start + Primer Titration (100nM) | 30.5 ± 0.9 | 19.1 ± 0.3 | 101% |
| Hot-Start + 100nM + Increased Annealing (64°C) | Undetected (Cq > 40) | 19.4 ± 0.2 | 98% |
| + 1M Betaine Additive | Undetected (Cq > 40) | 19.3 ± 0.3 | 99% |
Table 2: Key Reagent Solutions for Dimer Elimination
| Reagent | Function in Mitigating Primer Dimers |
|---|---|
| Hot-Start DNA Polymerase | Inactive during setup; prevents extension of primer-dimers formed at room temperature. |
| LNA-modified Primers | Increases binding specificity and Tm; 3'-end LNA modifications block polymerase extension on dimerized primers. |
| Betaine (PCR Additive) | Homogenizes melting temperatures and destabilizes secondary structures, reducing non-specific priming. |
| MgClâ‚‚ Solution | Critical cofactor; precise titration (often reduction) destabilizes primer-dimer duplexes. |
| DMSO (1-3%) | Disrupts secondary structure in GC-rich regions, improving primer specificity. |
Visualizations
Troubleshooting Primer Dimers Workflow
Primer Dimer Formation and Inhibition Pathway
Conclusion
Eliminating primer dimers is not a single-step fix but a holistic process integrating thoughtful primer design, optimized reaction conditions, rigorous troubleshooting, and conclusive validation. By mastering the foundational principles, researchers can proactively prevent dimers through careful in silico design and the use of modern hot-start enzymes. When problems arise, a systematic approach to parameter adjustment often yields success, but knowing when to re-design primers is a key professional judgment. Ultimately, validation through melting curve analysis or sequencing is non-negotiable for ensuring data integrity, especially in sensitive applications like clinical diagnostics and drug development. Embracing these combined strategies ensures PCR results are specific, reliable, and reproducible, directly accelerating the pace and confidence of biomedical discovery and translational research. Future directions include leveraging machine learning for predictive primer design and adopting novel polymerase engineering for even greater inherent specificity.